- 1 Introduction
- 2 What You Can Learn from This Article
- 3 Directions to Create a Cobblestone Floor
- 4 Organize Materials
- 5 How to Upload a Prefab from Unity to STYLY
- 6 Extra: Create a Round Floor
- 7 Extra 2: Create a Star-Shaped Floor
Introduction
In this article, I will explain how to place cobblestones on a plate polygon using Houdini.
If you use a square plate polygon, it will become a square cobblestone floor like this.
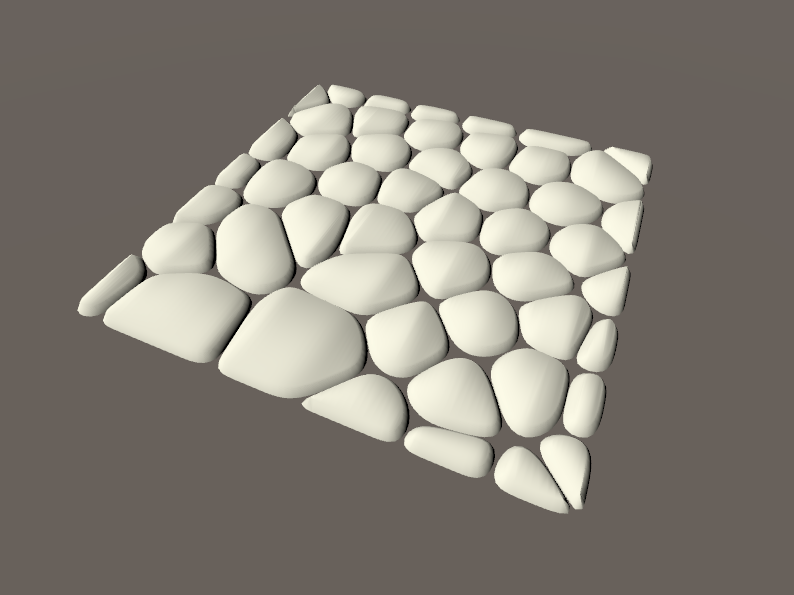
A cobblestone floor created from a square plate polygon
If you use a star shaped plate polygon, it will become a star shaped cobblestone floor like this.
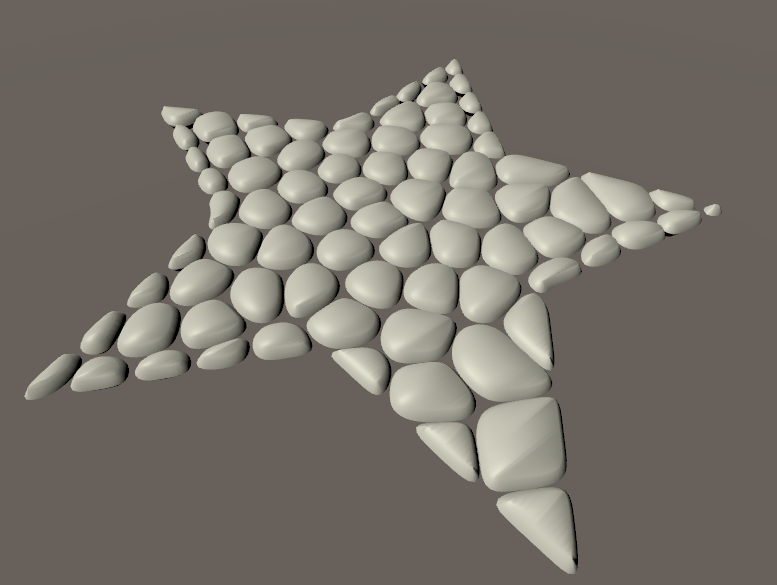
A cobblestone floor created from a star shaped plate polygon
What You Can Learn from This Article
・How to use Houdini to place cobblestones on a floor
・How to unfold a UV mesh using Houdini
The Previous Article
Directions to Create a Cobblestone Floor
Prepare a Plate Polygon (Grid Node)
First, we need to prepare a plate polygon which we want to add cobblestones to.
I will use a Grid node (square plate polygon) for this tutorial.
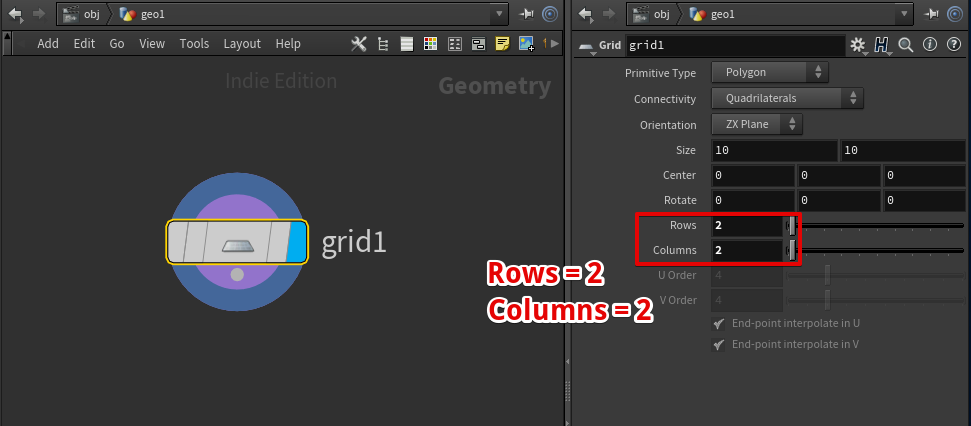
Create a Grid node
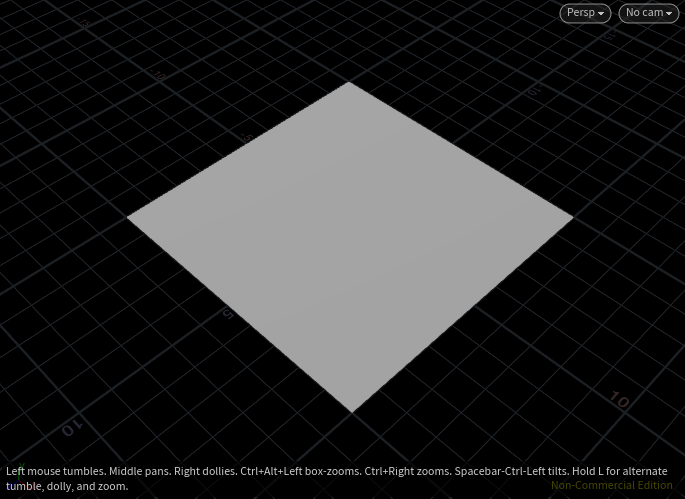
A square mesh created with Grid node
Split the Plate (Voronoi Fracture)
Next, we will split the plate using an algorithm called Voronoi tessellation.
I will not explain the details of Voronoi tessellation in this article, but dividing a plate as in the image below is called Voronoi tessellation.
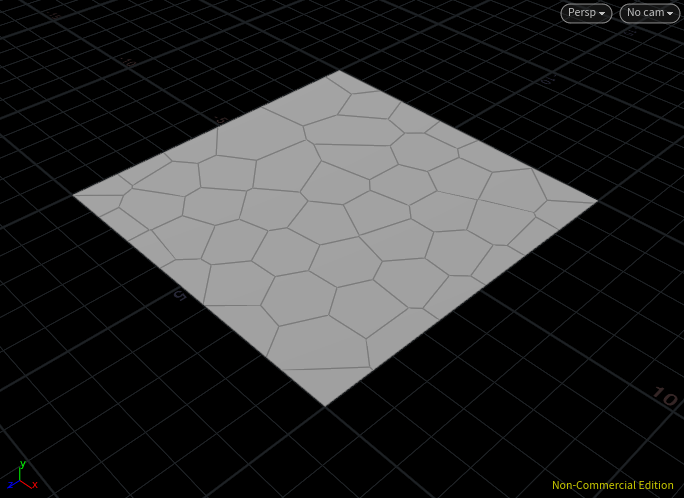
Plate divided by Voronoi tessellation
Prepare a Center Point for the Split (Scatter Node)
In order to divide a plate, we need to use a point cloud as a center point for the split.
We will use Scatter node to create a point cloud.
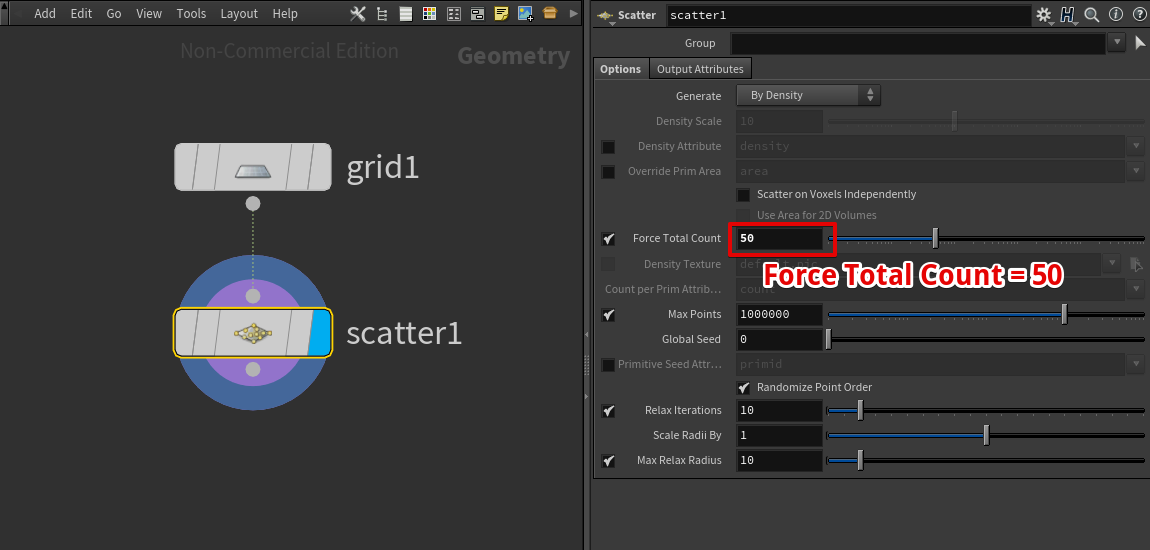
Attach Scatter to Grid
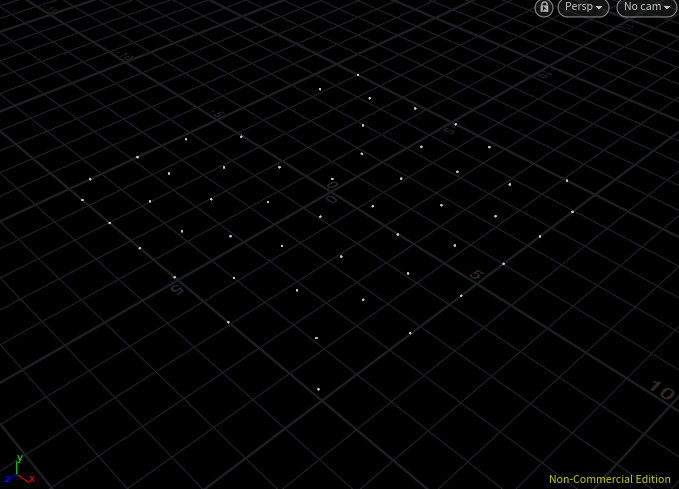
Point cloud created with the Scatter node
Using a Point Cloud for Voronoi Fracture (Voronoi Fracture Node)
Next, we will use a Voronoi Fracture node to split the plate.
Attach the plate polygon (Grid node) to the left of the Voronoi Fracture node, and the point cloud (Scatter node) to the right side of the Voronoi Fracture node.
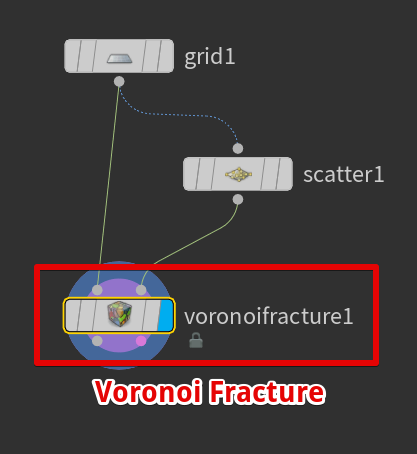
Create a Voronoi Fracture node
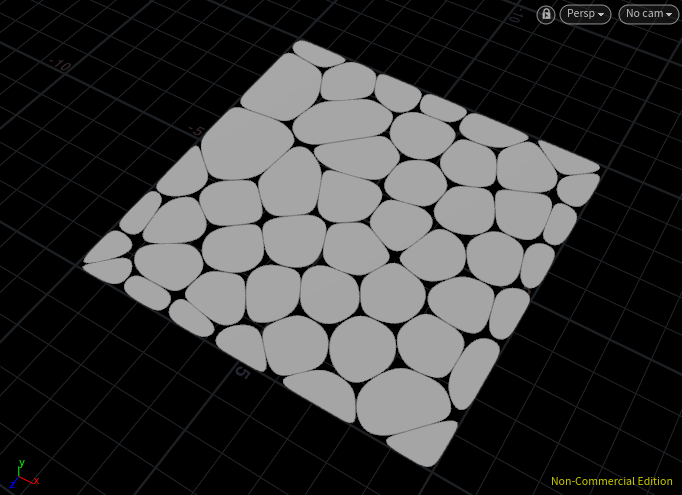
Voronoi fracture and the plate
The plate has been divided, but it does not represent cobblestones yet.
Additional Info: Display Wires
Wires can be displayed by pressing the Shift + W keys while selecting in Scene view.
By pressing it once more, they will turn invisible.
Rounding the Stones (Resample Node)
Rounding the stones
Attach a Resample node to the Voronoi Fracture, and resample the divided parts.
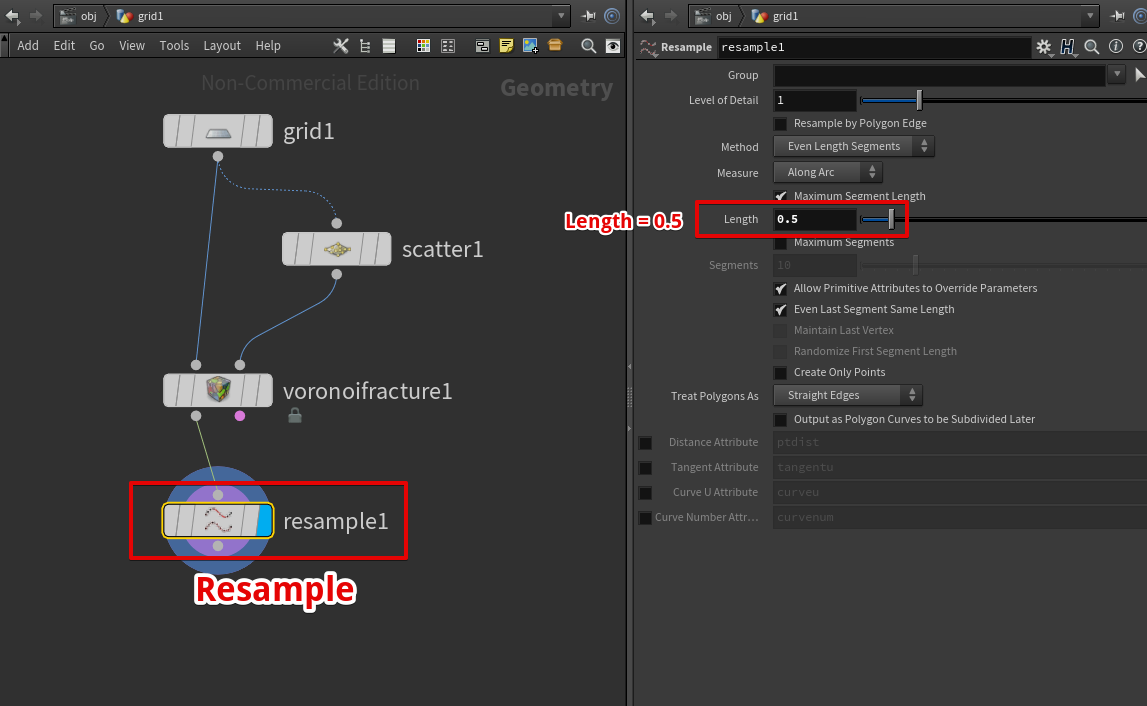
Attach Resample node
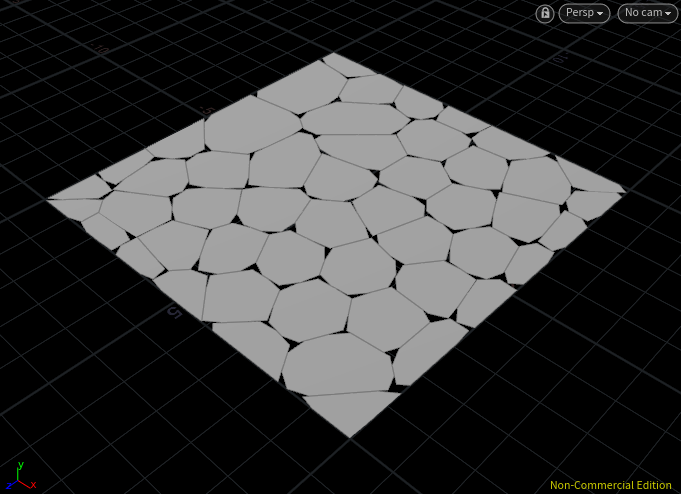
Resample Result
Apply the resample result again to round up the stones.

Attach Resample node
Resample Apply Result
Thicken the Stone (PolyExtrude node)
Attach the PolyExtrude node to the Resample node in order to thicken the stones.
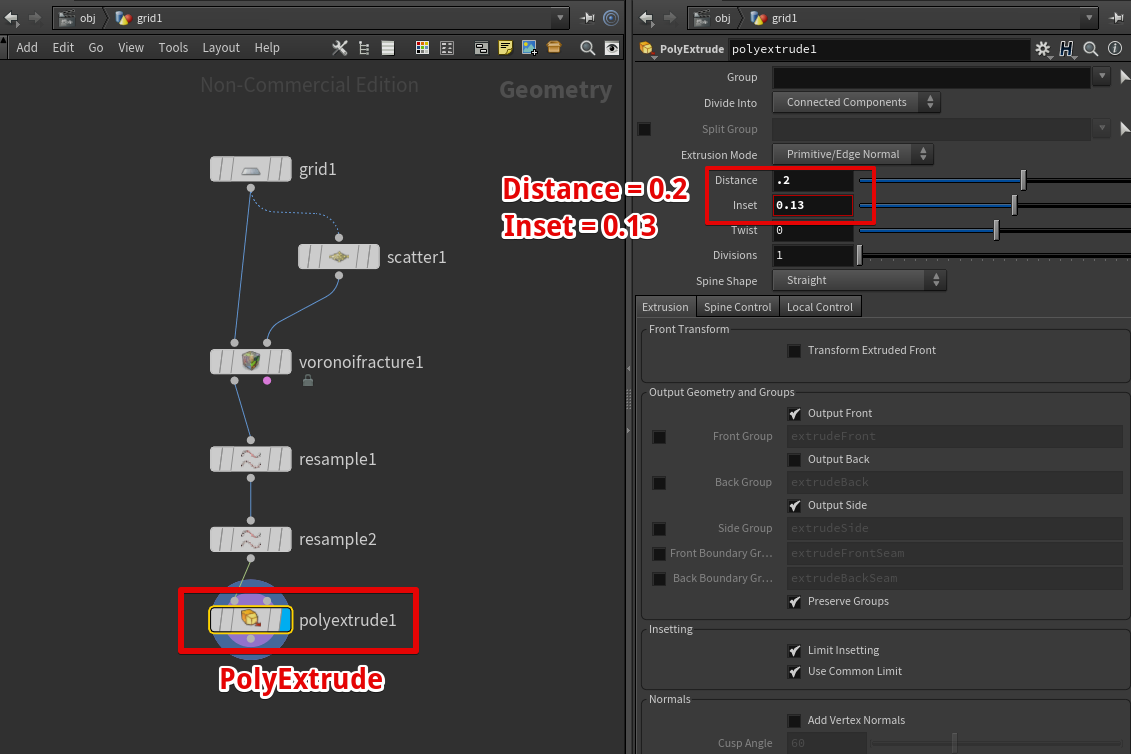
Attach PolyExtrude node
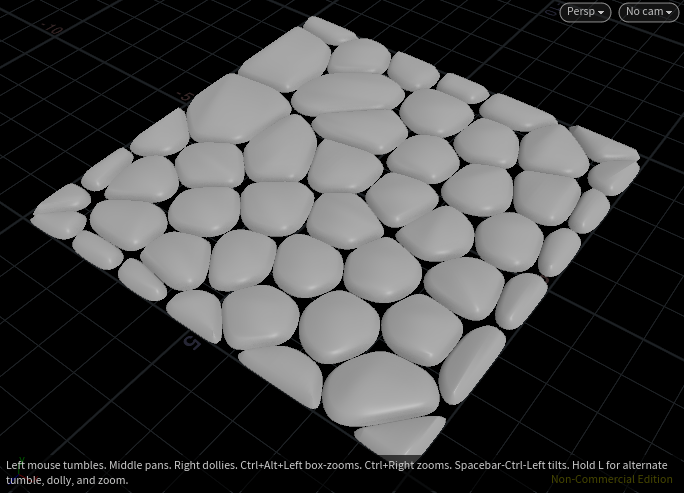
PolyExtrude apply result
Unfold UV Mesh (UV Texture Node)
Lastly, unfold the UV mesh.
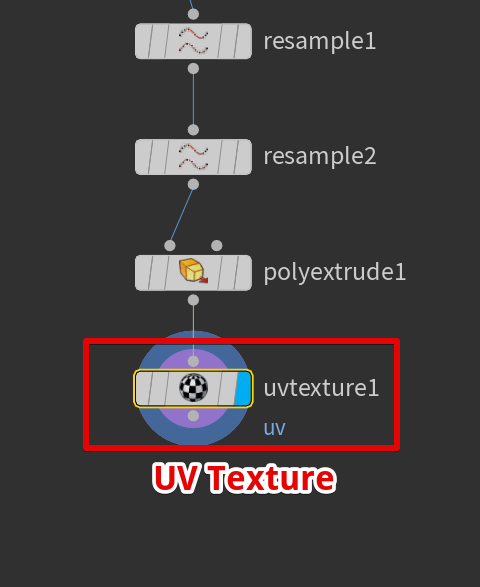
Attach UV Texture node
Attach the UV Quick Shade node and display the UV mesh as in the image below.
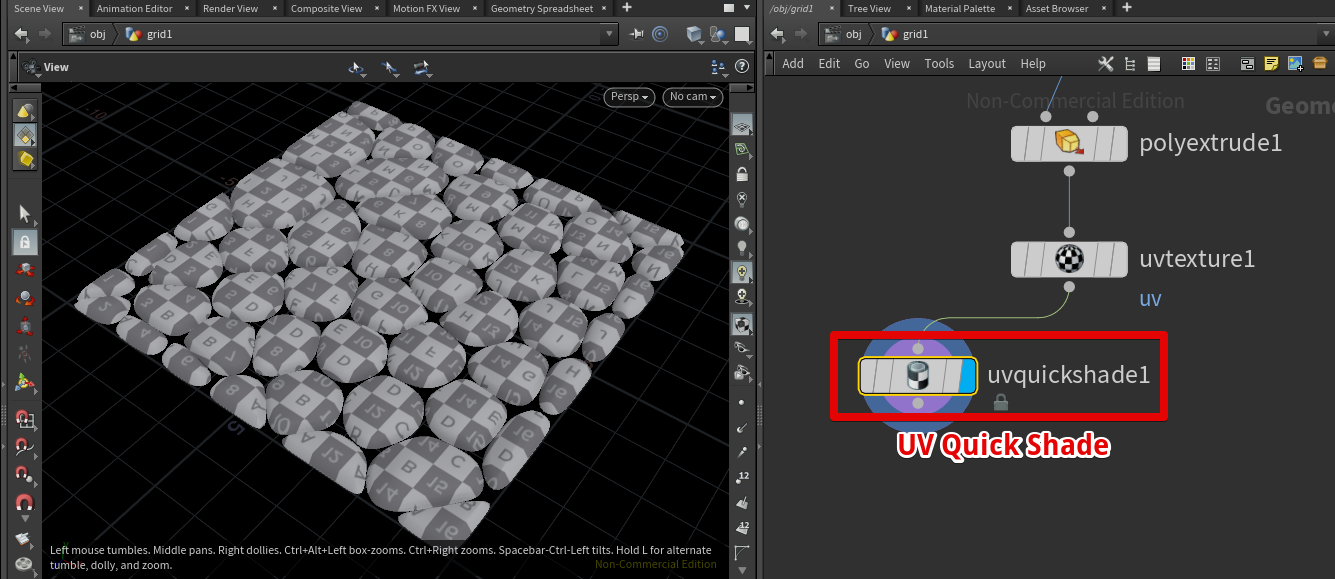
Check the UV with the UV Quick Shade
This completes the process to make a cobblestone floor.
OBJ File Export (ROP Geometry Node)
Use the ROP Geometry node to export as an OBJ file.
Enter the obj file path for the Output File, and click the Save to Disk button to export as an obj file.
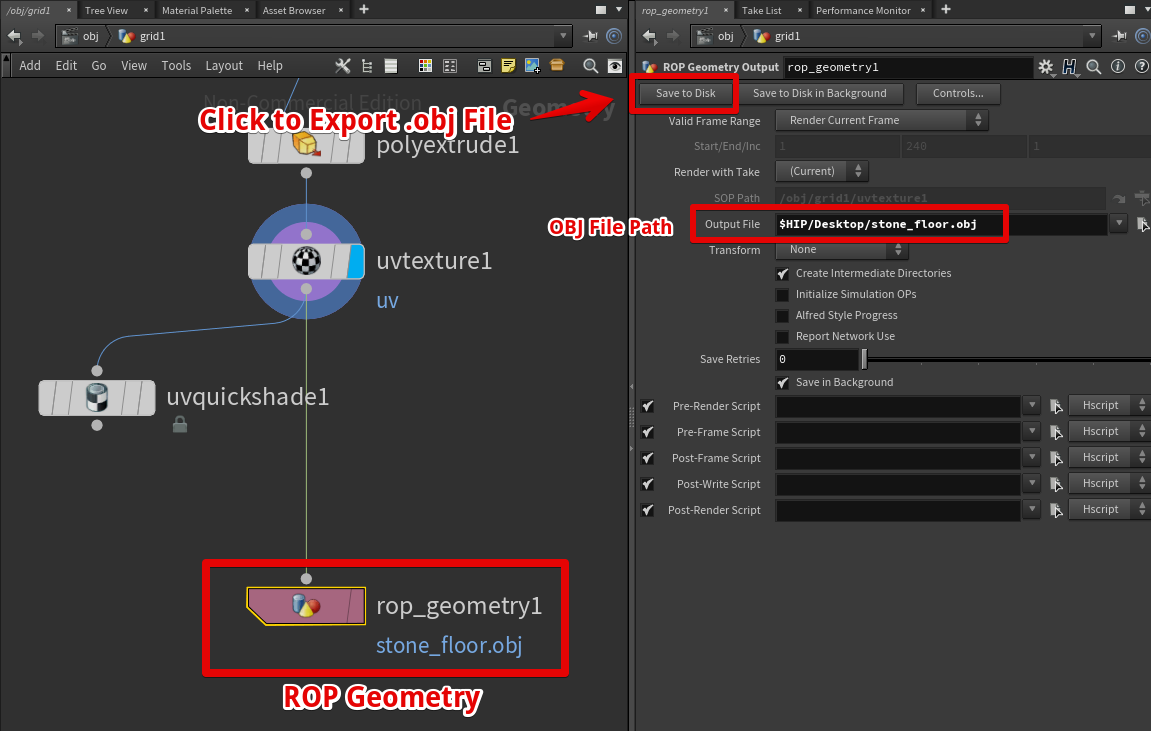
Use the ROP Geometry node and export as an OBJ file
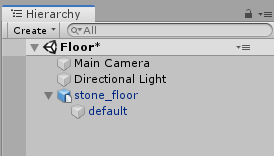
If you import the OBJ file into a Unity scene, it will look like the image shown below.
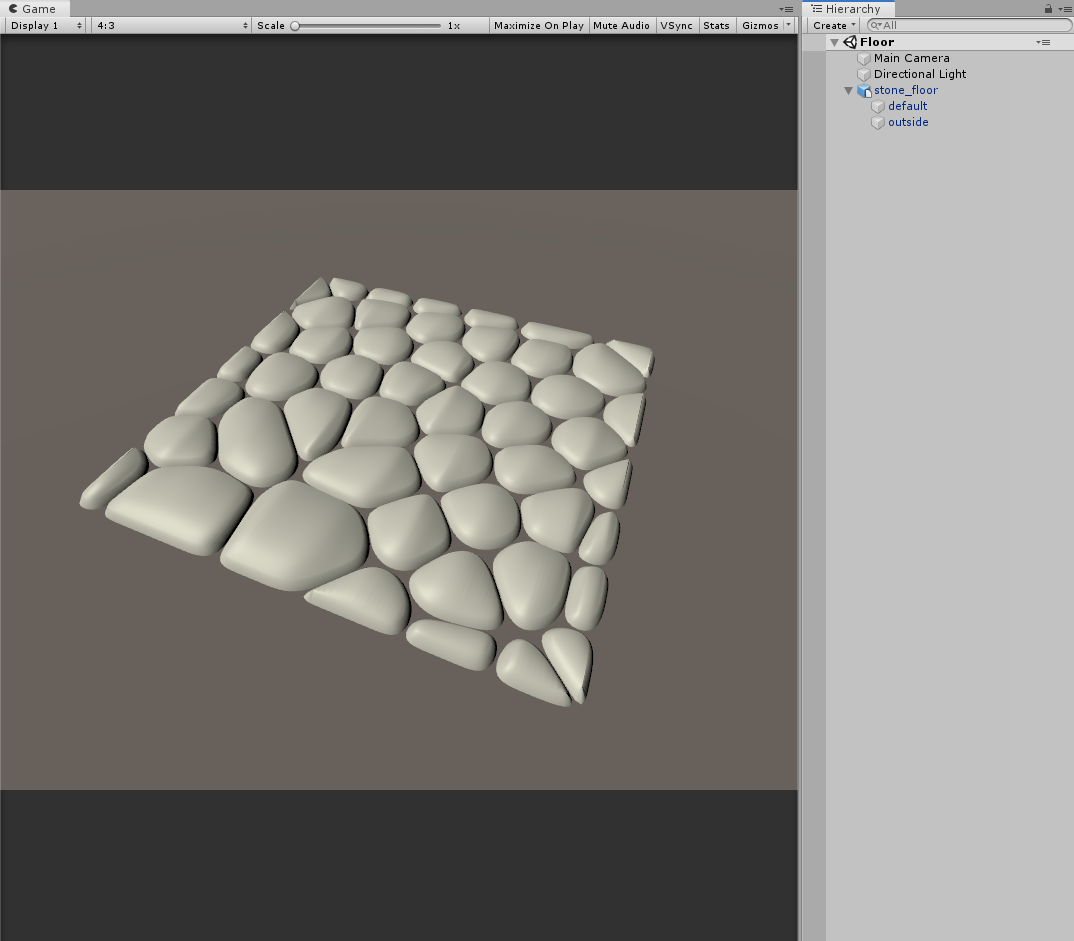
Cobblestone floor in Unity
Organize Materials
When imported to Unity, the material of the OBJ file is divided into two.
We can prevent this by setting up a Group within Houdini.
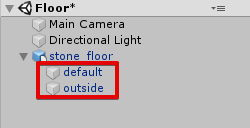
Multi materials exist
If you check the Voronoi Fracture node from previous steps, the group settings are active so we need to deactivate them.
Uncheck the Interior Group and Exterior Group option.
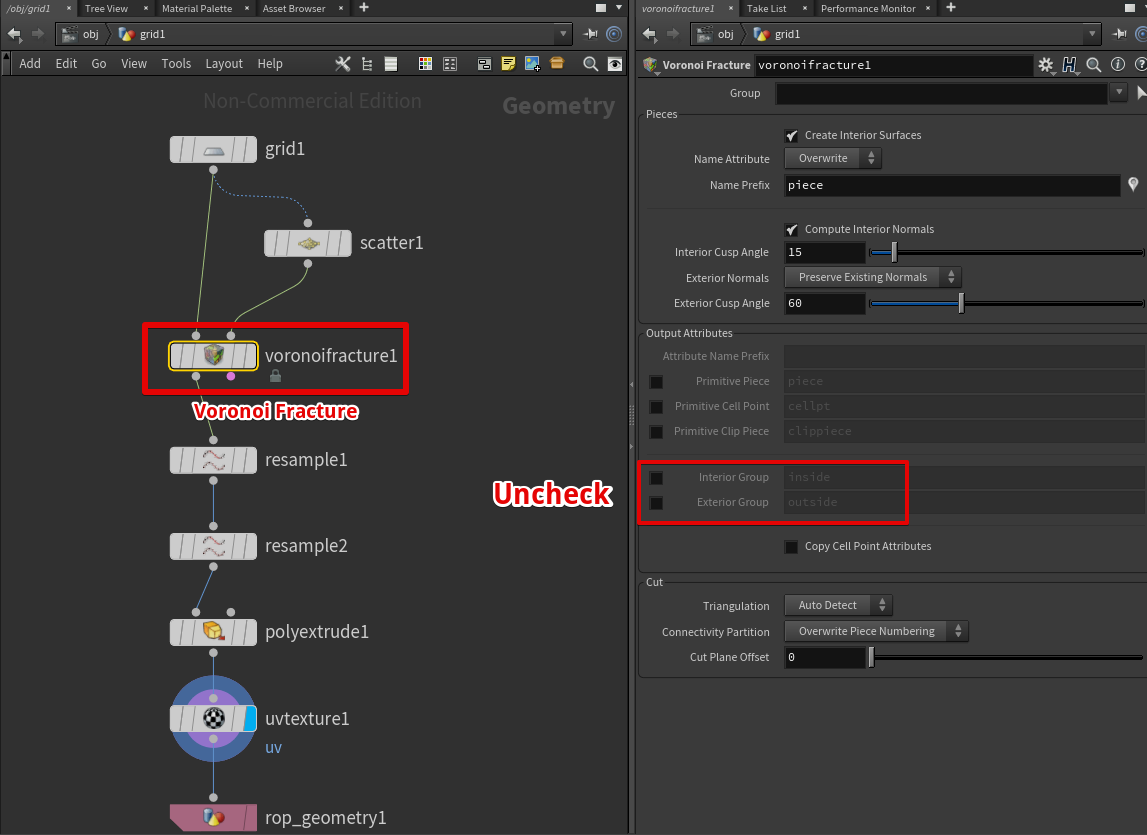
Change the Voronoi Fracture node settings
If you export as an OBJ file with these options, only one default material will exist.
Only one material exists
How to Upload a Prefab from Unity to STYLY
In order to learn how to upload your created prefab to STYLY, refer to the article below.

Extra: Create a Round Floor
We used a Grid node to create a square cobblestone floor, but if you replace the Grid node with a Circle node, the result will be a circular cobblestone floor.
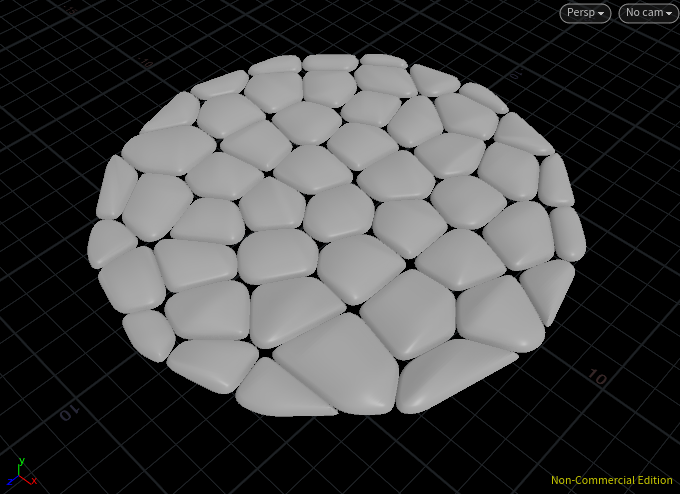
Round cobblestone floor
The normal direction of the Circle node is opposite of that of the Grid node, so I used the Reverse node to flip the direction.
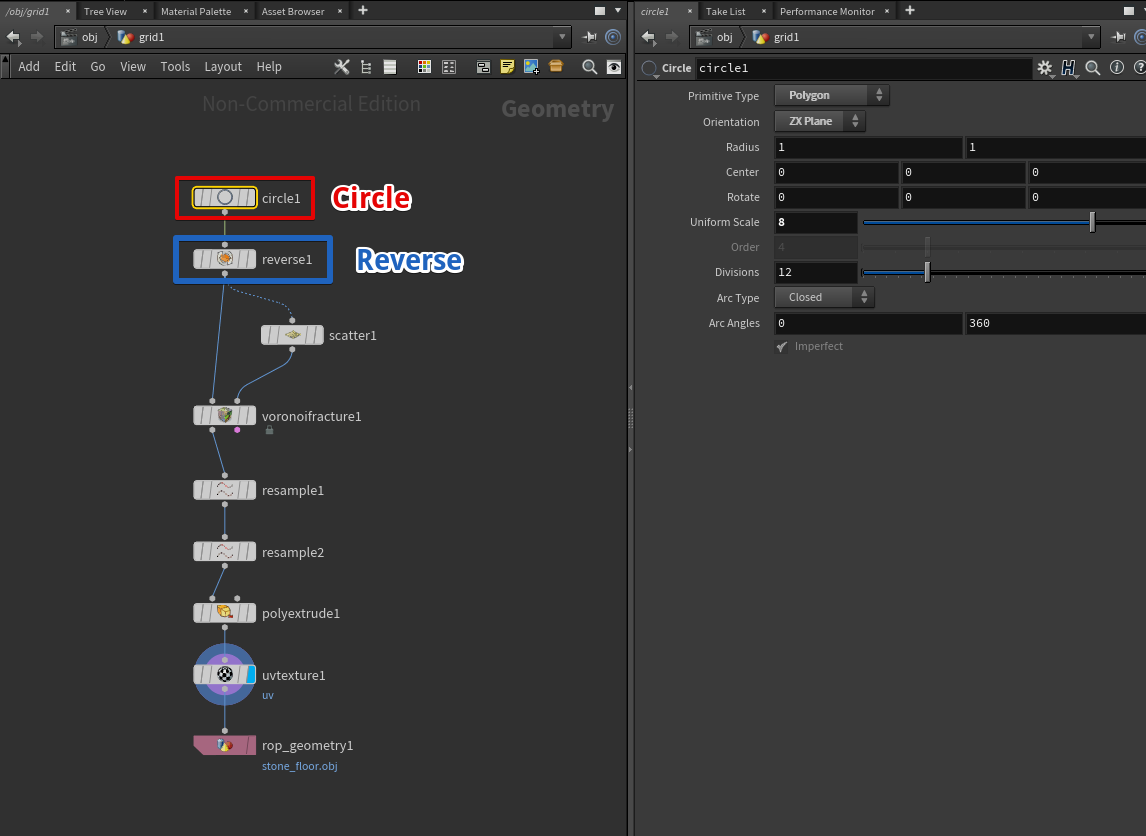
Attach the Reverse node to the Circle node
Extra 2: Create a Star-Shaped Floor
I will explain how to create a star-shaped floor as seen in the image below.
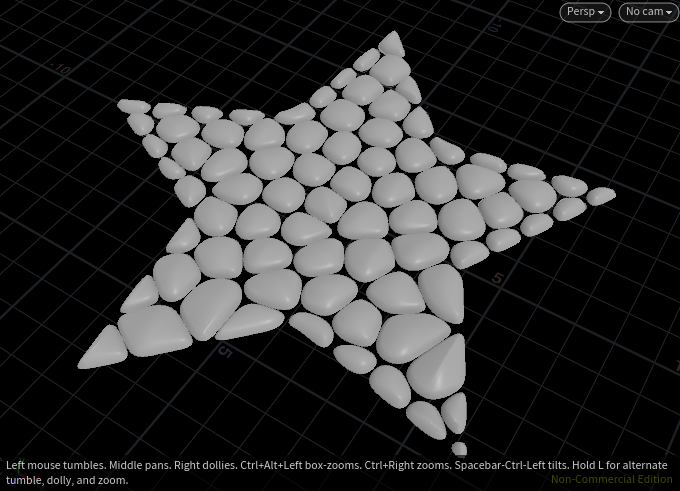
Star-shaped floor
How to Create a Star-Shaped Floor
You can create a star shape by using the Circle node to create a regular decagon with smaller vertices.
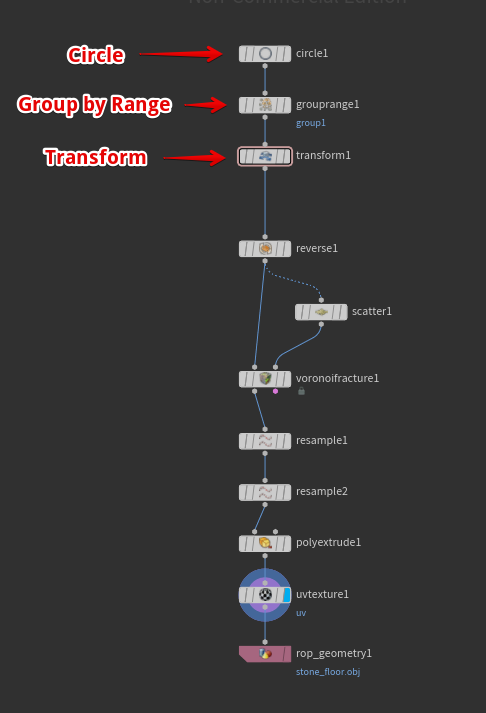
Creating a star-shaped node
Circle Node Settings (Create a Regular Decagon)
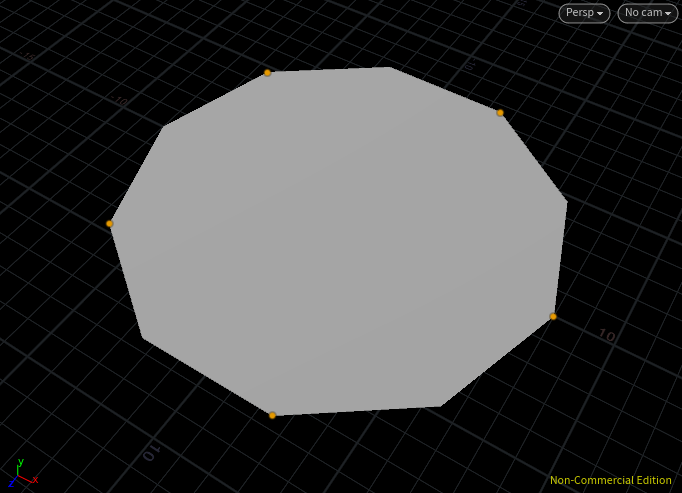
Change the Division of the Circle node to 10, and the shape will be transformed into a regular decagon.
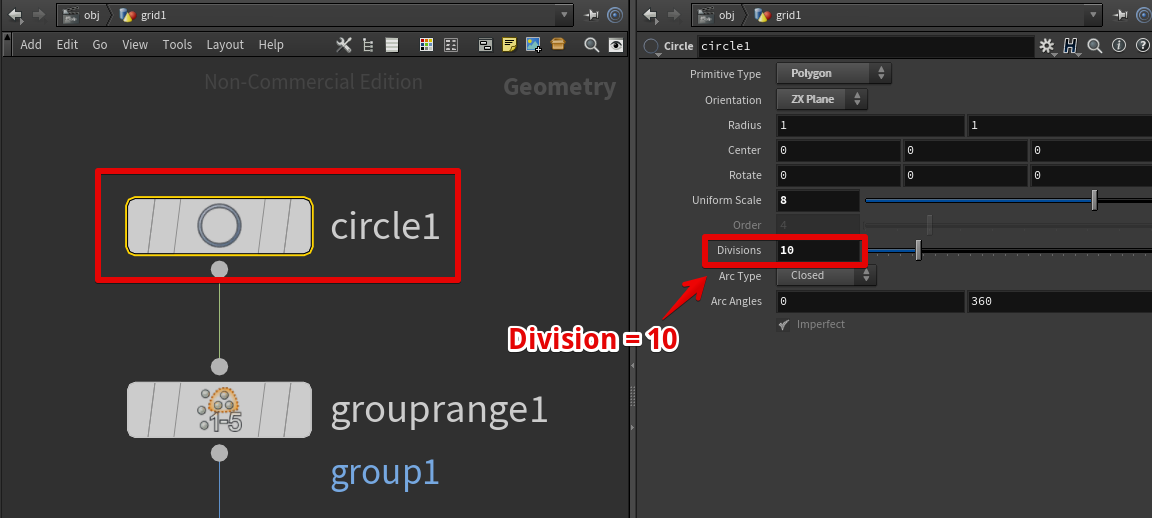
Change Circle node settings
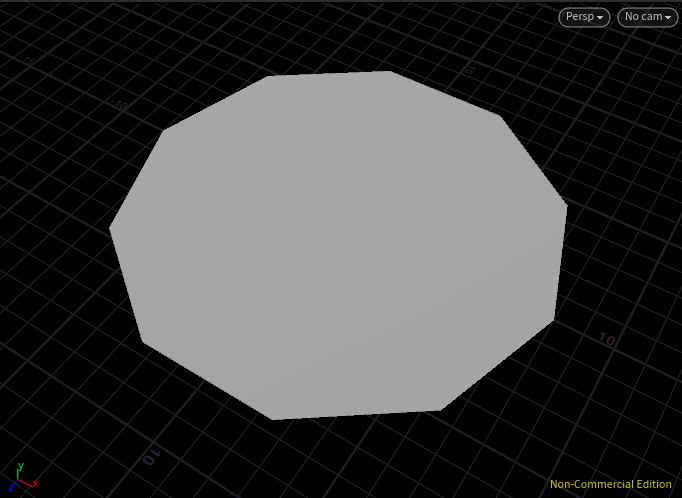
Result
Group by Range Node Settings (Select Even Vertices)
Apply group1 to the even vertices.
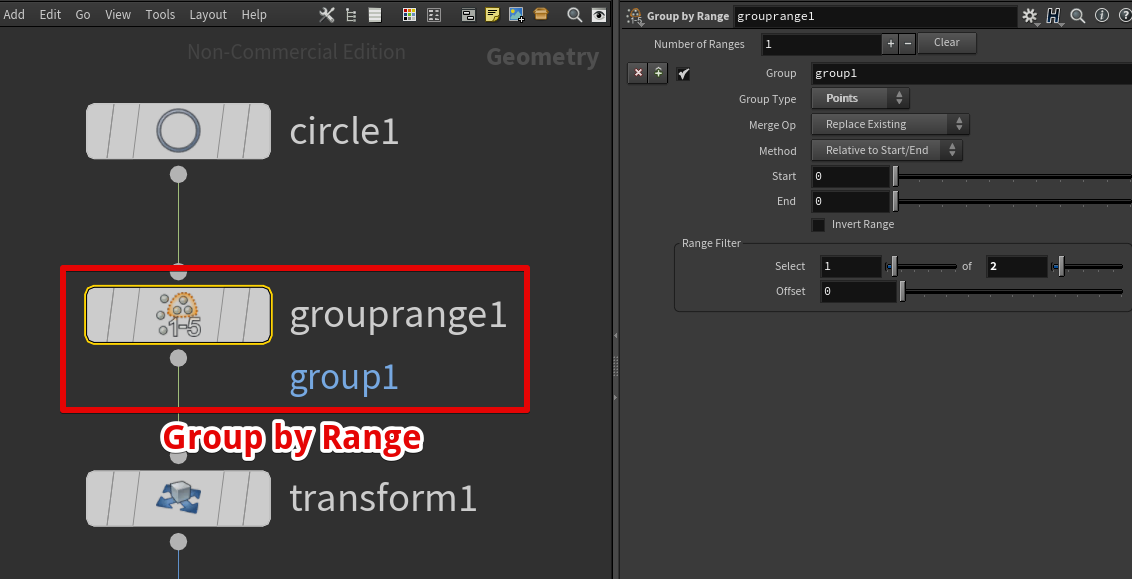
Attach Group by Range node to the Circle node
Result
Transform Node Settings (Making the Selected Even Vertices Smaller)
Use the Transform node and change the even vertices to a 0.5 scale.
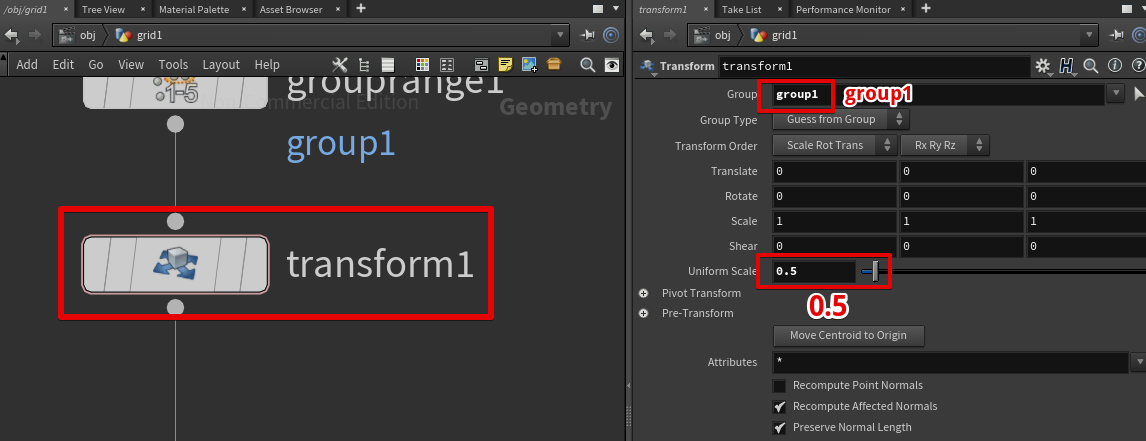
Use the Transform node to change the scale
Result
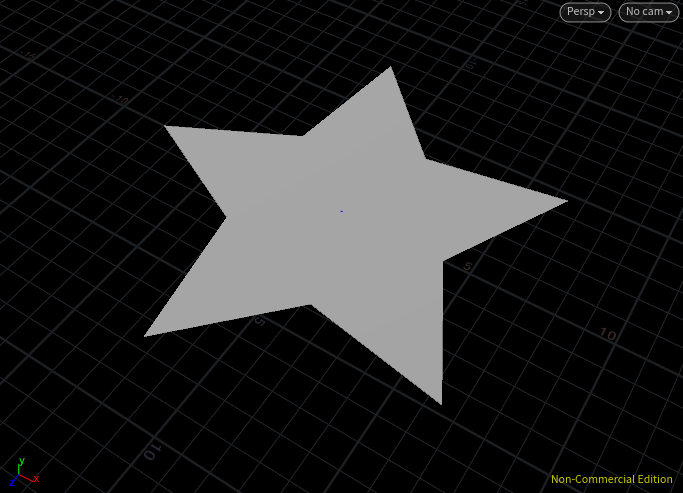
Completed Star-Shaped Floor
By turning the UV Texture node Display flag on, a star-shaped cobblestone floor as in the image below will appear.
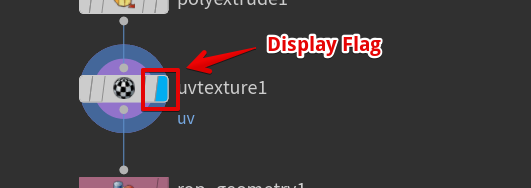
Turn the Display flag on
Result