In this article, I’ll show you how to create a material from a photo using Adobe Capture, attach it to a 3D model in Unity, and create a scene.
You only need to take a picture of the object you want to use as a material, so it is very easy to create a material.
This is useful for creating scenes.
A scene using a material created with Adobe Capture
Sample
You can experience a sample space using materials created with Adobe Capture from the STYLY GALLERY.
Note: This scene does’nt work correctly on the web.
It will only work correctly in the VR application.
What is Adobe Capture?
Adobe Capture is one of the smartphone applications provided by Adobe.
It allows you to create brushes and color themes from photos.
In this article, we will create a material using the material creation function, one of the features of Capture, and import it into Unity to create a scene.
You can download Adobe Capture from here. (Compatible with both IOS and Android)
https://www.adobe.com/jp/products/capture.html
Take a photo
Let’s take a picture with your smartphone.
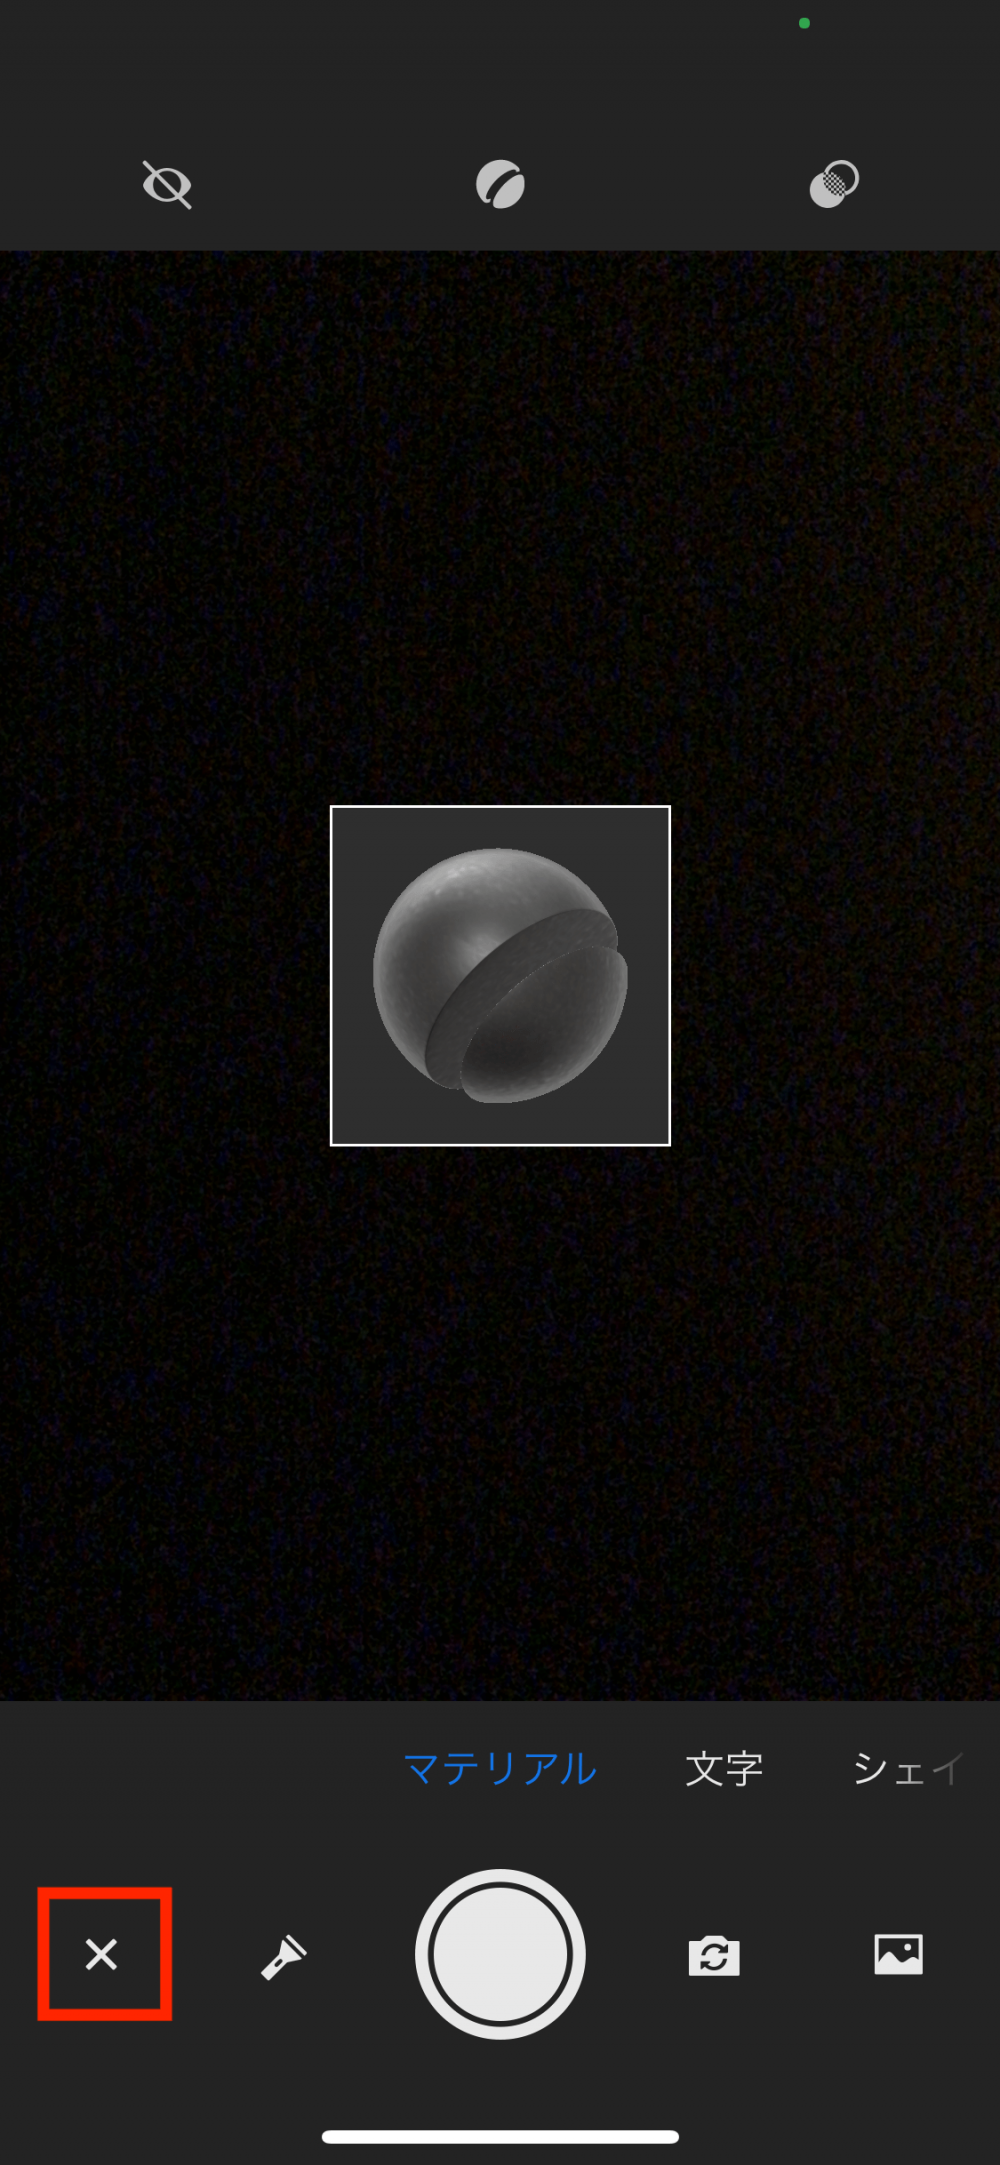
Select “Material” from the items at the bottom of the screen and take a picture.
A preview of the material that will be created in the center will be displayed.
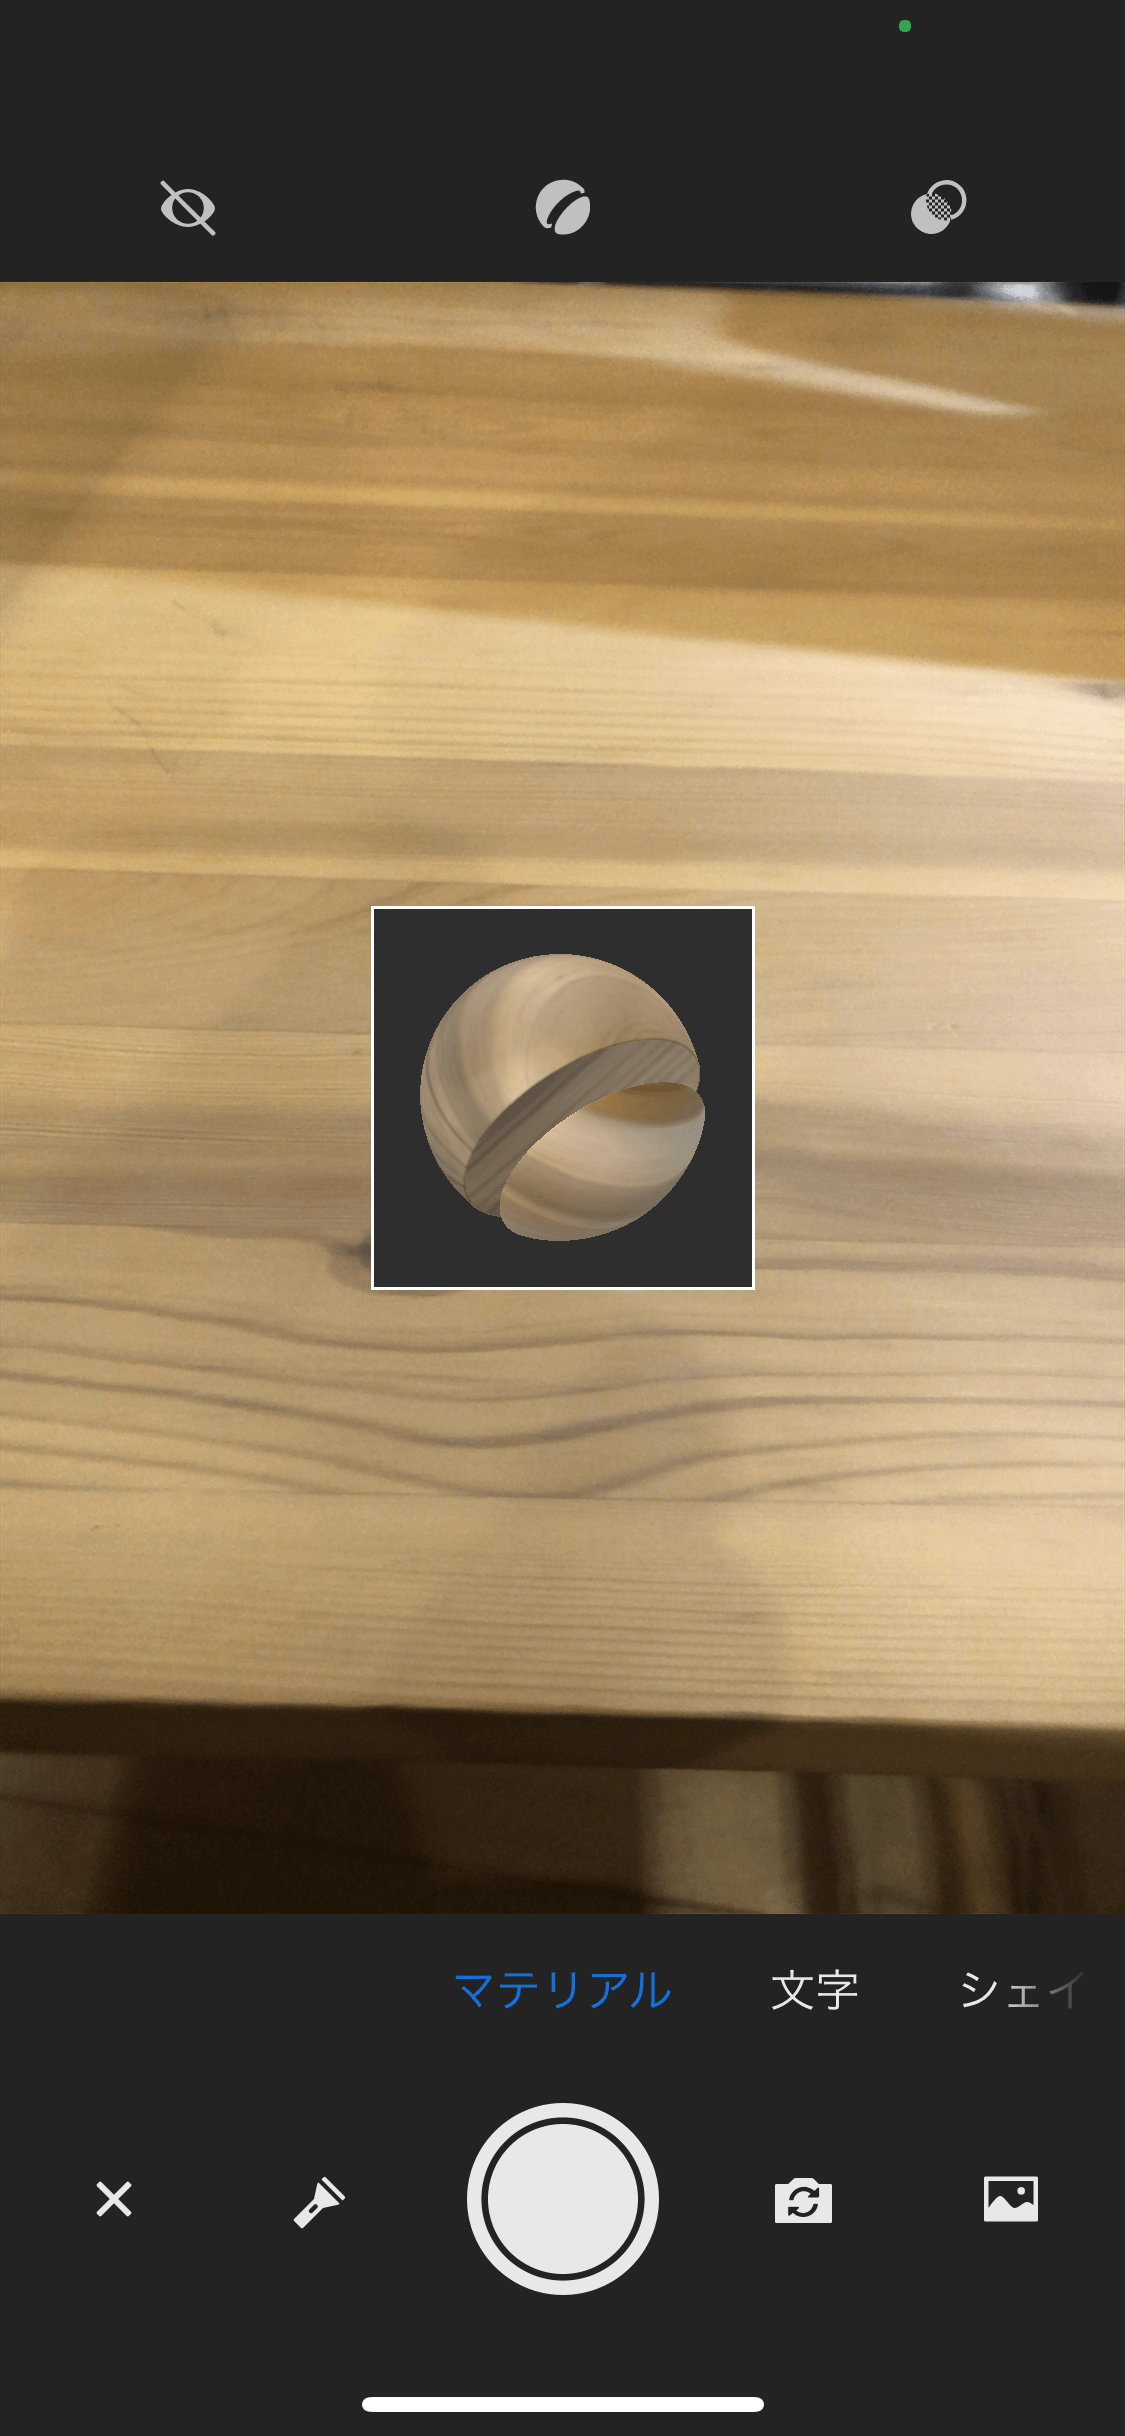
Shooting screen
You can select the shape of the material for the preview from the icons above the center.
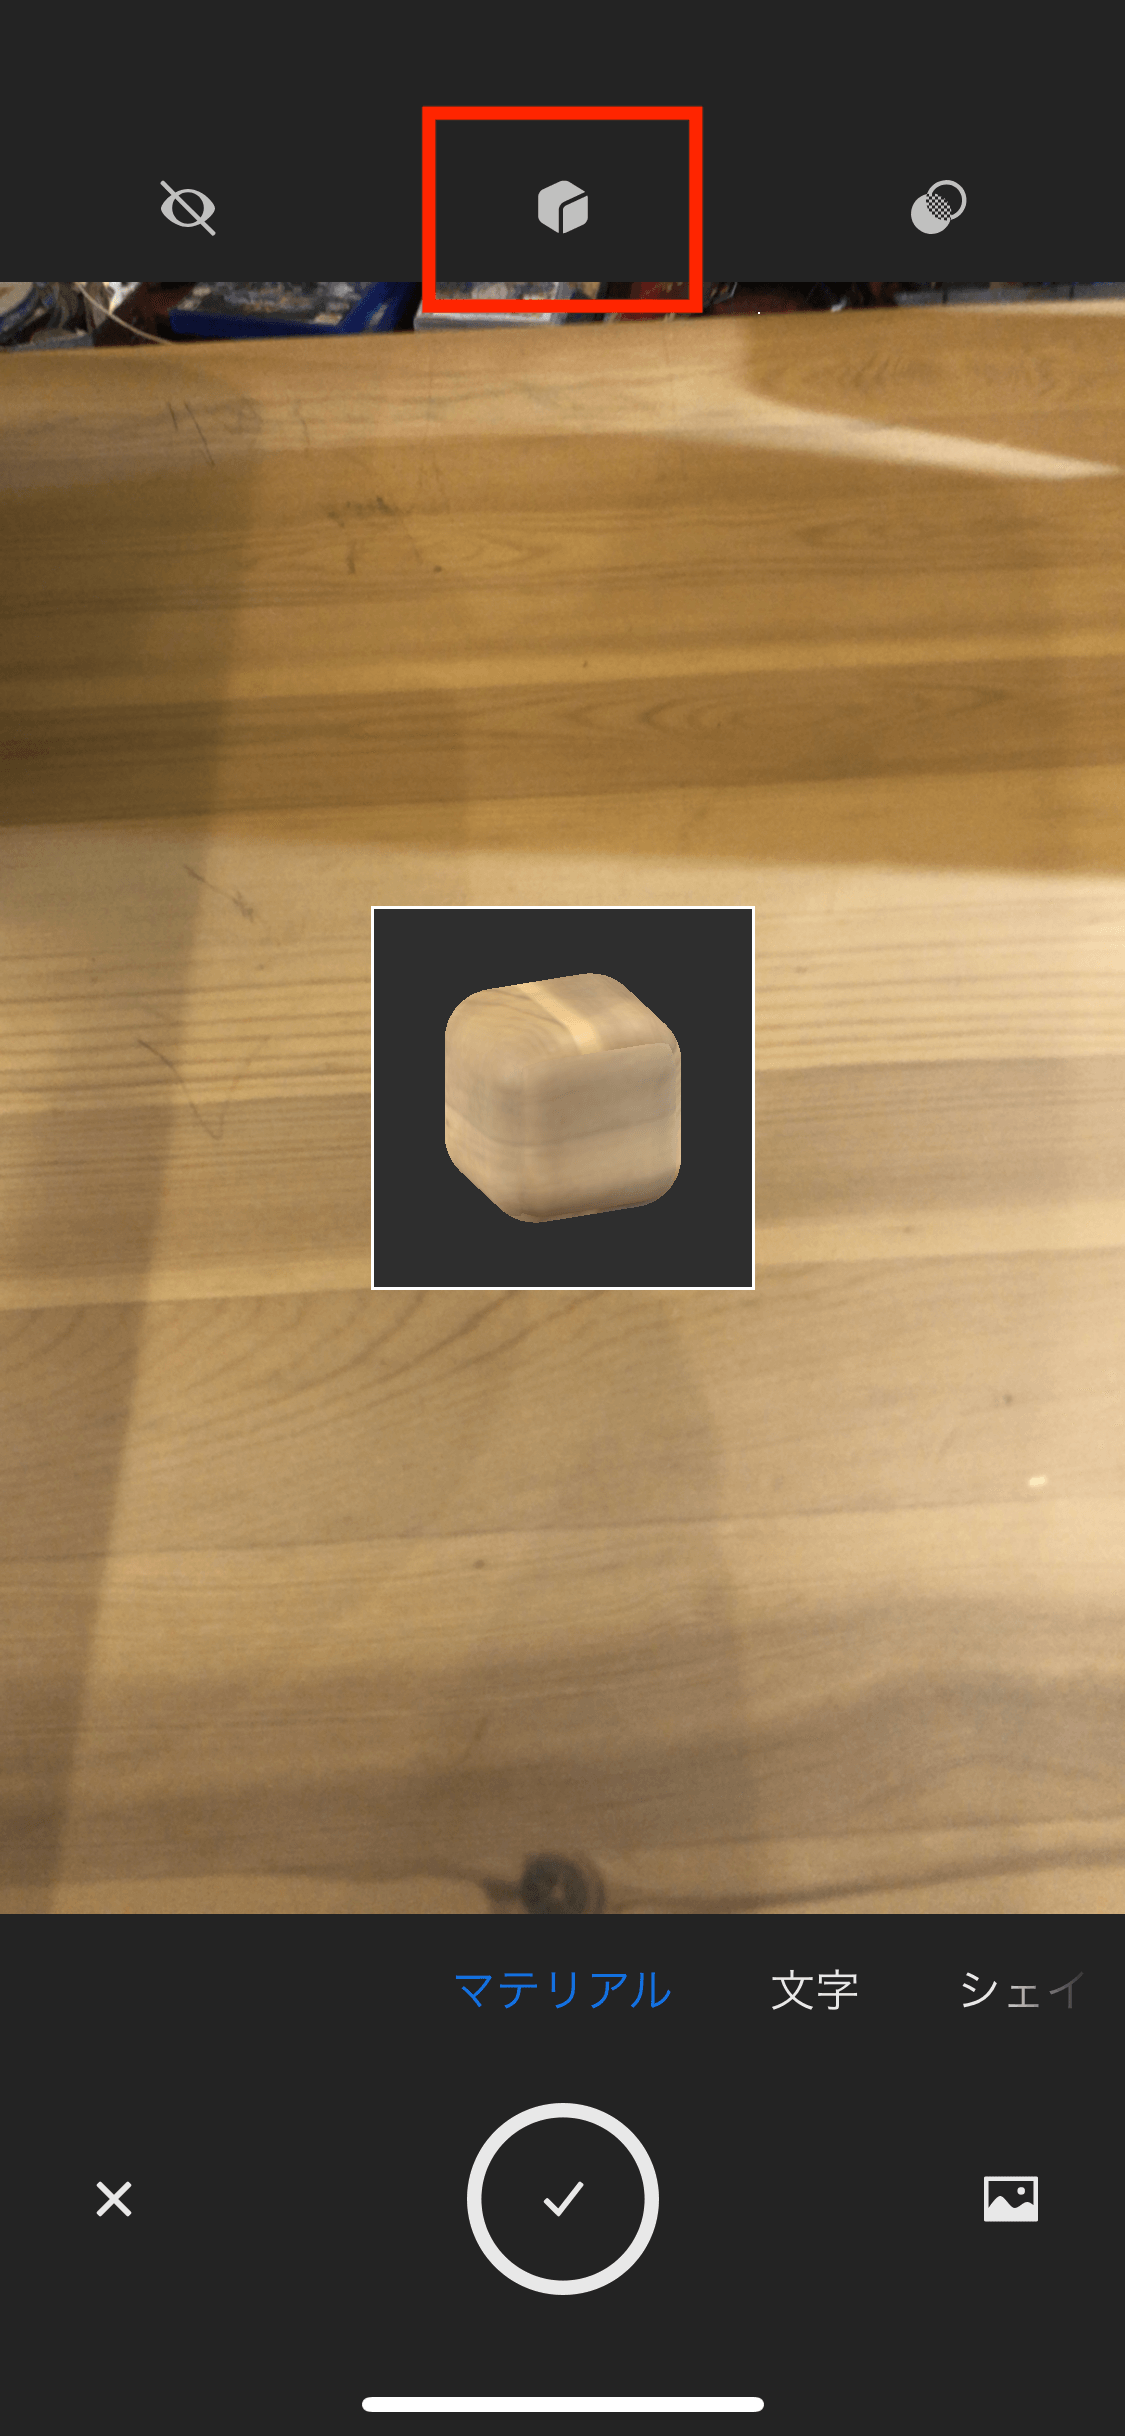
Changing the material shape
The icon in the upper right corner allows you to add effects to the camera.
The effect will be applied to the material indirectly.
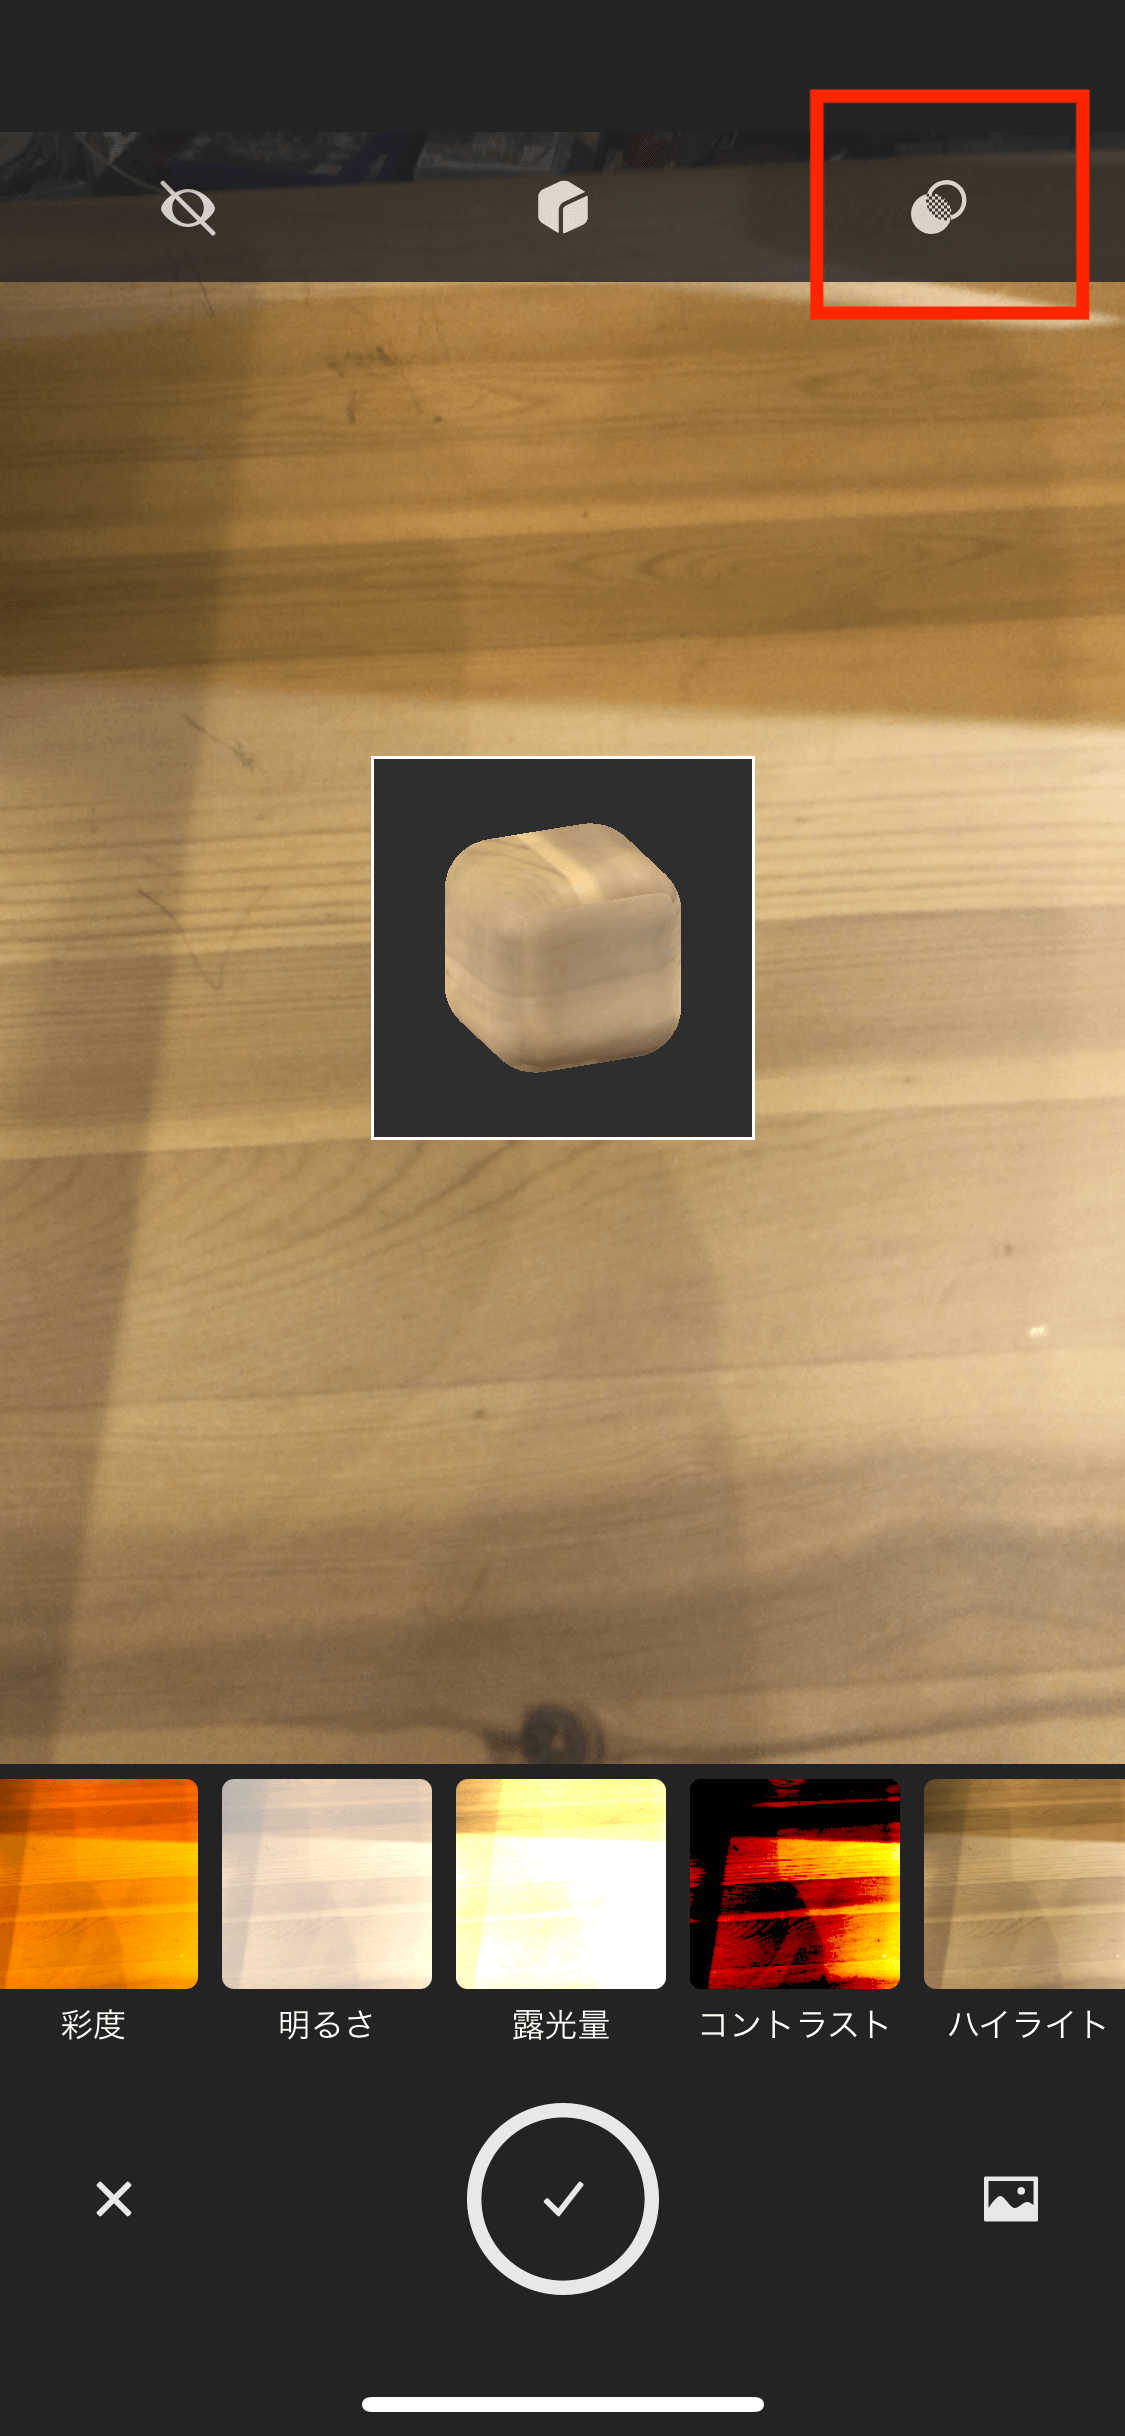
Changing the camera effect
Exporting a Material
Once you have taken the shot, you will be taken to a screen where you can edit the material.
Here you can make minor adjustments and output the material.
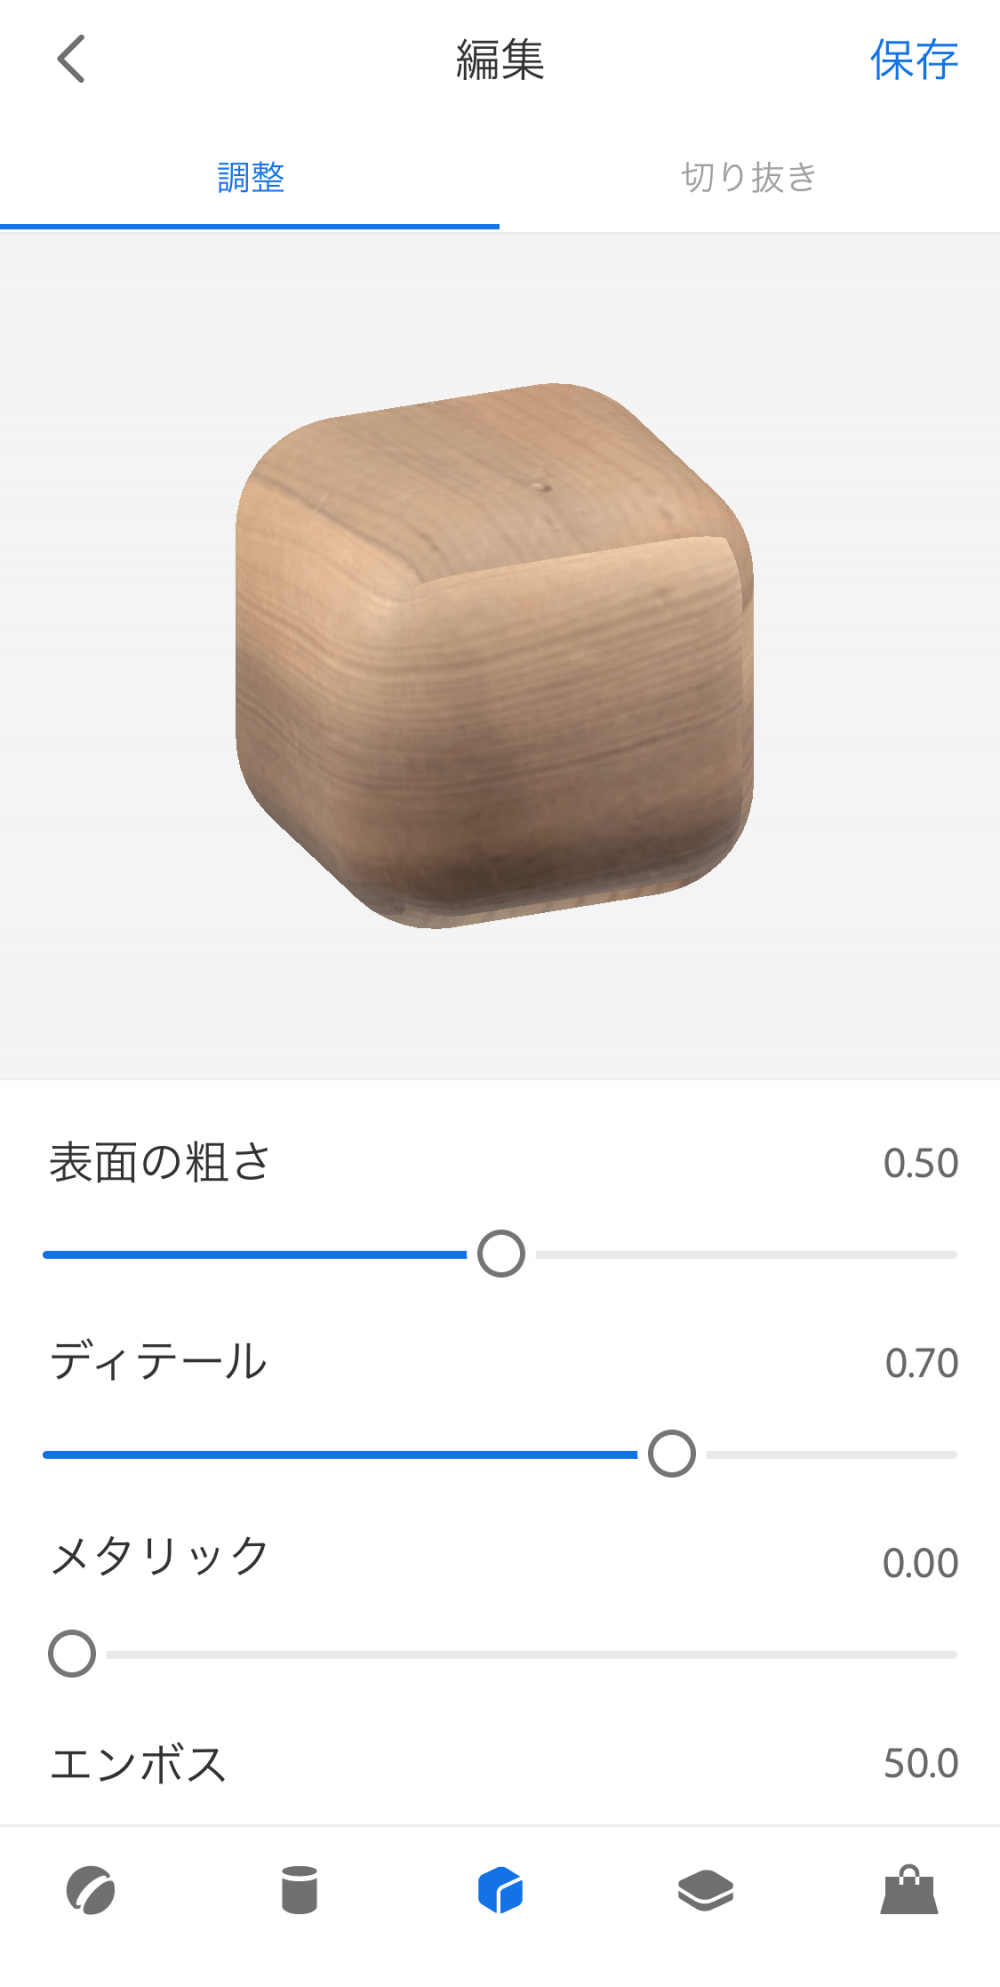
Material adjustment screen
The Adjustment tab allows you to adjust the texture and details of the material.
- Surface Roughness
Indicates the roughness of the material’s surface.
Decreasing the value reduces the roughness and makes the material smooth. - Detail
Shows the details of the image that will appear on the surface of the material.
Increasing this value maintains the texture of the image when there are detailed patterns. - Metallic
This parameter indicates the level of metallic texture of the material.
Increasing the value gives the material a metallic sheen. - Emboss
Indicates the level of unevenness in the material.
Values range from -100 to 100. The closer the value is to 0, the flatter the material will be. - Number of Lines
The higher the value, the higher the number of lines and the finer the display. - Repeat
Allows you to repeat the image on the surface of the material.
This is useful when you want to apply a pattern evenly. - Blend edges
Blends the material’s color edges.
The higher the value, the milder the color change will be.
The Crop tab allows you to crop the photo to be used for creation.
By cropping only the part of the photo that you want to use as a material, you can create a material that is close to your ideal.
Preview the material and save it when you are done.
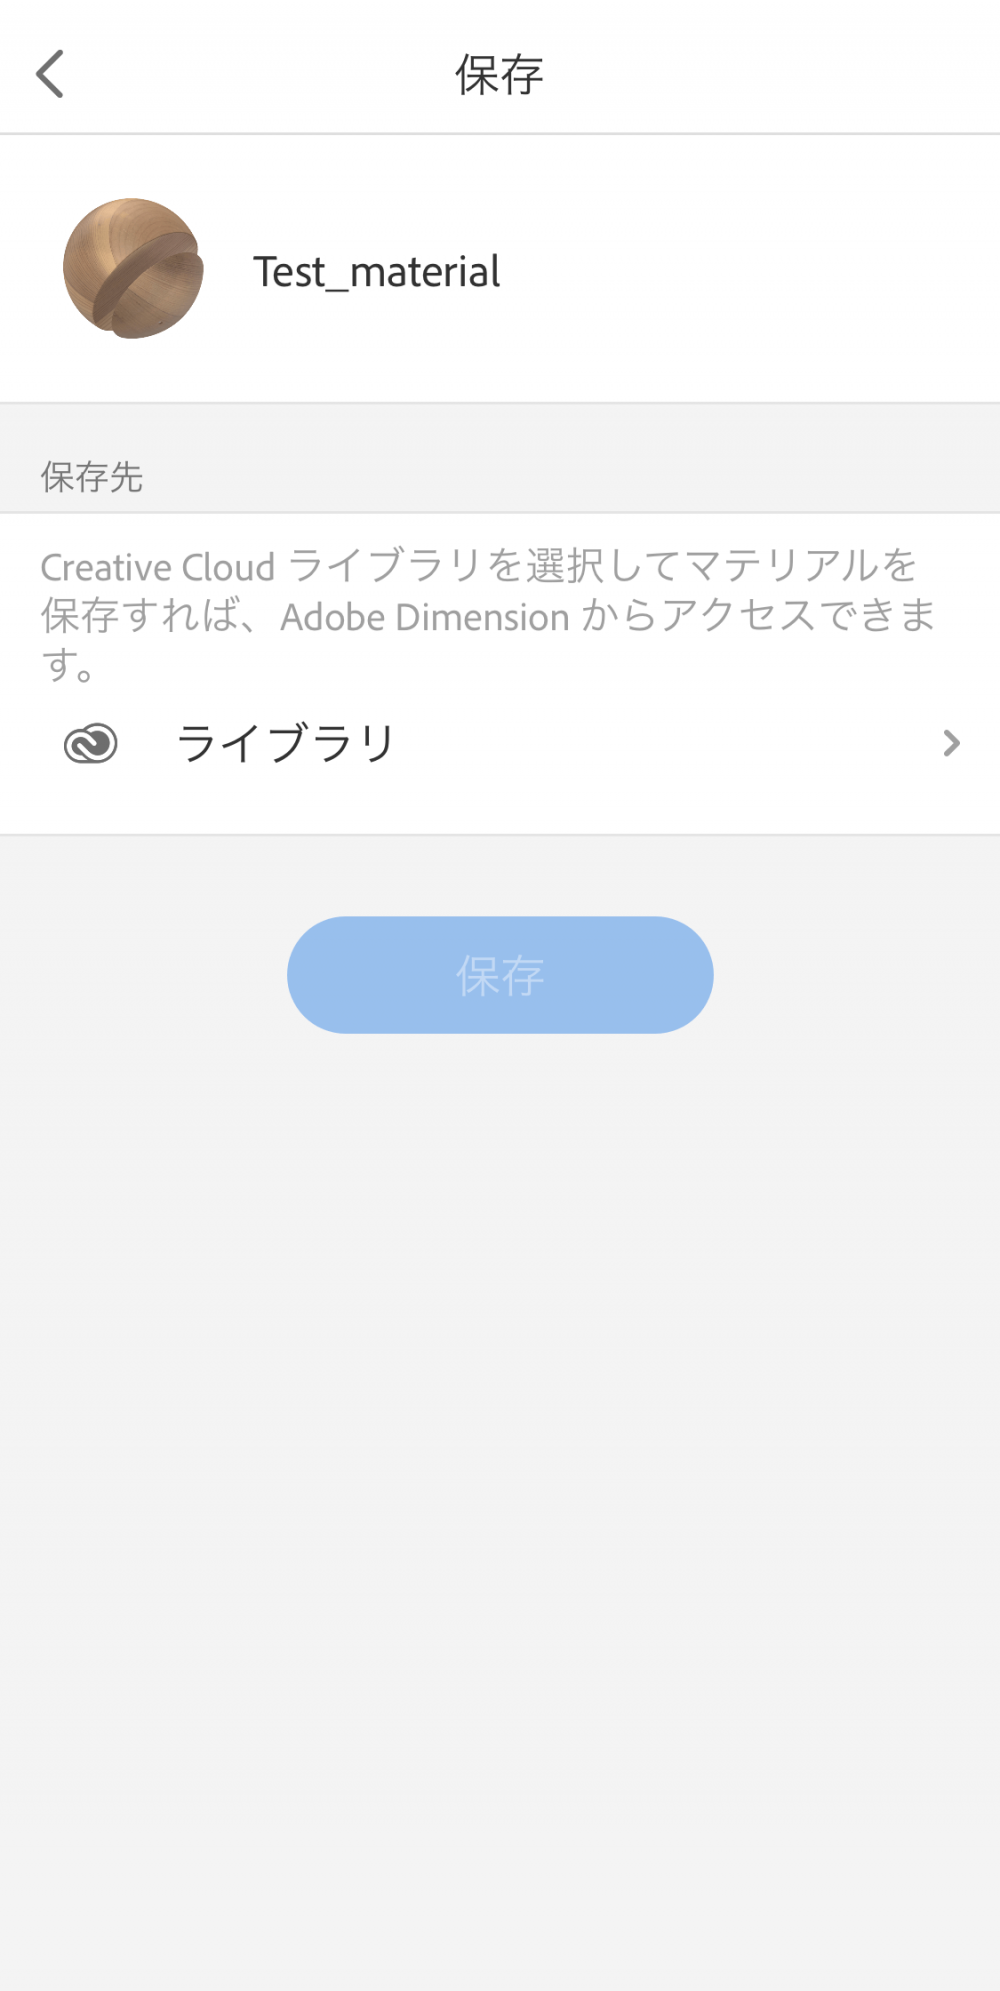
Saving a Material
Importing into Unity
Let’s open the saved material.
Click the button at the bottom right of the screen to go to the list of materials.
Go to the list of materials
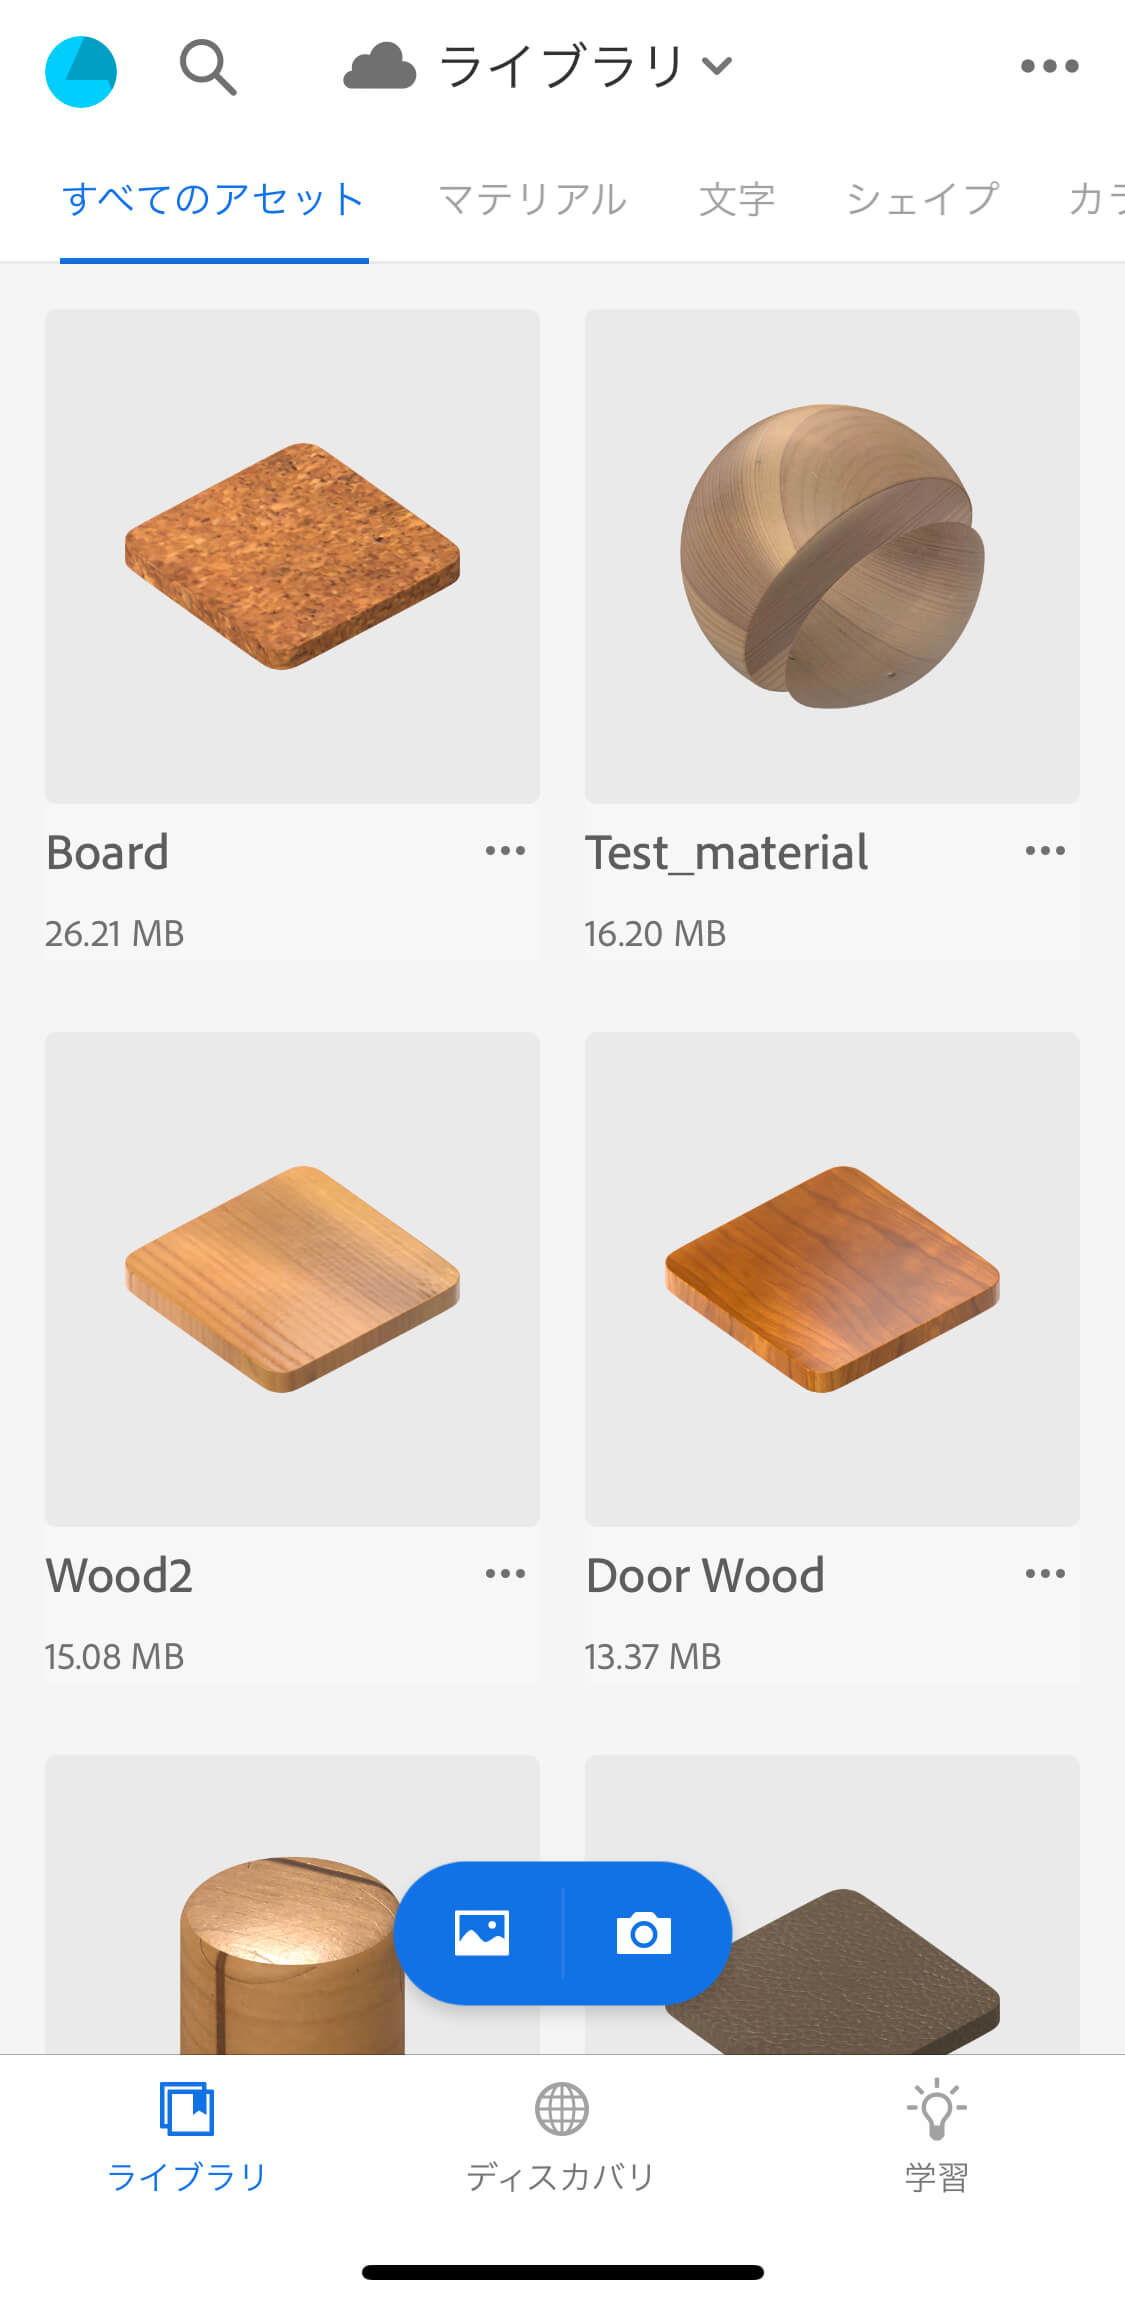
Material list screen
Import the created material into Unity.
You can export the material as a Zip file by clicking the symbol in the lower left corner of the image.
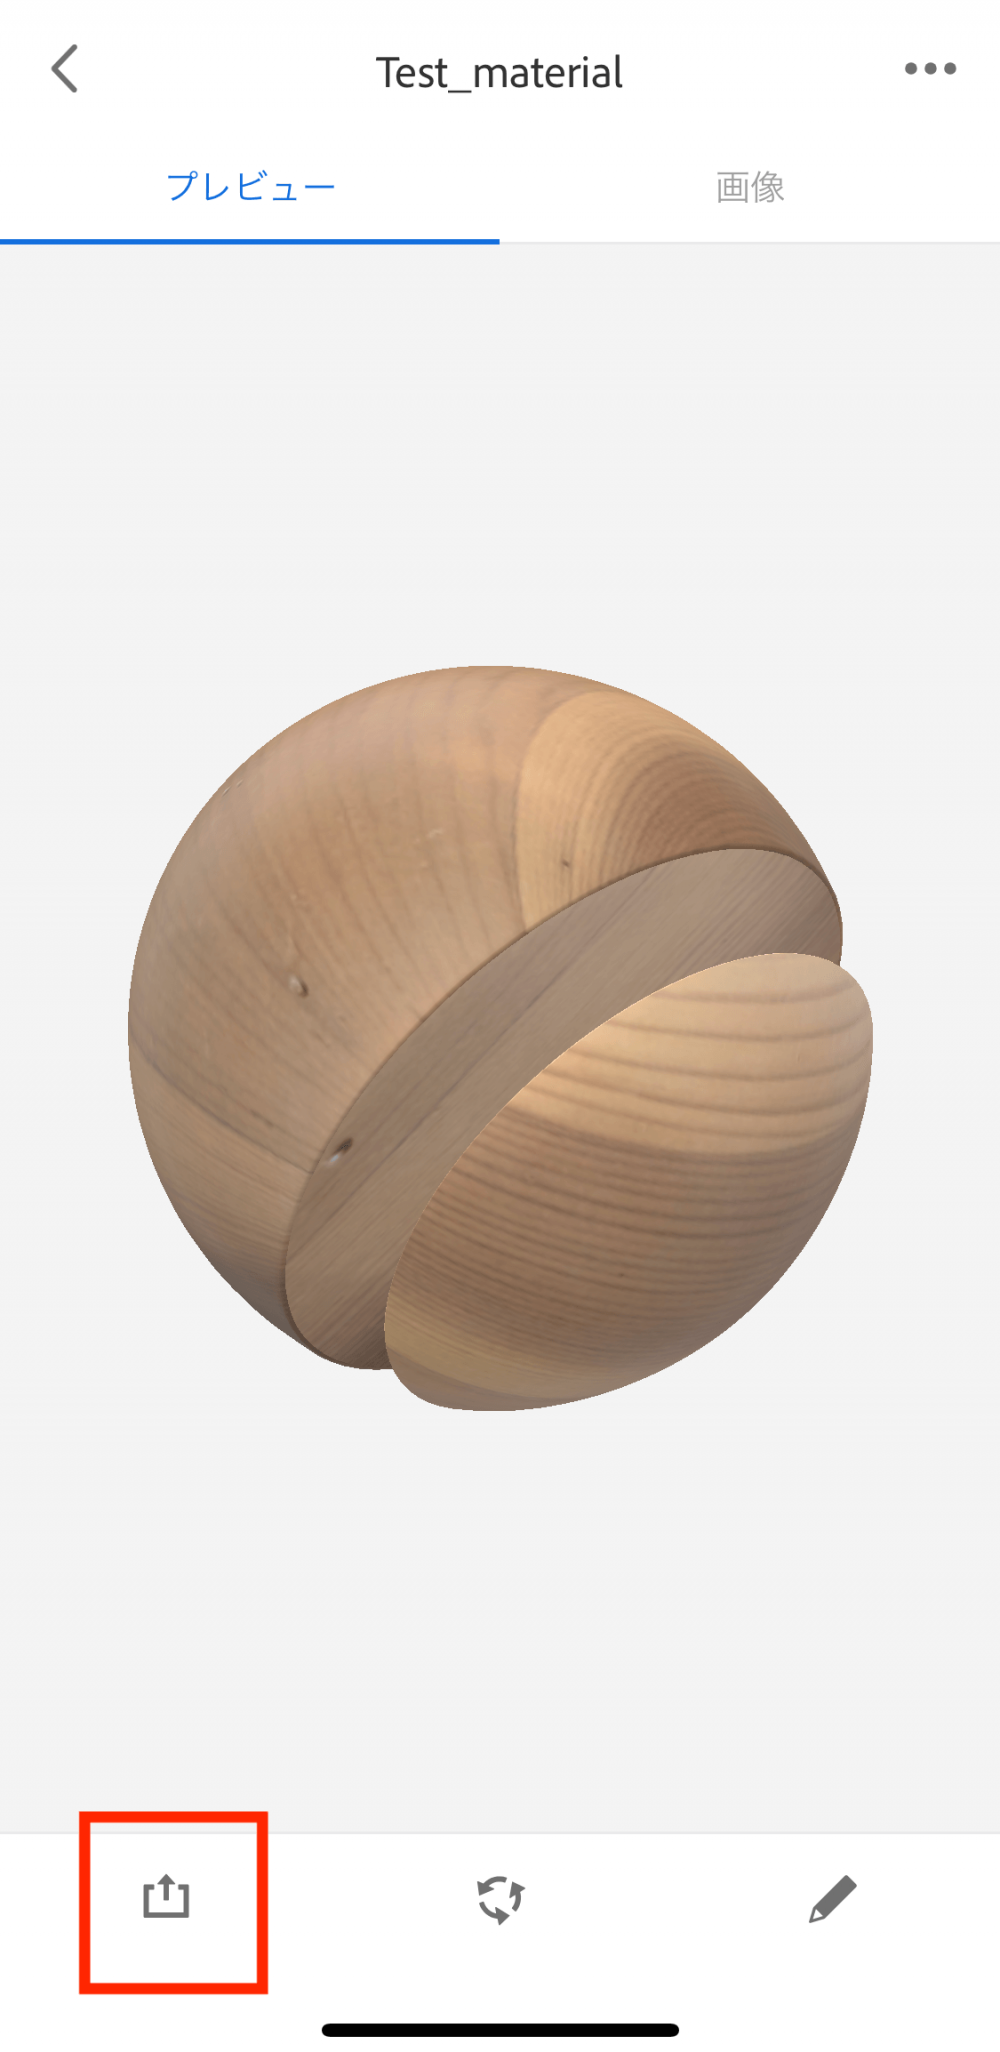
Sharing a material
Select a material from the export format and choose a sharing method.
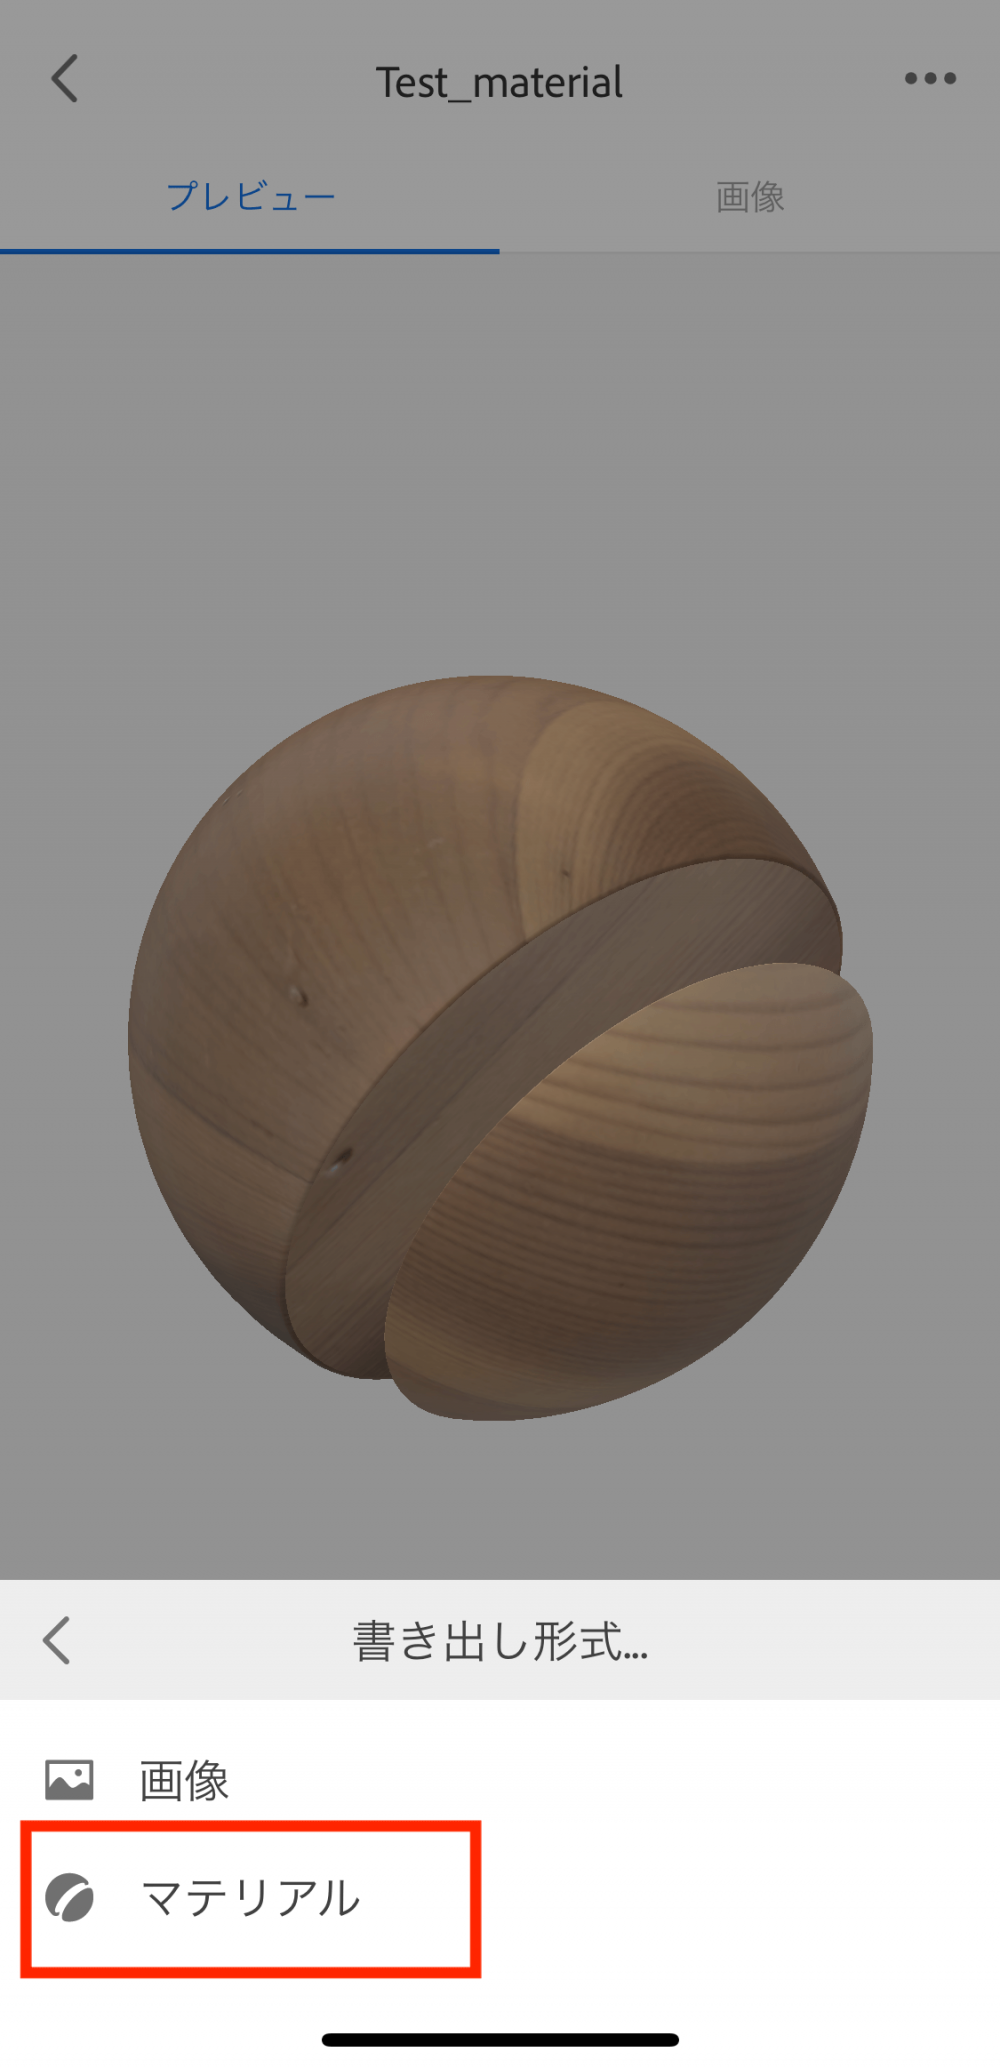
Specify the export format
Once downloaded, unzip the zip file.
In the extracted file, import the folder containing the four PNG files into Unity.
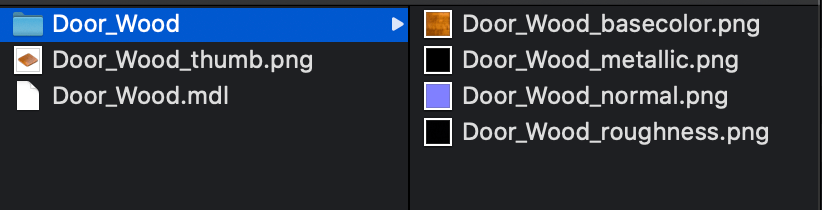
Folder to import
The next step is to recreate the material based on the PNG files in Unity.
Create a new Material in Unity.
Edit the Main Maps section in the Inspector.
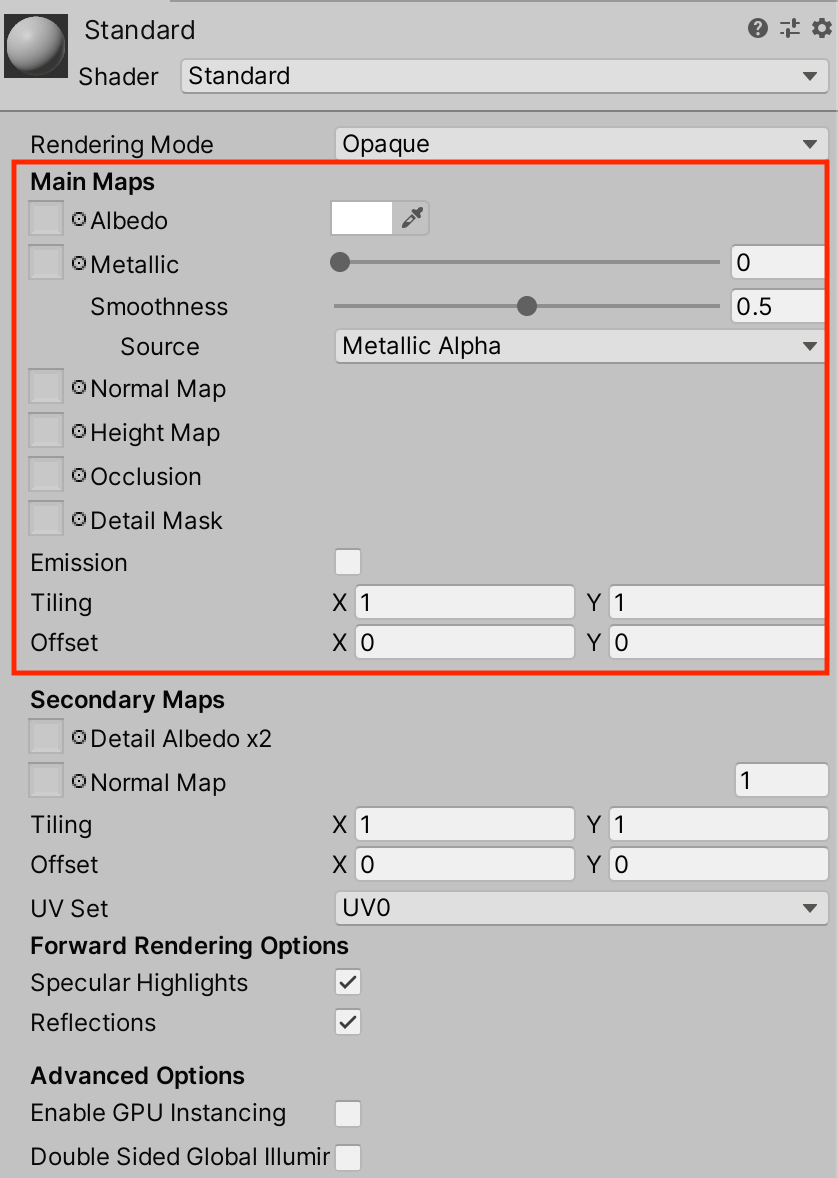
Set the Main Maps
Set up the maps as follows.
Drag and drop a texture onto the small square to the right of each item.
- Specify a basecolor texture for the Albedo section.
- Specify a metallic texture for the Metallic section.
- Specify a normal texture for the Normal Map section.
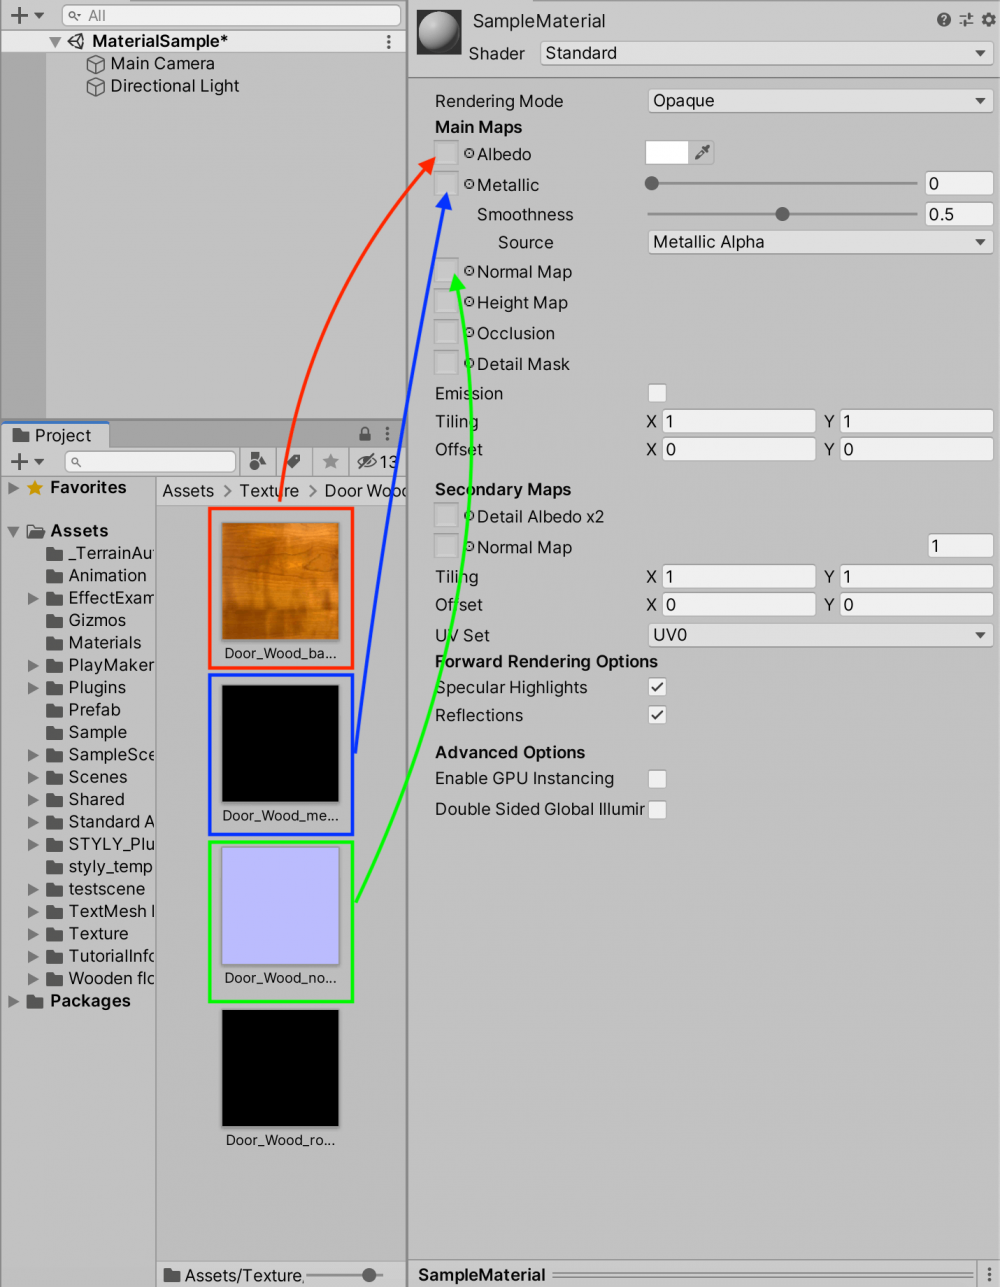
Specifying textures
Since the roughness texture cannot be specified, adjust the Smoothness value to adjust the roughness.
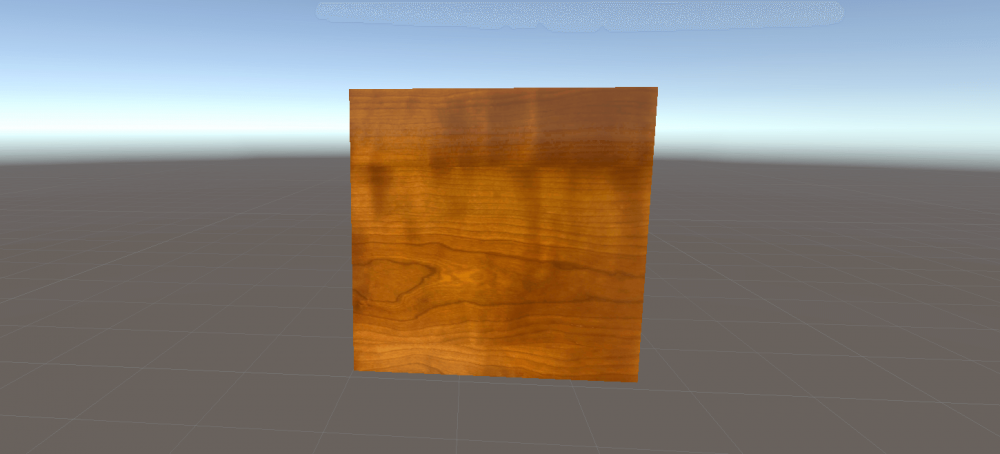
Let’s attach the completed material to the 3D model!
Creating a scene
Now, let’s create a scene using the material we created in Capture.
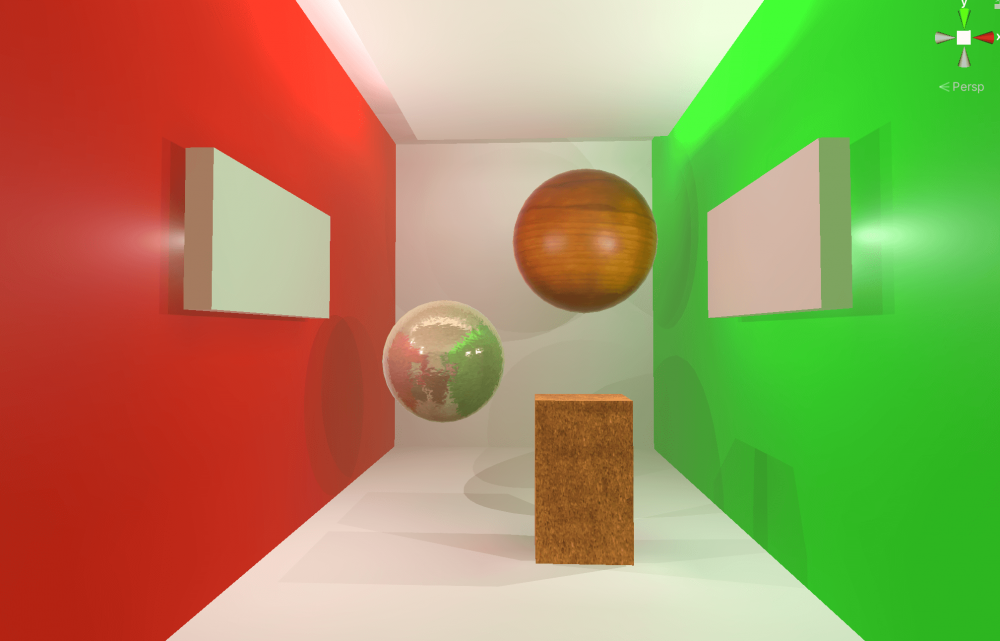
To make it easier to see the differences between the materials, we will create a Cornell Box (an environment used to check the quality of 3DCG) and compare the results within it.
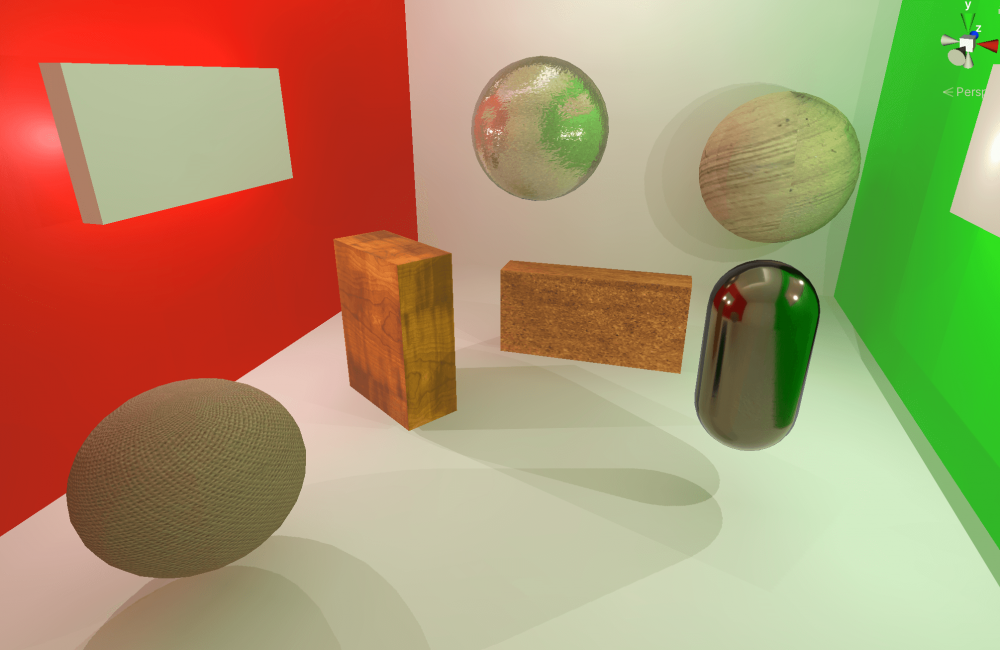
Sample scene created this time
The materials in this scene were created from photos of corkboards, wallpaper, desks, etc.
This sample scene was created using Global Ilumination (GI) based on the information in the following article.
![[Unity] Basic knowledge of Global Illumination (GI) – How to reflect it in STYLY](https://styly.cc/wp-content/uploads/2019/05/GI-room-EyeCatch-160x160.jpg)
By using Gl, you can create a more beautiful scene.
If you are interested, please check it out.
Uploading to STYLY
In this article, I showed you how to create a material from a photo using Adobe Capture.
Capture also allows you to create materials from your camera roll.
If you are out and about and find something you want to use as a material, take a picture of it and use it to create a scene.
Let’s actually upload your 3D model to STYLY.
How to create an account

How to upload to STYLY

How to upload from Unity to STYLY
