This article explains how to create a shader using ShaderForge, a free node-based editor available in Unity.
What is ShaderForge?
It’s one of the tools for creating “shaders” to arrange the look and feel in Unity.
There are several ways to create a shader, and we are going to look at their details in this article.
![[Unity]Introduction to Shaders](https://styly.cc/wp-content/uploads/2020/05/Screen-Shot-2020-05-24-at-16.36.19-160x160.png)
ShaderForge is a “node-based editor” to create shaders easily by connecting nodes without writing any codes.
ShaderForge was originally sold as a paid asset on the Unity Asset Store, but now it’s available for free on GitHub.
Installation/Startup/Initial Settings
Introduction
Go to your GitHub page, and select “Code” then “Download ZIP” in the upper right corner of the page.

Drag and drop the Shader Forge folder inside the unzipped one to the Assets section of the Unity screen.
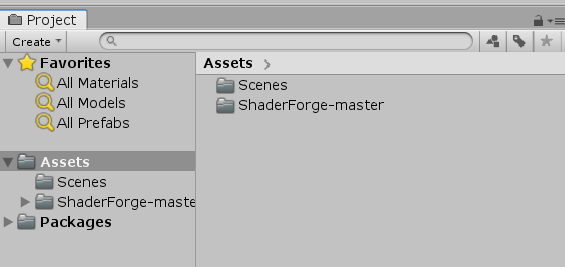
Added to Assets
Launch
When the installation is completed, click “Shader Forge” in the Window tab of Unity.
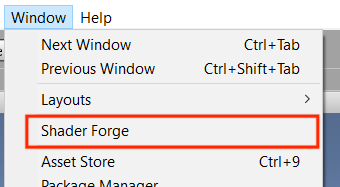
Launch Shader Forge
After launching the Shader Forge, click “New Shader”. In this case, select “Lit(Basic)”.

New Shader
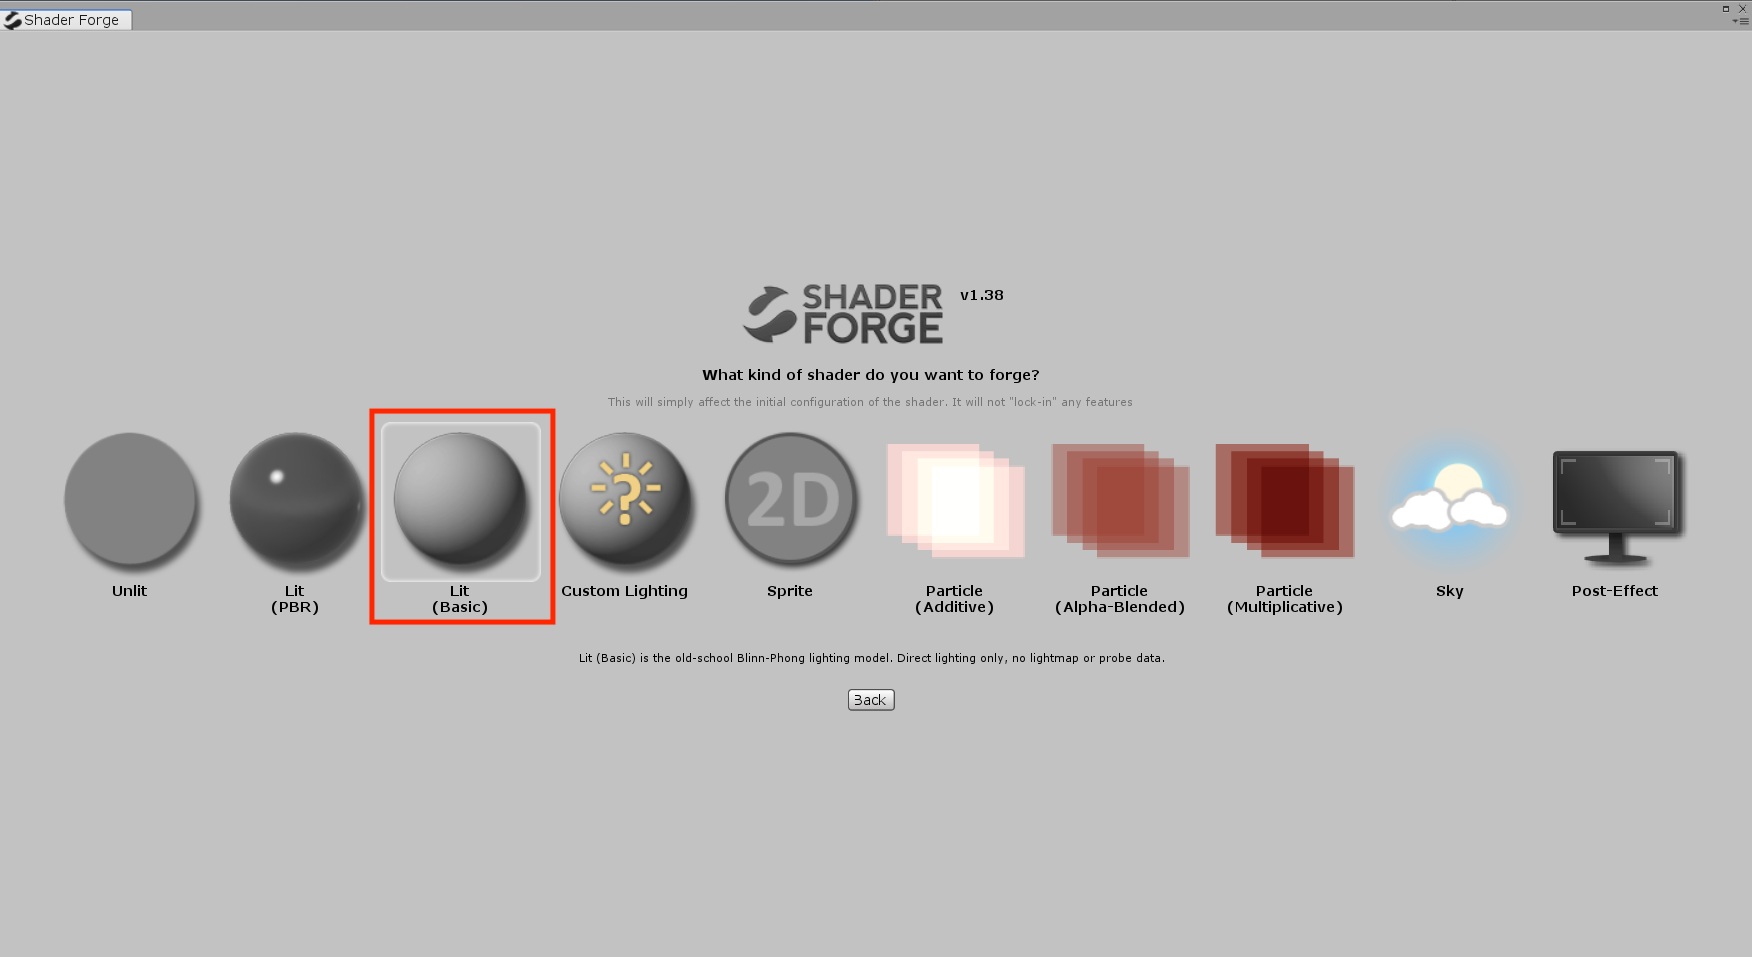
Lit(basic)
The following editor screen has been launched.

The initial screen of the editor
We will start with the initial settings. Go to Settings in the top left corner and check the box below.

Settings
- Auto :compile shaders automatically (uncheck this option if your device is slow)
- Rotate:rotate the preview object.
- Show node browser panel:check to display the panel on the right.
The panel displayed in the browser panel is shown in the frame on the right below.
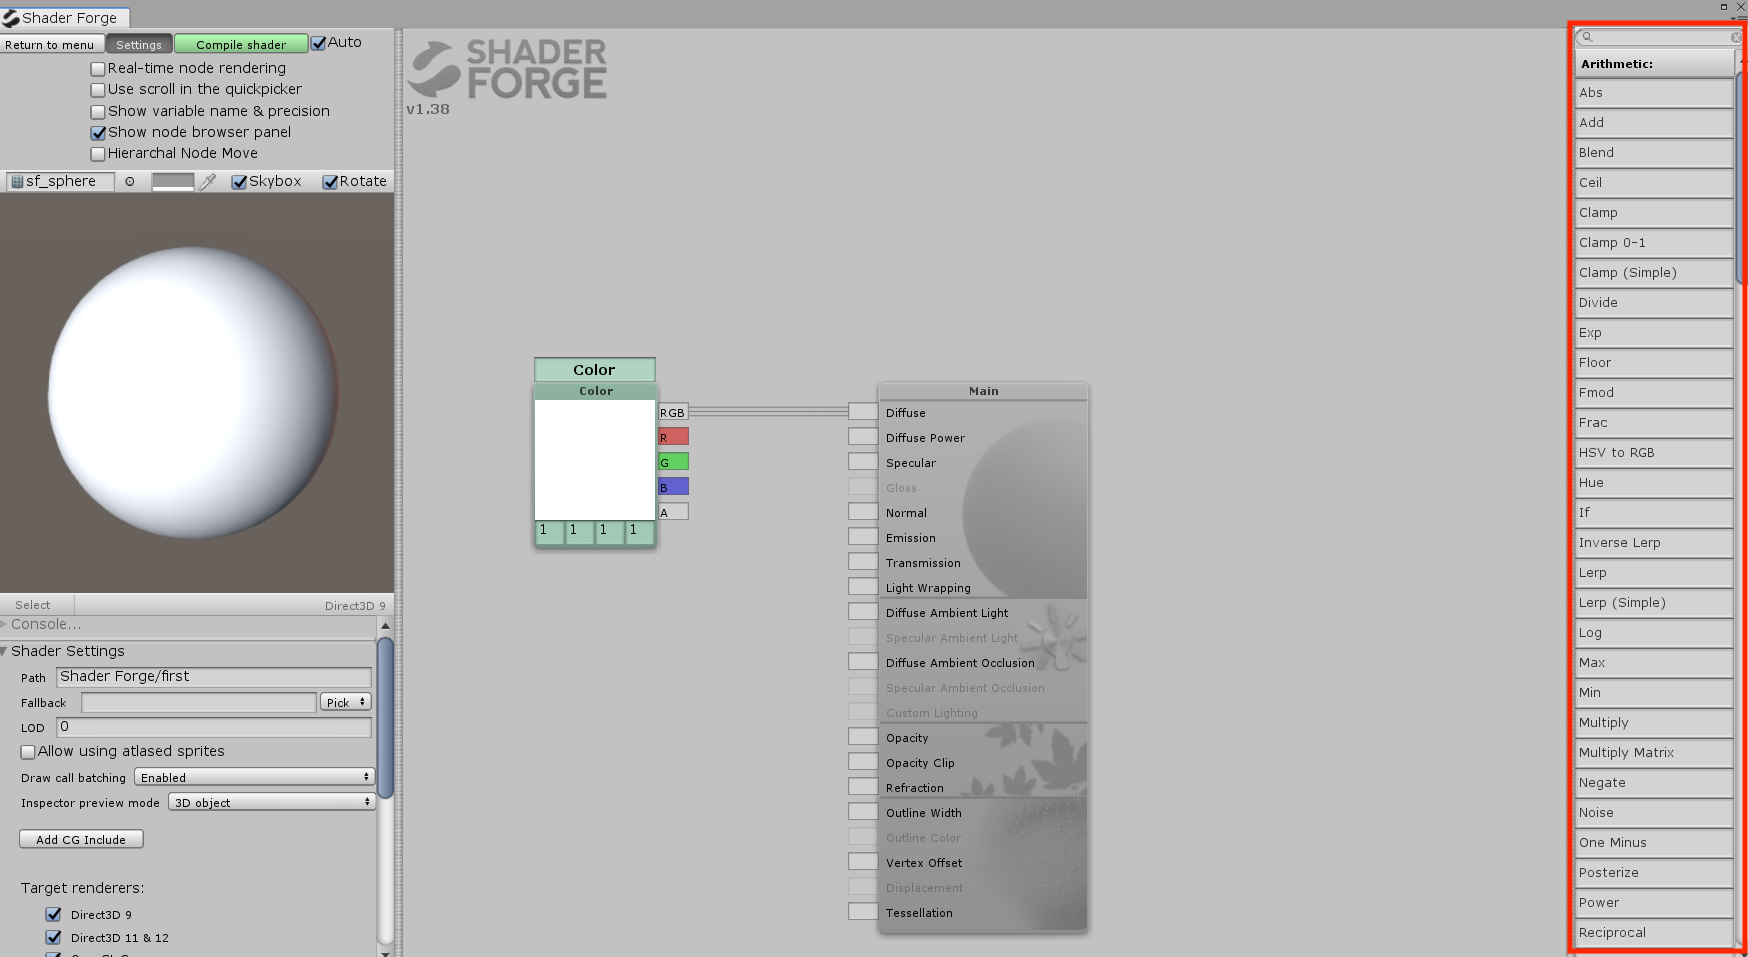
browser panel
Meanwhile, in Mac, open the Shader Settings section in the lower left corner and check the Target Renderers, iOS Metal.
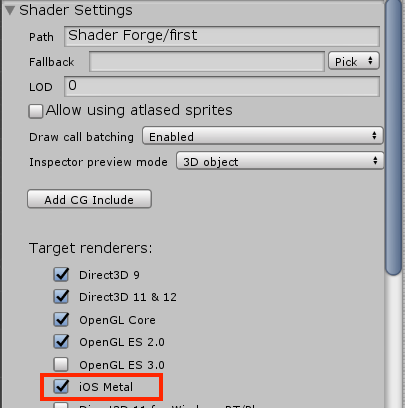
Shader Settings
Preparation is now completed.
In addition, if you want to re-edit the shader you created in ShaderForge after closing the screen, select “Open in Shader Forge” from the Inspector when you select Shader.
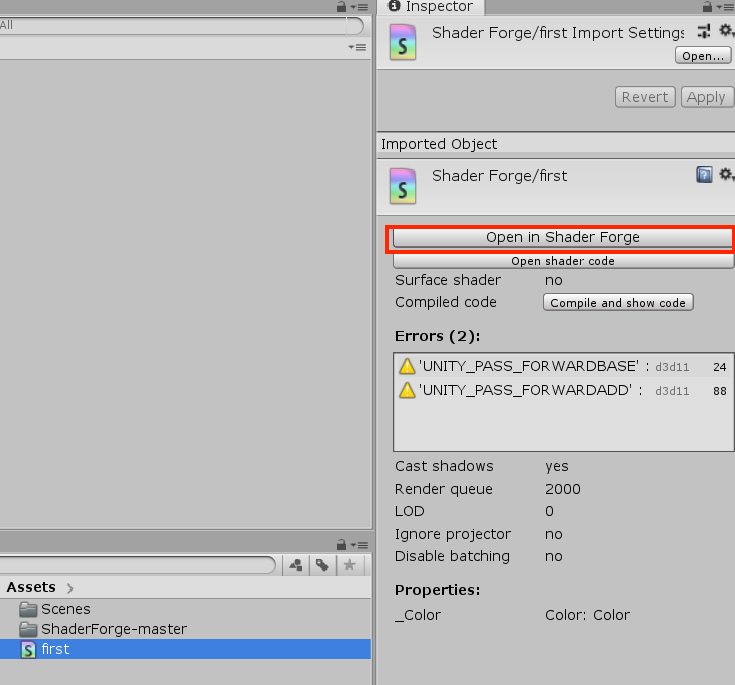
Open in Shader Forge
Making a shader
Basic Operation
In the Node Editor, the shaders are created by connecting the “nodes” with lines called “edges”.
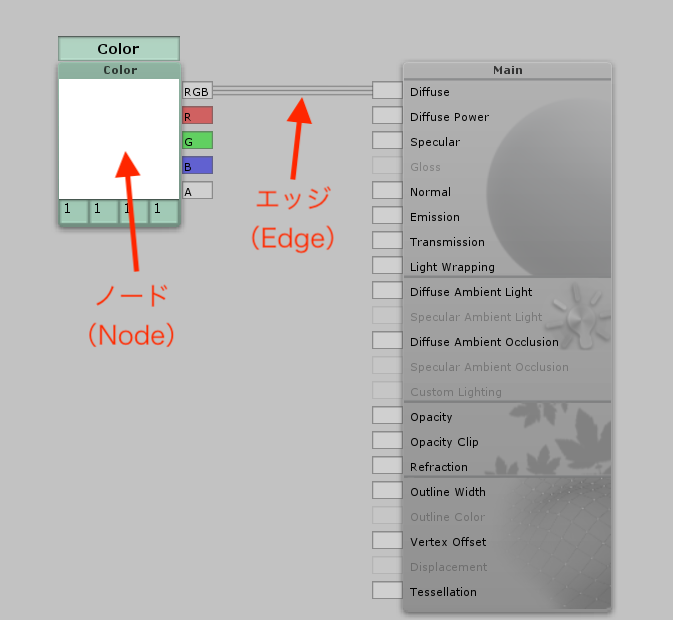
Nodes and edges
The basic operations of the Node Editor are as follows
- Add a node from the right-click menu, or add a node from the node browser panel
- Press [Ctrl(command)] + [X] to delete a node.
- If you want to remove the edges between nodes, create an empty node and attach it to the one you want to disconnect, then delete it.
Applying textures
Right click while pointing any empty area and select Texture 2D under Properties.
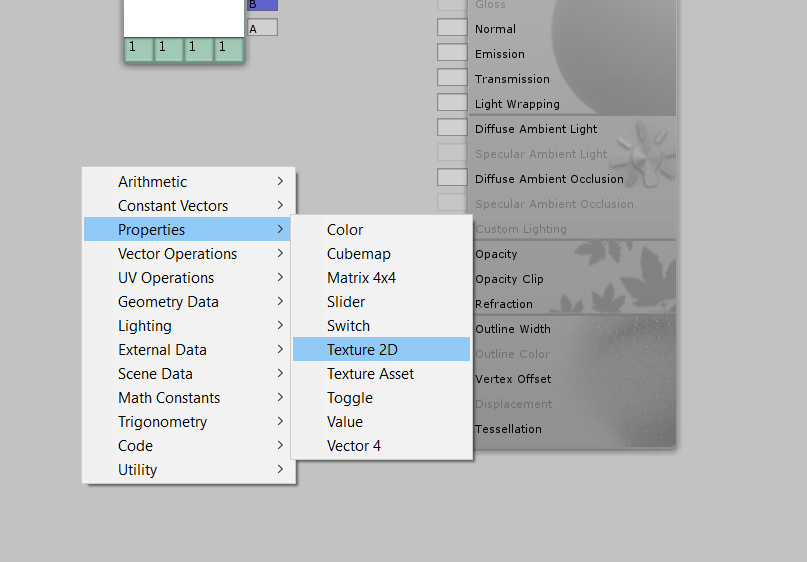
Select Texture 2D
A Texture 2D node is added. When the cursor is on a node, the “Select” button appears; click it.
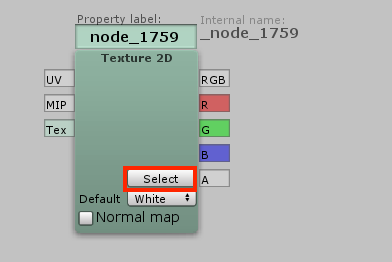
Move the cursor to the node and click “Select”
When the texture selection window is displayed, select the original texture “sf_conc_floor_01_d”.
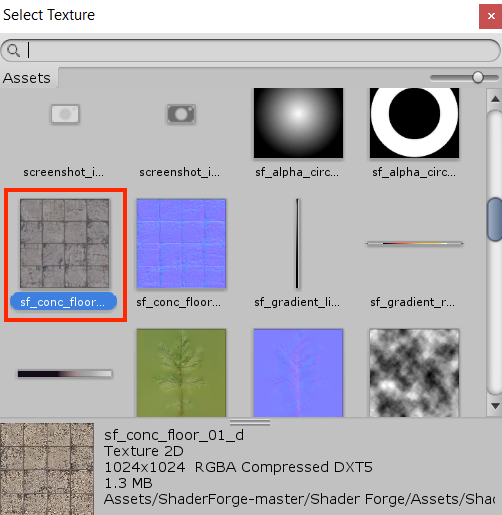
Select the texture
Drag from the “RGB” part of the Texture 2D node to the “Diffuse” direction of the Main node.
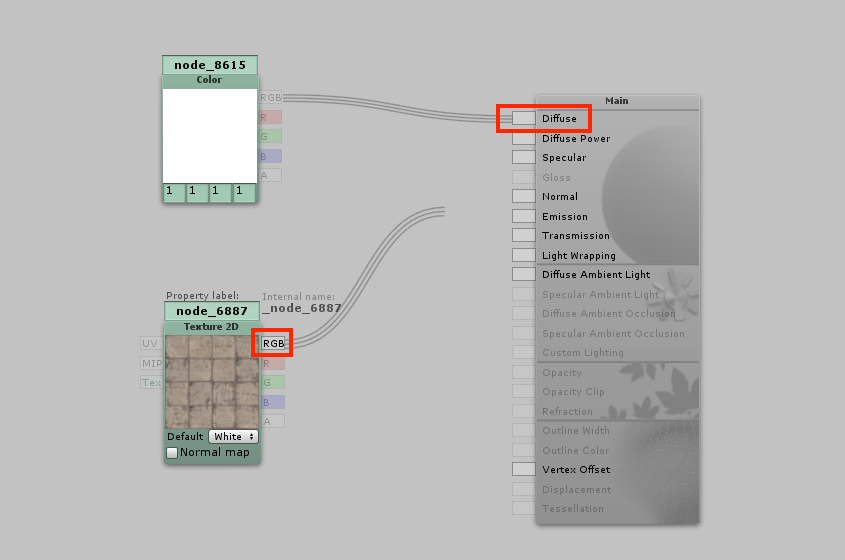
Dragging from RGB to Diffuse
Nodes are now connected, and since only one edge can be connected to Diffuse, the Color Any edges connected to a node will be automatically removed.
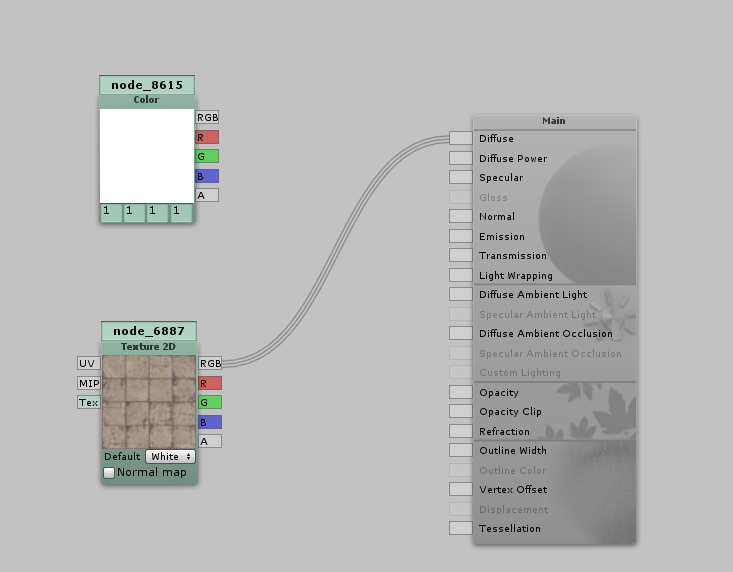
Nodes are connected.
This is automatically reflected in the preview.
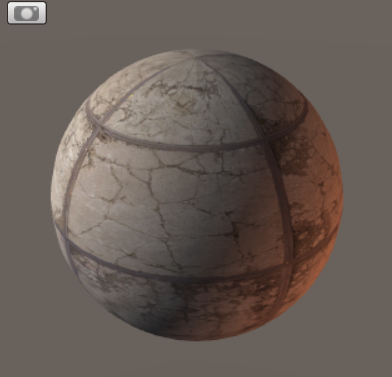
Preview
Multiply textures by colors
Follow the same steps as before but select “Arithmetic” > “Multiply” from the right-click menu.
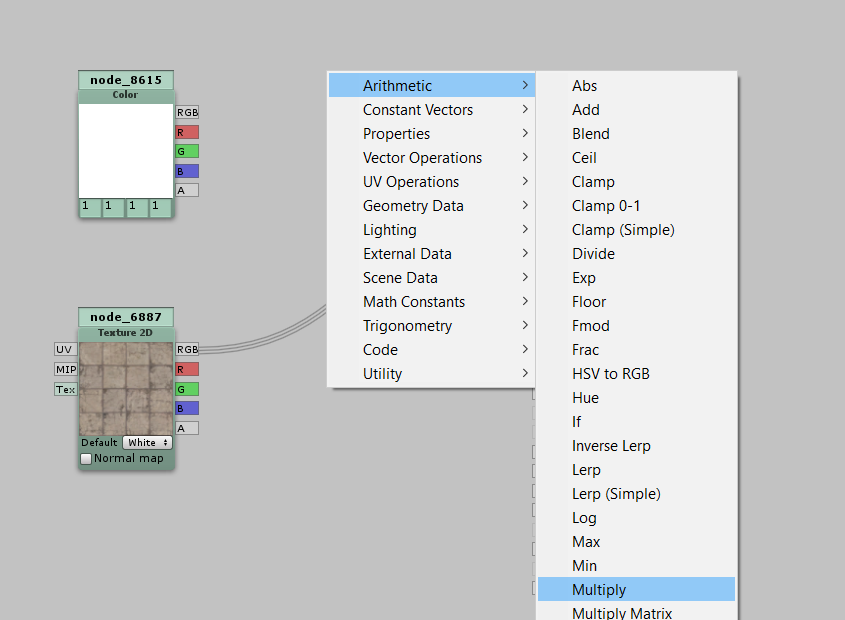
Add Multiply
Connect the added nodes as follows- the Color node has been changed to light blue.
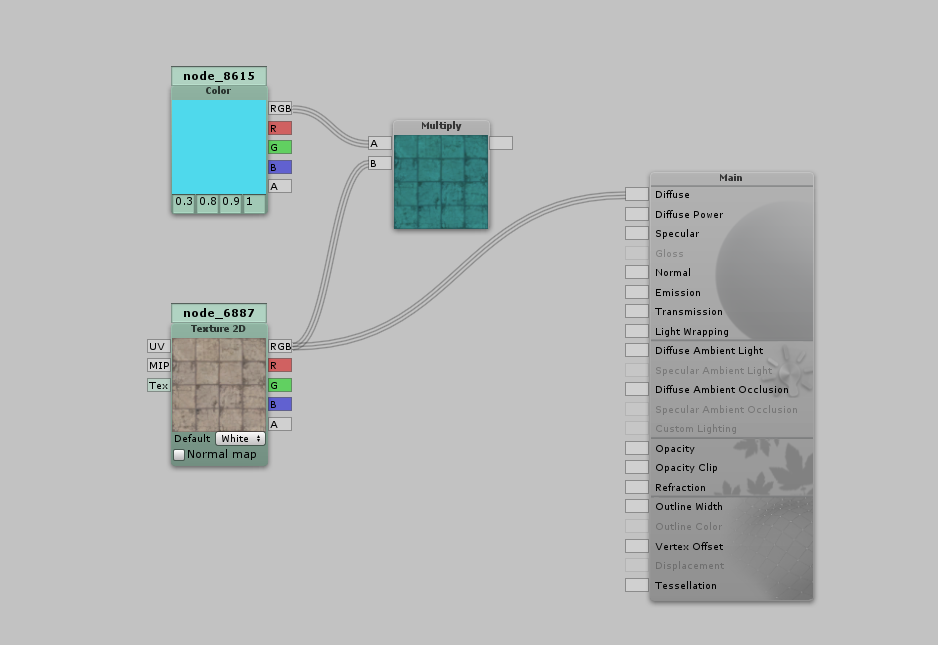
Multiply textures and colors
Finally, when the right side of the Multiply node is connected to the Main node’s “Diffuse”, the preview also has a light blue tint to it.

Connect the Multiply result to Diffuse
Make the color gradient
Delete the Color node and add the followings,
- Properties > Color: 2 nodes
- Geometry Data > UV Coordinates
- Arithmetic > Lerp
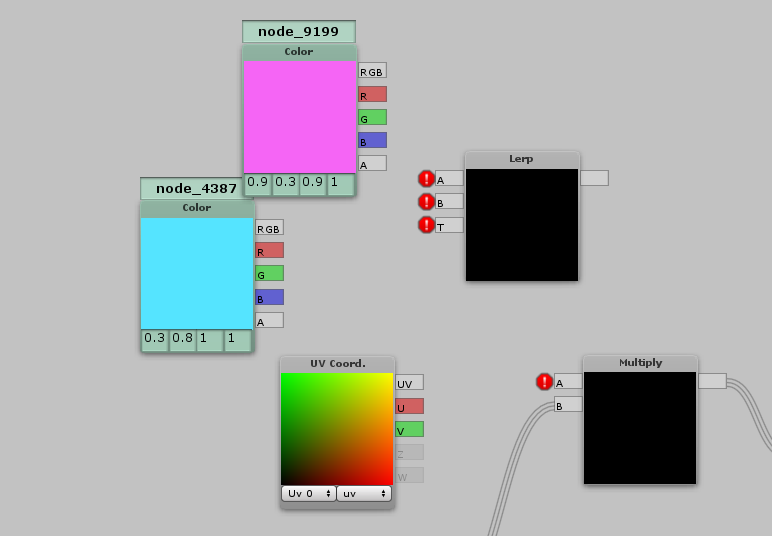
Add four nodes
Lerp is a node that blends the inputs of A and B with the values coming into T as the middle. In this case, we want the UV information to be V and the vertical direction to be T. So, if we connect the nodes as shown below, it’s a gradient.
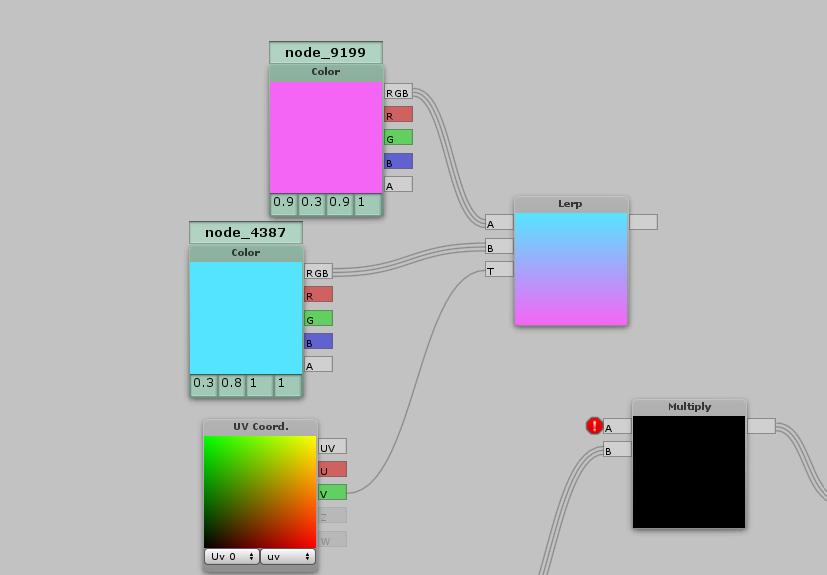
Now, I’ve got a gradient.
When you connect an edge from the right side of the Lerp node to the A of the Multiply node, the texture is now multiplied by the gradient, which reflects the gradient.
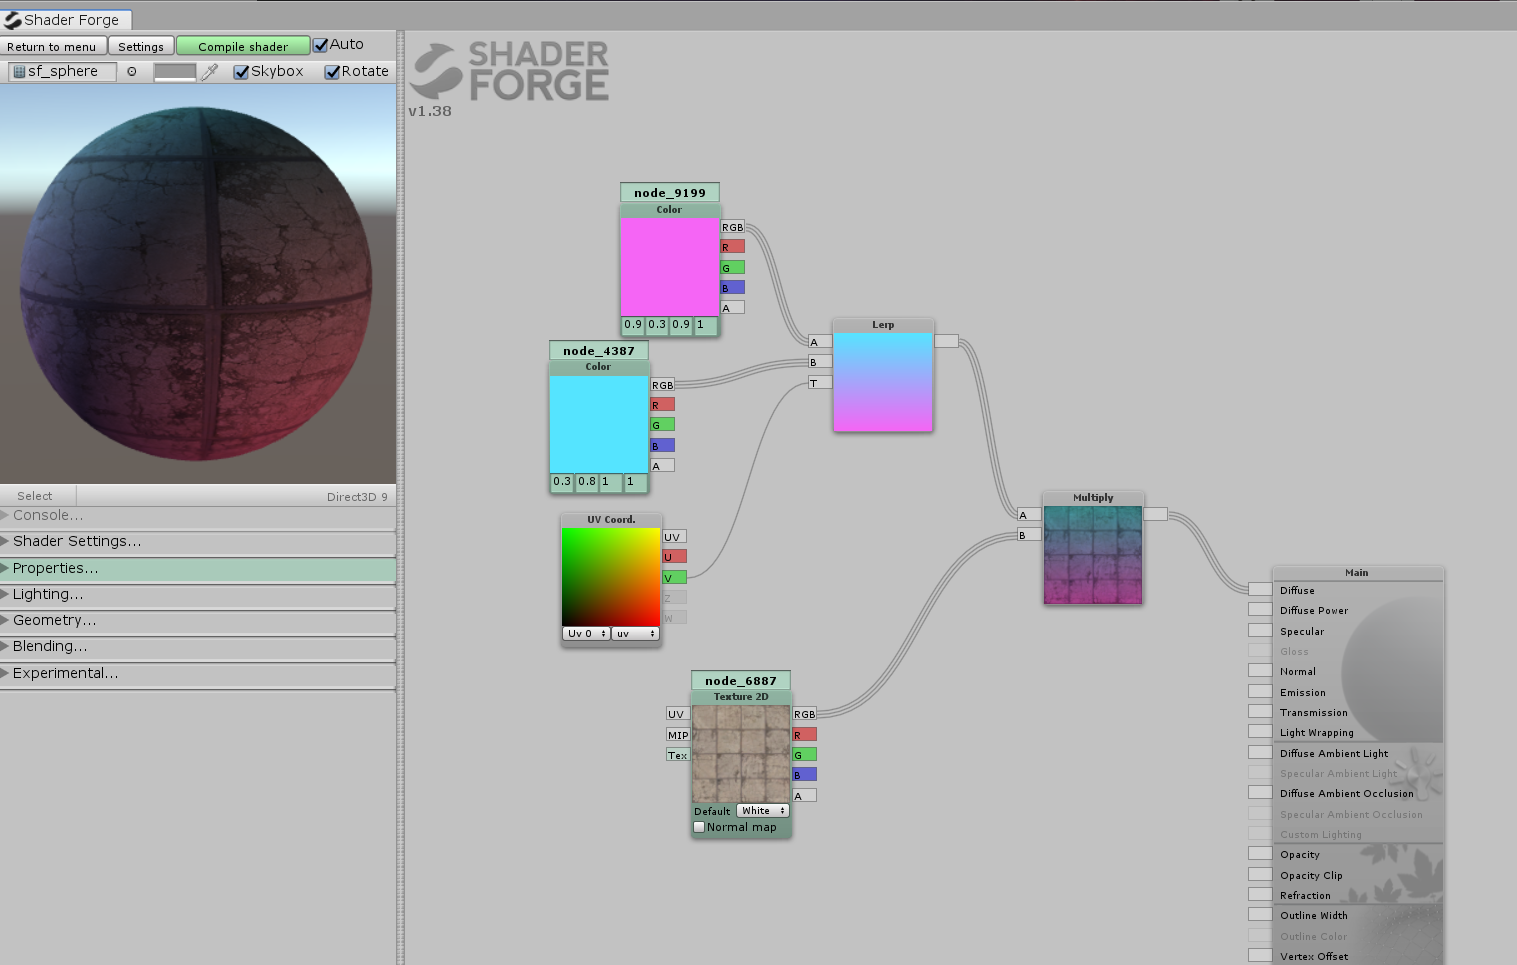
The gradient is reflected.
Setting the Normal Map
Simply put a normal map, the texture for expressing unevenness.
This time, we add a texture called “sf_conc_floor_01_n” (the normal map corresponding to sf_conc_floor_01_d) in Properties -> Texture 2D.
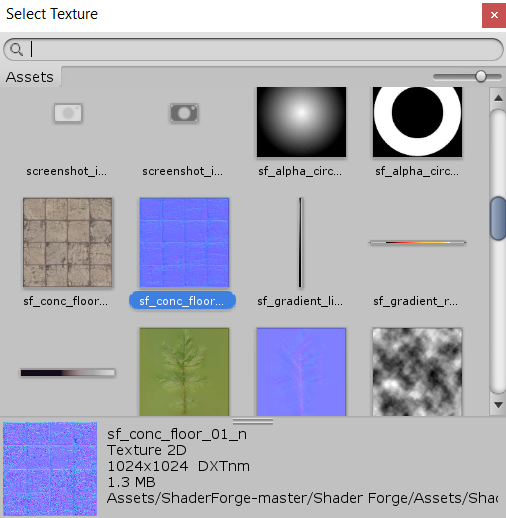
Select the normal map
Connect the RGB of the Texture 2D node to the “Normal” of the Main node.
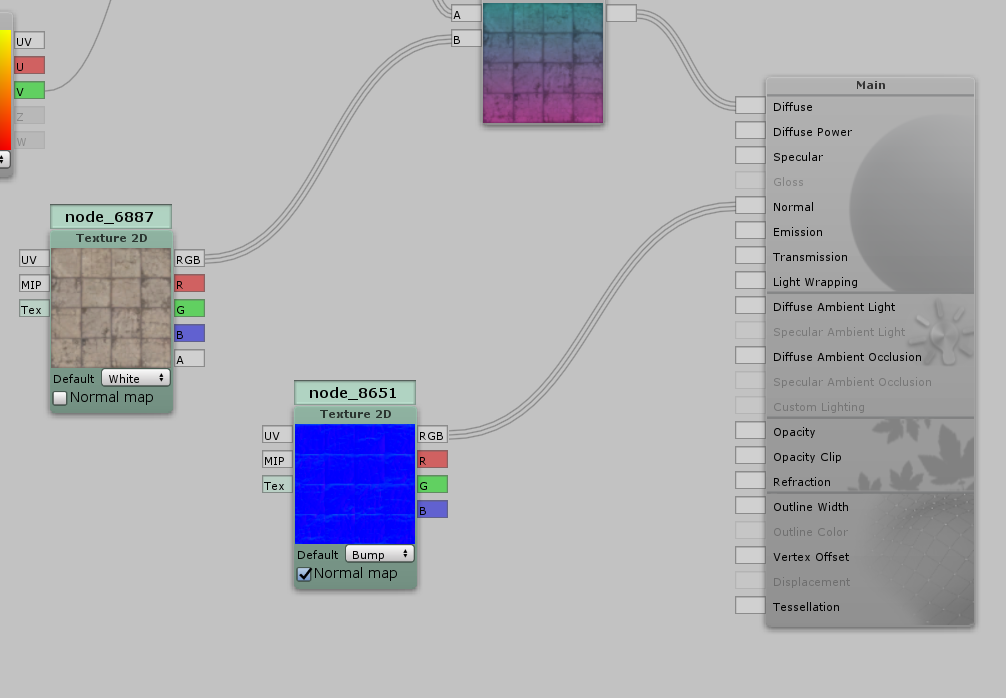
Connect to Normal
Above is a preview before connecting to the normal map, and below is the one after the connection. You can see the texture has become rather bumpy.

Before applying the normal map

After applying the normal map
Adjusting the gloss
The Main node has items such as Specific, Emission and Opacity, which can be adjusted by connecting the numerical nodes.
In this case, we right click and add the “Slider” node from Properties and connect it to the Specular in the Main node.
As you move the slider, you can change the number from 0 – 1 and the preview will reflect the gloss in real time.
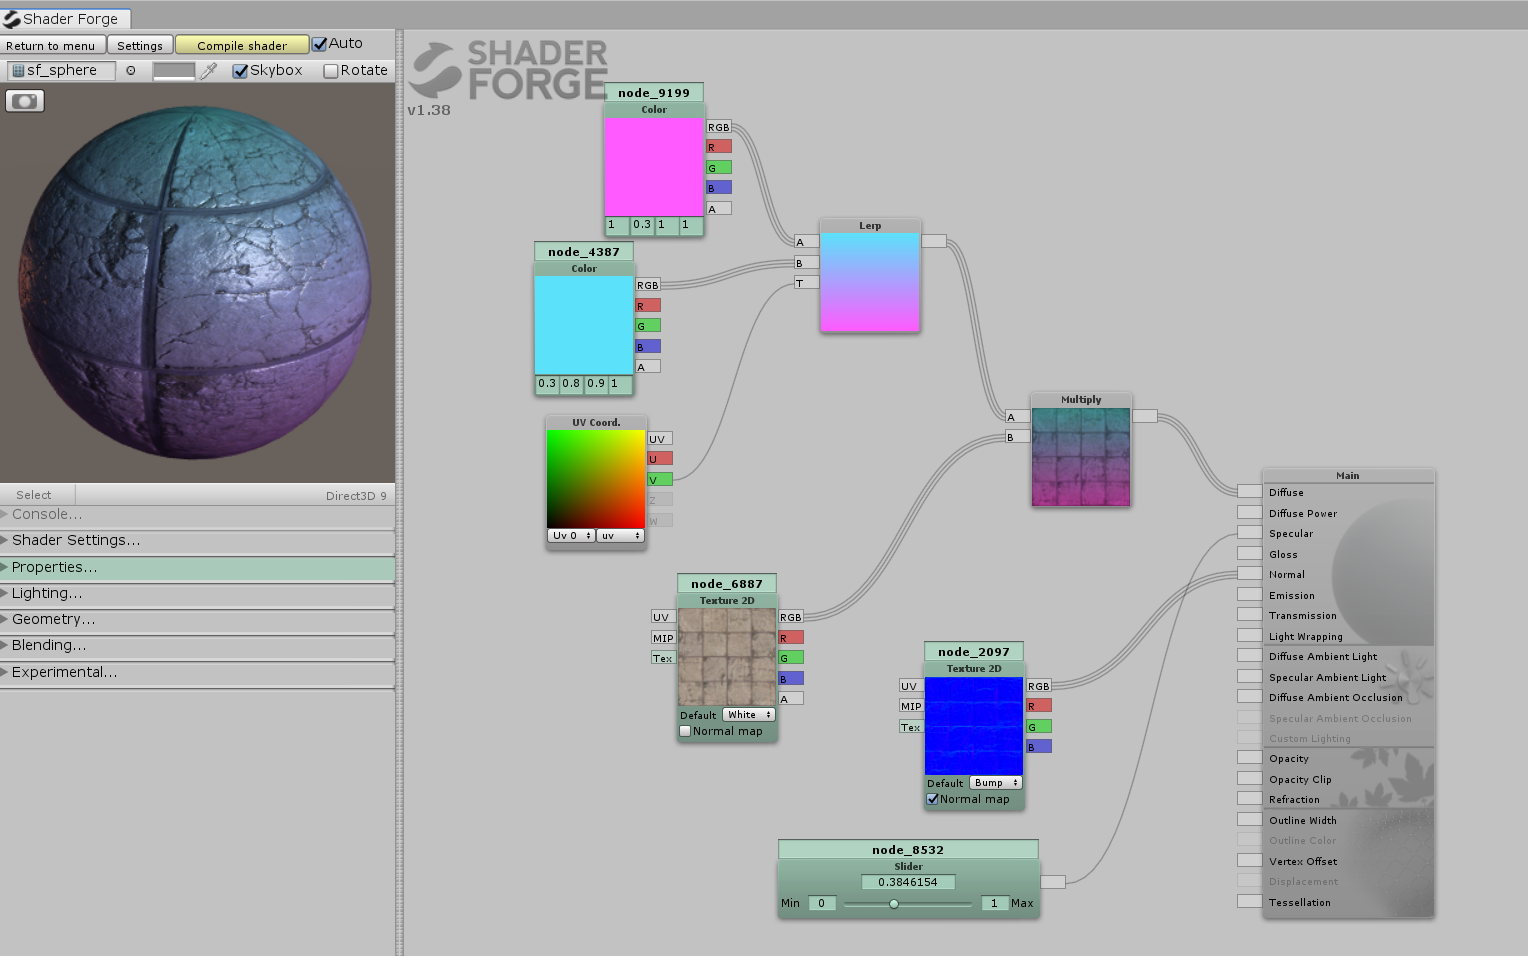
Adjusting the gloss
How to upload to STYLY
Objects created in ShaderForge with shaders can be uploaded to STYLY.
Let’s upload a 3D model from Unity to STYLY.
Create a STYLY account.
How to create an account

How to upload to STYLY from Unity

This is the basic explanation of the usage of ShaderForge.
If you want to try something more difficult, see the following articles!