In this article, the 2D image placed in the scene will be displayed against the player camera (main camera).
Here’s how to implement the always-facing gimmick using PlayMaker.
In game effects, this is what we call a billboard.
The 2D image follows the direction of the main camera.
Advance preparation
Unity Setup
Please refer to the following article for the installation Unity & project creation.
Buy PlayMaker
Please refer to the article below to purchase & import PlayMaker.
Prepare a 2D image to be loaded
Please prepare the 2D image data of your choice.
In this article, we will be using the “Planet.png” image data.
Importing a 2D image into Unity
Create a folder called Sprites in any location.
This time, Assets>STYLY_Examples>SpritesLookAtCamera
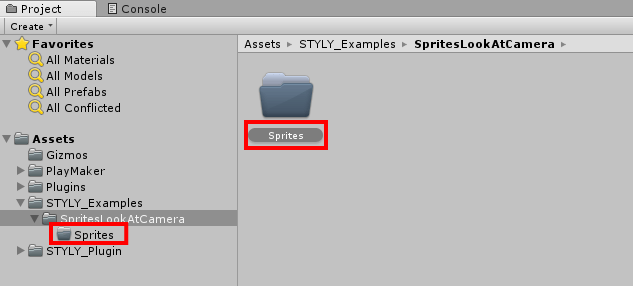
Create a folder renamed as “Sprites”.
Insert image data from Explorer into the Sprites folder.
Drag and drop to load the image into Unity.
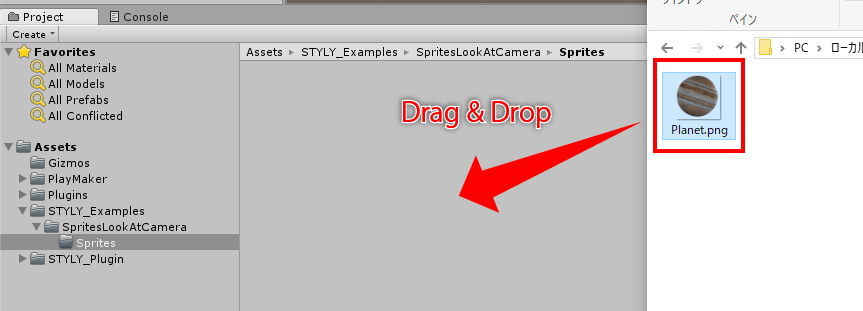
Drag and drop images into Unity
If you click on the image icon, there is an item called TextureType in the Inspector.
Change the TextureType to “Sprite(2D&UI)”.
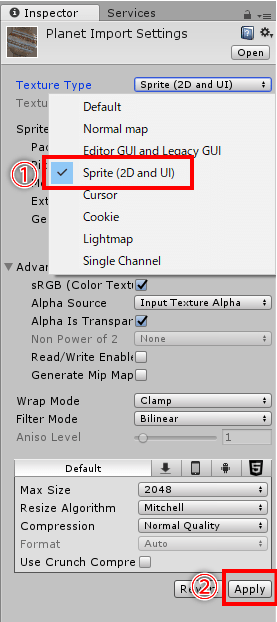
Change the TextureType.
From the Sprites folder on the Scene or in Hierarchy
Let’s drag and drop the Sprite to appear on the game screen.
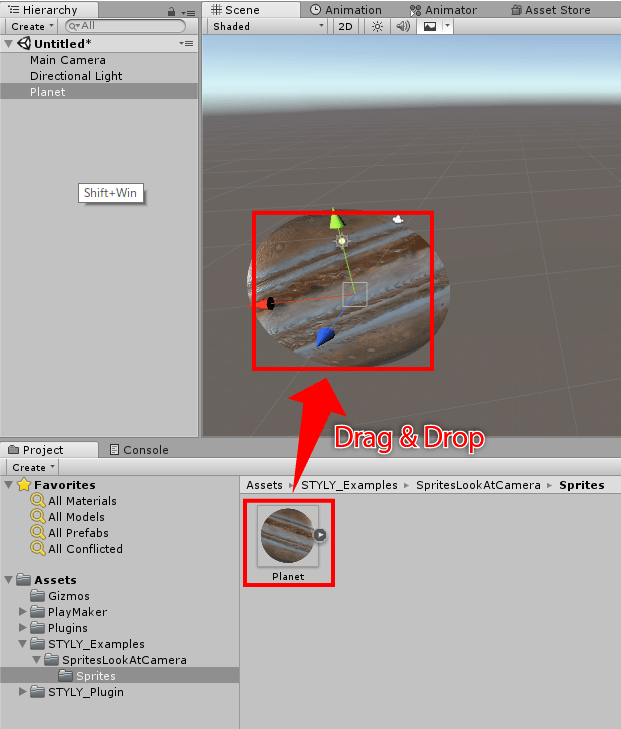
Dragging and dropping images into a scene
We are now ready to load the image into the Scene.
Preparing to work with 2D images in PlayMaker
We will now move on to the implementation of PlayMaker.
To implement a feature in PlayMaker, use the screen called PlayMakerEditor.
If it’s not showing up on Unity
Go to PlayMaker>PlayMaker Editor from the top menu.

Display the PlayMaker Editor.
With GameObject selected on the Scene or Hierarchy folder, the
Right-click on the PlayMakerEditor.
Then the menu “Add FSM” will be displayed and click on it.
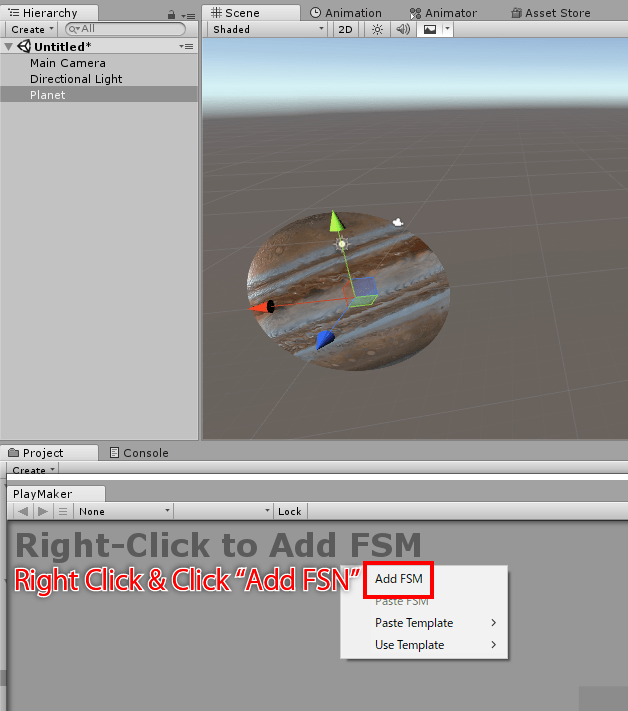
Add State to PlayMakerEditor by right-clicking
A “toy” icon will then appear on the corresponding GameObject in the Scene and Hierarchy.
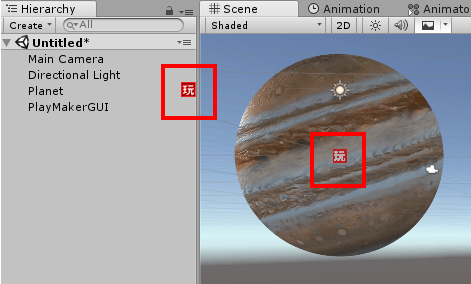
When PlayMaker is attached to a GameObject, a “play” icon appears.
Now you’re ready to implement your gimmick in PlayMaker.
Get the game object of MainCamera.
Get the MainCamera game object on PlayMakerEditor (on STYLY, MainCamera becomes its own view).
Let’s change the name of the state called “State 1”with the arrows connected from START to “LookAtCamera”.
For information on how to get the camera information, see the article below.
![[Unity/Playmaker] How to implement camera acquisition and interaction with camera](https://styly.cc/wp-content/uploads/2020/01/GIF2-4-160x160.gif)
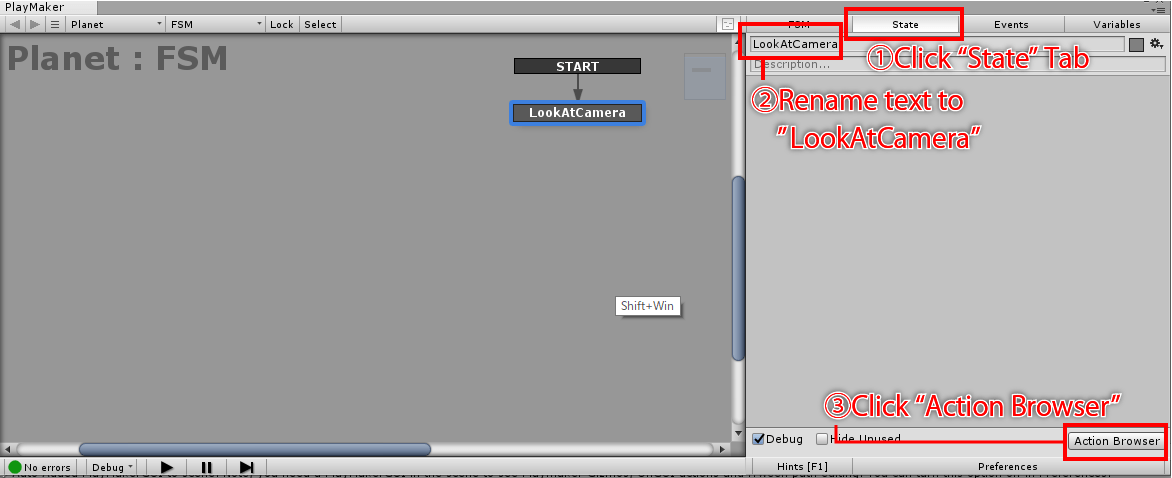
Rename State and open the ActionBrowser.
Click on the State tab on the right and click the “Action Browser” button at the bottom.
Search for “Find Game Object” from the list of actions that will be displayed.
Click on “Add Action to State” to add a State.

Add a Find Game Object
Once you’ve added the Find Game Object to the State, set the Object Name.
Let’s set “[VRTK]_VIVE” in the Object Name.
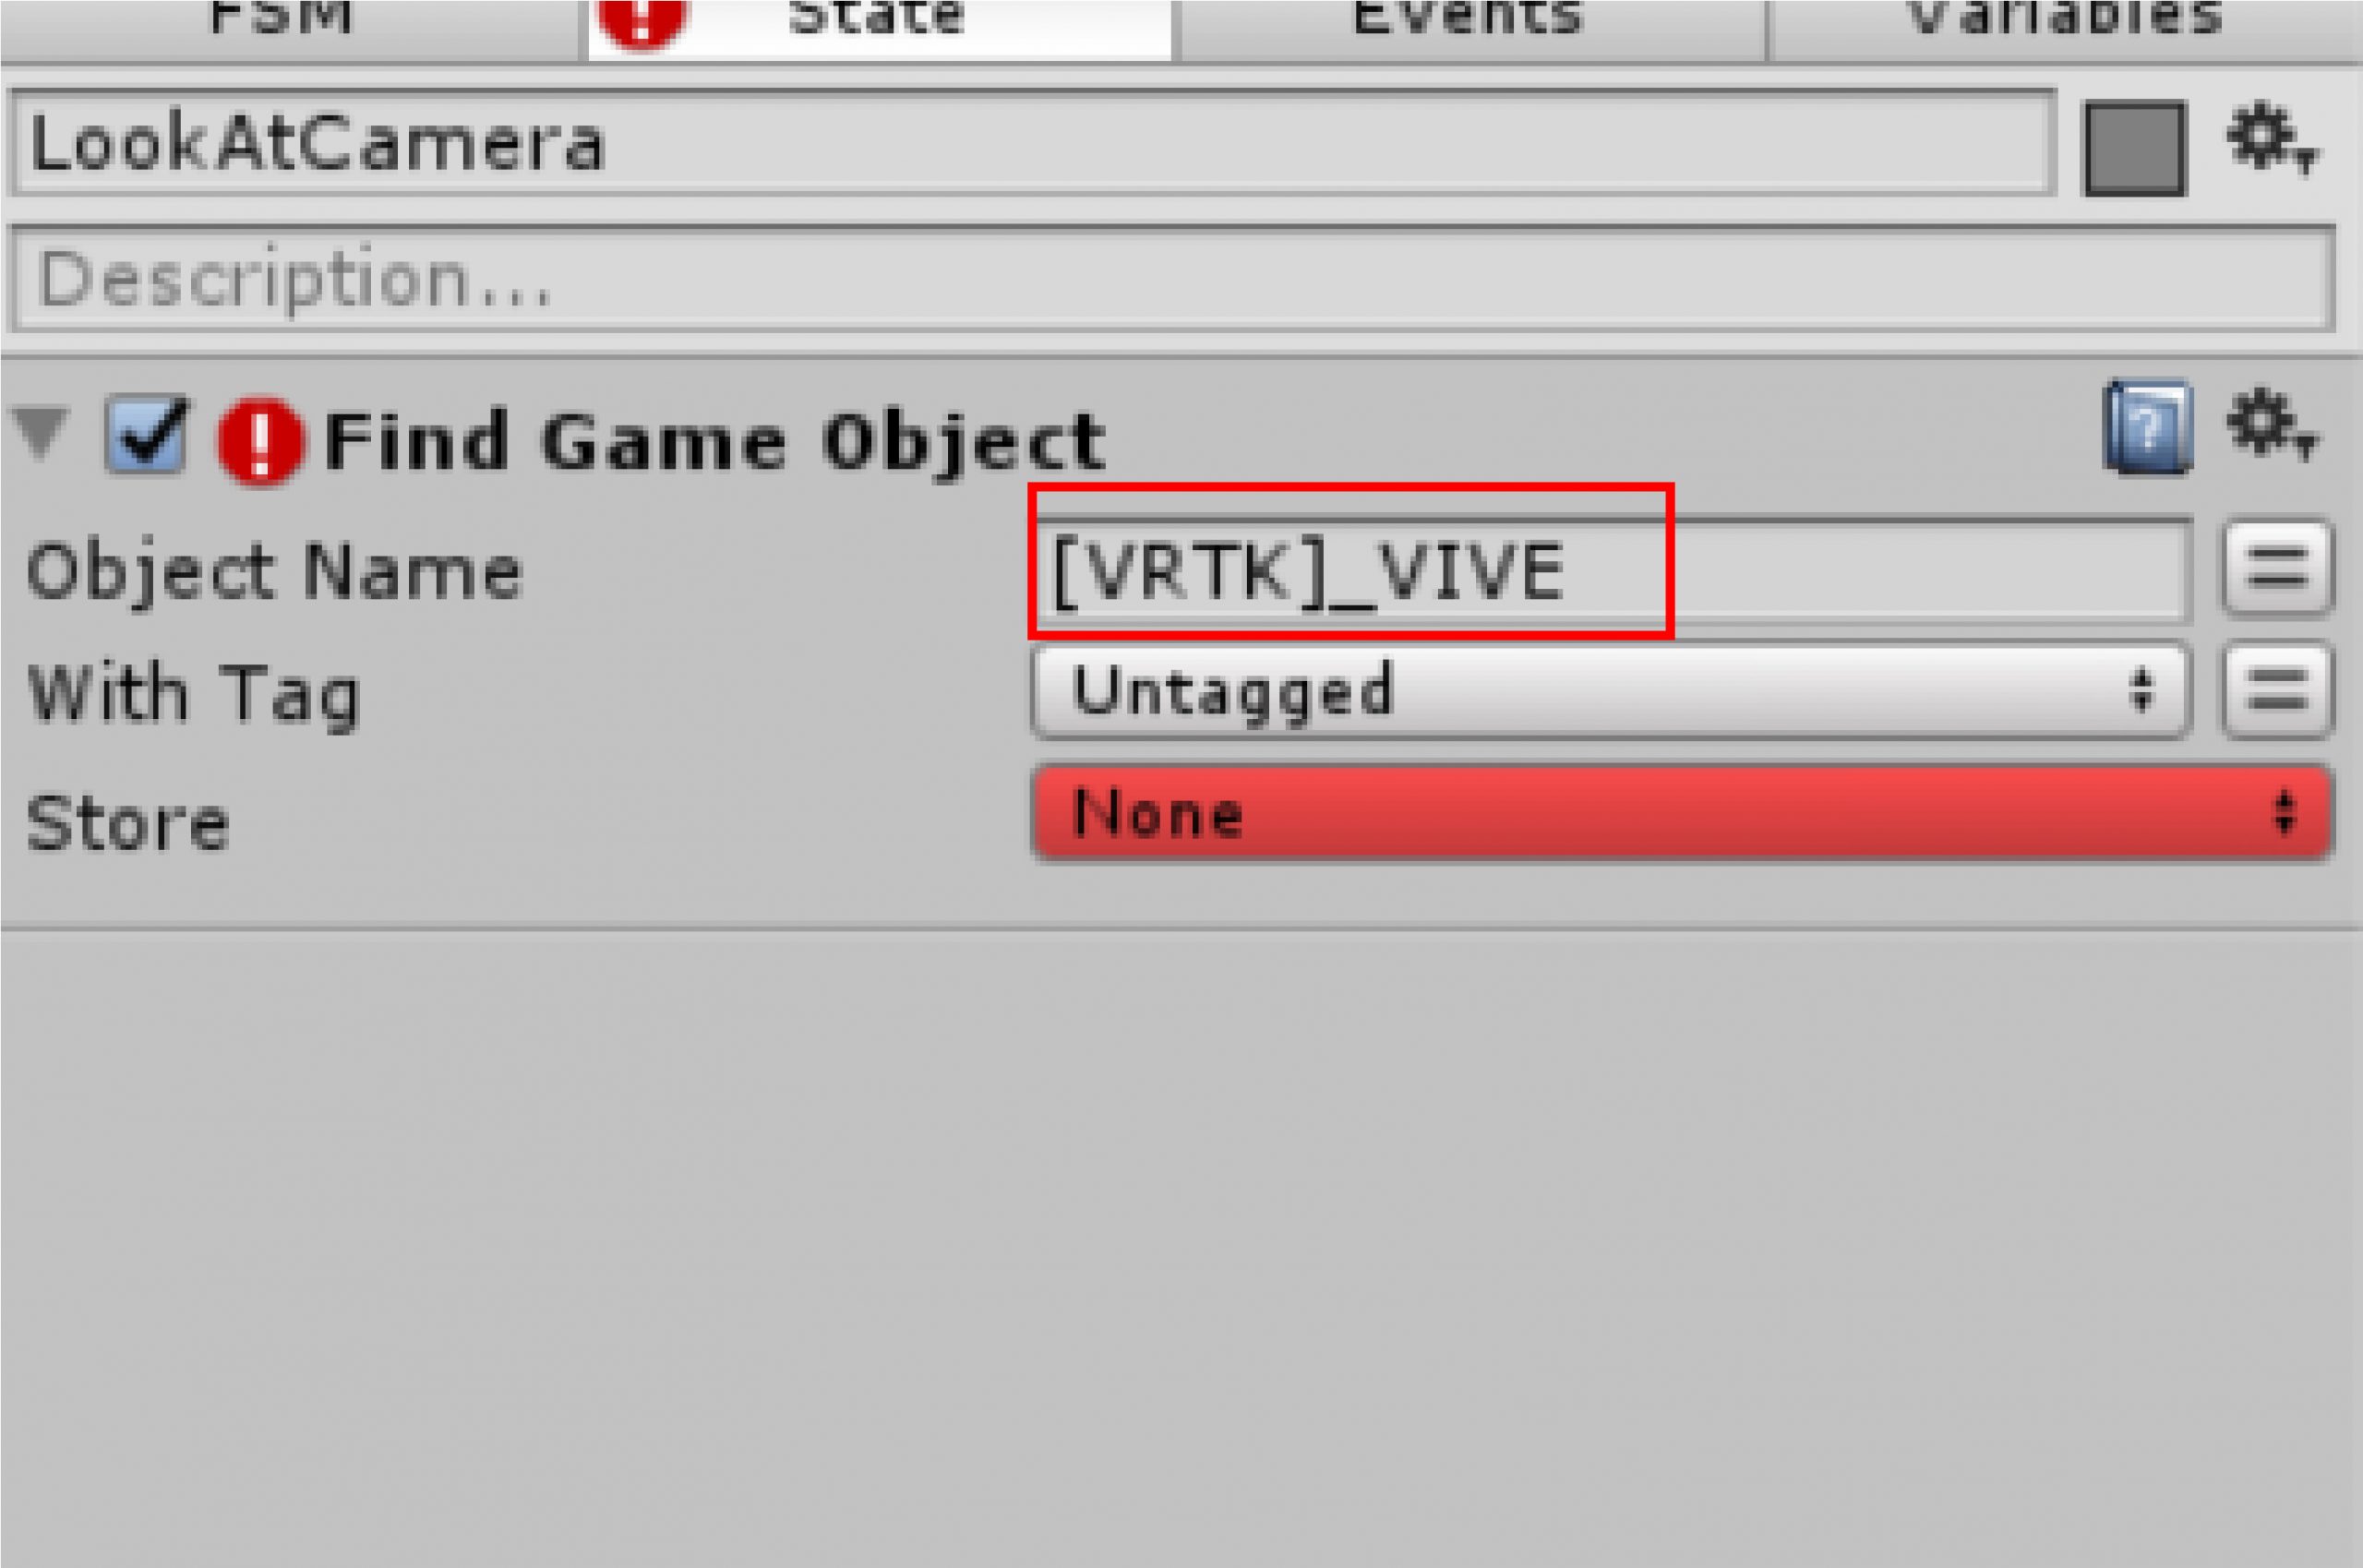
Set the Object Name to [VRTK]_VIVE.
By inputting [VRTK]_VIVE, the camera information of the HMD can be acquired.
This information is stored in a variable.
Select the Store menu bar and select “New Variable…
Select New Variable… and type in “MainCamera”.
Stored in “MainCamra” variable
The camera’s information is now stored in “MainCamera”.
Implement the function to face forward to MainCamera.
Now that MainCamera is retrieved, the z-axis of the image will always be in front of MainCamera.
Implement the gimmick.
Open the ActionBrowser, search for “LookAt” and click it.
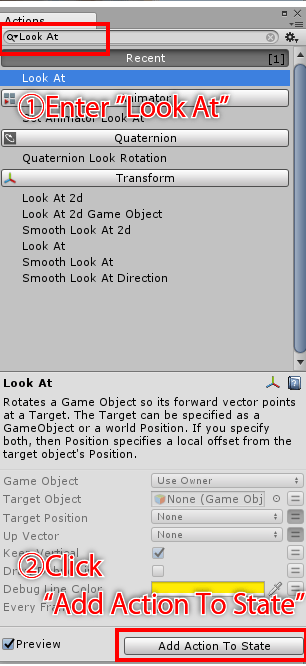
Search for functions to be implemented by ActionBrowser (Look At)
Set the variable “MainCamera” in the TargetObject of the State tab.
If you click the button with two lines on the right side, you can select a variable from the pull-down menu.
Let’s set the “MainCamera” setting.
Select MainCamera.
If you check the “Keep Vertical” checkbox, the camera will not follow the up and down movement.
Only the left and right movements are followed.
If you check “Draw Debug Line”, a line will appear on the screen when the game is played.
You can see how the Z-axis of the image is following the MainCamera. (Default value is yellow.)
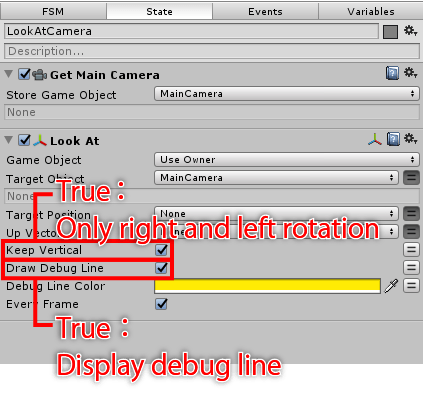
Check “Keep Vertical” and “Draw Debug line” arbitrarily.
Flip a 2D image horizontally.
However, because the Z-axis is facing the main camera, the image is flipped left and right.
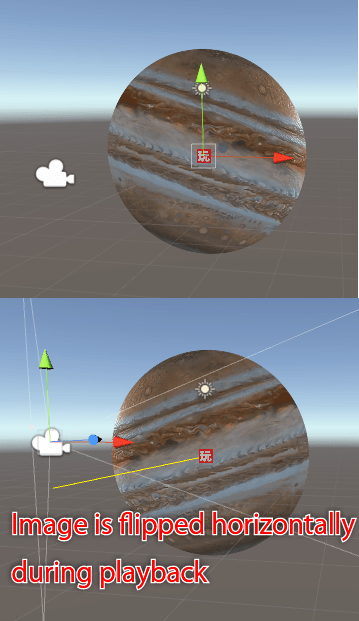
As it is, the image is inverted.
Click on the GameObject in the image and click on the “X” in the Flip in the Inspector’s Sprite Renderer.
Check the checkbox.
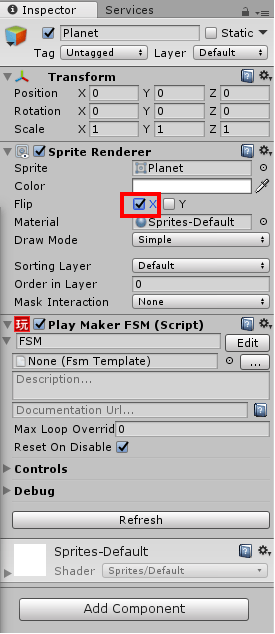
Flip the image left/right by checking the Flip “X” of the image’s Inspector
This allowed me to return the image to its original orientation.
Prefabrication
Now that the implementation is done, let’s make it Prefab to upload to STYLY.
Create an arbitrary folder to store Prefab.
This time, I created a folder called Prefabs under Assets>STYLY_Examples>.
After clicking on the GameObject with the gimmick implemented on Inspector, the
Then drag and drop it into the Prefs folder.
A Prefab is created with the gimmick implemented in PlayMaker.
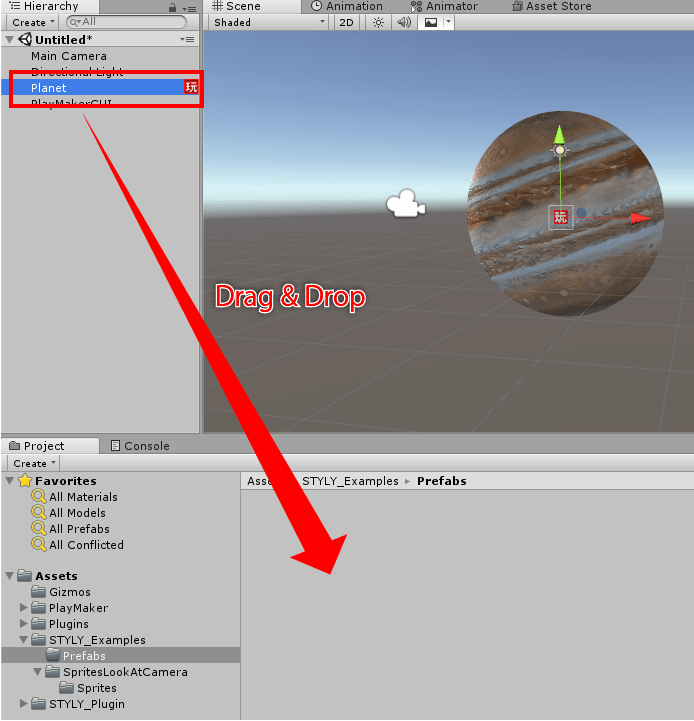
Drag and drop to make it Prefab.
Upload to STYLY
Upload Prefab from Unity to STYLY with reference to the following article.

How to upload a prefab from Unity to STYLY
Thank you for your hard work.
It’s interesting because the scenery changes. I hope you’ll give it a try.