In this article, I’ll show you how to use Playmaker to implement interactions, such as 3D models triggering actions in response to the movement of the main camera.
By learning this, you can create a tricky space like the one below.

Advance preparation
Let’s install Playmaker, a plugin for Unity in advance.
![[Unity Tutorial] Creating a Game Using Playmaker ① From Basic Introduction to Installing](https://styly.cc/wp-content/uploads/2019/06/1200px-160x160.jpg)
If you are using Playmaker for the first time, please read the following articles for better understanding.
![[Unity] Starting Playmaker from Scratch](https://styly.cc/wp-content/uploads/2019/09/PlaymaerCoreConcept-160x160.png)
Overall flow and blueprints
[Point]
- Use the “Find Game Object”.
- Enter “[VRTK]_VIVE” in the Object Name in “Find Game Object” and store it in the variable.
Playmaker has an action called “Find Game Object”.
Put this action on the 3D model and enter [VRTK]_VIVE in the “Object Name” field in the action.
By storing this information in variables, the 3D model can always attain information about the main camera.
If you add other actions while the 3D model has information about the main camera, the actions will be triggered according to the movement of the main camera.
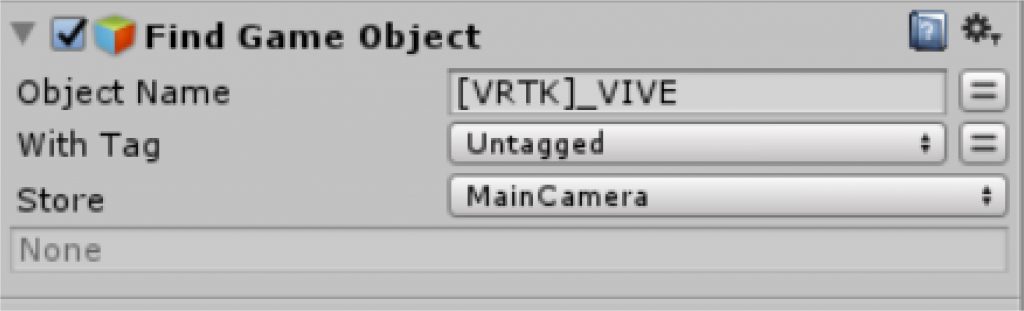
Find Game Object
You can use any variable to store in the Store (in this case, it’s “MainCamera”).
In fact, the steps to get the information are described below.
Retrieve information from the main camera
First, let’s create a 3D model that will be interactive with the camera.
This time we’ll use Cube, so let’s create a Cube on Hierarcy.
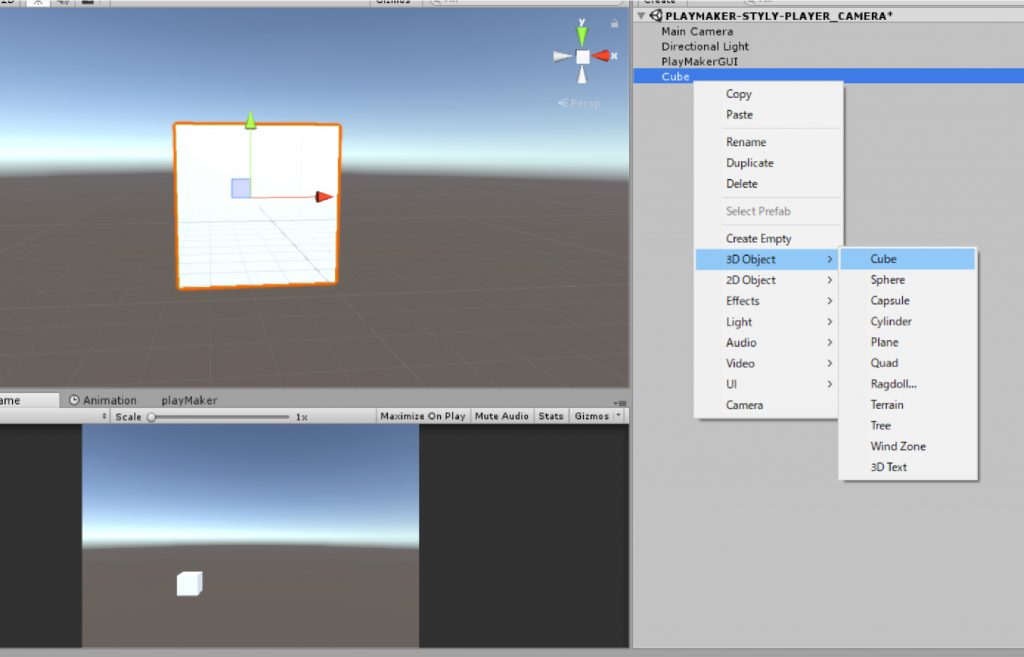
Create a Cube
In order to operate the Playmaker, the PlayMaker Editor window will open.
Select [PlayMaker Editor] from the [PlayMaker] in the top menu bar.
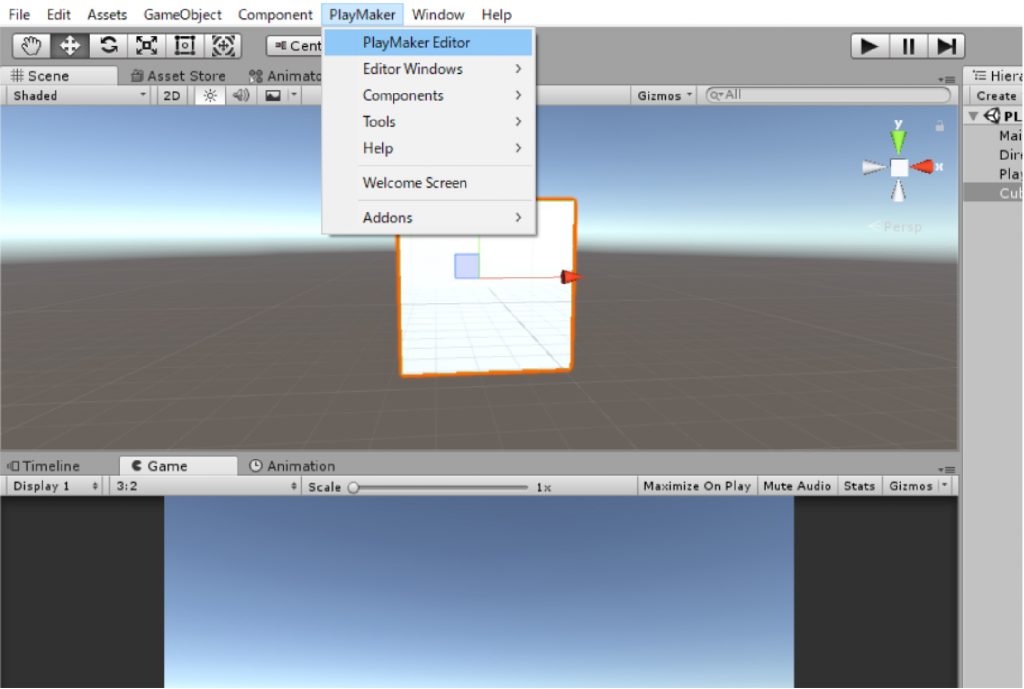
PlayMaker > PlayMaker Editor
After displaying the PlayMaker Editor, add the FSM to the Cube you just created.
With Cube selected, right click on the PlayMaker Editor and select “Add FSM”.
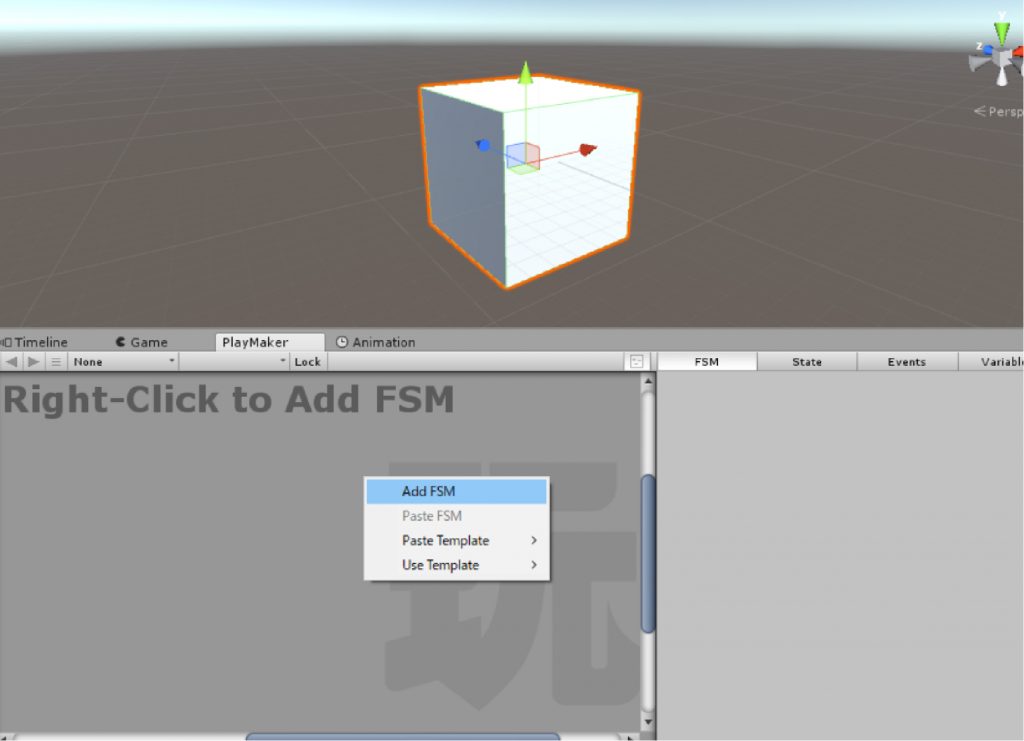
Select Add FSM
In the Game window, the “Game” logo will be displayed in the Cube and “State 1” will be displayed in the PlayMaker window.
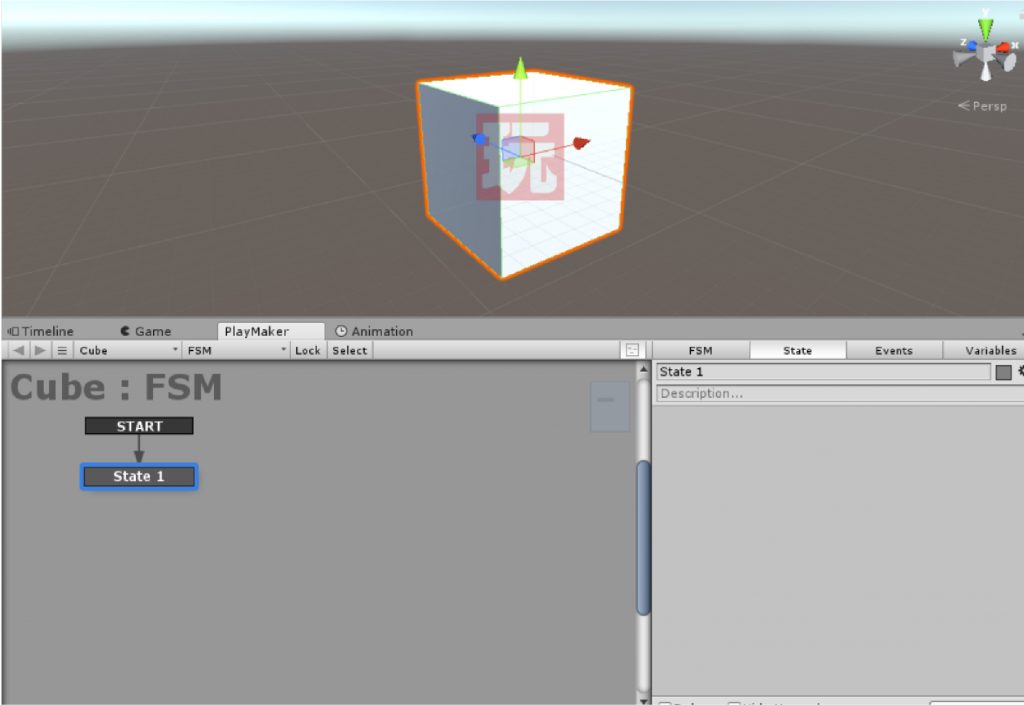
State1 is displayed
Now you have PlayMaker applied to Cube.
Next, let’s add the “Find Game Object” action to State1.
From the state screen, select “Action Browser” at the bottom right.

Select Action Brower
The action browser will be displayed.
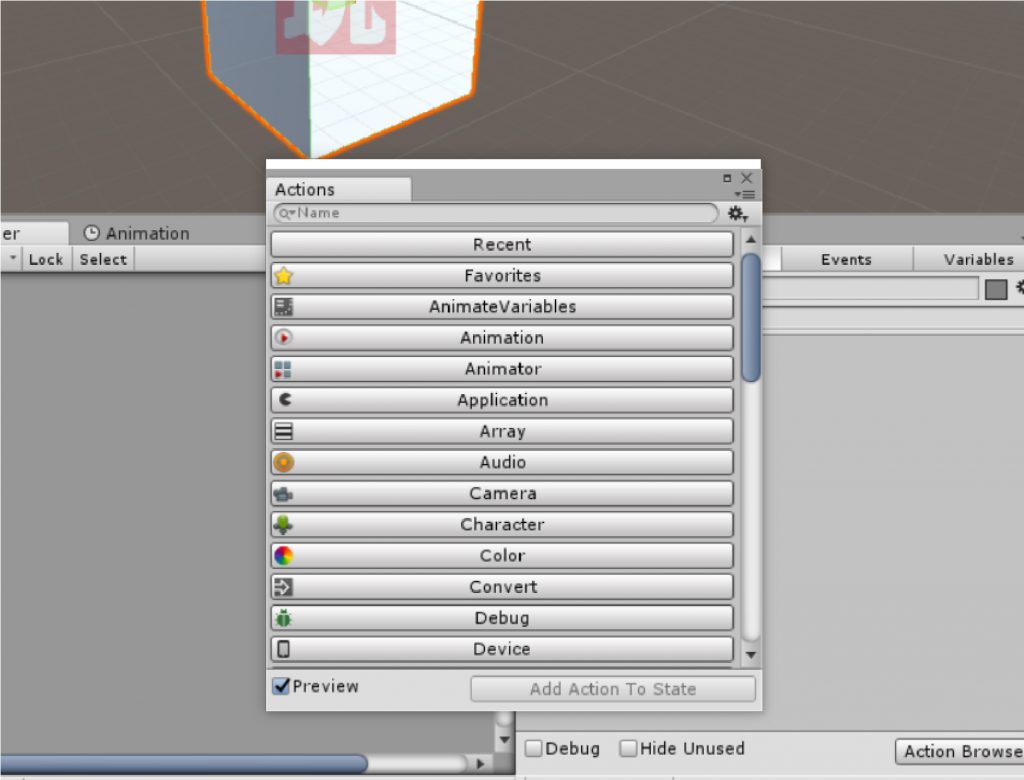
Action Browser
When you search for “Find Game Object” in the search field of the action browser, you can see the action of “Find Game Object”.
After selecting “Find Game Object”, select “Add Action to State” at the bottom right.
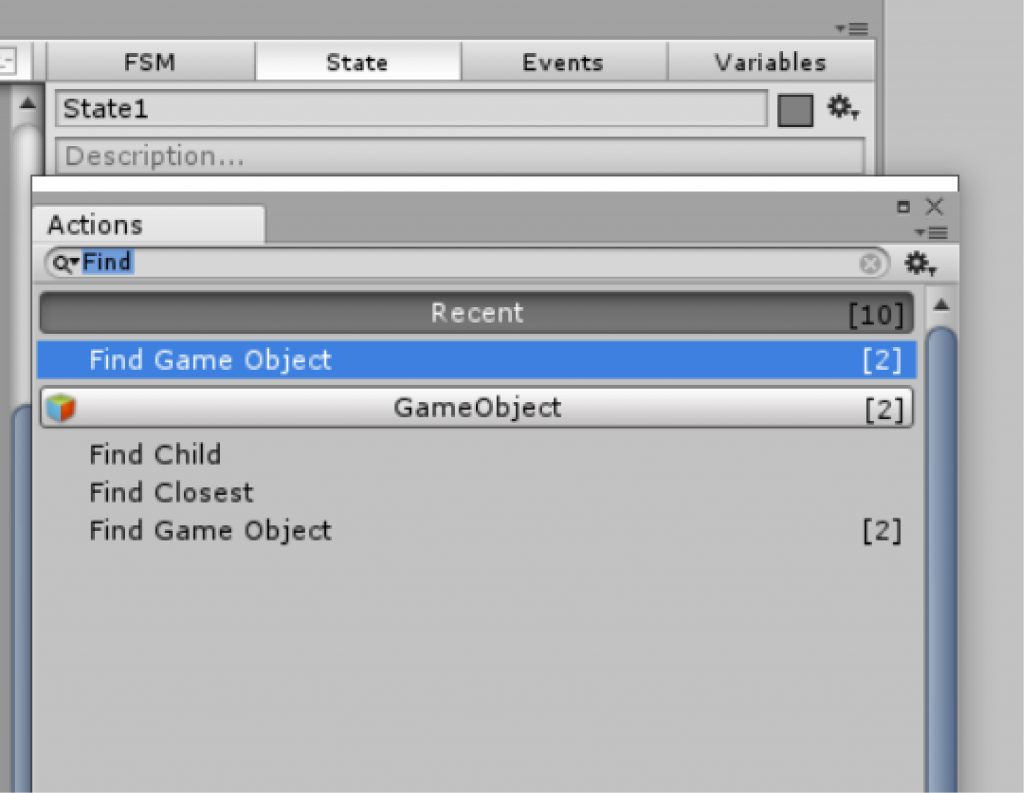
Find Game Object
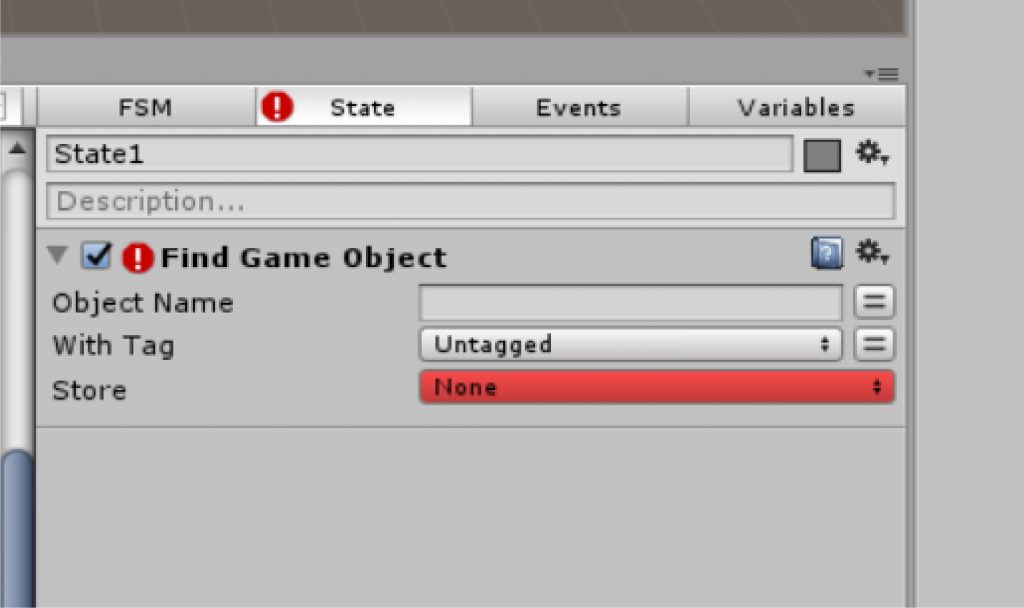
A “Find Game Object” action has been added to State1.
be added
Now we can get the Main Camera game object.
Next, enter “[VRTK]_VIVE” in the Object Name field of the Find Game Object.
![Enter [VRTK]_VIVE](https://styly.cc/wp-content/uploads/2020/02/GIf1-51-1.png)
Enter [VRTK]_VIVE
’Upon completion, enter the variables in the Store field.
This time, we will enter “MainCamera”. In the menu bar, change “None” to “New Variable…” and enter “MainCamera”.
This allowed us to store the game object “Main Camera” in a variable called “MainCamera”.
Through the above procedure, the 3D model (in this case, the Cube) will be able to attain the main camera information.
How to trigger an interaction
By using this variable “MainCamera” for other objects and actions, we can implement the interaction.
Here’s an article about the actual implementation of interactions.
Moving the camera

This article explains how to enable your camera to work automatically.
Camera warp

![Unity/PlayMaker] How to warp the player’s viewpoint](https://styly.cc/wp-content/uploads/2023/08/image2-160x160.gif)
This article explains how the camera warps by triggering an action.
The 3D model is always looking at the camera (Look At)
![[Unity/Playmaker] Create a function to make the image always face the camera](https://styly.cc/wp-content/uploads/2019/03/lookatcamera_sample-160x160.gif)
In this article, I explain the interaction where the 3D model moves according to the position of the camera and always faces the camera.
Here is an example of how to implement the interaction in this way.
The action is triggered in response to the position of the camera

In this article, I explain how the action is triggered in response to the camera position (in this case, the light glows).
Upload to STYLY
How to create a STYLY account

How to upload to STYLY

How to upload a prefab from Unity to STYLY

Experiment with different actions and create your own unique creations!