This article explains the types and usage of each module of Particle System.
There is a detailed documentation on the official Unity website, but this article aims to provide an intuitive understanding of the Particle System using videos.
*The version of Unity used in this article is 2019.3.6f.
- 1 Description of the Particle System module
- 2 Description of the Emission Module
- 3 Description of Shape Module
- 4 Renderer Module Description
- 5 Size over Lifetime Module Description
- 6 Description of the Color over Lifetime module
- 7 Description of the Force over Lifetime module
- 8 Description of Limit Velocity over Lifetime module
- 9 Description of Velocity over Lifetime Module
- 10 Description of the Rotation over Lifetime module
- 11 Trails Module Description
- 12 Description of Noise Module
- 13 Description of the Collision Module
- 14 Sub Emitters Module Description
- 15 Description of the Light Module
- 16 Description of Inherit Velocity Module
- 17 How to upload your 3D model to STYLY
Description of the Particle System module
For more information on the basics of the Particle System module, please refer to this article.
![[Unity Tutorial] Particle Systems](https://styly.cc/wp-content/uploads/2019/06/スクリーンショット-2019-06-25-4.30.36-160x160.png)
Description of the Emission Module
The Emission module determines the amount of particles and the timing of their emission.
If the Rate over Distance value is set to 10, 10 particles will be emitted every time a particle moves a certain distance.

Setting Rate over Distance

When the Emission Module is set
Bursts can be set to emit a large number of particles at a certain time.
When Bursts is set
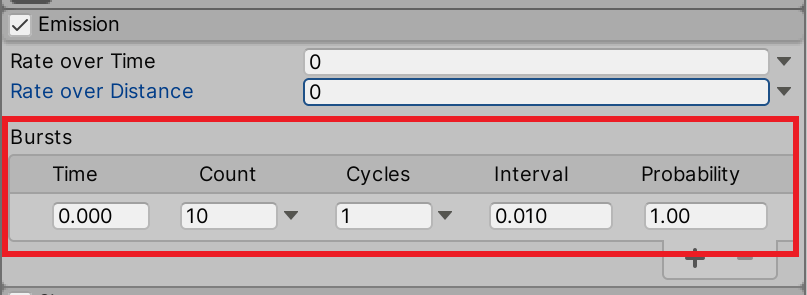
Bursts Settings
Description of Shape Module
The Shape module allows you to set the shape of the particles to be emitted.
Select a shape from the Shape pull-down menu.

Setting Shape

Various Shape Shapes
Renderer Module Description
The Renderer module allows you to set the shape and shade of the Particle by selecting Mesh in the Render Mode and choosing a shape from the Mesh pull-down menu.
In the Renderer module, you can set the shape and shadow of the particle.

Setting up a Mesh in the Renderer Module
In the Renderer module, you can also change the Material.

Setting up the Material
When the Mesh and Material settings are set
Size over Lifetime Module Description
The Size over Lifetime module allows you to change the size of a particle over time.
It also allows you to set the curve so that you can change the size from large to small to large.
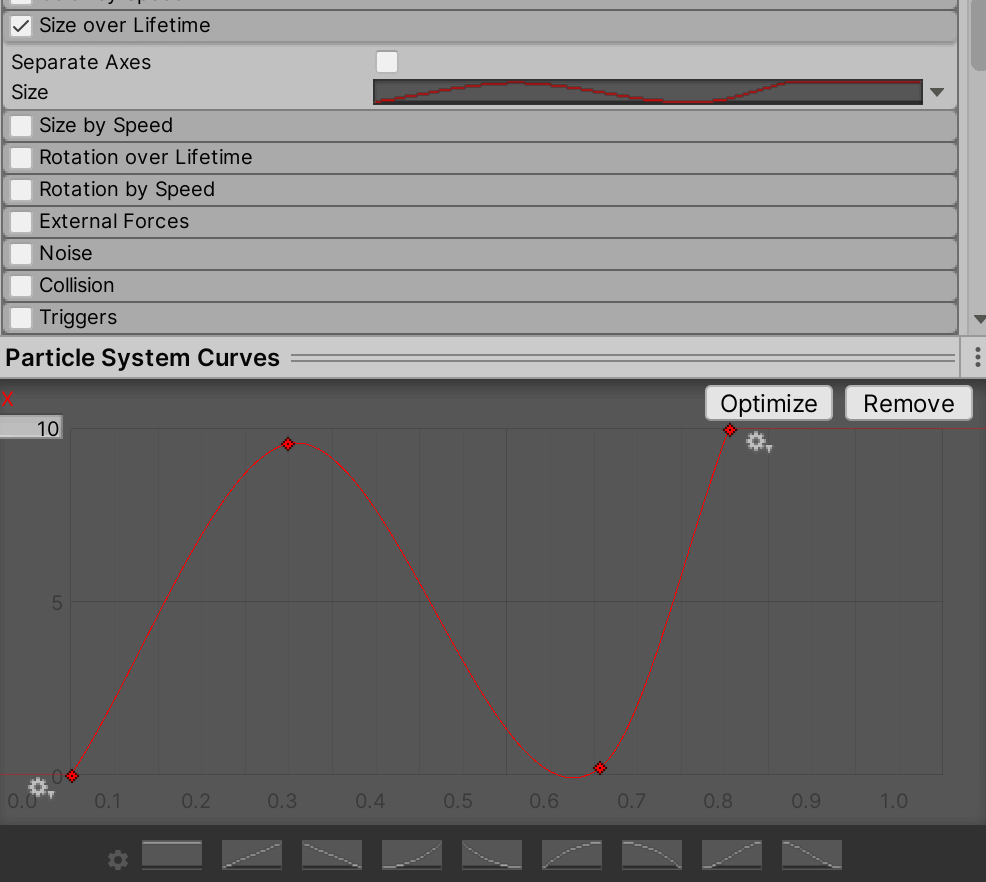
When the Size over Lifetime module is set to Curve
Size over Lifetime module set with Curve
Description of the Color over Lifetime module
The Color over Lifetime module allows you to change the Color and Alpha values over time.

Setting Color over Lifetime
When Color over Lifetime is set.
Description of the Force over Lifetime module
The Force over Lifetime module allows you to add wind-influenced expressions to Particles.
For example, if you set it as shown in the image, it will look like the wind is blowing to the right.

Setting up the Force over Lifetime module

When the Force over Lifetime module is set
Description of Limit Velocity over Lifetime module
The Limit Velocity over Lifetime module allows you to slow down the movement of a particle.
This allows you to implement expressions such as air resistance.
In the Speed field of the Limit Velocity over Lifetime module, you can input the speed that results from the deceleration due to air resistance.
Dampen is the magnitude of the air resistance.
Set Start Speed to 20, Speed in the Limit Velocity over Lifetime module to 0, and Dampen to 0.1.
If Dampen is set to 0.1, the speed of 20 will gradually approach 0 and finally stop.
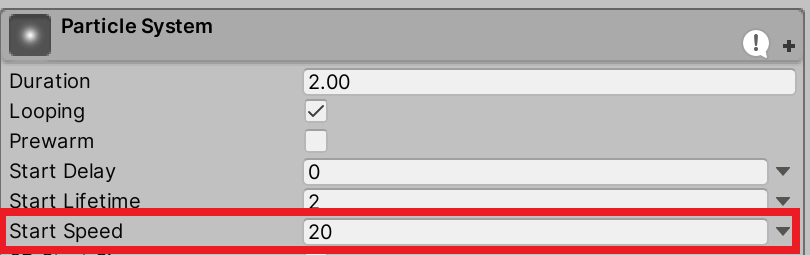
Set Start Speed to 20
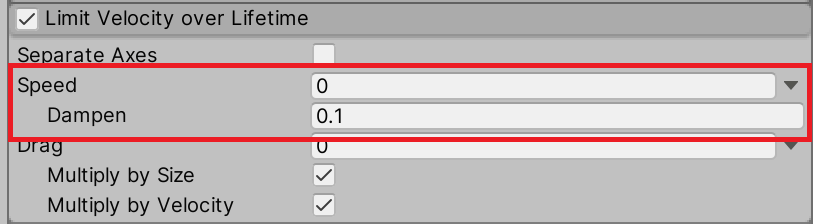
Set Speed to 0 and Dampen to 0.1

Limit Velocity over Lifetime module with Speed set to 0
Description of Velocity over Lifetime Module
The Velocity over Lifetime module allows you to control the force applied to the velocity.
If you set the y-axis to Curve, you can add a height difference to the movement of the particle.
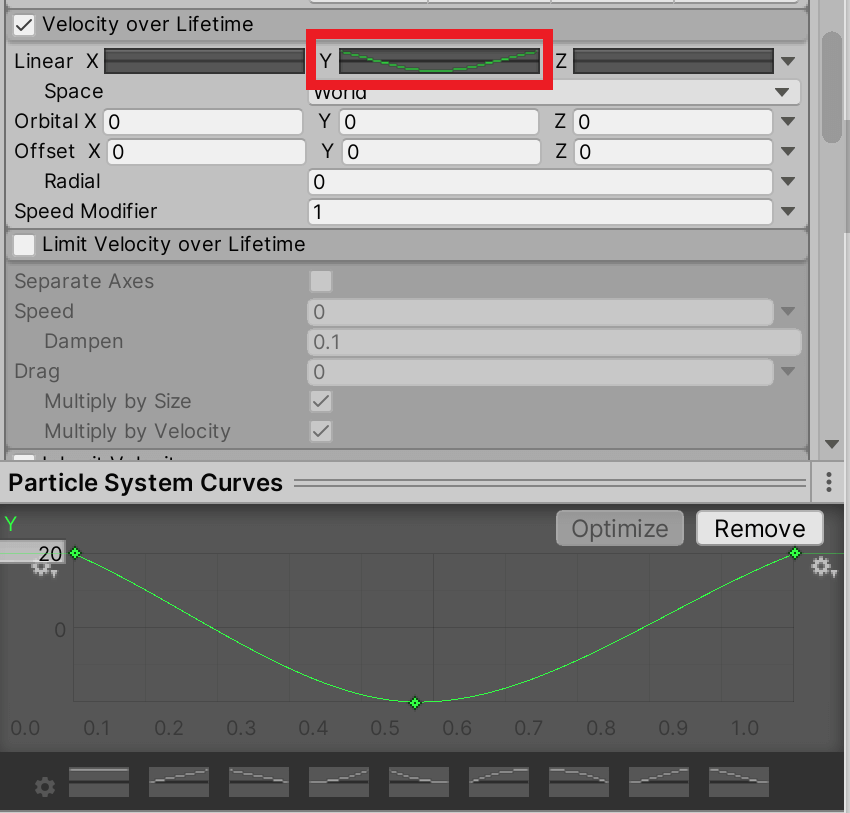
Setting the Velocity over Lifetime module to Curve
When y-axis of Velocity over Lifetime module is set to Curve
You can also create a vortex-like effect.
Set Orbital to 5 and Radial to 1.
The number of Particle occurrences is set to 1 and Trails is set to ON to represent a vortex.
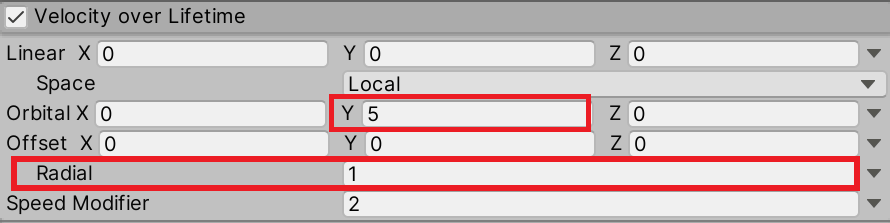
Set Orbital to 5 and Radial to 1.
You can create a Particle that looks like a vortex.
Description of the Rotation over Lifetime module
The Rotation over Lifetime module allows you to rotate a particle along the time lapse.
When the Rotation over Lifetime module is set
If you check the Separate Axes checkbox, you can set the particle to rotate on each of the X, Y, and Z axes.

Setting the X axis to 100

When X axis is set to 100
When Y is set to 100
When Z is set to 200
Trails Module Description
When the Trails module is turned on, the trails that the particle has traveled can be displayed.

When the Trails module setting is turned on (without Material)
Material can be set in the Renderer module.
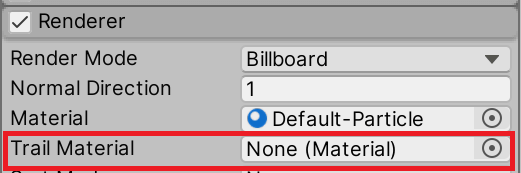
Setting the Material in Trails
When the Renderer Mode in the Renderer module is set to None, the particles that are displayed by default will be hidden and only the trails will be displayed.

Setting the Renderer Mode to None
When the Trails module is configured
If you set the Trails module Type to Ribbon, you can express particles by connecting their grains with lines.
Set the number of particles generated to 4, set the Trails module Mode to Ribbon, and set the Ribbon Count to 2.
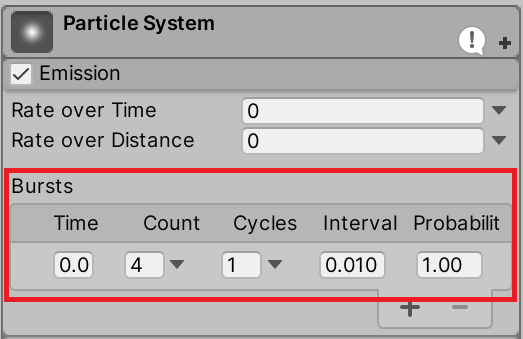
Set the number of particles generated to 4
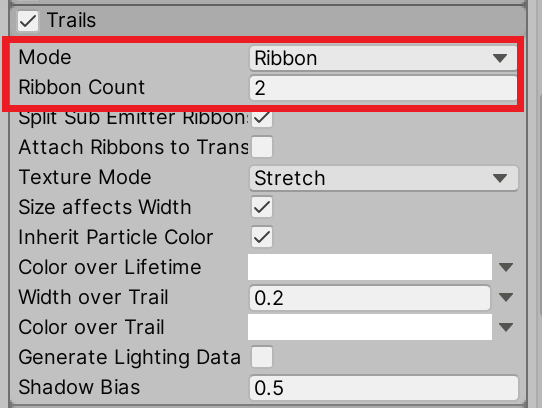
Set the Mode to Ribbon and the Ribbon Count to 2
Trails module Type is set to Ribbon
Description of Noise Module
When the Noise module is turned on, irregular movements can be added to Particles.
The noise movement can be easily confirmed by displaying Trails.
When Trails is turned on, and Strength, which controls the intensity of Noise, is set to 4, the following video will be shown.
When the Noise module is set
Description of the Collision Module
The Collision module controls the behavior of the particle when it collides with another object.
When turned on, it can express the physical behavior when colliding with an object.
When the Collision module’s Type is set to World, collisions with other objects in the scene that have colliders are possible.
Bounce sets the magnitude of the impact when a collision occurs. The smaller the value, the smaller the impact.
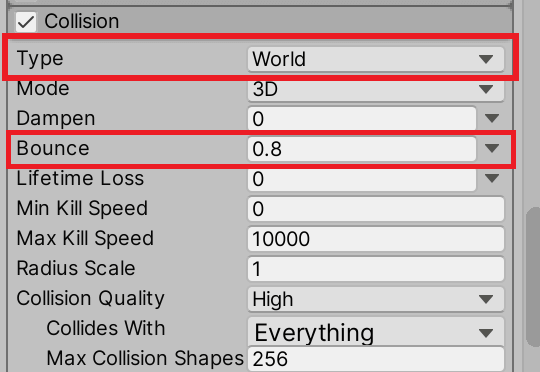
Set Type to World and Bounce to 0.8

When the Particle collides with another object, it will bounce back.
Sub Emitters Module Description
The Sub Emitters module allows you to add Emitters.
We will apply the Collision condition.
Set the Collision module’s Type to World.
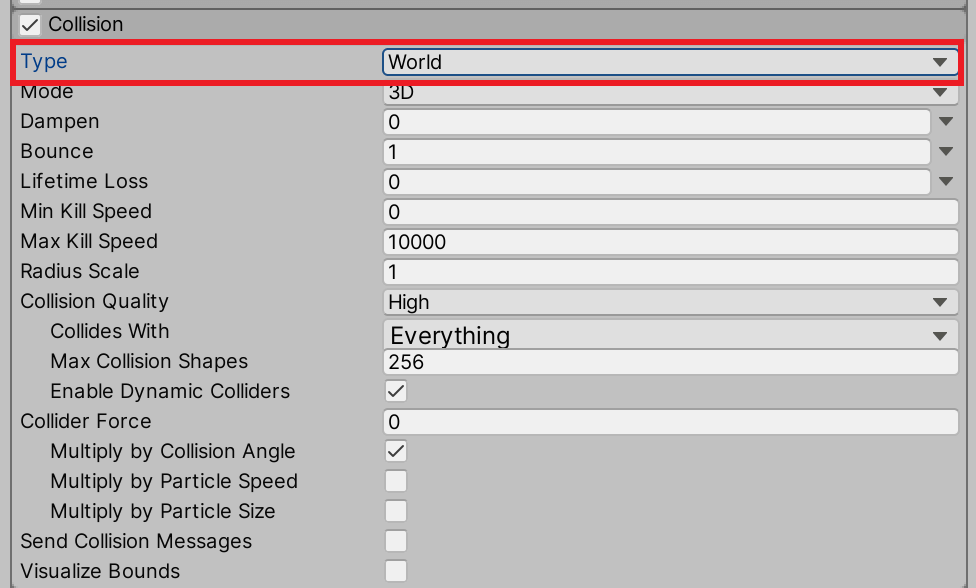
Turn on the Collision module and set the Type to World.
Place the objects that you want to collide in the scene.

Place an object with a collider in the scene.
Set the Sub Emitters module to Collision and set the Particles to be generated upon collision.
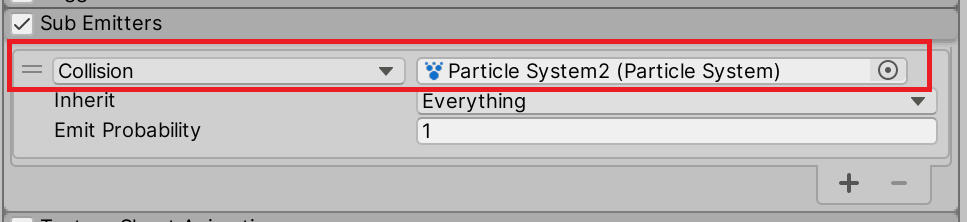
Setting up Particles to fire on collision
When a white particle collides with a cube, a colorful particle will be generated.
Description of the Light Module
When you set the Light module, you can make a particle emit light.
In the Light module, select Point Light in the Hierarchy window, and set Intensity Multiplier to 0.5.
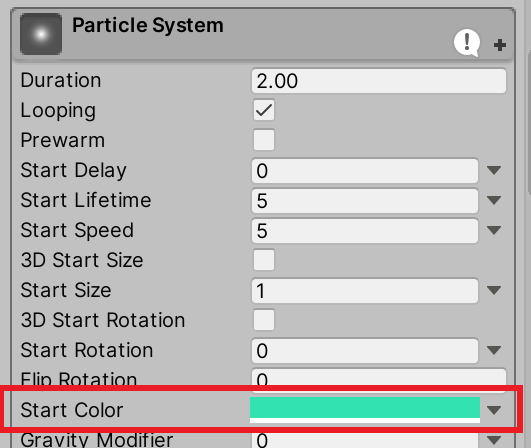
Color settings
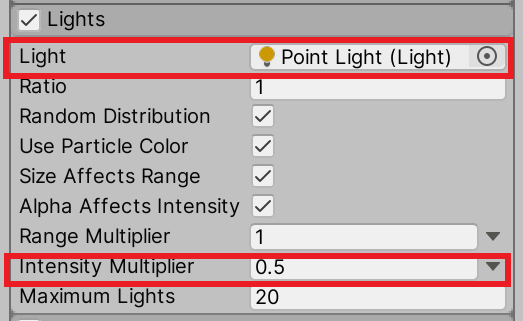
Set Point Light to Light and Intensity Multiplier to 0.5
When the Light module is set
Description of Inherit Velocity Module
The Inherit Velocity module allows a particle system to move with respect to the velocity of its parent object when the particle system is a child hierarchy.
When using the Inherit Velocity module, the Simulation Space should be set to World.

Simulation Space is set to World
If Multiplier is less than 1, the particles in the child hierarchy will follow the parent object.
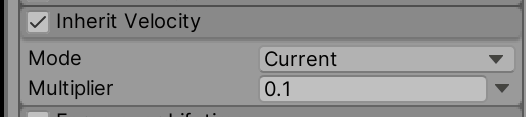
Set Mode to Current and Multiplier to 0.1
When Multiplier is set to 0.1 in Inherit Velocity module
If Multiplier is greater than 1, the particle in the child hierarchy will move faster than the parent object.
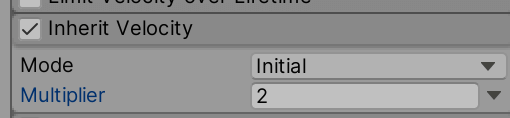
Set Mode to Initial and Multiplier to 2

When Multiplier is set to 2 in the Inherit Velocity module
This video gives an overview of each module of Particle.
This is a very deep part of Particle, so you may find interesting expressions by customizing it in various ways.
How to upload your 3D model to STYLY
Let’s try to upload your 3D model to STYLY.
Create a STYLY account
How to create an account

How to upload to STYLY

How to upload from Unity to STYLY
