This article explains how to transition from other scenes to the scene published in STYLY GALLERY.
If you use scene transitions, you can create a portal scene to introduce multiple scenes at once.

Rendering image
Sample scene
This sample scene is a portal scene that leads to multiple scenes, allowing you to experience scene transitions.
Click on the thumbnail of the destination scene to move to the next scene.
*Since there is no return path to the sample scene in the destination scene, you cannot go back to the sample scene once you have transitioned.
Advance preparation
Install PlayMaker, a plug-in for Unity, in advance.
![[Unity Tutorial] Creating a Game Using Playmaker ① From Basic Introduction to Installing](https://styly.cc/wp-content/uploads/2019/06/1200px-160x160.jpg)
If you are using PlayMaker for the first time, you can deepen your understanding by reading the following article beforehand.
![[Unity] Starting Playmaker from Scratch](https://styly.cc/wp-content/uploads/2019/09/PlaymaerCoreConcept-160x160.png)
You should also install the STYLY Plugin.

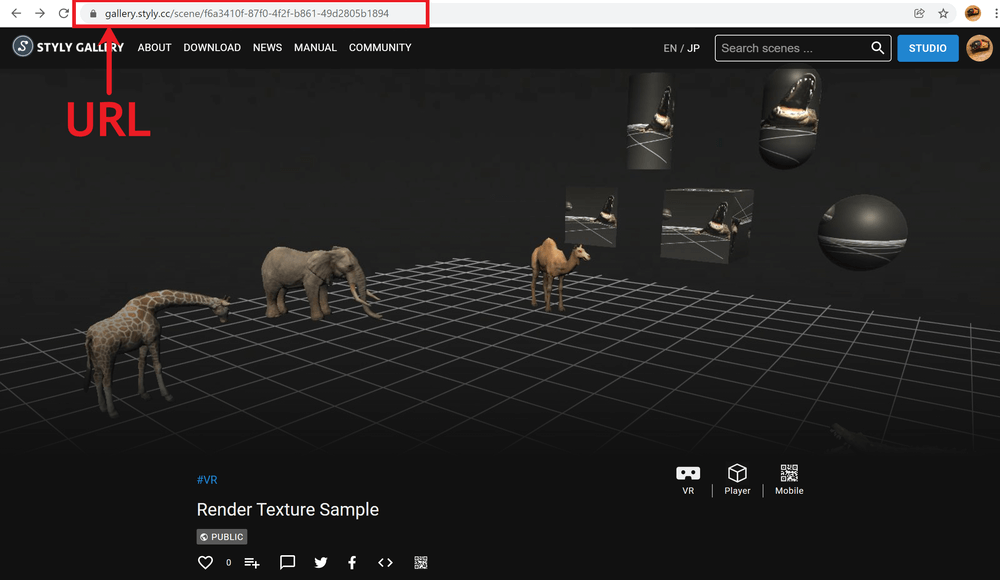
Confirming the URL and GUID of the scene
In order to transition a scene, you need the GUID of the destination scene.
Open the destination scene in STYLY GALLERY.
Open the destination scene in STYLY GALLERY.
The string following “https://gallery.styly.cc/scene/” in the URL is the GUID of the destination scene.

The string following “https://gallery.styly.cc/scene/” is the GUID of the destination scene.
We will use GUID later, so make a note of it.
Explanation of Action
The PlayMaker Action that will be used for the scene transition is “Change Styly Scene”.
This Action can be used by installing the STYLY Plugin.
Change Styly Scene
By using Change Styly Scene, you can make scene transitions.
Scene transitions using Change Styly Scene
The following image shows the contents of the Change Styly Scene.
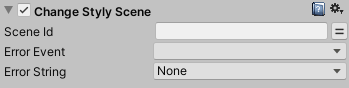
Change Styly Scene
Enter the GUID of the scene to be transitioned to in “Scene Id”.
Enter the event to be transitioned to in “Error Event” if the Action does not work properly.
*If this field is not set, the Action will stop and the next Action cannot be performed if the Action does not work properly, so be sure to set this field.
If a variable is specified in the “Error String” field, the cause of the Action failure will be saved in the variable.
How to transition a scene
As an example of how to transition scenes, we will create a cube that can be clicked to move to another scene.
First, select GameObject → 3D Object → Cube.

Select GameObject → 3D Object → Cube.
With the Cube selected, click Add Component in the Inspector window.
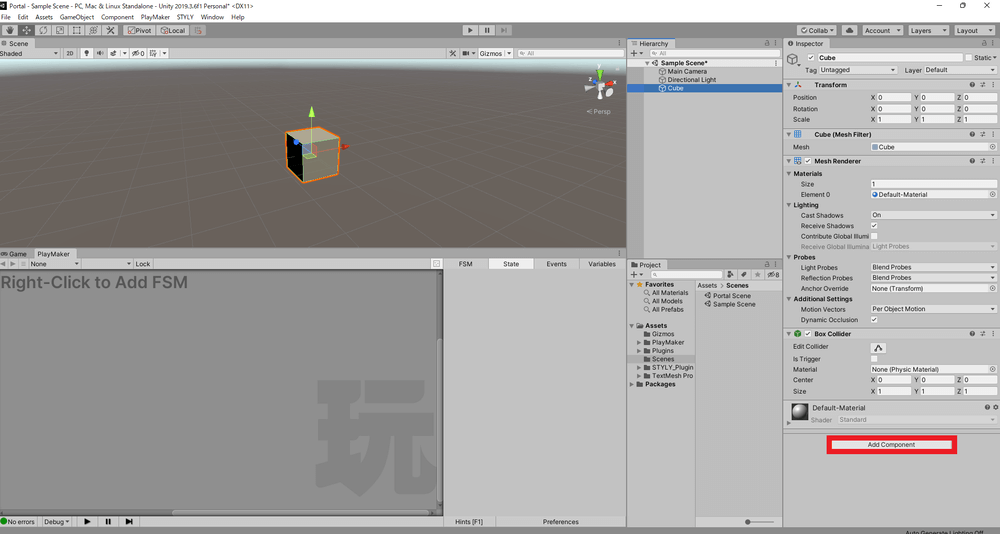
Click Add Component
In the Add Component window, search for “PlayMakerFSM” and “Event Trigger” and add them.
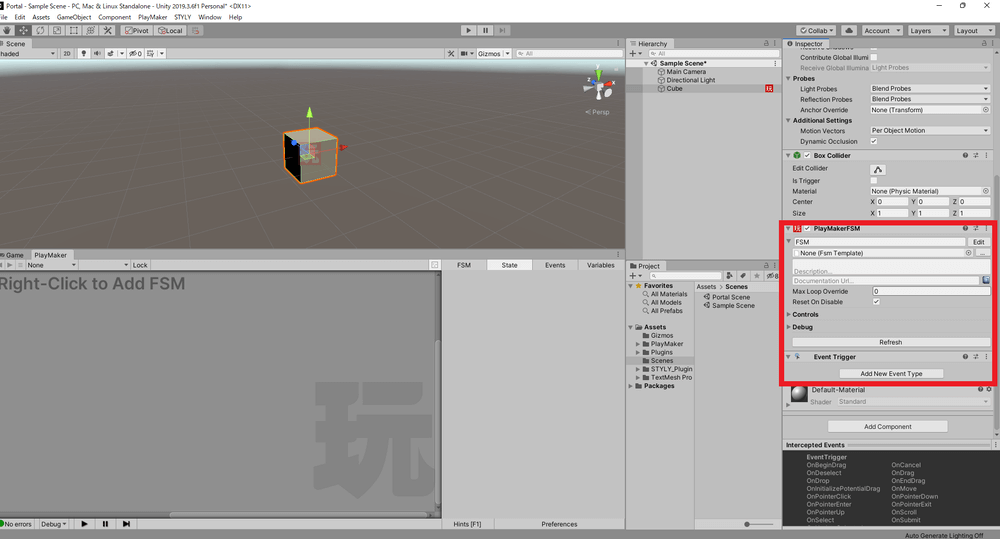
Add “PlayMakerFSM” and “Event Trigger”.
Click the [Edit] button in the added PlayMakerFSM component.
![Click the [Edit] button](https://styly.cc/wp-content/uploads/2021/12/Tomo_Portal_6_1000.png)
Click the [Edit] button
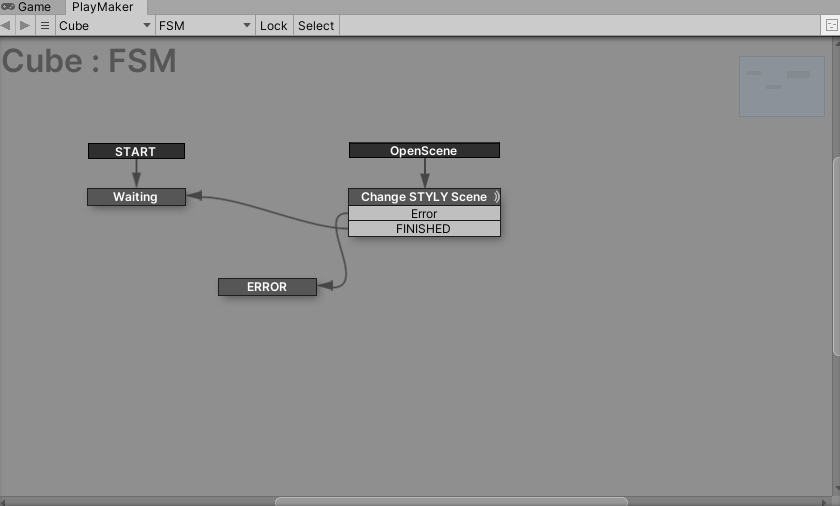
Open the Event tab from the right frame of the opened PlayMaker window, enter “OpenScene” in the Add Event field, and press the Enter key.
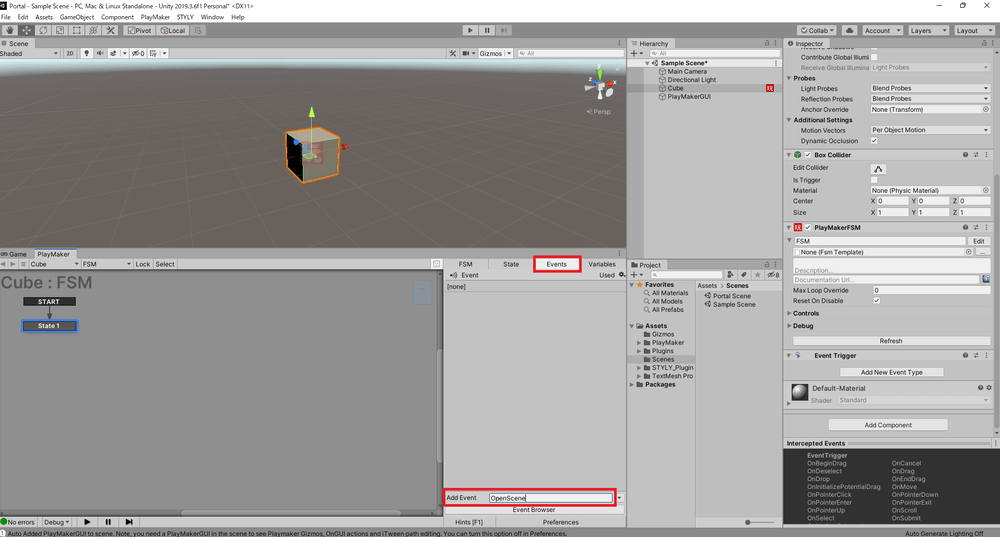
Enter “OpenScene” in the Add Event field and press the Enter key
Right-click in the left frame of the PlayMaker window and select Add Global Transition → OpenScene.
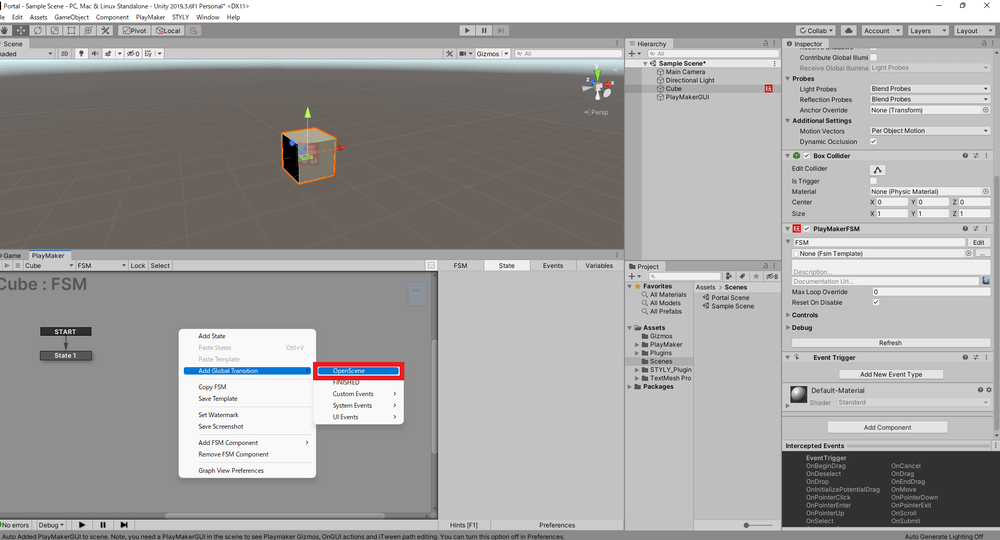
Select Add Global Transition → OpenScene
Now, for clarity, change the name of the State at the end of the START arrow to “Waiting” and the name of the State at the end of the OpenScene arrow to “Change STYLY Scene”.
Click the [Action Browser] button at the bottom right of the PlayMaker window to open the Actions window.
![Click the [Action Browser] button.](https://styly.cc/wp-content/uploads/2021/12/Tomo_Portal2_8_1000.png)
Click the [Action Browser] button.
After selecting “Change STYLY Scene” in the PlayMaker window, add “Change Styly Scene” from the Actions window.
Enter the GUID of the scene to be transitioned to in the Scene Id of Change Styly Scene.
In the Error Event of Change Styly Scene, select New Event…. and add a new Event “Error”.
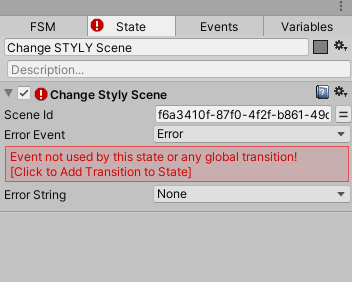
State after setting
Click on [Click to Add Transition to State].
![Click on [Click to Add Transition to State].](https://styly.cc/wp-content/uploads/2021/12/Tomo_Portal2_10.png)
Click on [Click to Add Transition to State].
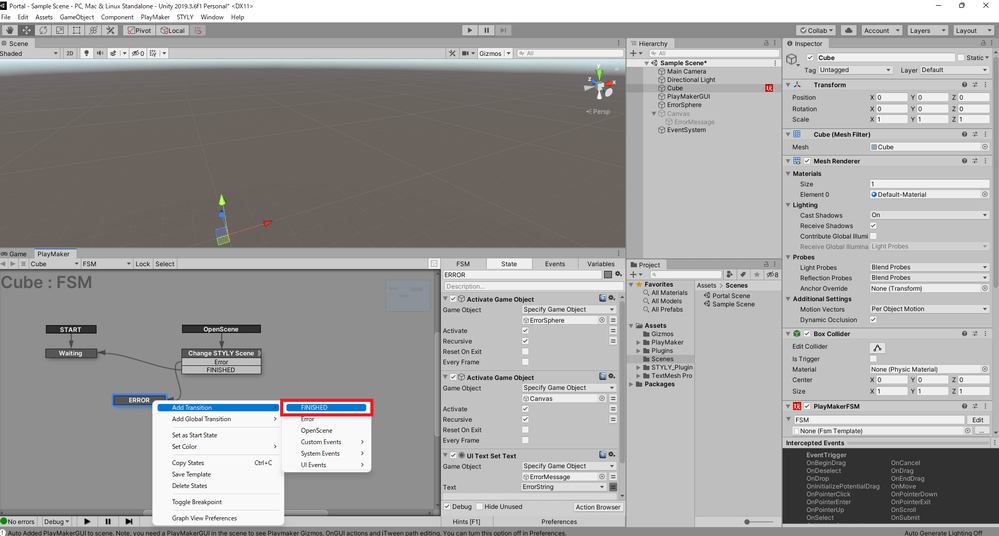
Right-click on the Change STYLY Scene in the left frame of the PlayMaker window, and select Add Transition → FINISHED.

Select Add Transition → FINISHED.
Drag and drop from FINISHED under the Change STYLY Scene to Waiting.
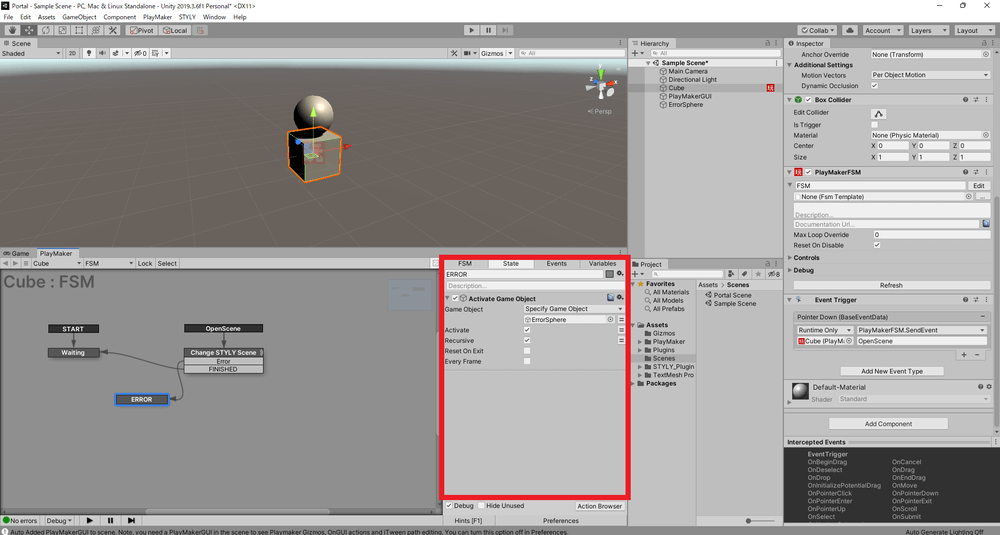
Right-click on the blank space in the left frame of the PlayMaker window, and select Add State.
Rename the added State to “ERROR”.
Under Change STYLY Scene, drag and drop from Error to ERROR.
After setting the transition destination
Select the Cube, click [Add New Event Type] under Event Trigger in the Inspector window, and select PointerDown.
![Click [Add New Event Type] and select PointerDown.](https://styly.cc/wp-content/uploads/2021/12/Tomo_Portal_31.png)
Click [Add New Event Type] and select PointerDown.
Click the [+] button on the bottom right.
![Click [+].](https://styly.cc/wp-content/uploads/2021/12/Tomo_Portal_32.png)
Click [+].
Change None(Object) to Cube, and change No Function to PlayMakerFSM → SendEvent(string).
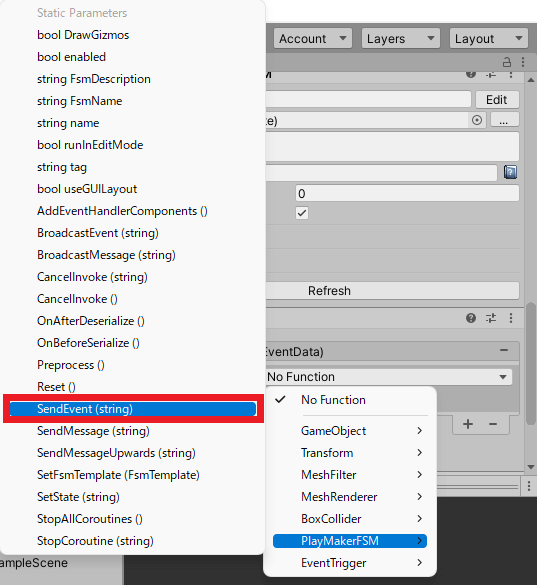
Change No Function to PlayMakerFSM → SendEvent(string)
Enter “OpenScene” in the blank field.
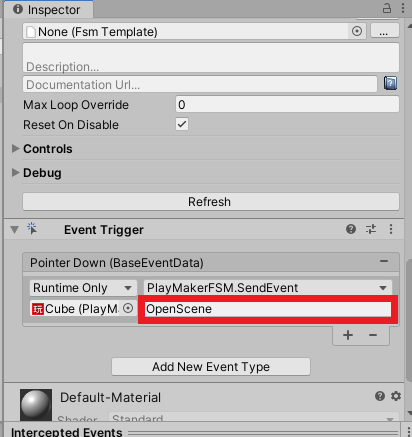
Enter “OpenScene” in the blank field.
You have now completed the basic part of the scene transition.
The next step is to create a mechanism in case some error occurs during the scene transition.
Select GameObject → 3D Object → Sphere.
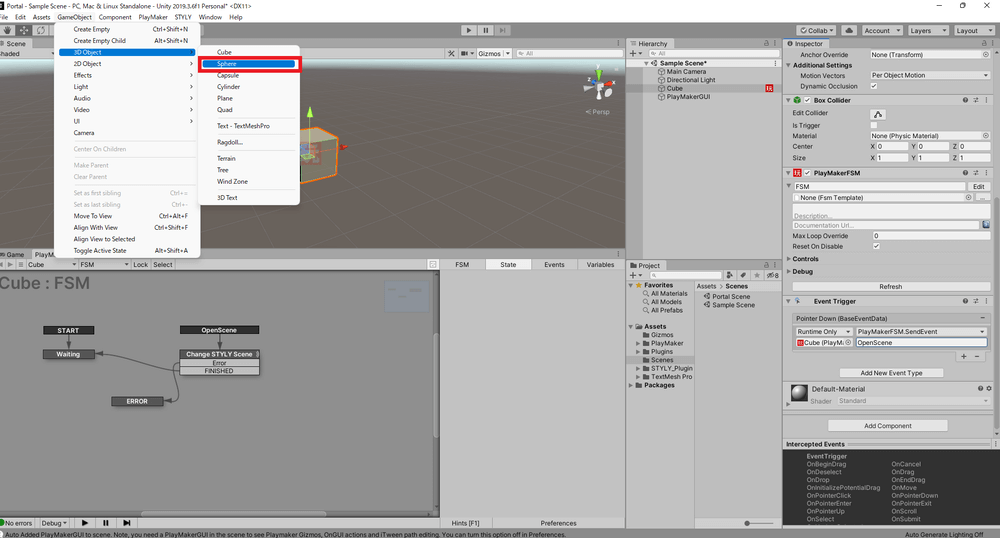
Select GameObject → 3D Object → Sphere.
Rename the Sphere you just created to “ErrorSphere” for clarity.
Move the ErrorSphere to a more visible location.
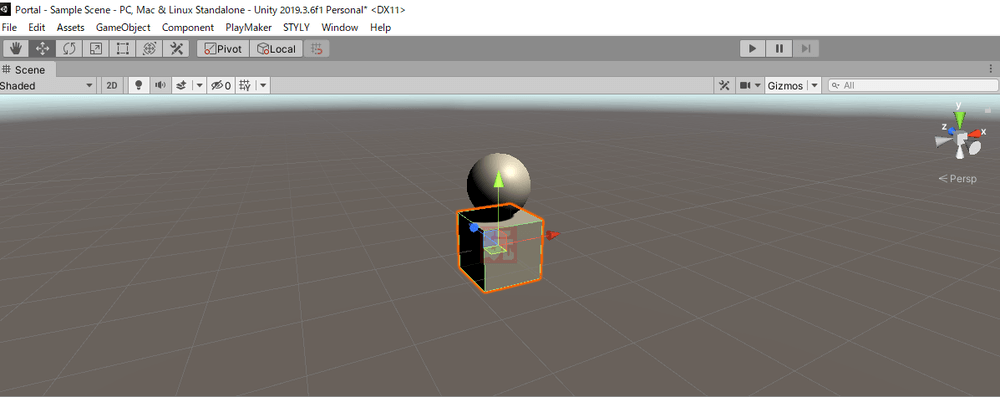
Move the ErrorSphere to a more visible location
After selecting ERROR in the PlayMaker window, add an “Activate Game Object” from the Actions window.
Select ErrorSphere as the Game Object in Activate Game Object.
Select ErrorSphere as Game Object
Uncheck the ErrorSphere checkbox and deactivate it in the Inspector window.
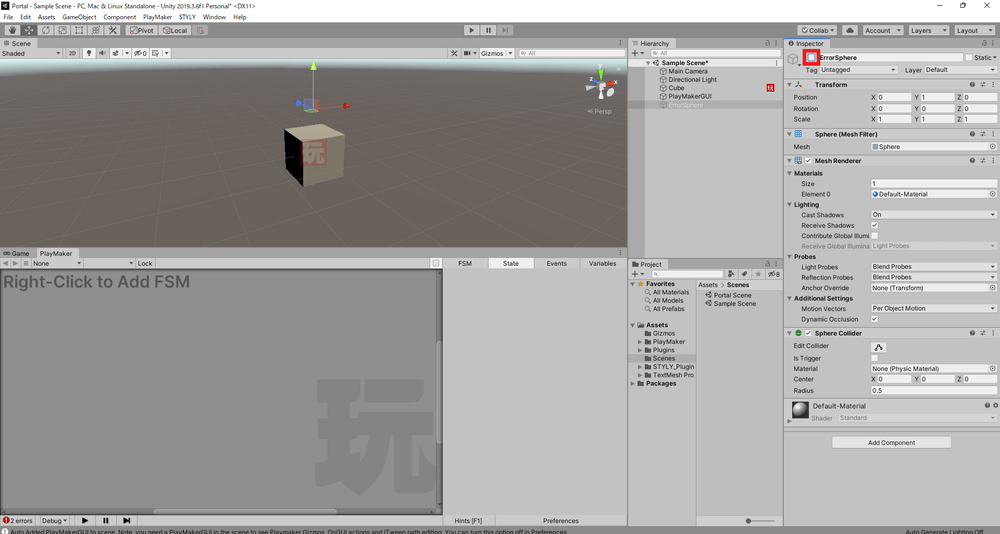
Deactivate the ErrorSphere
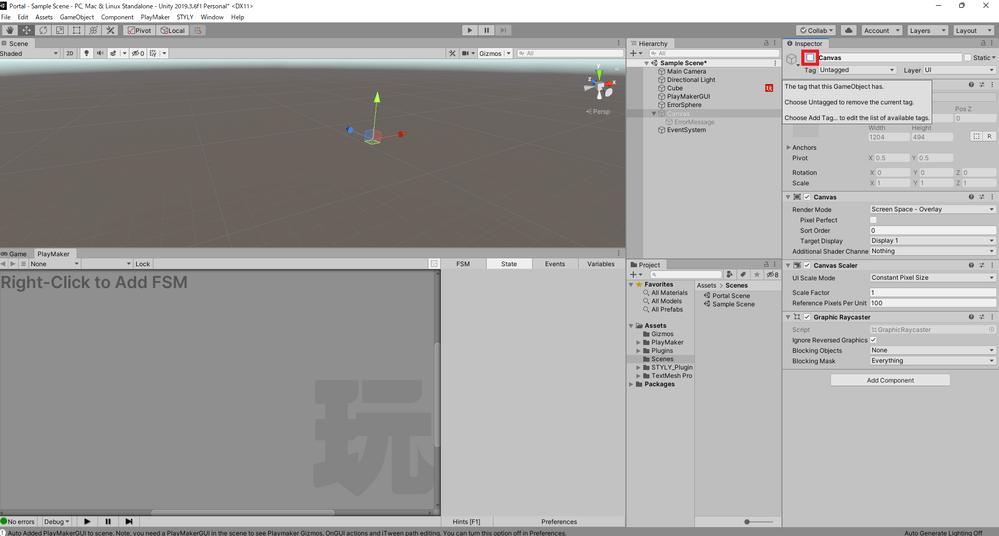
Select GameObject → UI → Canvas.
Right-click on the created Canvas and select UI → Text.
Name the Text you created “ErrorMessage”.
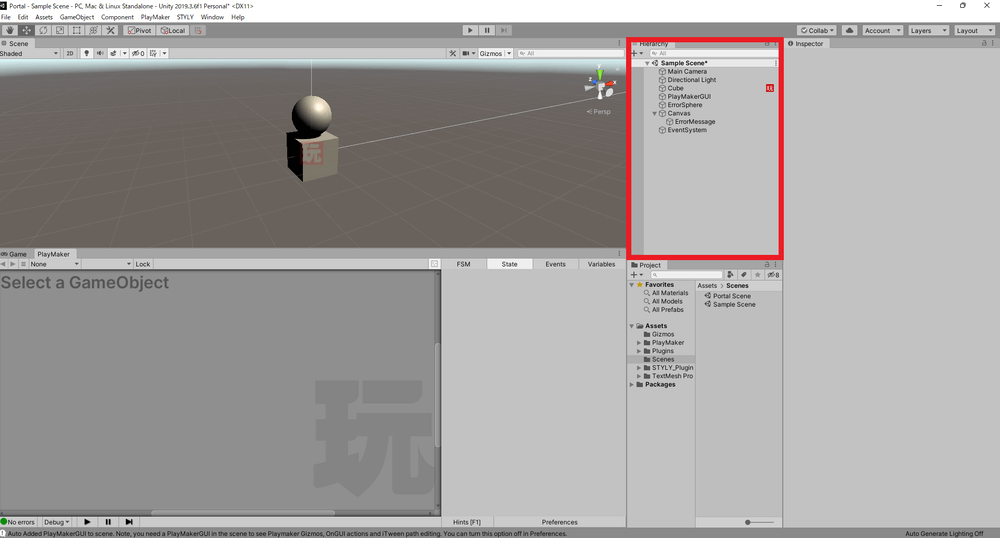
After adding Canvas and ErrorMessage
Select the Canvas and set the Render Mode of the Canvas in the Inspector window to Screen Space – Overlay.
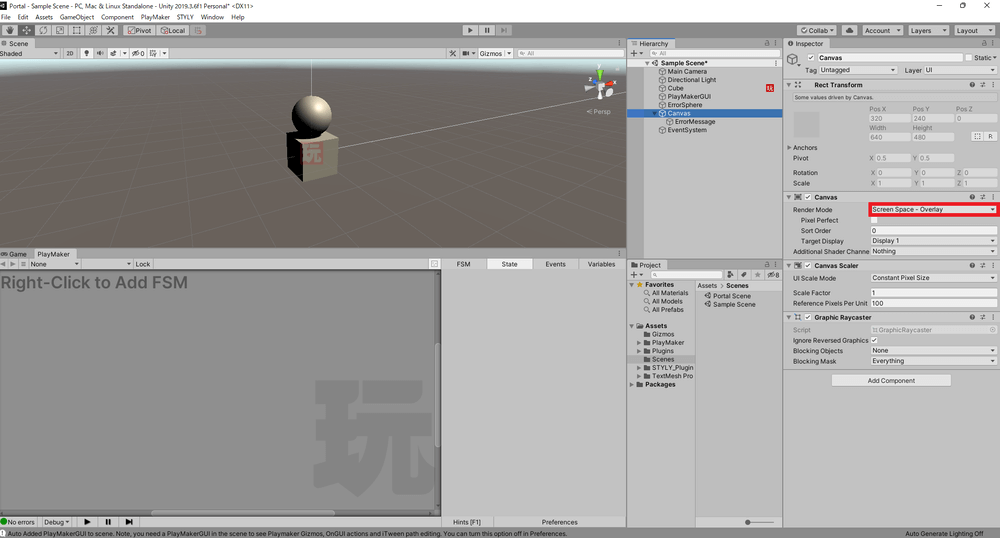
Set the Render Mode to Screen Space – Overlay
Set the position and size of the ErrorMessage so that it is easily visible.
Set the position and size of the ErrorMessage so that it is easily visible.
Select the Cube, then select Change STYLY Scene in the PlayMaker window, and select New Variable… for the Error String of the Change Styly Scene in the State. and add a new variable “ErrorString”.
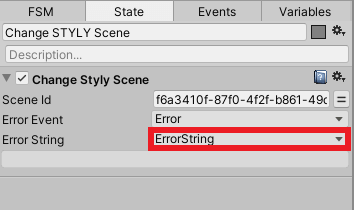
Adding a new variable “ErrorString” to Error String
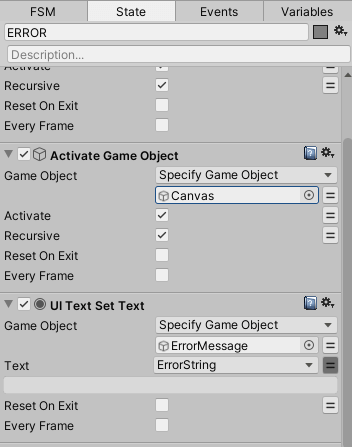
Select ERROR in the PlayMaker window, and add UI Text Set Text and Activate Game Object from the Actions window.
Select ErrorMessage as the Game Object in UI Text Set Text.
Set the variable ErrorString to Text in UI Text Set Text.
Select Canvas as the Game Object in Activate Game Object.
State after setting
Select Canvas and deactivate it in the Inspector window.
Deactivate Canvas
Select the Cube, right-click on the ERROR in the left frame of the PlayMaker window, and select Add Transition → FINISHED.
Select Add Transition → FINISHED
Drag and drop from FINISHED to Waiting under ErrorCheck.

Drag and drop from FINISHED to Waiting
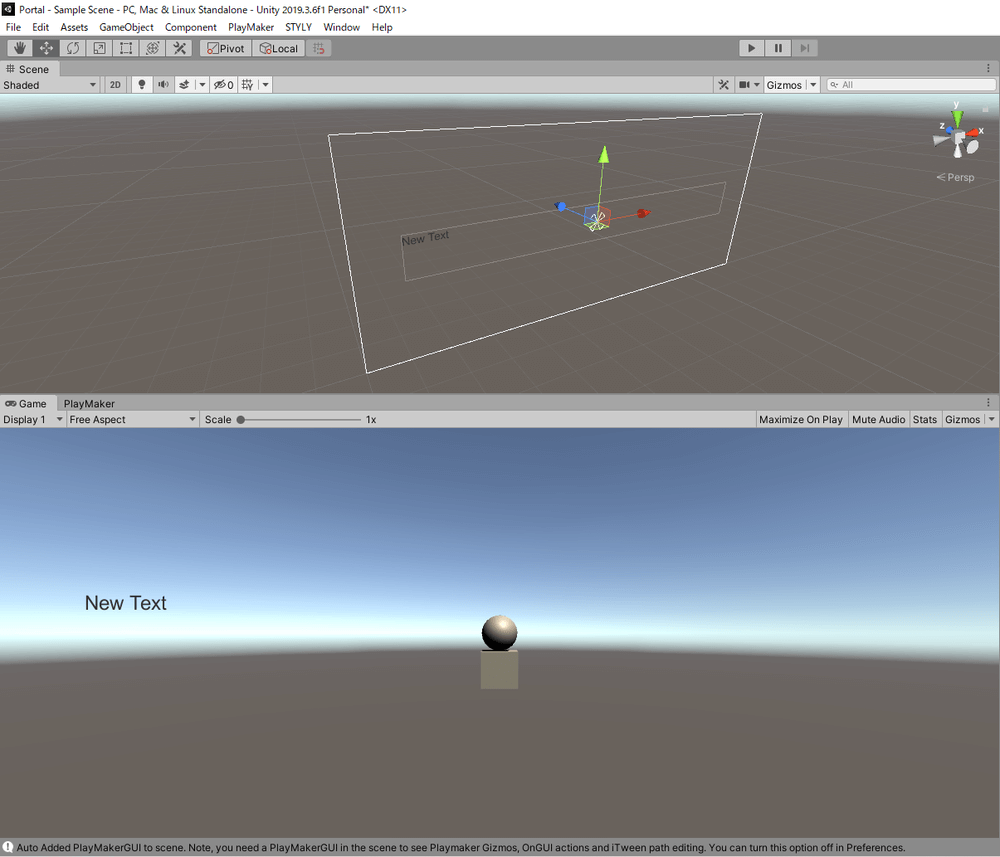
Now, if any error occurs during the scene transition, the ErrorSphere will be activated on the Cube and the error contents will be displayed.
When an error occurs, it will look like this.
This is useful for debugging purposes.
Creating a return path to the original scene.
When a scene is transitioned using Change Styly Scene, a way back to the original scene must be prepared in the transition destination.
If you want to go back and forth between the original scene and the destination scene, add an object to the destination scene that transitions the scene as shown above.
This concludes the explanation of how to transition scenes.
In this article, we have added the function of scene transition to Cube, but it can be added to various other objects as well.
I hope you will try to use it to create your own portal scenes.
How to upload to STYLY
Let’s try to upload your creation to STYLY.
How to create an account

How to upload 3D models to STYLY

How to upload to STYLY from Unity
You can use STYLY FORUM to solve the problem. STYLY FORUM is a place where people can discuss a service or technical issue on STYLY, or provide bug reports on STYLY.
https://en.forum.styly.cc/support/discussions