I will explain how to bake in Substance Designer by using the high-poly mesh created in ZBrush.
Successful baking to make a clean normal map and occlusion map is so important that it could determine the quality of the object.
I will explain the workflow to make it happen.
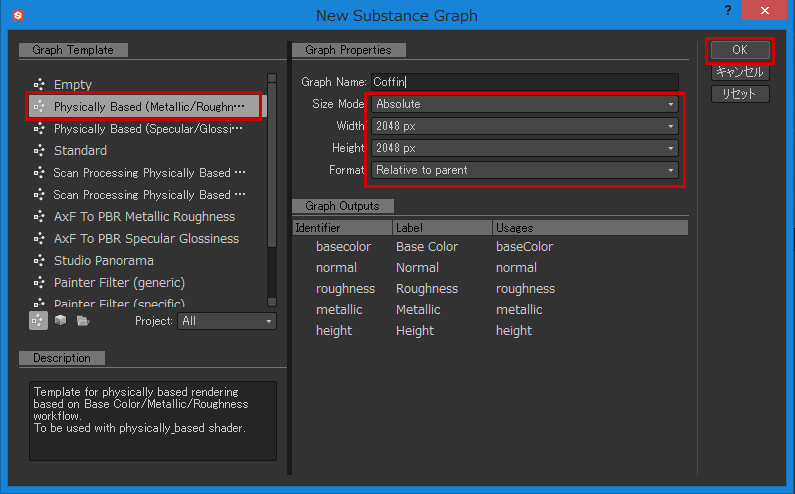
Create a new substance in Substance Designer
Open the ‘New Substance Graph’ window by selecting File > New Substance.
This time, select ‘Physically Based(Metallic/Roughness)’.
Set the size of the texture to ‘2048 x 2048’ and click ‘OK’.
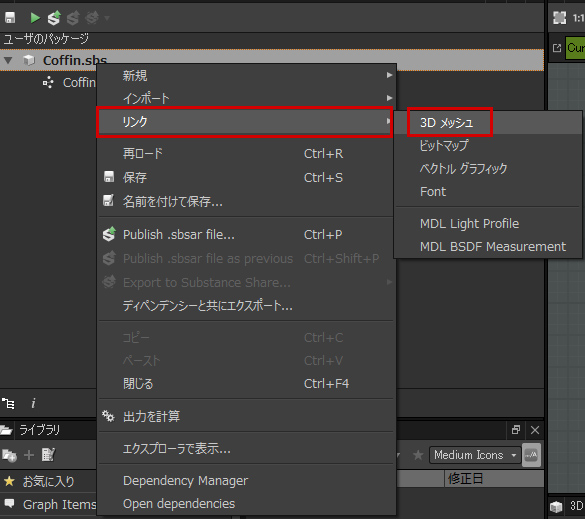
Next, import the object for the texture we are going to make.
Right-click the sbs package we just made to bring up a menu. Select Link > 3D Mesh.
Specify the low-poly mesh to use here.
In the current state, 3D View doesn’t reflect the change so double-click the mesh linked under the ‘Resources’ folder.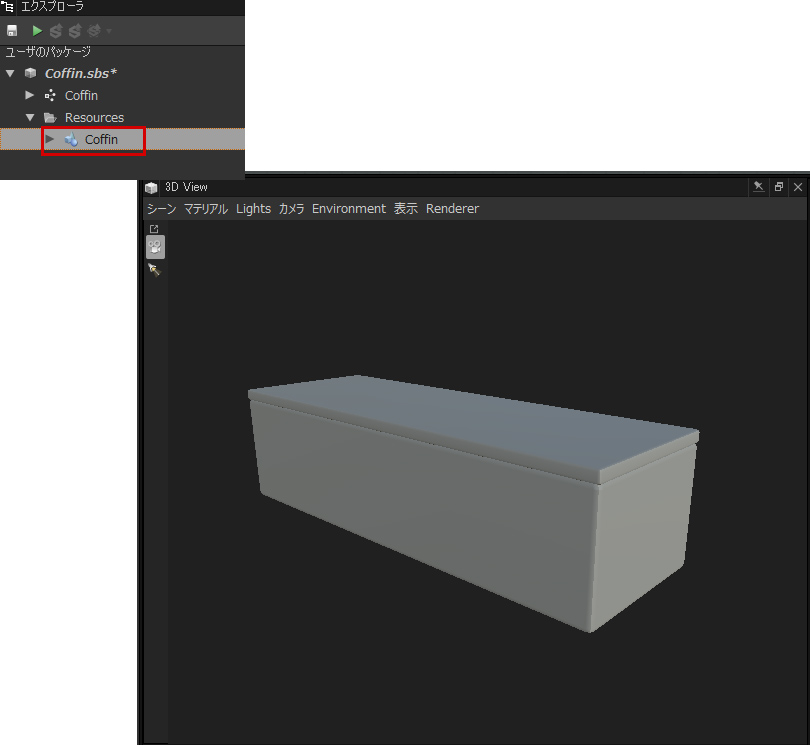
Then, the 3D View displays the mesh you linked.
Set the parameters for baking in Substance Designer
Right-click the linked 3D mesh to bring up a menu, and select ‘Bake model Infomation’.
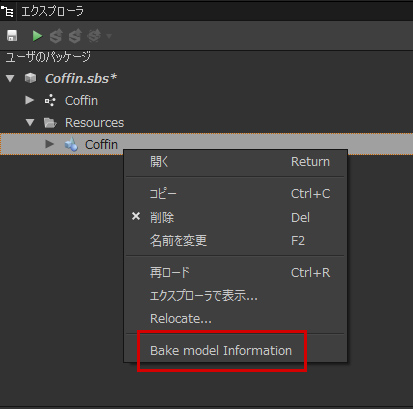
The setting window for baking pops up.
Set the parameters for baking in this window.
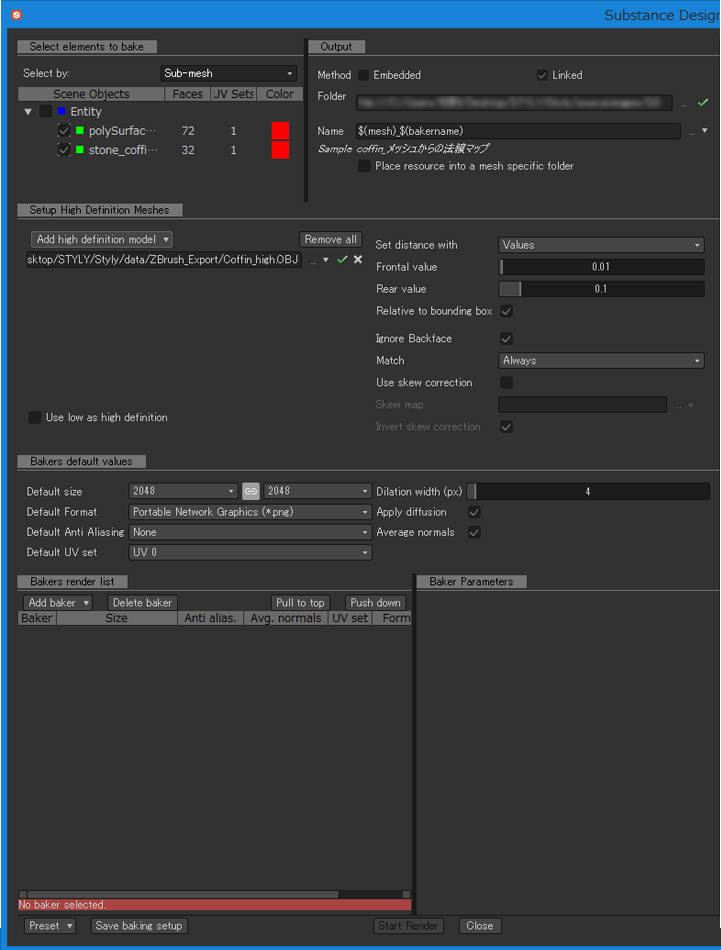
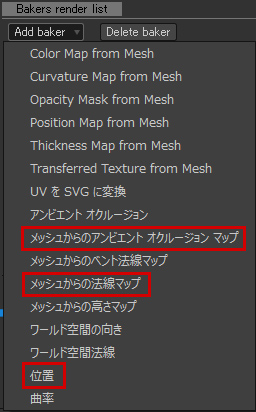
Firstly, add the map to create by baking.
Select the maps required from the ‘Add baker’ drop-down.
The maps required this time are:
- Ambient Occlusion Map from Mesh
- Normal Map from Mesh
- Position
We create those three bakers.
Set other parameters.
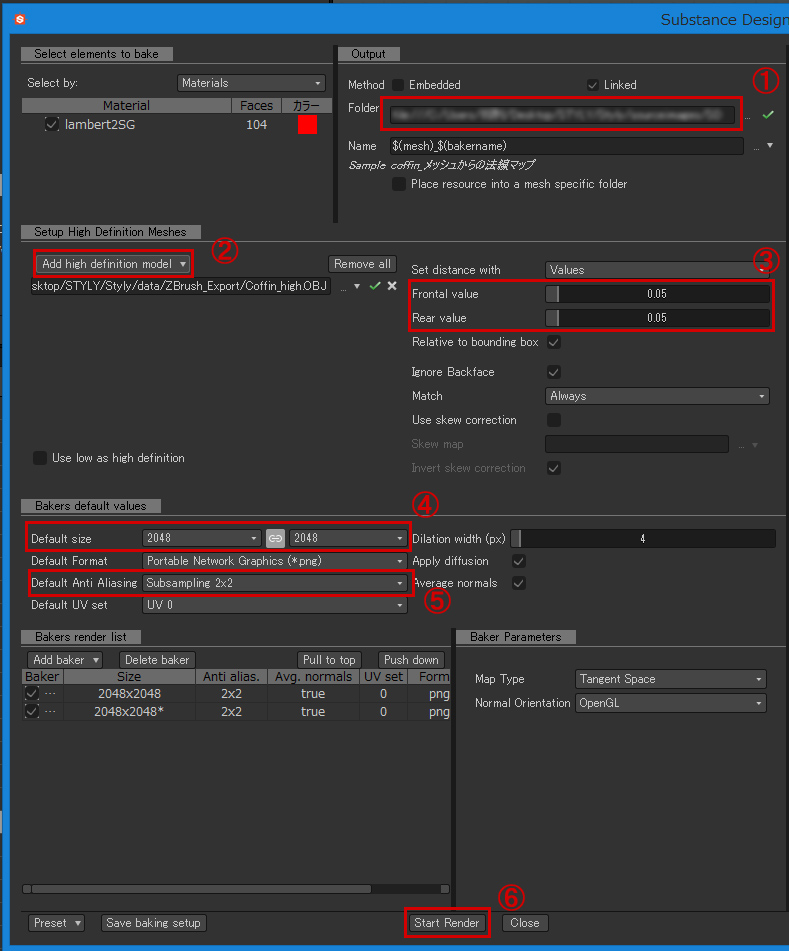
① The folder where the created maps are saved.
Substance Designer refers to the images so the maps are saved in the folder.
② The high-poly mesh created in Zbrush
Specify the high-poly mesh to use.
③ The maximum distance the rays can make before finding a surface.
The default values work in most cases.
Adjust them just in case the appearance looked something wrong.
④ The size of the map
It determines the resolution of the map.
⑤ Anti Aliasing
Higher sampling value gives better quality but it takes more time to bake.
I recommend starting with the lowest value to see if it works, and then increase the value step by step.
⑥Start rendering with the selected baker.
Depends on the setting of the baker, it might take a very long time. So wait for it with patience.
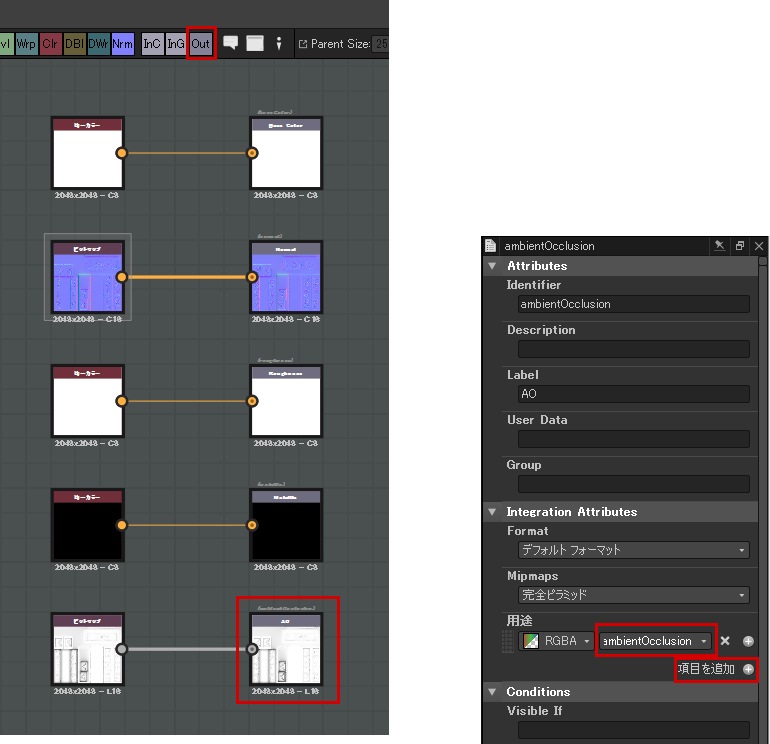
Assign each map
Check the result of the baking.
Since I used the preset of ‘Metallic/Roughness’, some Output nodes have already been prepared.
But, as there is no Ambient Occlusion, let’s make the one.
Add an Output node and set to ‘ambientOcclusion’ by the ‘Add Items’ button.
An Ambient occlusion has been added to the Output node now.
Connect the normal map and the occlusion map to the Output nodes.
Assign the Uniform Color nodes to Basecolor, Roughness and Metallic maps.
Check them in 3D View.
The details from the high-poly mesh have been added to the low-poly mesh, which didn’t have any details originally.
It should work this way as long as the normal map was baked properly. If there is a part that the map isn’t applied to properly, adjust the parameters and bake again.
In my case, the maps worked well.
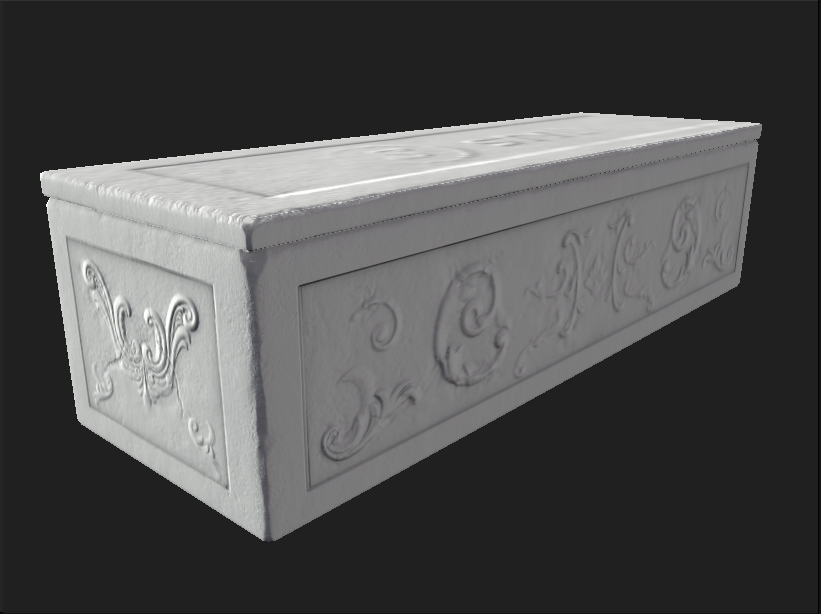
You can achieve this level of expression just by normal maps and the occlusion maps.
After this, we start to make the texture such as Color, Roughness, Metallic, etc.
It’s also possible to add more details to the normal map if you want.
For the casket, I complete the texture just by Substance Designer.