In this article, I explain how to create texture by Substance Designer.
We create a new texture by connecting Nodes while making good use of the textures generated by the Baker.
We make a texture for the casket at the centre of the stage. As it’s fairly aged one, let’s make the texture with moss growing.
Create BaseColor by using Gradient Map
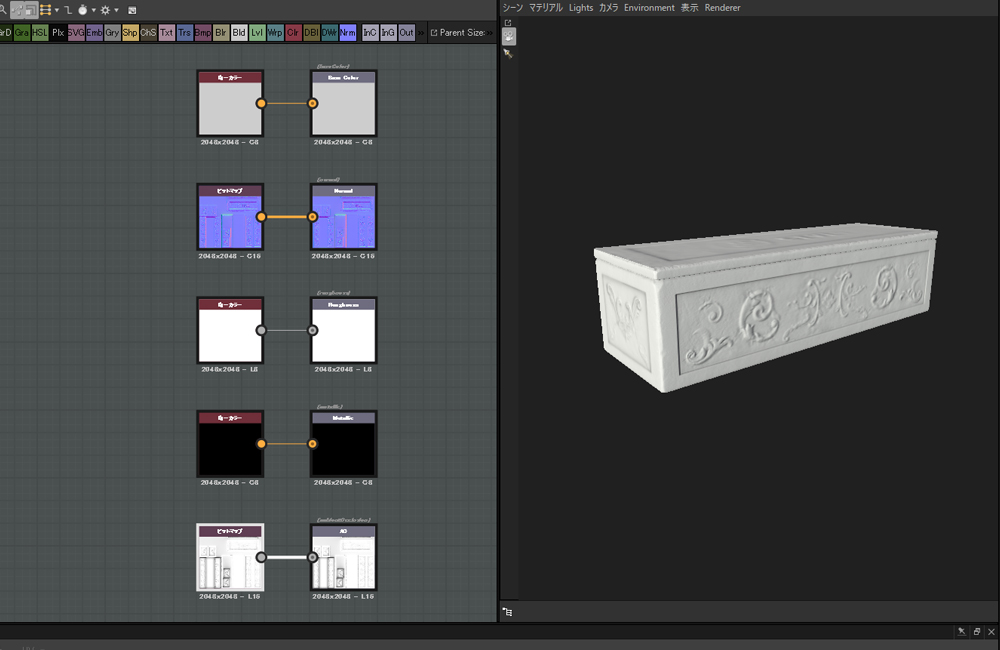
The shown above is the state after assigning the texture generated by the Baker to the casket created last time.
Firstly, create BaseColor.
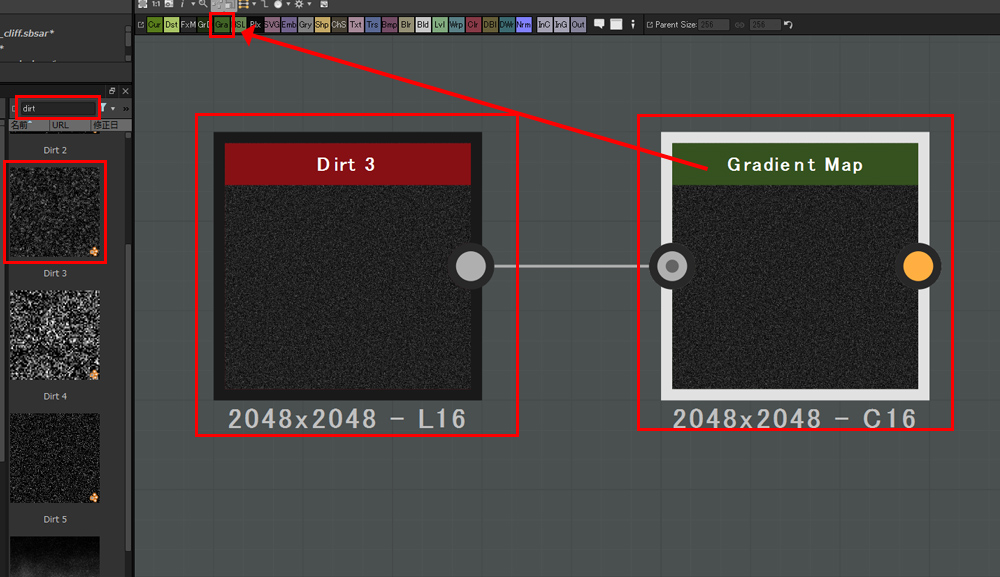
Select ‘Gradient Map’ from the icons at the top.
As we use ‘Noise’ here, find ‘Dirt’ by typing ‘dirt’.
I selected Dirt3 and connected it to Gradient Map.
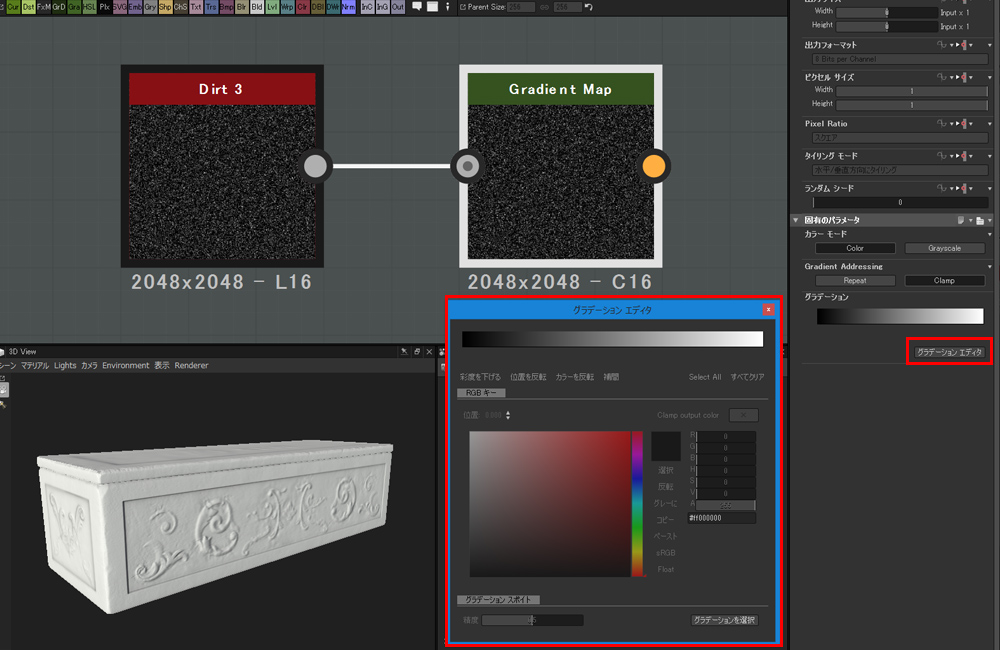
With Gradient Map selected, click the ‘Gradation Editor’ button in the parameter window to open the editor.
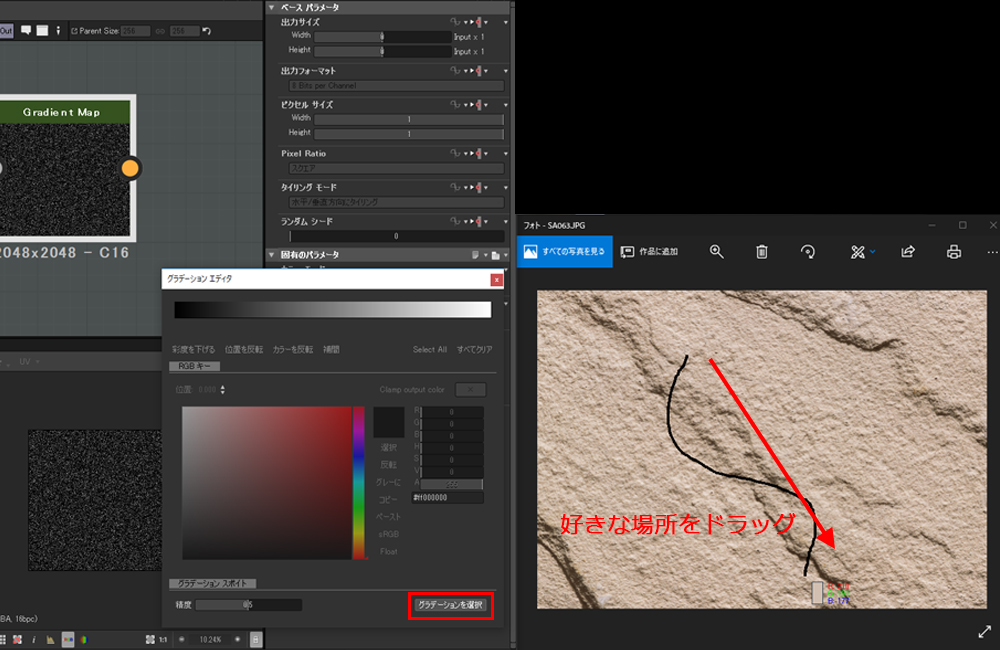
Now, prepare the image to make gradation.
Gradation can be defined by dragging the mouse along a curve where the colours you want are.
It’s a good function as you can try it over and over until you find a nice gradation.
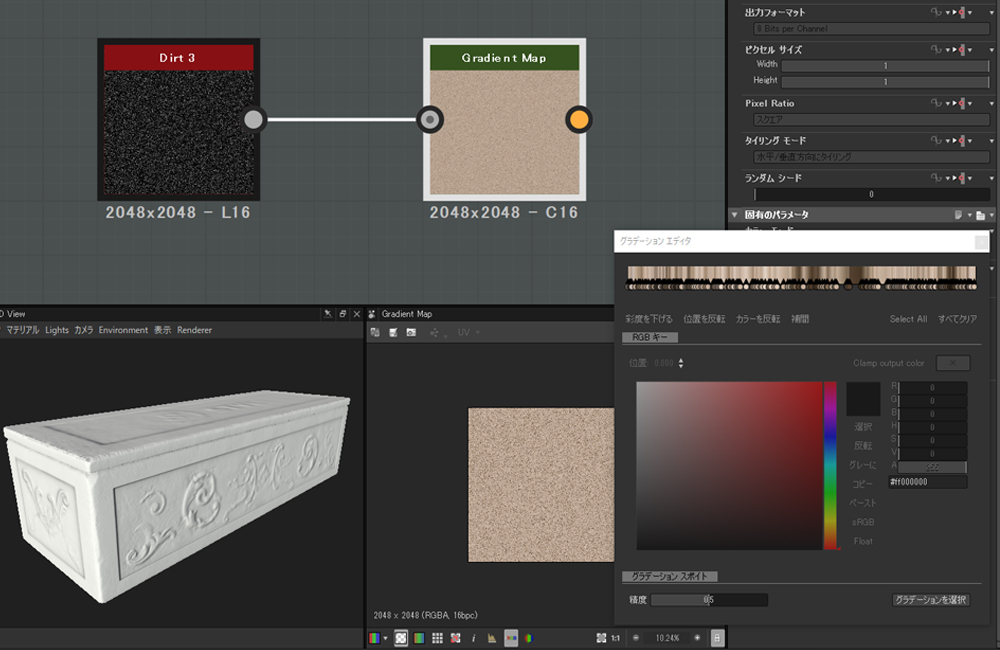
This time, I ended up with the image shown above.
Let’s check it by connecting to BaseColor.
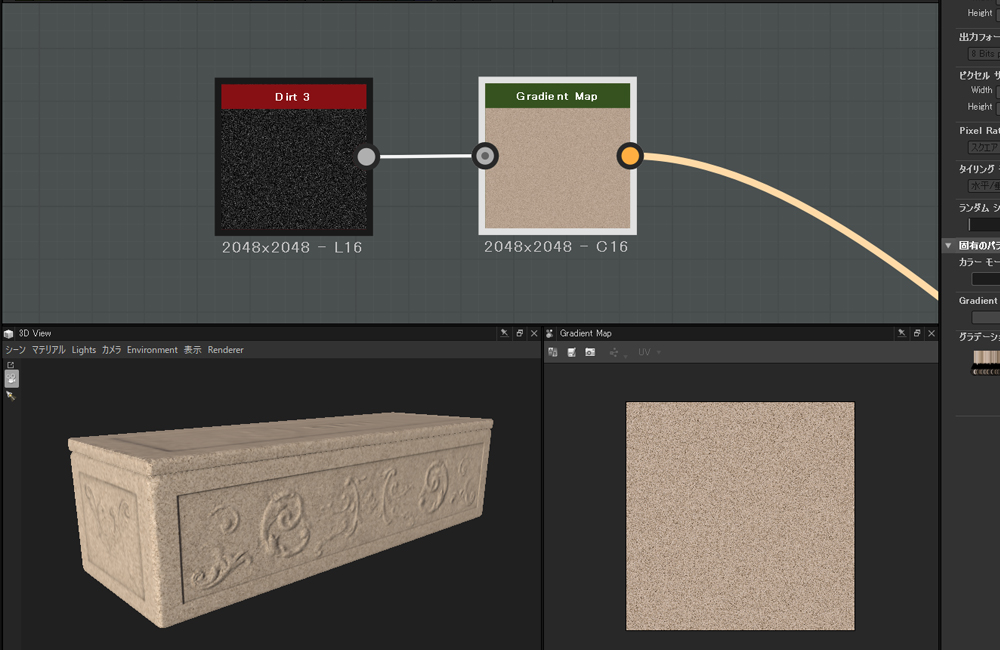
If it doesn’t look what you imagined, you could try various options, using other images, replacing the noise type, and etc.
OK, we now have a base colour for stone anyway. Next, let’s render moss.
Blend two Nodes
As we did to create the texture for stone, pick up colour from the image that looks containing the colour of moss.
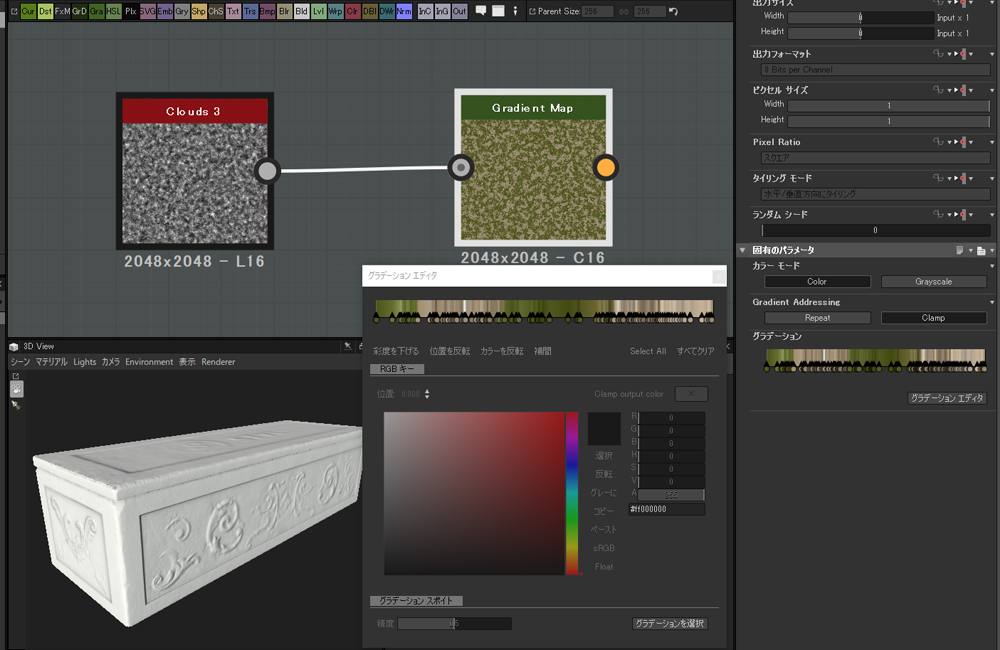
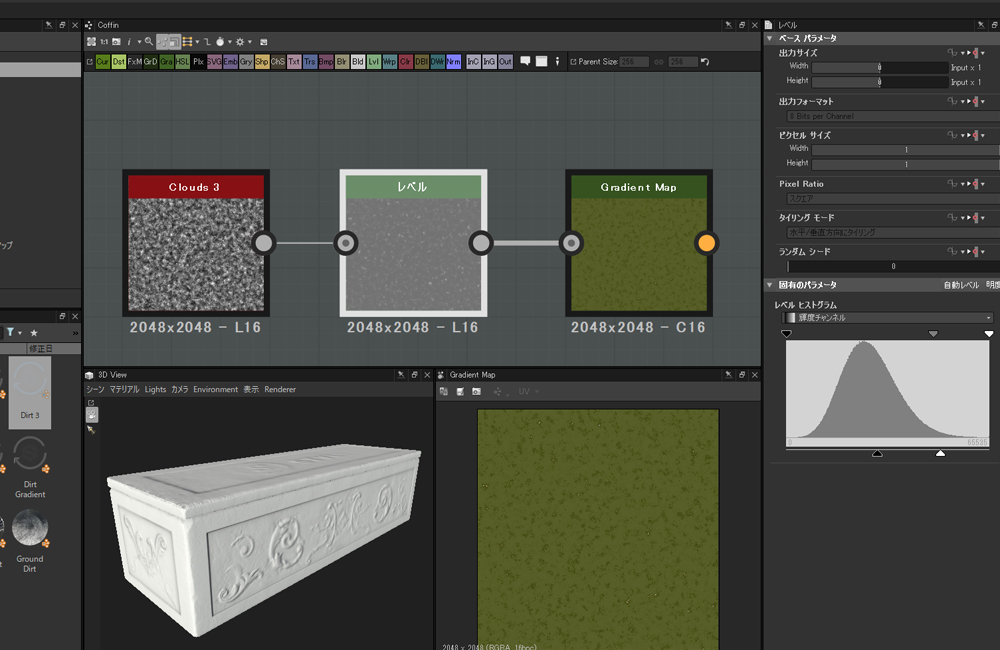
Place a Level node between Noise and Gradient Map to adjust the contrast.
The gradation reflects the change of the Noise’s contrast.
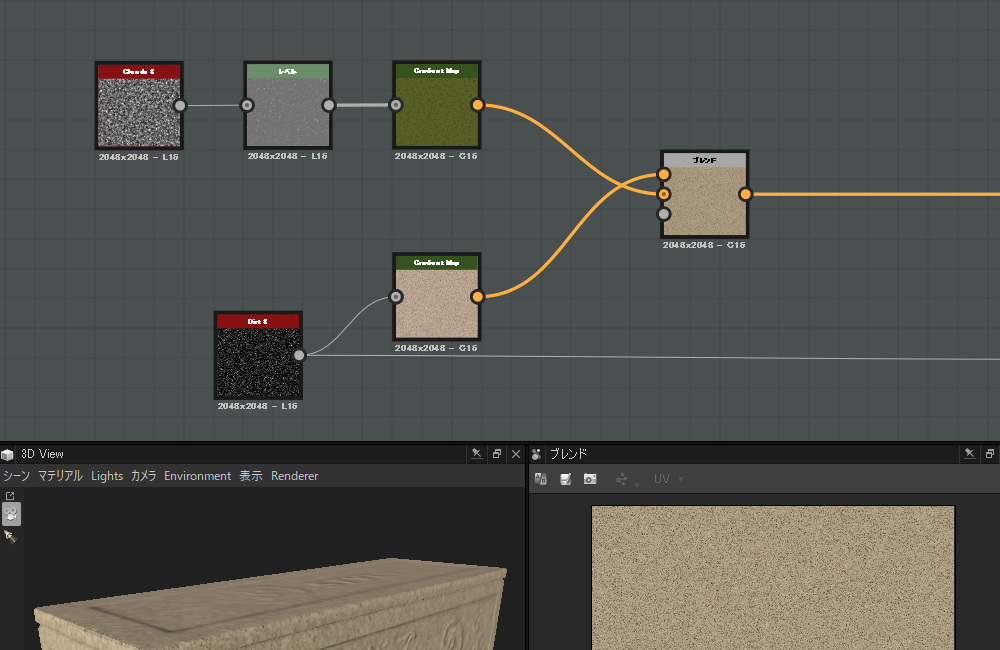
By placing a Blend node, I connected stone and moss into one.
By blending those two, I render moss growing mainly on the bottom half of the casket.
Use Mask Generator
Apply ‘Mask’ on some places by Mask Generator.
Since I want to change the mask to height, I use ‘Bottom To Top’.
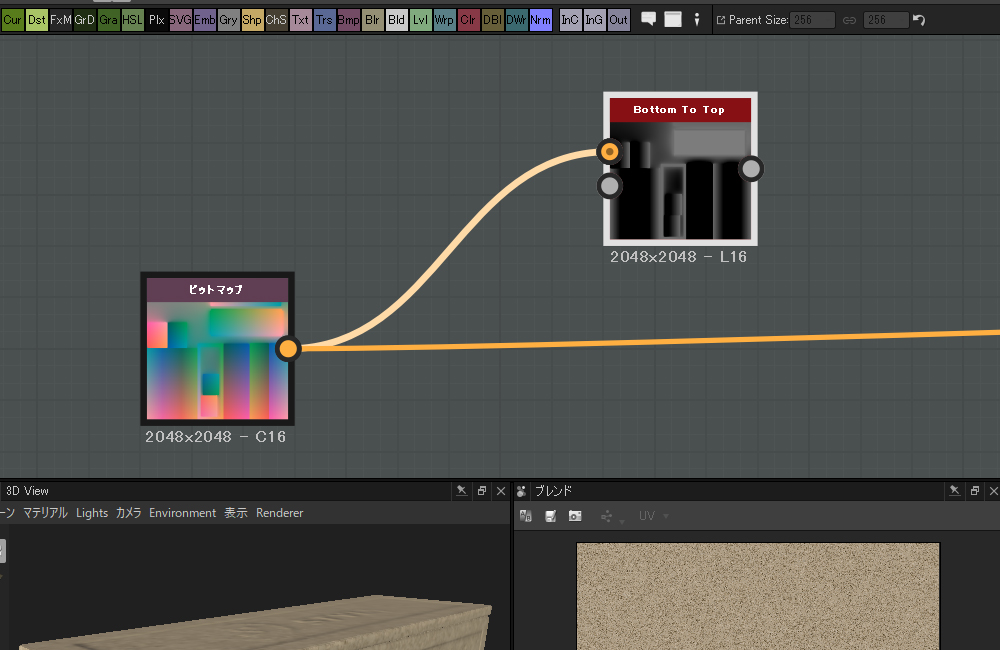
Place ‘Bottom To Top’ and connect the Position map to it.
Now you can vary the mask on the casket in proportion to height.
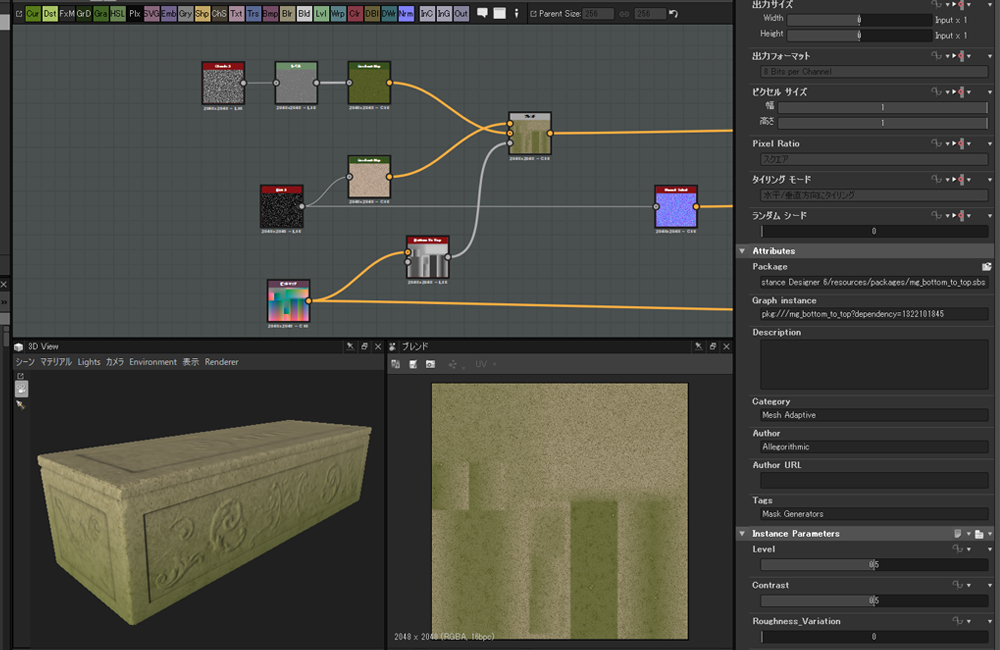
The default setting gives the appearance shown above.
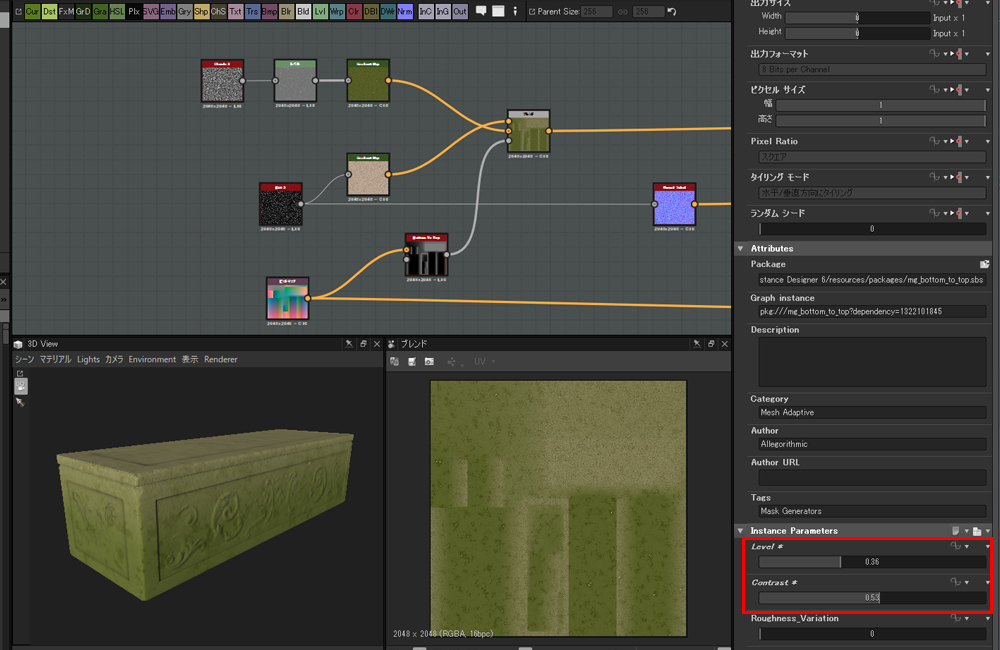
Adjust the position and the density of moss by varying Level and Contrast.
Since I also wanted to apply the normal map of moss in the same way, I used ‘Normal Blend’.
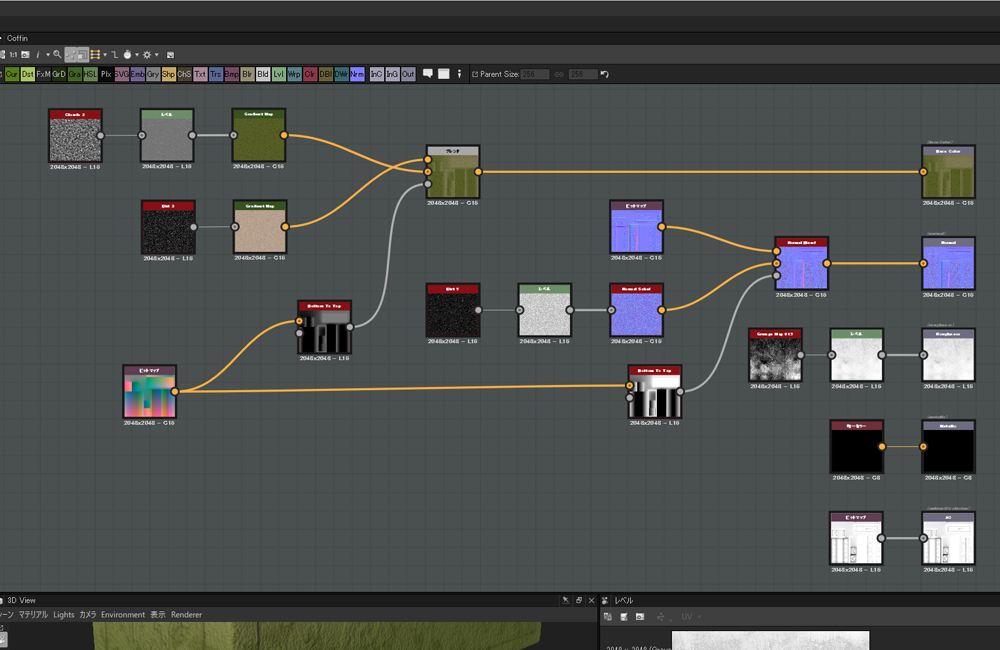
The whole node layout is shown above.
Roughness is set in a simple way here.
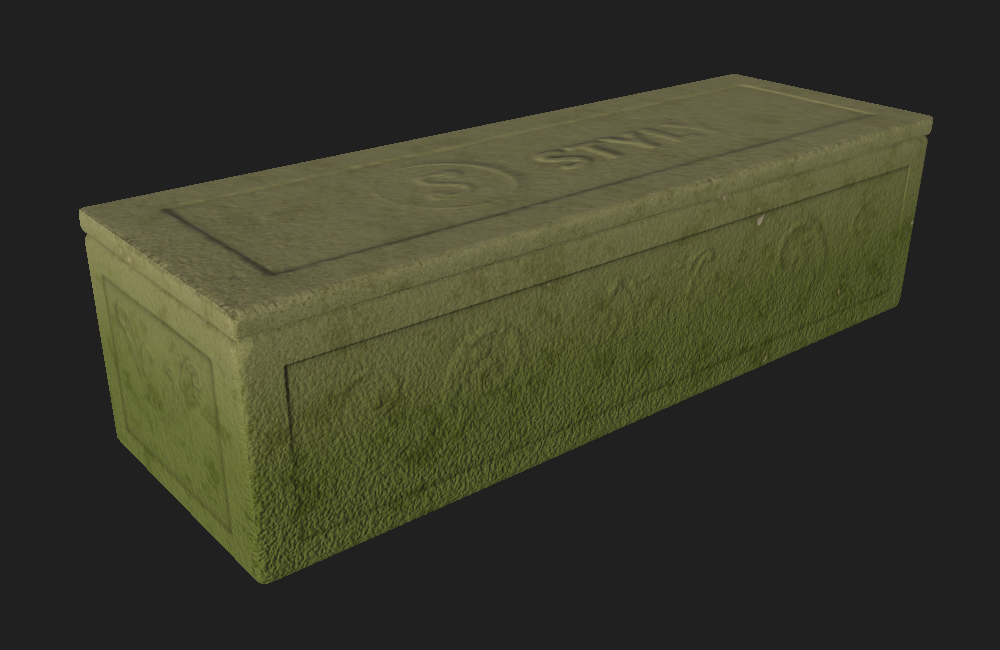
The texture of the casket is completed.
In this article, I introduced how to create texture and use Generator in Substance Designer.
Since it’s a unique approach, you might find it difficult until you get familiar with it. But, depends on the subject, there are many cases where Substance Designer is more useful than Substance Painter.
It’s an excellent software to create a seamless texture. In addition, it’s a powerful one to create texture in the way shown in this article.
You can access the VR space created in this series: TreasureHunter