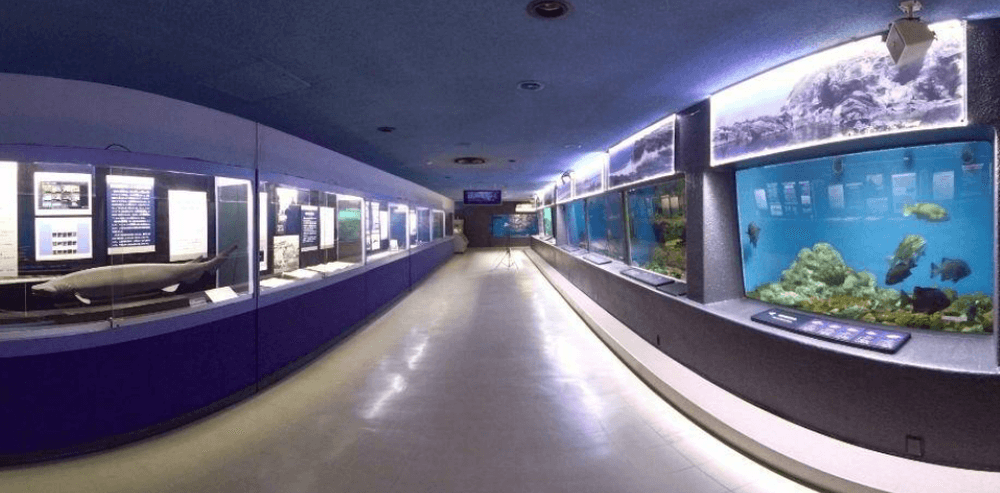
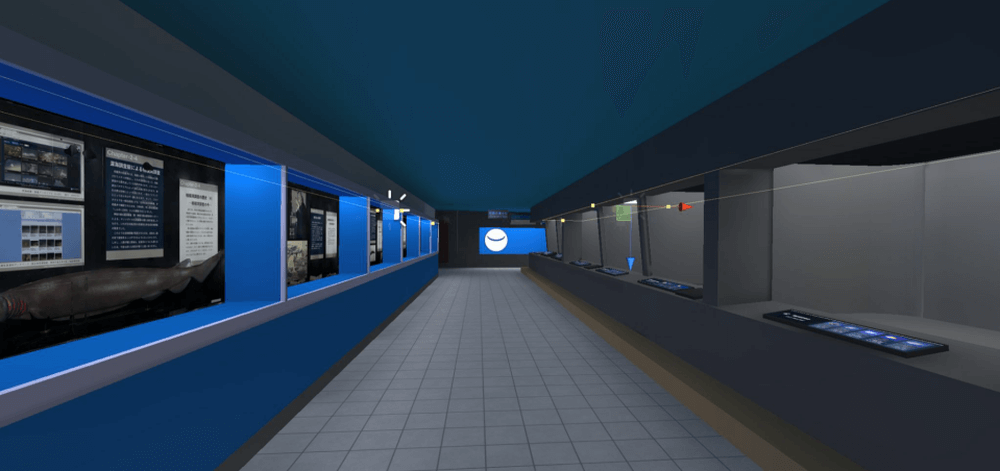
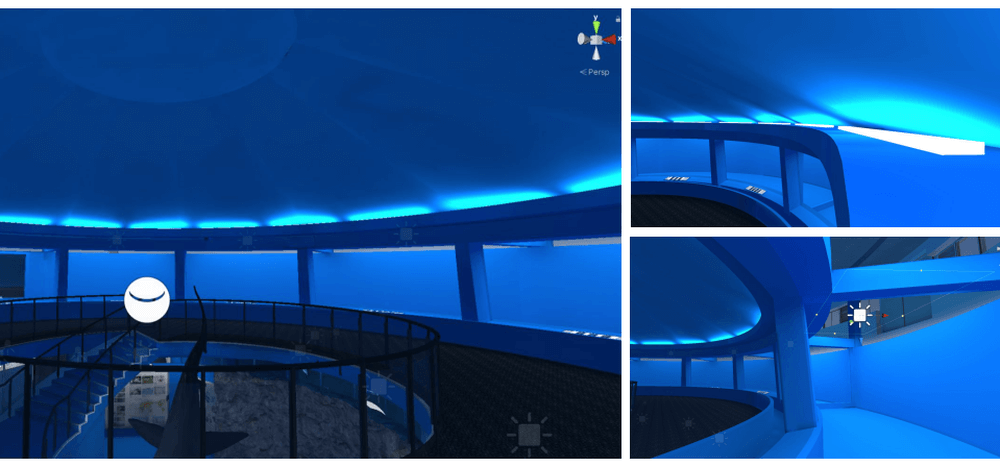
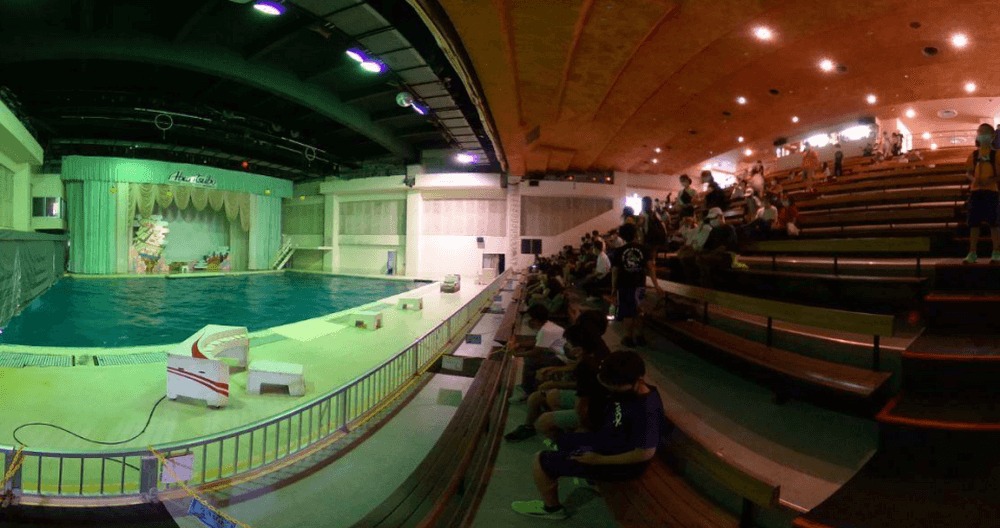
interior lighting in reality and how to reproduce spatial lighting that can be applied in both STYLY Studio and Unity, based on the VR
Keikyu Aburatsubo Marine
Park production example.
Sample Scenes
You
can experience the VR Keikyu Aburatsubo Marine Park space from STYLY GALLERY.
For more information about the VR Keikyu Aburatsubo Marine Park and specific experience methods, see the following.
https://rojohaku.com/vraburatsubo/
To substitute interior lighting in VR
To reproduce interior lighting, check which lights in Unity or STYLY Studio correspond to those in reality
.
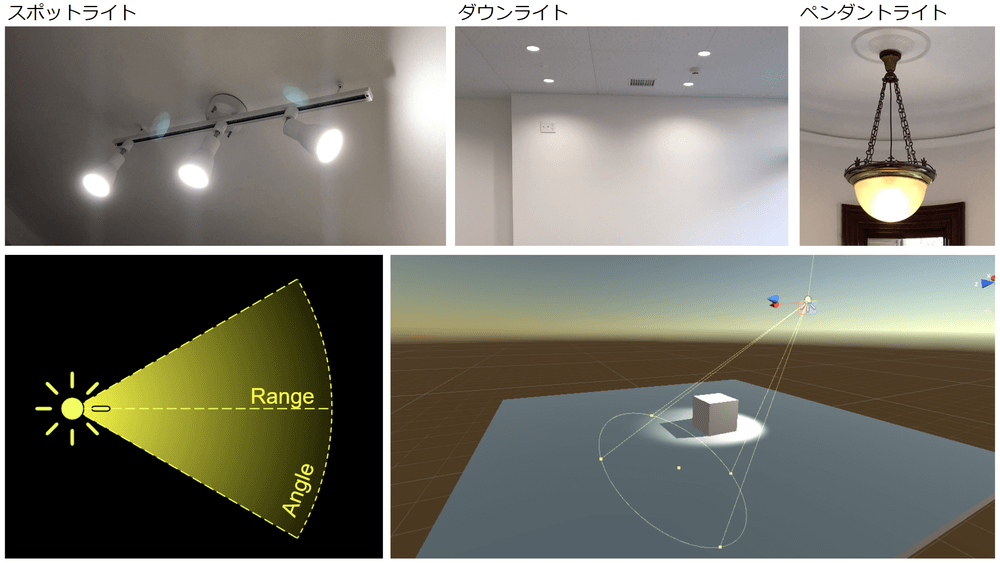
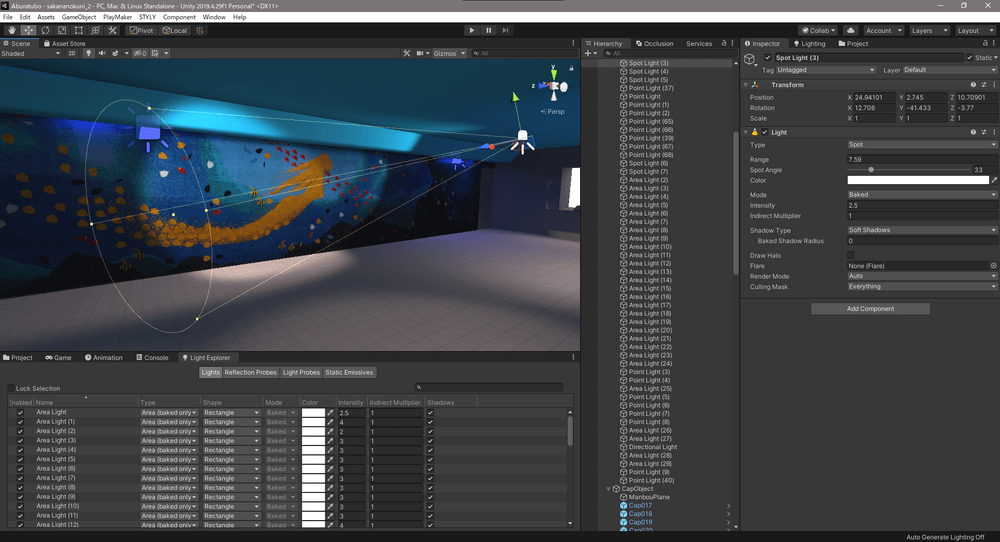
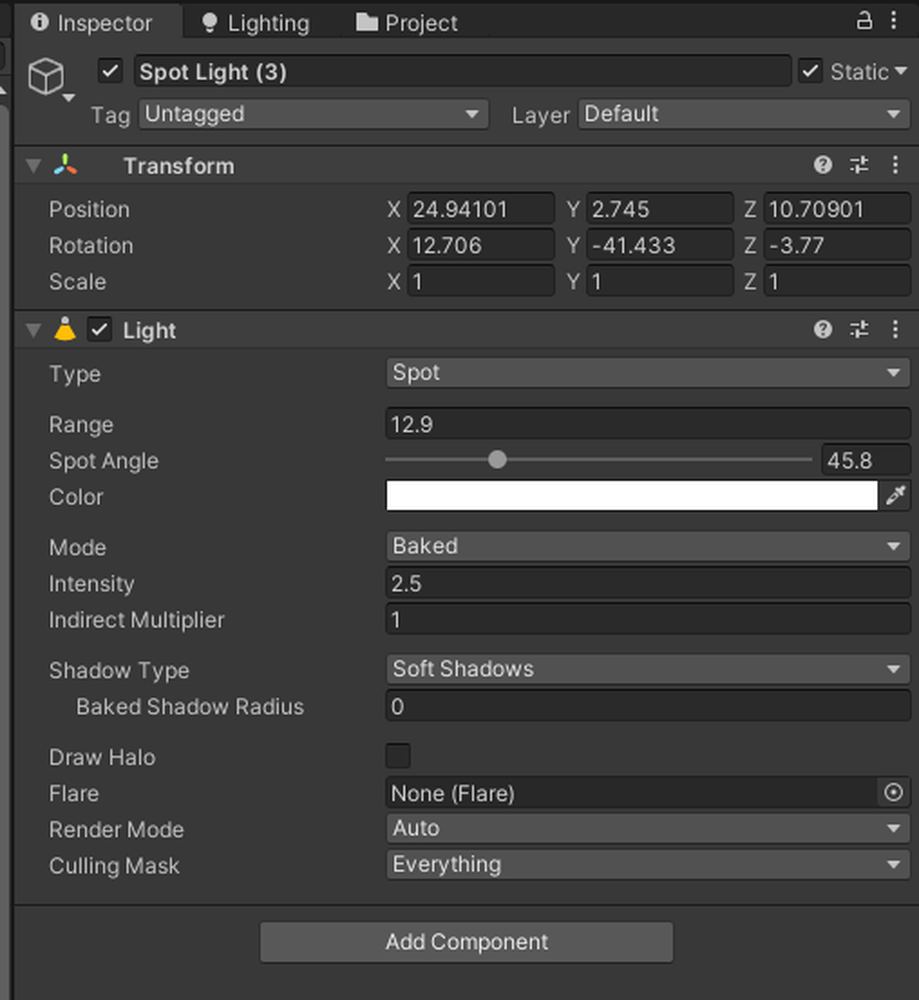
Spot Light
Spot Light/ Down Light/ Pendant
.
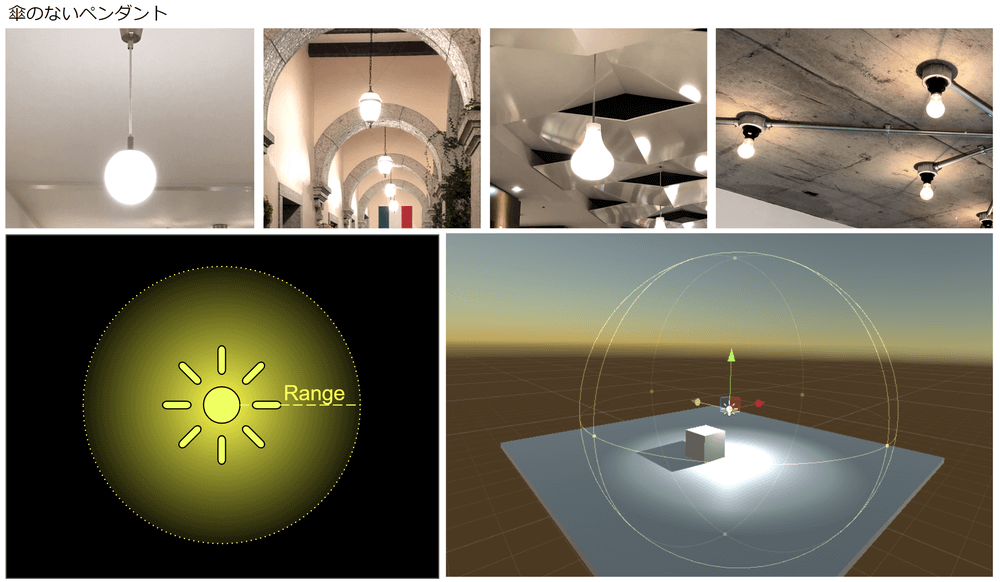
Point Light
Pendant without umbrella
Area Light / Emission Material
Ceiling Light/ Lights with long or wide emitting surfaces, such as LED indirect lighting
.
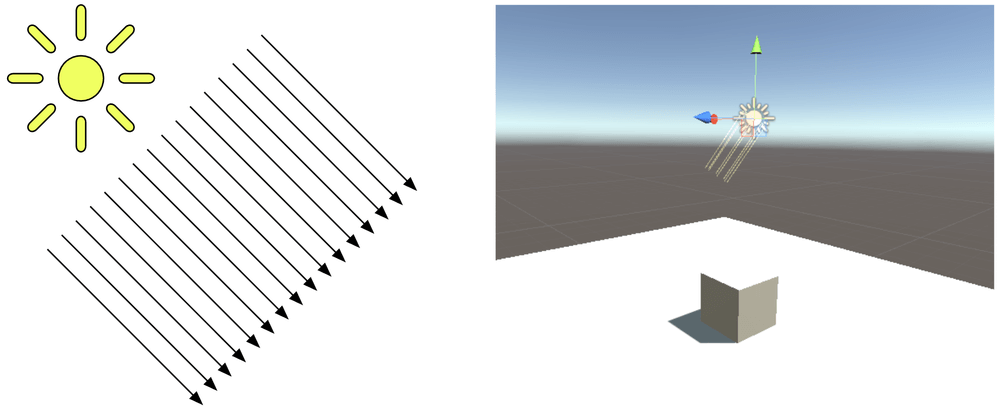
Directional Light
Sunlight
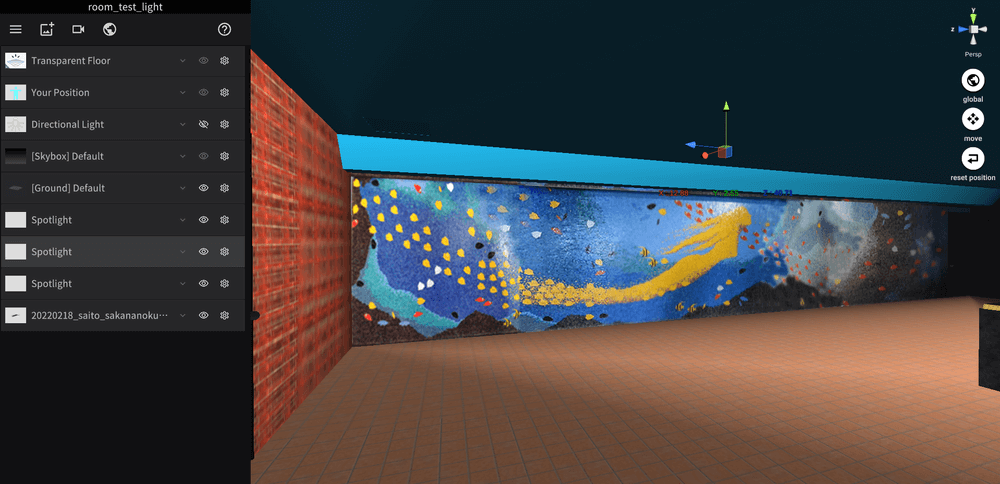
How to recreate interior lighting in STYLY Studio
If you want to immediately check the 3D model of your building in VR, follow the steps below to create a VR scene.
See below for basic STYLY Studio operations.
Upload the FBX model to STYLY Studio.
See the “Upload” section in the following article for instructions.
Insert a light asset.
Create a light by selecting Environment>Light>Point Light or Spot Light from the asset icon.
You can set the properties when creating.
Please refer to the following table to set the properties.
*Properties cannot be changed after creation.
|
Notation |
Description |
Recommended value |
|
Color of the light |
Color of the light |
White |
|
Reach of the light |
Reach of the light |
1 |
|
Intensity of the light |
Intensity of the light |
10 |
Once you have created one light, duplicate and move it around repeatedly.
Placing lights in multiple locations will illuminate a space.
Select a light in the list of assets on the left and press [S shift]+[D]keys to duplicate it.
.
How to recreate interior lighting in Unity
Lighting in STYLY Studio is fairly simplified.
If you want realistic lighting, use Unity.
See the link below for instructions on installing Unity and uploading it to STYLY.
Importing a 3D model of a building
First, import the 3D model of your building into Unity.
Drag and drop the FBX file into Project, then Drag and drop the FBX file from Project to Hierarchy.
Click on the FBX file in Project, check Generate Lightmap UVs in the Model tab of Inspecter and Apply.
In the Material tab, select UseExternalMaterials(Legacy) for Location and Local Materials Folder
for
Search and Apply.
A material folder for the FBX is created in the same folder as the FBX in Project.
*The icon on Hierarchy and the one on Project are displayed differently in Inspecter, even with the same display name.
.
Placing the lights
The lights are placed according to the lighting type in reality.
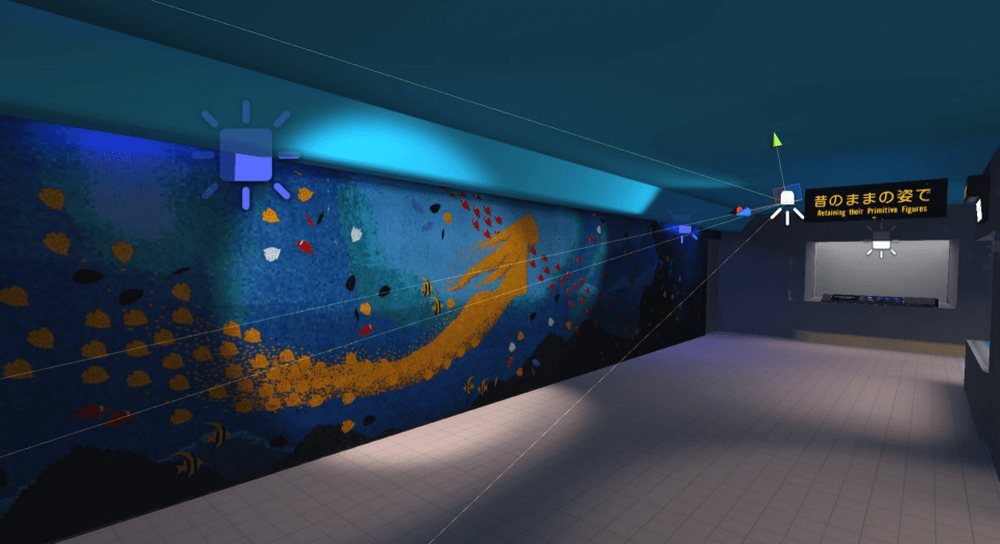
As an example, let’s take the Fish Country and Fantasium Theater at Aburatsubo Marine Park.
.
Entrance.
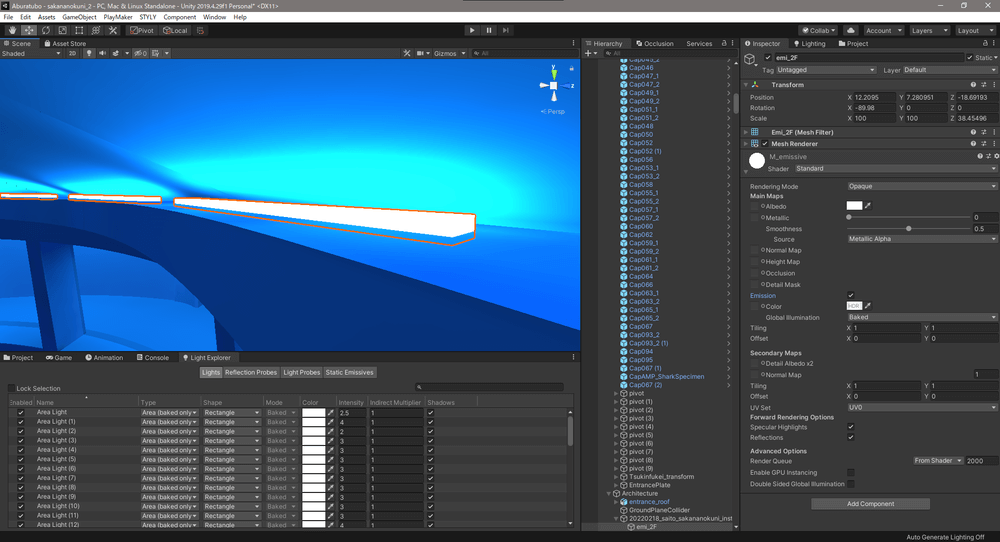
Lights used: SpotLight, AreaLight
Light settings
.
Main settings for Spot/Point/Area Light
|
Item |
Description |
Setting |
|
Type |
Type of light |
Spot/Point/Area |
|
Shape(Area only) |
Light Shape |
RectangleSquare/DiscCircle |
|
Range |
Range of light |
Adjust the range of the light so that it fully covers the asset to be illuminated. |
|
Spot Angle(Spot only) |
Angle of light |
Any |
|
Color |
Color of the light |
Optional |
|
Mode |
Lighting mode |
Baked |
|
Intensity |
Baked Intensity |
1 to 3 |
|
Indirect Multiplier |
Indirect light intensity |
1 |
|
Shadow Type |
Shadow Type |
Soft/hard Shadows |
|
Cast Shadows |
Enable Shadows |
Check the box |
Tips: Light Explorer
You can bring up the LightExplorer Window by selecting Window>Rendering>LightExplorer.
This window allows you to manage the list of all lights placed in the Scene and their settings.
Emission Material
Emission material is to create an object that emits light in the material settings
Therefore, the method is different from the above light settings.
Check the Emission checkbox for the material you want to emit light from and set the Color and Intensity (emission intensity).
Baking the light (Light Bake)
There are two main types of lighting methods in Unity : real-time lighting andlight baking.
Each has its own strengths, and the standard in many games today is to mix both into the lighting of a single space.
In this article, we will discuss light baking as the most lightweight lighting method.
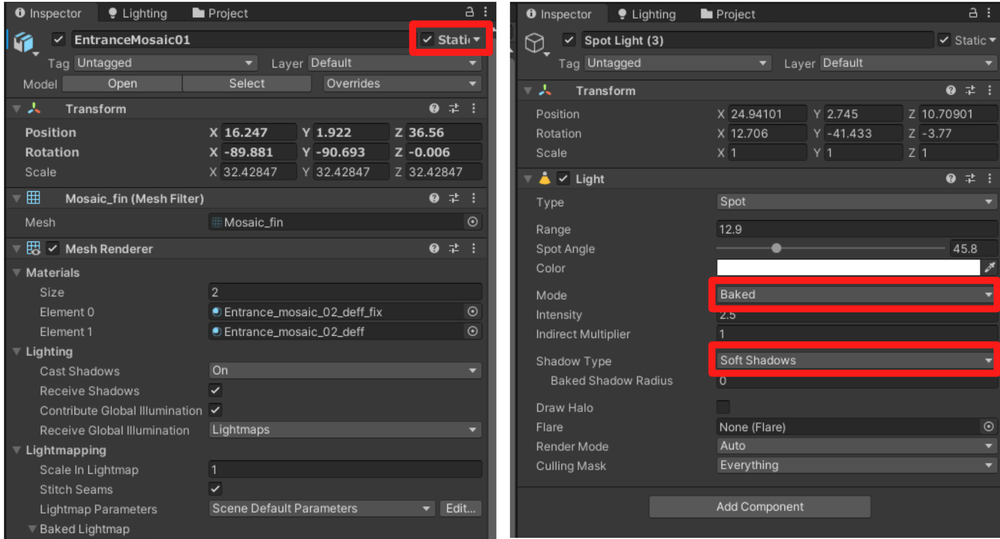
Inspector settings for an object
Set the object you want to light (not moving) to Static
Inspectors settings for lights
Select Baked for Mode
Select Soft Shadows for Shadow Type.
.
Lighting
|
Item |
Description |
Setting |
|
Lighting Mode |
Selects the lighting mode, lightest for light baking. |
Subtractive |
|
Lightmapper |
Select the device for lighting calculation processing. |
CPU/GPU |
|
Lightmap Resolution |
Select the resolution of the lightmap; higher resolutions produce higher quality shadows. |
20~. |
|
Compress Lightmaps |
Compress lightmaps. |
Uncheck |
Once all object, light, and lighting settings are complete, press the Generate Lighting button at the bottom of the Lighting>Scene tab to generate the lightmap
.
Compress Lightmaps can reduce lightmap weight, but may cause lighting degradation in standalone VR.
Therefore, it is recommended not to compress
.
Once the
baking process is done, the lights are not reflected in real time as they are when placed, so the lightmaps need to be updated using “Generate Lighting” to update after changes such as placement.
Therefore, it will go smoother if the placement is completed before baking.
Also, if you
want to check the lights again in real time, remove Static from the object and change the Mode to Realtime and use “Generate Lighting.
Generating lightmaps takes time and the intended lighting cannot be achieved at once.
Therefore
, the
Lightmap Resolution value should be set low at first, so the light can be confirmed at a lower quality and then generated at the last step with higher quality settings.
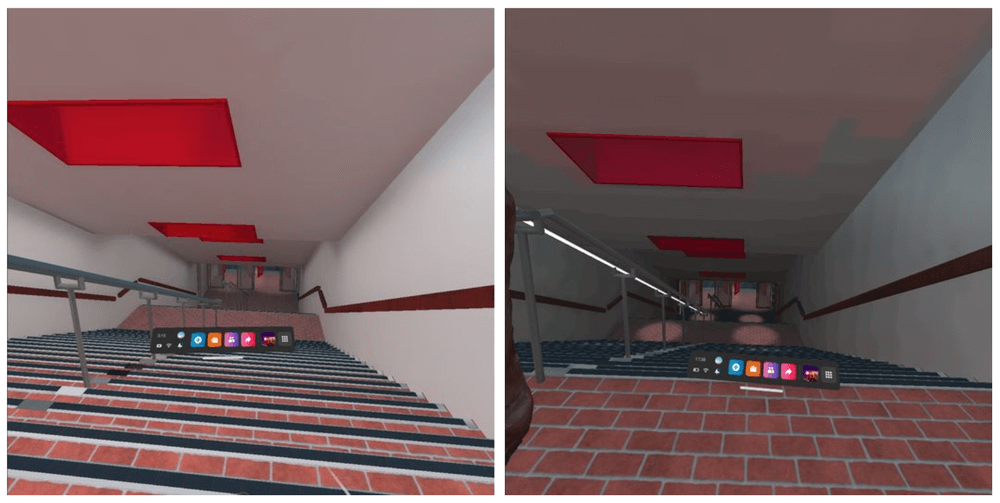
After
completion, the lightmaps are reflected and
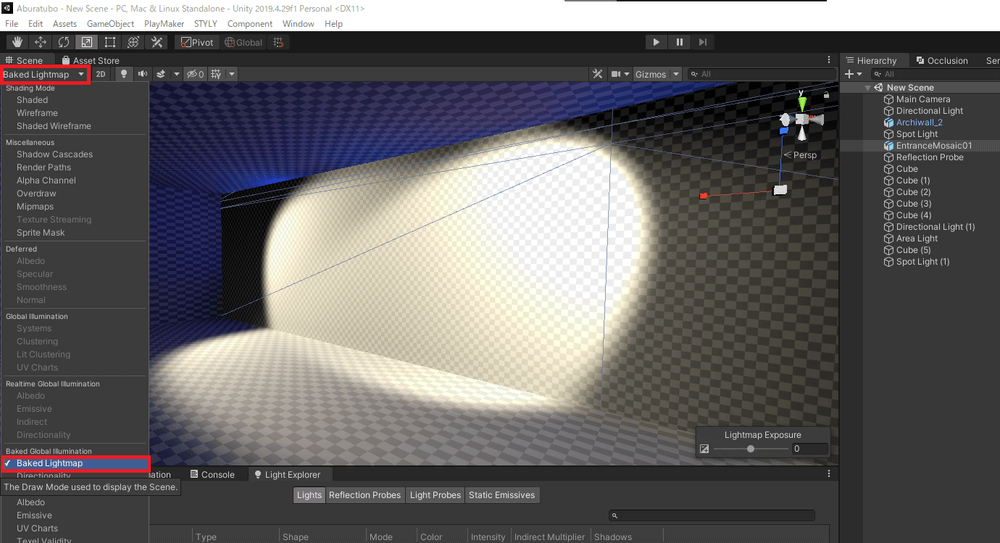 Checking the lightmap[/caption]
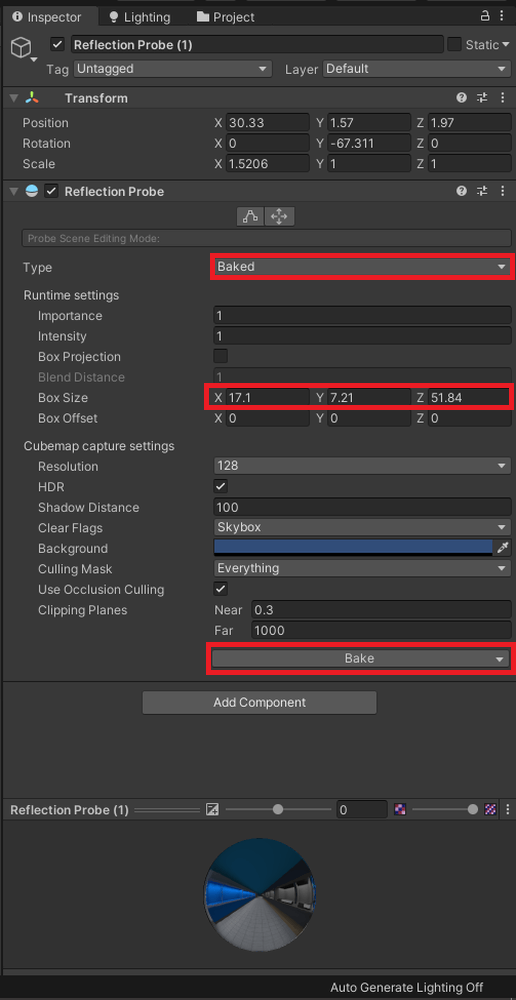
Reflection Probe
This function is used to simulate reflections of the environment in a 3D scene.
Select + mark>Light>Reflection Probe in the Hierarchy to add it to the scene.
Set Type to Baked, Box Size to encompass the indoor space.
Once placed and configured, click Bake at the bottom to update the settings.
Collider setting
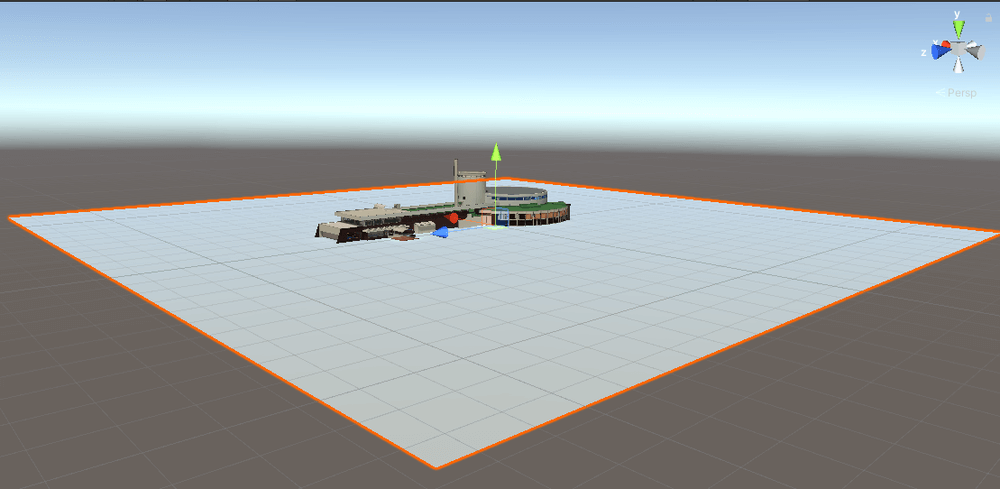
In order to set up physical collisions in the scene to be experienced in VR, a collider must be set.
For a 1F building, place the Plane on the part of the scene that hits the floor.
.
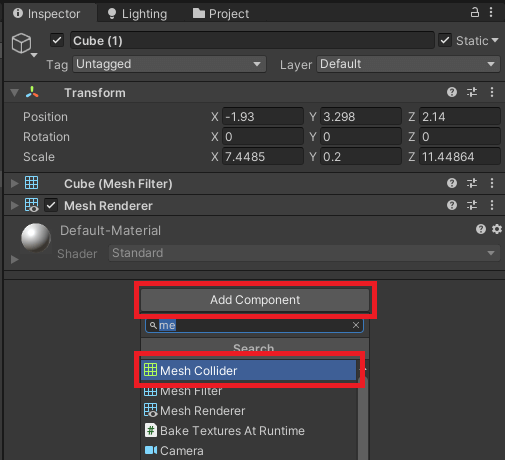
On 2F or higher, select the floor or stair model and add a Mesh Collider from the Add Component at the bottom of Inspecter.
Summary
By uploading a
3D model of your building to STYLY, you can easily experience your CG model in VR on your phone, tablet, browser, or HMD.
Understand real-world interior lighting and be able to reproduce it in Unity
.
The example is from the development of VR Keikyu Yubotsubo Marine Park.
Please try to imagine what it was like back then by viewing the scene.
For questions about STYLY, bug reports, and requests for improvements, please contact STYLY FORUM
https://jp.forum.styly.cc/support/discussions
Certified (QA) by Shota Yoshizawa
Edited by SASAnishiki
