In this article, I will show you how to combine Unity’s NavMeshAgent and PlayMaker to create a 3D model that automatically moves to its destination in a STYLY scene. Therefore, you can easily create an active scene with movement by using this function.
Sample
What we will create this time will be a scene in which a 3D model automatically moves to another position.
In the following scene, you can see how NavMesh can be used to create movement.
NavMesh is a feature of Unity that allows you to create 3D models that move around the scene using AI.
You can not only move the model to the destination, but also set the movement of the model along the way in detail. It is also possible to add complex movements such as avoiding obstacles.
In this article, we will use this feature to create a scene where Capsule is heading to the Sphere position while avoiding obstacles.
In this article, we will use an asset called PlayMaker. Therefore, please install PlayMaker beforehand.
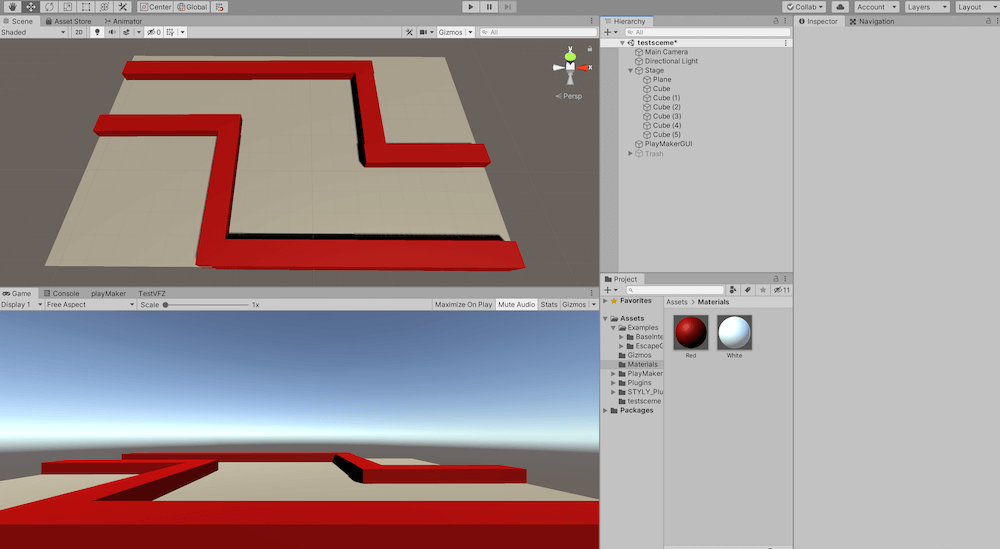
Overview of the stage
Place a Plane (the stage) and a Cube (the walls) in your scene.
Next, change the stage to “NavigationStatic” in the Inspector.
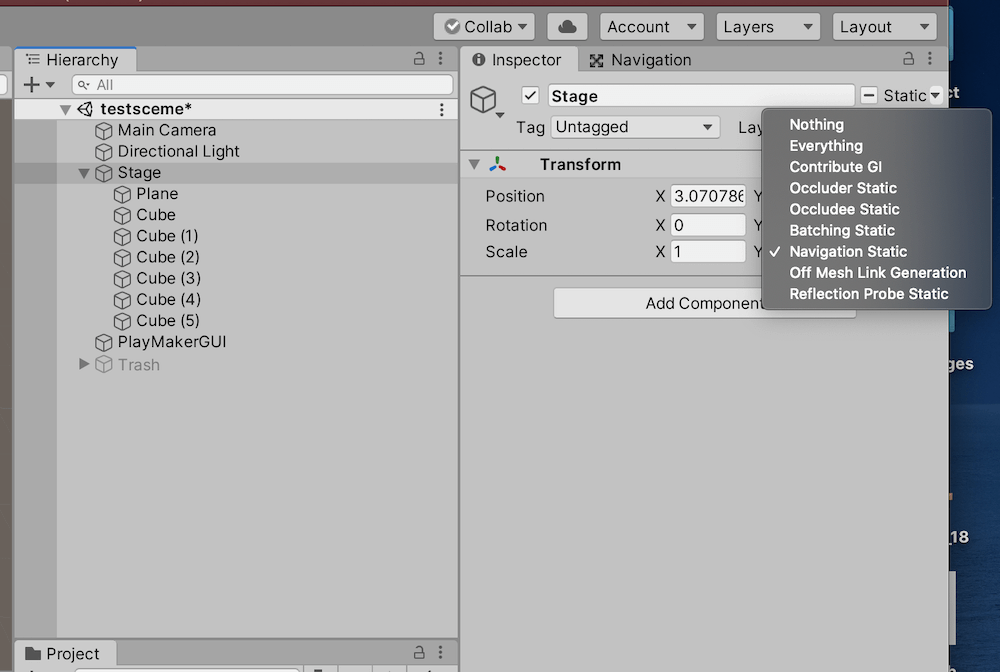
Change the Stage to NavigationStatic
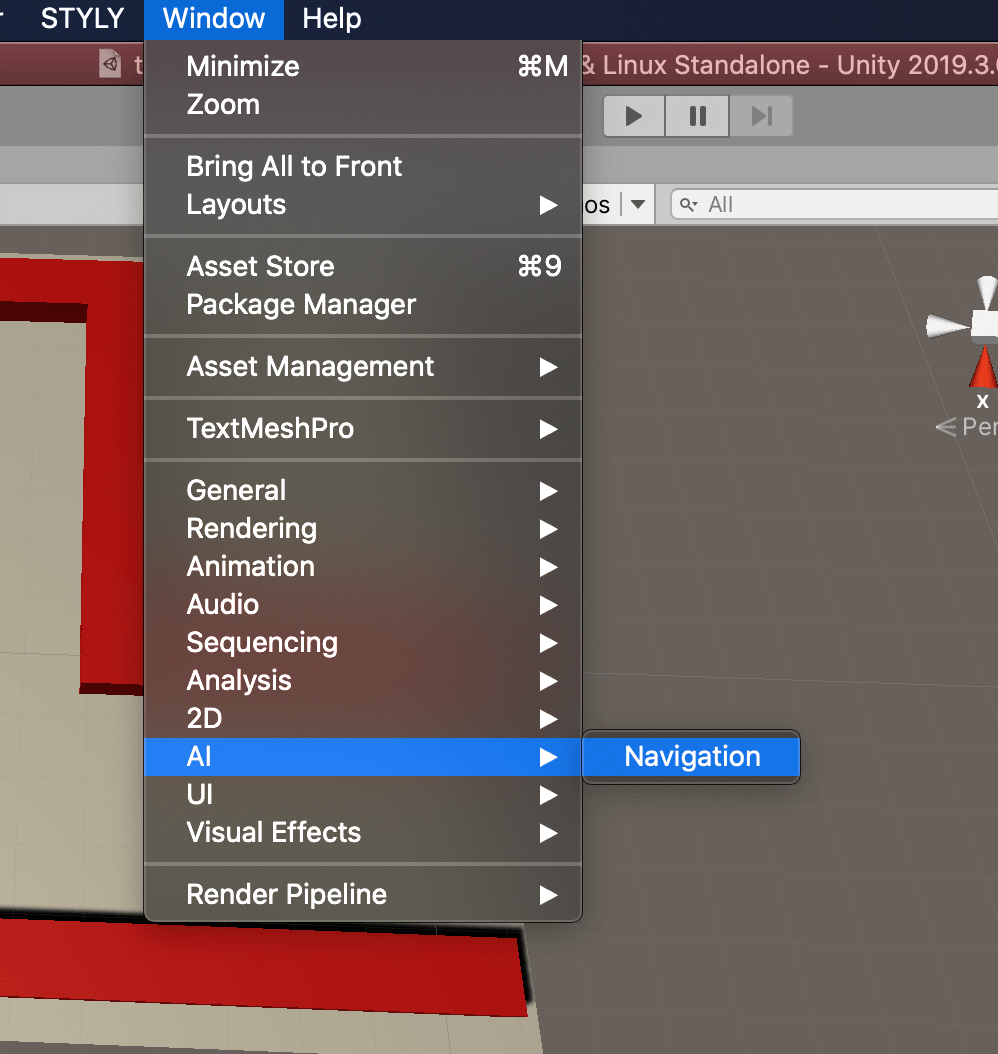
Bake to adjust the walkable area.
Then, open the Navigation window from Menu > Window > AI > Navigation, and press the Bake button on the Bake tab.
Explanation of the Navigation position
Then, the range that can be moved will be displayed in light blue.

Explanation of the baked range
Adjust the movable range by changing the AgentRadius on the Bake tab, and do not forget to bake after changing the Radius.
Set up the destination in Capsule using PlayMaker
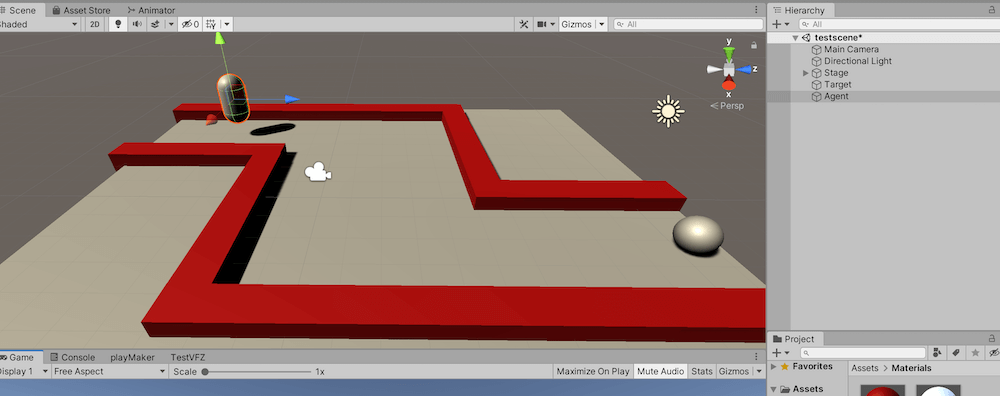
Create the 3D model that you want to move (Capsule in this case) and the 3D model that you want to move to (Sphere in this case).
Description of the created 3D model
Add the component “NavMeshAgent” to the Capsule. various settings exist for the Agent. There are various settings for the Agent, which will be explained in detail later.
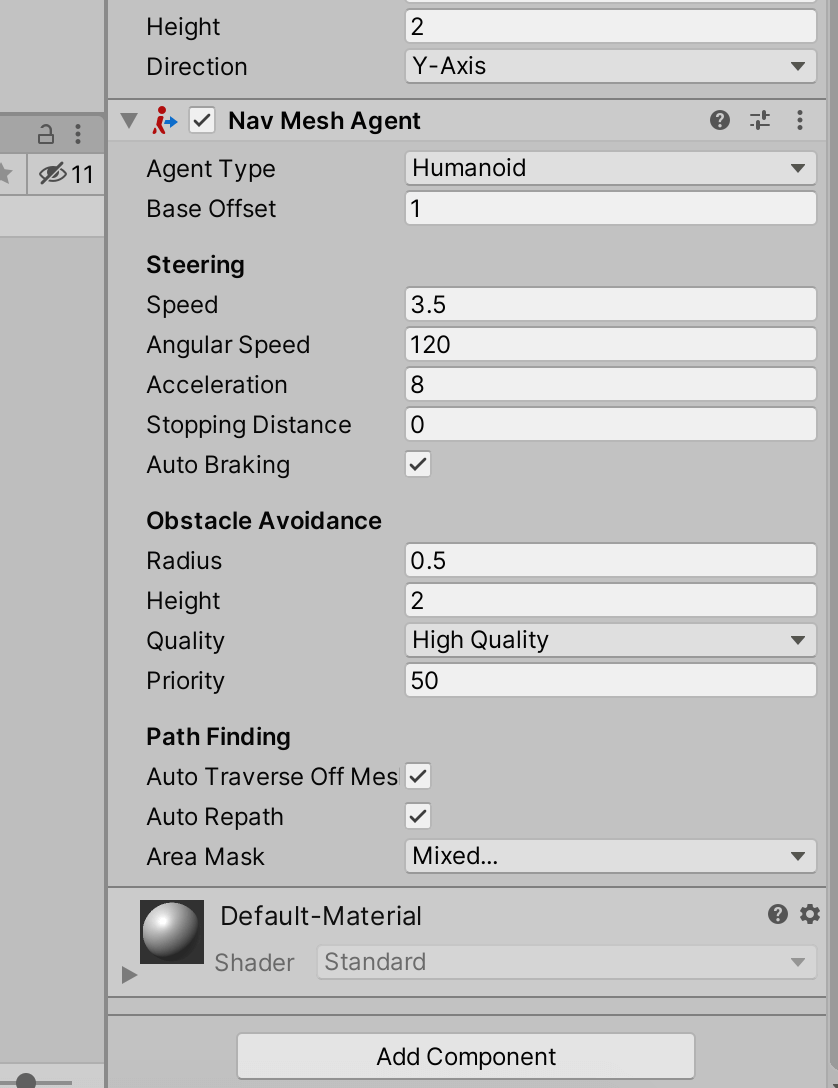
Explanation of the NavMeshAgent component
Set up PlayMaker by adding FSM to Capsule, as shown in the image below.

Capsule FSM settings (1)

Capsule FSM settings (2)
This time, we are creating a movement that acquires the destination Position and sets it as the destination at startup.
Note that the target object of the action SetProperty must be set to the NavMeshAgent component of Capsule.
When the play button is pressed in this state, we will see that Capsule moves to the Sphere location.
Agent parameters
NavMeshAgent has a number of parameters related to motion, which can be adjusted to set the detailed motion.
Please refer to the official documentation for detailed explanations of the setting items.
Placing Obstacles
You can also place obstacles on the baked plane to make the 3D model go around them.
Place a 3D model as an obstacle
Let’s place an obstacle in the stage, as shown in the image below.
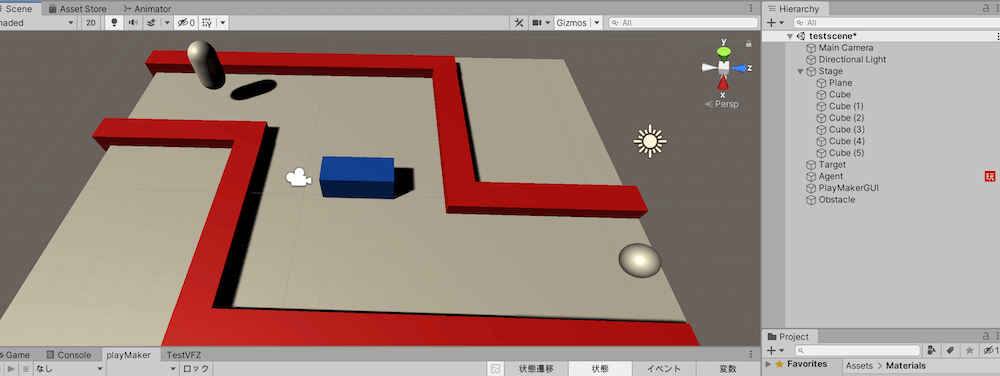
Scene after placing the obstacle
Add the component “NavMeshObstacle” to the obstacle.
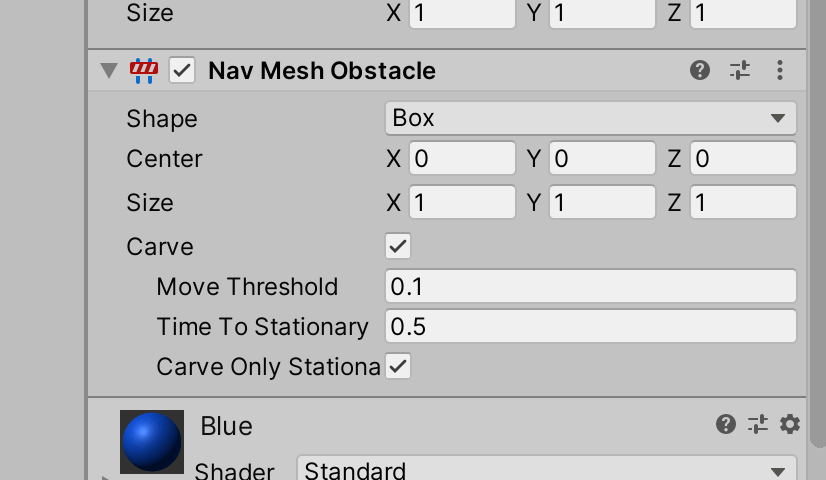
Explanation of NavMeshObstacle component
Although the Capsule can avoid obstacles in this state, it will be able to avoid them more smoothly by checking the Carve checkbox of the NavMeshObstacle component.
Conclusion
As described above, NavMesh enables us to easily create 3D models with motion.
In addition, although there was only one destination in this scene, it is possible to create unpredictable movements by setting multiple destinations to patrol a certain area or by randomizing the destinations.
Please try using NavMesh to expand the range of your expression.
How to upload to STYLY
Let’s upload your completed scene to STYLY.
How to create a STYLY account

How to upload 3D model to STYLY

How to upload from Unity to STYLY

Introduction to NEWVIEW SCHOOL ONLINE
NEWVIEW SCHOOL ONLINE is now open! Learn the basics of Unity and PlayMaker, necessary for creating VR/AR content, and learn the process (and creation techniques) for developing attractive content available on STYLY.
- Create VR/AR content without writing any programming code.
- Professionally supervised Unity courses available.
- Explore additional elements, such as photogrammetric production methods and content lightening.
- Learn the concept of creating VR/AR content.
