Have you ever experienced slow scene loading and behavior in Unity when you put a lot of objects in a scene or use your own objects?
I want to use Unity to handle heavy CG data and photogrammetric data! Let’s take a look at Mesh Optimizer, a useful Unity asset for such situations.
What is Mesh Optimizer?
Mesh Optimizer is a free Unity asset that reduces the weight of meshes in 3D models.
It is a useful tool for reducing the number of polygons in Unity while keeping the objects visible in the scene.
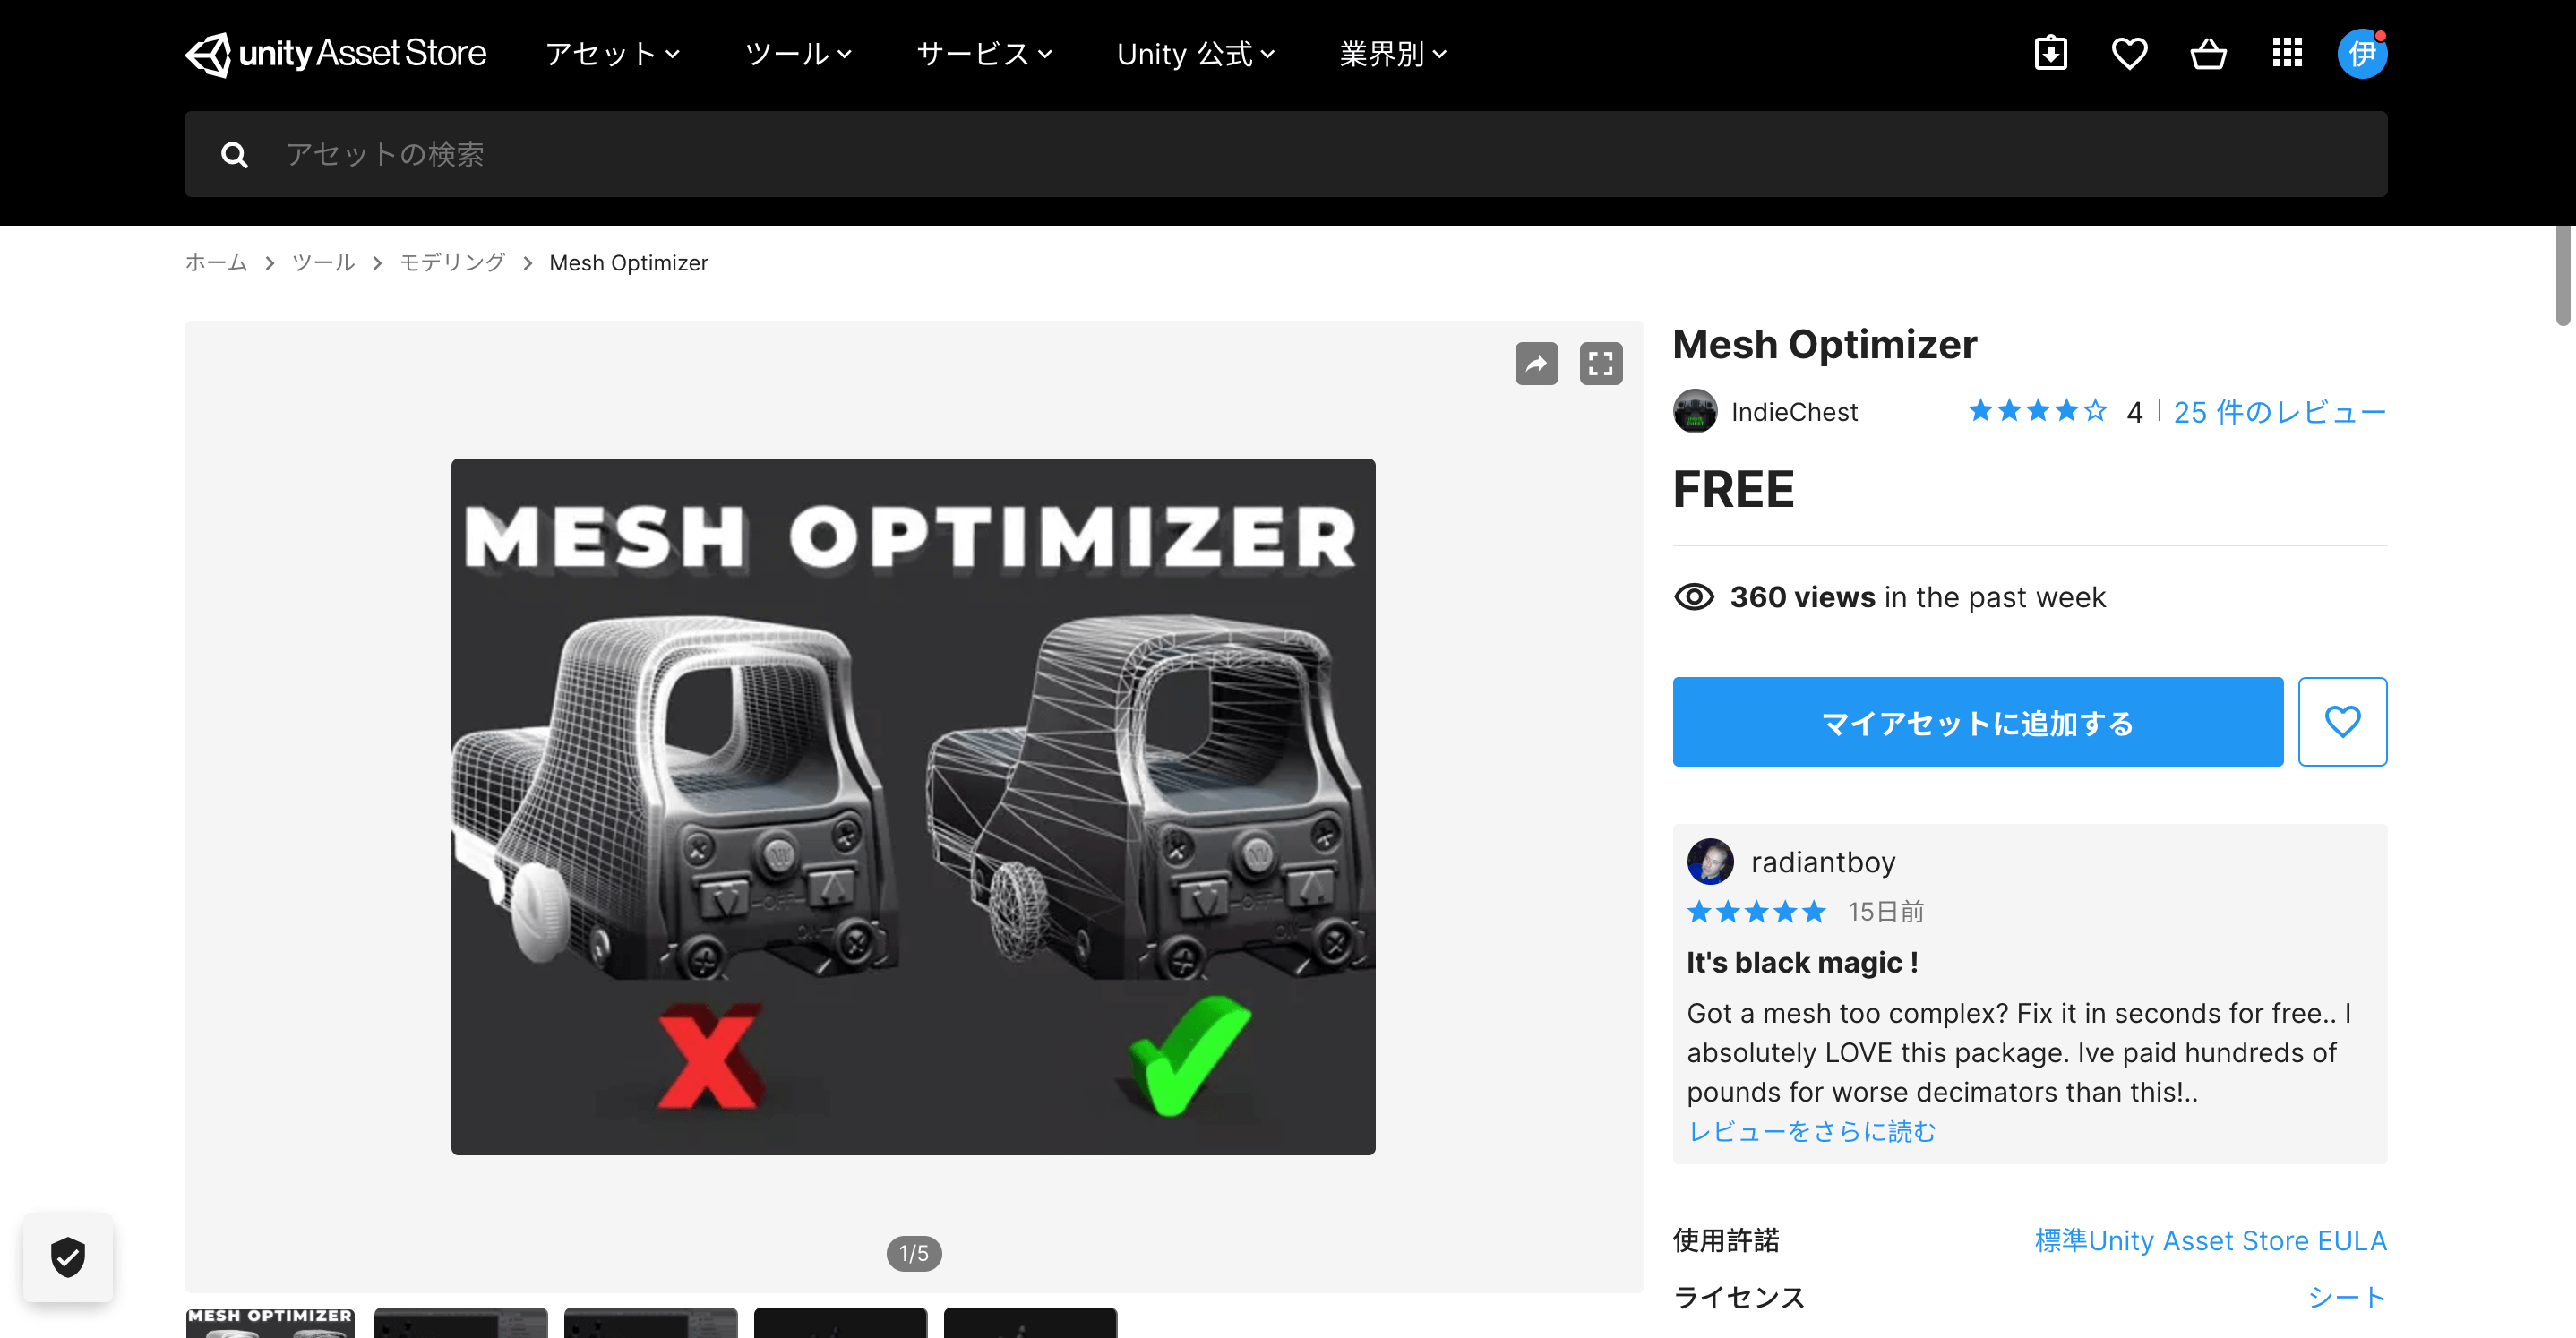
Mesh Optimizer at the Asset Store
Take a look at the following image.
On the left is the original data with a large number of polygons, and on the right is the data with a reduced number of polygons.
You can see that the number of triangles representing the mesh has been greatly reduced.
This is a great way to reduce the weight of Unity games and art.

Polygon count before and after using Mesh Optimizer
Let’s take a look at how easy it is to do this in Unity with Mesh Optimizer.
Download the Mesh Optimizer
The Mesh Optimizer is a free asset that can be downloaded from the Unity Asset Store, just like any other Unity asset.
Open the link above and select “Add to My Assets”, then open the Unity project where you want to use the Mesh Optimizer and select “Open in Unity”.
This will open the Package Manager in the Unity project and select “Import” to import the Mesh Optimizer.

The PackageManager for importing Mesh Optimizer is now open.
When the folder “Optimizer” is added to Unity’s Asset, the download is complete.
Let’s lighten the polygon count of the CG data.
In this article, I will try to lighten the weight of this model.
The data seems to have been generated by photogrammetry, and it looks like a heavy CG.

Model to be lightened in polygons
Please refer to this article for how to download the above data from Sketchfab.
![[Unity Asset] How to download 3DCG stably from Sketchfab using Sketchfab for Unity.](https://styly.cc/wp-content/uploads/2021/08/cdb9484b-be9a-4f66-995f-ef2afb6566b9-160x160.png)
In Unity, you can change the drawing method of the model by opening the tab in the upper left corner of the Scene window (shown in the red box below).
By selecting “Wireframe”, you can display the model as polygons.
In this view, you can see that the object is made up of many polygons.
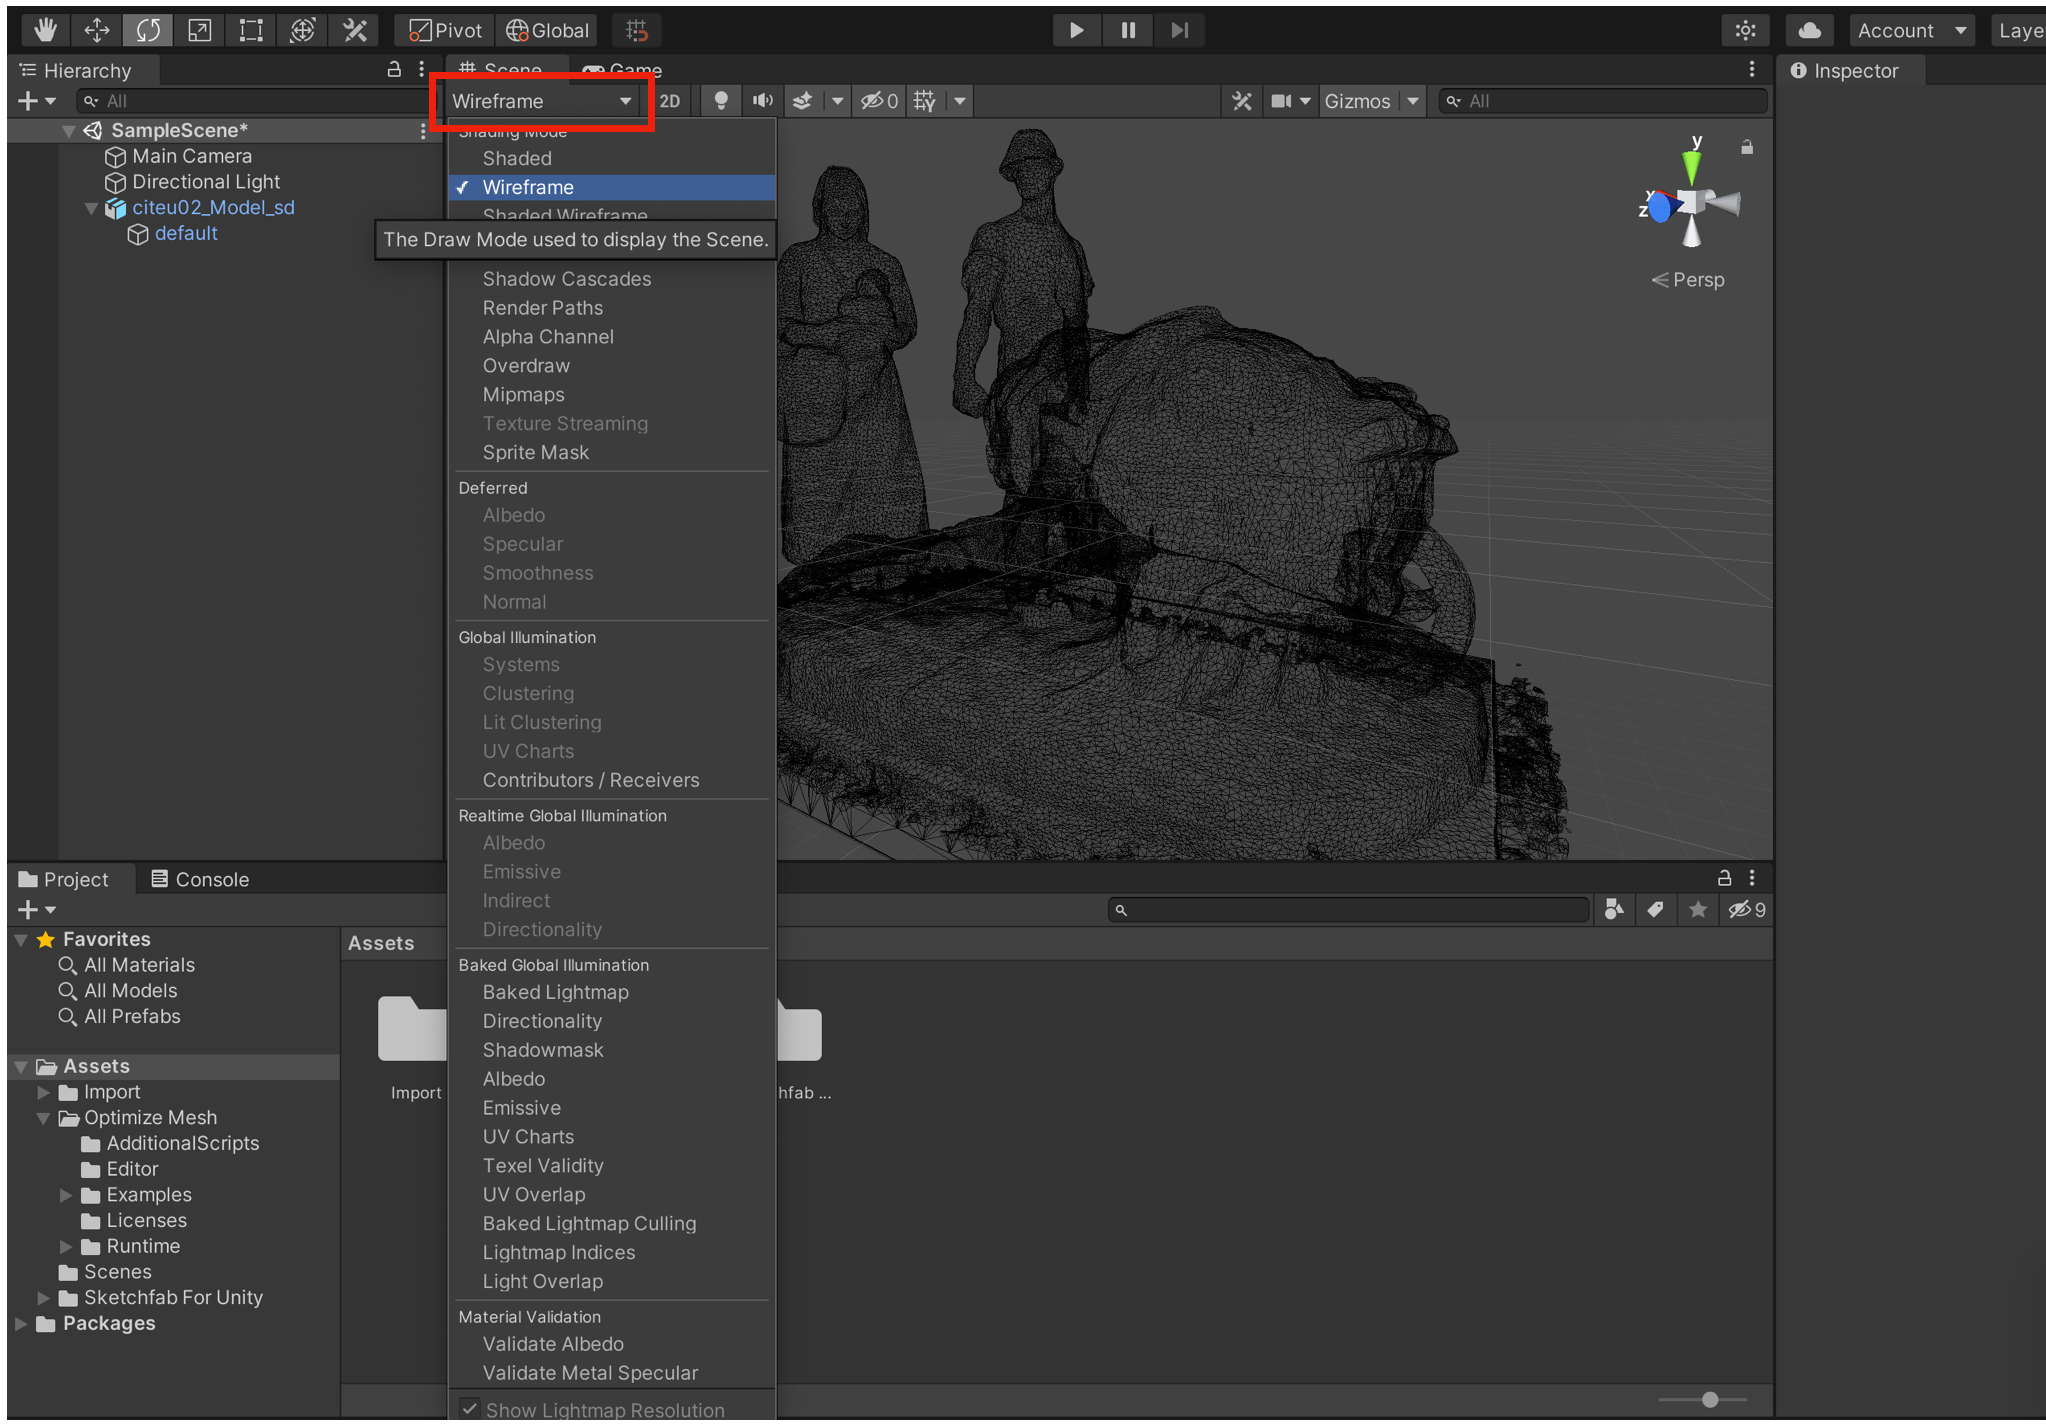
If you set the upper left setting in the scene window to WireFrame, the mesh will be displayed.
The Mesh Optimizer is easy to use. It can be set up by following the steps below.
- First, move the object into the hierarchy and display it in the scene view.
- Next, display the Inspector window as shown in the following image.
- Find the object with the MeshRenderer component.
- Attach the “OptimizeMesh” script to that object, which can be found by opening Asset>Optimize Mesh>AdditionalScripts.
- Then, “Optimize Mesh” will appear on the object as shown in the image below.
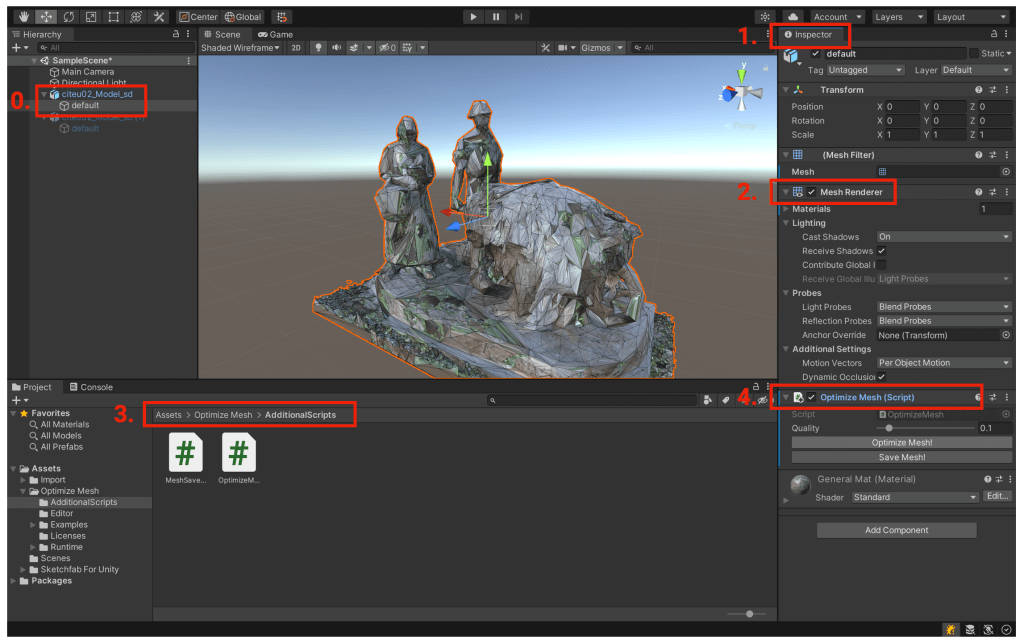
Please check the order of the numbers.
Once this is done, the Mesh Optimizer setup is complete.
The Mesh Optimizer consists of simple buttons as shown below.

An Optimize Mesh component is added
By changing the “Quality” value, you can reduce the polygon count of the object.
Below is an image with the Quality set to 0.1 and “Optimize Mesh!”
The image on the right is the original image, and the image on the left is the mesh that has been lightened.
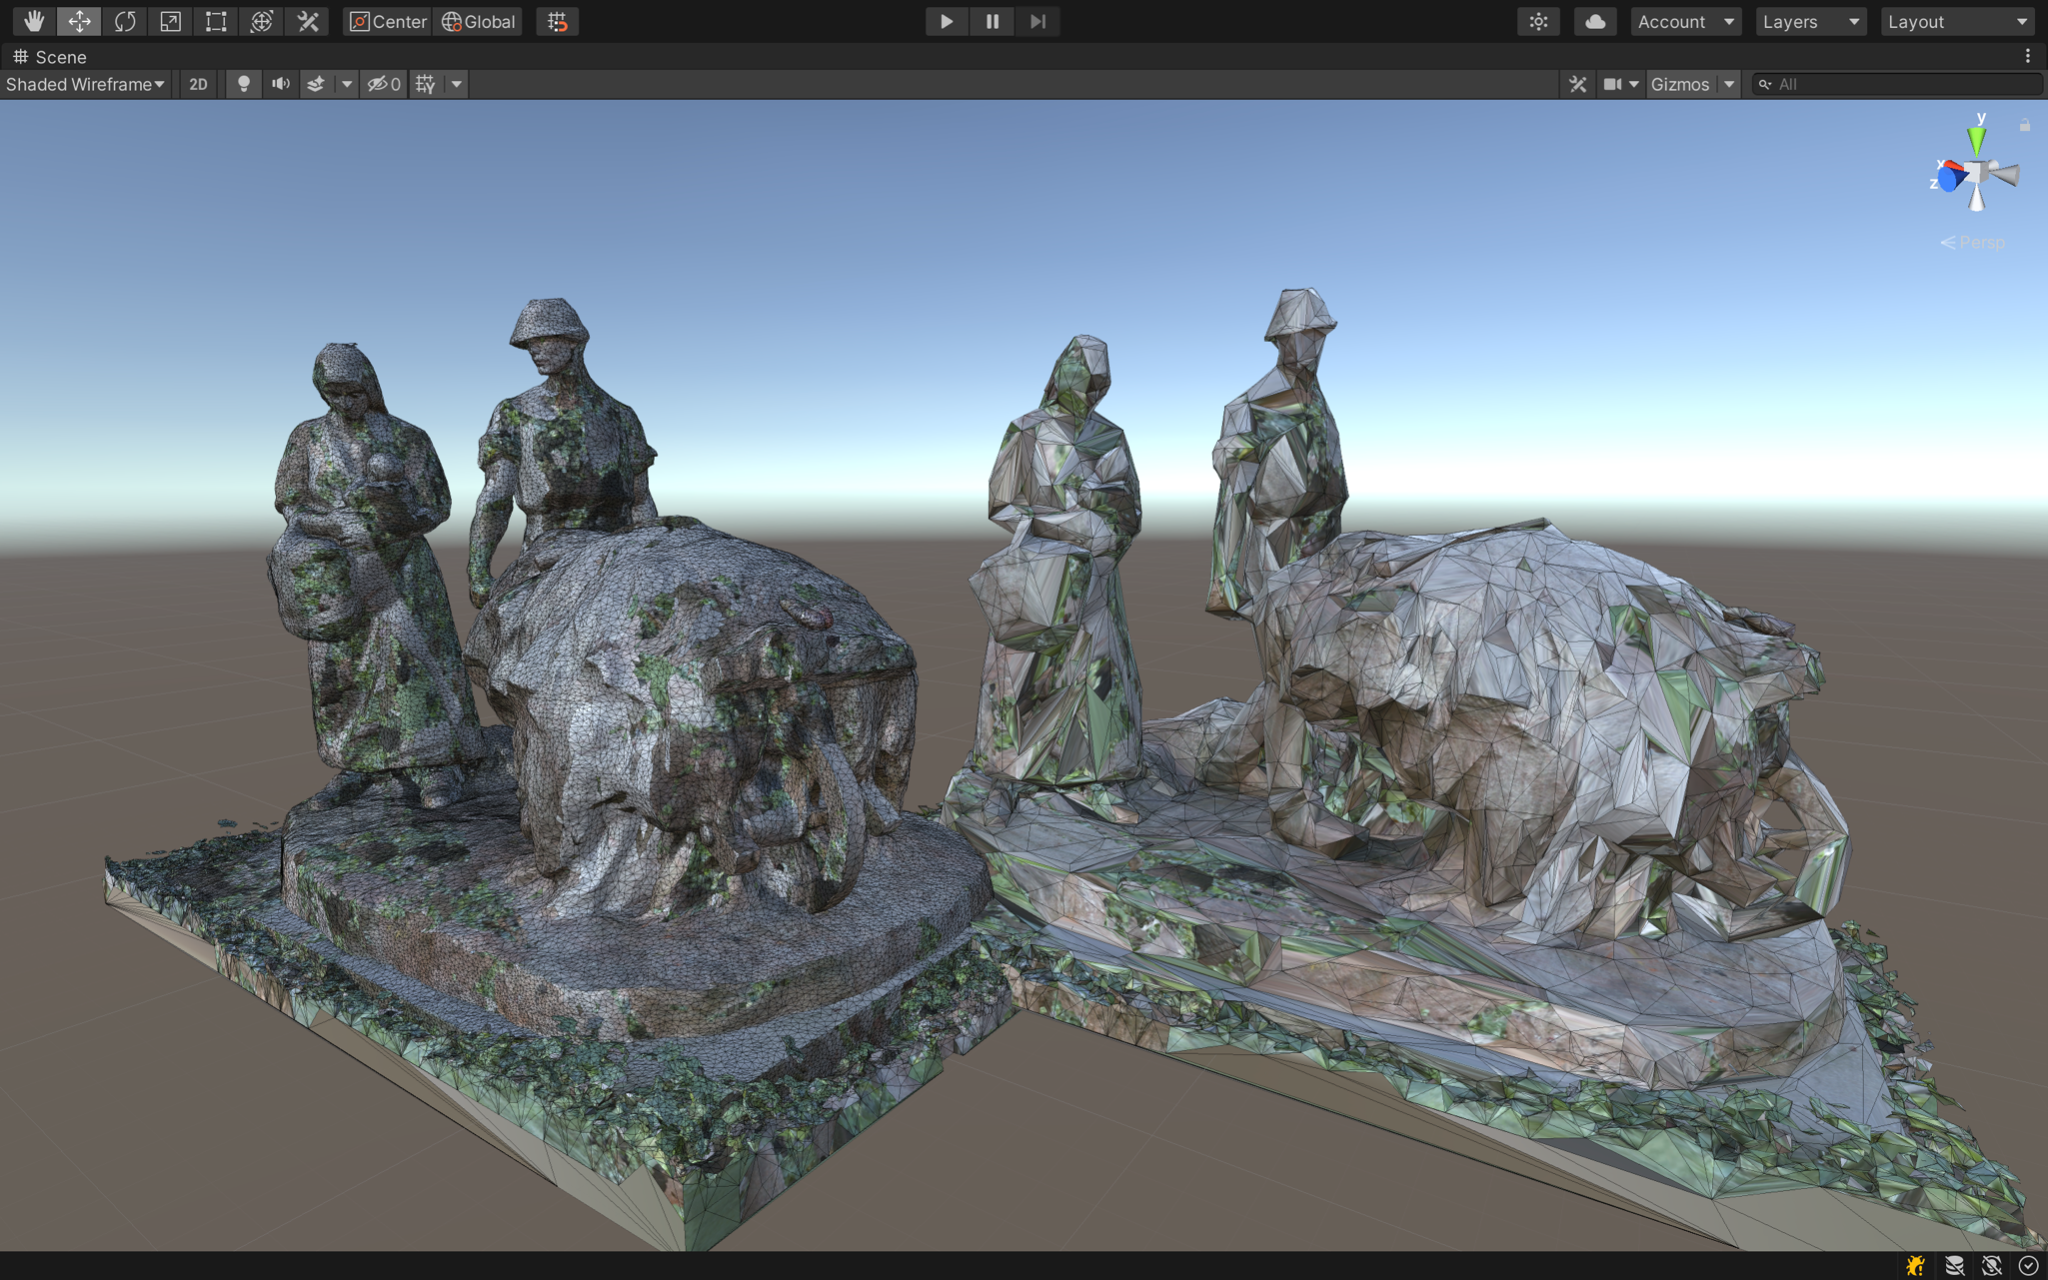
The original model on the left and the lightened model on the right.
In the Wireframe view, you can see that the number of polygons has been greatly reduced.
Polygon count before and after using Mesh Optimizer
Specifically, the number of vertexes was reduced from 168418 to 33047. The file size was reduced from 83 Mbytes to about 1 Mbyte.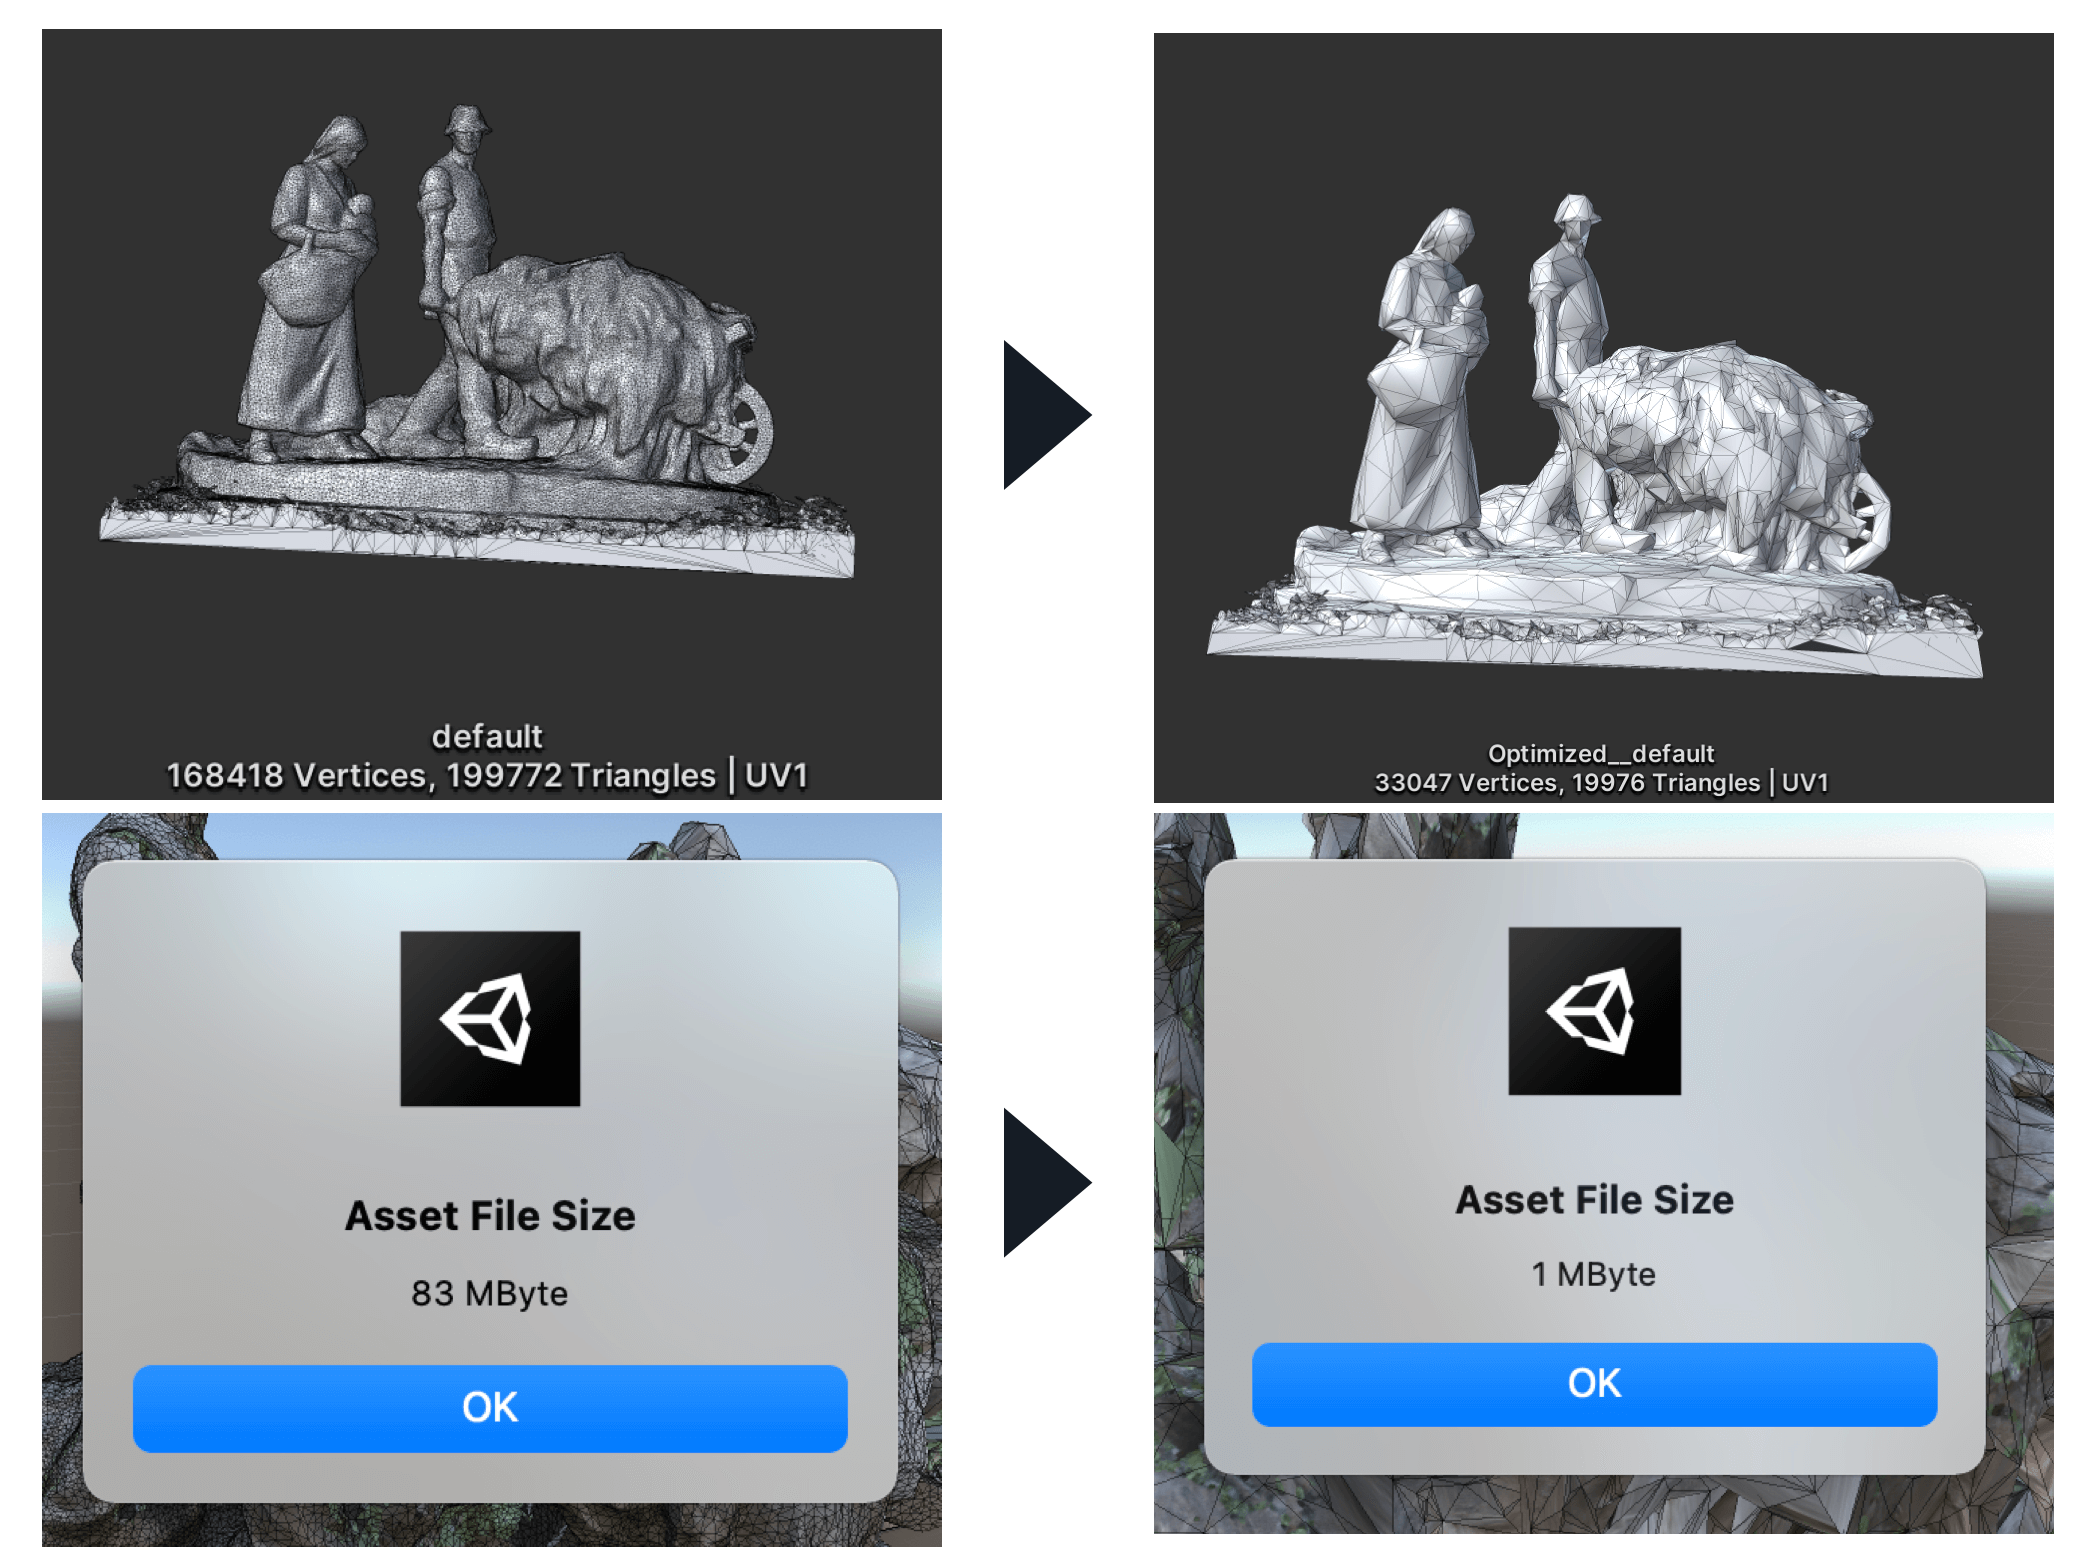
In this case, the value was greatly reduced to “0.1”, so the appearance is a little rough.
Please adjust the value according to the object you are using to find the right balance between appearance and lightness of the object.
It is easy to lower the value gradually to 0.9, 0.8, 0.7, and so on, until the change in appearance is not noticeable.
Let’s save the lightened object.
Mesh Optimizer also allows you to easily save the data after reducing the polygon count.
When you have completed the reduction as shown above, simply select the “Save Mesh!” button to save the reduced object.
Select “Save Mesh!
After selecting the “Save Mesh!” button, you will be prompted to choose a name and a location to save the file (this time on a Mac).

Destination selection screen
If you want to save the project in Unity, you can select the folder where the project is saved by clicking the vertical 3-point leader button to the right of the project in UnityHub and selecting “Reveal in Finder”.
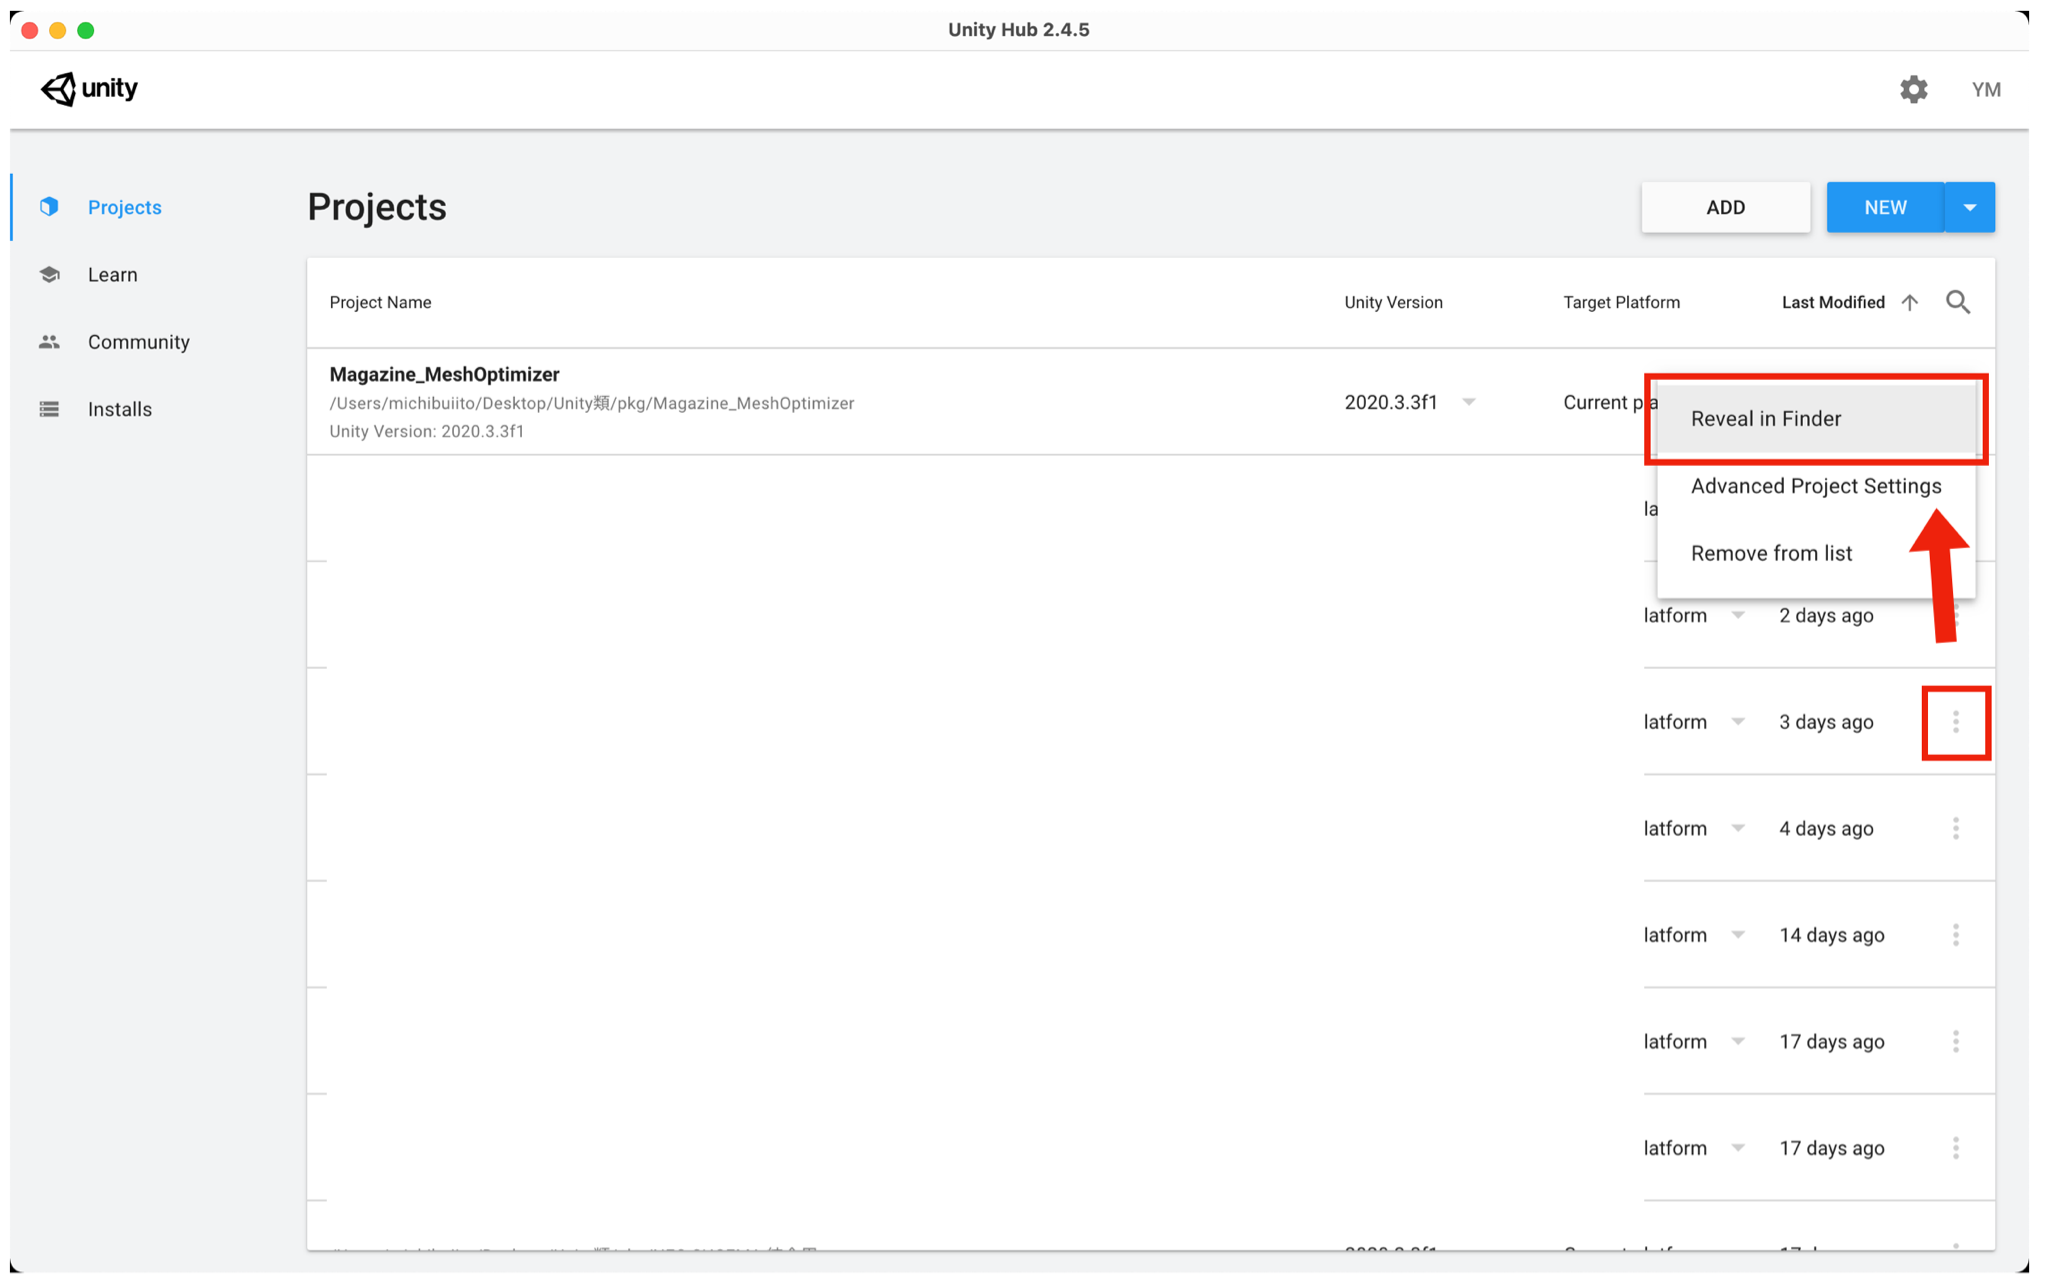
Select “Reveal in Finder”
Open Assets in the Finder and save the data there, as shown in the following image.
The red frame shows the saved lightweight data.
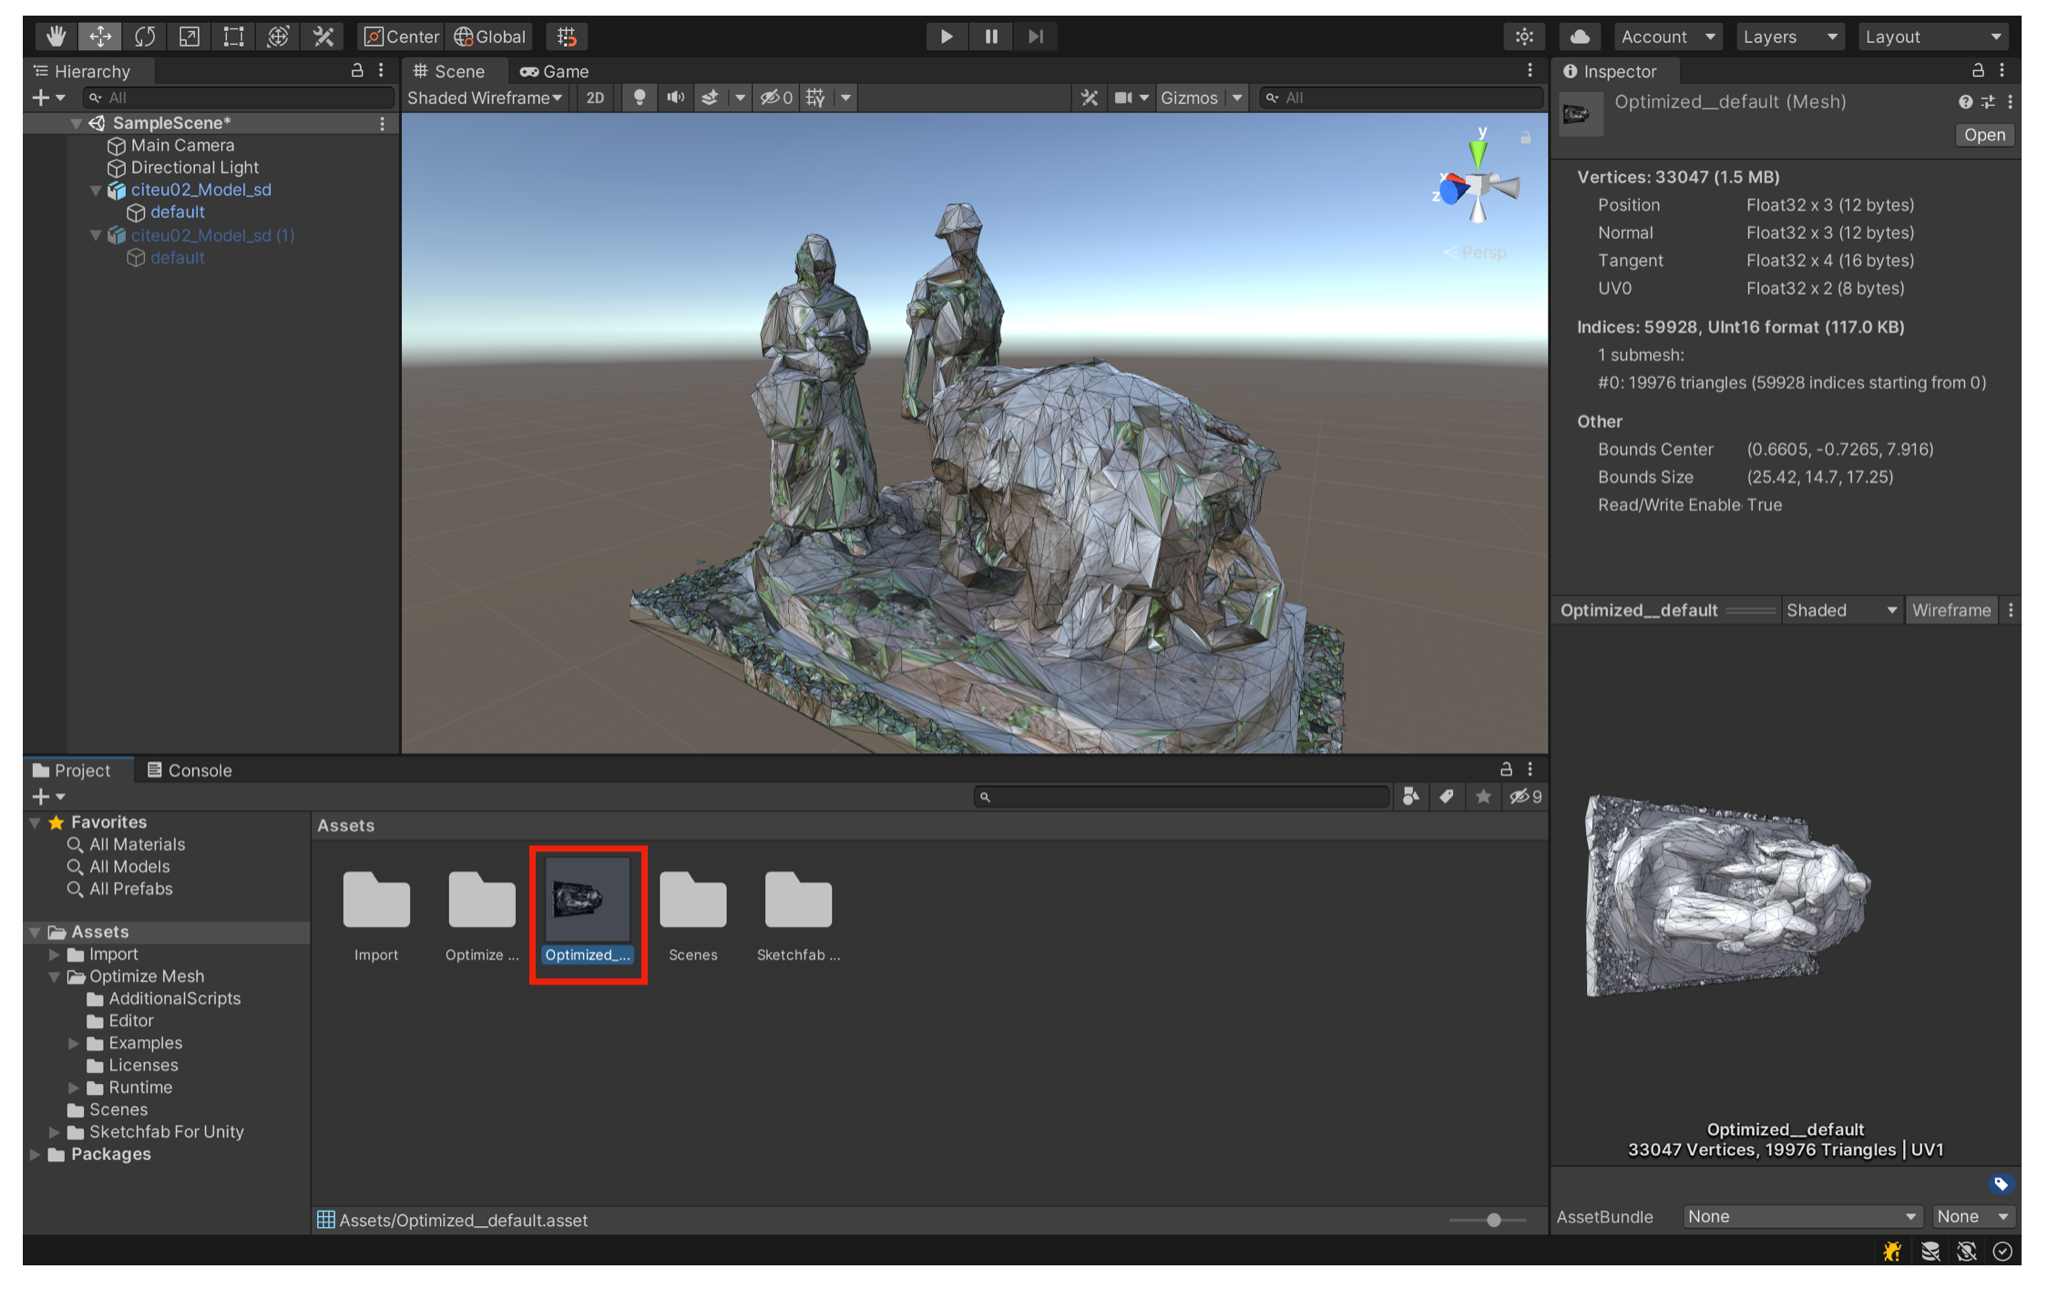
The model is now saved in Assets.
When you want to return to the original mesh
If you want to revert to the original mesh, you can do so in the Inspector of the object you were editing, by selecting the Mesh you were editing from the circular button on the right side of the Mesh Filter.
Select the original Mesh from the Select Mesh window that opens by pressing the circular button on the right side of the image.
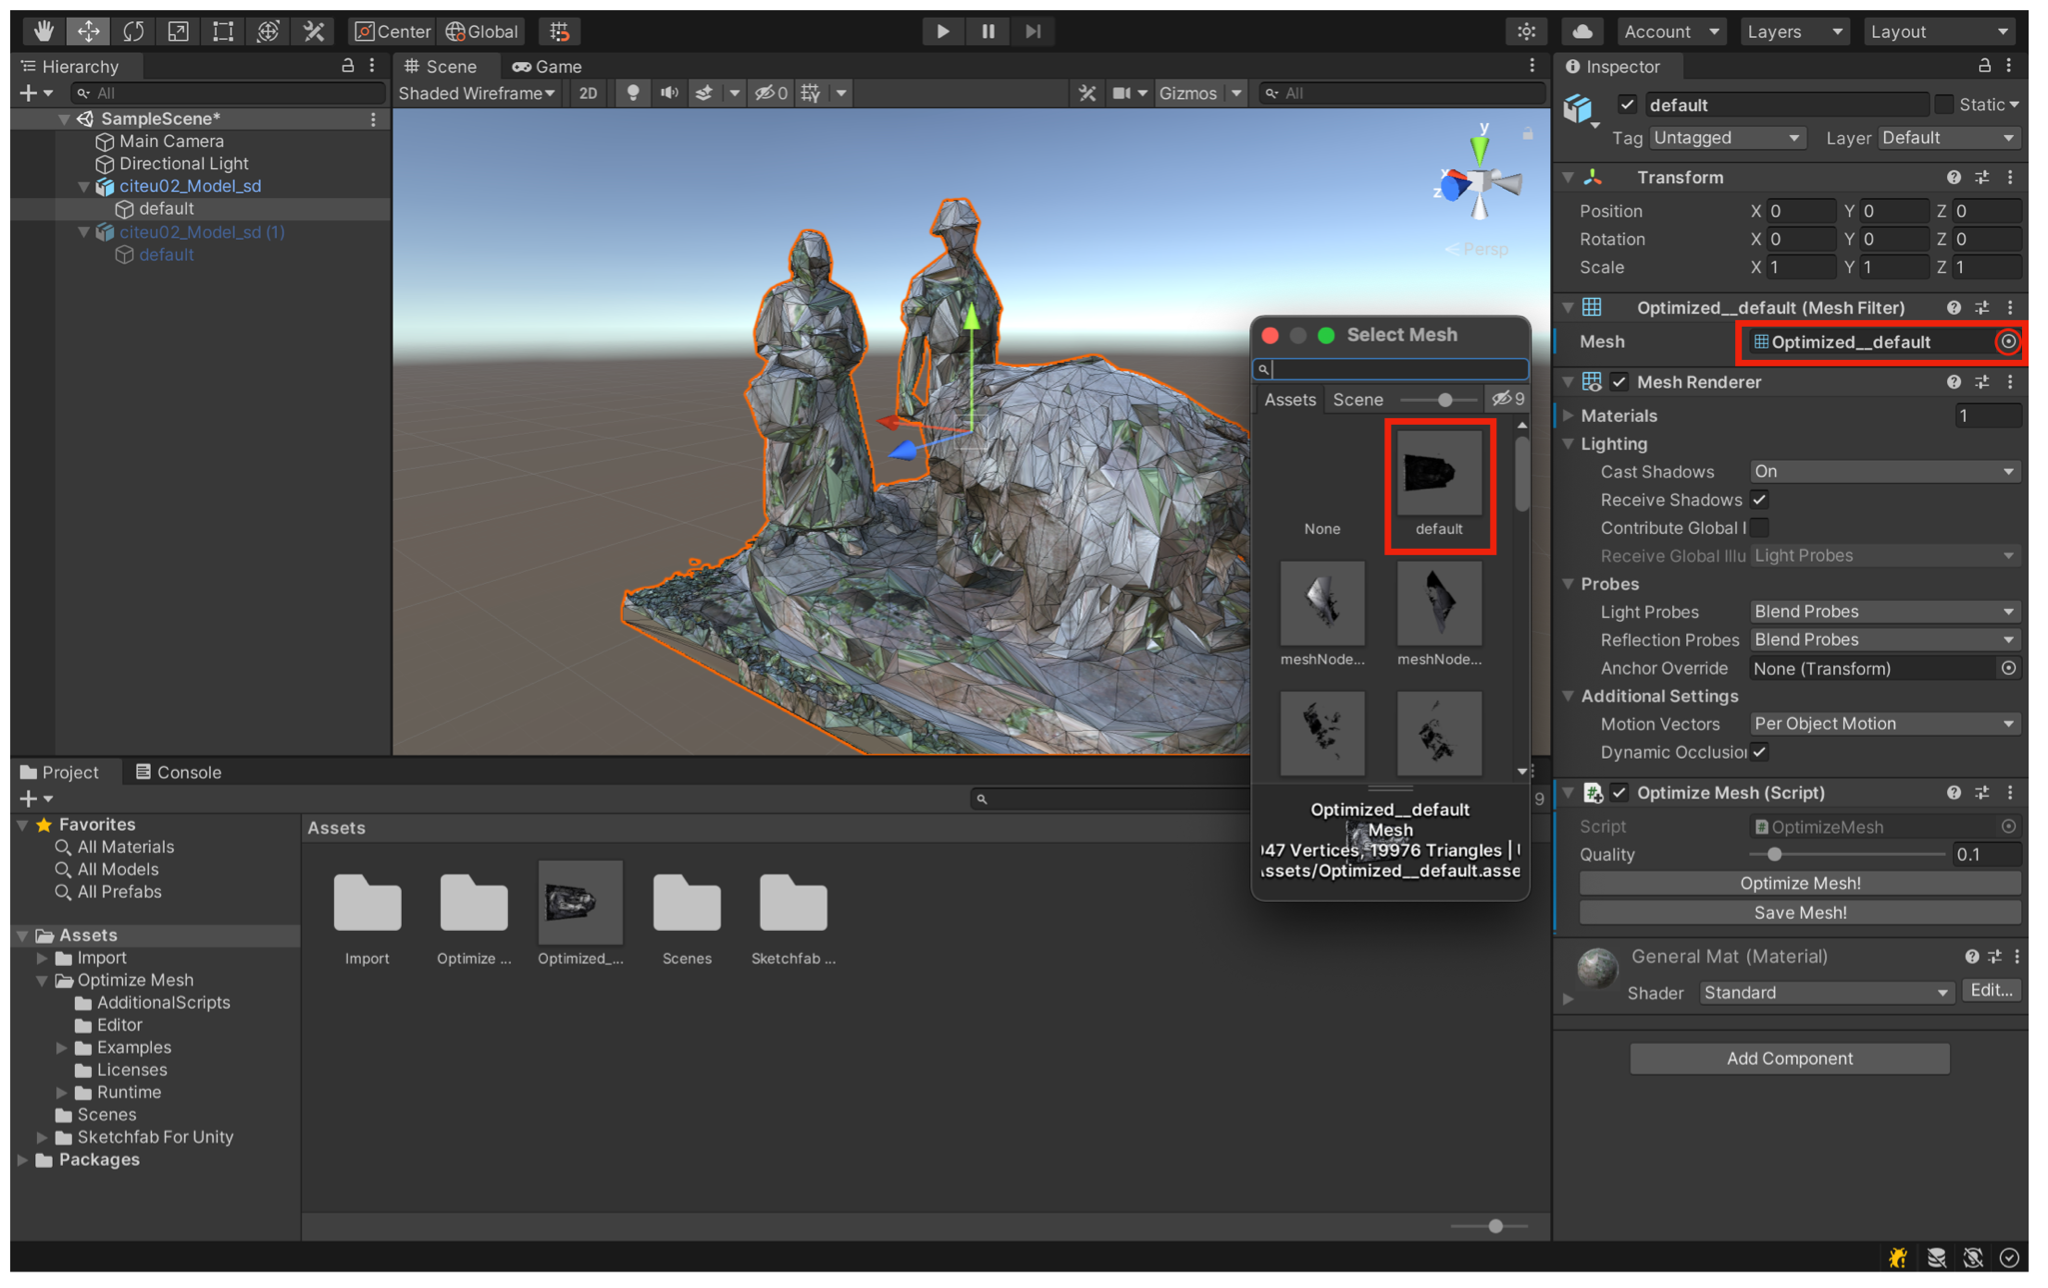
Selecting the original Mesh
Tips
In this article, I introduced the Mesh Optimizer, which allows you to reduce the number of polygons in CG by adjusting simple values.
I would like to share some tips on how to use this asset.
Reduce the weight of backgrounds and other items, not the main characters and items.
It is a good idea to reduce the weight of items that users do not pay much attention to, rather than items that stand out or are related to the production.
Trees and rocks are essential for backgrounds, but they can be data-heavy, so it is recommended to start with such items.
Rounded objects are easier to reduce in weight.
When simulating a sharp or long object to reduce the number of polygons, the sharp points may be rounded or shortened.
This is a good way to reduce the number of meshes for more rounded or straight objects.
It’s easier to adjust if the meshes are combined as much as possible.
If you can join objects in MAYA, Blender, etc., join as many objects as possible.
In the Mesh Optimizer, if an object is made up of several meshes, you will have to add an Optimize Mesh Script to each of them and change the value.
If your object consists of several meshes, you will have to add an Optimize Mesh Script to each of them and change the values. This may not be a problem if your object consists of only a few meshes, but if your object consists of dozens of meshes, it will take a lot of time and effort to adjust them.
Skinned Mesh Renderer is not supported.
Skinned Mesh Renderer, which is used for avatars such as Unity-chan, does not support Mesh Optimizer because the way Mesh is processed is different.
Especially in VR and AR, making the scene lighter and more comfortable for the user will lead to a better experience.
In VR, using heavy scenes is said to be the reason for VR sickness.
Let’s lighten the objects and make xR a crisp and pleasant experience!
How to upload to STYLY
Let’s upload your 3D model to STYLY.
How to create a STYLY account

How to upload 3D models to STYLY

How to upload from Unity to STYLY

You can use STYLY FORUM to solve the problem. STYLY FORUM is a place where people can discuss a service or technical issue on STYLY, or provide bug reports on STYLY.
https://en.forum.styly.cc/support/discussions