In this article, I explain how to use Spline, a free software program, to create 3D graphics easily.
What is Spline?
Spline is a software that allows you to easily create 3D graphics, mainly for the web.
You can download it from the following website
The main feature of Spline is that you can easily create beautiful materials without having to build nodes like in Blender.
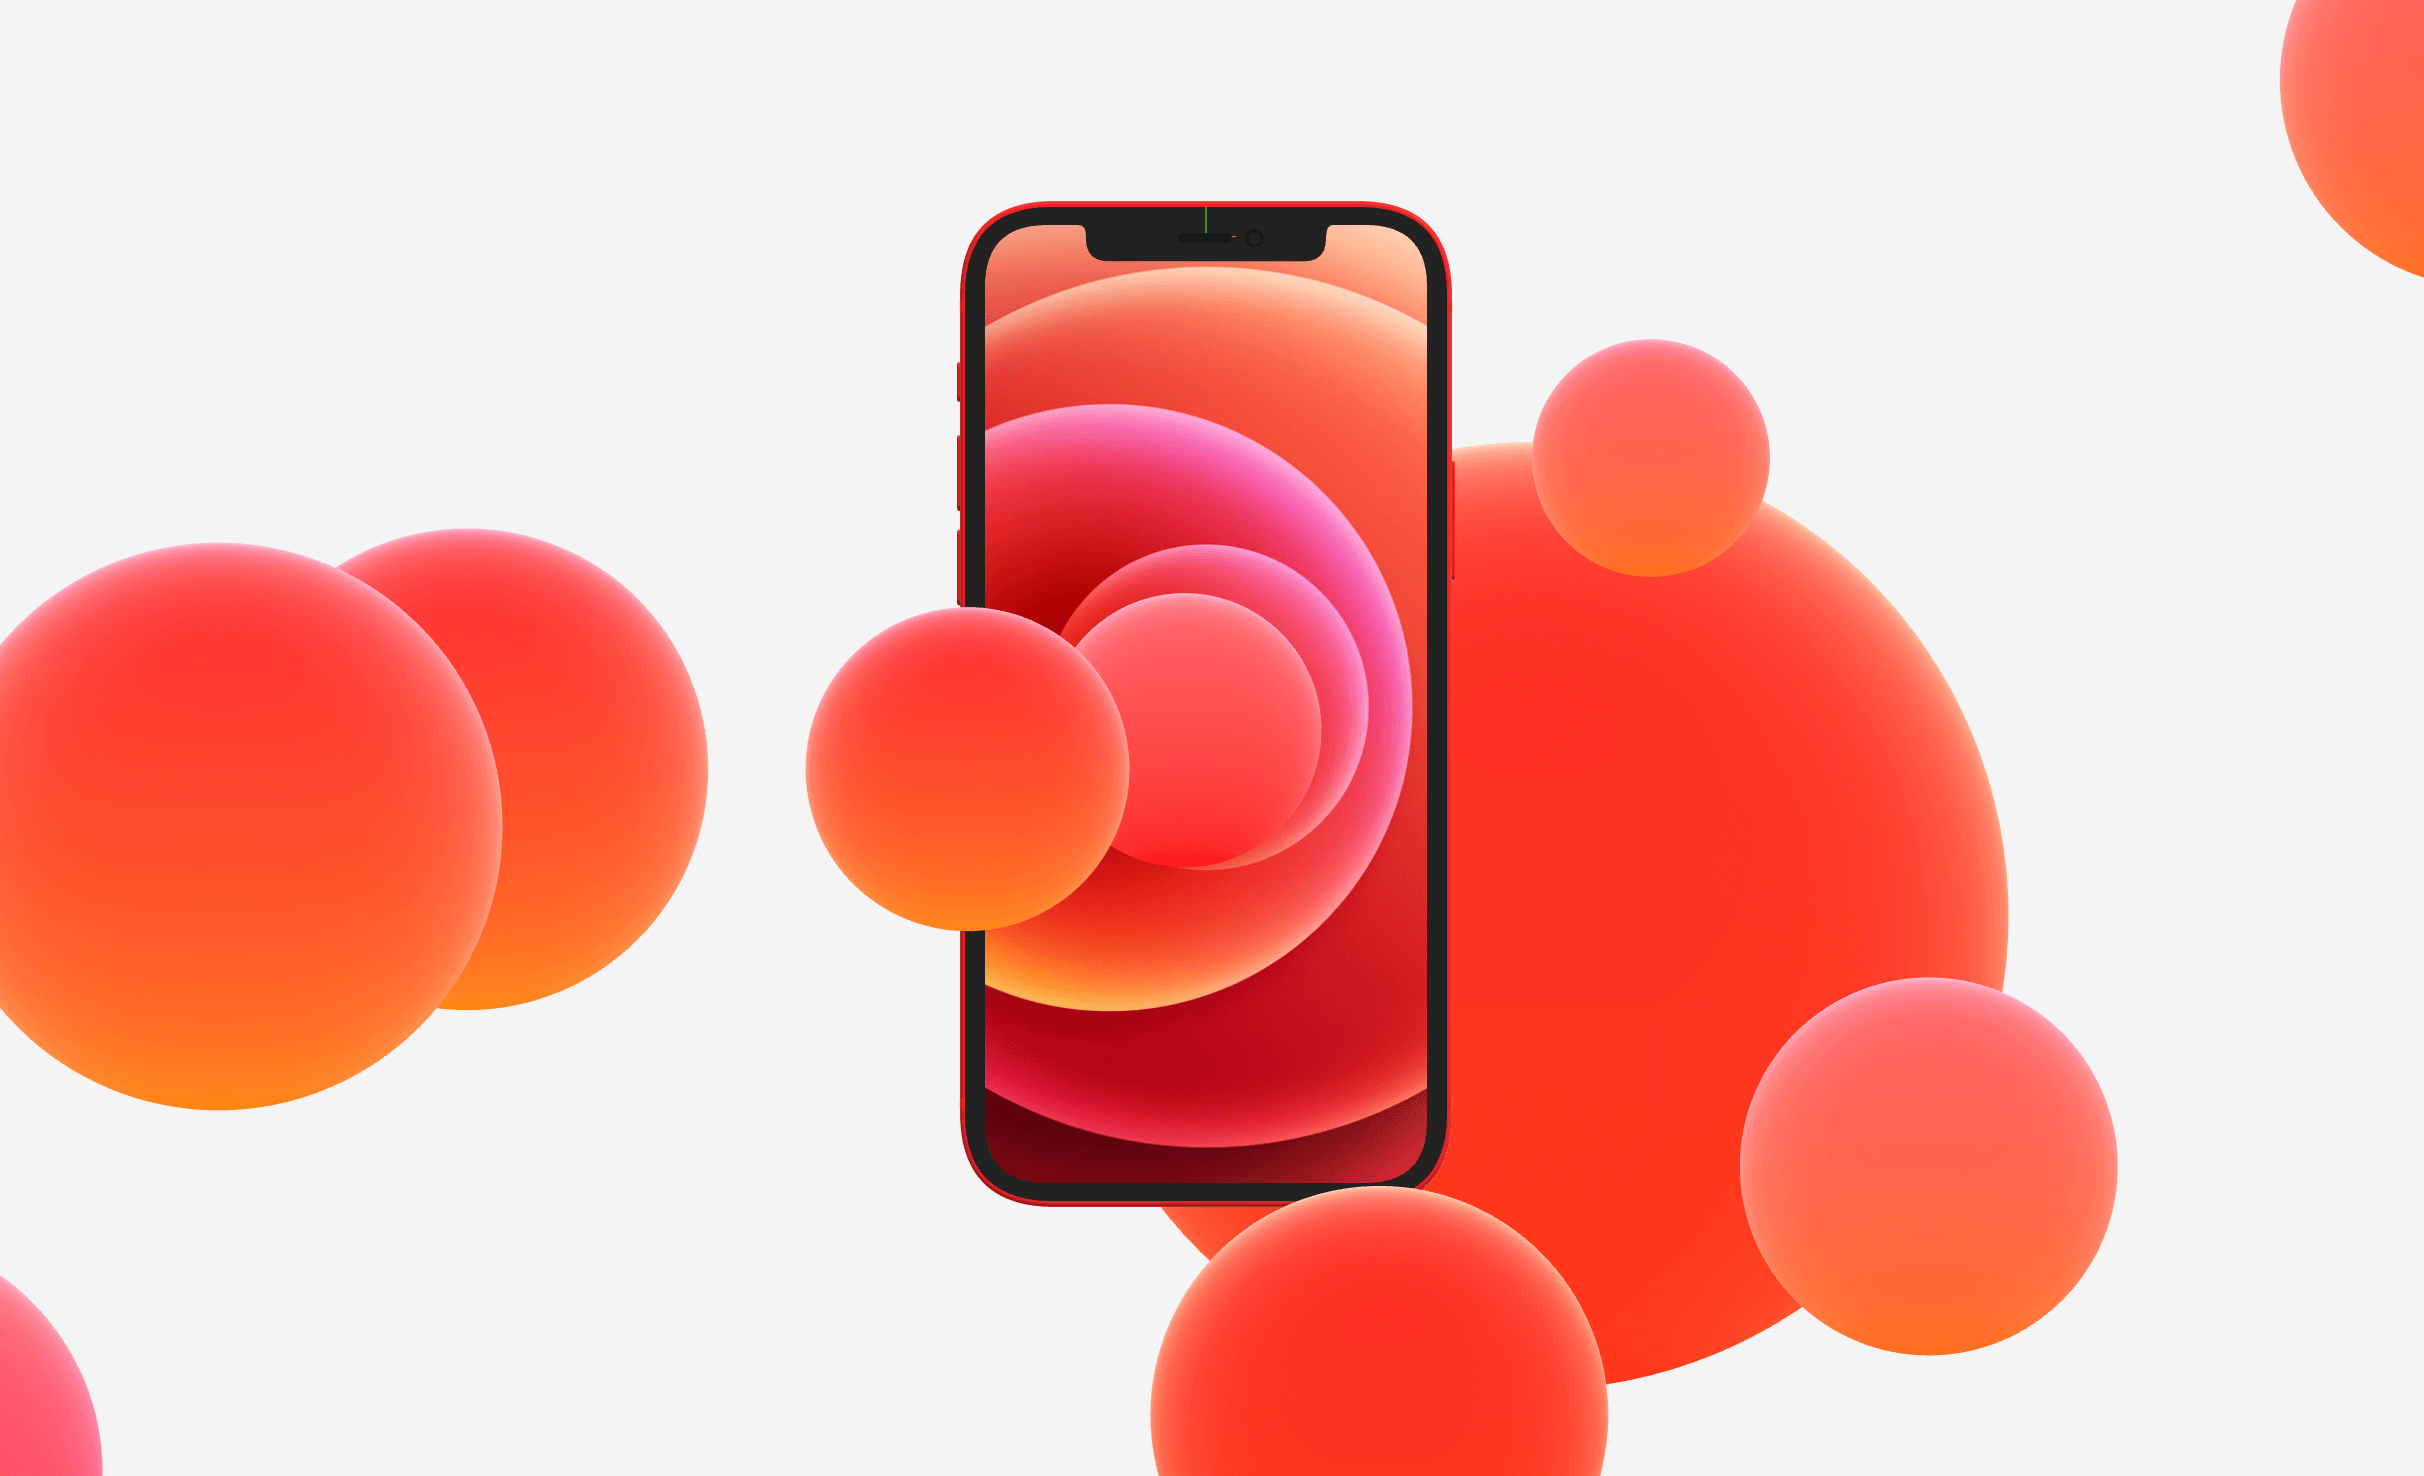
As an example, if you look at Spline’s official Instagram account, you can see many pop 3D graphics.
If you like this kind of atmosphere in your work, why not try Spline?
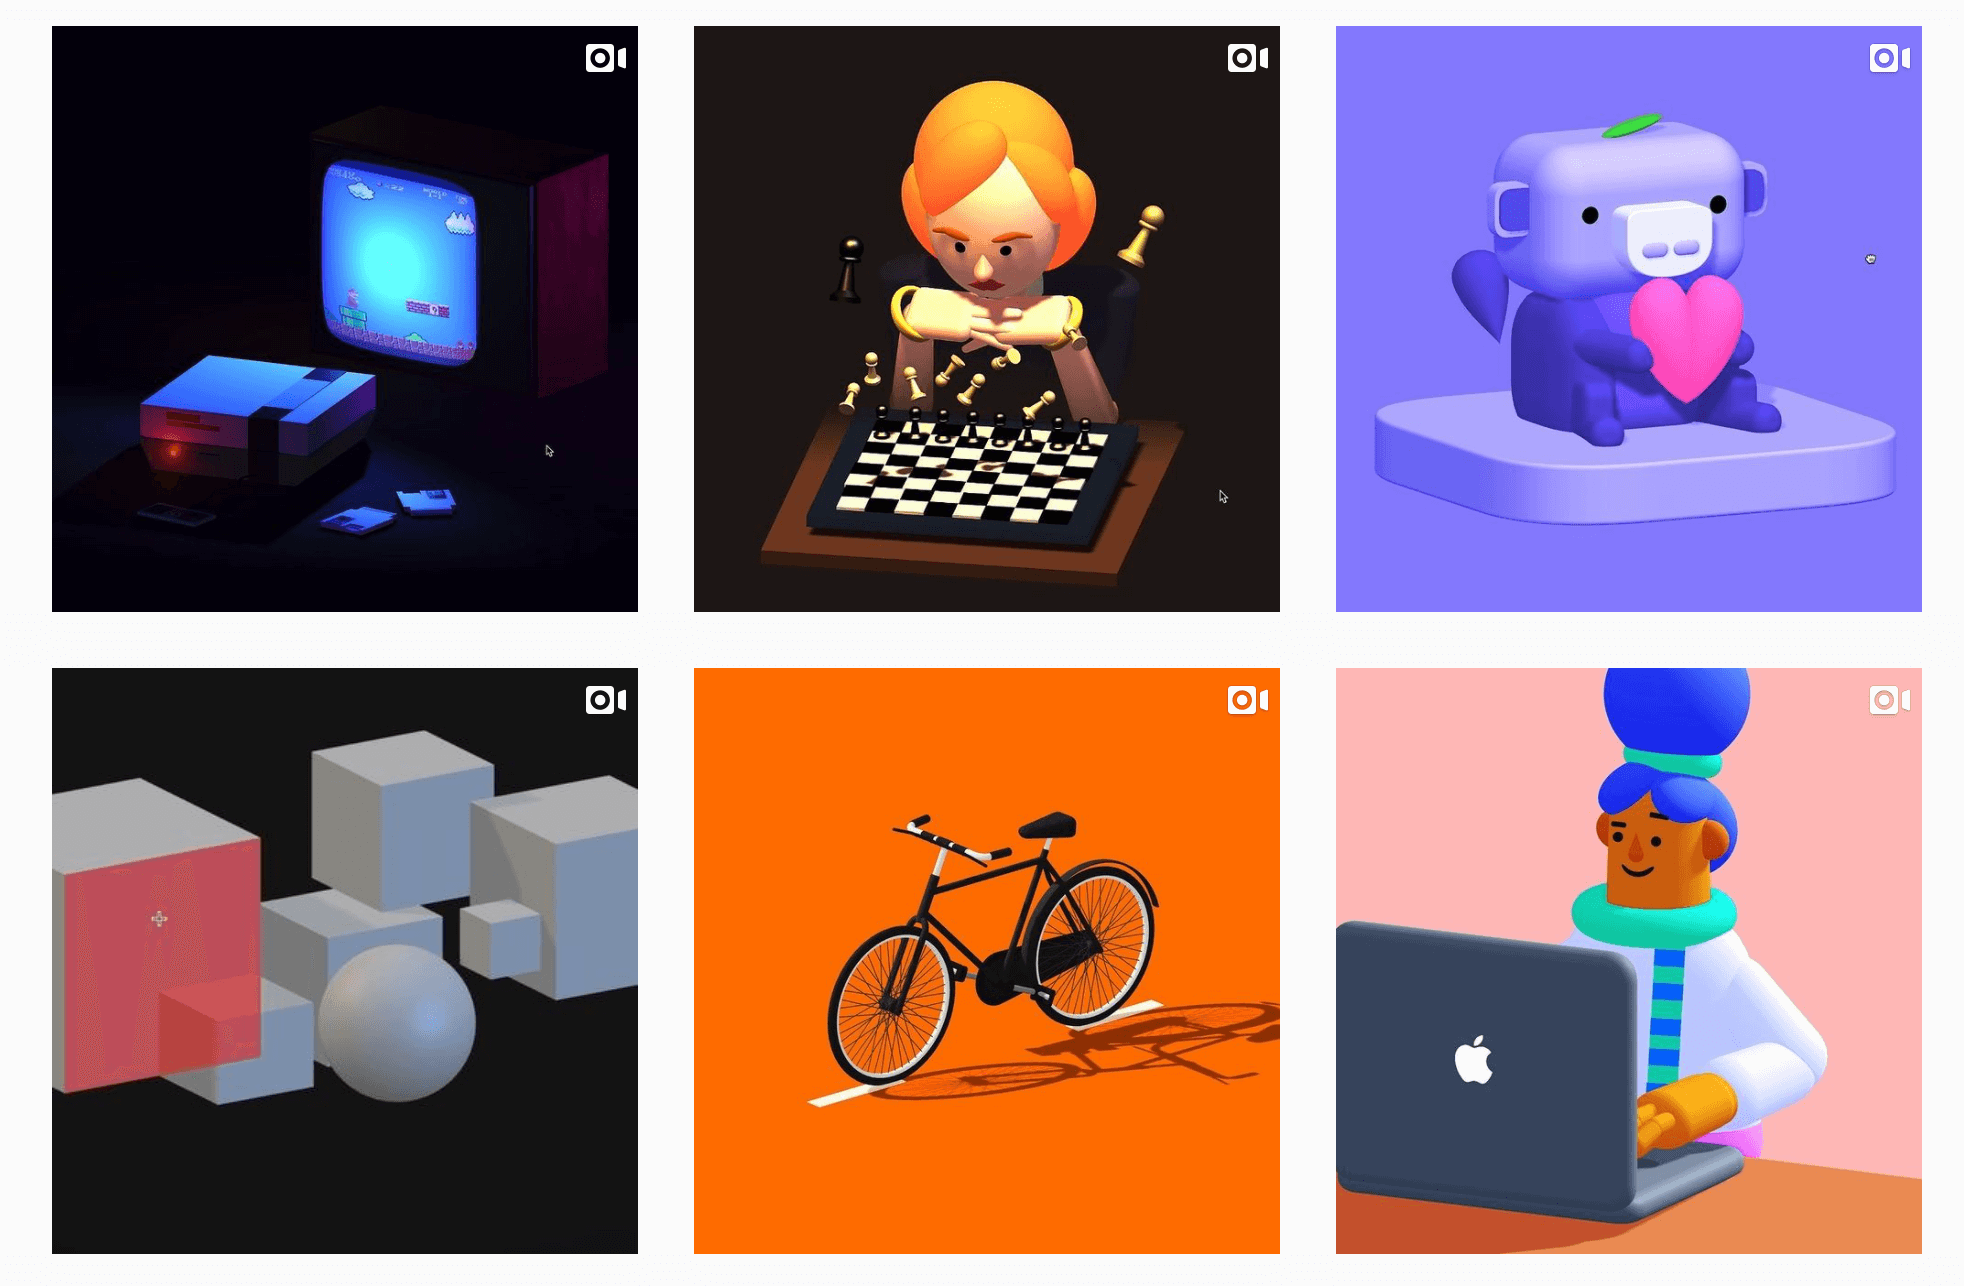
Works on Spline’s official Instagram
It is important to note that Spline is a software for making 3D graphics for the web, so it cannot output 3D objects, but only URLs, images, and videos for public use.
As an example, if you output a model made with Spline in Public URL format, you can create a new web page where you can view the 3D model, or embed the 3D model in an existing web page as shown here. (Drag it to rotate it.)
At the end of this article, I’ve also included how to recreate Spline’s materials in Blender.
Please refer to this article for more information.
Basic Operation
The basic screen structure is as follows.
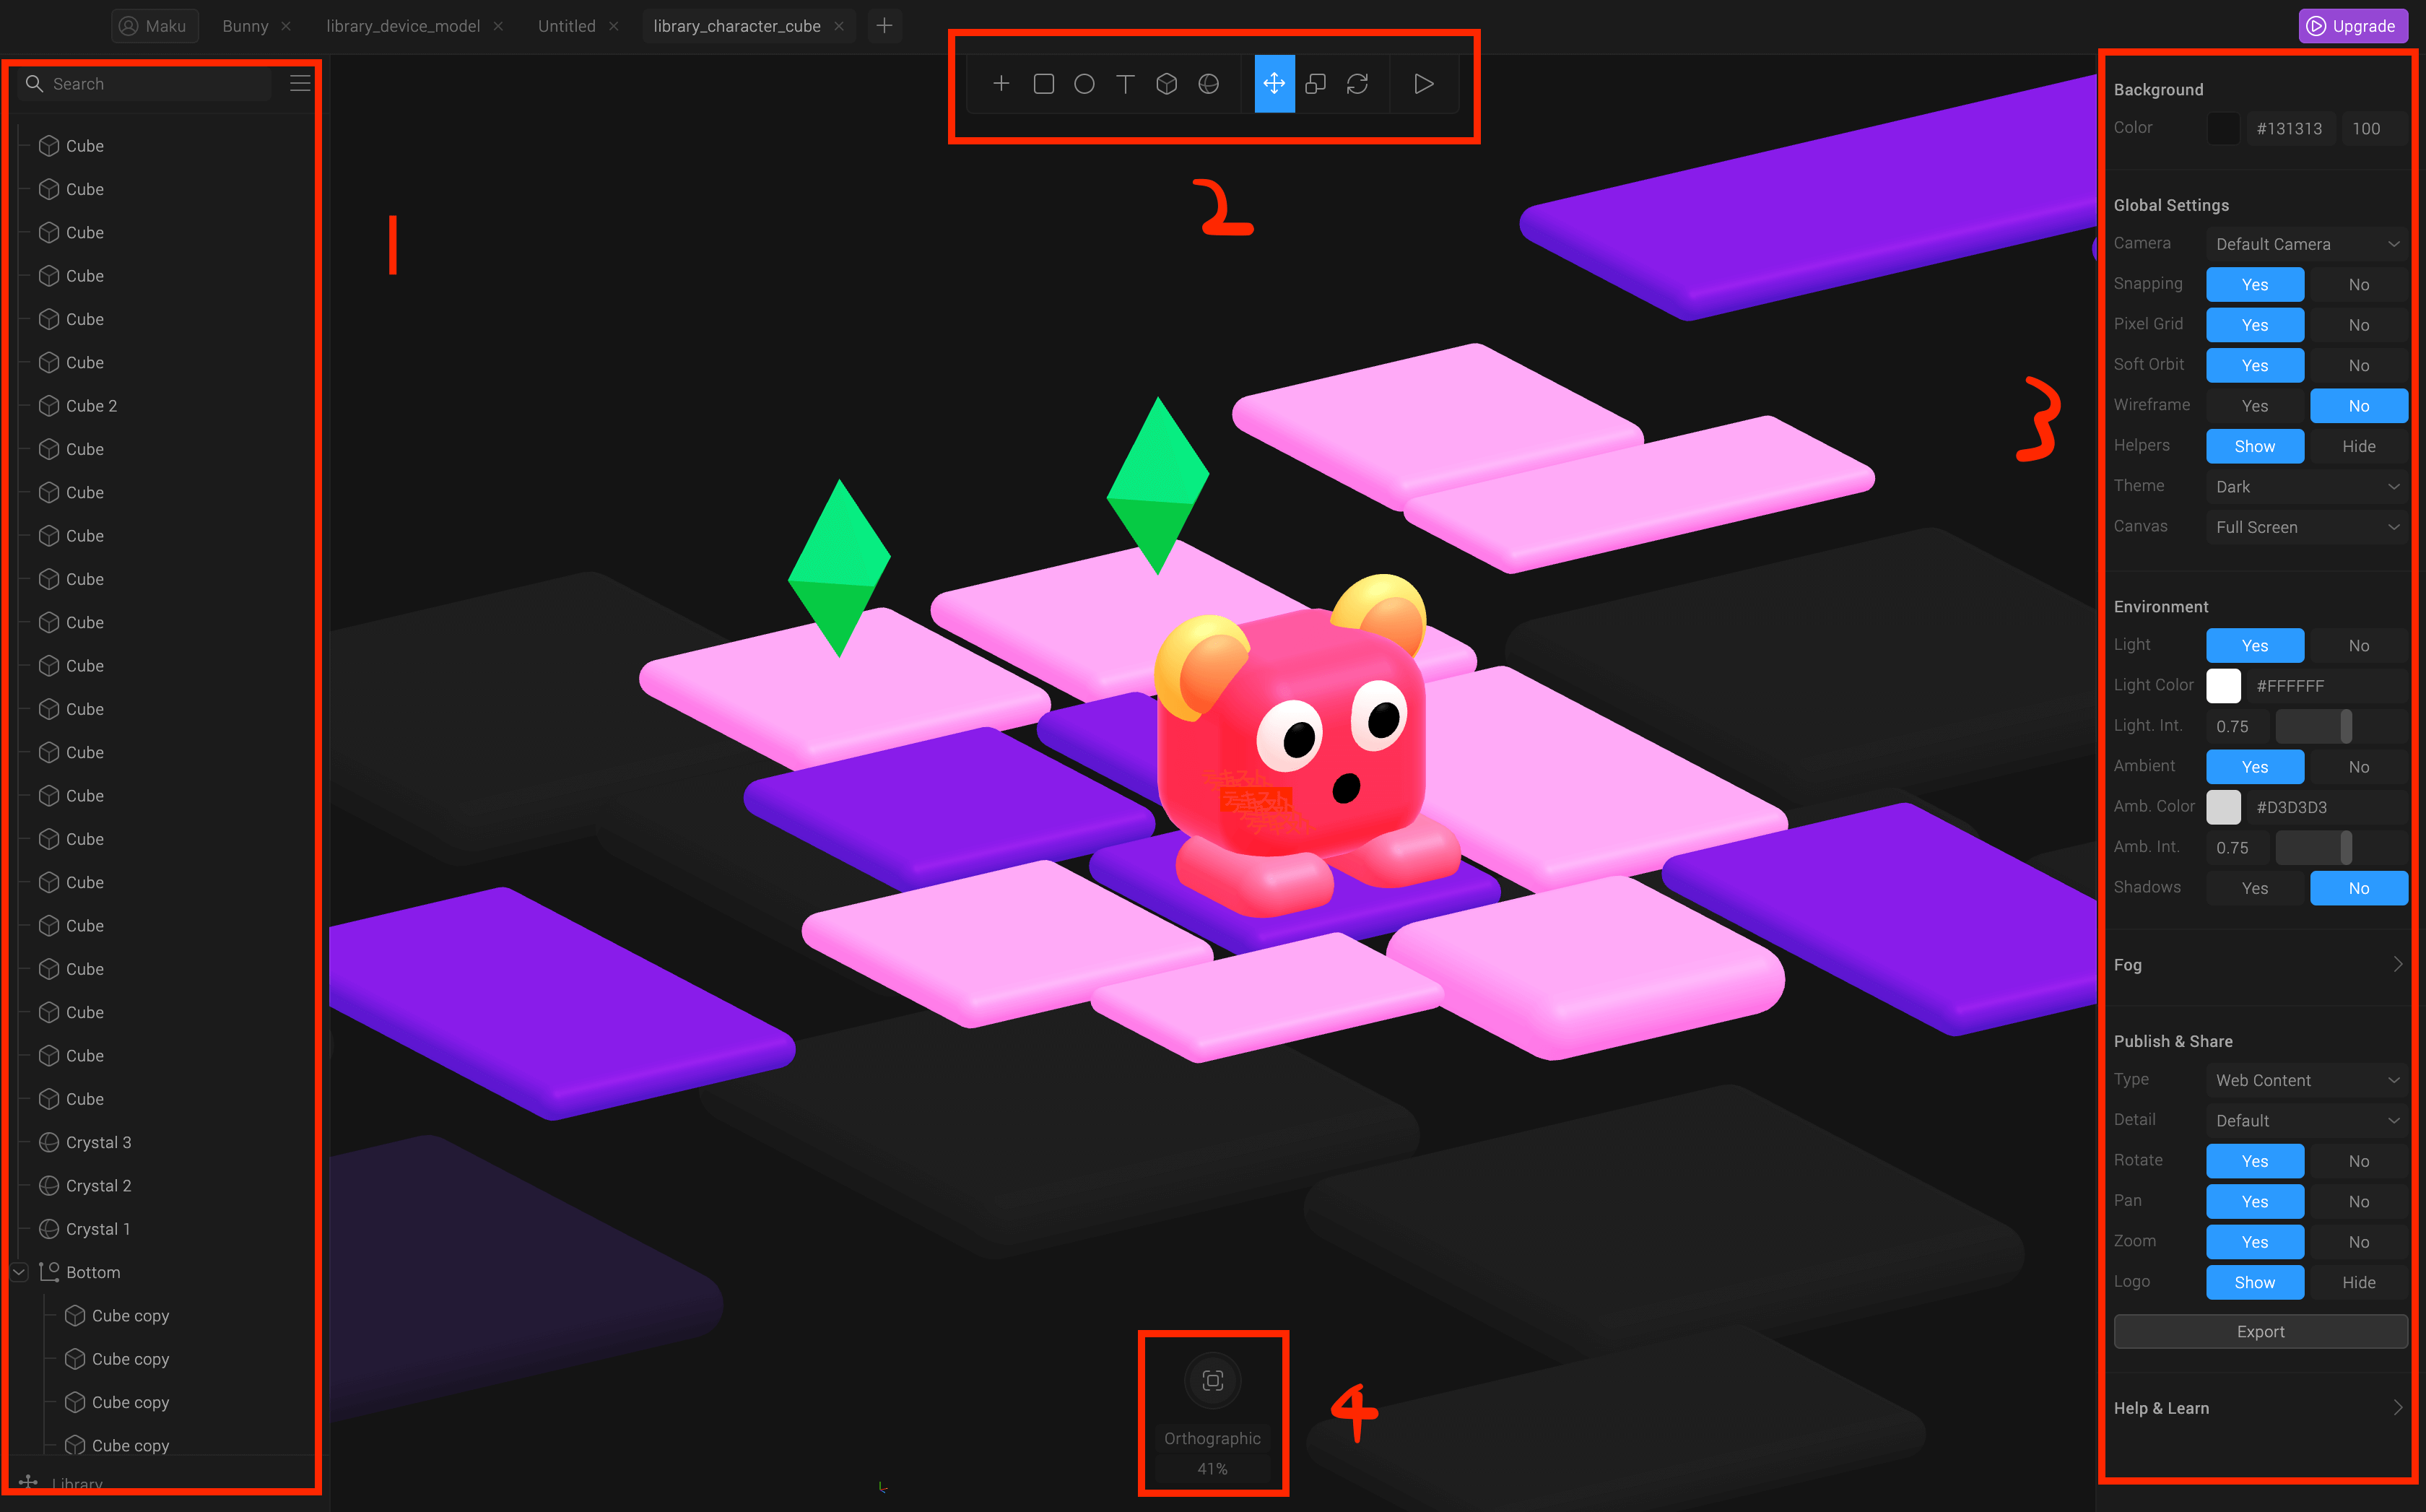
Explanation of Spline’s UI
- A panel to manage the objects placed on the screen.
- Tools panel for placing, moving, rotating, and expanding objects
- A panel to edit the properties of the entire scene and each object
- Panel to control the camera
Screen Operation (Camera Operation)
- [Alt] + drag to rotate the screen (camera).
- Press [Space] + drag to move the camera up, down, left, or right.
- Press the mouse wheel and drag to zoom in/out.
Placing objects
Use the “+” button on the toolbar at the top center of the screen to add a new object.
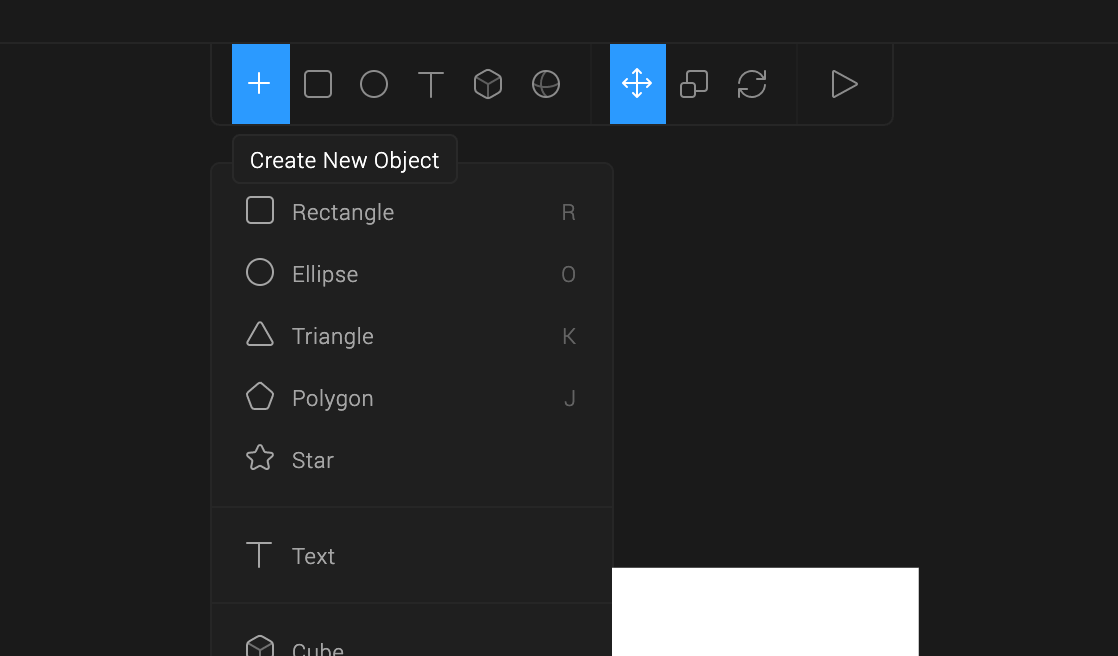
Add an object from the “+” button
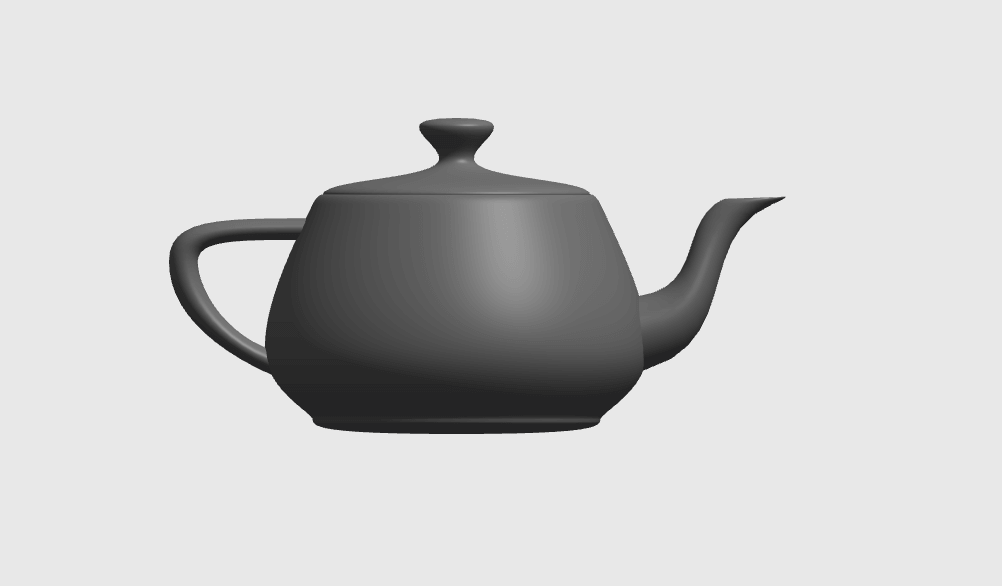
In addition to basic shapes, models such as Bunny and Teapot, which are used as standard 3D software, are also available.
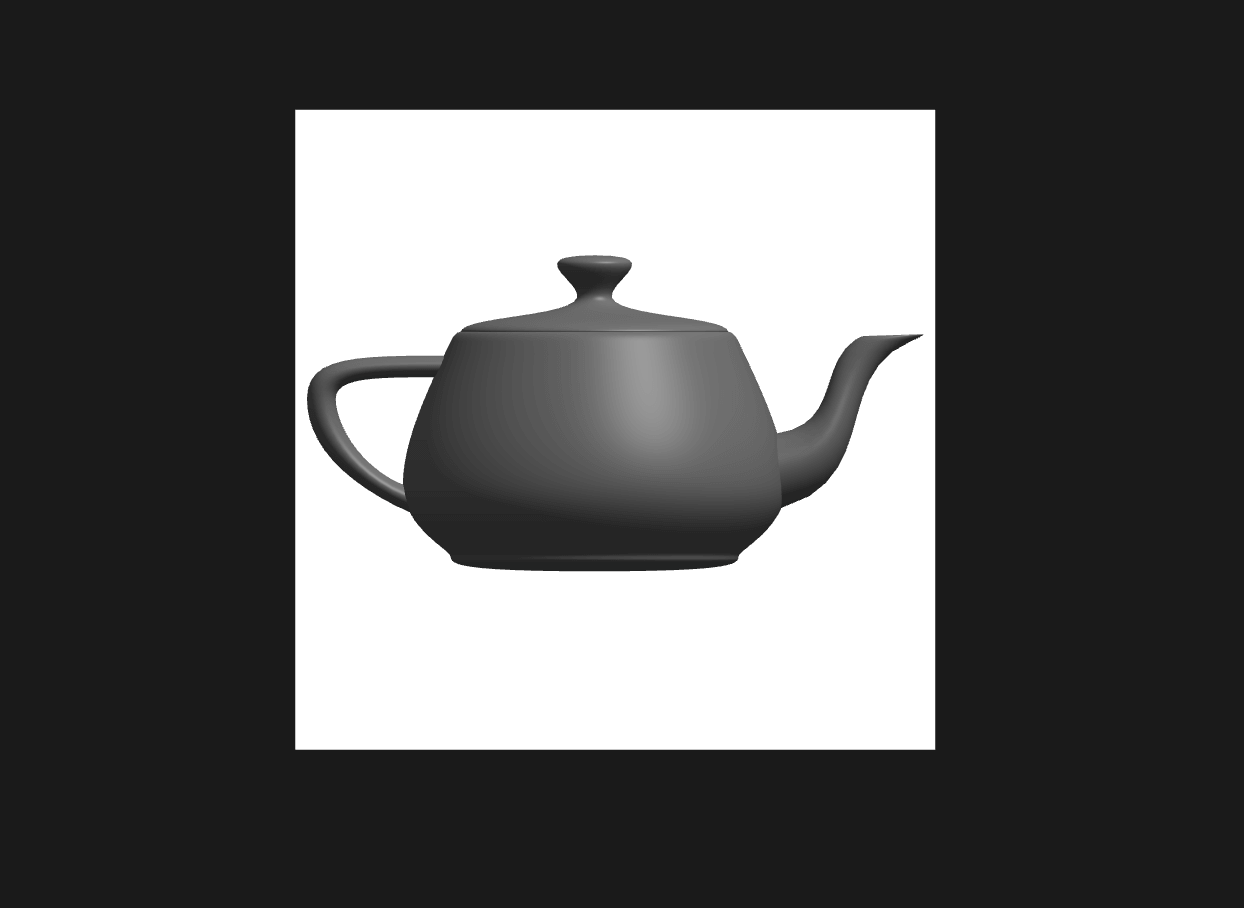
Example of placing a Teapot
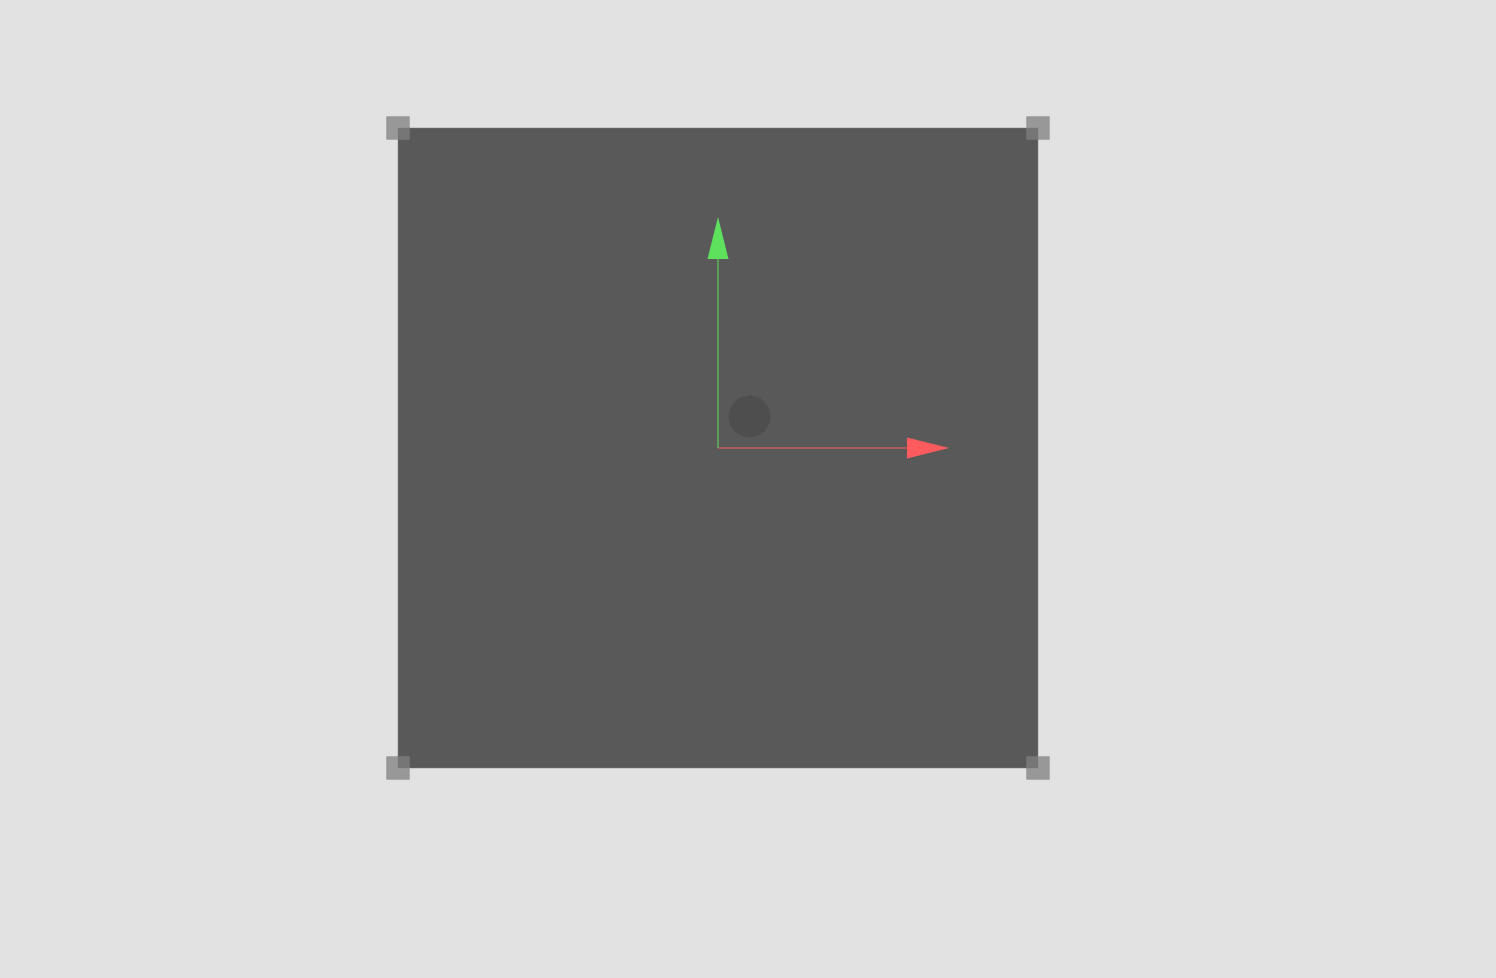
In the initial state, the entire screen does not appear to be a campus as in the sample scene, but rather a white canvas floating in a black background.
This is actually just a white “Rectangle” placed in the center in the initial state.

The left panel is the object list
The left panel shows the list of objects currently on the screen, so let’s delete a Rectangle by pressing the [Delete] key.

Deleting a Rectangle
In the right panel, if no object is selected, you will see an item to change the background color.
Change Background
Change the background color to white, as it is easier to see.
The background is now white
In addition to the 3D models of basic shapes prepared in advance, you can also insert models from Google Poly from the “Library” in the lower left corner of the screen.
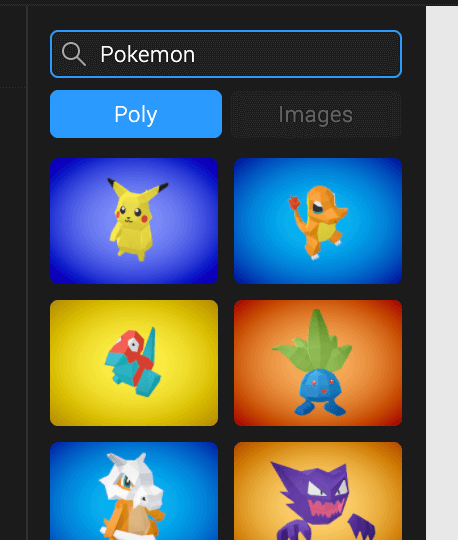
Importing from Google Poly
If you want to use a 3D model created by another software, you can upload it to Google Poly and then import it. (However, Google Poly will be shutting down on June 30, 2021, so it is highly unlikely that you will be able to import them after that date.
Changing the shape
There are two ways to change the shape: by picking the vertices in the 3D view, or by editing the property values in the right panel.
Spline’s method of changing property values is much easier to use than other tools.

Spline official sample
This is an example of how to create a soft, three-dimensional icon in the official Spline sample.
Let’s take a look at how to make this.
This is not made by deforming a cube, but by deforming a rectangle.
First, place the rectangle.
Place the rectangle
After placing the rectangle, go to the right panel and change the properties of the shape as follows
- Corner: How much the corners of the rectangle should be rounded.
- Extrusion: Thickness
- Bevel: Bevel (how much to round the corners of the thick part)
- Bevel Sides: How much to subdivide the bevel.
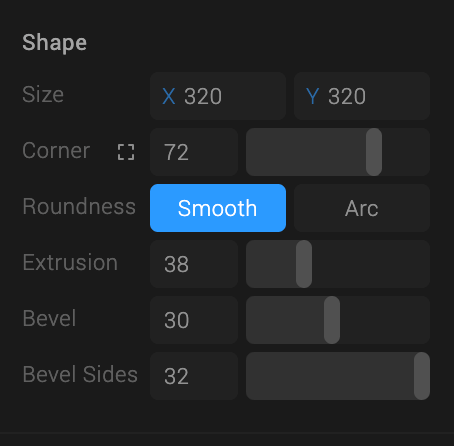
Shape Properties
If the shape is left as it is, there will be no shadows and it will be hard to see, so from the Material properties, change the Lighting to Physical.
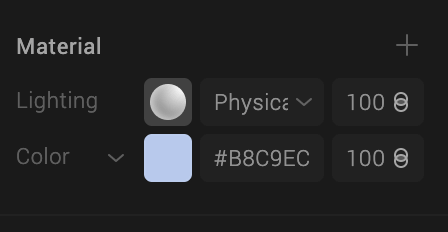
Material Properties
With just this, we could easily create a rounded rectangle!
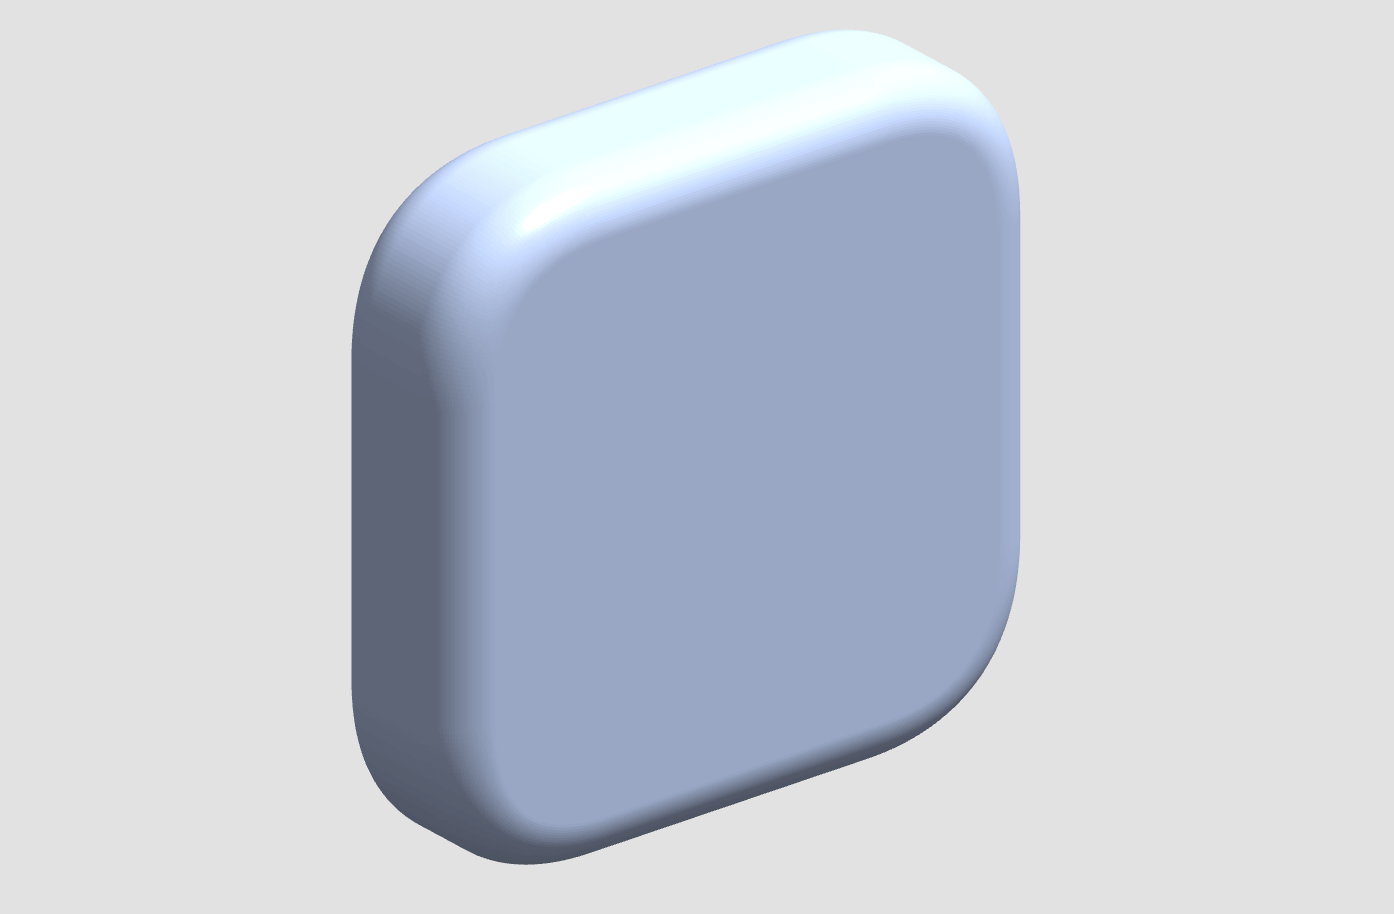
A rounded rectangle is created
Although it is not possible to create complex deformations, it is a very easy tool to create circles, rectangles, and other shapes using primitives.
Let’s change the properties and try different things.
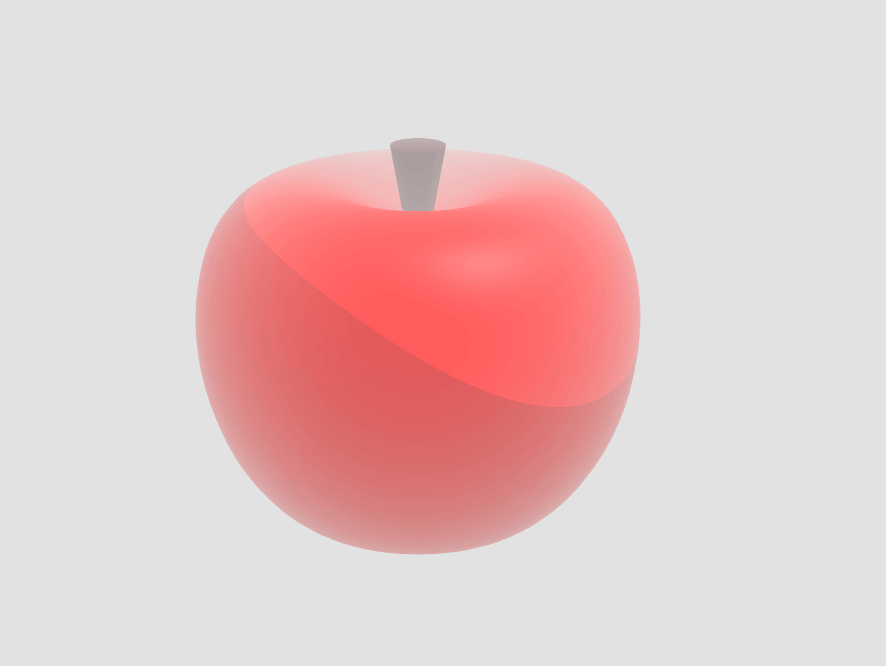
An apple made with Lathe and Cylinder
Changing the color
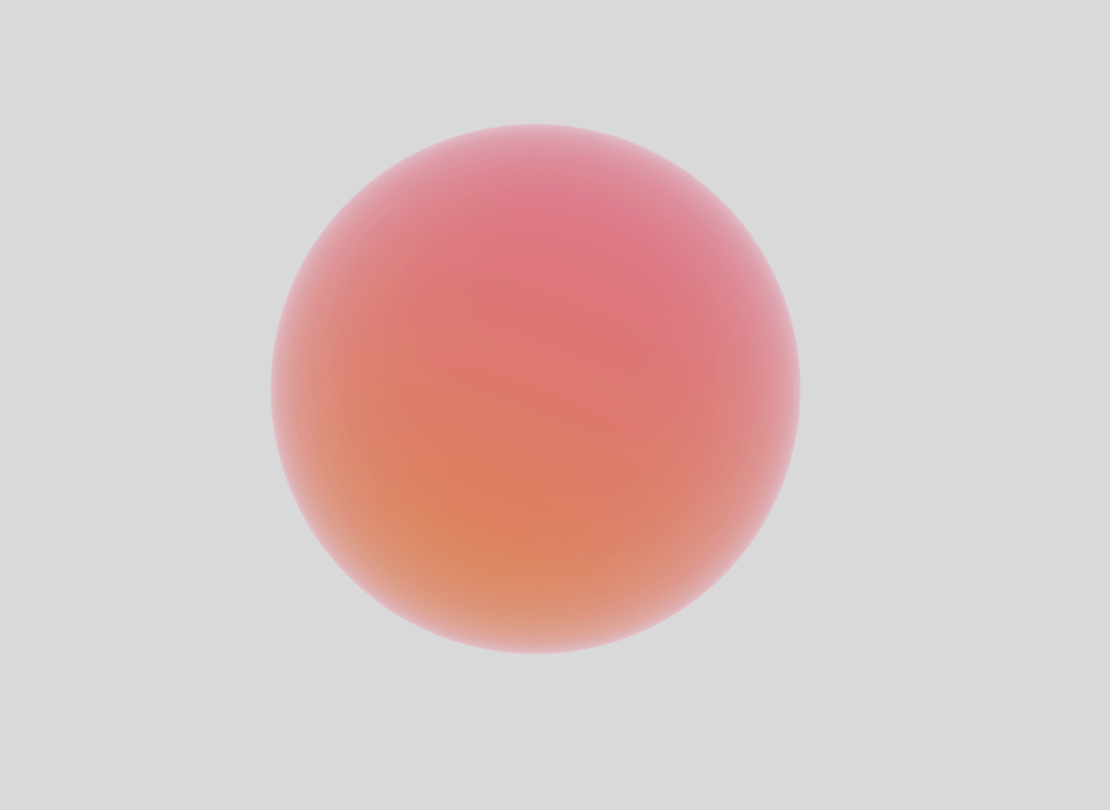
Let’s see how to make these beautiful matte gradient spheres used in the official Spline sample while actually creating them.
Just like editing a rectangle, the color will be changed from the Material property in the right panel.
Spline formula sample
First, place the sphere and change the Color to your desired color (darker colors are preferred). (Darker colors are preferable)

Initial state
Set Lighting to None.

No lighting
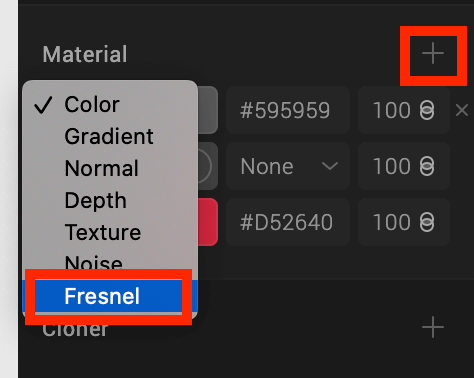
Change to Fresnel
Next, add a new property by clicking the “+” button, and change the added property to “Fresnel”.
Fresnel is a 3DCG term for “reproducing a phenomenon in which the strength of the reflection differs depending on the angle,” but in this case, you can think of it as something that blurs the outline.
Blurring the outline with Fresnel
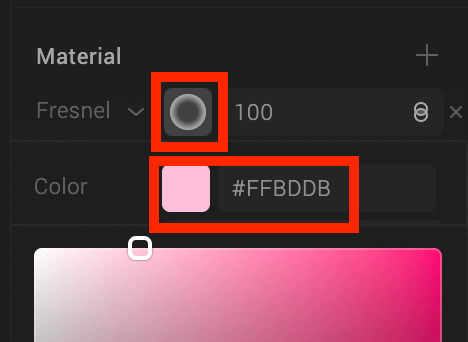
Change the properties of Fresnel.
Click on the circle to the right of the Fresnel text, and change the Color to a light color.
Change the color of Fresnel
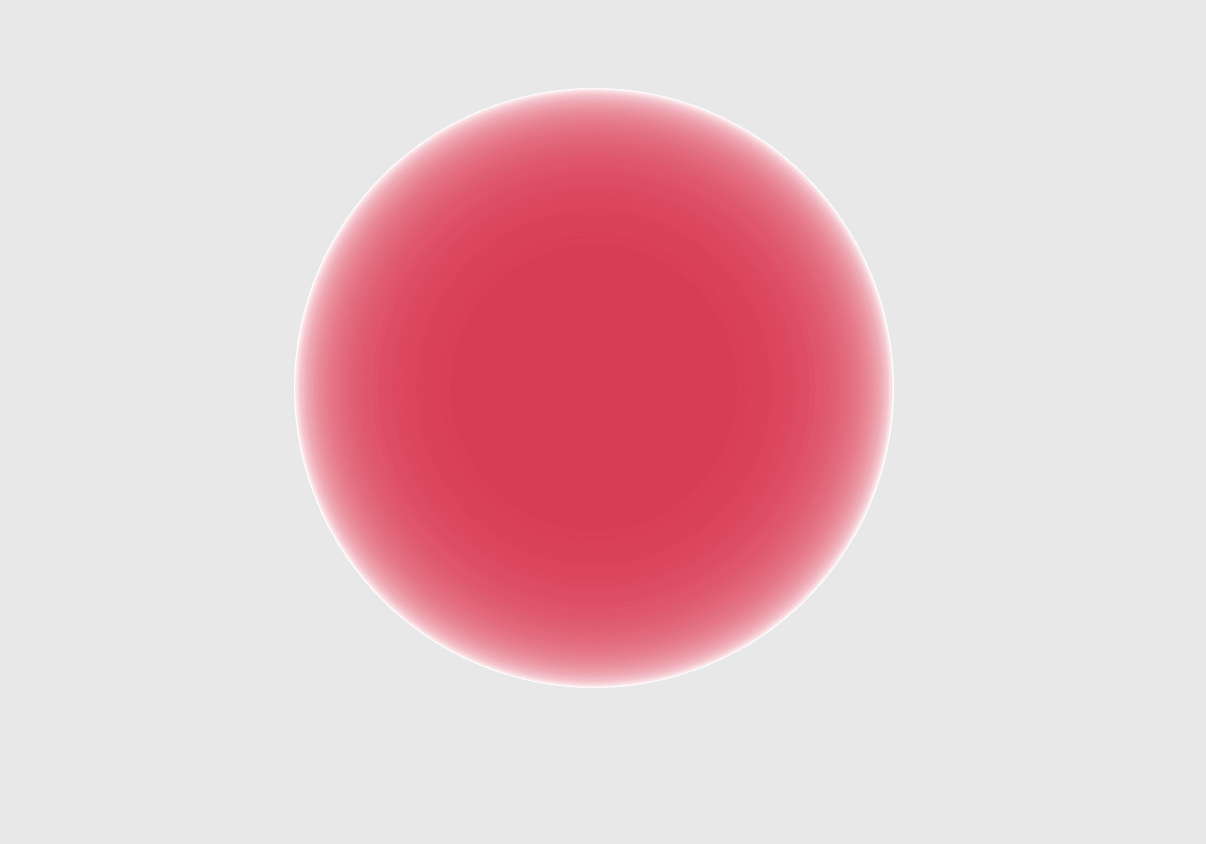
You will see that the outline has changed to pink.
The outline is now pink
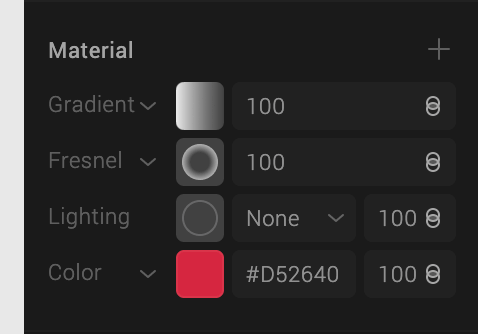
Similarly, add the property “Gradient”.
You can change the color from Ramp by clicking on the square to the right of the word Gradient.
By setting the transparency to 0 on the left side, we will create a gradient between the original material’s Color and the Color set by the Gradient.
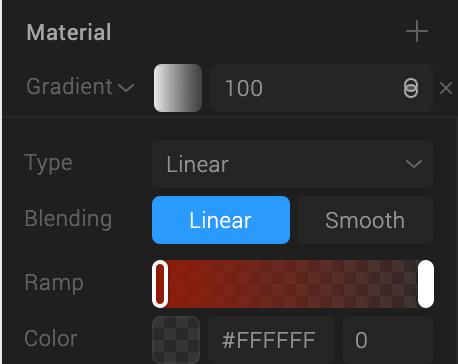
Gradient properties
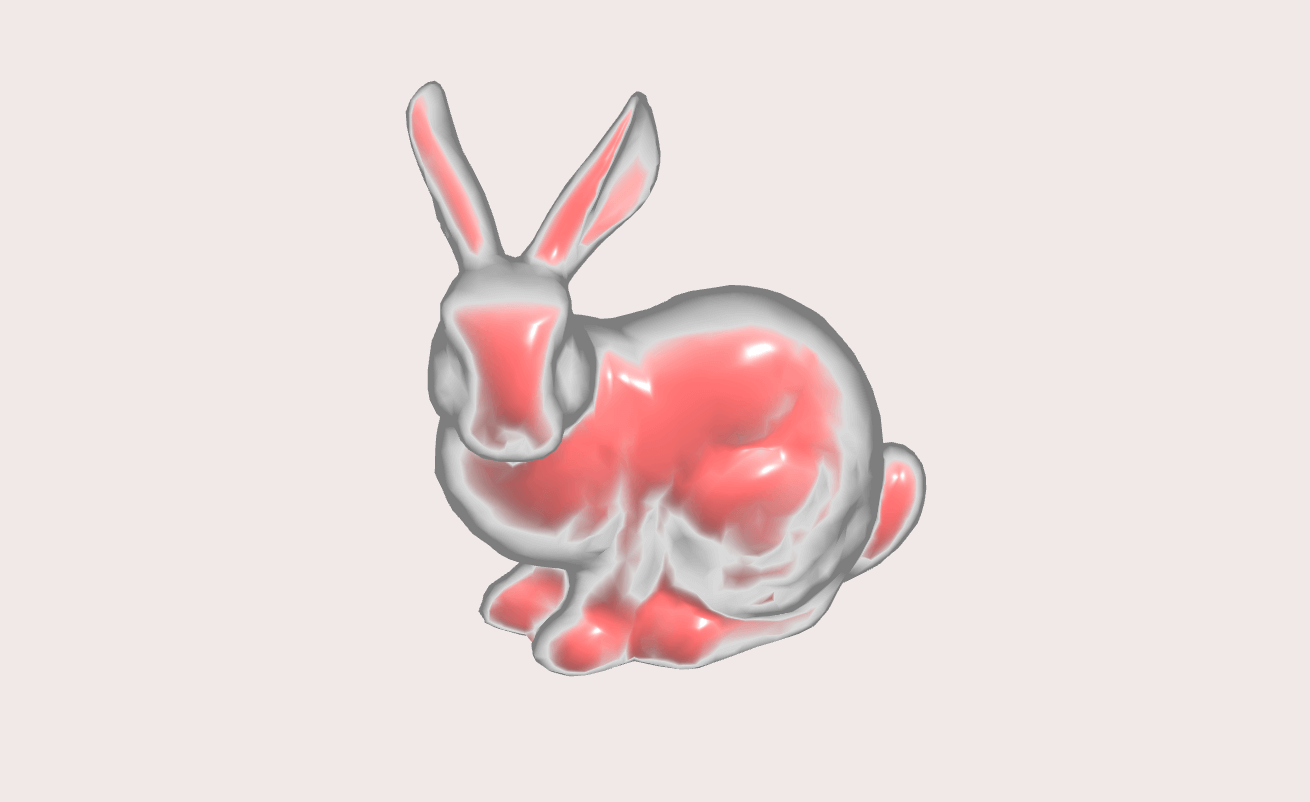
As it is, the border between the colors is clearly visible when viewed from above.
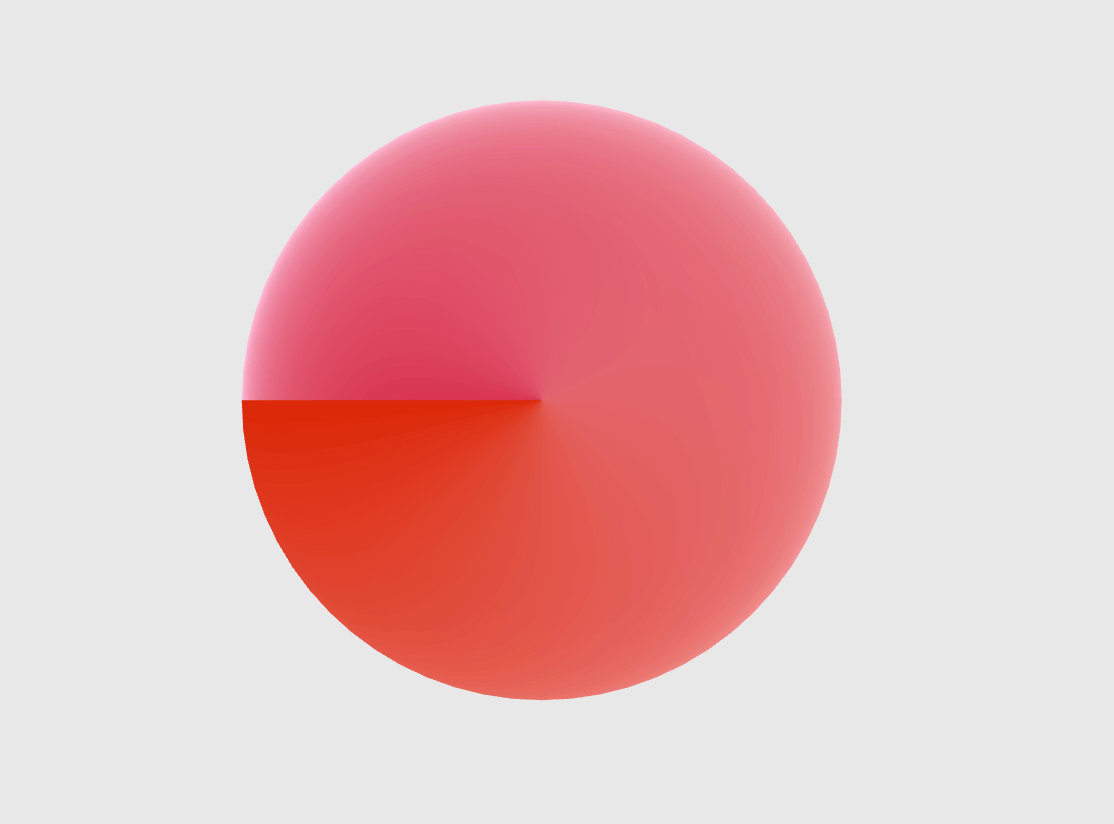
The problem is where the gradient starts
So, from the bottom of the Gradient properties, change Angle to 90.
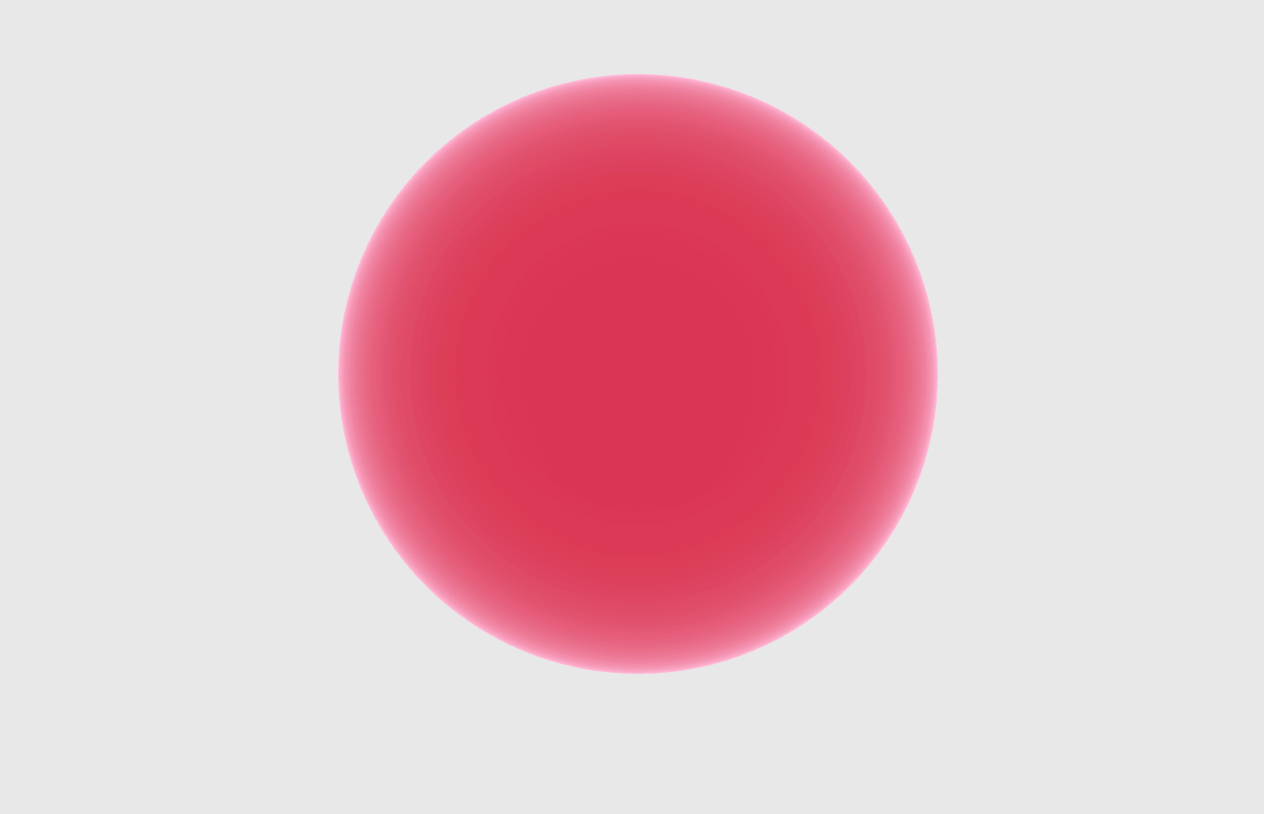
Matte gradient
Now we have a gradient that spreads nicely from the top and bottom of the circle.
Final material settings
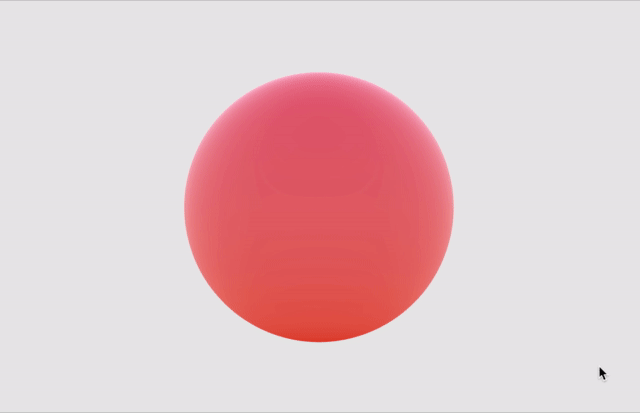
The matte gradient is now complete.
By applying Fresnel, you can also create the following expression. (This is a reproduction of a post on Spline’s official Instagram)
Watery shading
Two Fresnels of different scales are superimposed.
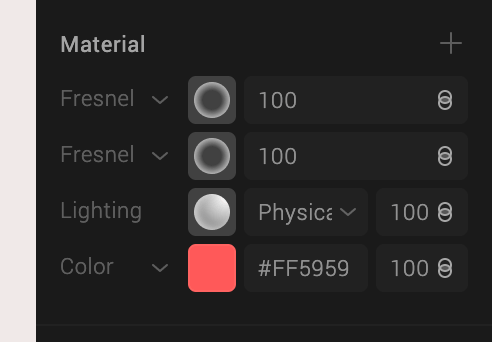
Overlapping Fresnel
Exporting
With no objects selected, you can export from Publish & Share in the right panel.
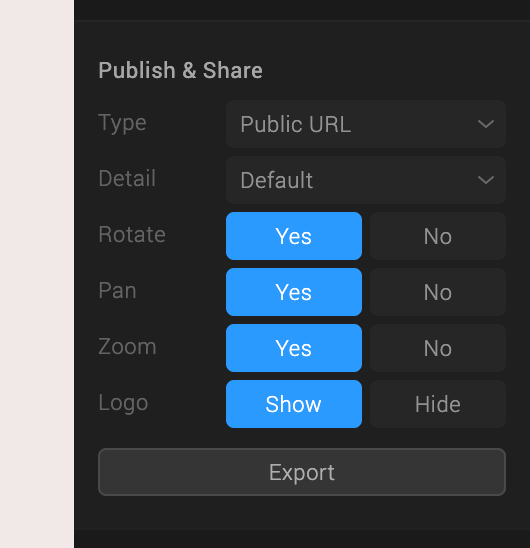
Publish & Share
However, as mentioned at the beginning of this article, it is currently not possible to export as a 3D model.
The output format can be Public URL (with logo if free), Web Content, Image, or Video and animated GIF if you are on the paid Pro plan.
If you choose Public URL, you will get a URL where you can move the model and view it, and a code for embedding in HTML.
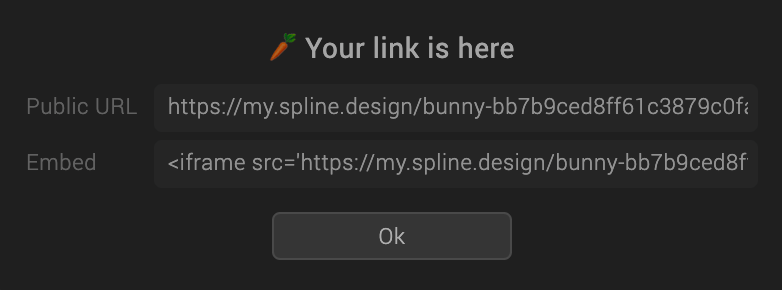
Exporting as Public URL
On the other hand, if you select Web Content, a zip file containing the following files will be output.
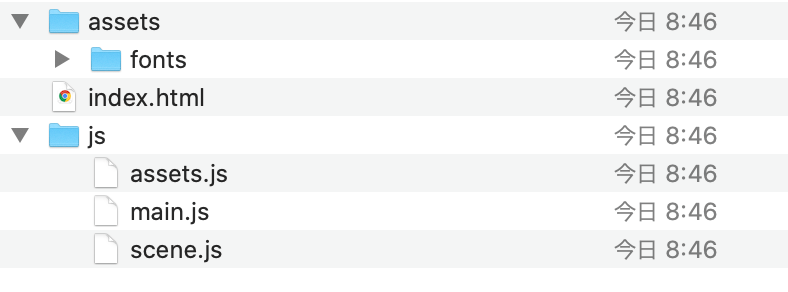
Export as Web Content
[Extra] Reproducing with Blender
I tried to recreate the matte gradient that I created in the “Change Color” section using Blender’s shader node. (The colors have been changed.)
I’m not going to explain in detail, but I wanted to output it as a 3D model…! I’ll spare you the details this time, but if you want to output it as a 3D model, please try it in Blender.
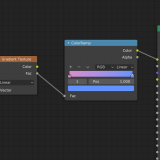
Reproduction in Blender
If you use Spline, the upper part of the split is the gradient of the object itself, and the lower part is Fresnel.
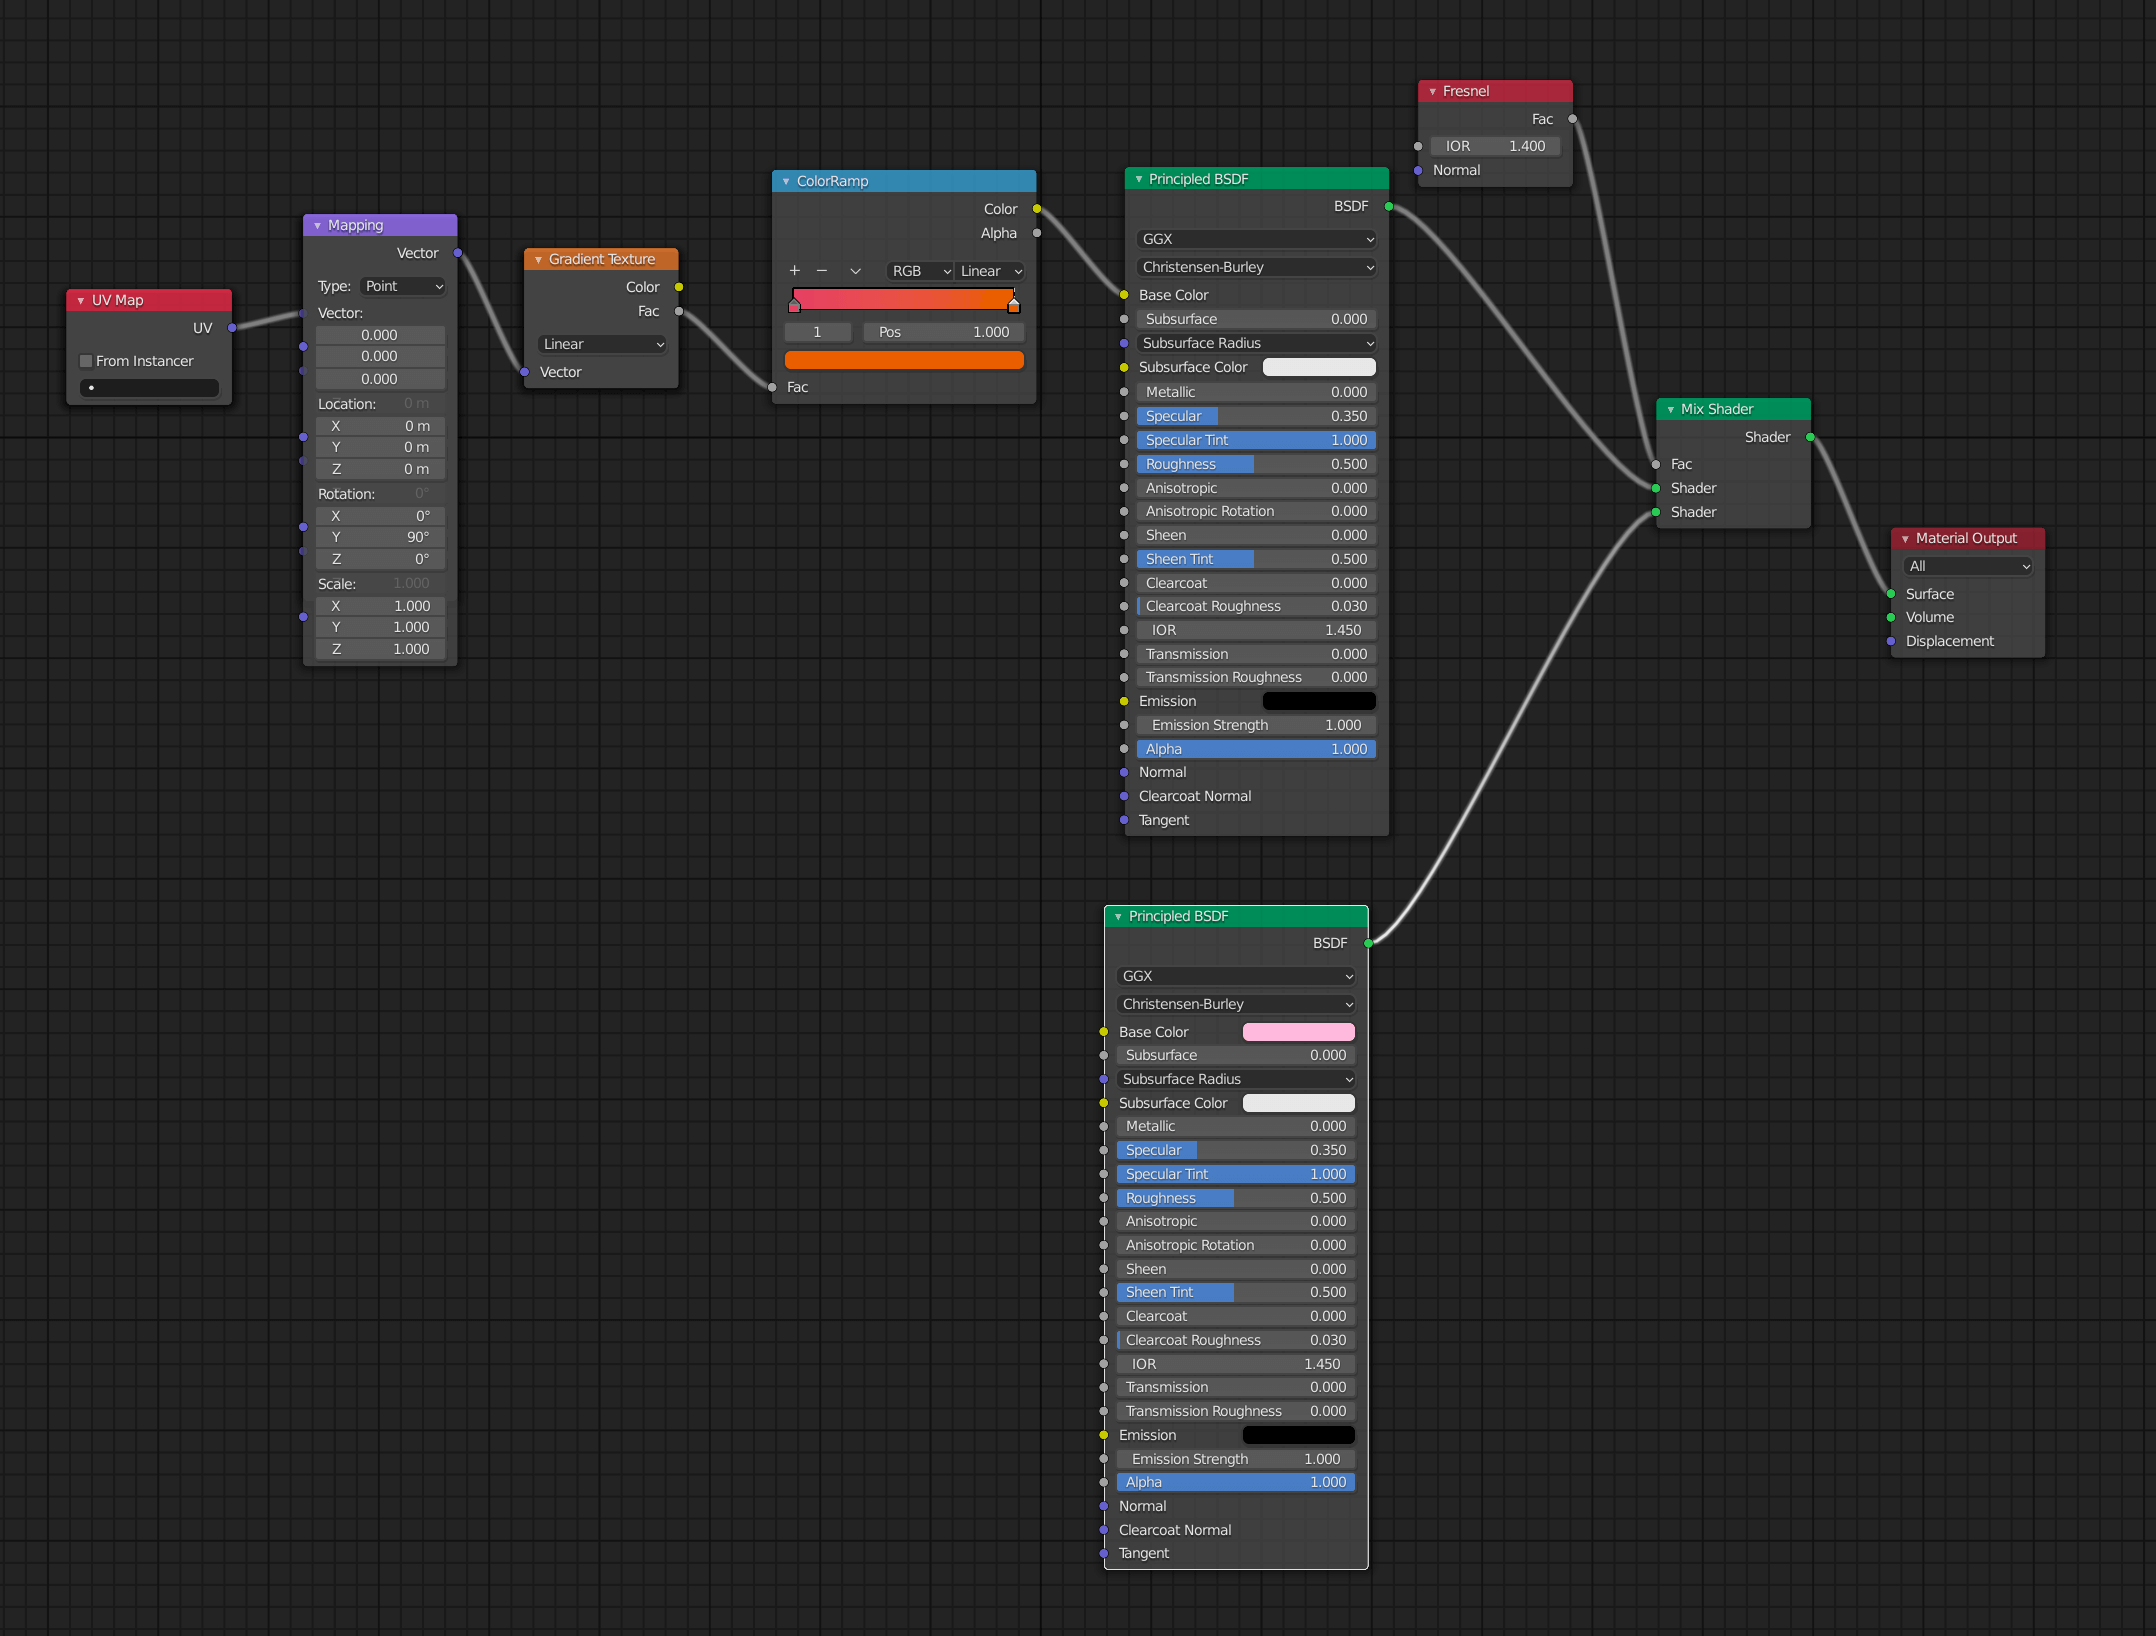
Shader Nodes
Please refer to the following article for more information on how to build shader nodes in Blender.
Introduction to NEWVIEW SCHOOL ONLINE
NEWVIEW SCHOOL ONLINE is now open! Learn the basics of Unity and PlayMaker, necessary for creating VR/AR content, and learn the process (and creation techniques) for developing attractive content available on STYLY.
- Create VR/AR content without writing any programming code.
- Professionally supervised Unity courses available.
- Explore additional elements, such as photogrammetric production methods and content lightening.
- Learn the concept of creating VR/AR content.
