This article describes how to make a Warriors-like game on STYLY using Unity’s PlayMaker.
Enemy characters will be randomly placed so that they will come towards the player. Create an exhilarating game in which you touch your weapon to make it disappear, and you can defeat a lot of enemy characters.
Completed scene
Sample.
You can experience the sample space from STYLY GALLERY.
You can download the Unity project described in the article here.
Assets to use
In this article we will use PlayMaker.
Use PlayMaker
Character motions are based on the Move Motion Free Pack.
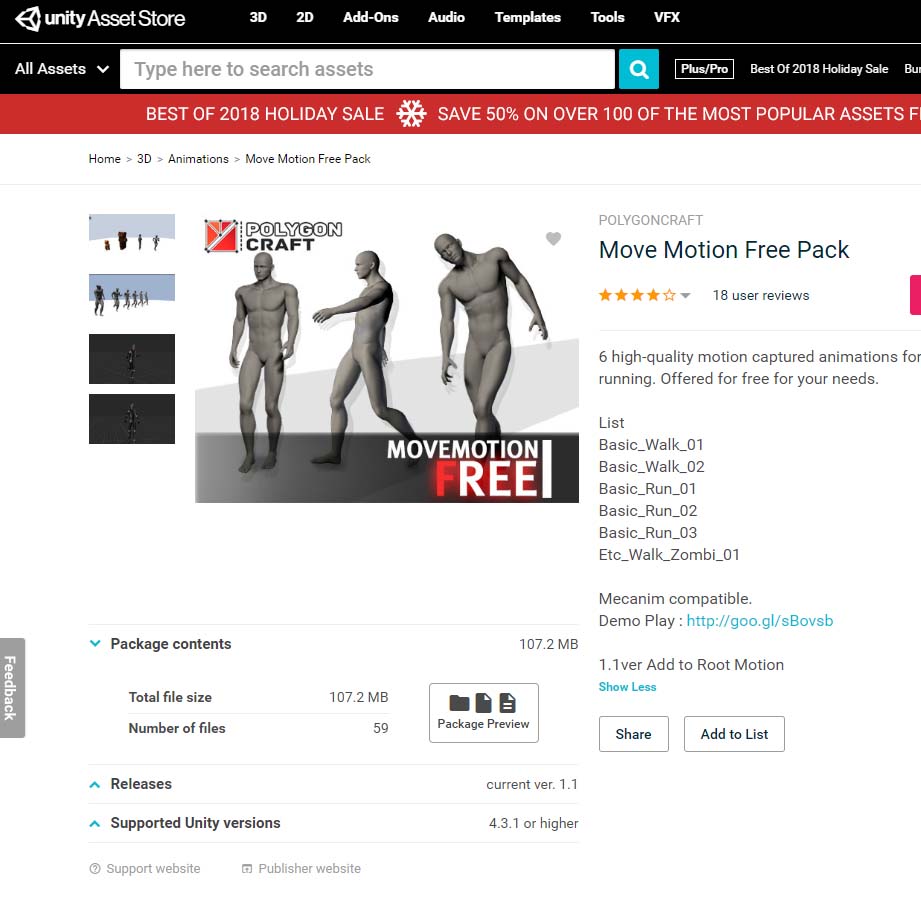
Move Motion Free Pack
Setting up a character
Rig Settings
Bourne and weight-adjusted humanoid characters are imported in Unity.
Set the Animation Type of the Inspector’s Rig to Humanoid. If you set the Avatar Definition to Create From This Model, the Animator component will be added automatically.
The name of the character is “Nakagawa”.
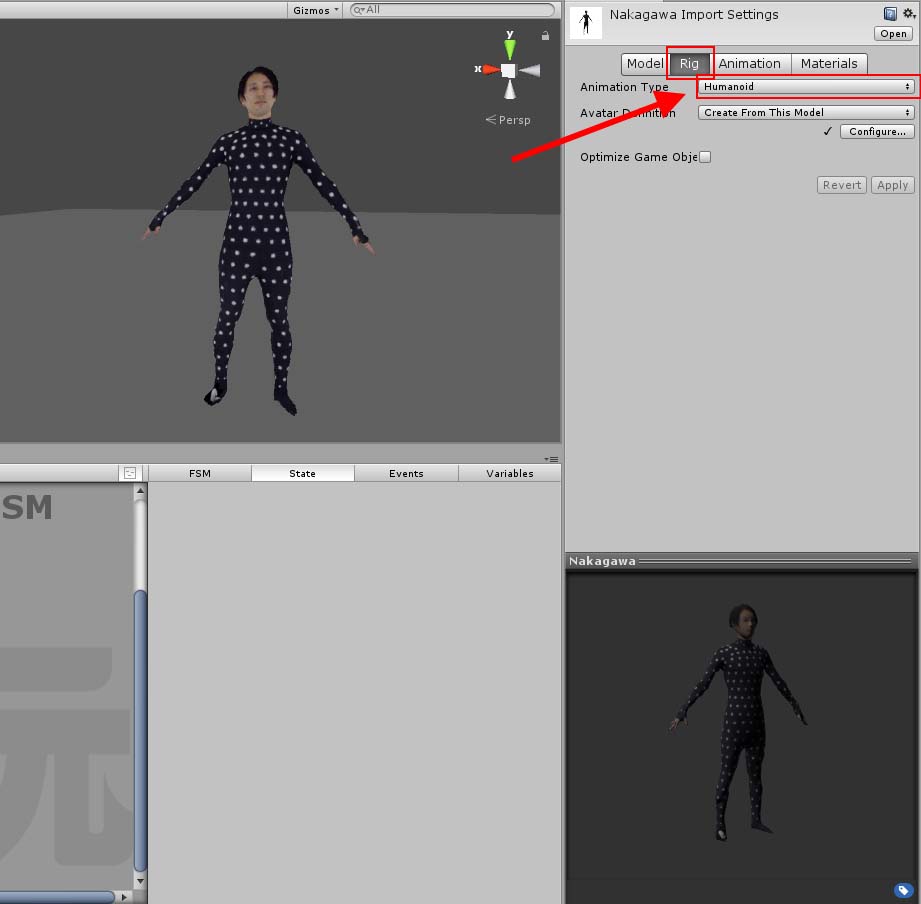
Rig Settings
Add the Animator Controller.
Add an Animator Controller to control the animation.
I selected Animator Controller from Create and named it “Nakagawa” for now.
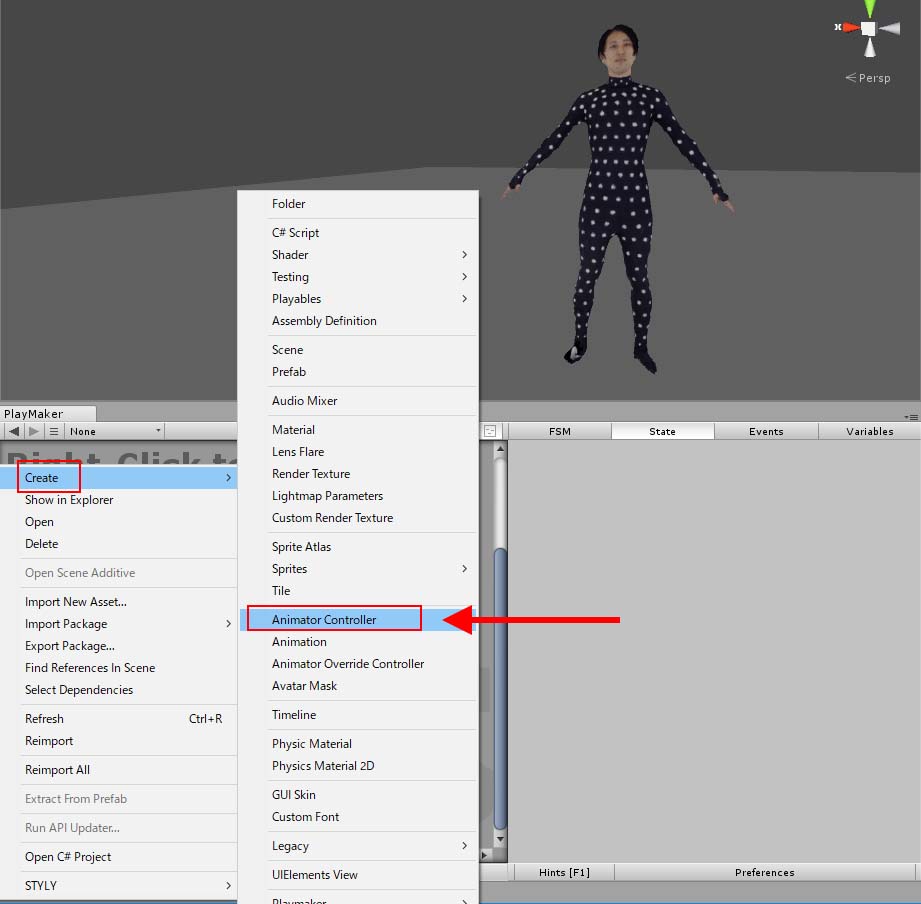
Adding the Animator Controller
Set the Animatior Controller (Nakagawa.control) we created earlier to the Controller of the Animator component.
Check the Apply Root Motion checkbox.
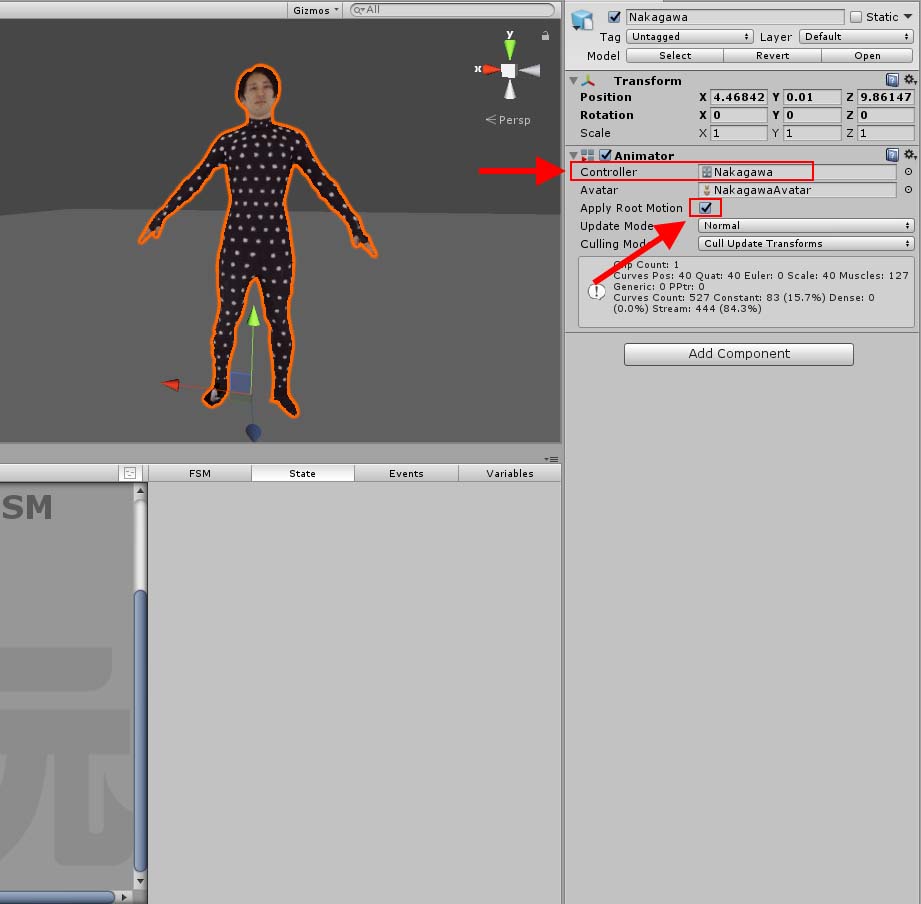
Controller Specification
Setting the Animator
Open the Animator window from Window → Animator.
Right-click Create State → Empty to create an empty state.
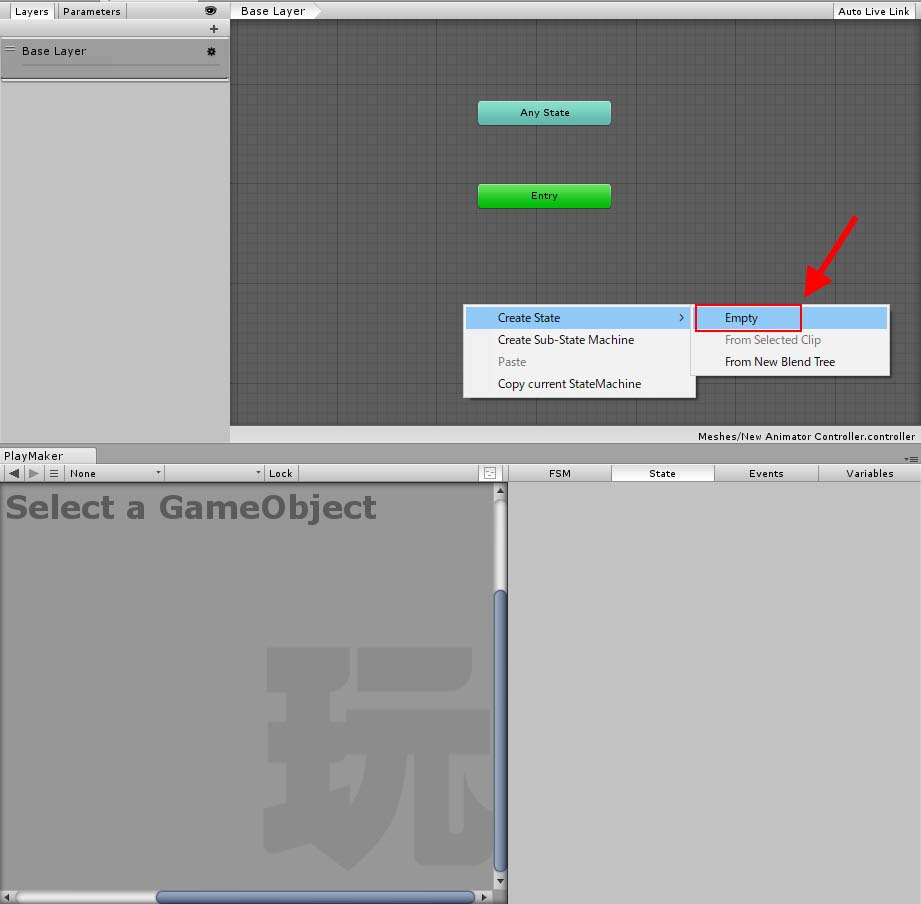
Adding a State
Select the New State that you created.
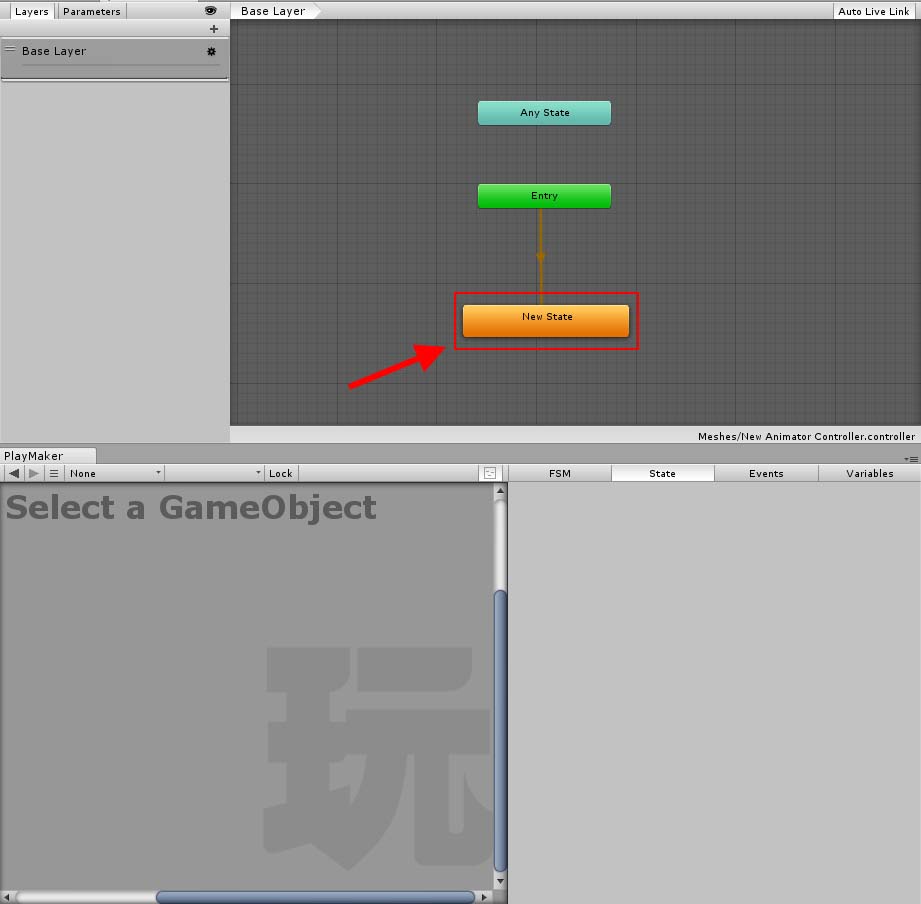
Select New State
You can specify the motion you want to use in the Motion field.
Here, I’m going to use “Basic_Walk_01″, which is included in the Move Motion Free Pack.
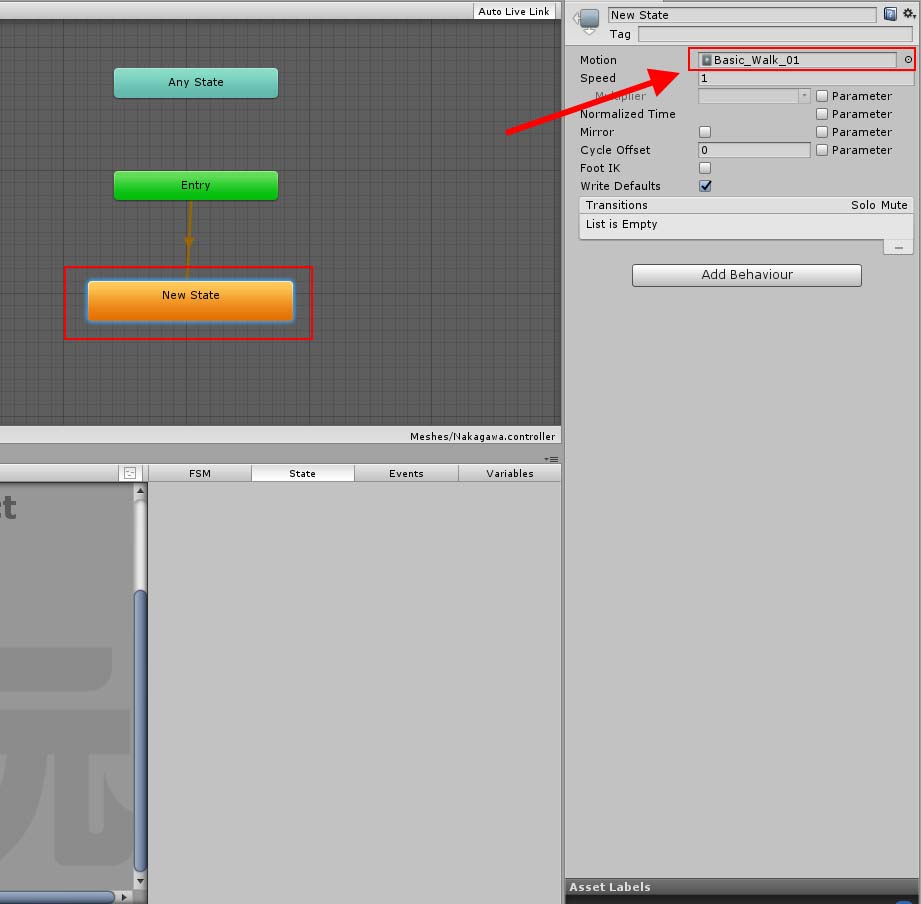
Specifying Motion
Play it back and check if the motion is passing well.
He did a good walking motion.

Motion has been applied.
PlayMaker settings
Adding a State
Prefabricates a character whose motion is set in motion.
Create a folder called “Prefabs” and drag it into it.

prefabricate.
We will create a new empty object and add the PlayMaker state to it.
Create an empty object from GameObject with Create Empty and name it “STYLYmusou”.
It will also be prefabricated by putting it in the Prefabs folder.
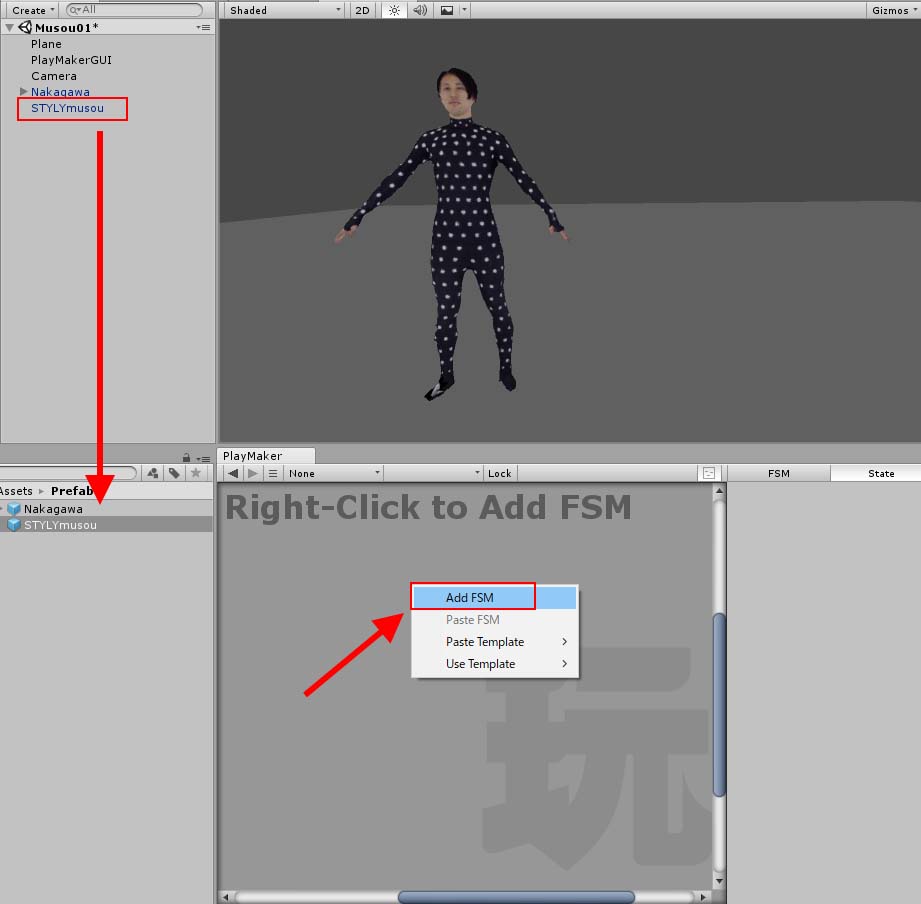
Create an empty object and make it prefabricated
Select STYLYmusou in the Prefabs folder, then right-click on the PlayMaker window and select Add FSM.
The state has now been created. When I select a prefab with FMS added on the hierarchy and try to edit it with PlayMaker, I get “Editing of Prefab Instance is disabled. See preferences”.
In this case, please select “Edit Prefab”. Here, we will be editing all the prefabs.
craft a sword
I made a sword for defeating enemies in Unity.
Here is a simple version of the Cube in portrait size.
There are a lot of sword-like weapons in the Asset Store, so it’s good to use them.
Add a Rigidbody and check the Is Kinematic checkbox to get a guess.
Uncheck Use Gravity.
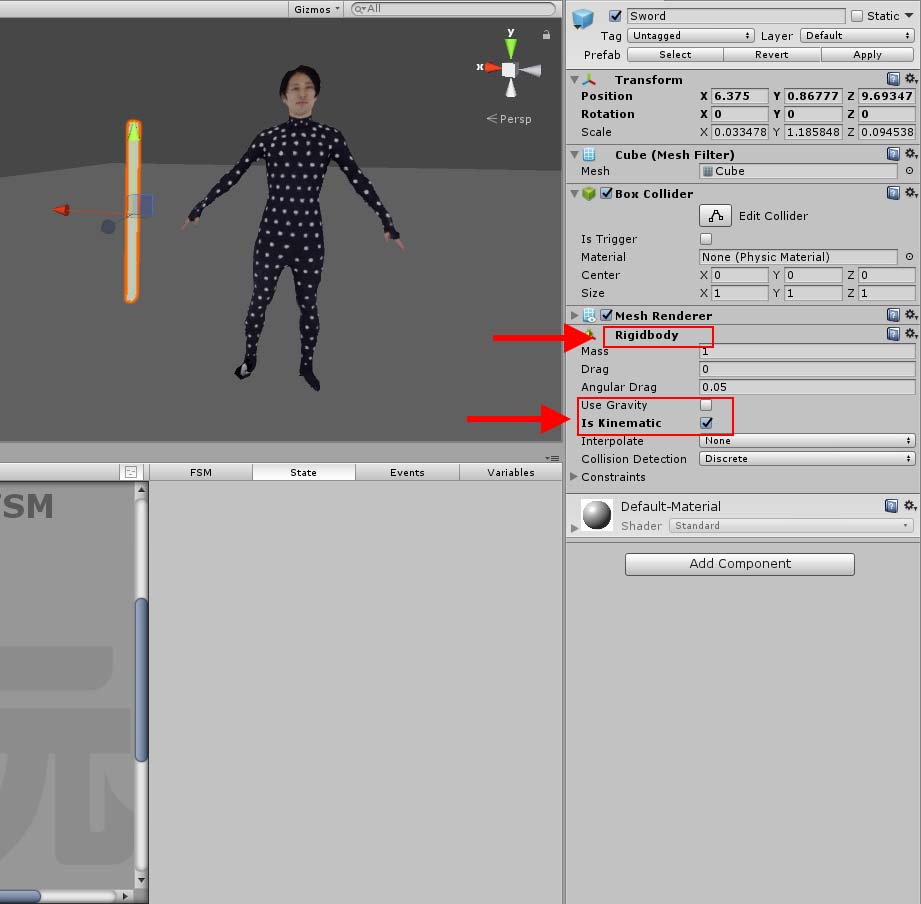
Adding Rigidbody
I named the sword I made “Sword” and prefabricated it.
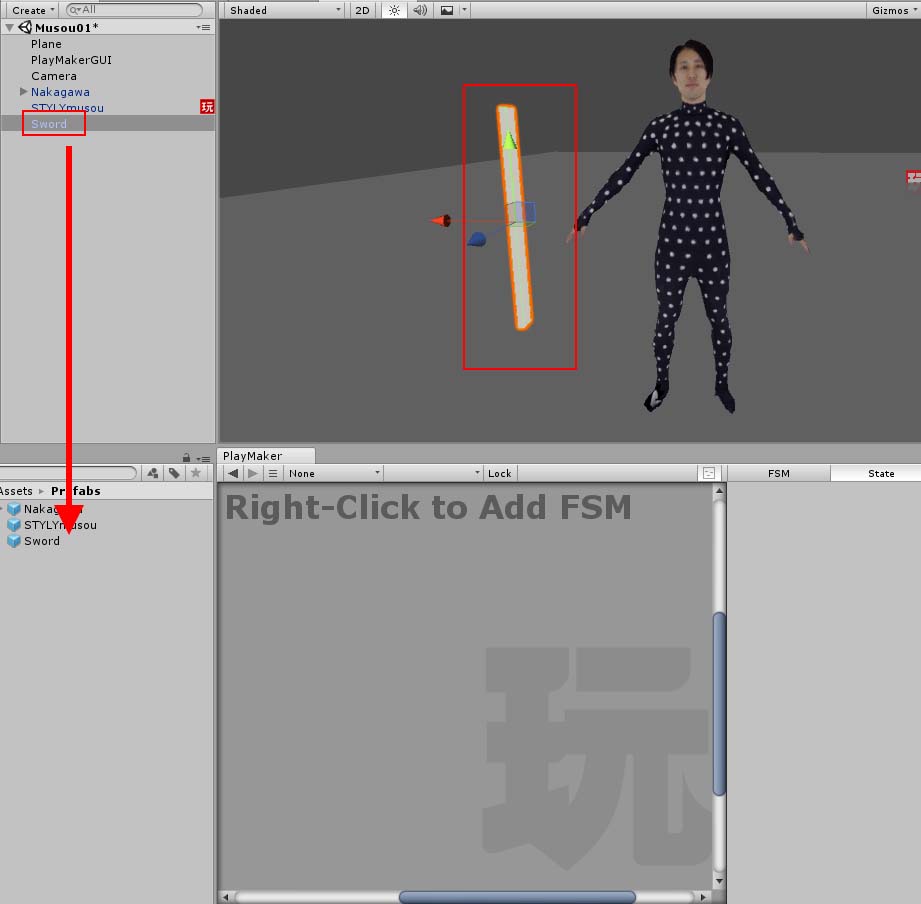
prefabricate.
Adding an Action
We’ll be adding actions in PlayMaker.
Attach the sword you just made to the controller.
For information on how to attach objects to the controller, see the following article.
![[Unity/Playmaker] How to attach an object to a controller](https://styly.cc/wp-content/uploads/2020/03/5-2-160x160.png)
最初にFind Game Objectを使ってVRコントローラを取得します。 剣をここで取得したコントローラの子要素にして使用するためです。
First, we use Find Game Object to get the VR controller. This is to use the sword as a child element of the controller acquired here.
For Object Name, enter “Controller (right)”.
Please note that there is a half-size space between Controller and (right).
We create a new variable called “Controller” in the Store from the New Variable and store it here.
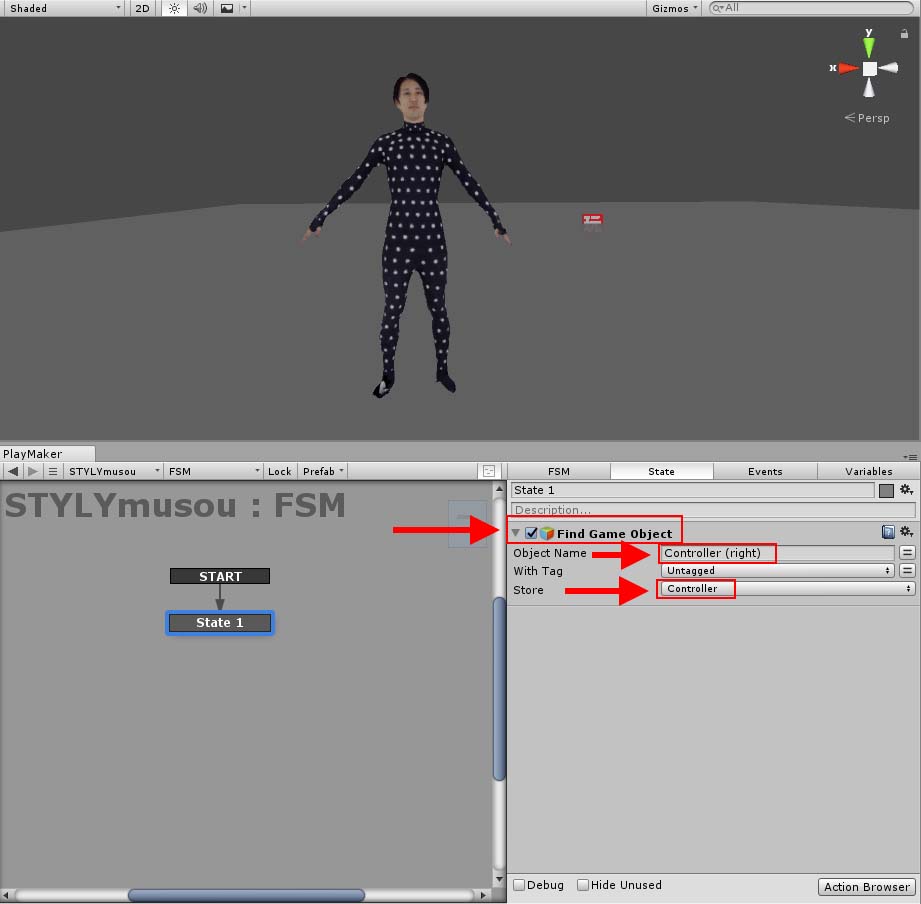
Adding a Find Game object
Add a Create Object to create an object.
The Game Object should be a prefabricated “word”.
In Store Object, we create a variable named “Sword” from New Variable and store it here.
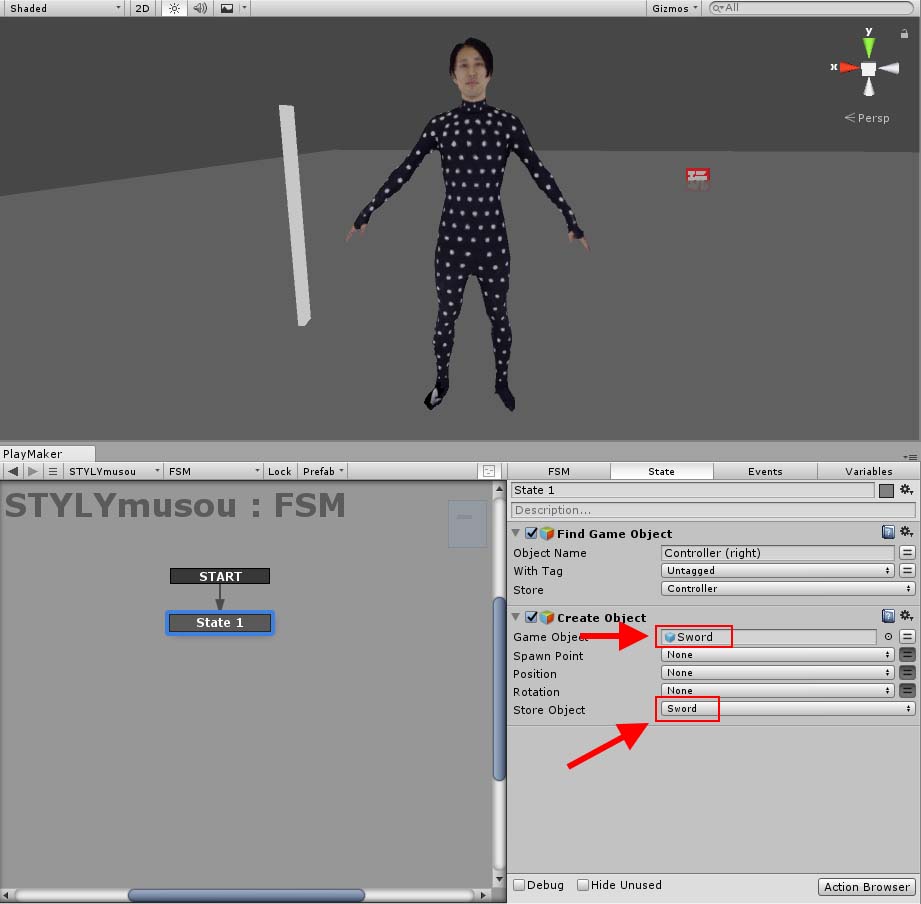
Adding a Create Object
Add a Set Parent to parent the controller and the sword.
Word and Controller are specified for the Game Object and Parent, respectively.
Check the boxes for Reset Local Position and Reset Local Rotation.
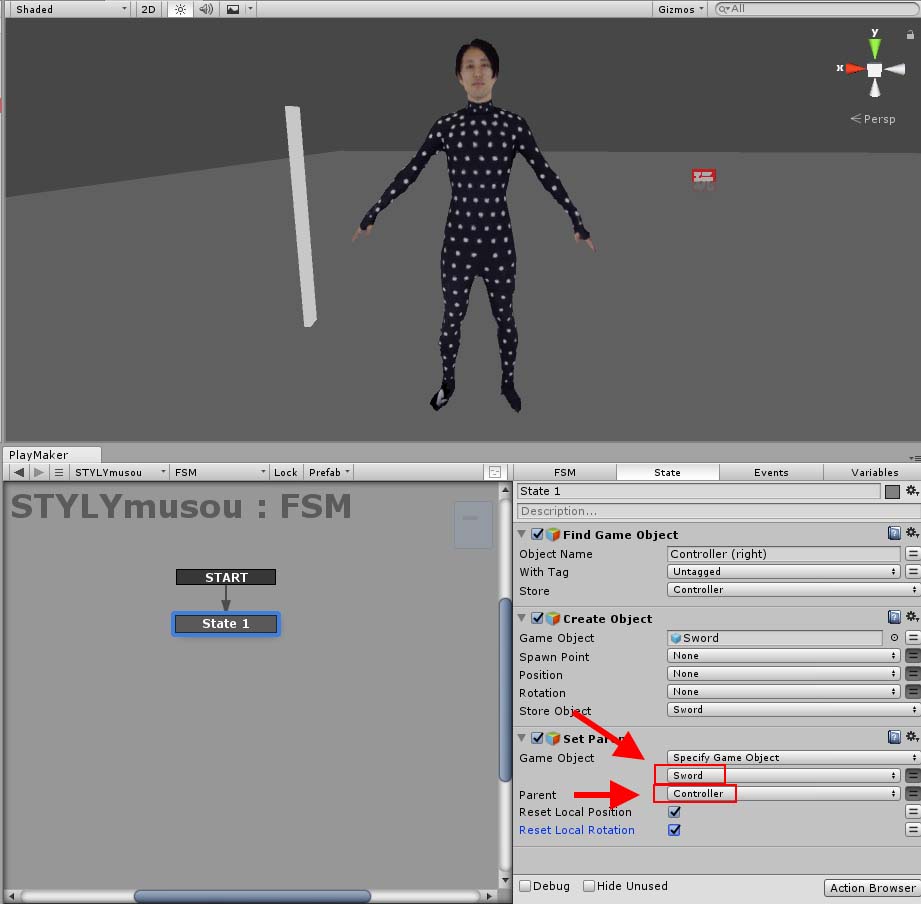
Adding a Set Parent
We now have the controller and the sword set up.
Add a Transition to make the state transition.
Right-click on State1 and select FINISHED from the Add transition.
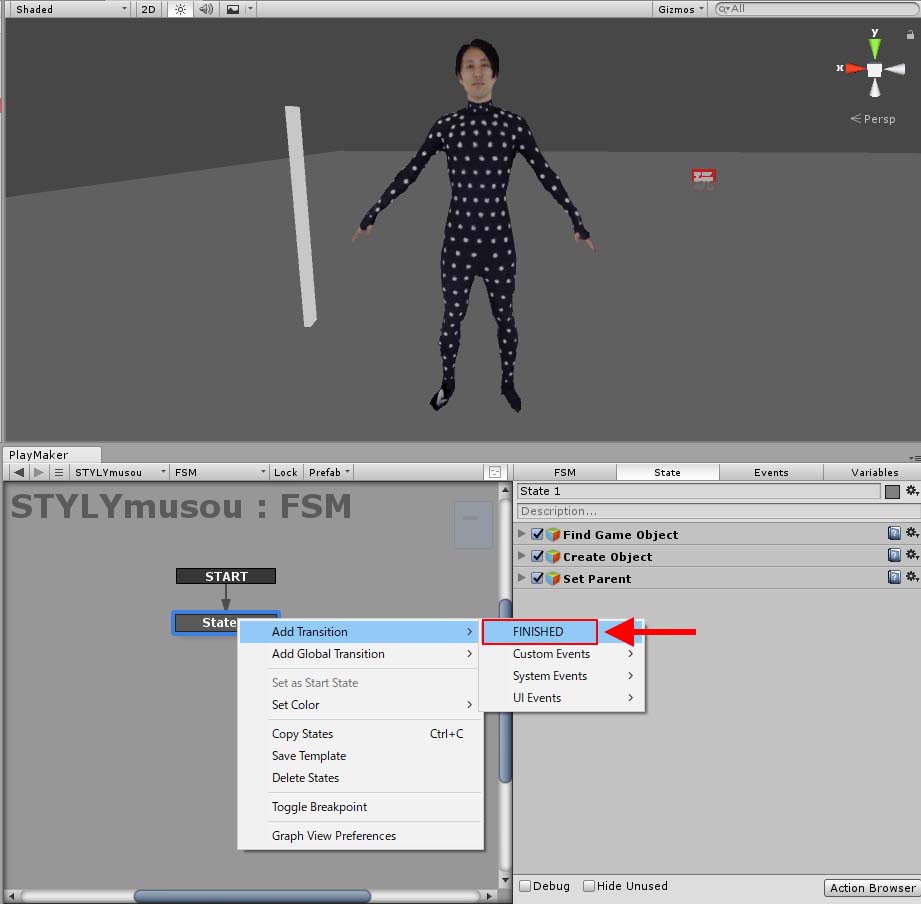
Adding a Transition
Create a new State2 by right-clicking on it and choosing Add State.
Drag State2 from FINISHED in State1 to connect it.
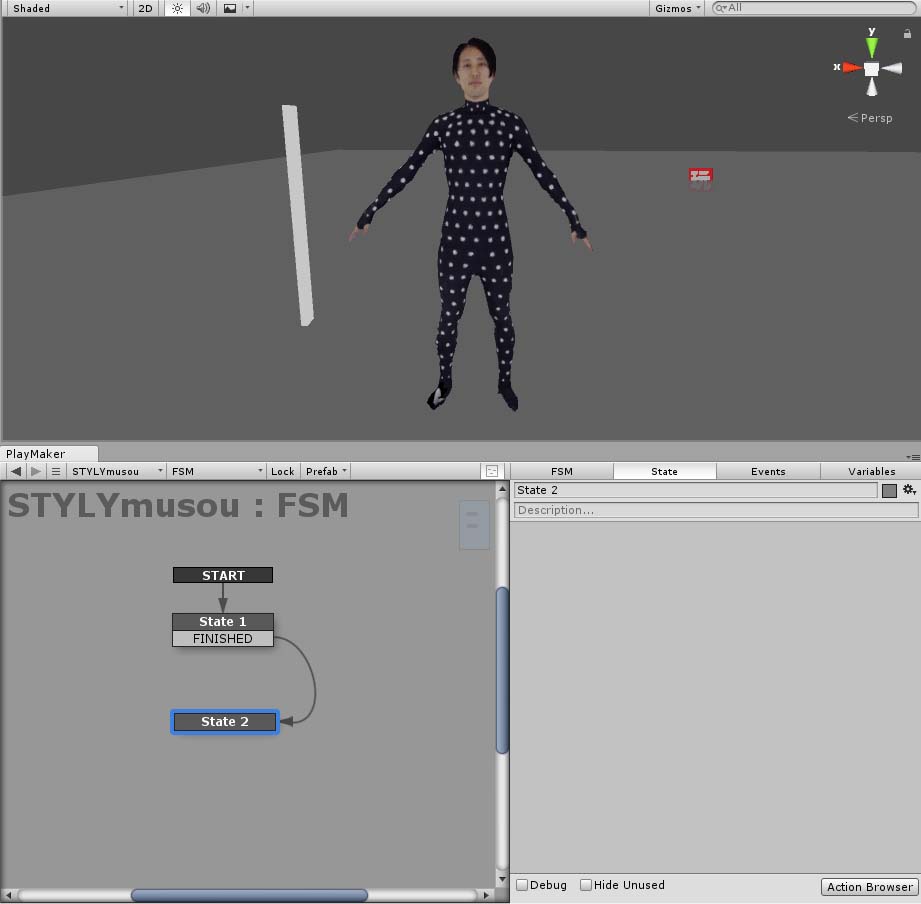
Add State
Now you can transition to State2.
character creation
We’ll name State2 “Character Generation” and create a character in this state.
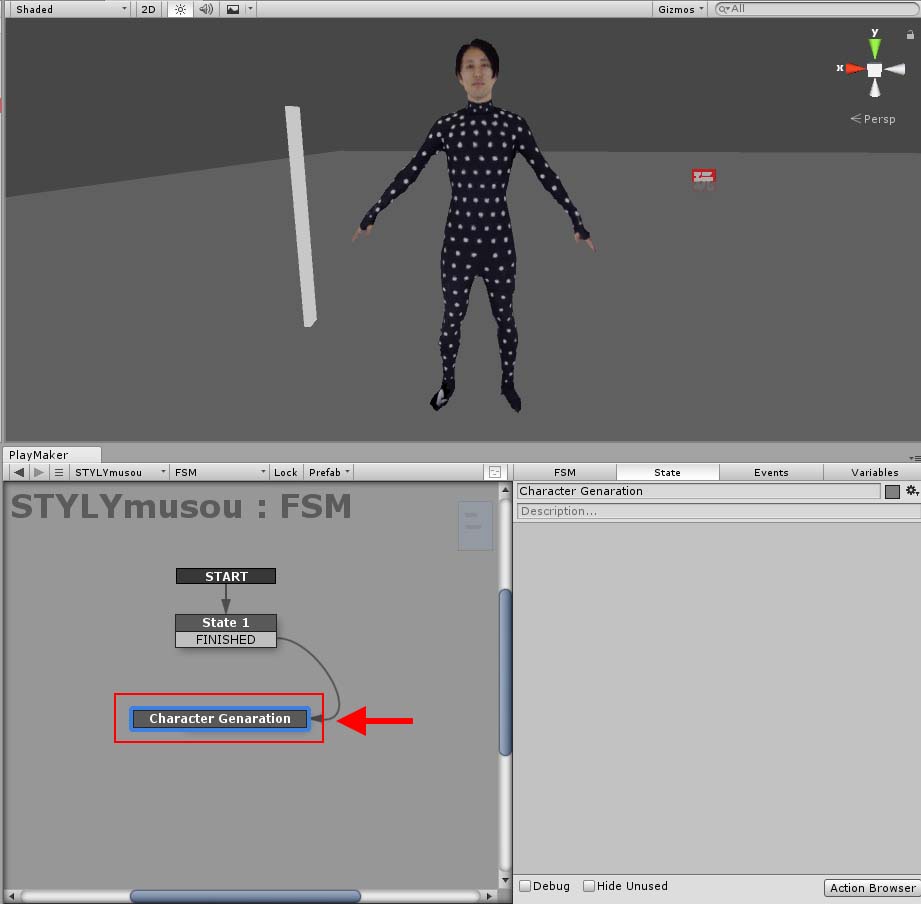
Rename State
Add a Create Object. The Game Object must be a prefabricated Nakagawa.
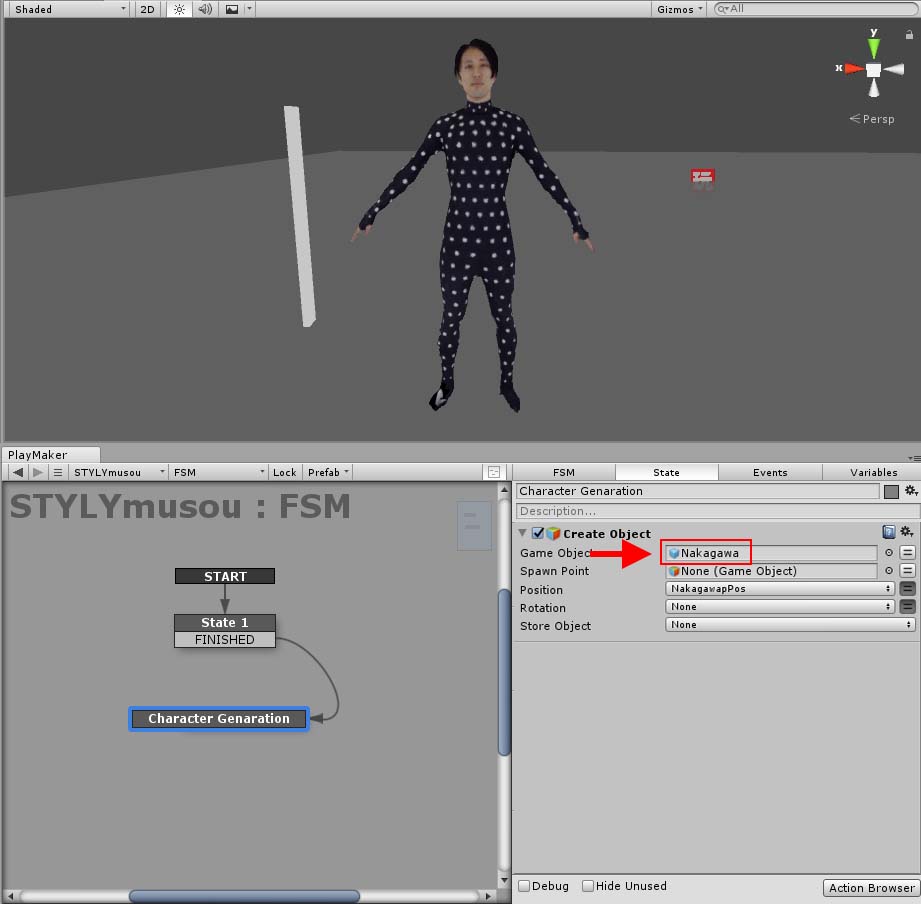
Adding a Create Object
Create X,Z values to determine the position at which the character will be created.
I use Random Float because I want it to be generated in a different place each time.
Get a value between -10 and 10 with Min and Max as -10 and 10 respectively.
In Store Result, we create X and Z from New Variable and store them there.
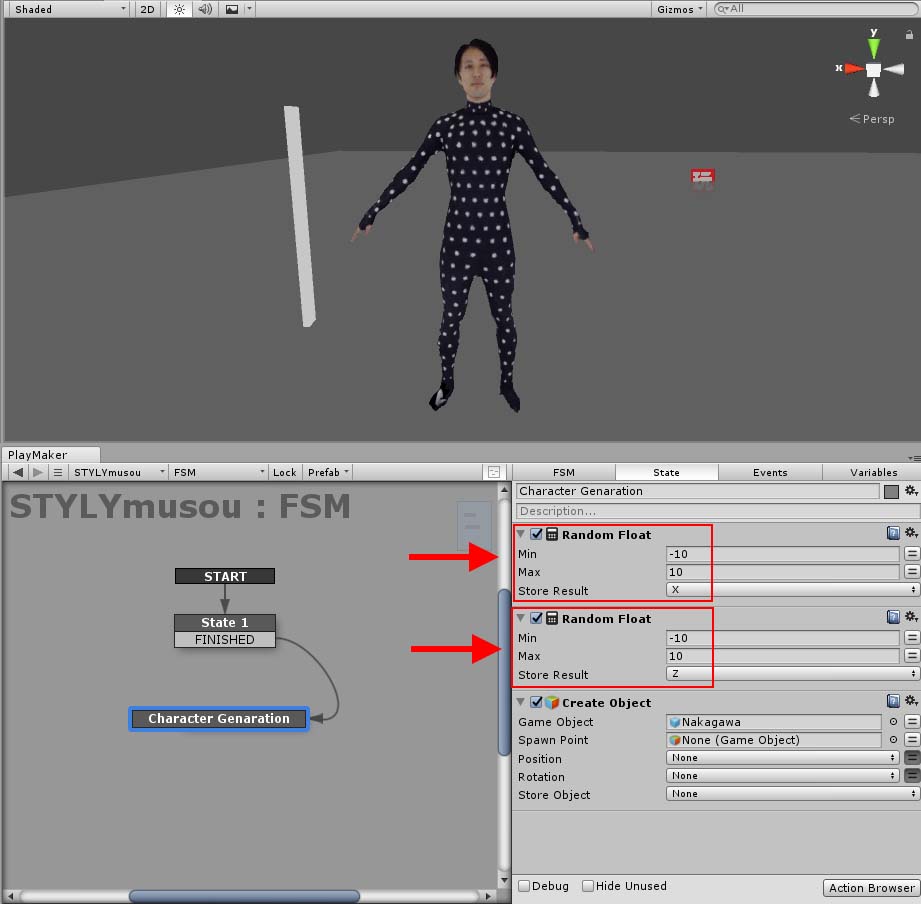
Adding a Random Float
Now you can get a random X and Z value each time.
Use Set Vector3 XYZ to store the X and Y values together.
Create a new “NakagawaPos” in the Vector3 Variable from the New Variable and store it here.
X is the X from Random Float and Z is the Z from Random Float, respectively.
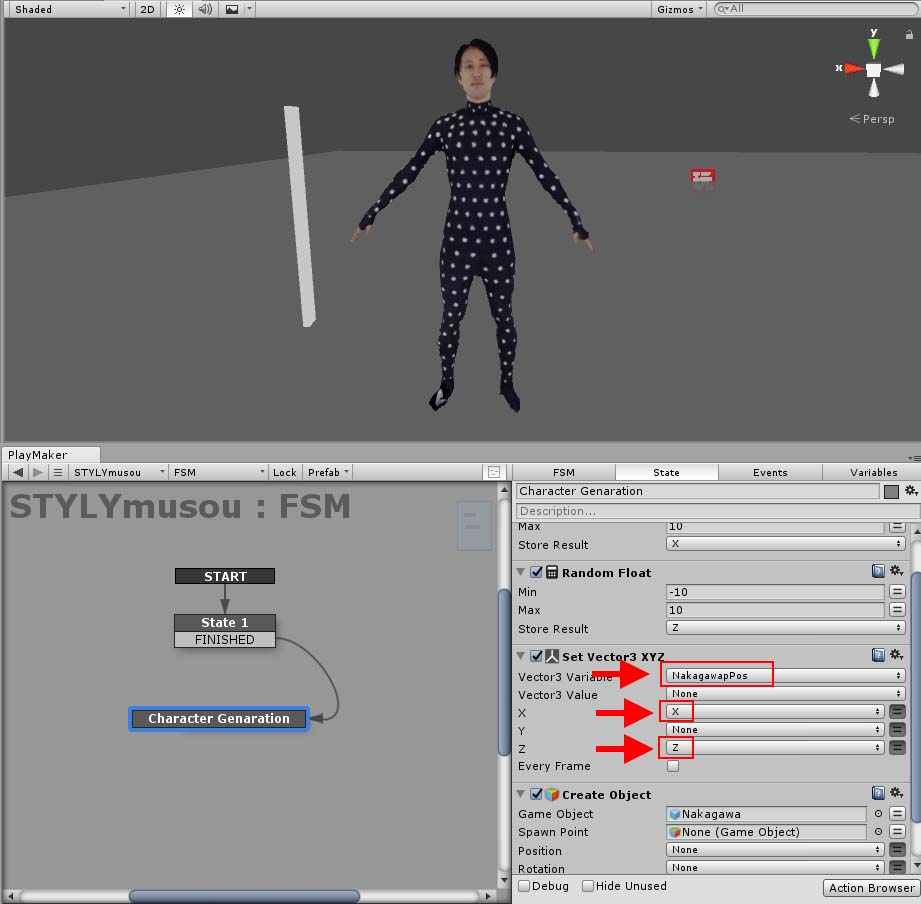
Add Set Vector3 XYZ
Specify the variable NakgawaPos as the position of Crate Object.
You are now ready to generate it at a random location.
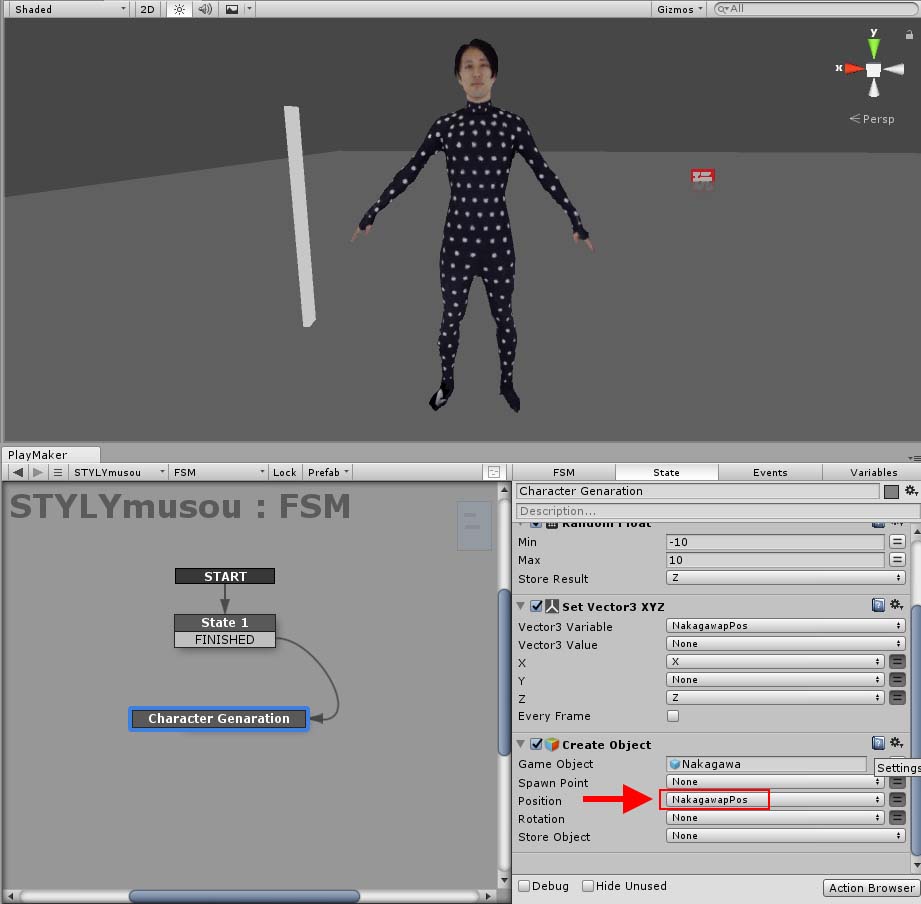
Specify a variable for Position
We will add FINISHED to the Character Generation trtansition.
Connects Random Wait from Character Generation.
Random Wait gets a random value from 1 to 3 seconds for Min and Max3, and changes the timing of character generation during that time.
I left the Real Time checked.
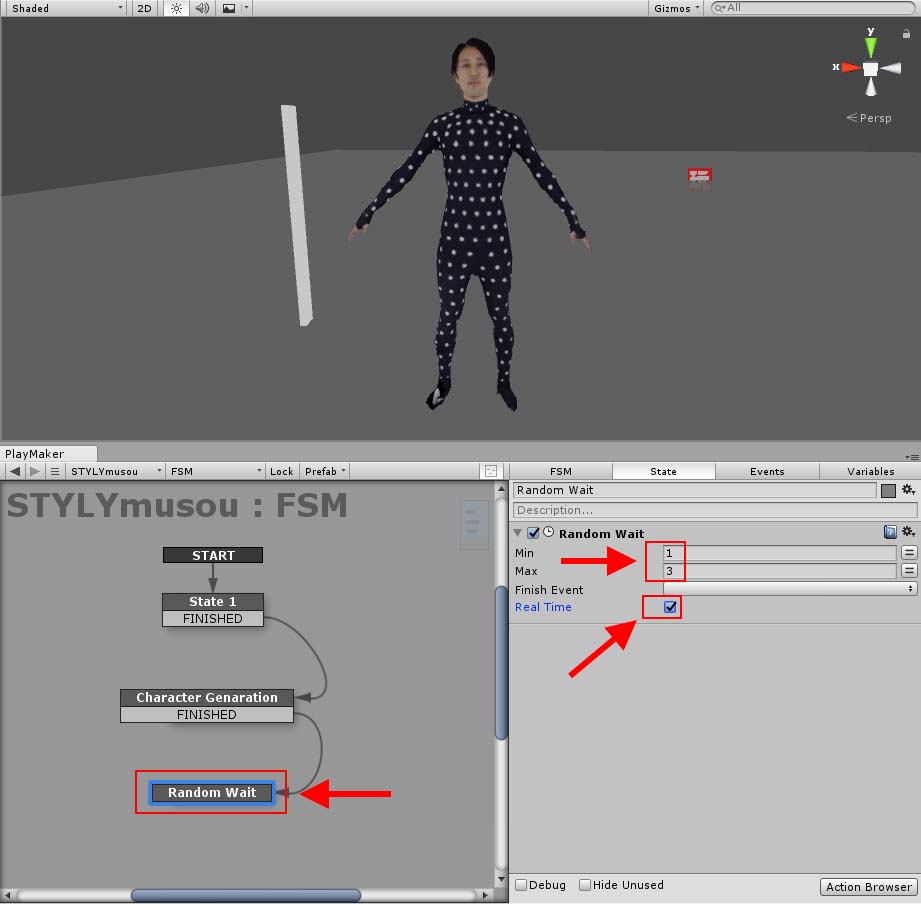
Adding a Random Wait
When the random waiting area is over, you can go back to Character Generation to generate a character again.
Add a FINISHED Transition to Random Wait and connect it to the Character Generation.
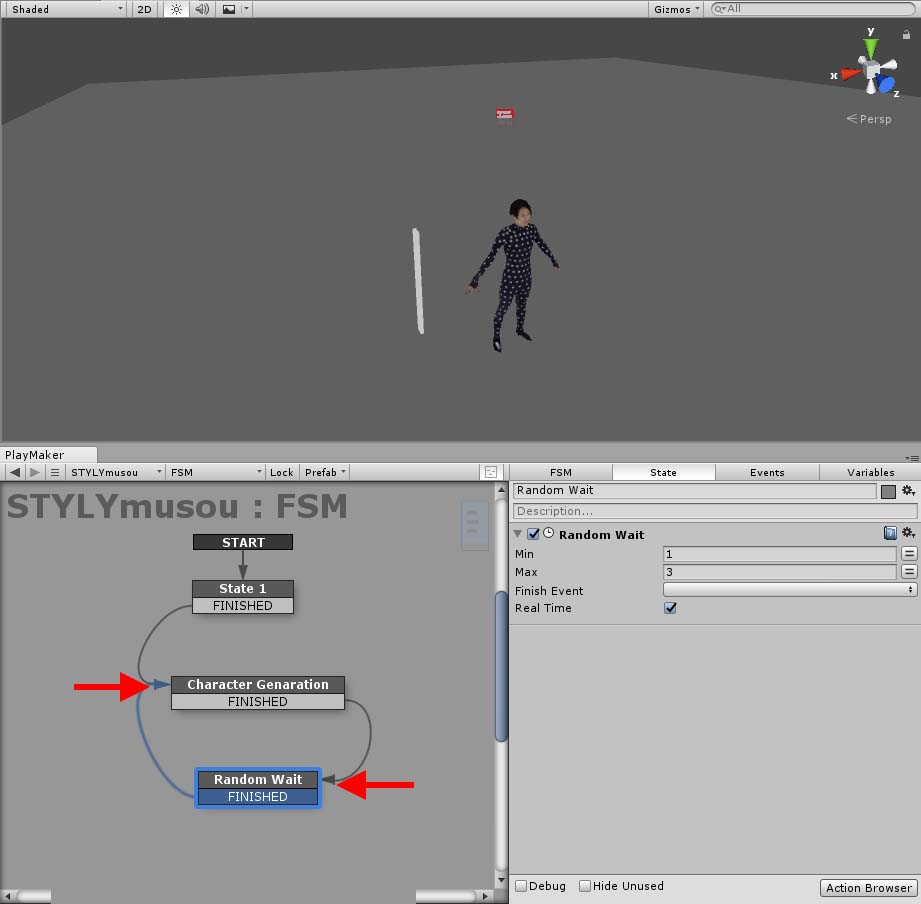
Return to Character Generation
If you play it back in Unity, you can see that the character is generated at a random position.
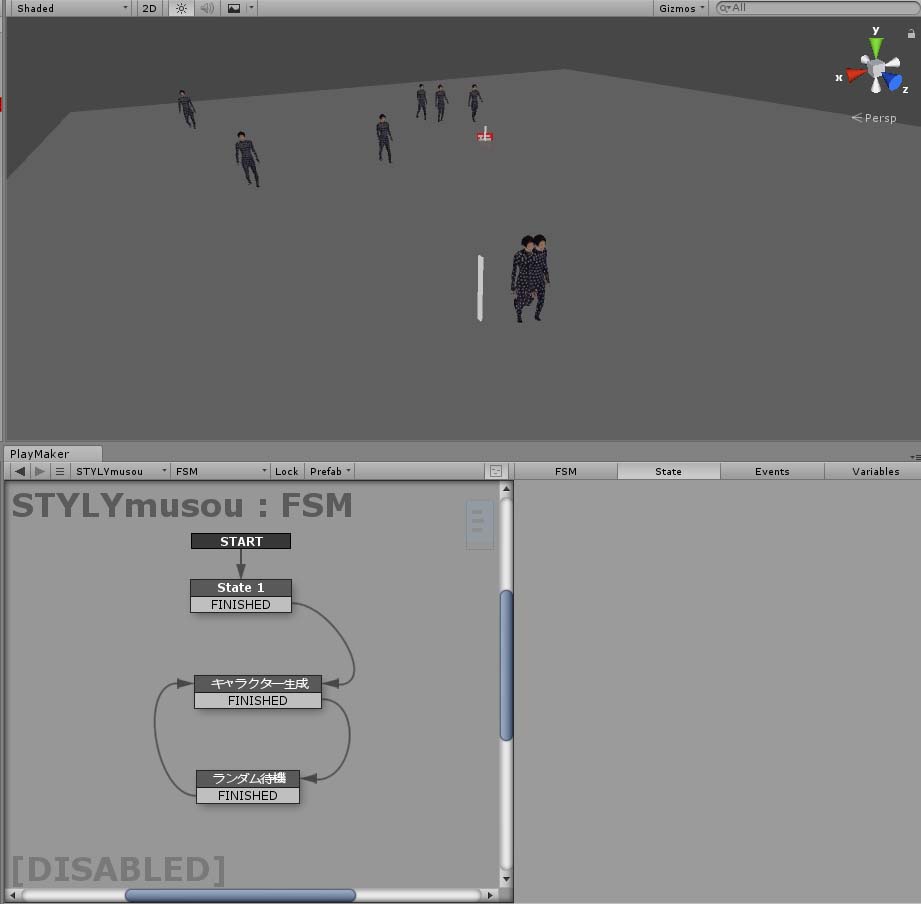
Replay results
How to upload assets to STYLY from Unity Read the article

In this article, I described how to pass an animation of another asset in Unity and how to generate a character in a random position in PlayMaker.
There are a lot of situations where random elements are needed for things that have a game character.
Also, the character must have motion, but it’s hard to create many motions by yourself.
It’s very convenient because you can apply the motion in the Unity’s AssetStore to your own characters.
In the next article, I’ll describe how to defeat an oncoming enemy character with a sword.
The 3D model used in the article can be found in the sample project.
The use of 3D models is available only in STYLY.
As long as you can use it within STYLY, there are no restrictions on modification or alteration.