This article explains how to combine Unity’s animation system with mixamo and PlayMaker to trigger events in the middle of an animation.
By triggering an event at any point in the animation, you can play sounds and generate objects in time with the animation.
This can be applied to a variety of effects, so let’s master it.

Generating particles in the middle of an animation
In this article, we will be using PlayMaker, a paid asset.
If you do not have it, please download it beforehand.
Sample
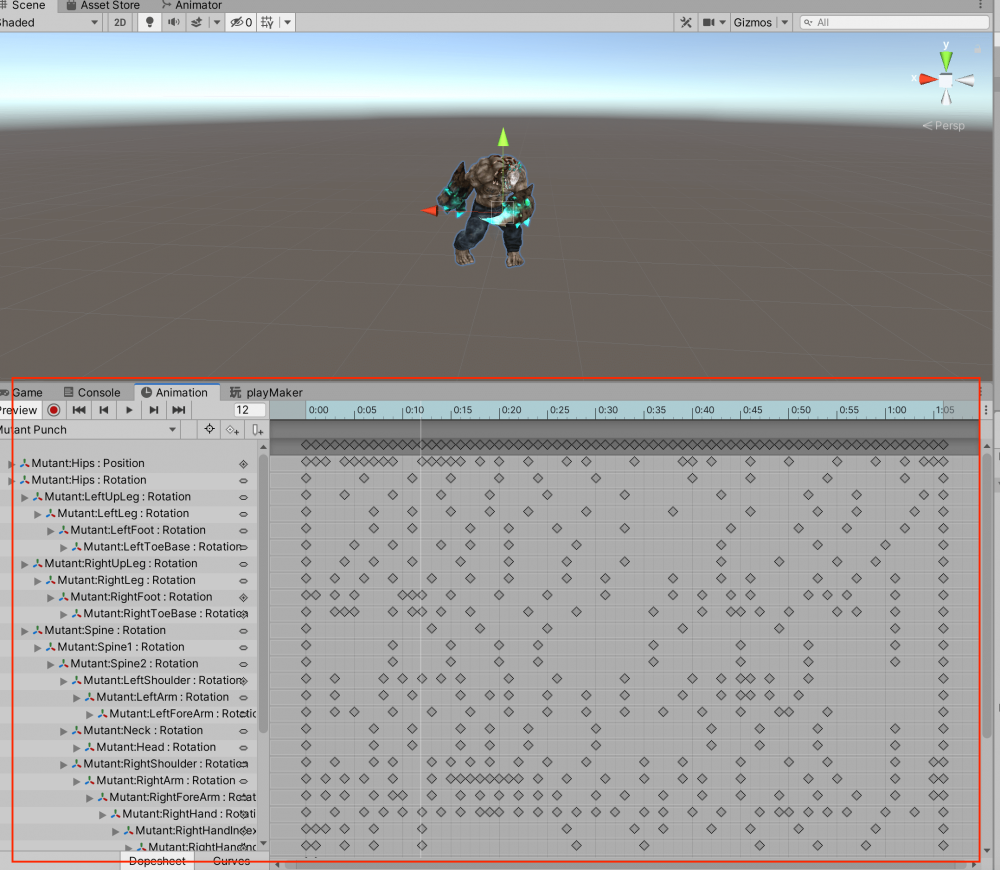
First, let’s check out a sample scene.
In this case, we will generate an event that generates particles when the character punches.
We will also be using mixamo, a 3D modeling tool.
If you are new to mixamo, please refer to the following article.
Creating a character (mixamo)
mixamo is a tool provided by Adobe that allows you to easily combine animation with 3D models.
mixamo: https://www.mixamo.com/#/
This is the character we will be using.
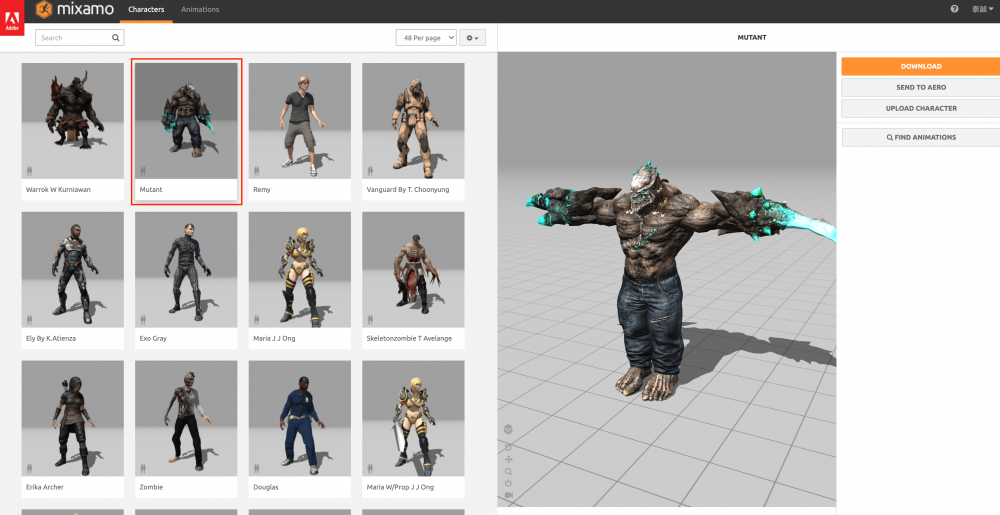
Mutant model
We will use this Mutant Punch motion for the animation.

Mutant Punch animation
Go to “Download” and download the file as “FBX for Unity”.
Creating the character (Unity)
Creating the Model
Next, we need to make sure that Unity can play the animation of the downloaded character.
Add the downloaded FBX file into your Unity project and add the mutant into your scene.

Place the Mutant in the scene
However, since the material is not attached at this point, we need to set up the material.
Select “Material” under “Import Settings” for the character, change “Location” to “Use External Materials (Legacy)”, and press the Apply button at the bottom right.

Setting up the Material
This will create a new Material folder and a folder with the same name as your character’s name.
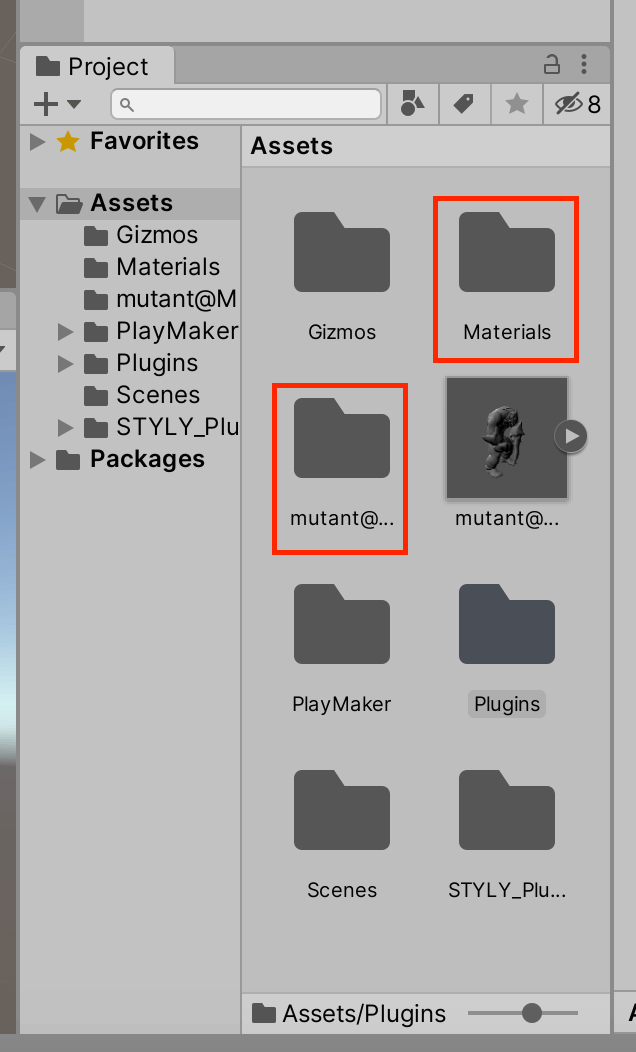
The newly created folder
Select the material in the Material folder and change the “shader” to Unlit/Texture.
Then apply the texture in the Character name folder.
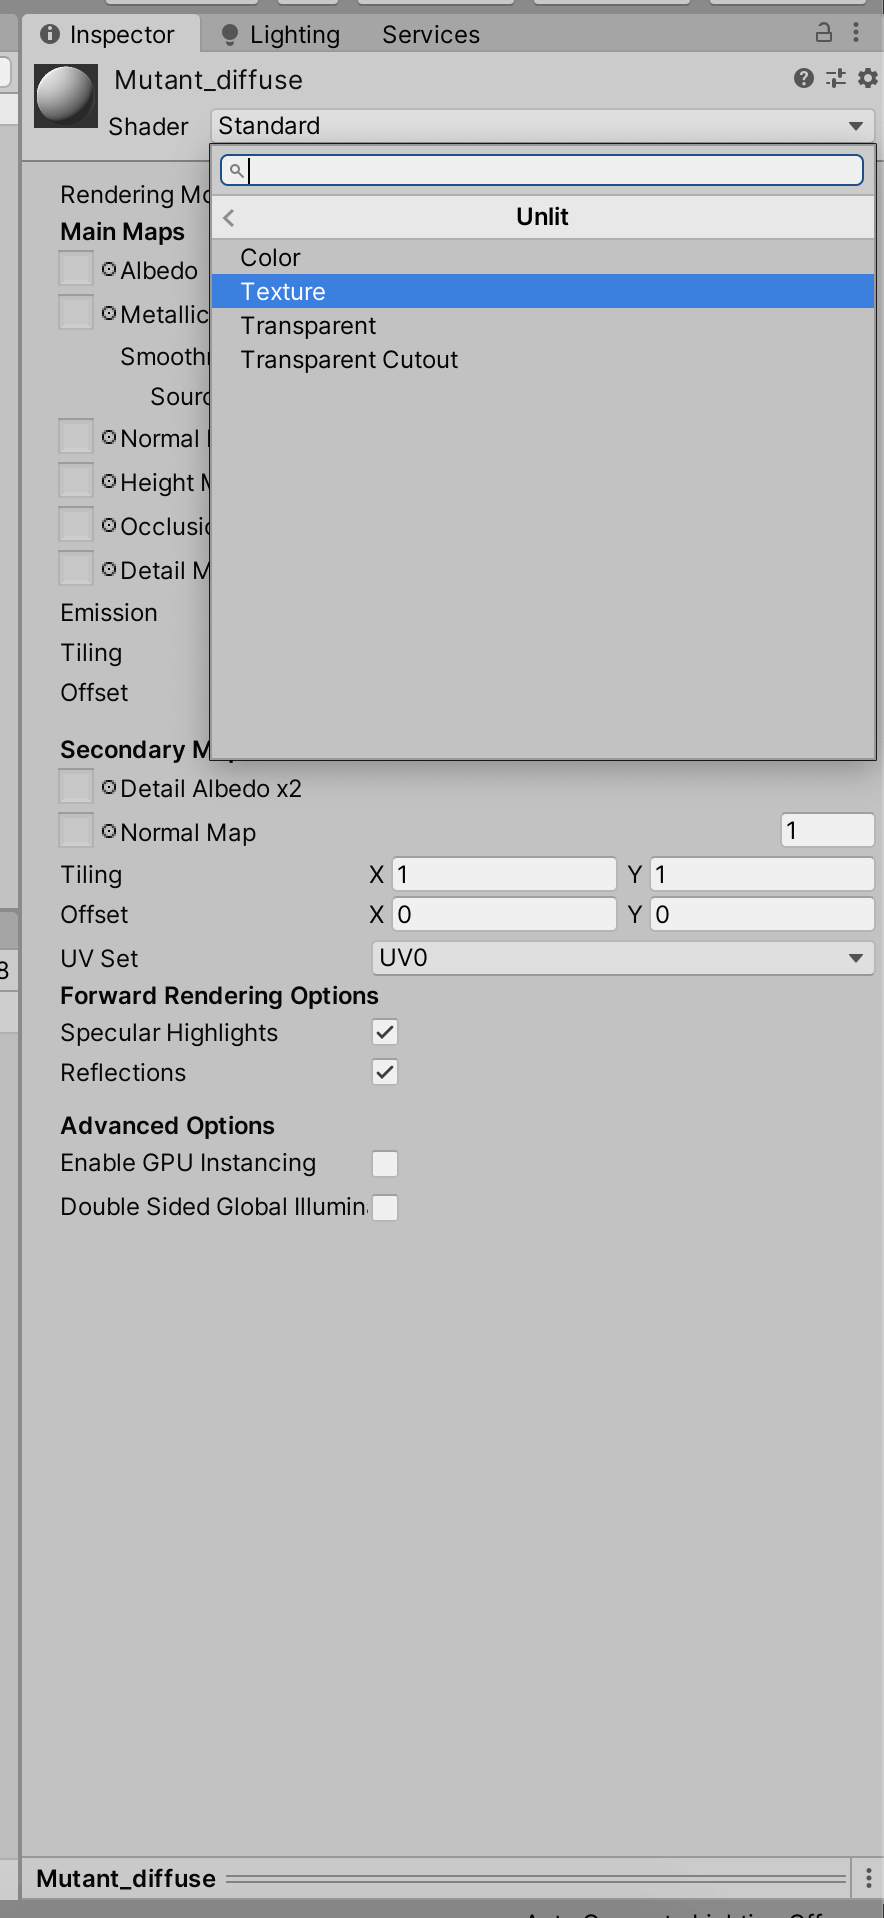
Change the shader of the material
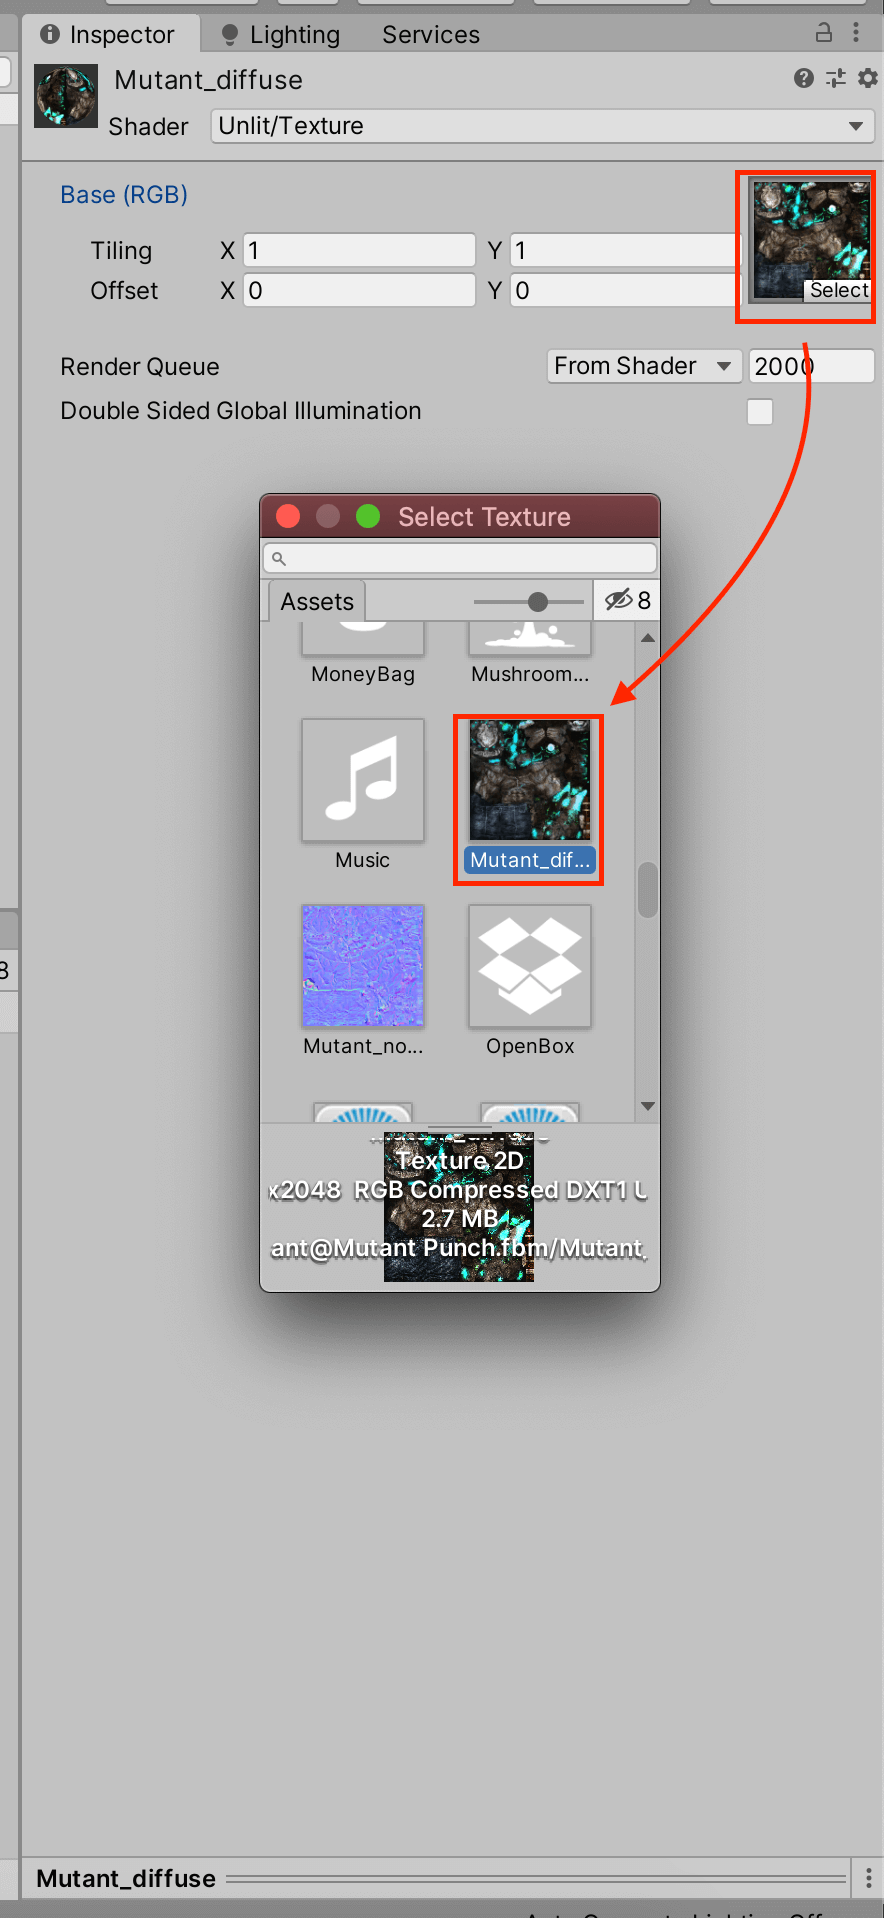
Select Texture
You have now created your model.
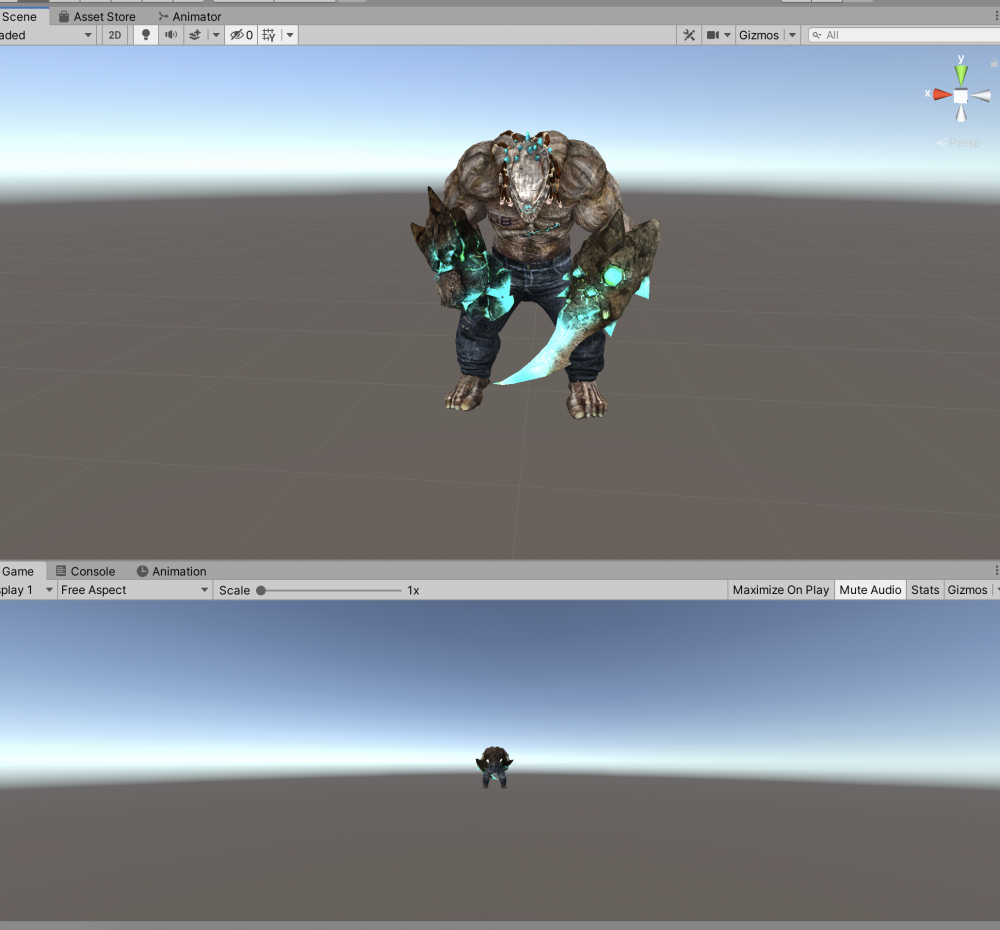
The character is exactly as you downloaded it
Creating the animation
The next step is to set up the animation.
First, we need to prepare the animator.
Right click in the Assets folder in the project window and create an “Animator Controller”.
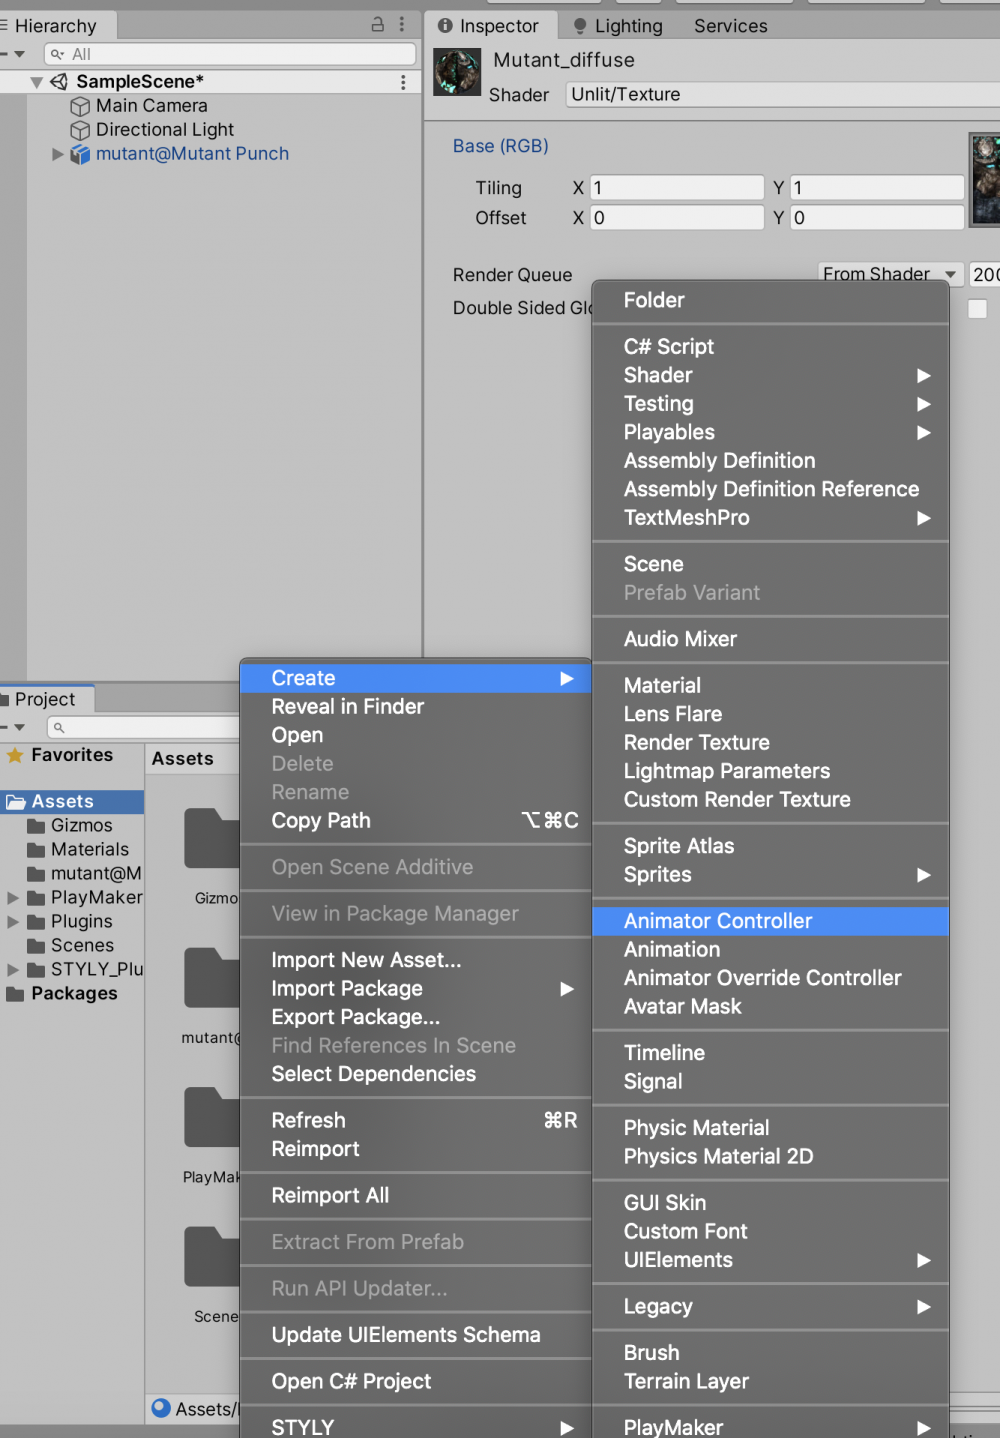
Create an Animator
Rename it to “Mutant Animator” and drag and drop it to mutant@Mutant Punch in the hierarchy to attach it.
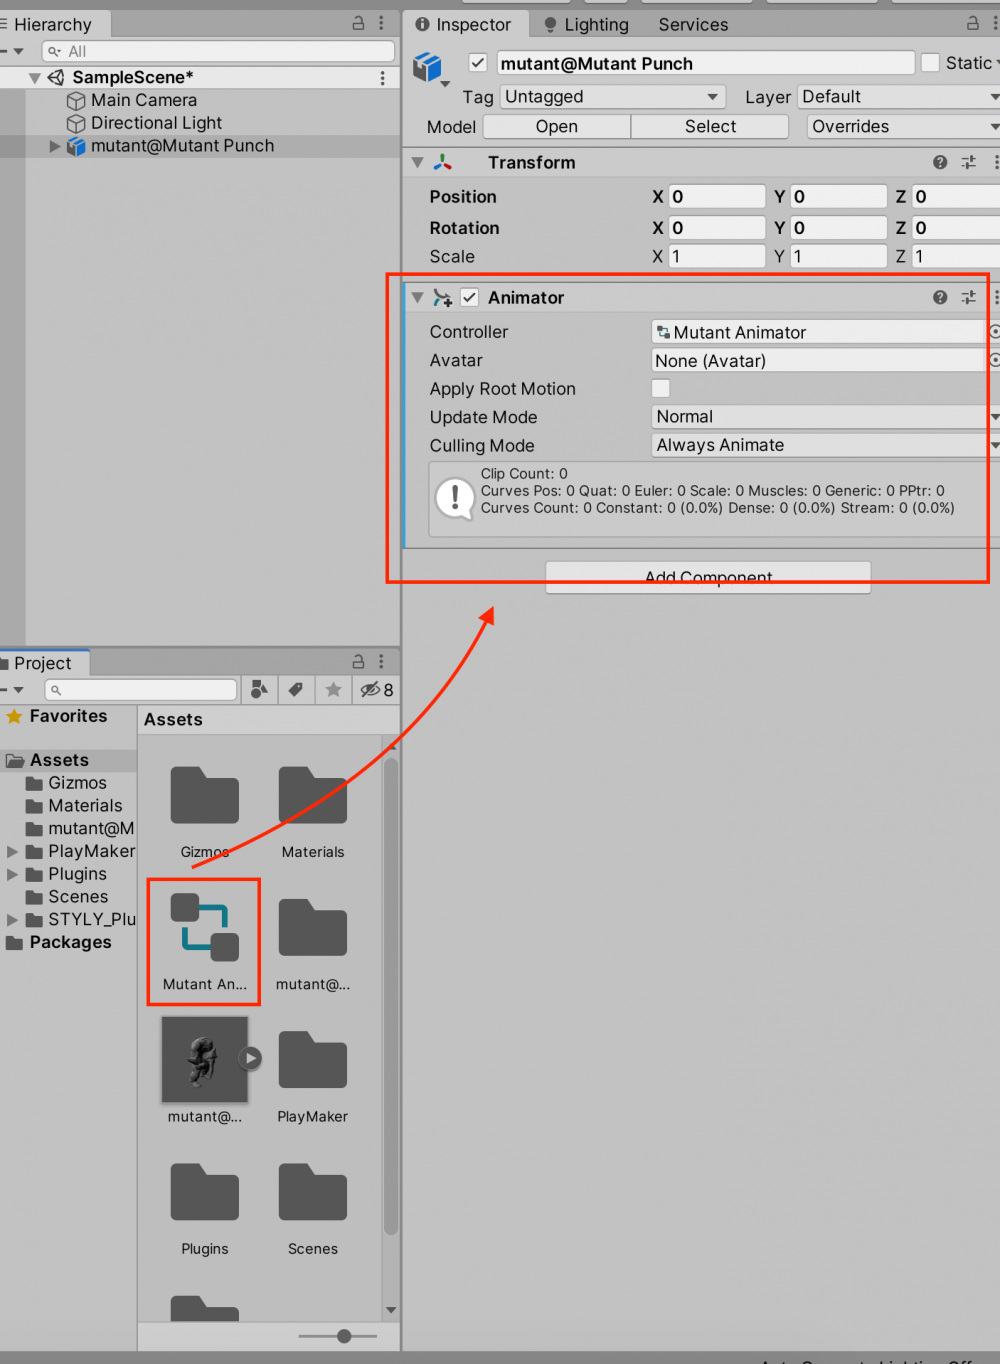
Attach the animator to the 3D model
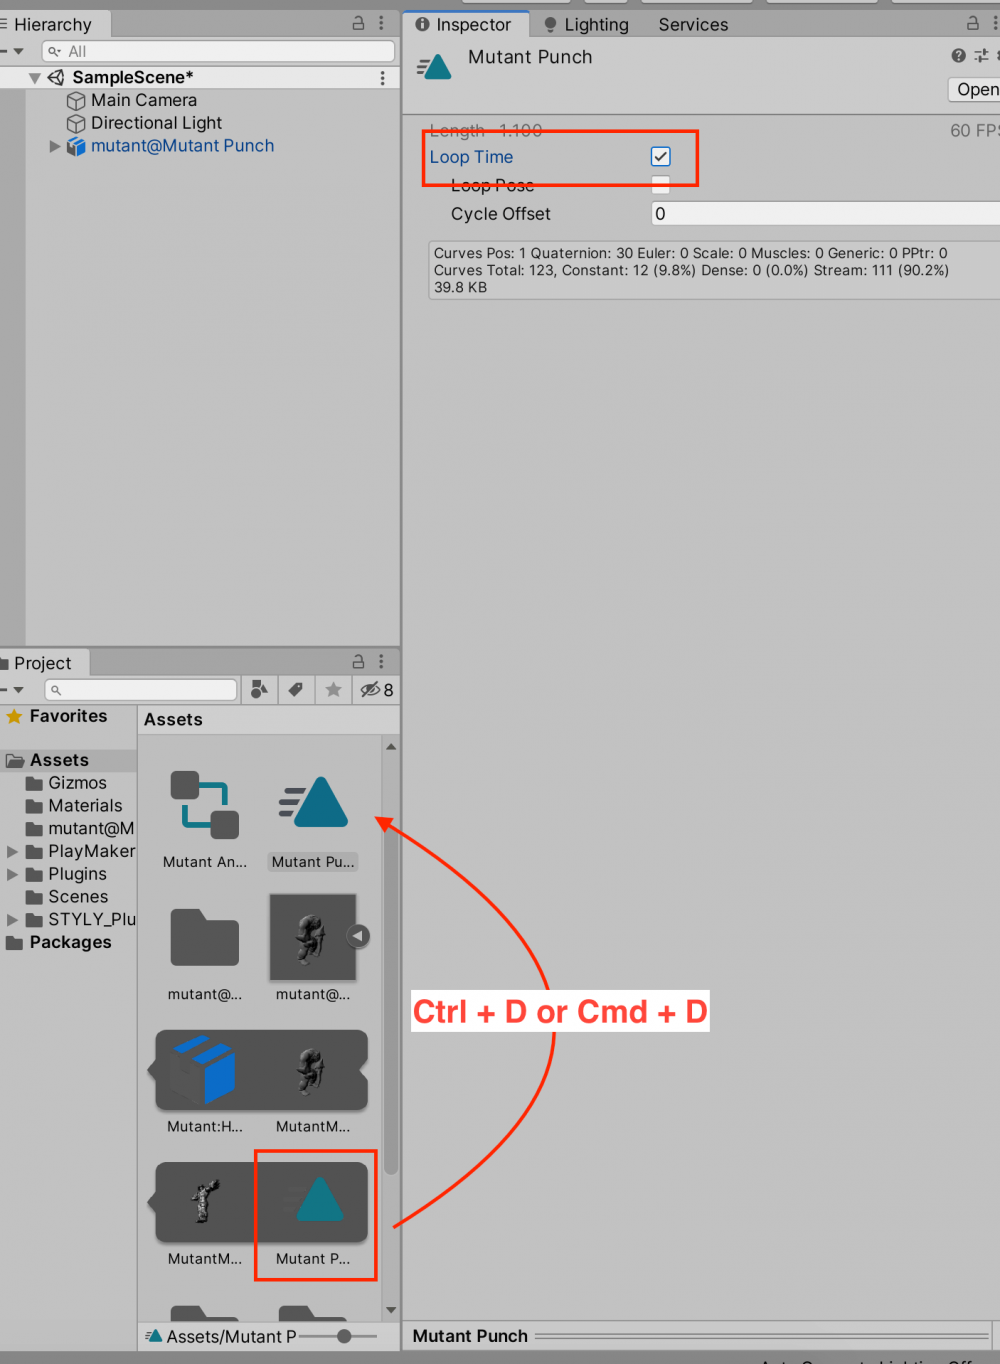
Select the FBX file and bring up the animation.
Duplicate the animation by pressing [Ctrl + D] (or [Command + D] on a Mac).
Select the duplicated Mutant Punch animation and check the “Loop Time” box in the Inspector window.
Duplicate the animation
Double-click on Mutant Animator to open the Animator window.
Add the duplicated Mutant Punch animation by dragging and dropping it into the Animator window.
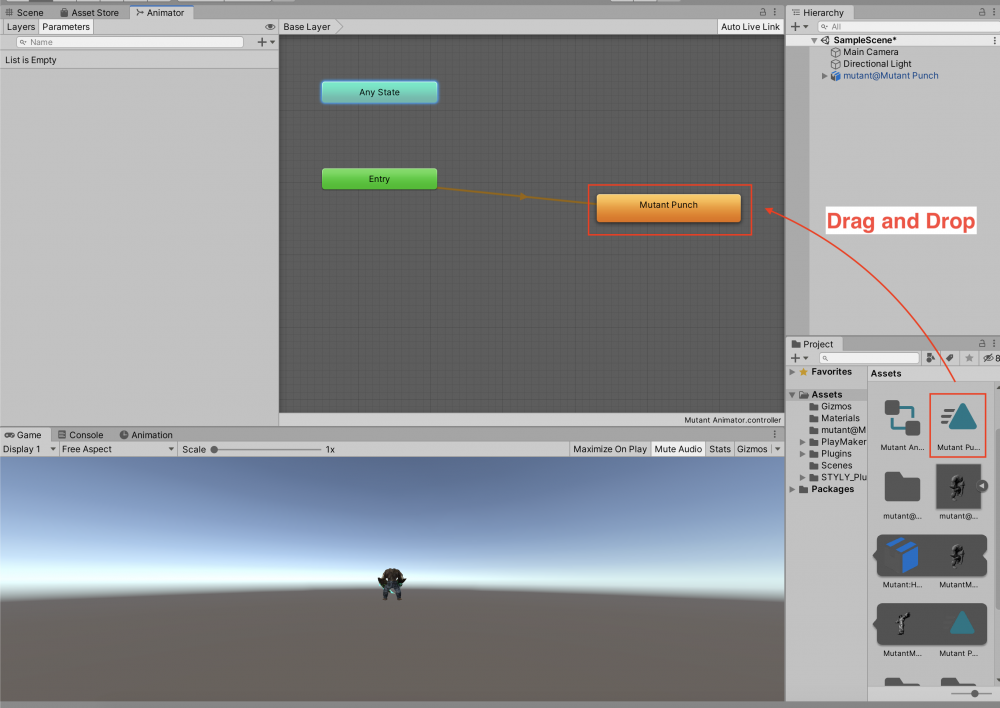
Add the animation to the controller
Pressing the Play button will cause the mutant to punch.
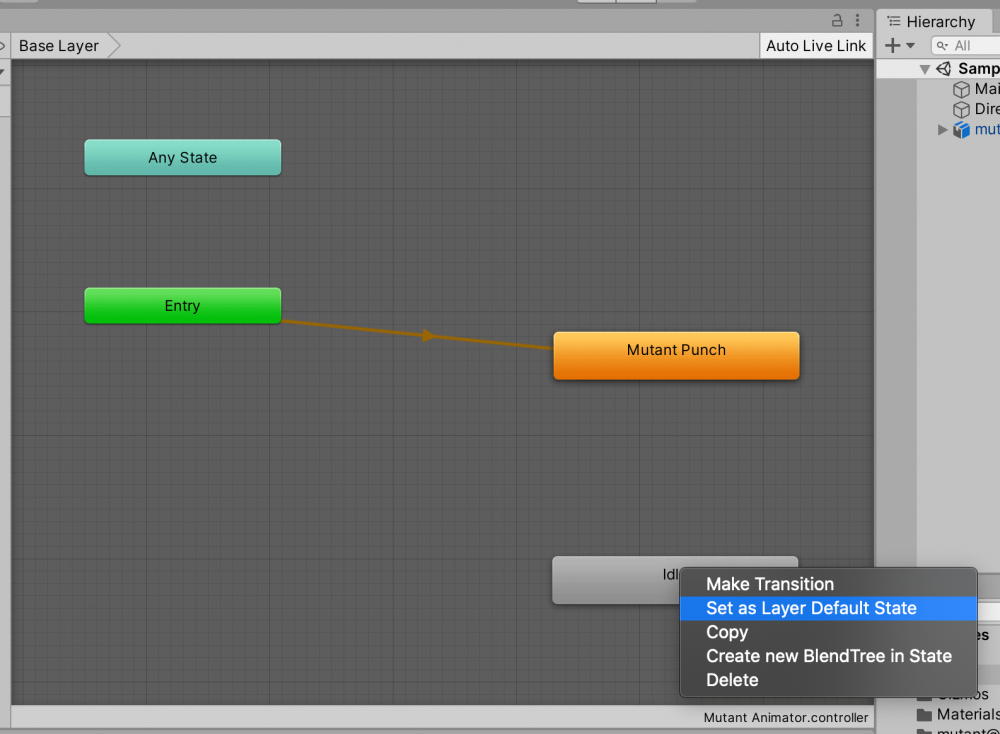
However, if we leave it like this, it will punch all the time, so we will add an idle state.
Open mixamo again and download the Mutant using the Idle motion.
Follow the same procedure as for Mutant Punch to add the animation to MutantAnimator.
Once you have added the Idle animation, right-click on Idle in the Animator window and set it to “Set as Layer Default State”.
This will cause the Idle animation to play during playback.
Set the Idle to its default state
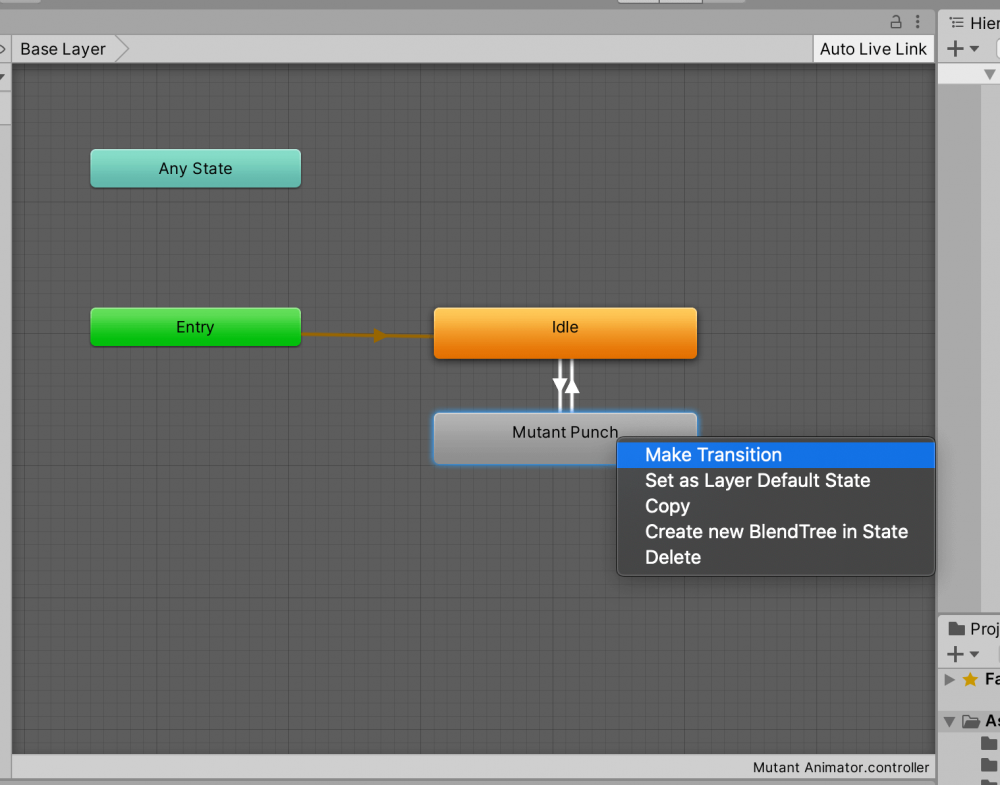
Right-click on the Idle again, then select “Make Transition”.
Connect the arrow to Mutant Punch.
Now, after Idle plays, it will transition to Mutant Punch.
Similarly, add a transition from Mutant Punch to Idle.
Adding animation transitions
Now we’re ready to set up our animation!
Preparing the Particles
Now that the character has been created, it is time to add the particles to be generated to the scene.
We will use the following assets.
These are official assets provided by Unity Technology, and can be downloaded for free.
There are many particles available for this asset, so we will only import the ones we will use.
This time, we will only use Effect Examples > Magic Effects.
Please uncheck all other files when importing.

Assets to import
Select “Earth Shatter” in Magic Effects > Prefabs, and uncheck “Looping” in the Inspector window.
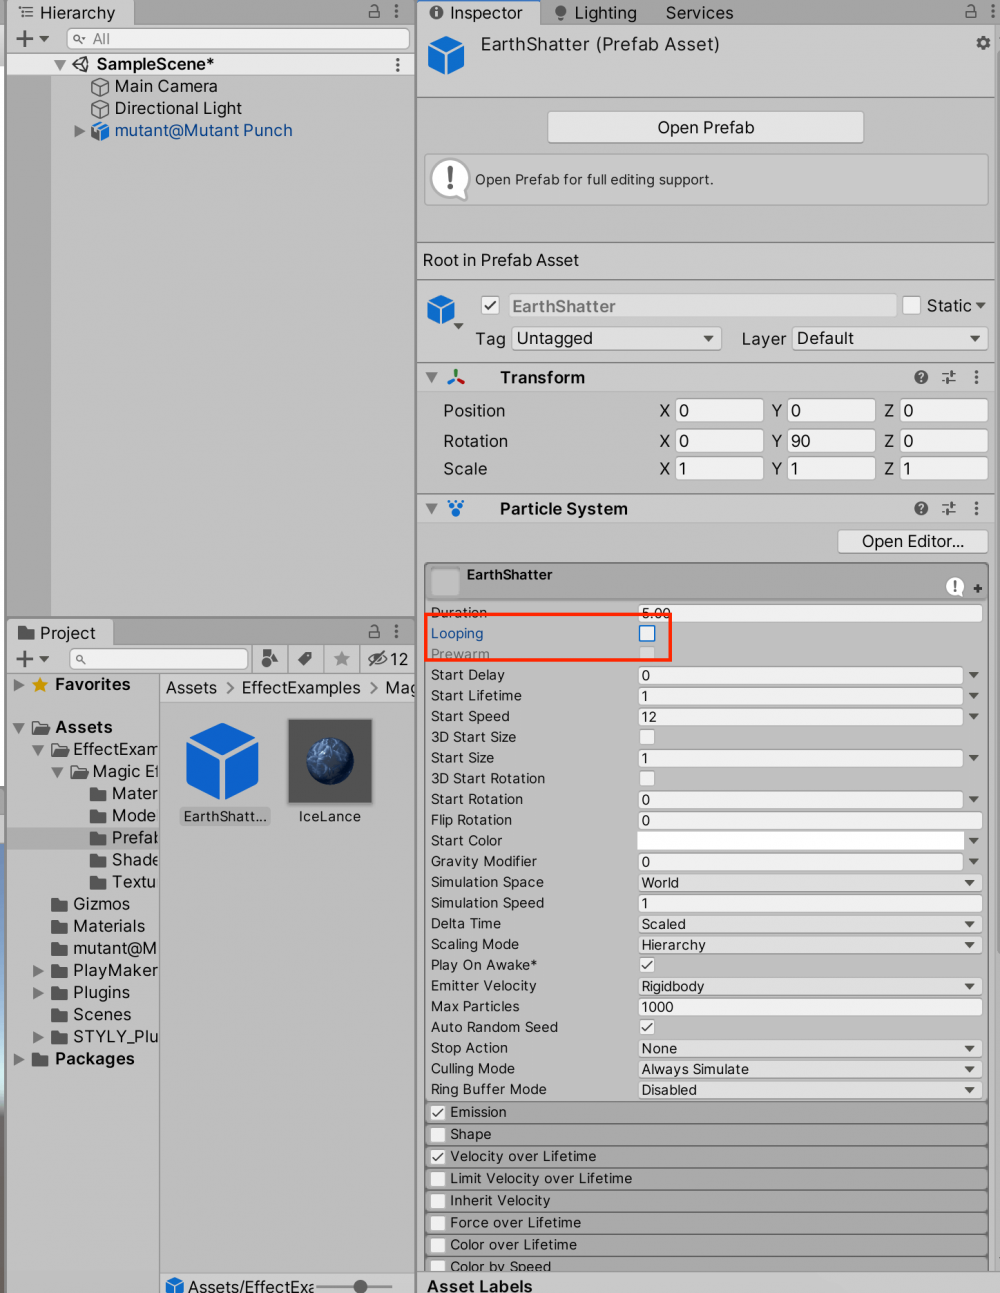
Uncheck Looping
This completes the preparation of the particles.
Trigger an event
The last step is to use PlayMaker to set up events to occur during the playback of the animation.
In this case, we want the Earth Shatter to be generated when the Mutant Punch is punched.
First, let’s create an event. Add an FSM to the mutant.
Add an event from the Events tab. This time, let’s name the event SpawnParticle.

Creating an event
Right-click on the FSM tab and select SpawnParticle from Add Global Transition.
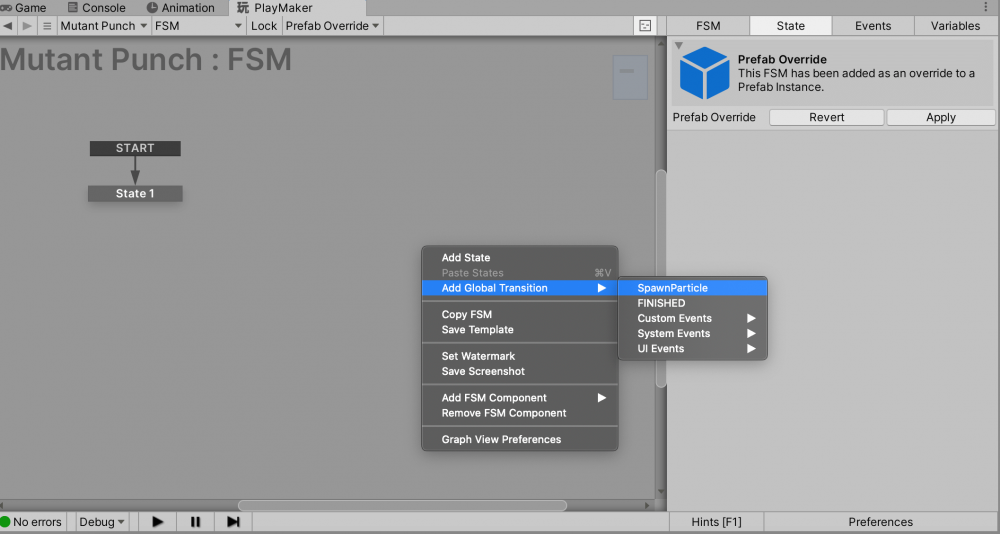
Adding a Transition
Configure the settings for the states connected to the SpawnParticle as follows.
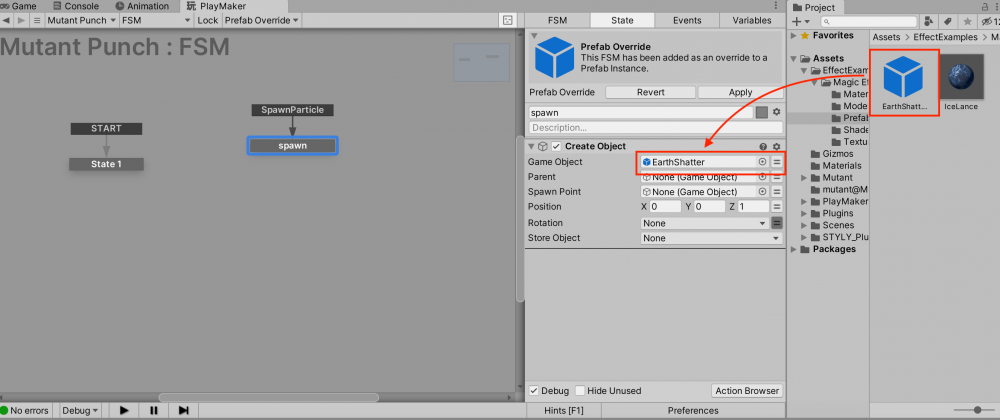
FSM Settings_1
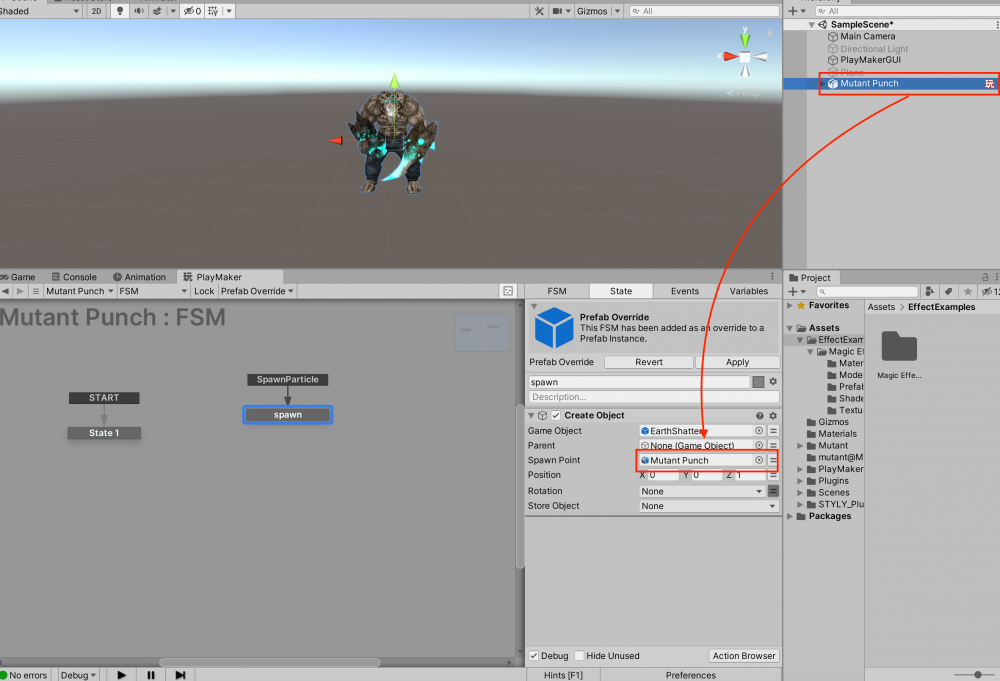
FSM Settings_2
Next, let’s generate a SpawnParticle from an animation.
Select the Mutant Punch animation file from the Assets folder.
The animation window should look like the following.
State of the animation window
In this state, preview the animation and adjust where to fire the event.
In this case, let’s call the event at the 15th frame.
Move the slider to the 15th frame, right click and select “Add Animation Event”.
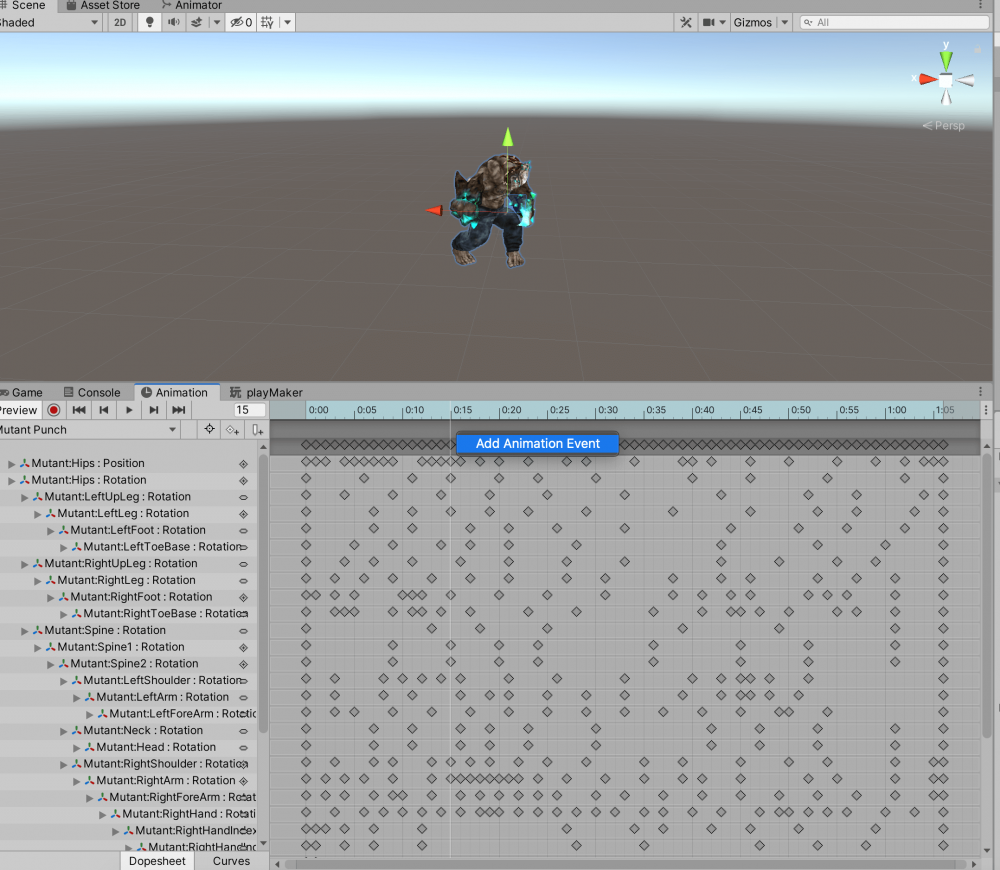
Adding an animation event
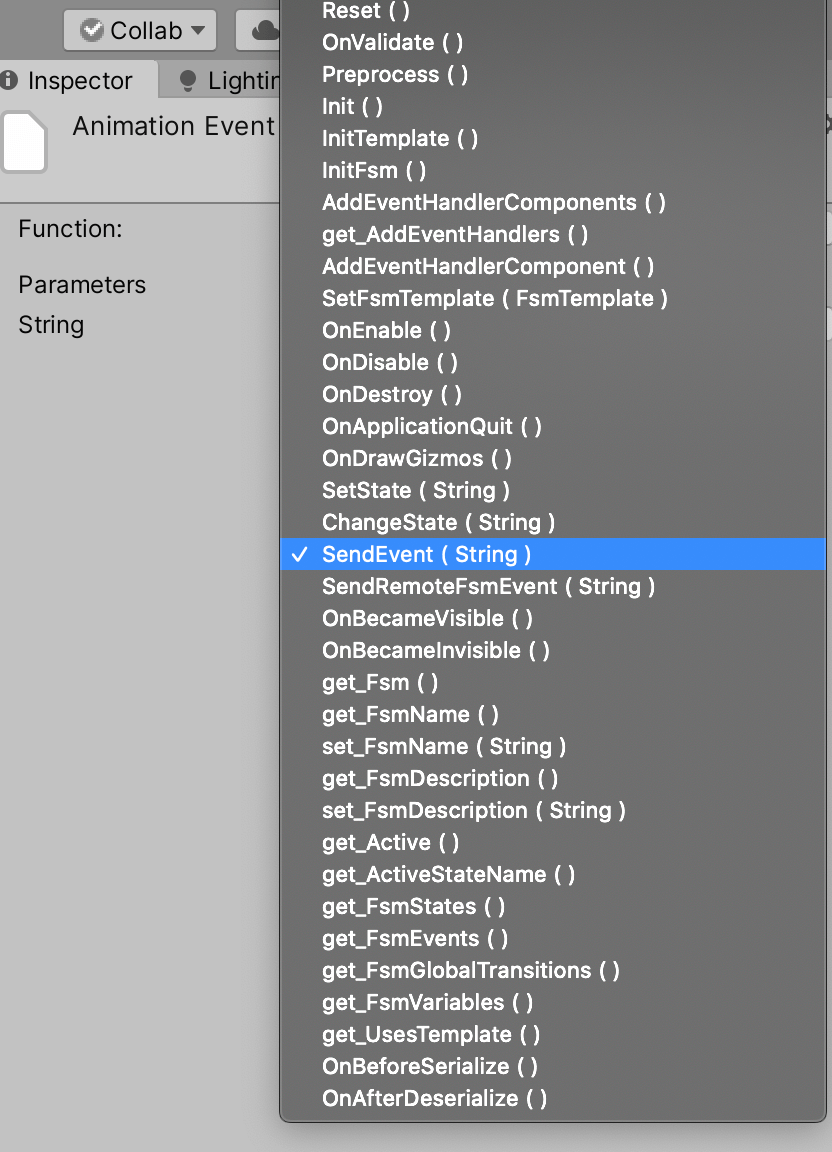
From the Inspector window, select Function > SendEvent (String).
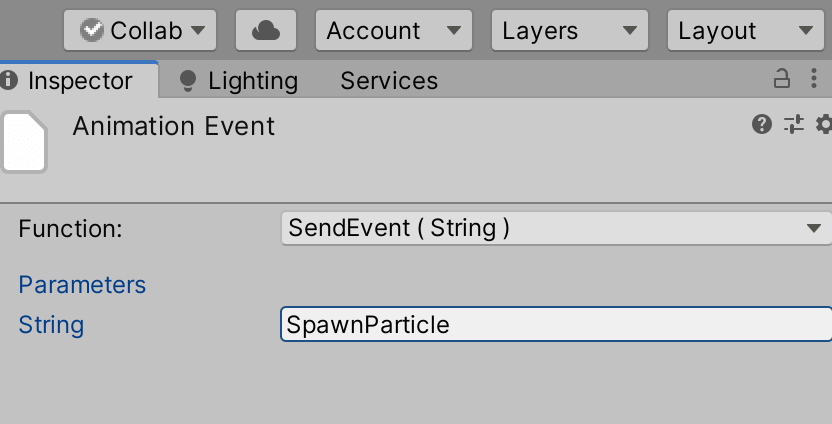
Then, in the String section below, enter the event you want to call, “SpawnParticle”.
Setting up SendEvent
Specify the Event name
If you press the Play button in this state, the particle will be played at the timing when the mutant throws the punch.

Checking the Completed Form
Now let’s create the stage.
You can add a Plane, etc., or you can use Terrain to easily create a stage with a terrain.
For more information about Terrain, please refer to the following article.
![[Introduction to Unity] How to Use Terrain Engine](https://styly.cc/wp-content/uploads/2019/07/スクリーンショット-2019-07-05-20.18.43-160x160.png)
How to upload to STYLY
Once you are done, let’s actually upload your 3D model to STYLY.
Create a STYLY account
How to upload from Unity to STYLY

This scene prefab has a large data size.
If it takes a long time to upload, you can try the following article on how to reduce the data size.
In this article, I introduced how to combine Unity’s animation system with PlayMaker to trigger events at any given time.
Depending on the combination of 3D models and events, various expressions are possible in the scene.
Please try out different combinations and use them to create your own scenes!
Let’s learn VR/AR content creation with no experience!
The online learning site NEWVIEW SCHOOL ONLINE is now open, where you can learn from the basics to the applications of Unity and PlayMaker, which are necessary for VR/AR content creation, and also learn the creation process (production techniques will also be disclosed) of the attractive content distributed on STYLY!
- You can create VR/AR contents without writing programming code.
- Officially supervised Unity courses are available.
- Additional elements such as photogrammetric production methods and content weight reduction are available.
- You can learn how to think about creating VR/AR content.
