In this article, we will introduce how to use Unity’s Visual Scripting, which allows even those unfamiliar with programming to easily create applications. You will learn how to set up the Visual Scripting environment, configure settings to prevent errors, and display HelloWorld on the console.
What is Visual Scripting?
It is a tool integrated into Unity that can be used for free.
Using Visual Scripting, even those unfamiliar with programming or in environments where scripts cannot be used can create applications.
Since it is node-based, you can visually understand the program’s flow and edit nodes while the scene is running.
Setting up Visual Scripting
Visual Scripting is installed by default in Unity Editor version 2021.1 and later.
We will use version 2022.3.24.f1 this time.
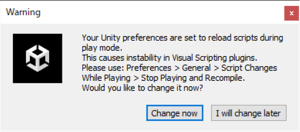
Please check the settings in advance as the following error may occur when running the scene.
Go to Edit → Preferences → General → Script Changes While Playing and set it to Stop Playing And Recompile.
Displaying HelloWorld on the Console
In the Hierarchy, create a GameObject with Create Empty and name it “HelloWorld”. Attach a Script Machine with AddComponent.
When you click the “new” button, the save location for the graph will be displayed. Create a folder named “Macros” and save it as “HelloWorld”.
Select the saved graph in the Inspector and click “Edit Graph” to open the Script Graph window.
Visual Scripting is essentially done in this window.

Basic screen[/caption>
Node: The core of Visual Scripting
The part that connects nodes is called a port.
[caption id="attachment_56084" align="aligncenter" width="500"] Node
Node
Graph Editor: The screen to manage nodes.
[caption id="attachment_56083" align="aligncenter" width="1000"] Graph Editor
Graph Inspector: Displays details of the selected node.
Blackboard: Manages variables.

Blackboard[/caption>
Right-click in the Graph Editor and search for Debug.Log to add it.
[caption id="attachment_56072" align="aligncenter" width="1000"] Add Debug.Log
If the following window appears, select “Add Node”.
[caption id="attachment_56078" align="aligncenter" width="500"] Add Node
Enter “HelloWorldString” in the Variables field from the HelloWorld inspector, press the + button next to it to create a variable.
Enter a value for the variable.
Type: Allows you to change the type of variable
Value: Allows you to enter a value
Drag and drop the two lines next to this variable to the GraphEditor.
Next, connect the nodes as shown below.
On Start: Called when the scene starts
Get Variable: Variable
Debug Log: Displays the variable of type String in the Console.
If the Console is not displayed, you can display it with Ctrl + Shift + C.
When executed, “HelloWorld” can be displayed on the Console.
“HelloWorld” will be displayed on the Console screen.
Next time, we will introduce IF statements, inputs, and coroutines using HelloWorld.


