If you are a newcomer to Unity, you may need guidance to understand how to use the various operation screens.
In this article, I’ll review the basic actions for Unity’s various operation screens as an introduction to the program.
Let’s learn how to operate them one by one!
If you have not yet downloaded and installed Unity Hub and Unity, please visit here.
Various window views in Unity
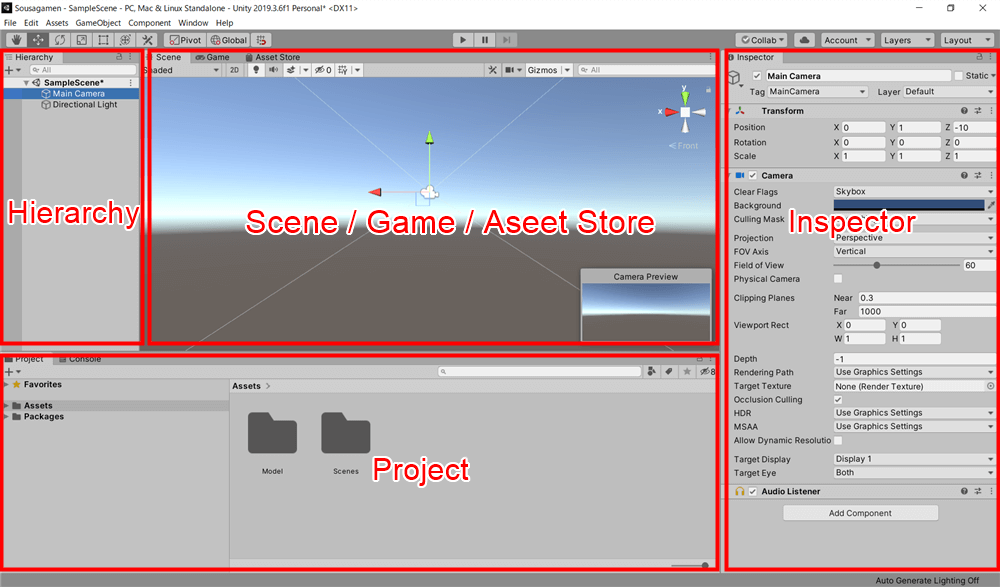
The default Unity screen looks like the image.
Here are the six main windows and views.
Hierarchy Window
What is the Hierarchy window?
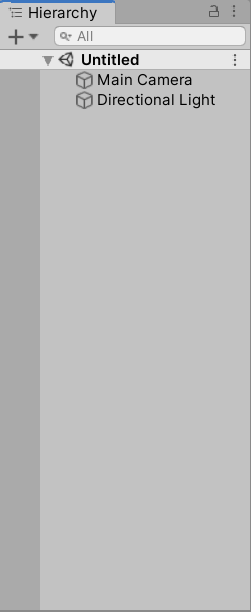
The Hierarchy window lists all objects in the scene view.
Note that Main Camera and Directional Light are shown from the beginning.
Adding Objects
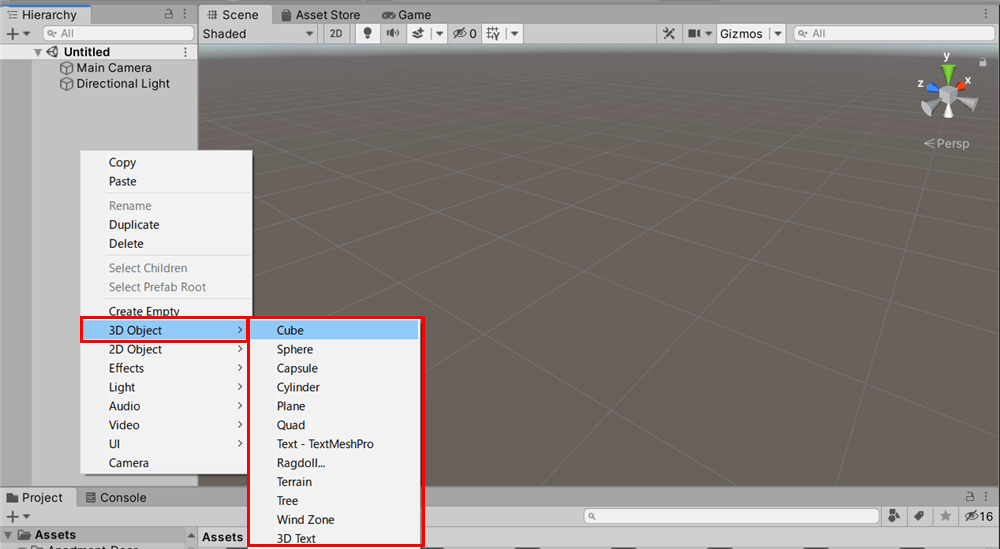
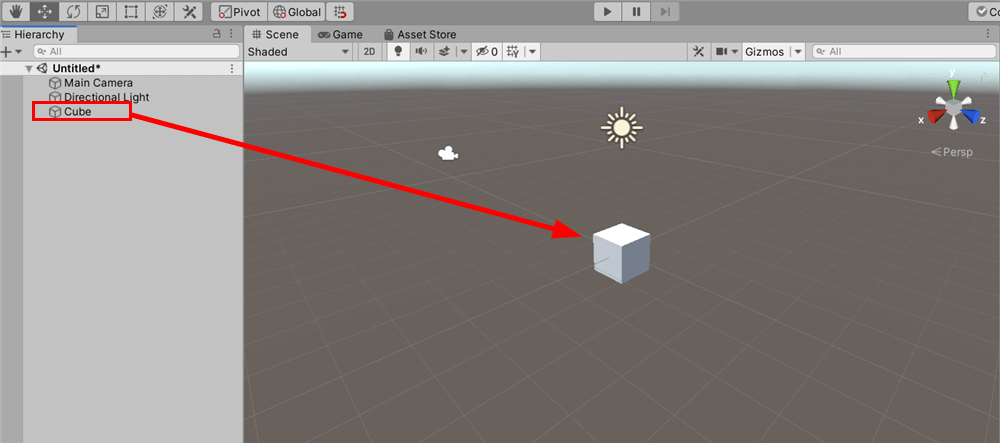
You can add an object you need, such as a Cube or Sphere, from the 3D Object menu by right-clicking on the hierarchy window.
If you try it out, a cube will appear in the Scene view as shown in the image.
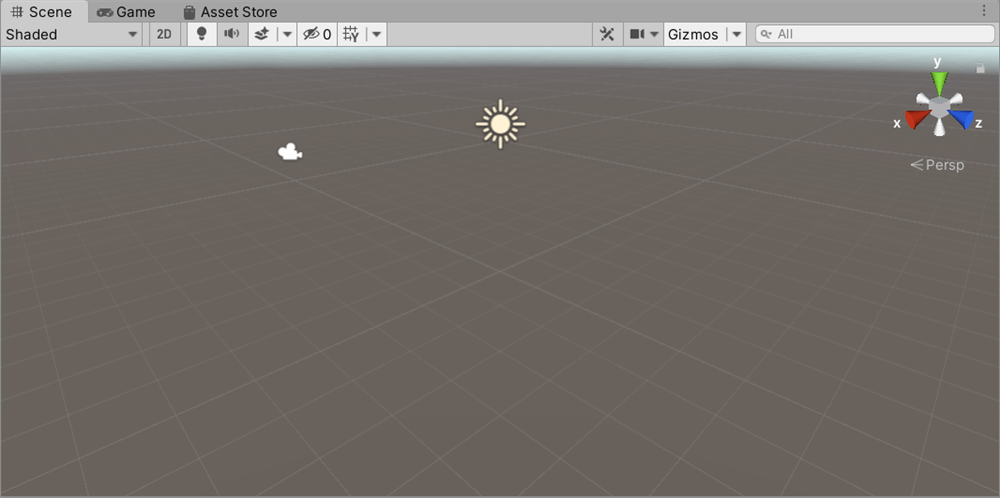
Scene View
What is Scene view?
Scene view is the screen in which you edit your Unity scene.
Here you can change the position, size, and angle of objects.
While the controls may seem difficult to use at first, you will get used to them as you use the software.
(*This article assumes the use of a three-button mouse.)
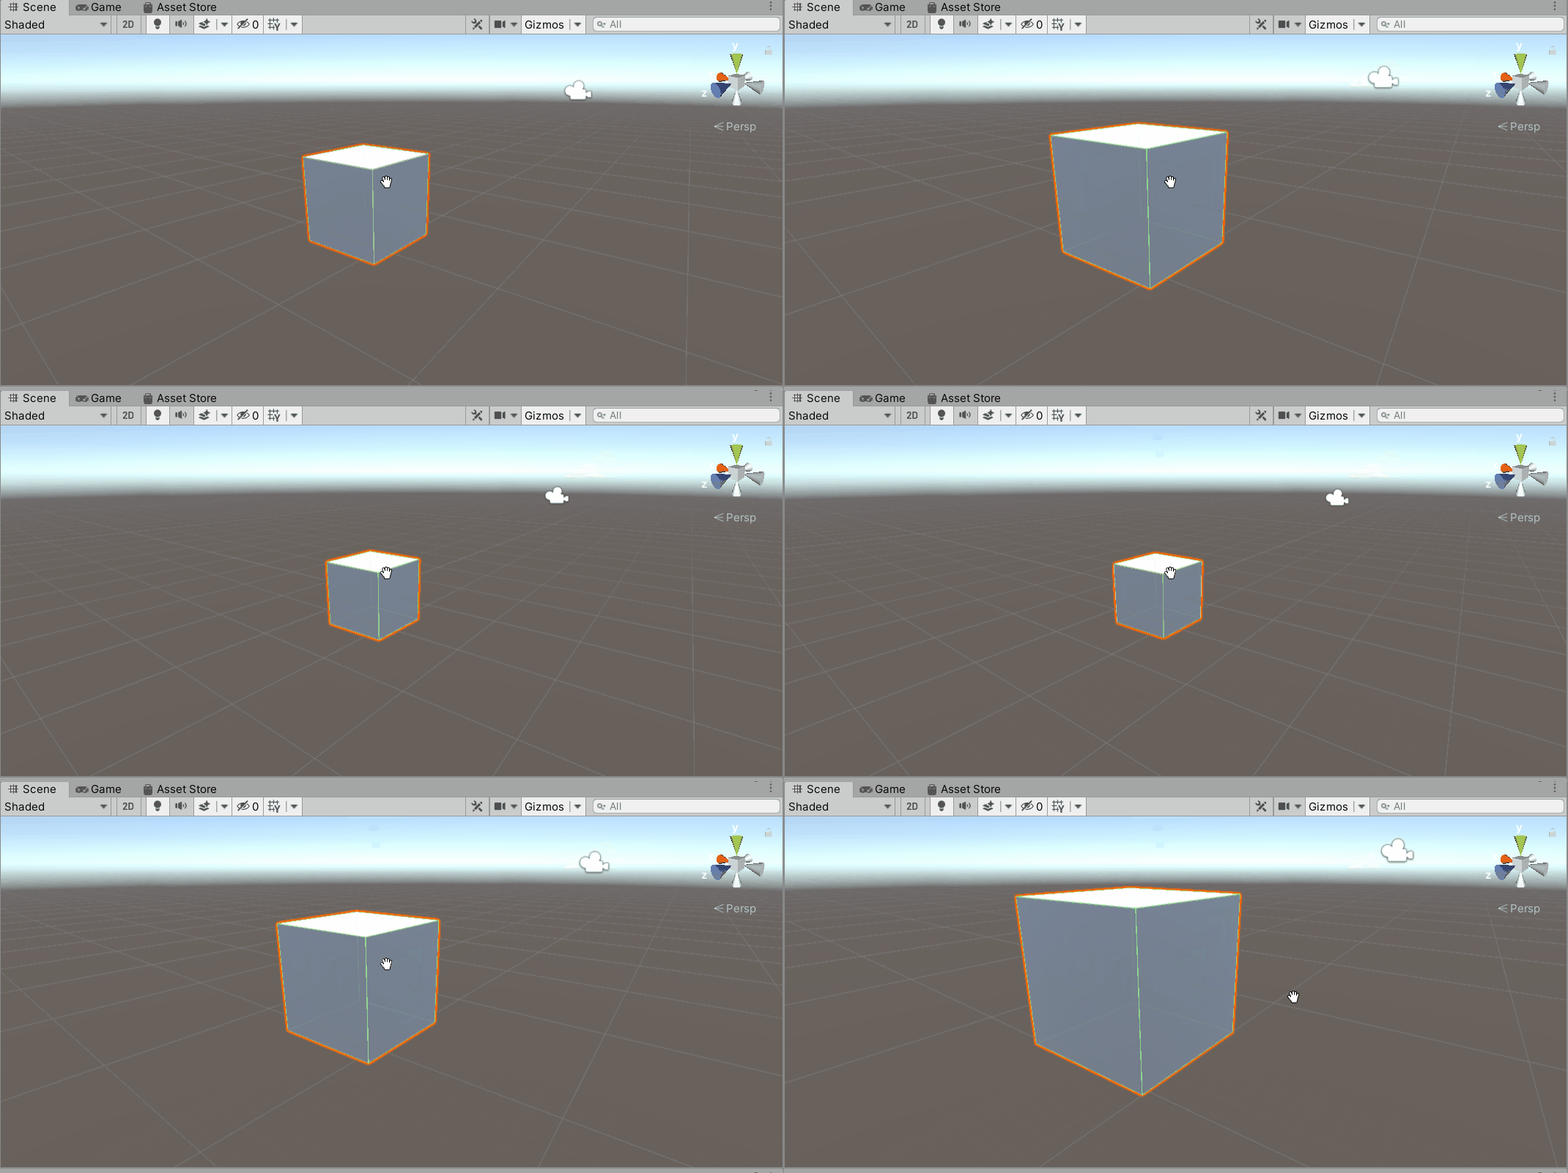
Viewpoint Manipulation
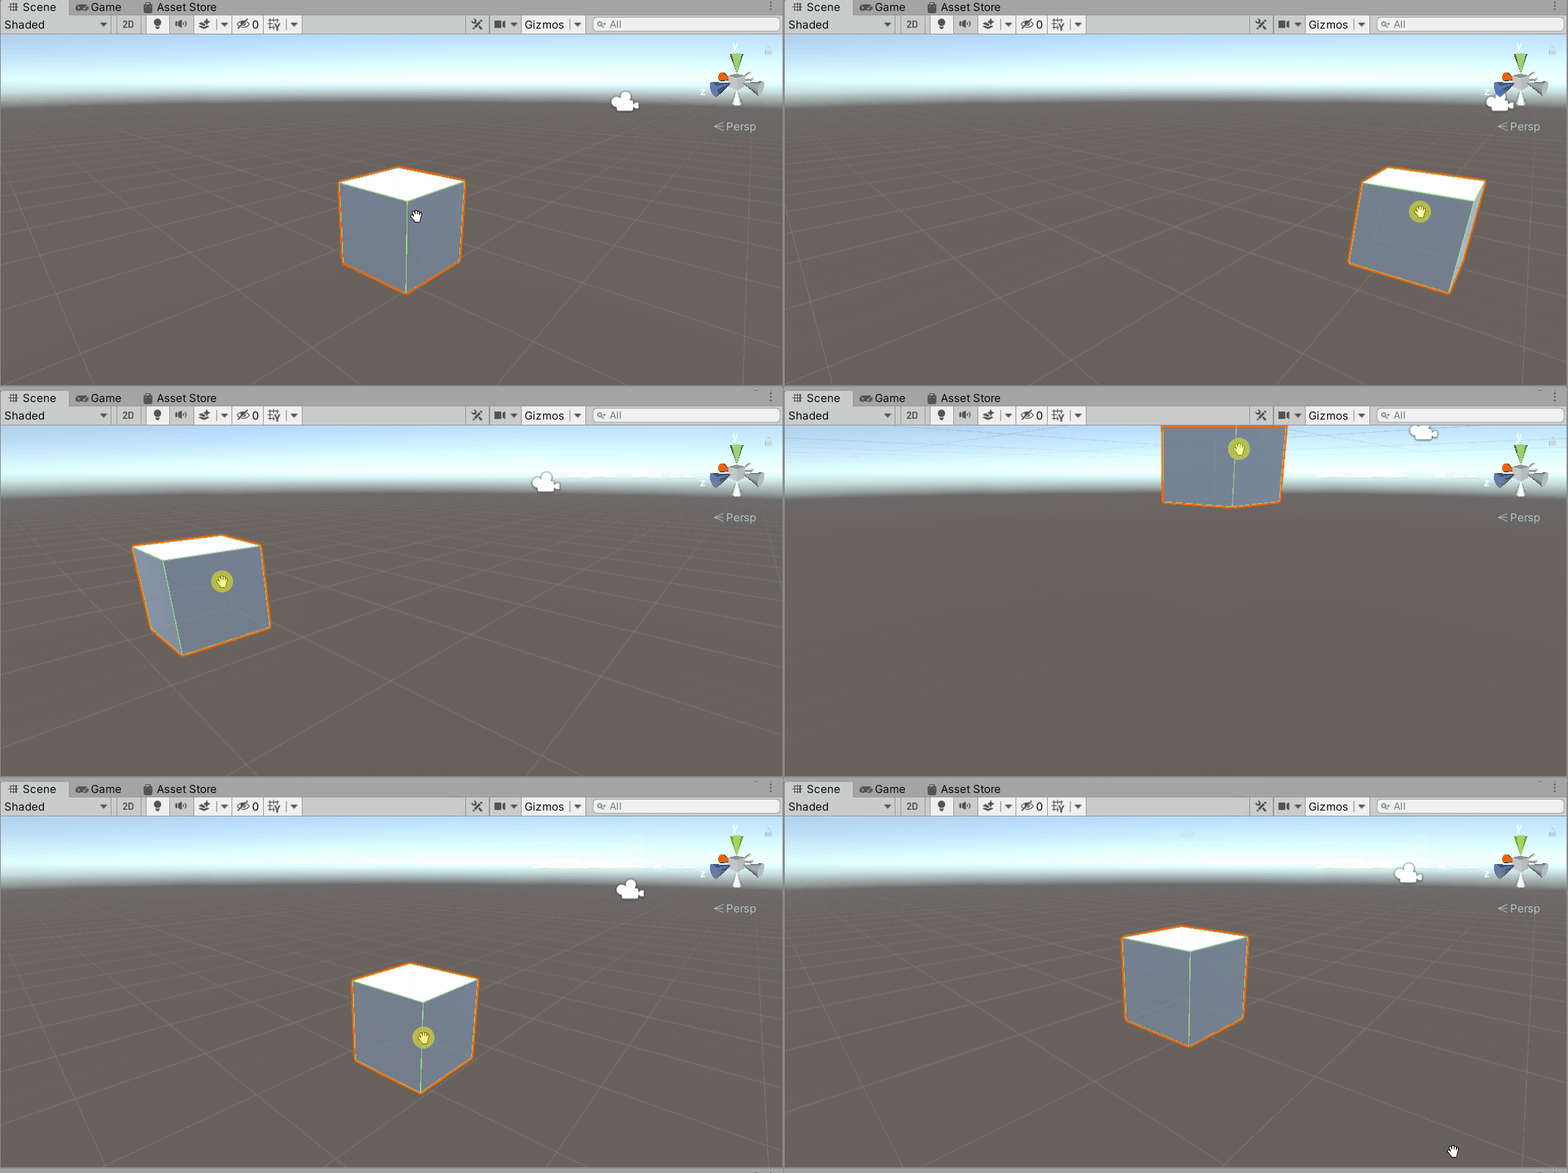
Holding down the middle mouse button and dragging shifts the viewpoint in parallel.
Rotating the view (right click)
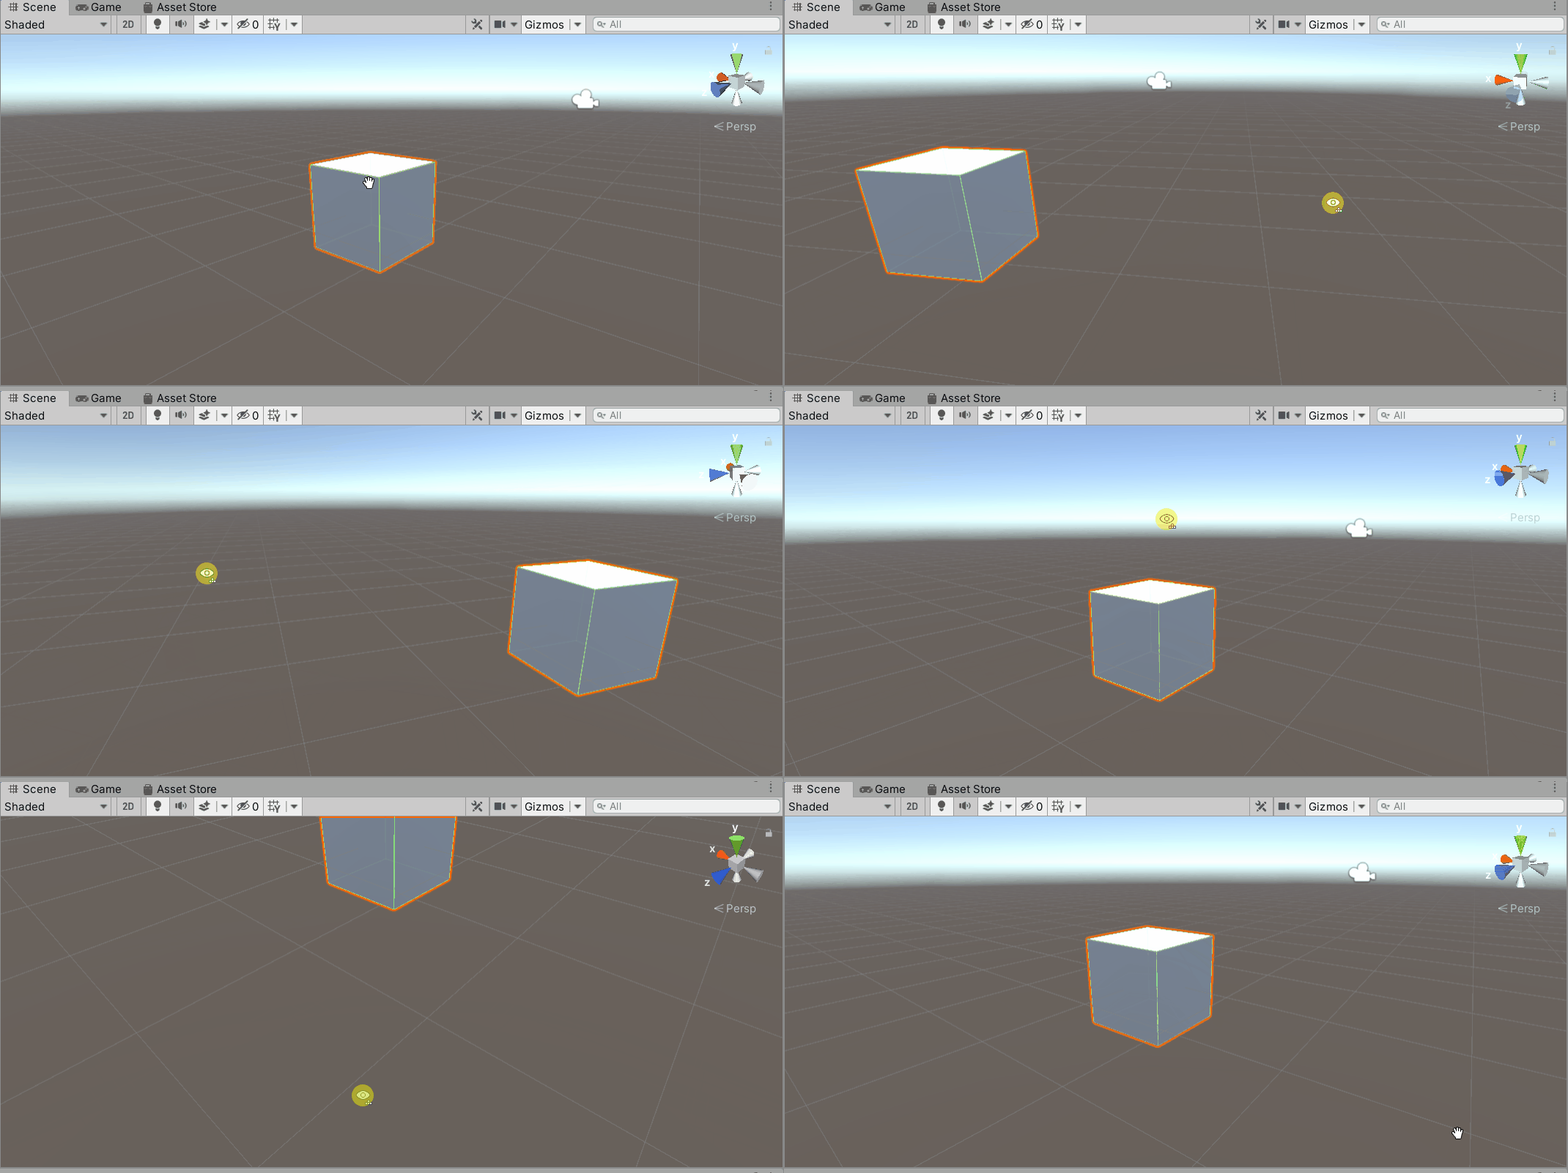
Right-click and drag the mouse to rotate the viewpoint.
Rotate around the center of the screen (Alt + left click)
Hold down the Alt key and left mouse button while dragging to rotate around the center of the screen.
This is useful when you want to see the other side of an object.
Zoom in and out (wheel scrolling)
Use the mouse wheel to zoom in and out.
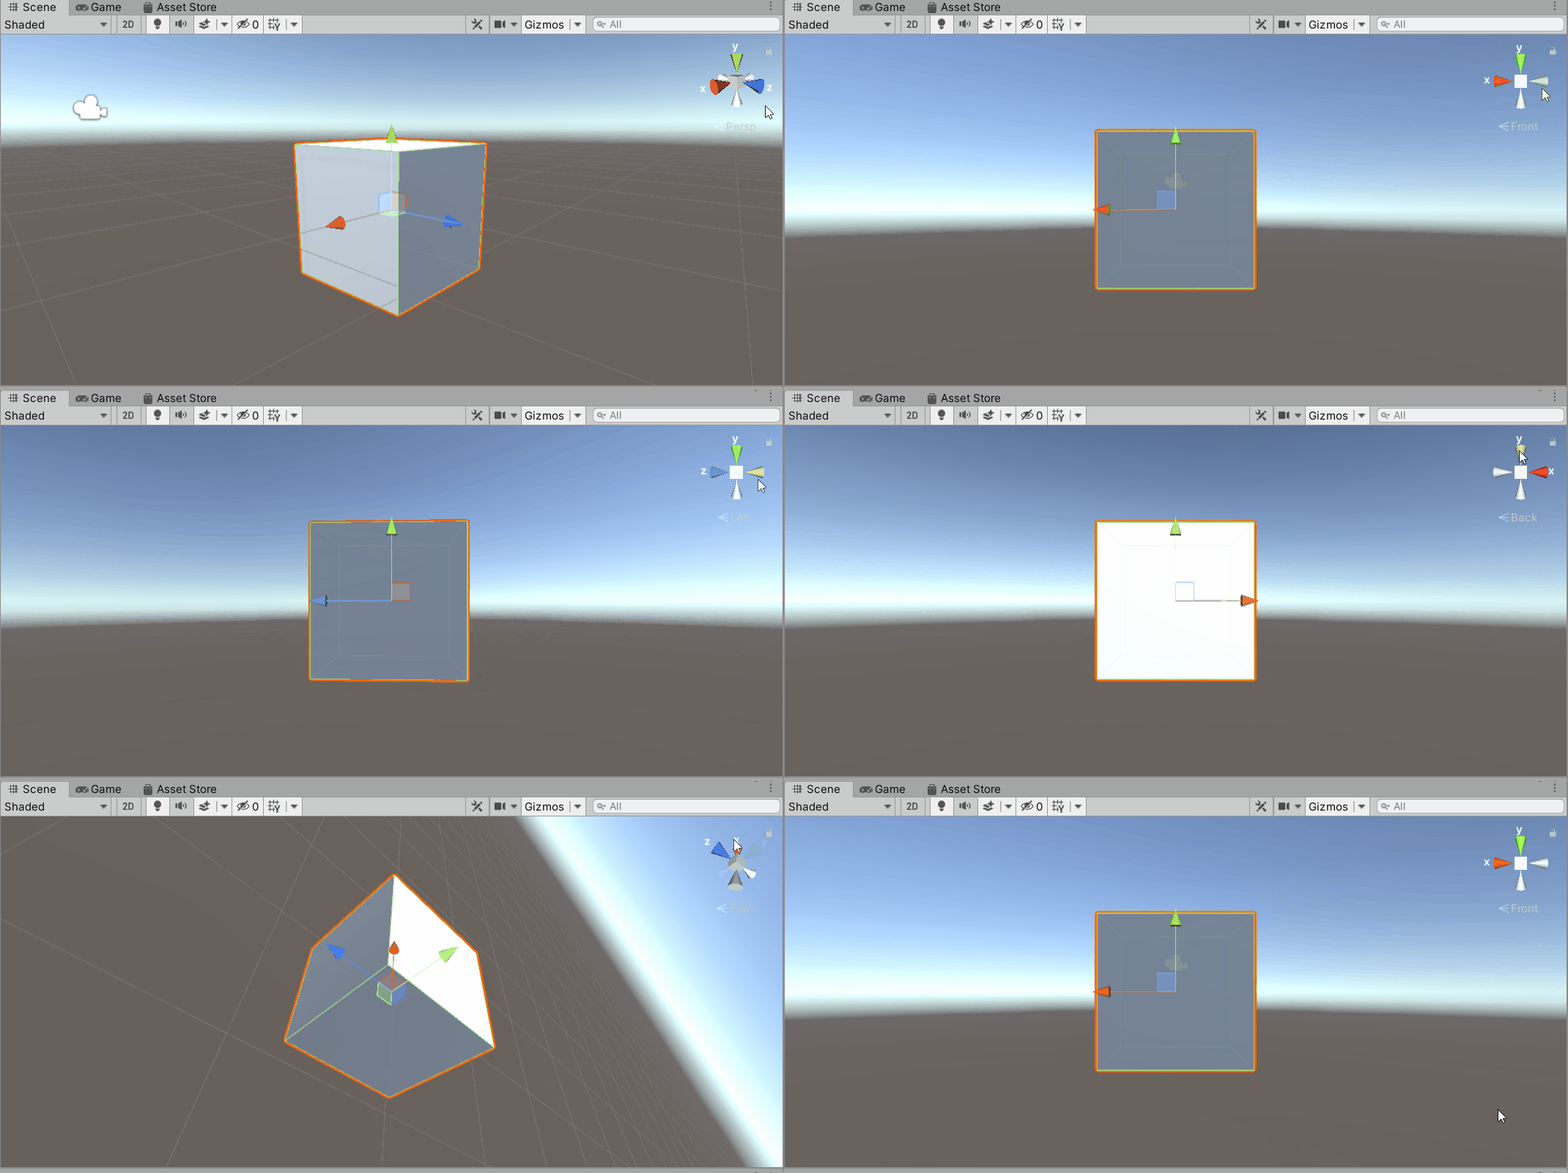
Scene Gizmo
Clicking the Scene Gizmo in the upper right corner of the Scene view switches the viewpoint to the front of the X, Y, and Z axes.
Editing Objects
Transformation Tools
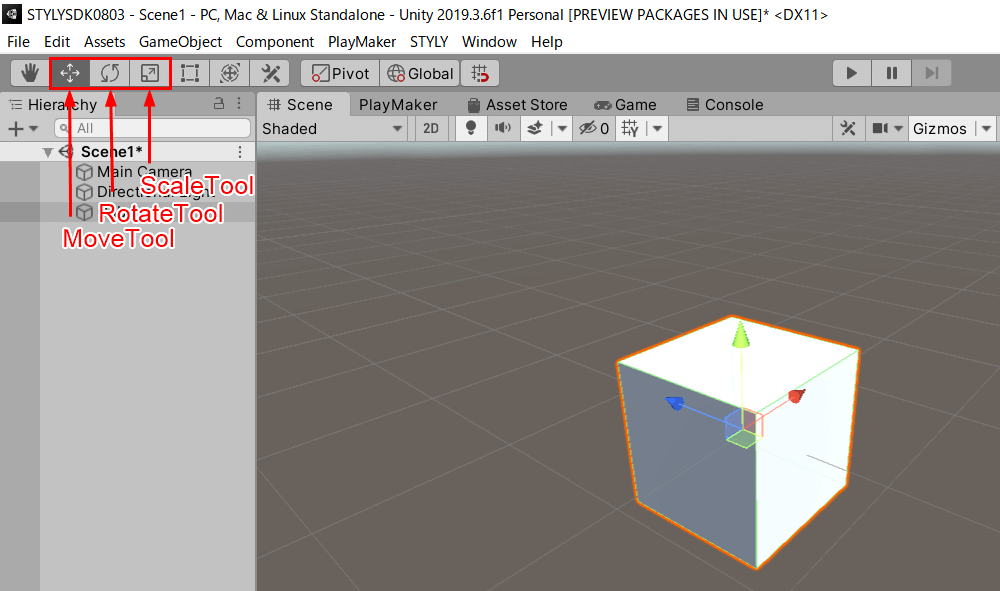
Click the Transform tool in the upper left corner of the Unity screen to switch to the tools that allow you to edit the object.
You can switch between the Translate, Rotate and Scale tools with the [W key], [E key], and [R key], respectively.
Keep in mind that these shortcuts are useful.
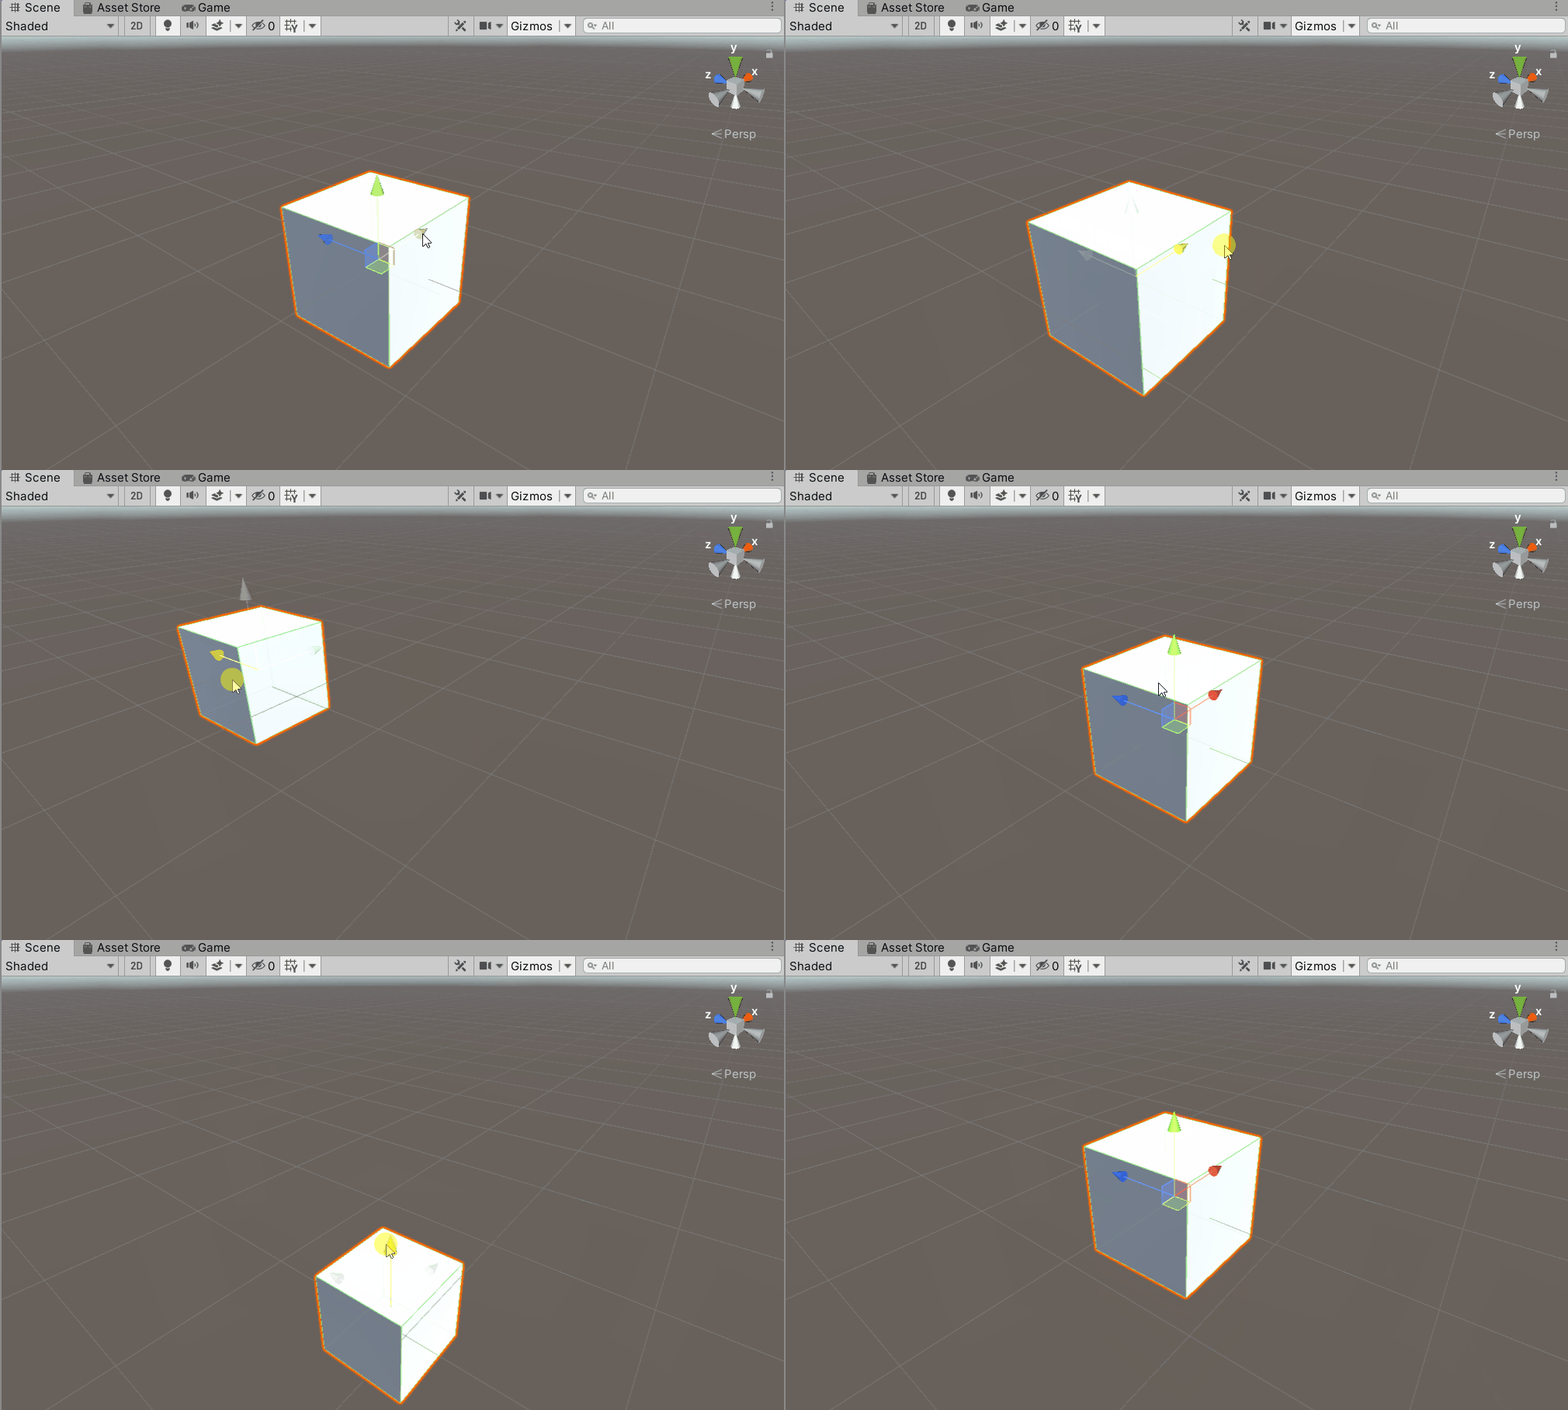
Move Objects (Translate Tool)
Drag the X, Y, and Z arrows to move the object along the axes.
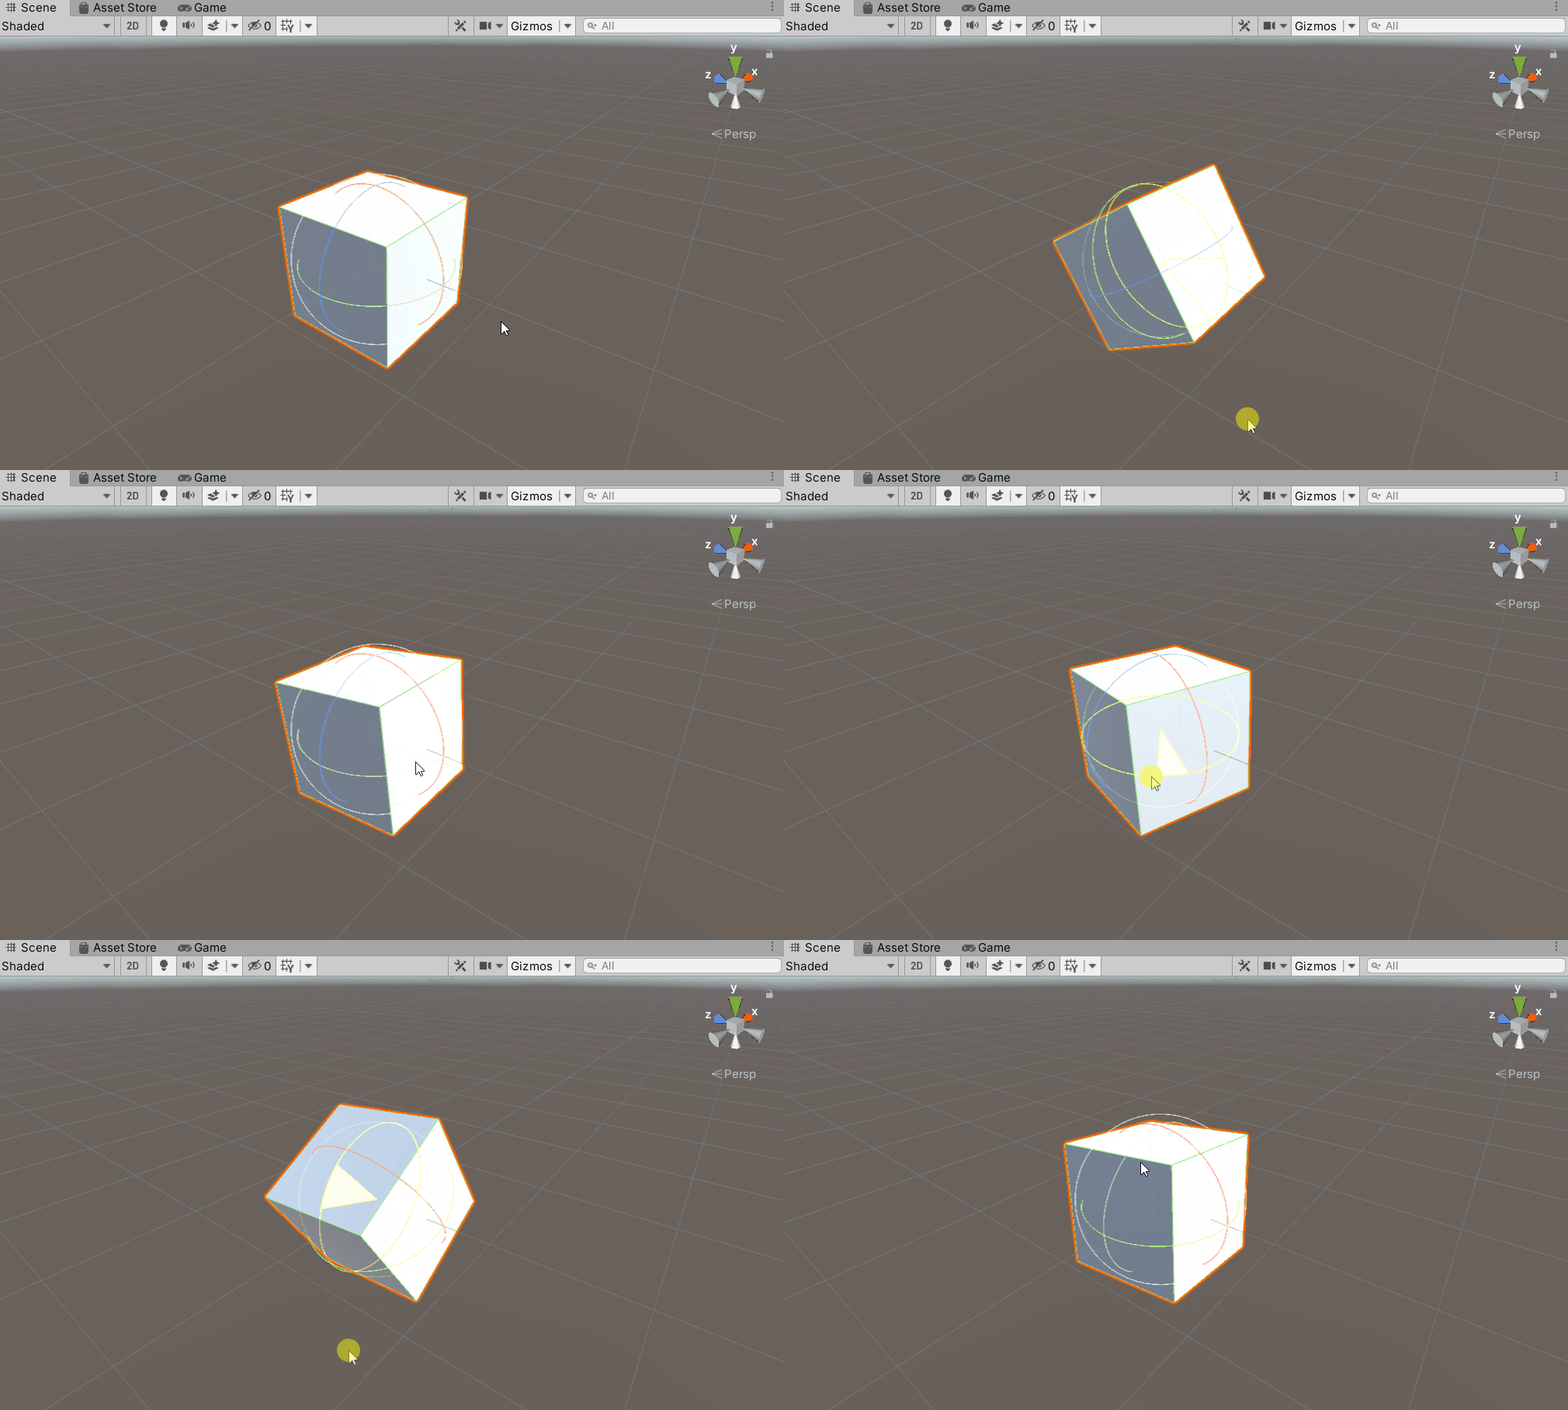
Rotation of objects (Rotate Tool))
Drag the displayed circle and the object will rotate on its axis.
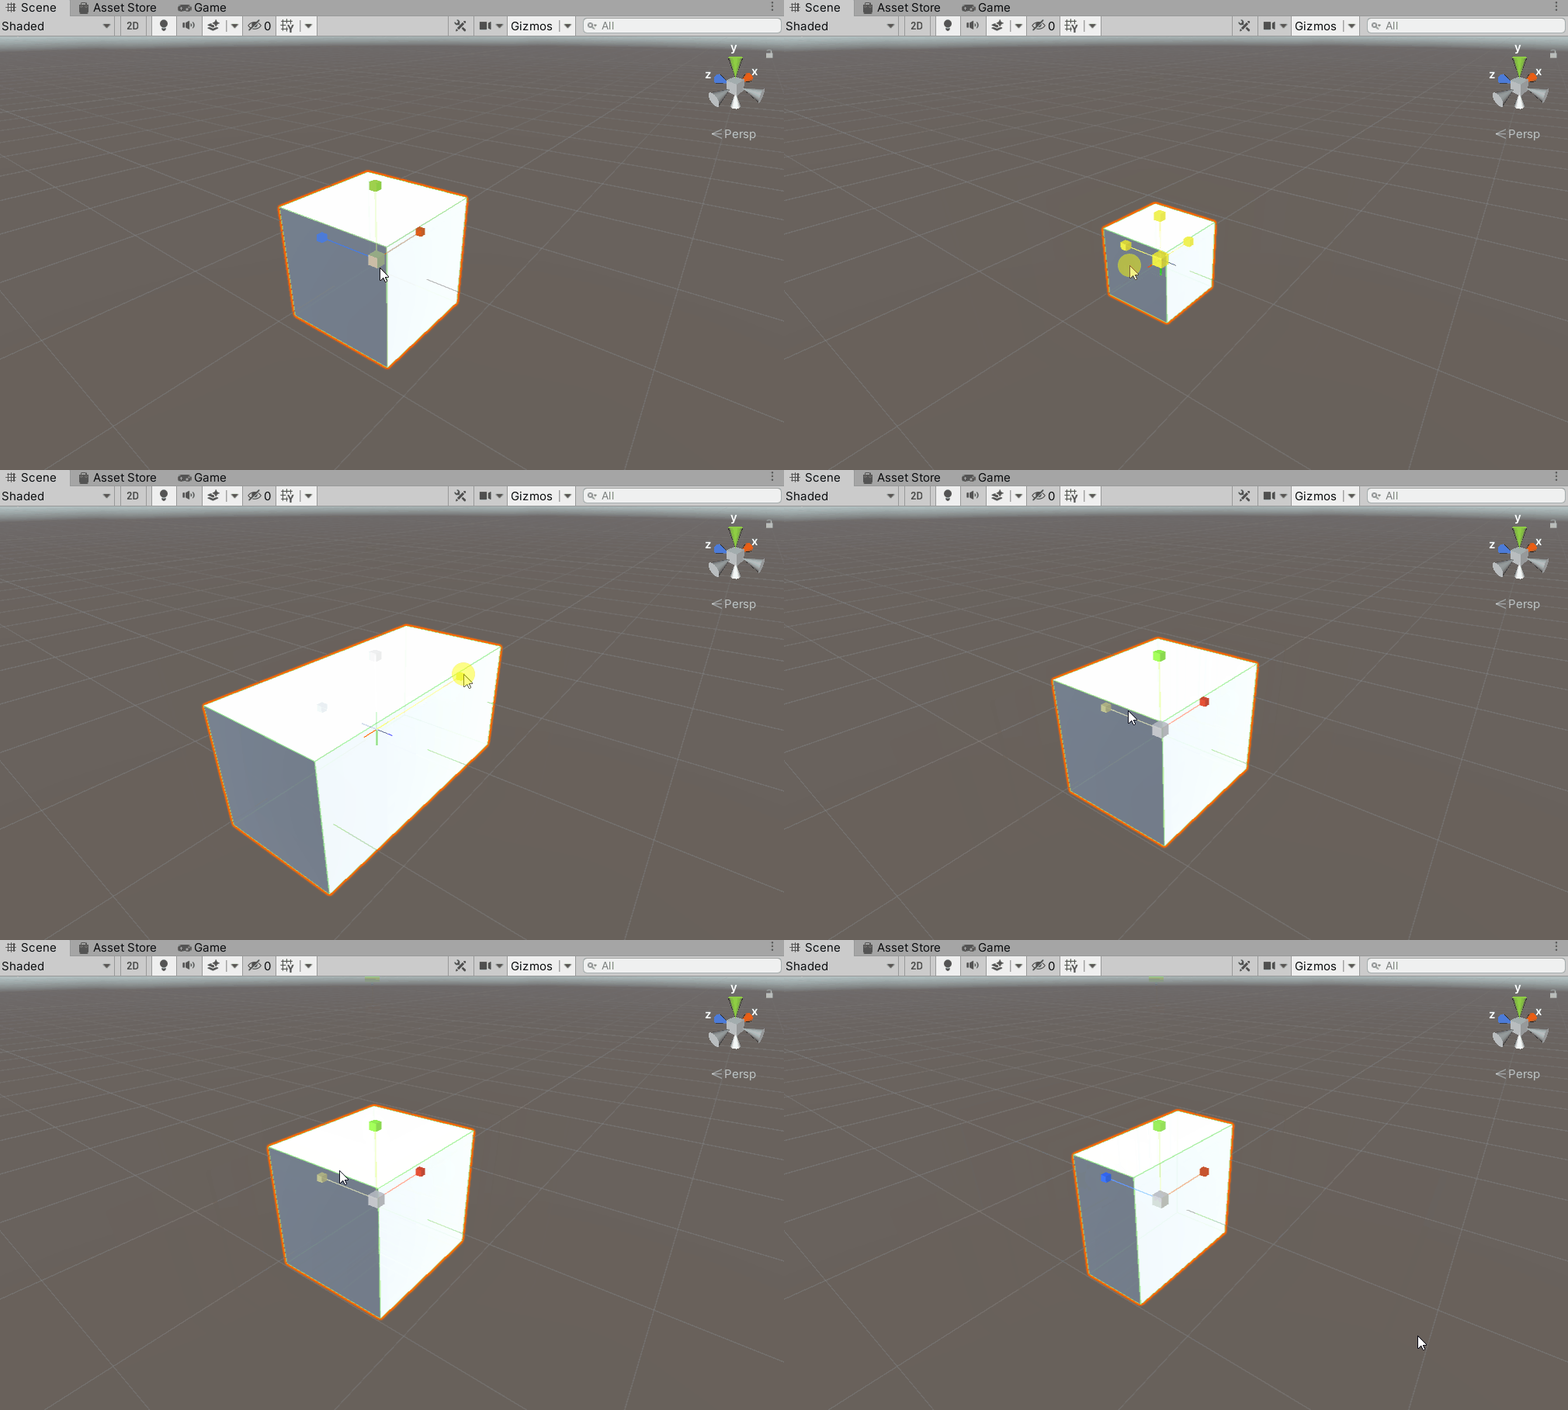
Object resizing (Scale Tool)
Drag the displayed cube to change the size of the object.
Inspector Window
What is the Inspector window?
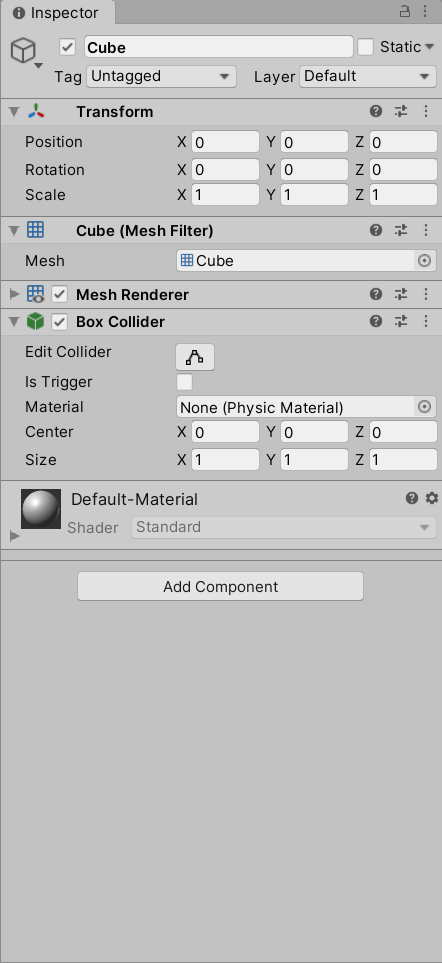
The Inspector window displays information about the objects in the Hierarchy window and the assets in the Project window.
You can view and edit the attributes of an object, such as its name, position, size, collision detection, and physical controls.
For example, we changed the position and size of an object intuitively in the Scene view, but in the Inspector window we can change these attributes by entering numbers in the Transform menu.
Add Components
A component is what we call the way a game object moves or functions.
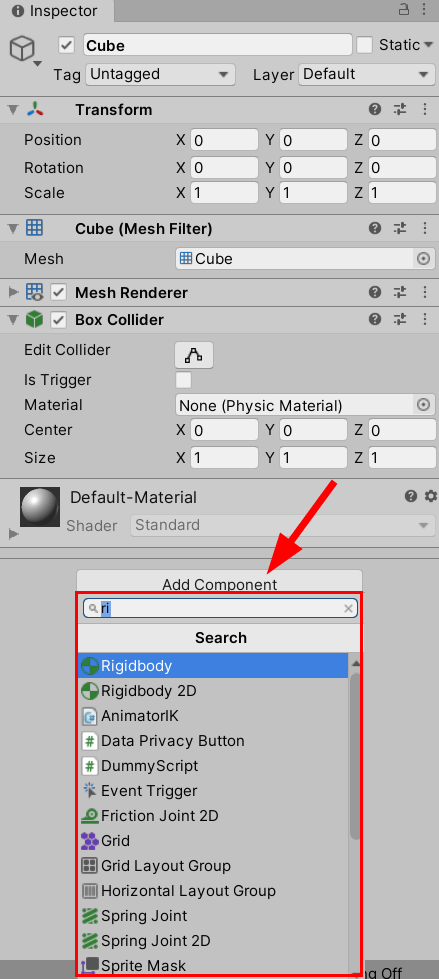
You can add a component by searching for and selecting the required one from Add Component.
For example, if you want to add gravity to an object, you need to add a new component, such as “Rigidbody.”
In the image, Rigidbody is accessed by typing “ri” in the input form.
Project Window
What is the Project window?
The Project window is where all the assets for your project are displayed.
You can add assets such as 3D models, materials, and sounds in this window and then edit them in Scene view.
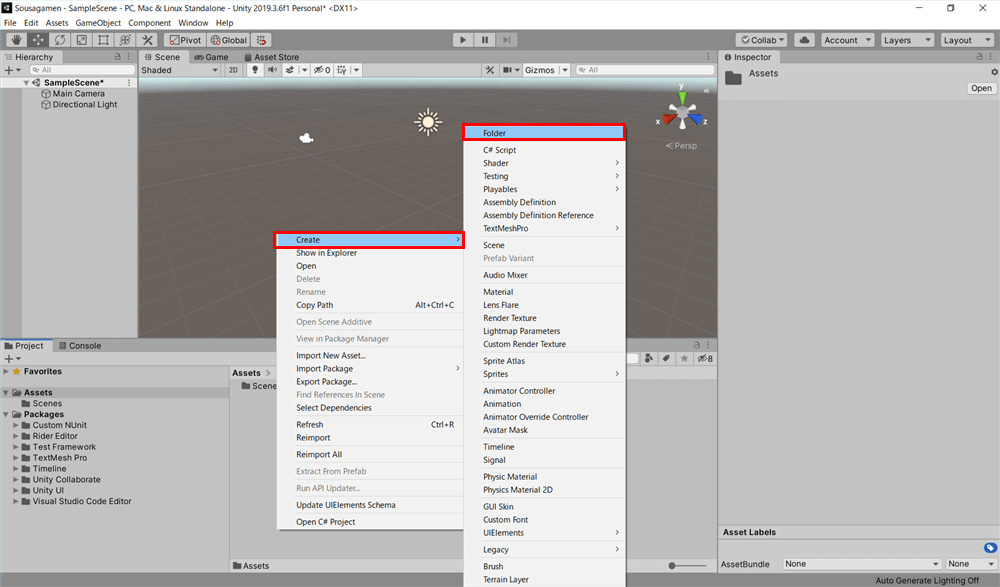
Right-click on an empty space and a menu will appear.
From here you can create folders, import assets, and delete assets.
How to create a folder
Let’s go to Menu > Create > Folder and create a folder.
Folders have been created.
Try to organize them in a way that is easy to understand.
On the left side of the project window, folders and assets are shown in a hierarchical way.
When you select a folder, its contents will be displayed on the right side.
You can change the size and appearance of your assets using the slider in the lower right corner.
Small Moves
A triangle to the left of a folder name indicates it contains more folders.
You can click on the triangle while holding down the Alt key to open or close all the folders in it at once.
This is useful when you have a large number of assets.
Game View
What is the Game view?
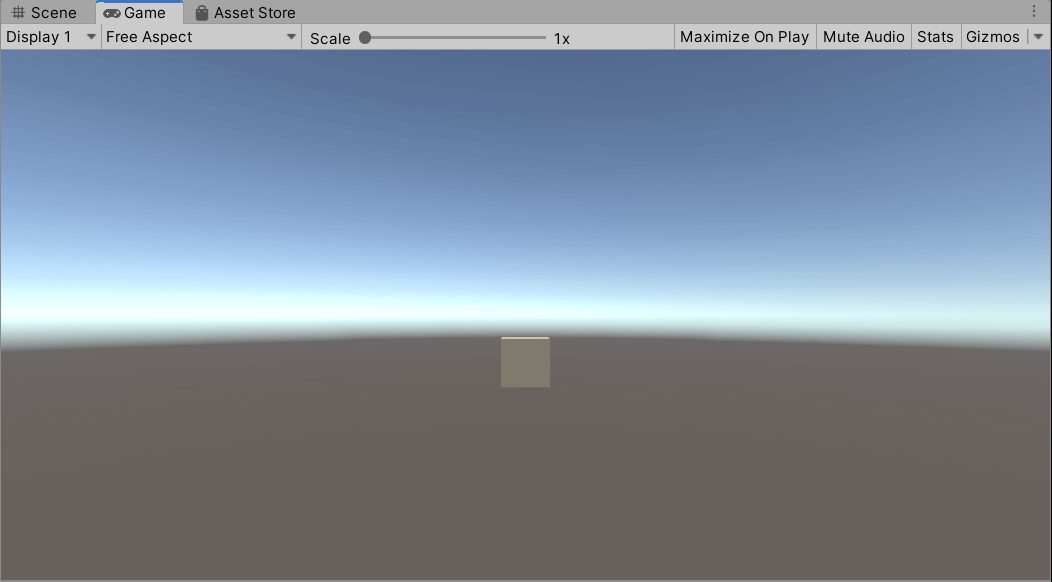
he Game view is a screen that shows an actual viewpoint of the game.
This is where we see what we have edited in the Scene view.
Changing the coordinates of the Main Camera will change the viewpoint in the Game view.
Playing the game
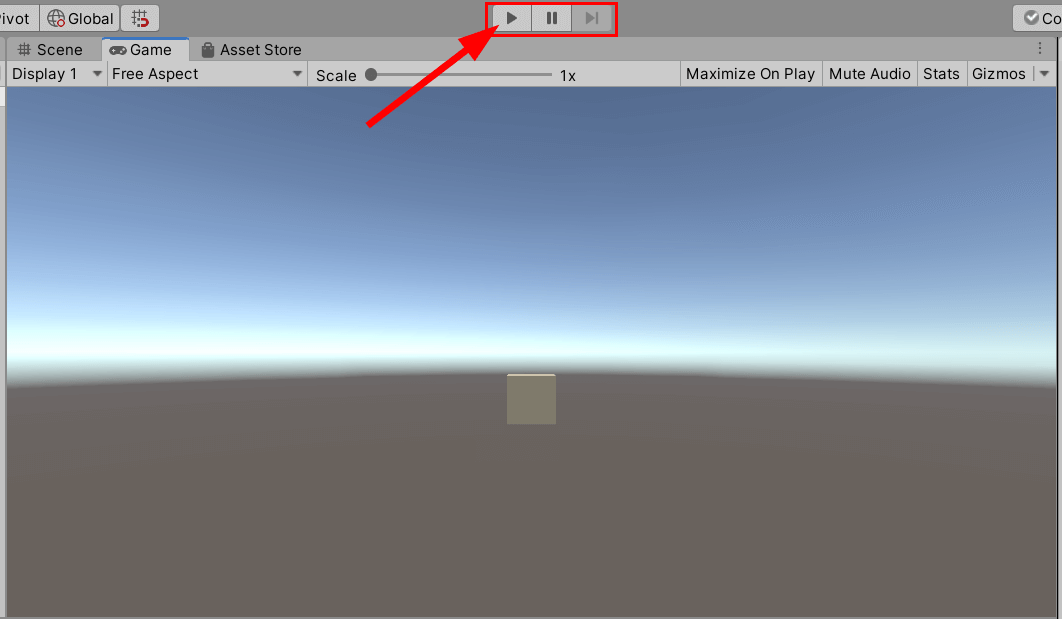
Click the Play button and the game will play.
Game physics and programs are set up and started at this time.
Small Moves
Anything you edit in the Scene view or Inspector window while the game is playing will be reset when playback is stopped.
Keep the above in mind, otherwise you may not notice and lose your changes. If you’re concerned, see this article.
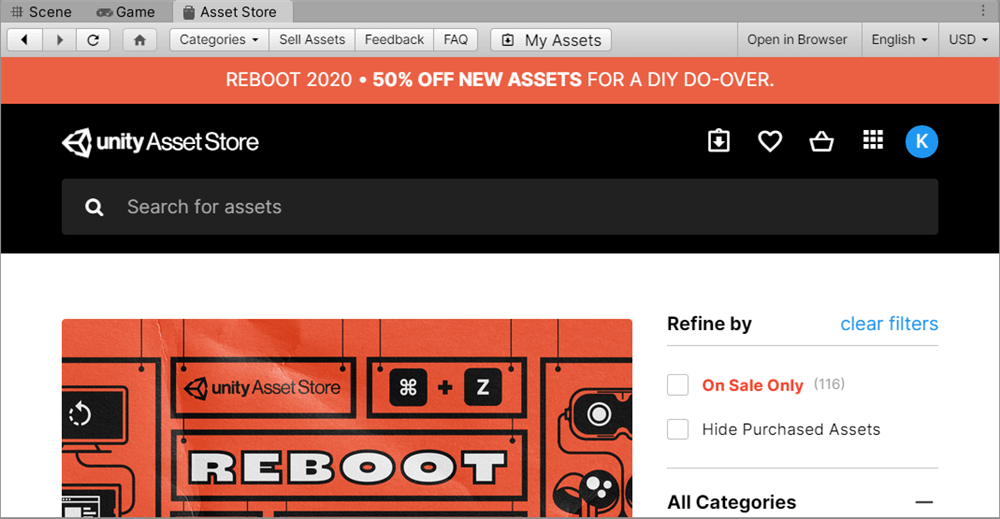
Aseet Store Window
The Asset Store is Unity’s official point of sale for downloading 3D models, textures, animations, audio, and other materials needed for game creation and animation.
You can read a detailed summary of the Asset Store here.
Conclusion
In this article, we have introduced basic operations in Unity.
It may be difficult to get used to it at first, but let’s try to learn and use Unity little by little!
Introduction to NEWVIEW SCHOOl ONLINE
NEWVIEW SCHOOl ONLINE, where you can learn the basics of Unity and PlayMaker necessary for creating VR/AR content, from the basics to the application of PlayMaker, and learn the process of creating the fascinating content available on STYLY (we’ll also expose the production techniques).
