Advance Preparation
Download the Unity sample project
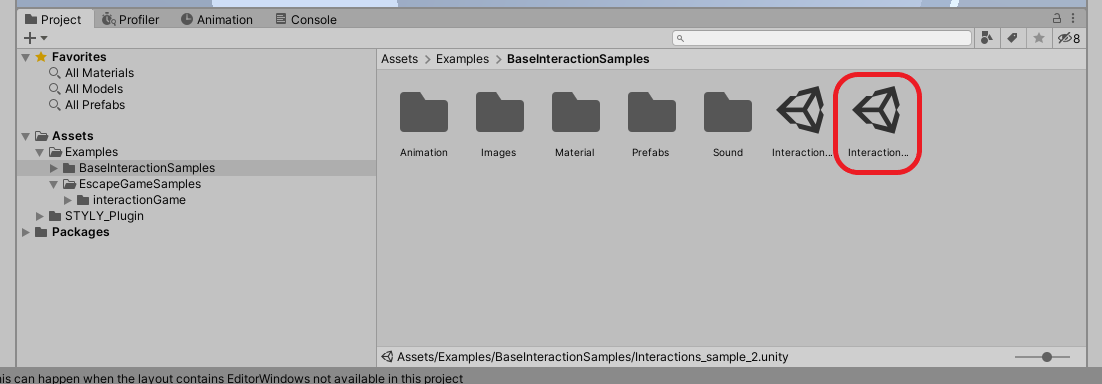
First, download the Unity sample project from the following URL
The assets included in the sample project for the above sample scene can be used freely without credit notation or permission.
Unzip the downloaded Zip file, open it in Unity, open the project window, and double-click on Examples/BaseInteractionSamples/Interactions_sample_2.
The sample scene will load.
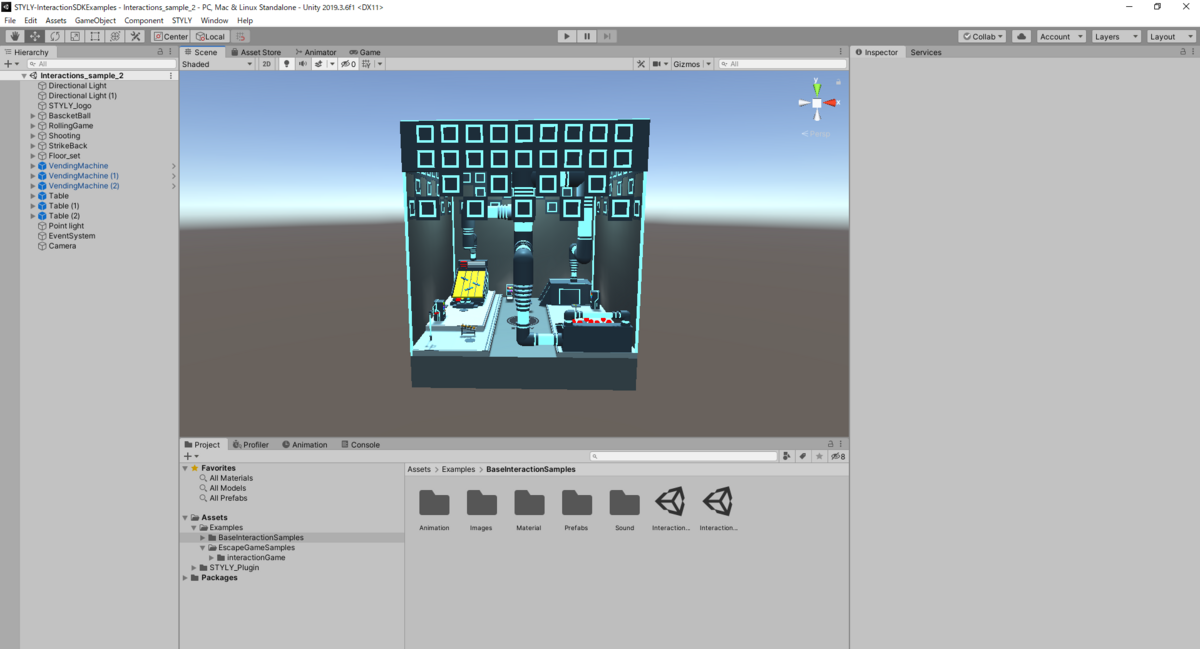
Let’s understand the game gimmick of Shooting.
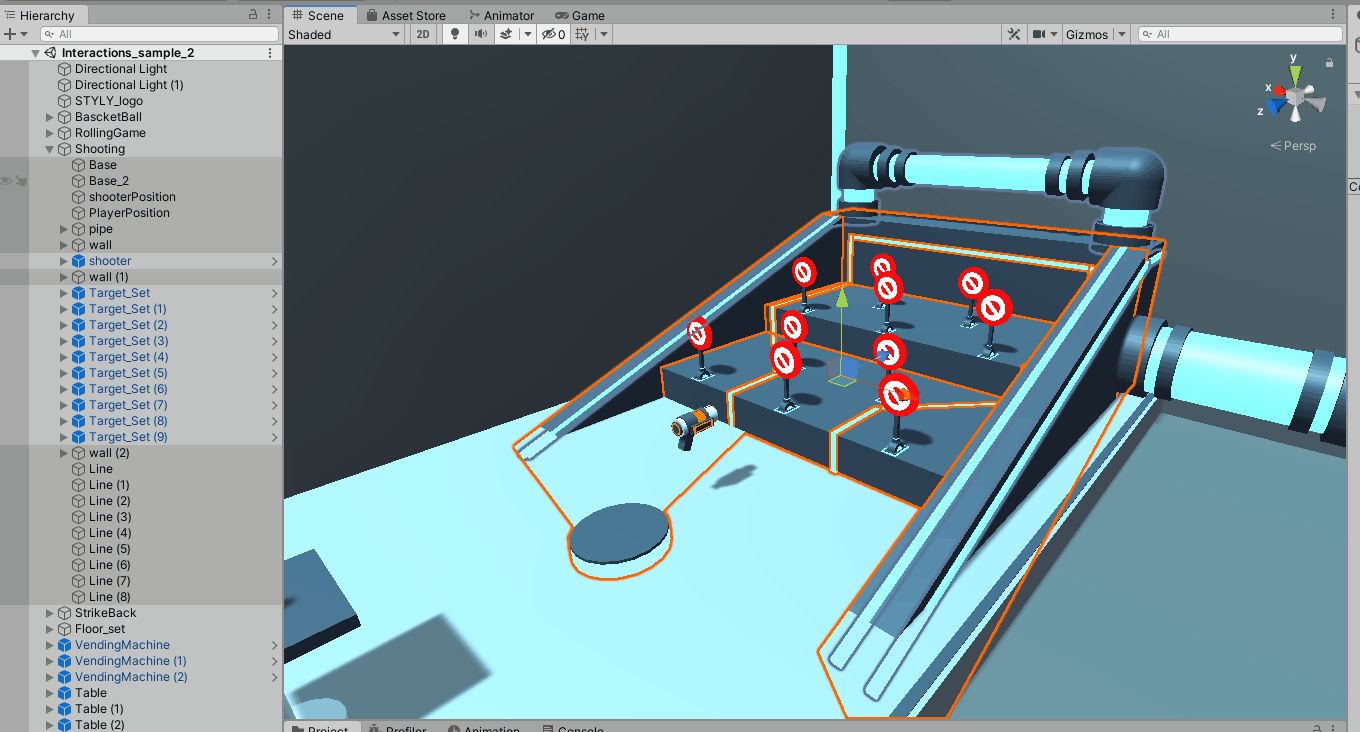
Composition of Shooting
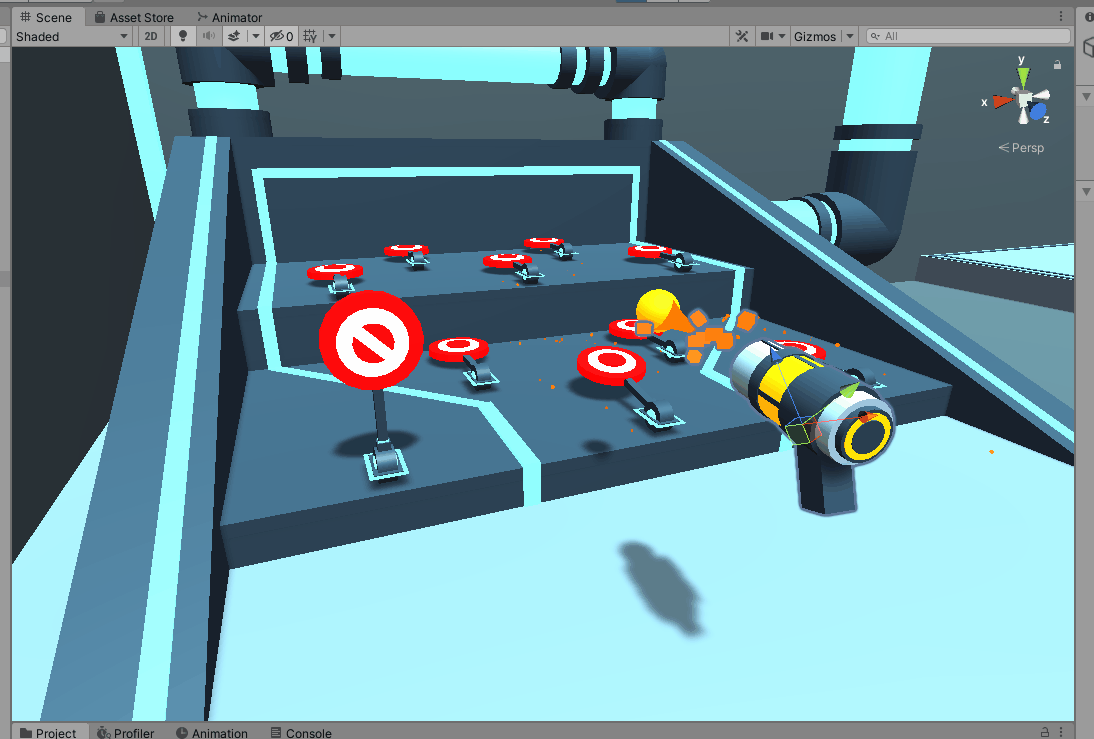
Let’s take a look at Shooting, one of the objects in the scene that uses the Interaction SDK.
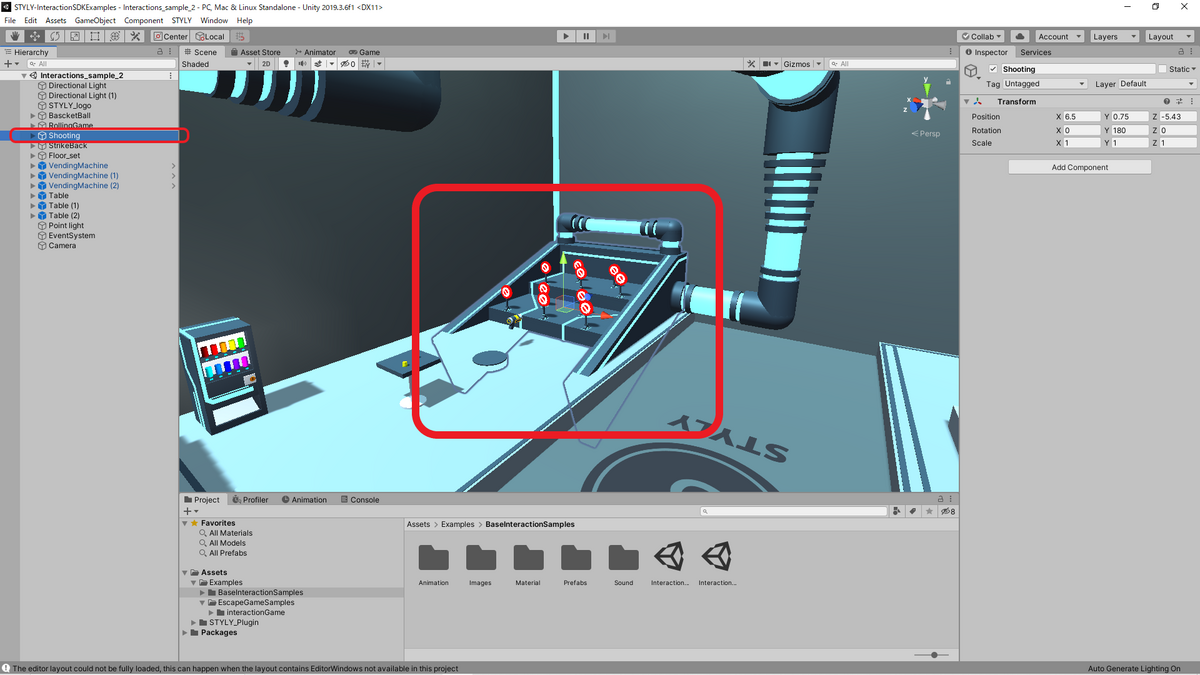
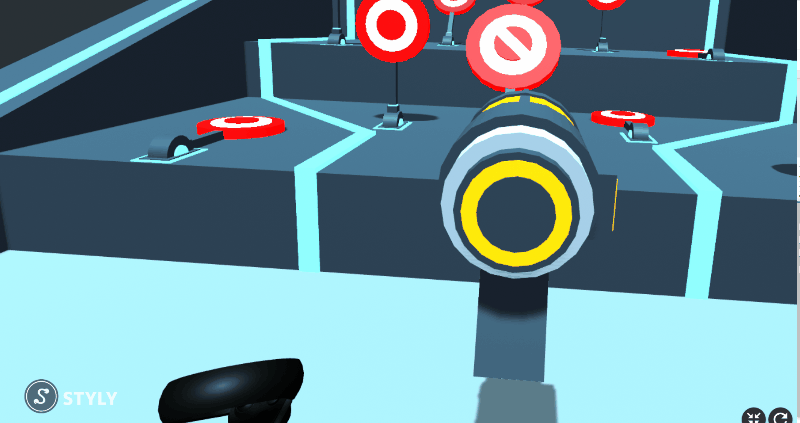
Shooting is a game sample that allows you to experience the gimmick of shooting (target shooting), with the simple rule that you shoot at the target with a white circle and do not shoot at the target with a diagonal line.
The game is divided into three main components.
The gun itself (shooter object)
The target (Target_Set object)
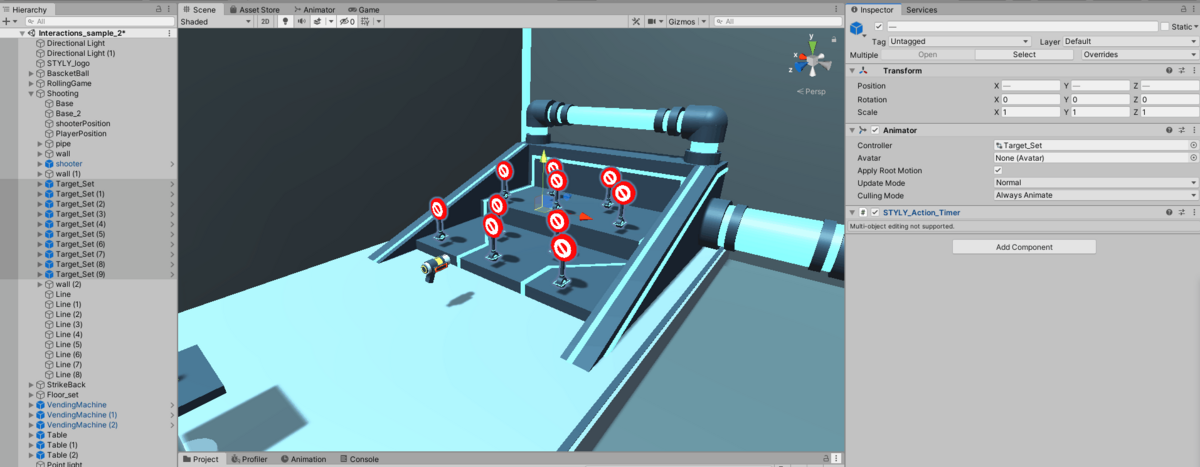
Stage

Let’s take a look at each of them in detail.
Composition of the gun
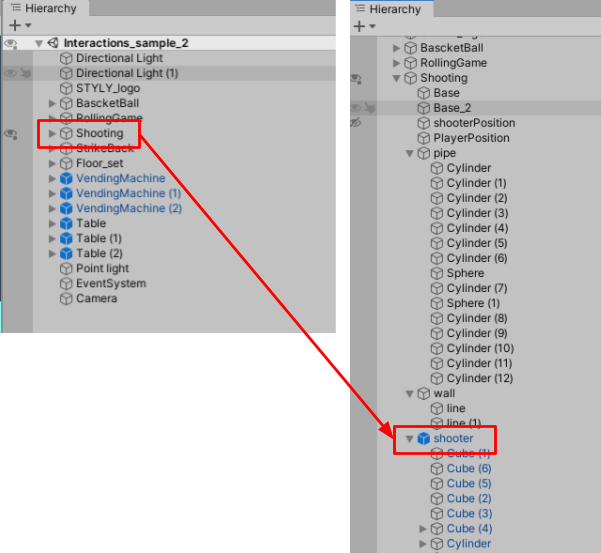
The gun itself is an object named shooter.
The shooter object is a child object of the Shooting object.
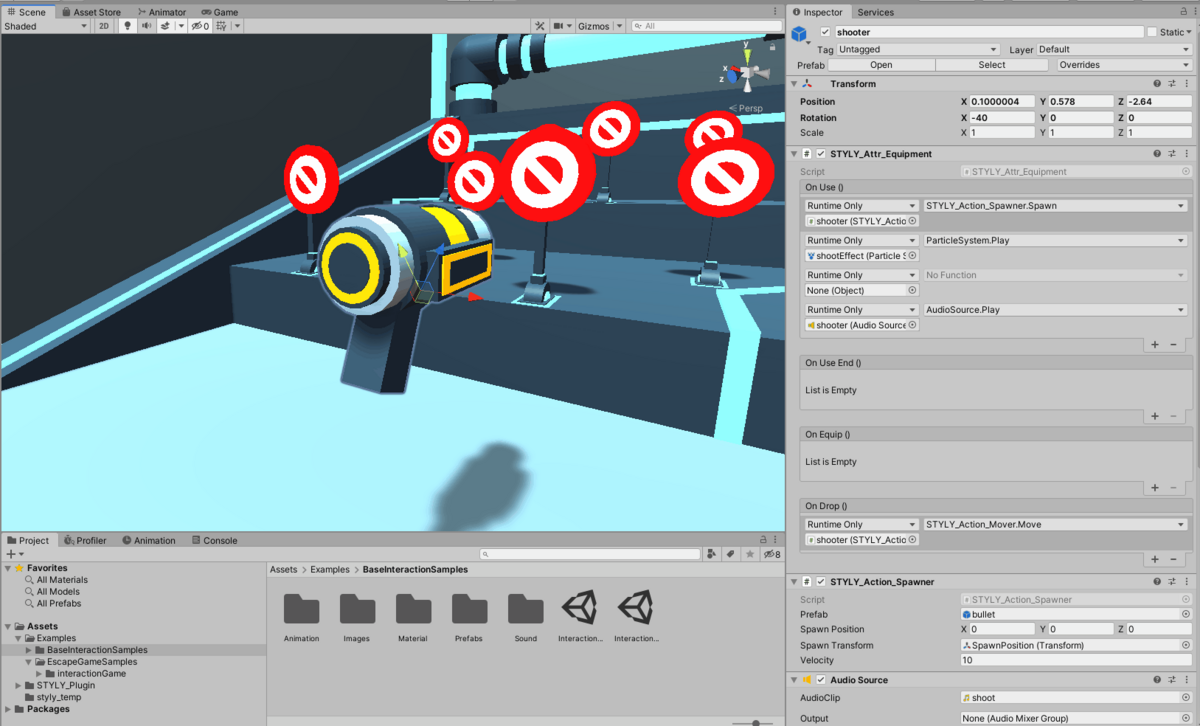
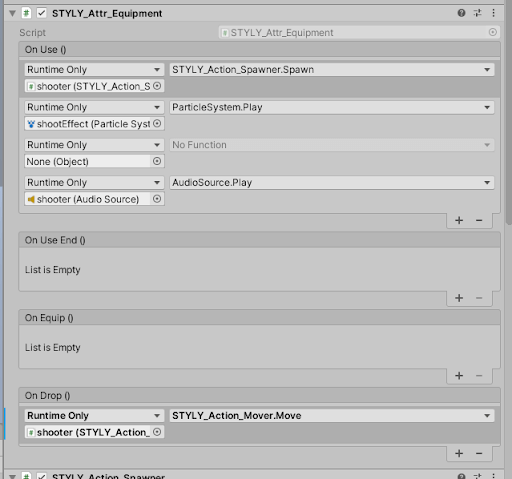
STYLY_Atter_Equipment
The STYLY_Action_Spawner event, ParticleSystem.Play (to play the specified particle), and AudioSouce.Play (to play the specified audio) events are executed.
Inspector of the shooter object
.
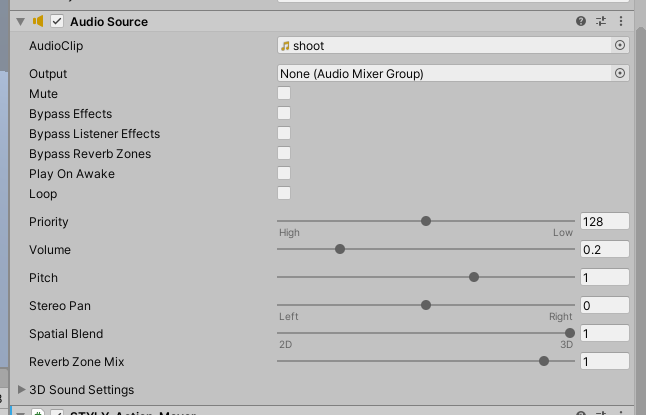
AudioSource.
Component that plays the shooter sound source.
inspector of the shooter object
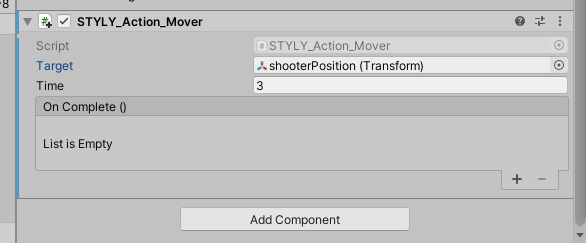
STYLY_Action_Mover
Component that moves an object to a specific position; when the shooter is released, the shooter object is moved to the specified point shooterPosition.
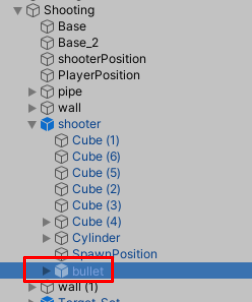
The ball object to be fired from the gun is a bullet object.
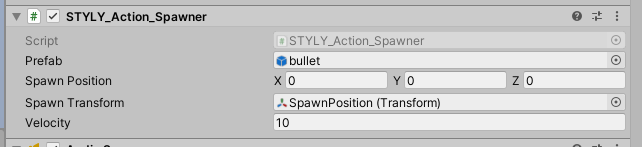
STYLY_Action_Spawner
This component generates the bullet prefab, which is the bullet to be fired from the gun.
inspector of the bullet object
The On Use event of the STYLY_Atter_Equipment component is used to execute the bullet, firing sound, and firing effect events, the STYLY_Action_Spawner component generates the bullet, the AudioSource plays the firing sound, and the On Drop event and STYLY_Action_Mover component are used to return to where it was when released.
Target Composition
Next, let’s look at the target, which is composed of a group of Target_Set(n) objects in the Shooting object.
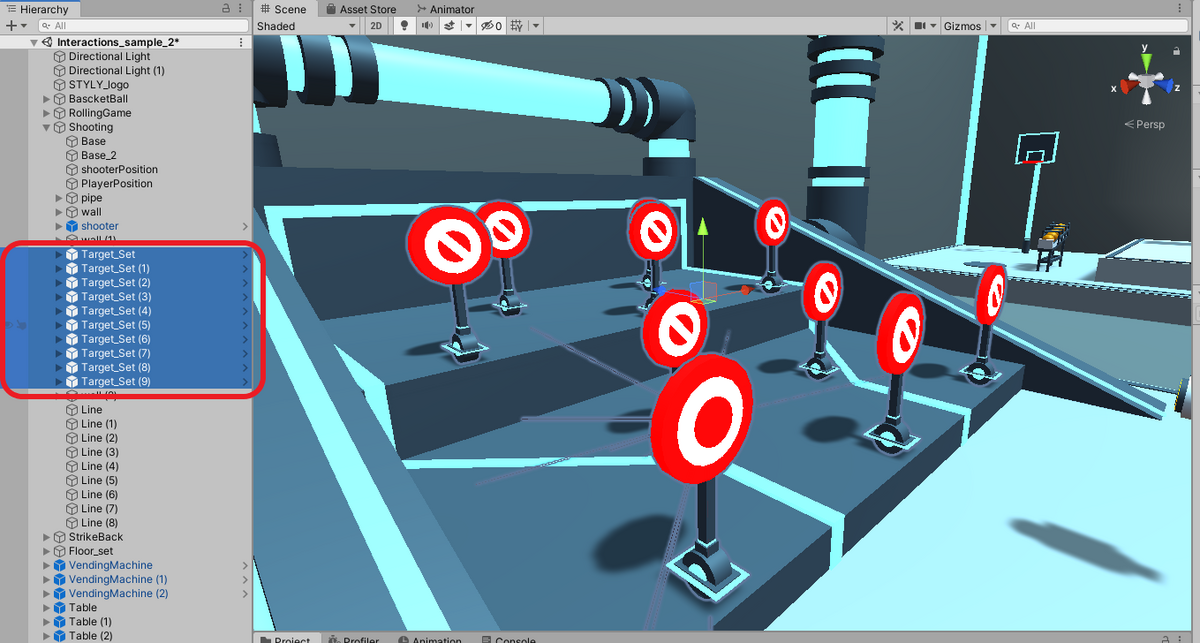
The target object is made up of Target_Set(n) objects in the Shooting object.
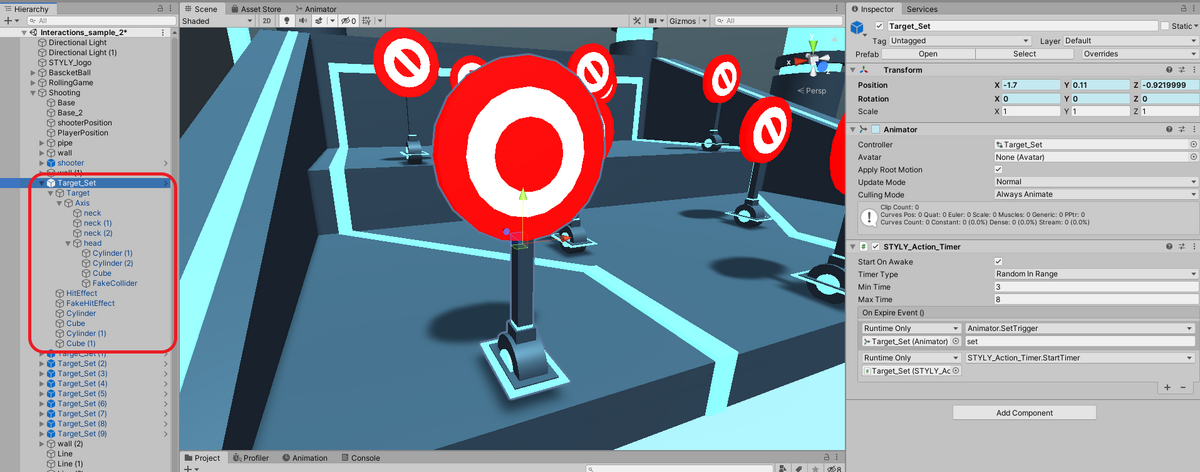
The gimmick of the target is to randomly rise and fall by using the STYLY_Action_Timer component to execute the SetTrigger of the Animator.
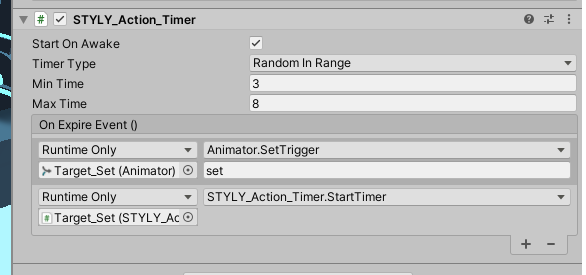
The set to be executed by SetTrigger is set in ParametersTrigger of Animator.
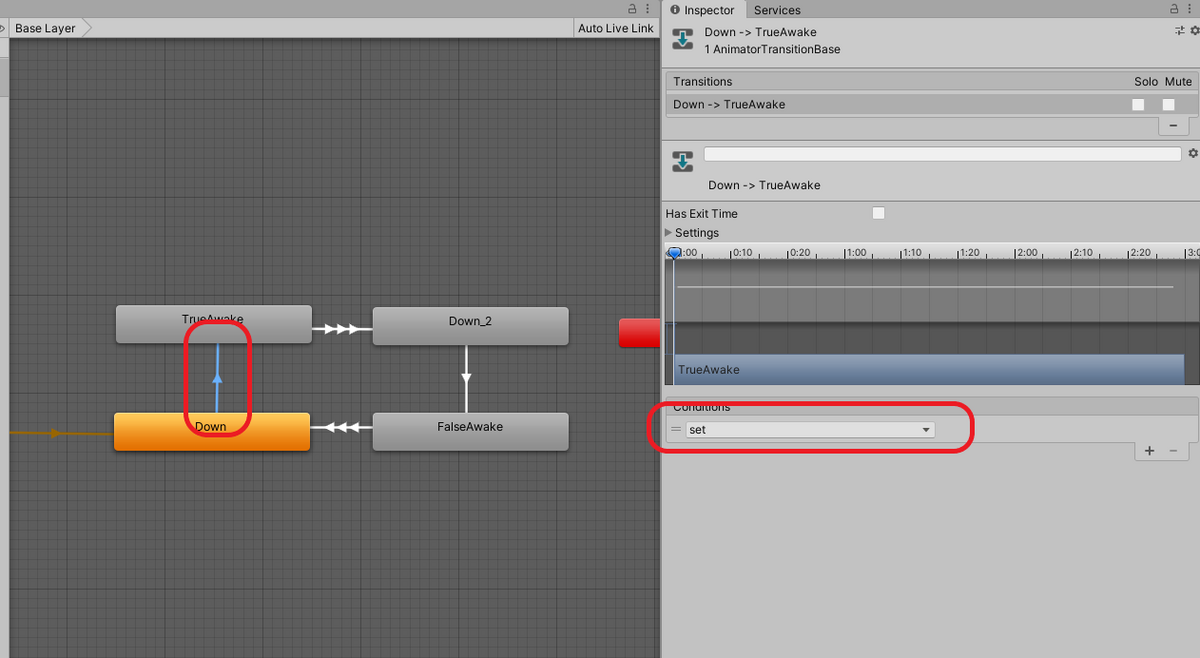
The gimmick of falling and getting up is set by Animation, which alternates between a white circle animation and a white circle with a slanted line.
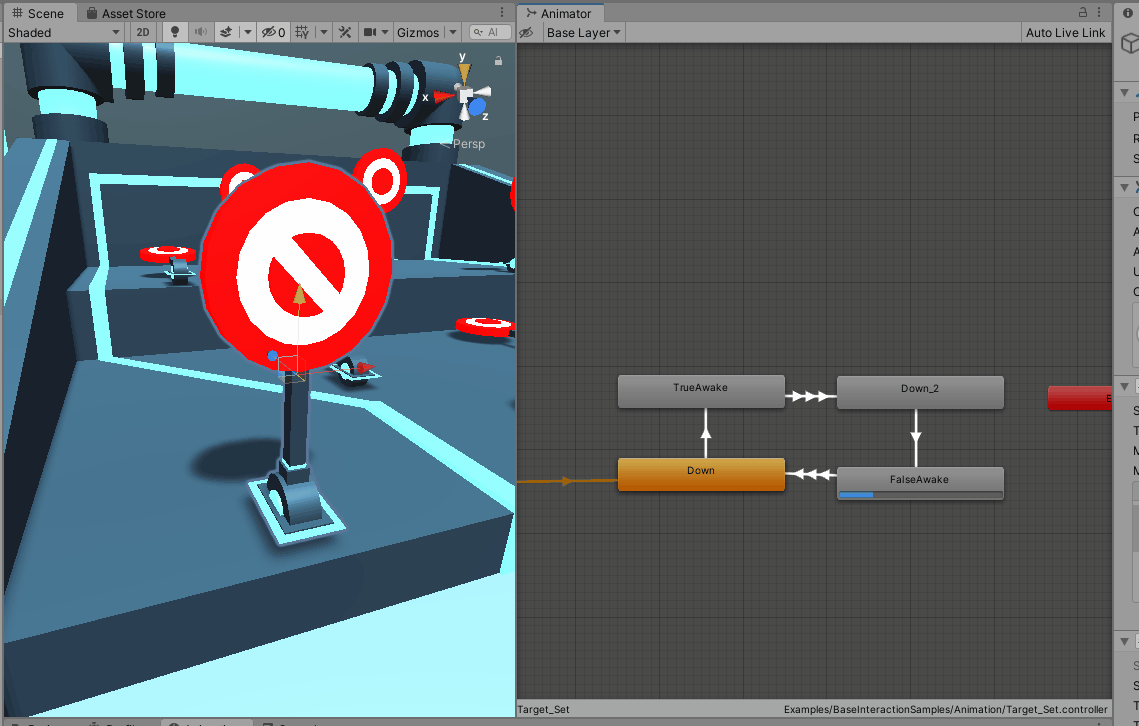
TrueAwake animation of a white circle

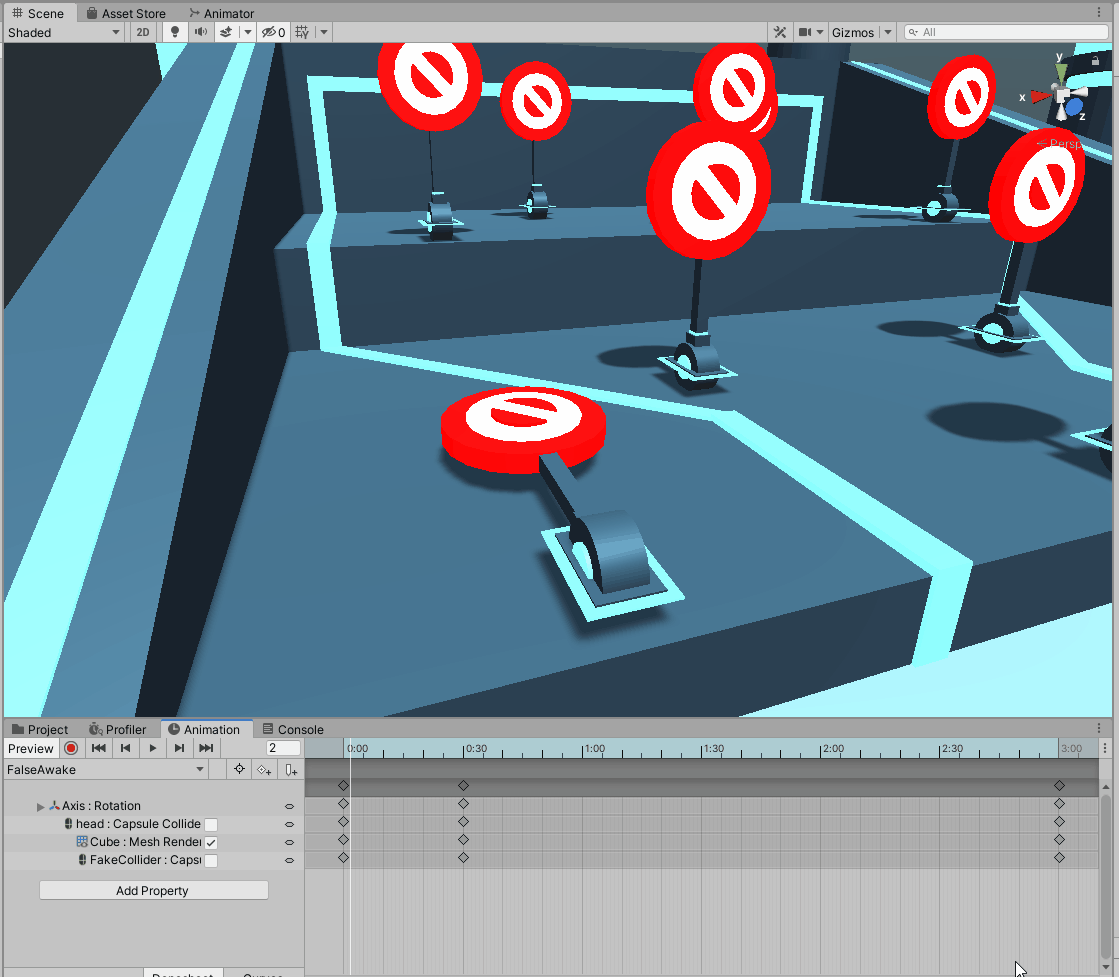
FalseAwake animation of a white circle with a diagonal line
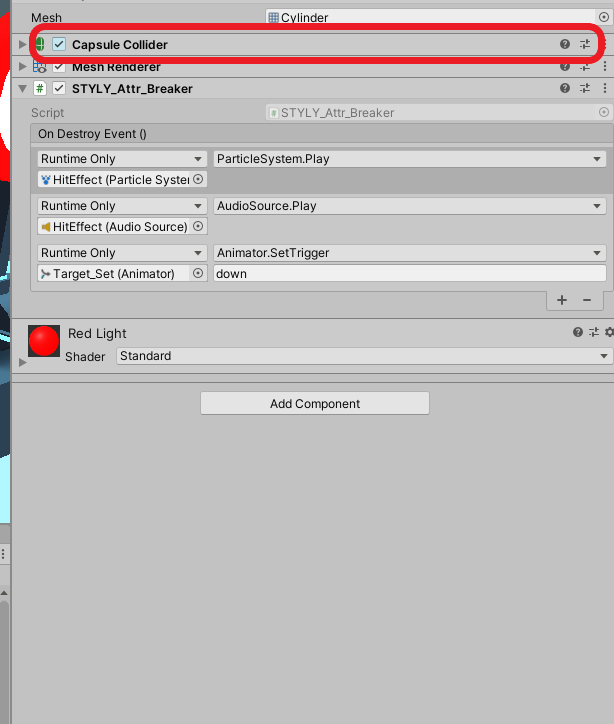
The TureAwake and FalseAwake animations are separated by turning on and off different CapsuleCollider components.
The purpose is to make it easier to manage each gimmick by using different CapsuleCollider components for judging white circles and shaded white circles.
True Awake Animation

Enlarged image
FalseAwake Animation.
Enlarged image
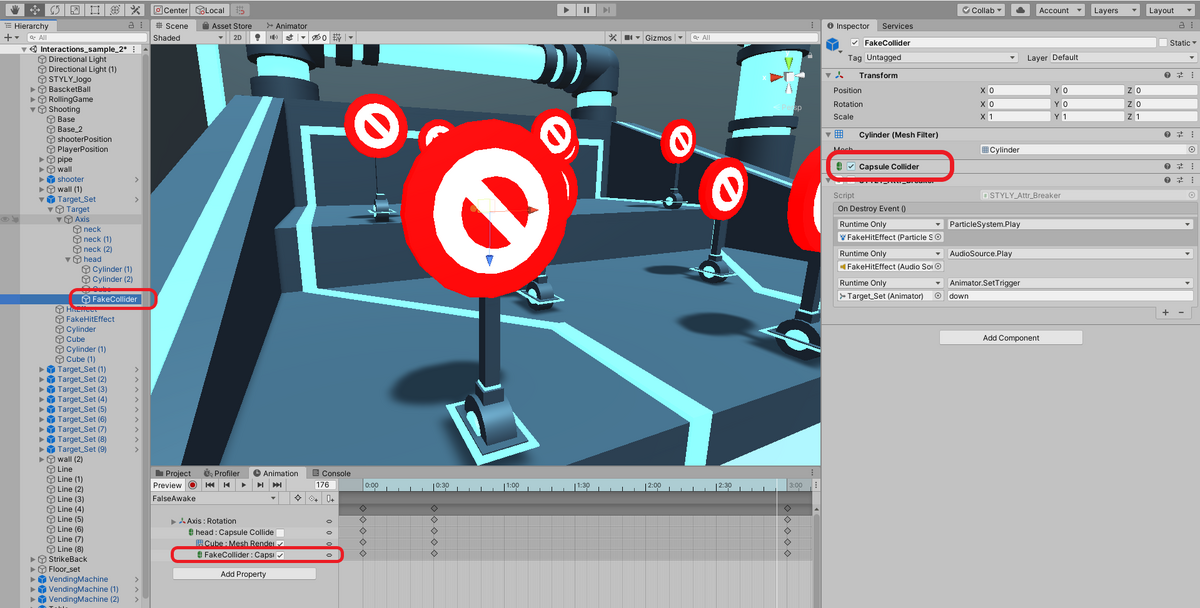
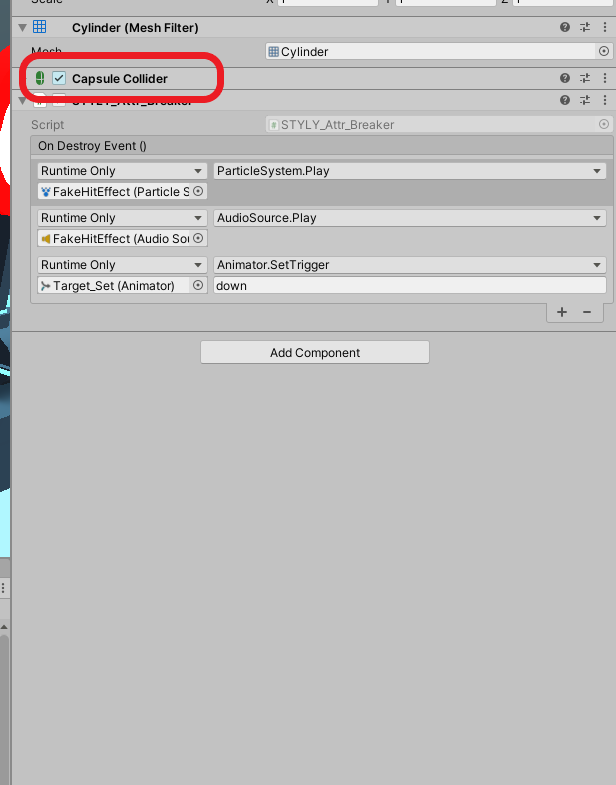
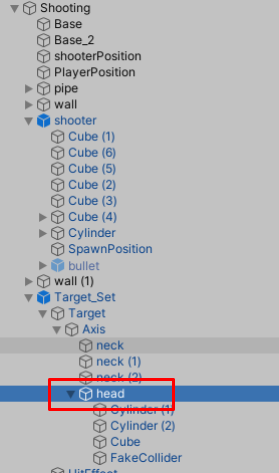
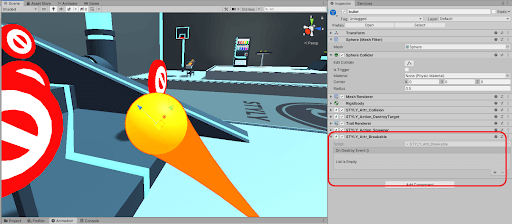
The hit decision is made by the STYLY_Attr_Breaker component of the head object in the Target_set.
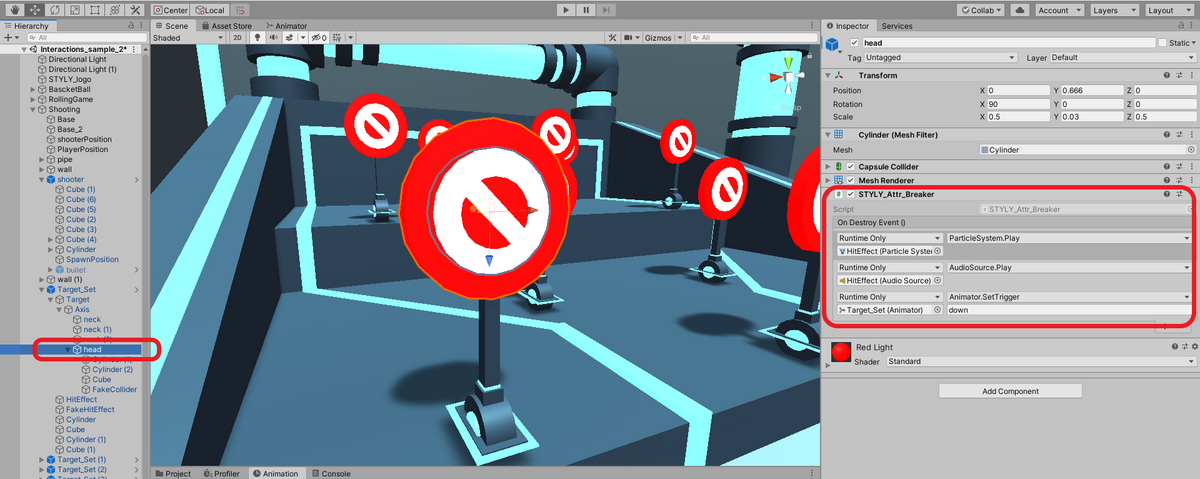
inspector of the head object
.
On Destory Event() is performed when a bullet object with a STYLY_Attr_Breakable component added collides with a head object.
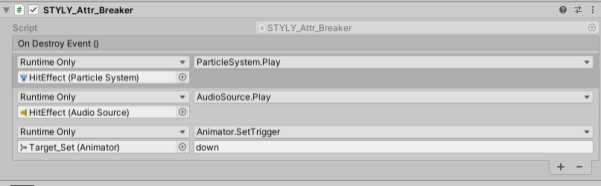
head object inspector
Also, the bullet part of the gun (bullet in the shooter object) has a STYLY_Attr_Breakable component attached to it, so OnDestroyEvent of STYLY_Attr_Breaker is executed and the ball disappears.
Components of the bullet object
.
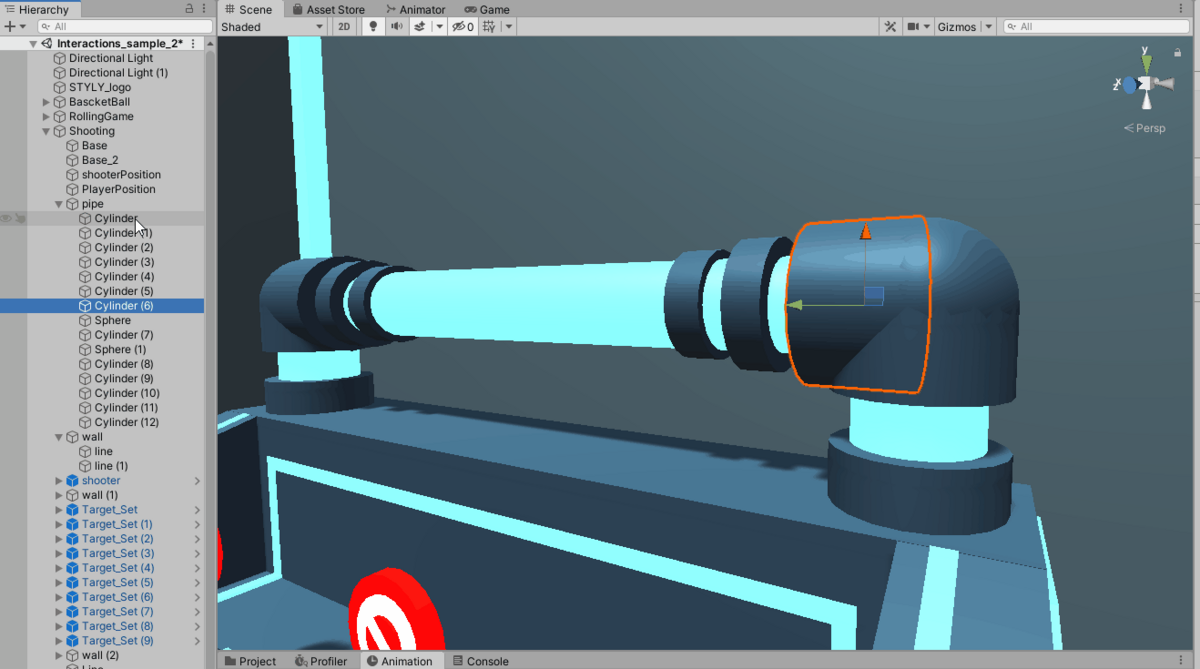
Composition of the stage
The stage portion is the group of objects selected in the image.
Basically, it is represented by deforming Unity’s primitive objects: Cube, Cylinder, and Sphere, which can be created by right-clicking on the hierarchy and selecting “Create”.
This is the structure of the Shooting game sample, which is simple enough with only the Interaction SDK and standard Unity functionality to understand its structure.
Understanding the StrikeBack Game Gimmick
StrikeBack Structure
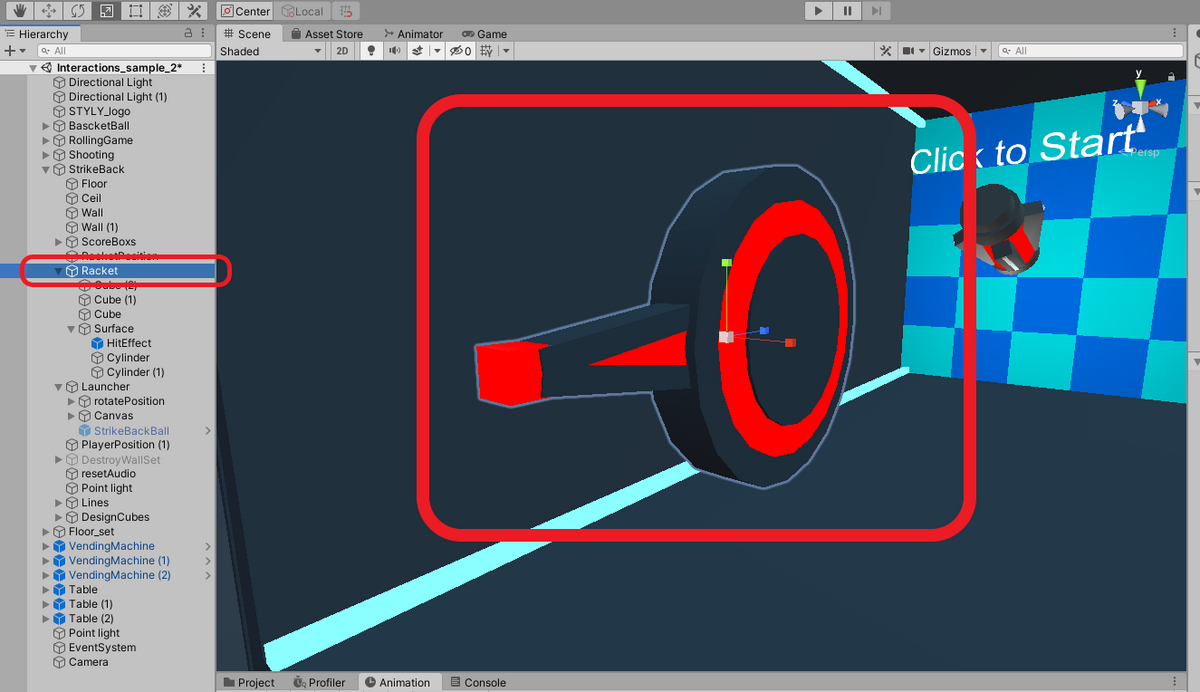
Next, let’s take a look at a StrikeBack game sample, looking for the StrikeBack object on the hierarchy
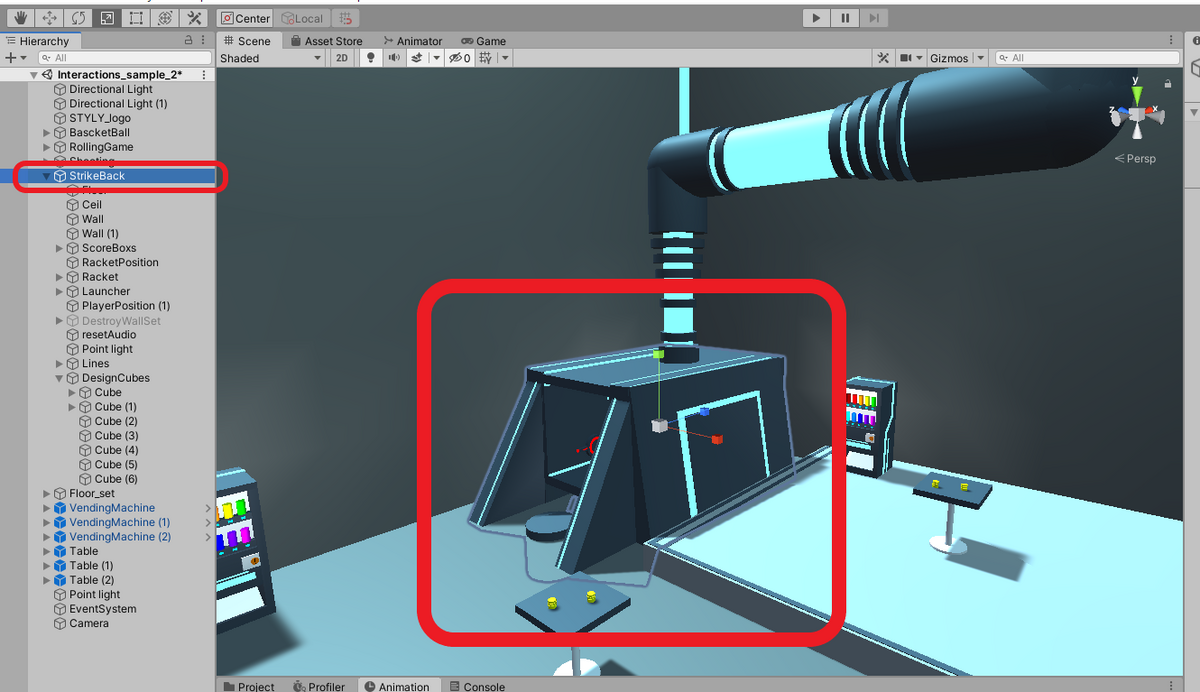
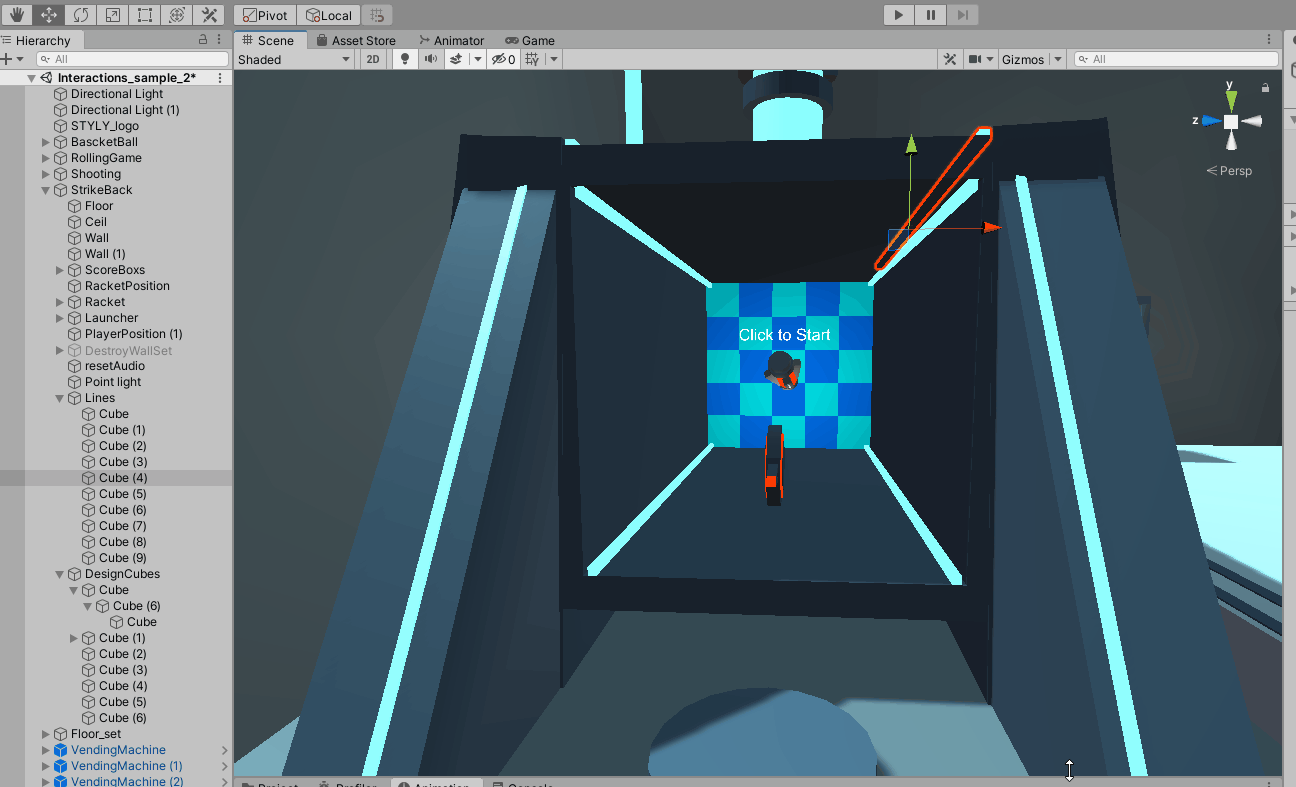
StrikeBack is a sample wall-hitting game using a racket as shown in the image. the game starts when you select the object labeled ClickStart with the controller. the object is to hit back with the racket and destroy all 25 objects in the back.

Looking at the contents of this one, it is divided into four major components.
Racket
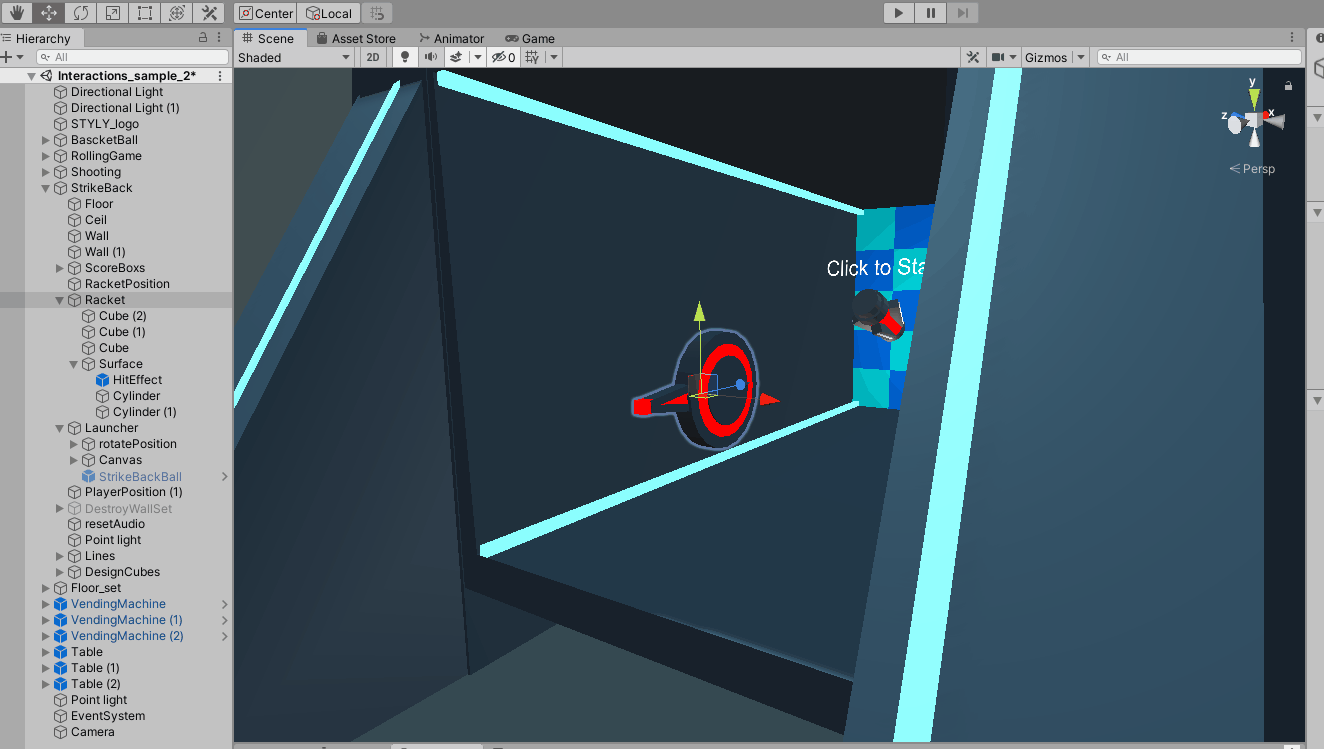
A square target
a ball (the ball will appear when you execute Click to Start)
The stage

Racket Composition
First, let’s look at the racket, whose object name in the hierarchy is Racket.
This object is almost the same as the gun, but it uses STYLY_Atter_Equipment to follow the controller, and STYLY_Action_Mover to return the racket to its original position when released.
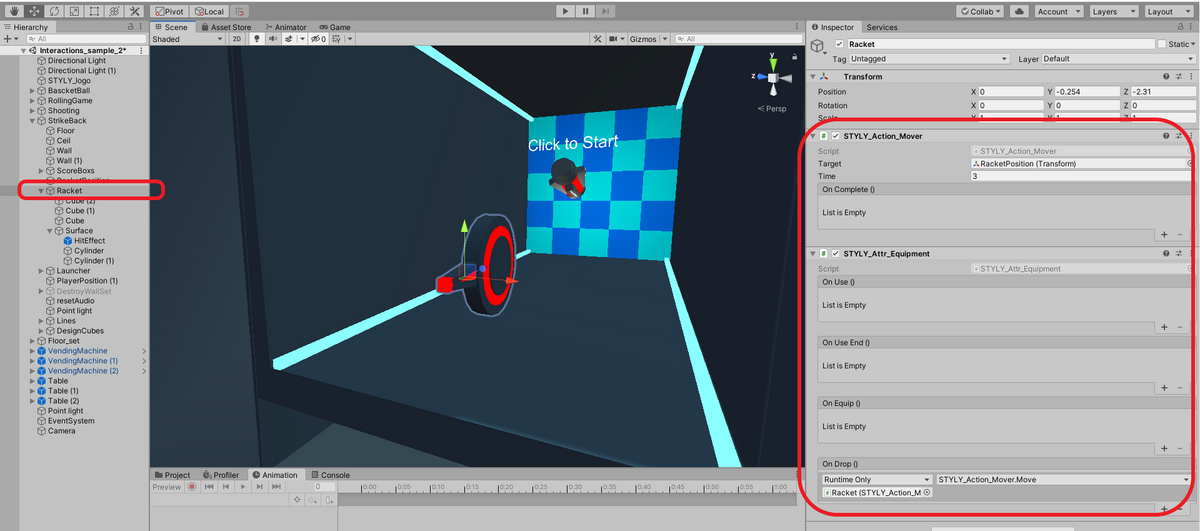
Inspector of the Racket object
STYLY_Atter_Equipment
Component that allows the Racket object to be held, with STYLY_Action_Mover’s Move on the On Drop event.
STYLY_Action_Mover
A component that moves a Racket object to its original location when it is released, allowing the user to specify the coordinates of the destination in Target and the movement time in Time.
The Racket is also composed of Unity primitive objects.
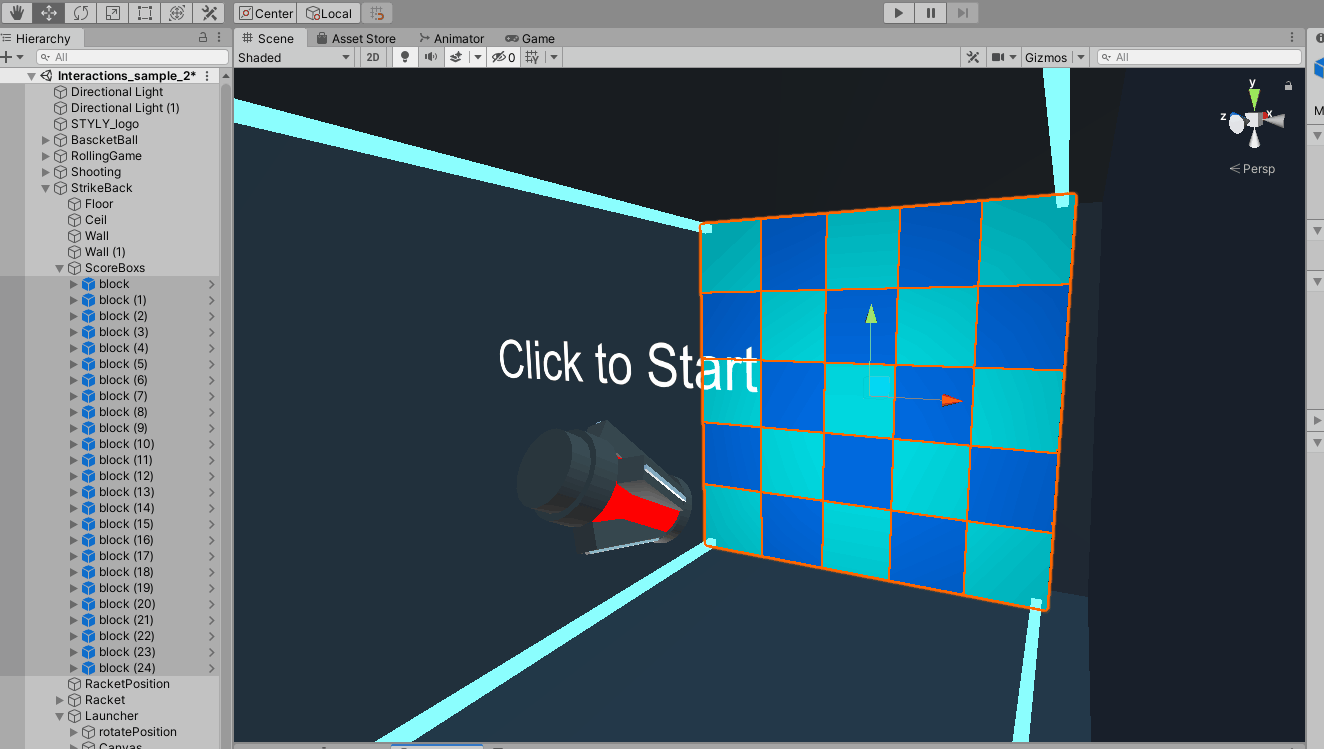
Composition of a square target
Next, let’s look at the square targets; the object names on the hierarchy are ScoreBoxes.
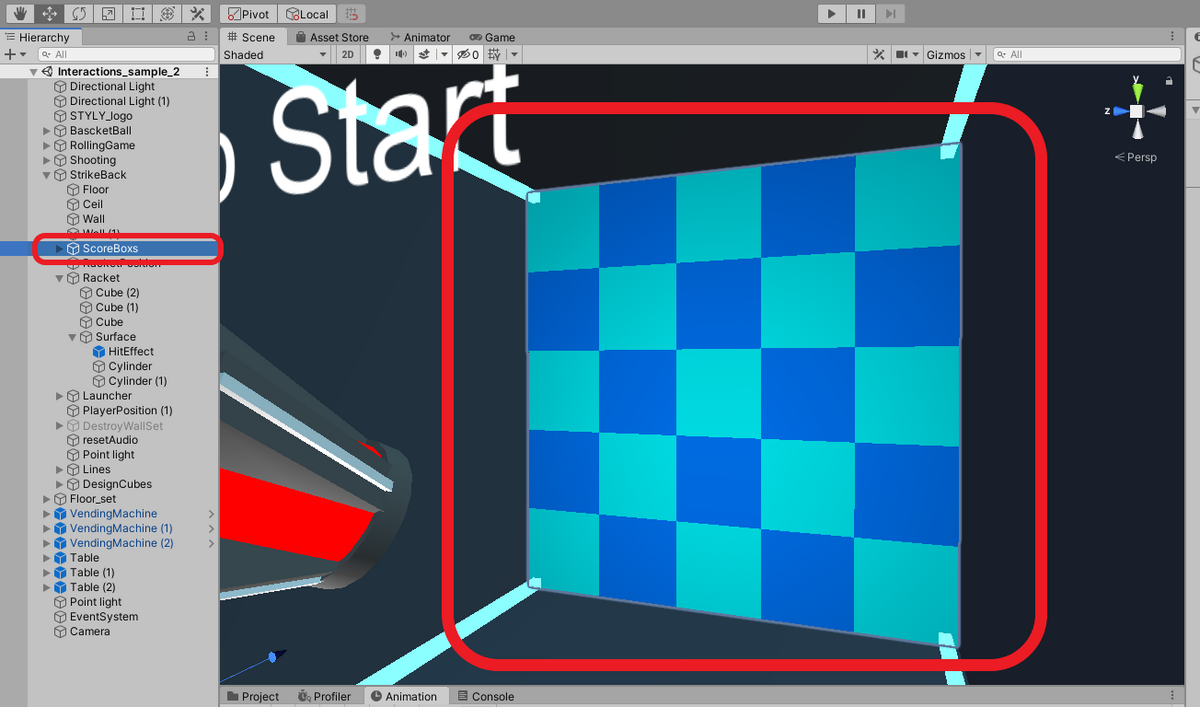
ScoreBoxes are composed of 25 blocks, one of which is assigned the STYLY_Attr_Collision component.
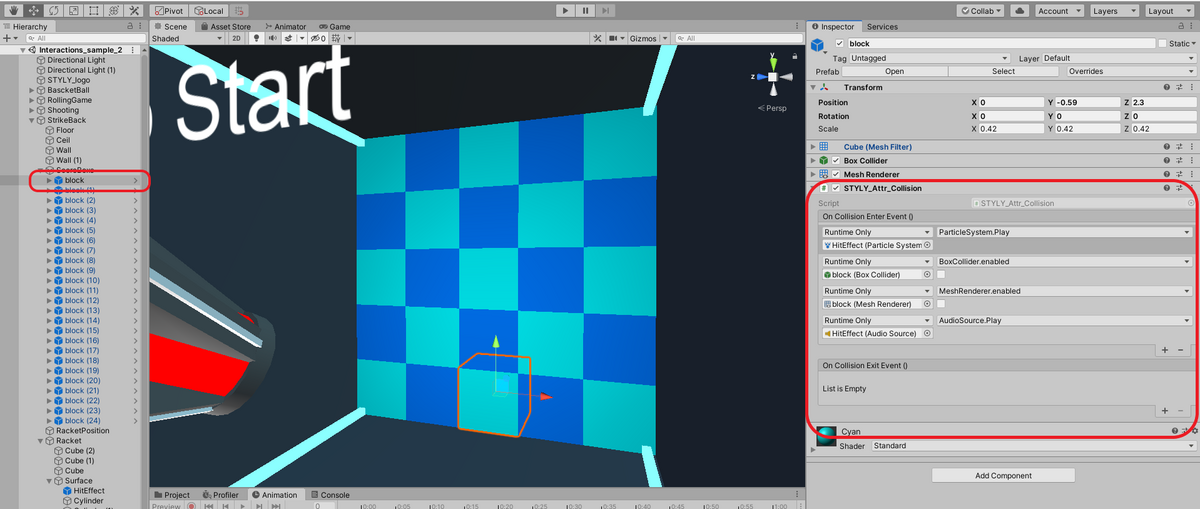
ScoreBox child object block inspector
STYLY_Attr_Collision
This component is used to determine when a red bullet hits a block, and the BoxCollider and MeshRenderer components for the collision detection are turned off.
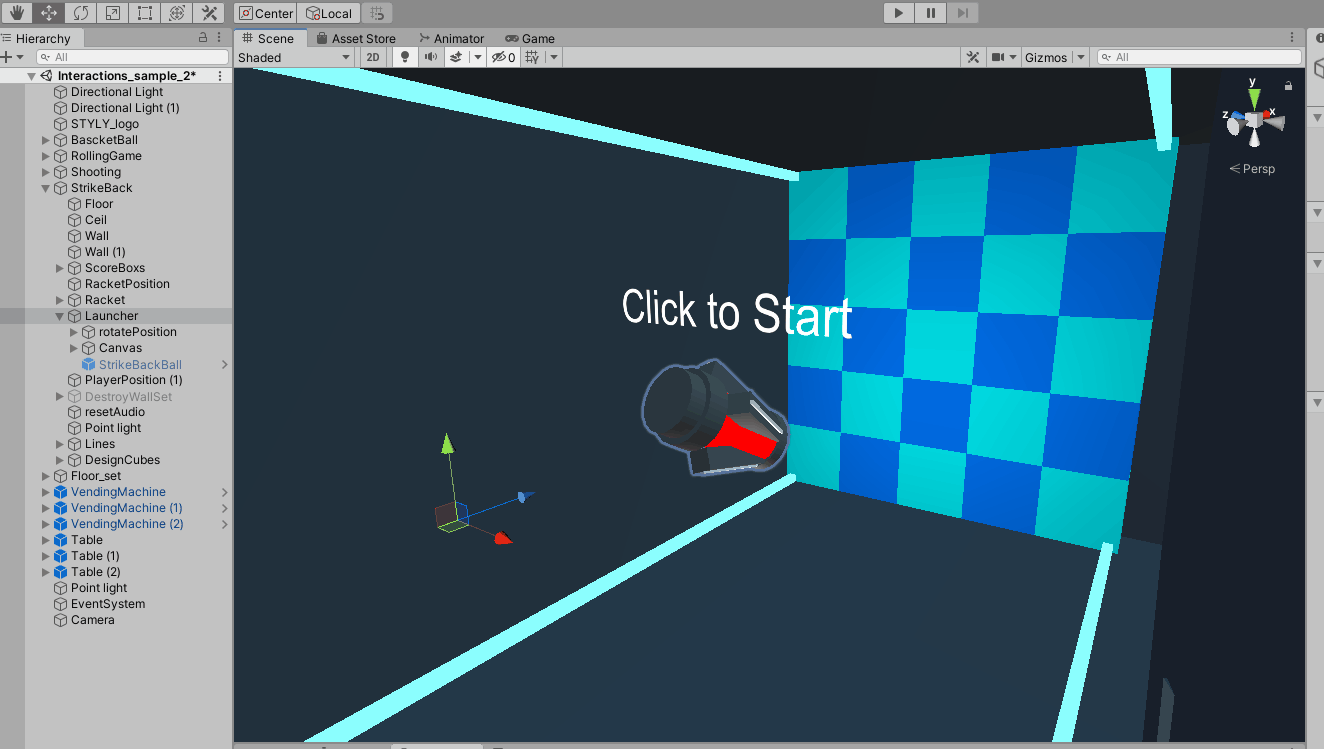
Ball Composition
Let’s look at the ball next; the object name on the hierarchy is Launcher.
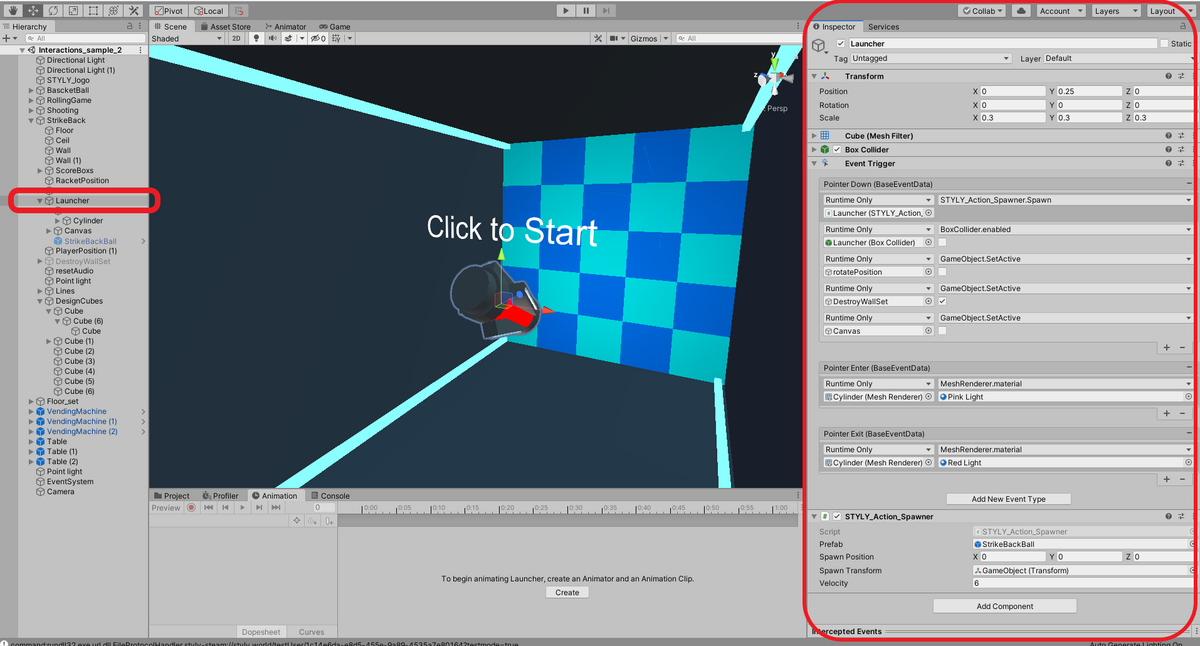
Inspector of the Launcher object
EventTrigger component and STYLY_Action_Spawner component.
The red ball object StrikeBackBall is created at the Pointer Down event, the rotatePosition object is deactivated, and the DestroyWallSet is activated.
The EventTrigger component is one of Unity’s standard functions for firing and setting Events.
The DestroyWallSet object is used to determine when a player is hit by a wall, and activating DestroyWallSet is used to determine when the game is over.

DestroyWallSet is a group of hit decisions to reset the game if a ball enters the same place after a block is erased.

STYLY_Attr_Breaker
When a red bullet hits the DestroyWallSet object, an OnDestroyEvent is fired and all 25 inactive BobCollider and MeshRenderer become active.
Let’s look at the StrikeBackBall object, the body of the red ball!
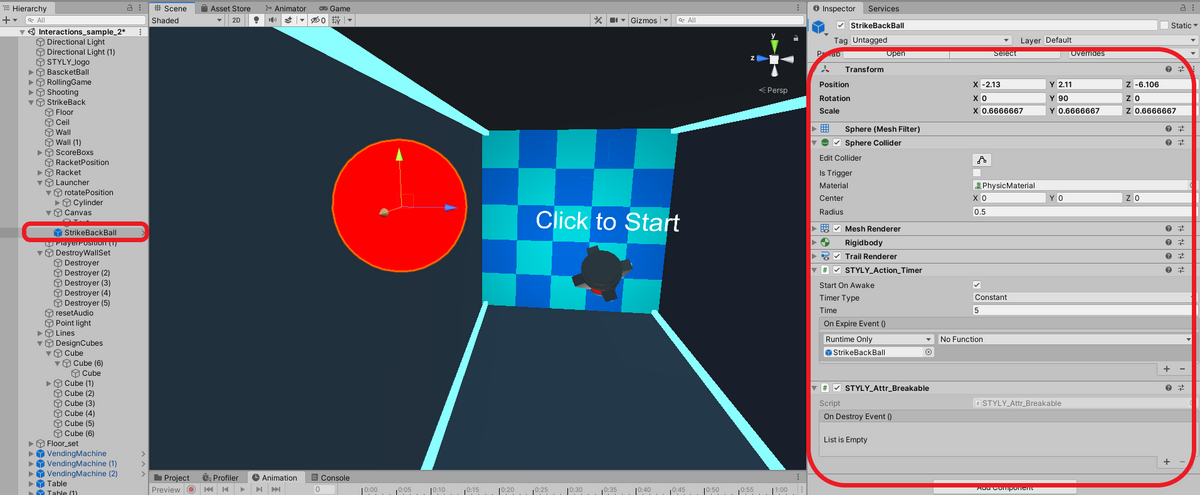
STYLY_Attr_Breakable
When this red ball hits the DestroyWallSet, the STYLY_Action_Breaker component is attached and OnDestroyEvent is fired.
Also, the drag value of the Rigidbody component is 0, so even if the ball bounces off a wall, it will return without decelerating.
Stage Composition
Finally, let’s take a look at the stage, which consists of the objects on the hierarchy as shown in the image.
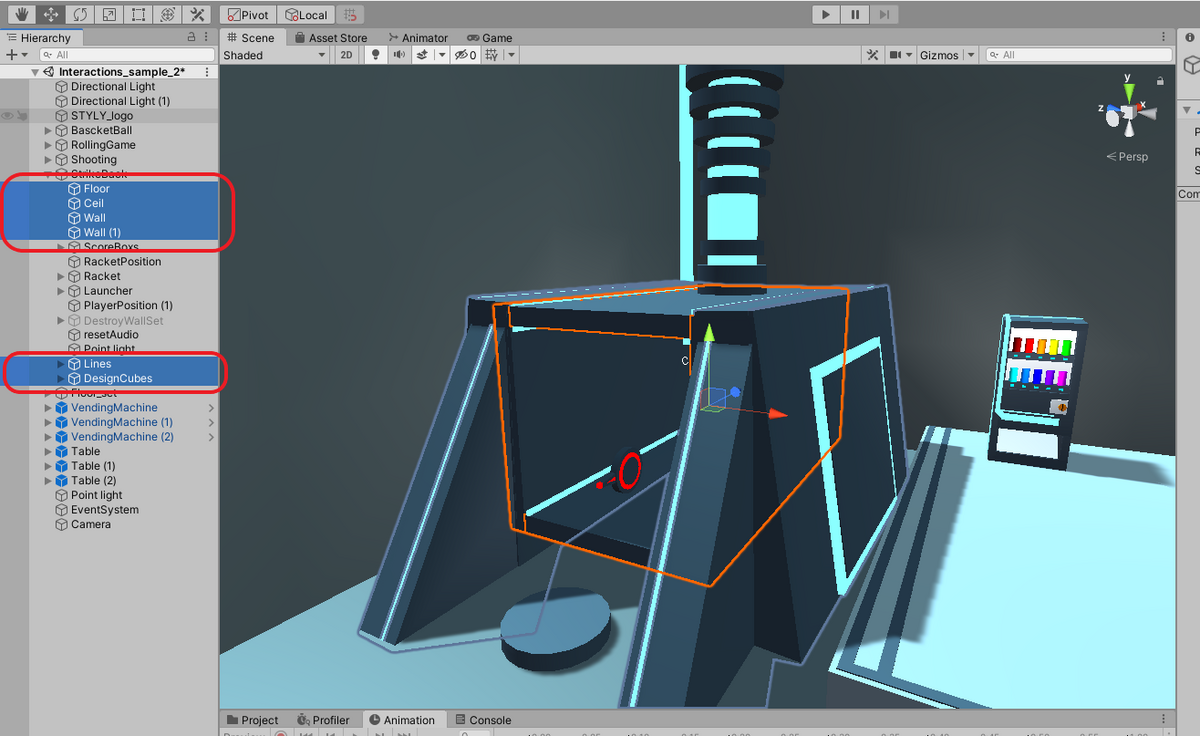
Each object is made up of a Unity primitive object, a Cube, which can be created by right-clicking on the hierarchy and selecting “Create”.
That’s it for the StrikeBack game sample, which is simple enough with only the Interaction SDK and standard Unity functionality to help you understand its structure.