本記事ではAIツールであるGENIEとTripoSRを使用して画像、テキストから3Dモデルを作成する方法を紹介します。
GENIE
Luma AIのGENIEは、テキスト入力で、3Dモデルを生成するAIサービスです。3Dモデリングとは異なり、専門知識やソフトウェアは不要で、誰でも簡単に3Dモデルを作成することが可能です。
特徴
- Text to 3D:3Dモデルを、自然言語で簡単に作成できます。
- 高速生成:数秒で複数の3Dモデルを生成できます。
- 編集機能:生成した3Dモデルを複数のバリエーションから選択、編集することができます。
- 商用利用可能:作成した3Dモデルを、商用利用することも可能です。
使い方
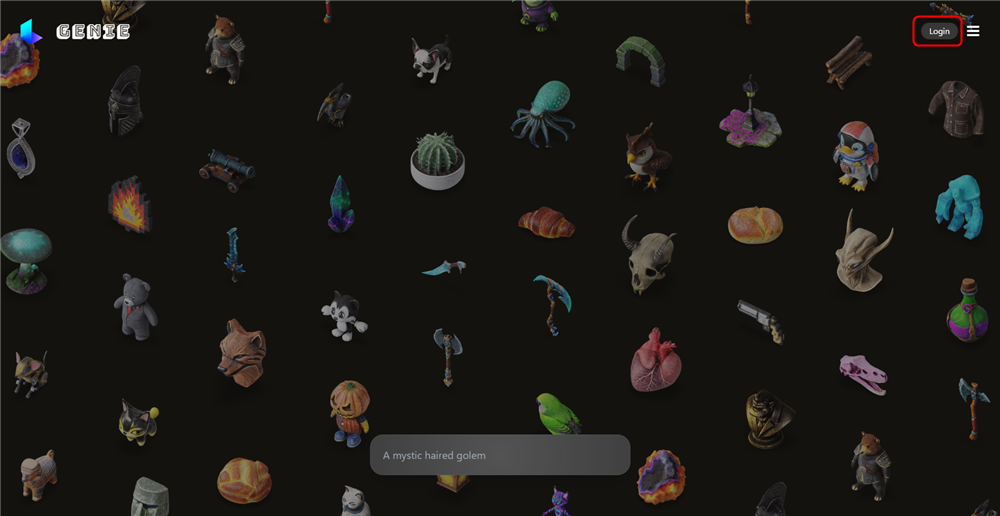
まずはGENIEにアクセスし、アカウントを作成します。
画面右上の「Login」をクリックし、ログイン方法を選択します(アカウントを持っていない人もLoginをクリックしてください)。
Login
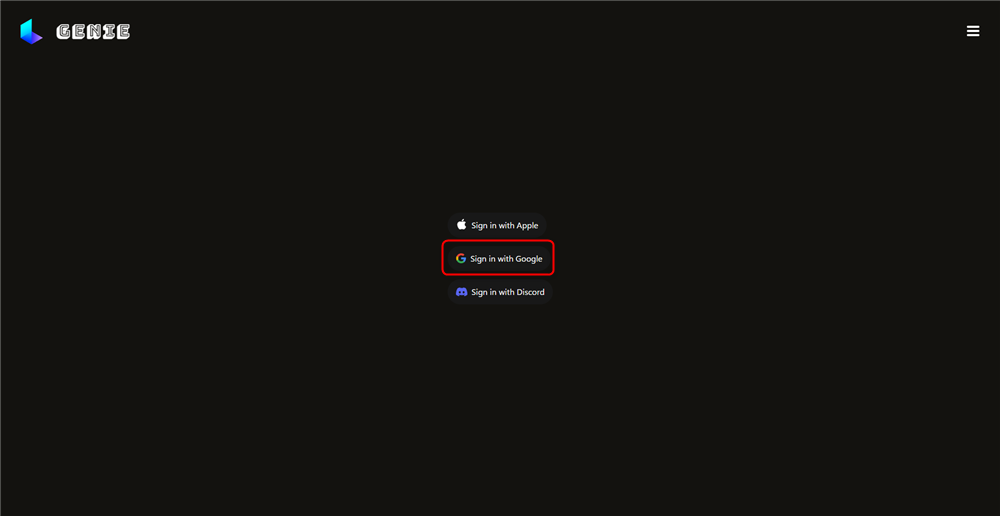
今回はSign in with Googleを選択し、Googleアカウントでログインします。
Sign in with Google
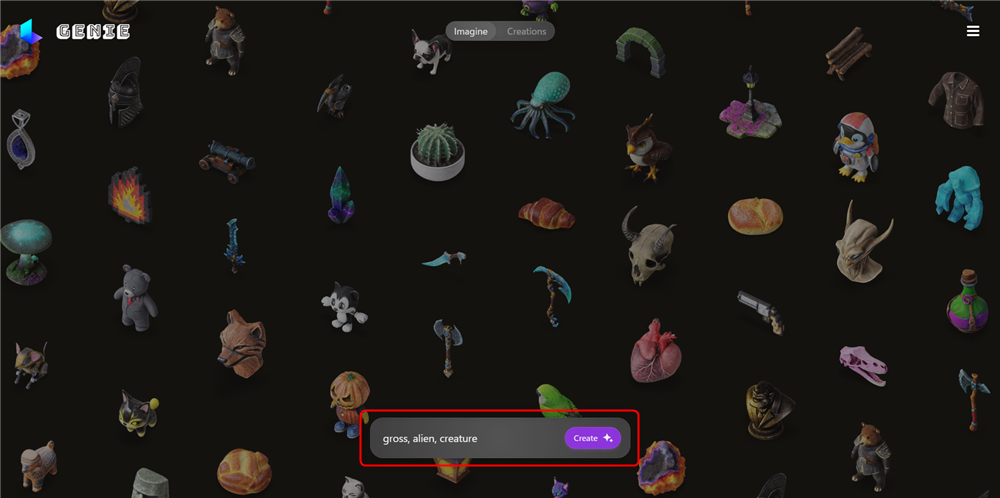
ログインできたら画面下部のボックスに生成したい内容を英語で入力します。
生成したい内容を英語で入力
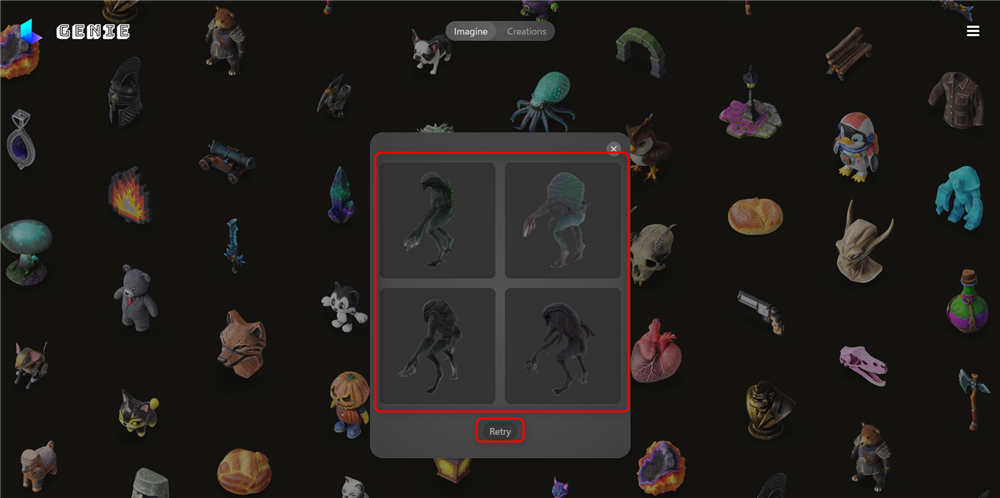
入力したらCreateをクリックし、少し待つとモデルが4つ生成されます。
Create
モデルが気に入らない場合はRetryをクリックすると再度生成されます。
モデルを決めてクリックすると、モデルの細かい項目を設定することができます。
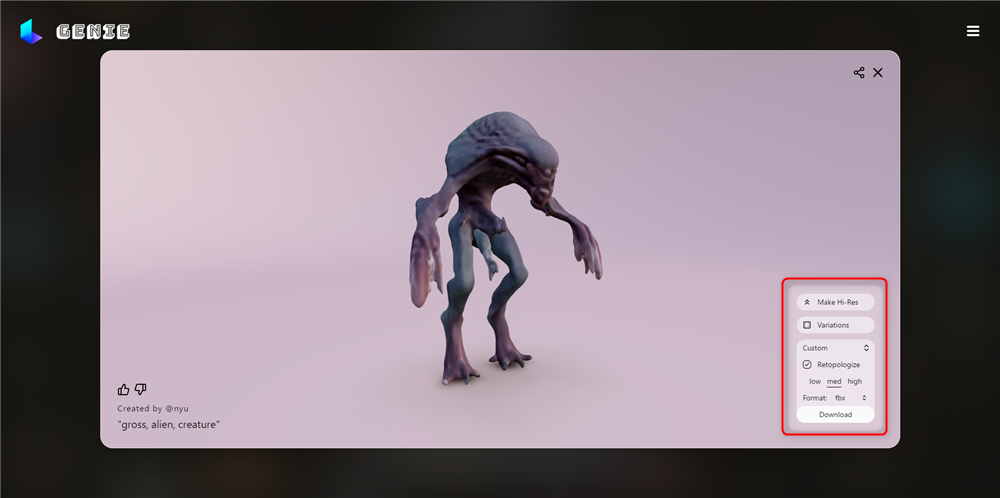
項目の設定
項目説明
Make High-Res
テクスチャの解像度を上げることができます(時間がかかることがあります)。
Variations
モデルの選択画面に戻ることができます。
Retpologize
Retpologizeを有効にするとモデルの解像度を選ぶことができます。Highだとモデルのポリゴン数とデータサイズが大きくなり、Lowだとポリゴン数が少なくなりデータサイズが小さくなります。
Fromat
ダウンロードするモデルの種類を選ぶことができます。
fbx、gltf、usdz、blend、stl、obj
項目を設定できたらダウンロードをクリックしてモデルをダウンロードします。
ダウンロードするとモデルデータと各種テクスチャが格納されています。
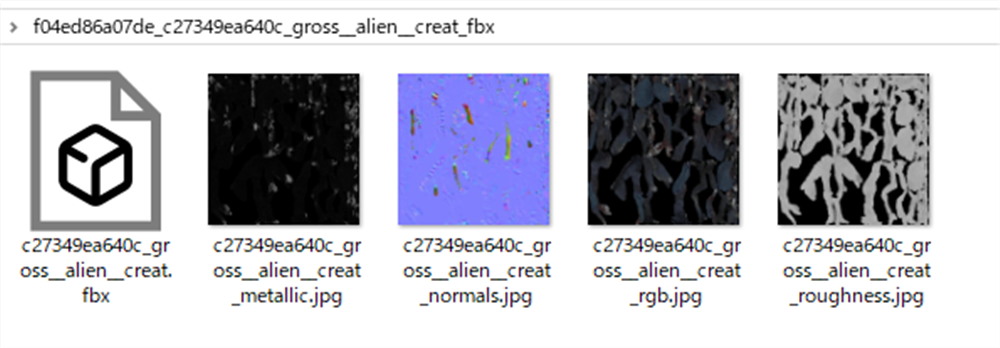
Texture
Blenderでダウンロードした内容を確認してみましょう。
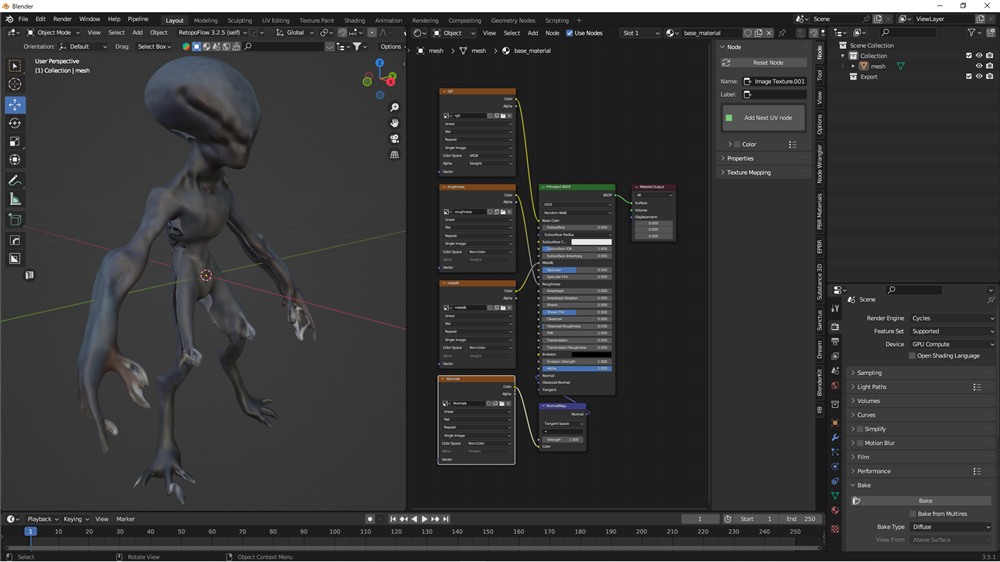
Blenderで内容を確認
TripoSR
TripoSRはwebブラウザ上で簡単に写真から3Dモデルを生成することができるサービスです。 ローカル構築で利用することもできますが、今回はweb上で使用する方法を解説します。
まずはTripoSRのデモページにアクセスします。
https://huggingface.co/spaces/stabilityai/TripoSR
まずはサンプルから見ていきましょう。
お好きなサンプルを選択しGenerateをクリックして少し待つと3Dモデルが生成されます。
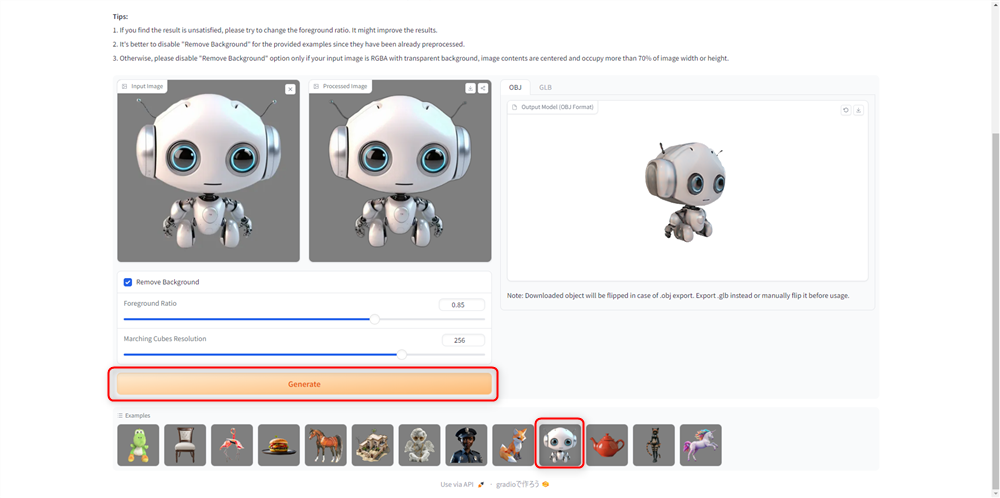
TripoSR
項目説明
Remove Background
画像に背景が含まれる場合に自動で背景を削除してくれます。この項目はオフにしておいた方がモデルの精度が上がるので、可能な場合は背景を透過した画像を用意してRemove Backgroundはオフにしておいた方が良いです。
Foreground Ratio
画面にある物の中でどのくらいの割合をモデル化するかを決めます。数値が大きいほど余白が減るので適宜調節してください。
Marching Cubes Resolution
モデルの解像度を変更することできます。
32から320までが選択できますが、数値が大きいほどモデルの精度が上がります。
モデルが生成されたらエクスポート形式をOBJかGLBから選択し、ダウンロードボタンからダウンロードすることができます。
使い方
自身で用意した画像を使用するときは、Input Imageの箇所に画像をドラッグ&ドロップ、もしくはクリックして画像をフォルダから選択してください。
今回は事前に生成した生物?の画像を使用します。
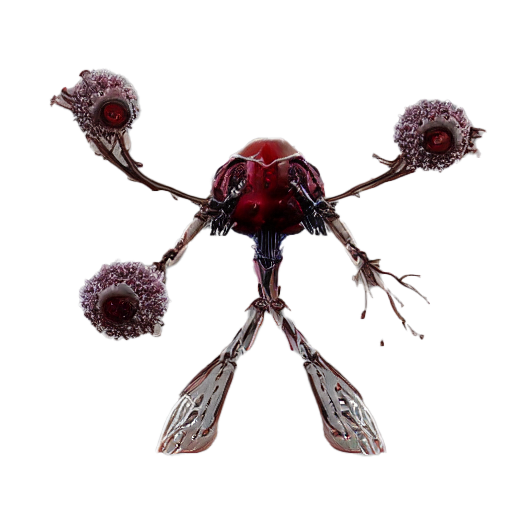
Sample image
画像をドラッグ&ドロップし、Foreground Ratioを0.9、Marching Cubes Resolutionを320とします。
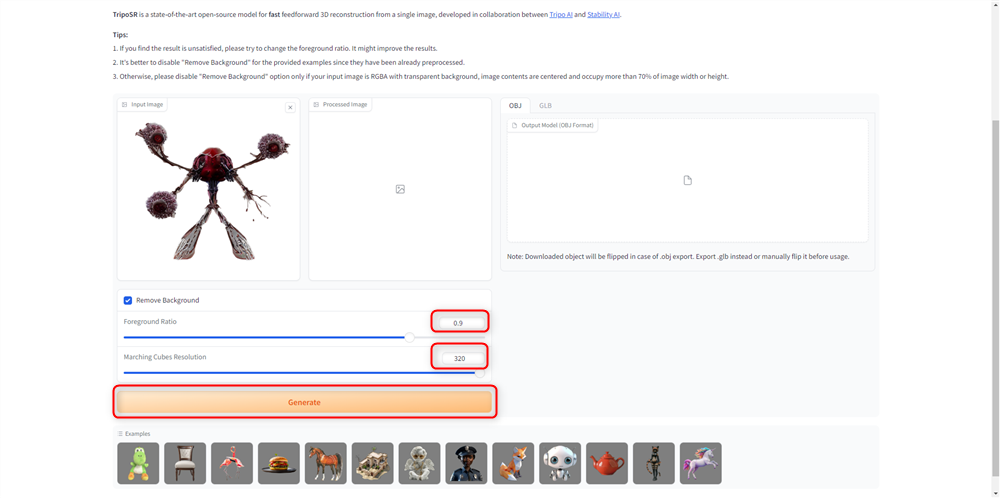
Foreground Ratio=0.9、Marching Cubes Resolution=320
Generateをクリックして少し待つとモデルが生成されるので、OBJを選択しダウンロードします。
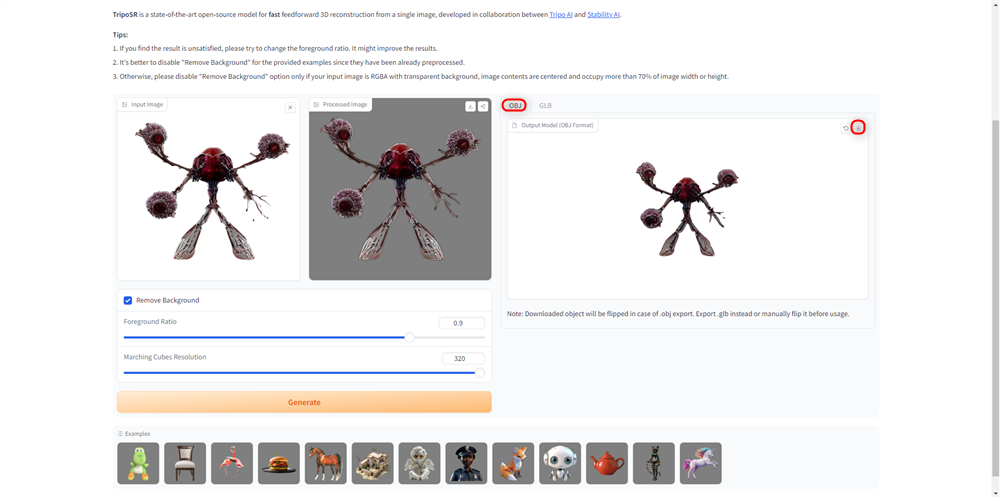
Download OBJ
Blenderでダウンロードした内容を確認してみましょう。
Blenderを起動し、File→ImportからWavefront(.obj)をクリック、ダウンロードしたファイルを選択します。
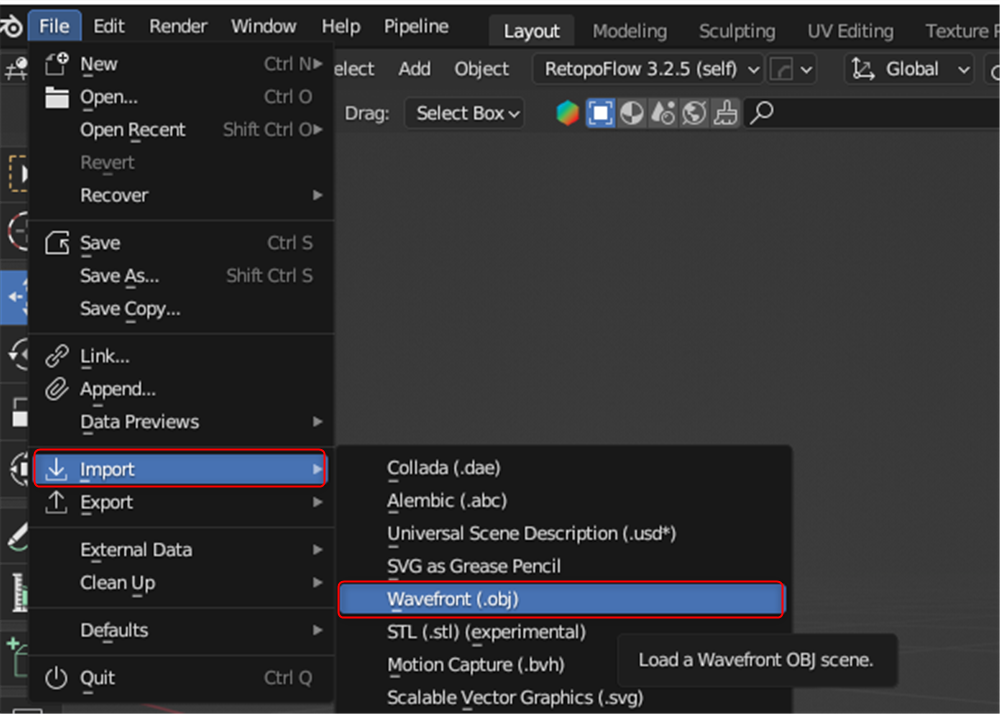
File→Import→Wavefront(.obj)
モデルを選択し、TABキーで編集モードに入りAキーで全選択しUキーを押してSmart UV Projectを選択しOKをクリックします。
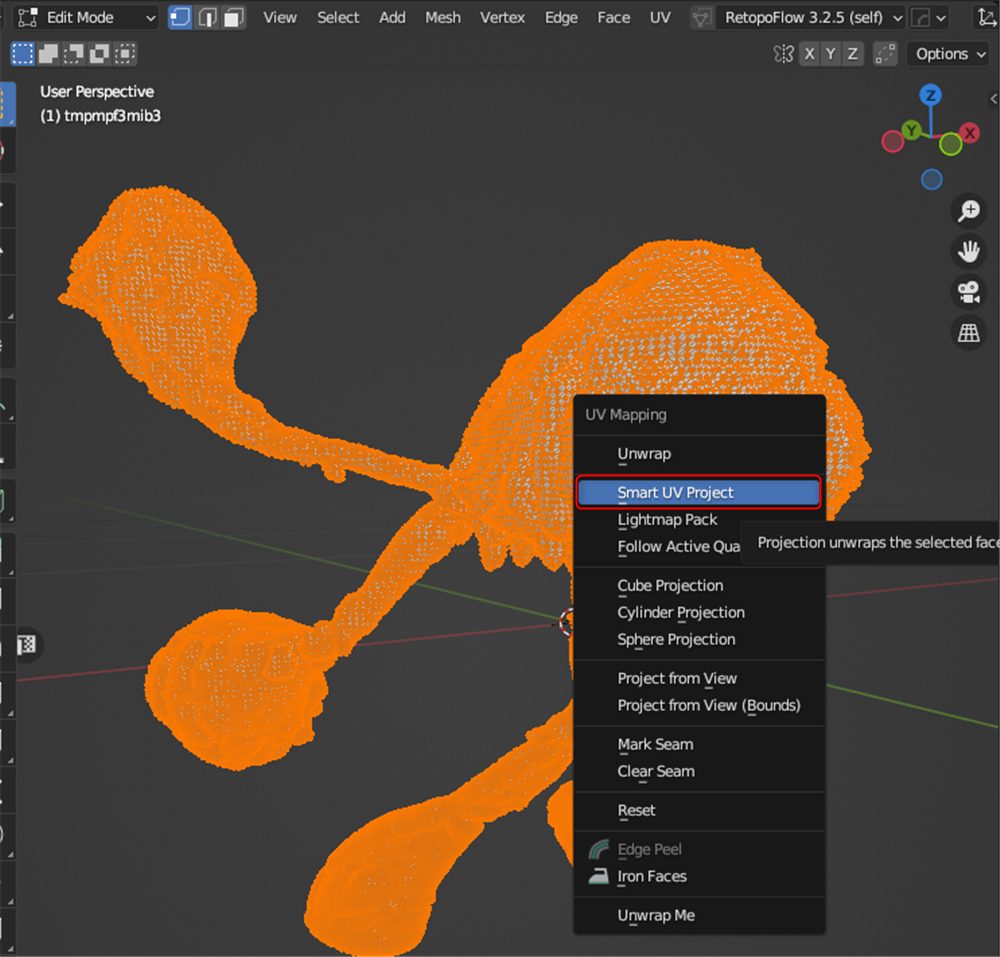
Smart UV Project
ShaderEditorから新しくマテリアルを追加してColor Attributeノードを追加するとテクスチャが表示されます。
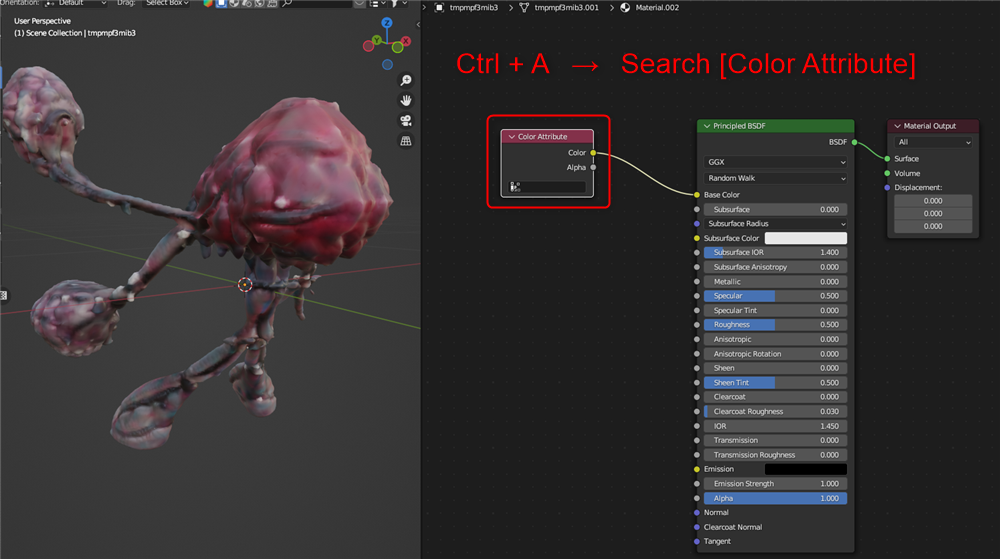
Color Attribute
このままでは他のソフトにテクスチャを持っていけないのでテクスチャをベイクします。
RenderEngineをCyclesに変更し、Bakeの箇所の設定を下記の画像のように変更します。ここではBake TypeをDiffuse(ベースカラー)を選択していますが、Typeを変更することで別のマップもベイクすることができます。
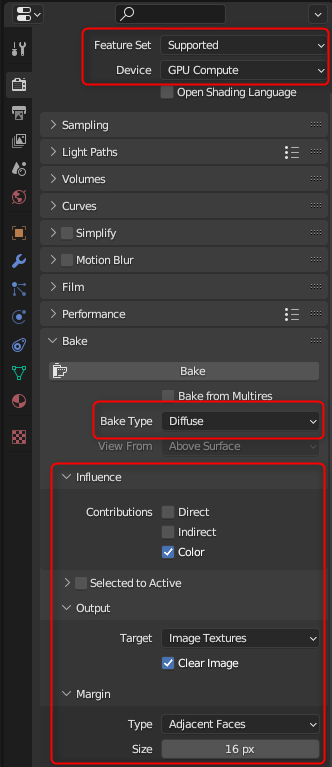
Bkae settings
ShaderEditorに戻り、Image Textureノードを追加します。
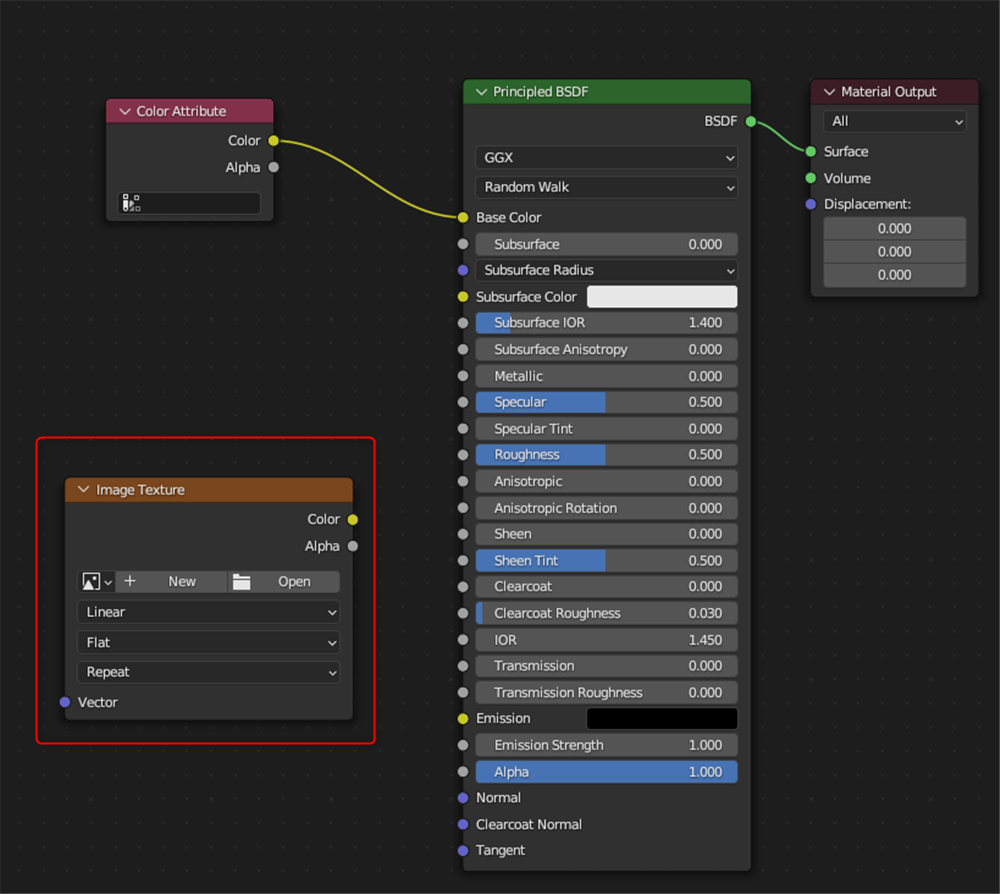
Add Image Texture
追加したらNewをクリックして新規画像を作成します。
今回はNameをCreatureに変更してOKをクリックします。
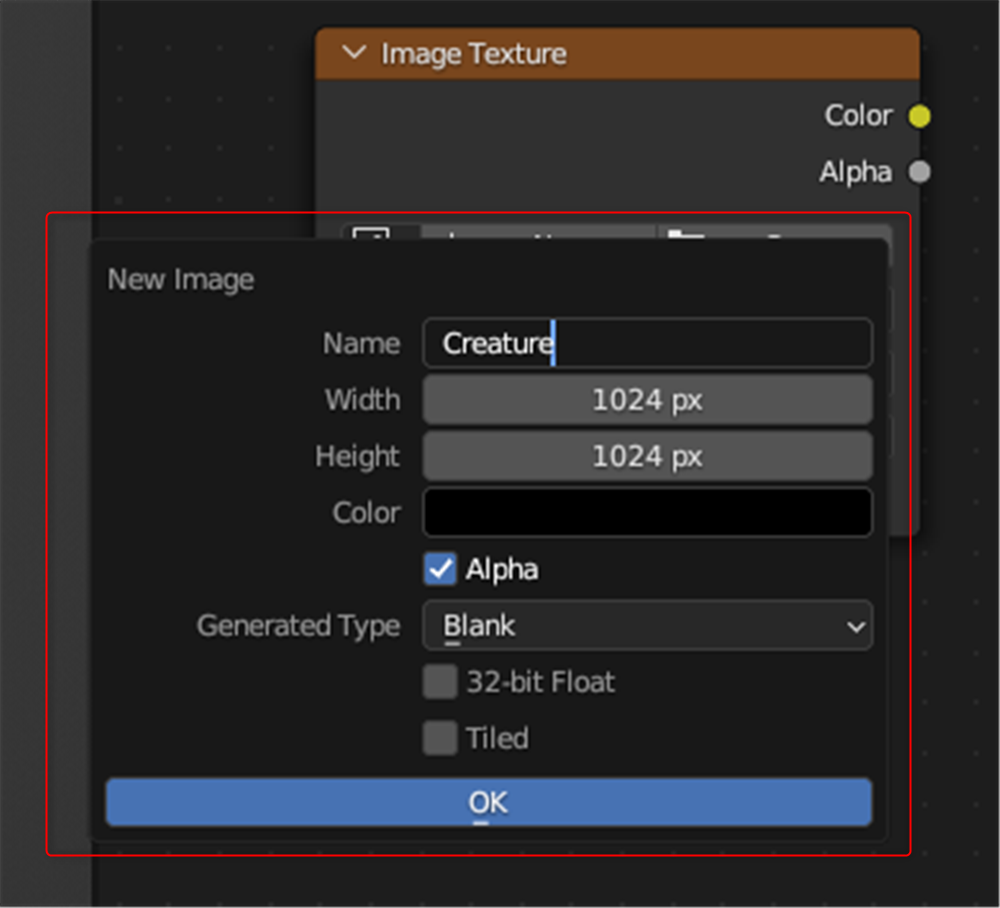
New image
ここまで出来たらオブジェクト、Image Textureノードを選択(外側がオレンジ色になっている状態)し、Bakeをクリックします。
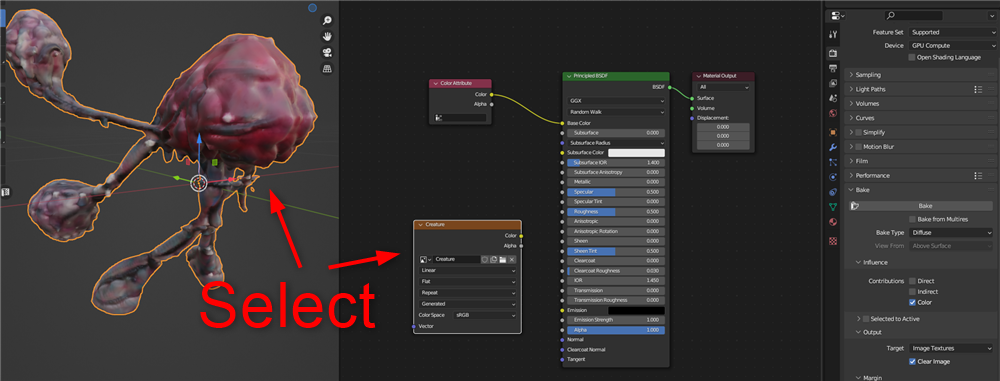
Select
ベイクが完了しImage TextureノードをBase Colorにつなぐとテクスチャが正常に表示されます。
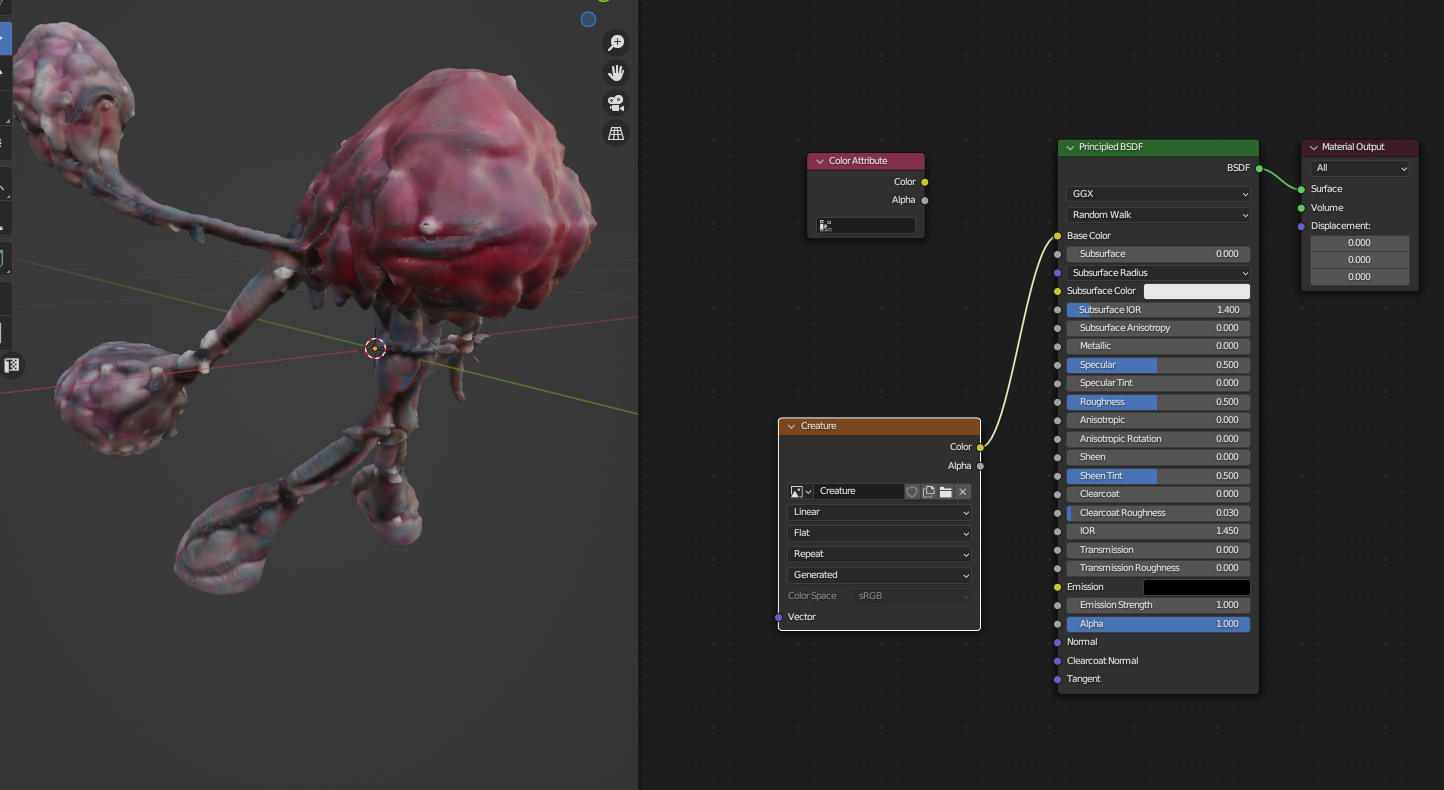
Base Color
画面上のUV Editing ウィンドウに移動してベイクした画像を選択します。
ImageをクリックしてSave Asで画像を任意のフォルダに保存します。
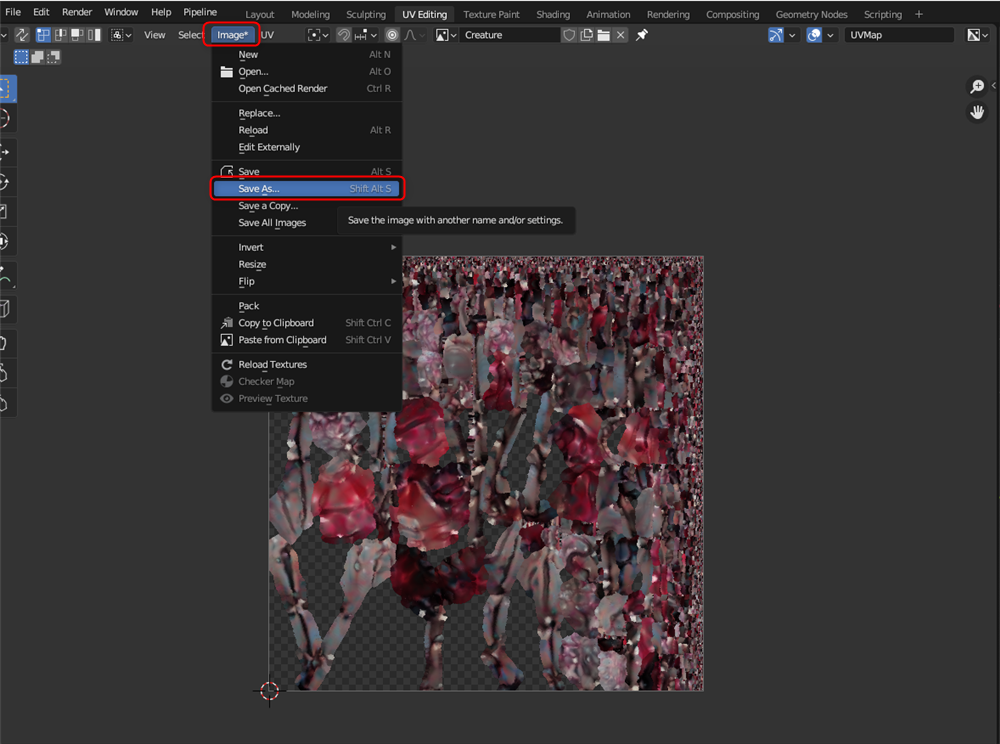
Save texture
これでBlenderでの作業は完了です。
MIxamoでアニメーションをつける
生成されたモデルが人型であればMixamoでアニメーションをつけることができます。今回はLuma AIで作成したモデルにアニメーションをつけます。
Mixamoの詳しい使い方は下記の記事で紹介しています。
こちらがMixamoでアニメーションをつけた様子です。

Dance animation
STYLYへアップロード
実際にSTYLYへアップロードして使用しましょう。
今回はUnityのシーンをそのままSTYLYにアップロードするので、こちらをご参照ください。

アカウント作成方法
