This article will show you the basic usage of Easy PBR and how to create materials.
Easy PBR is an add-on that allows you to use over 1200 different materials.
It also includes a bake function, so you can use the created textures in Unity and STYLY.
Use Blender version 3.1.
What is Easy PBR?
Easy PBR is a Blender add-on that allows you to use over 1200 materials provided by embientCG.
By using those materials as a node group, you can combine multiple materials.
It also includes a baking function and the ability to set the resolution of the material.
How to Install the Easy PBR Add-on
How to Install the Add-on
First, visit Gumroad’s Easy PBR download page.
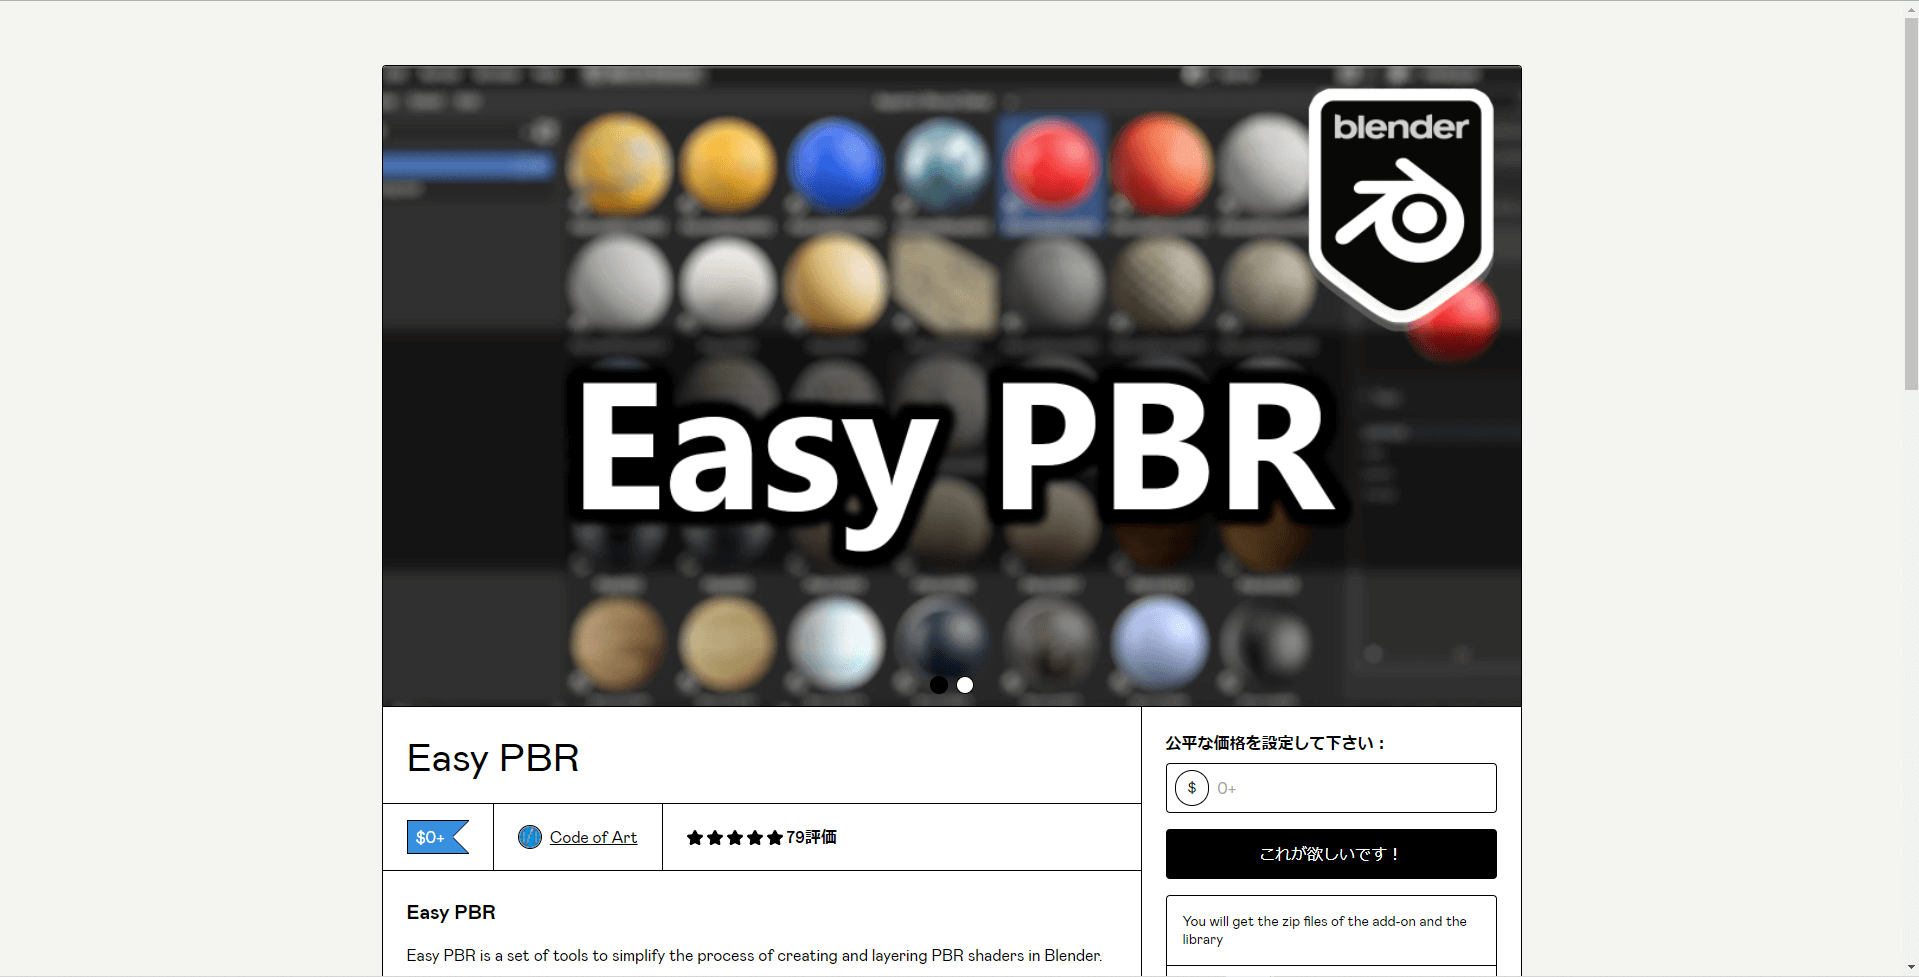
Easy PBR
Once you have accessed the site, type 0 in the Fair Price box and click the button below it (if you wish to make a donation to the producer, type an amount in this box).
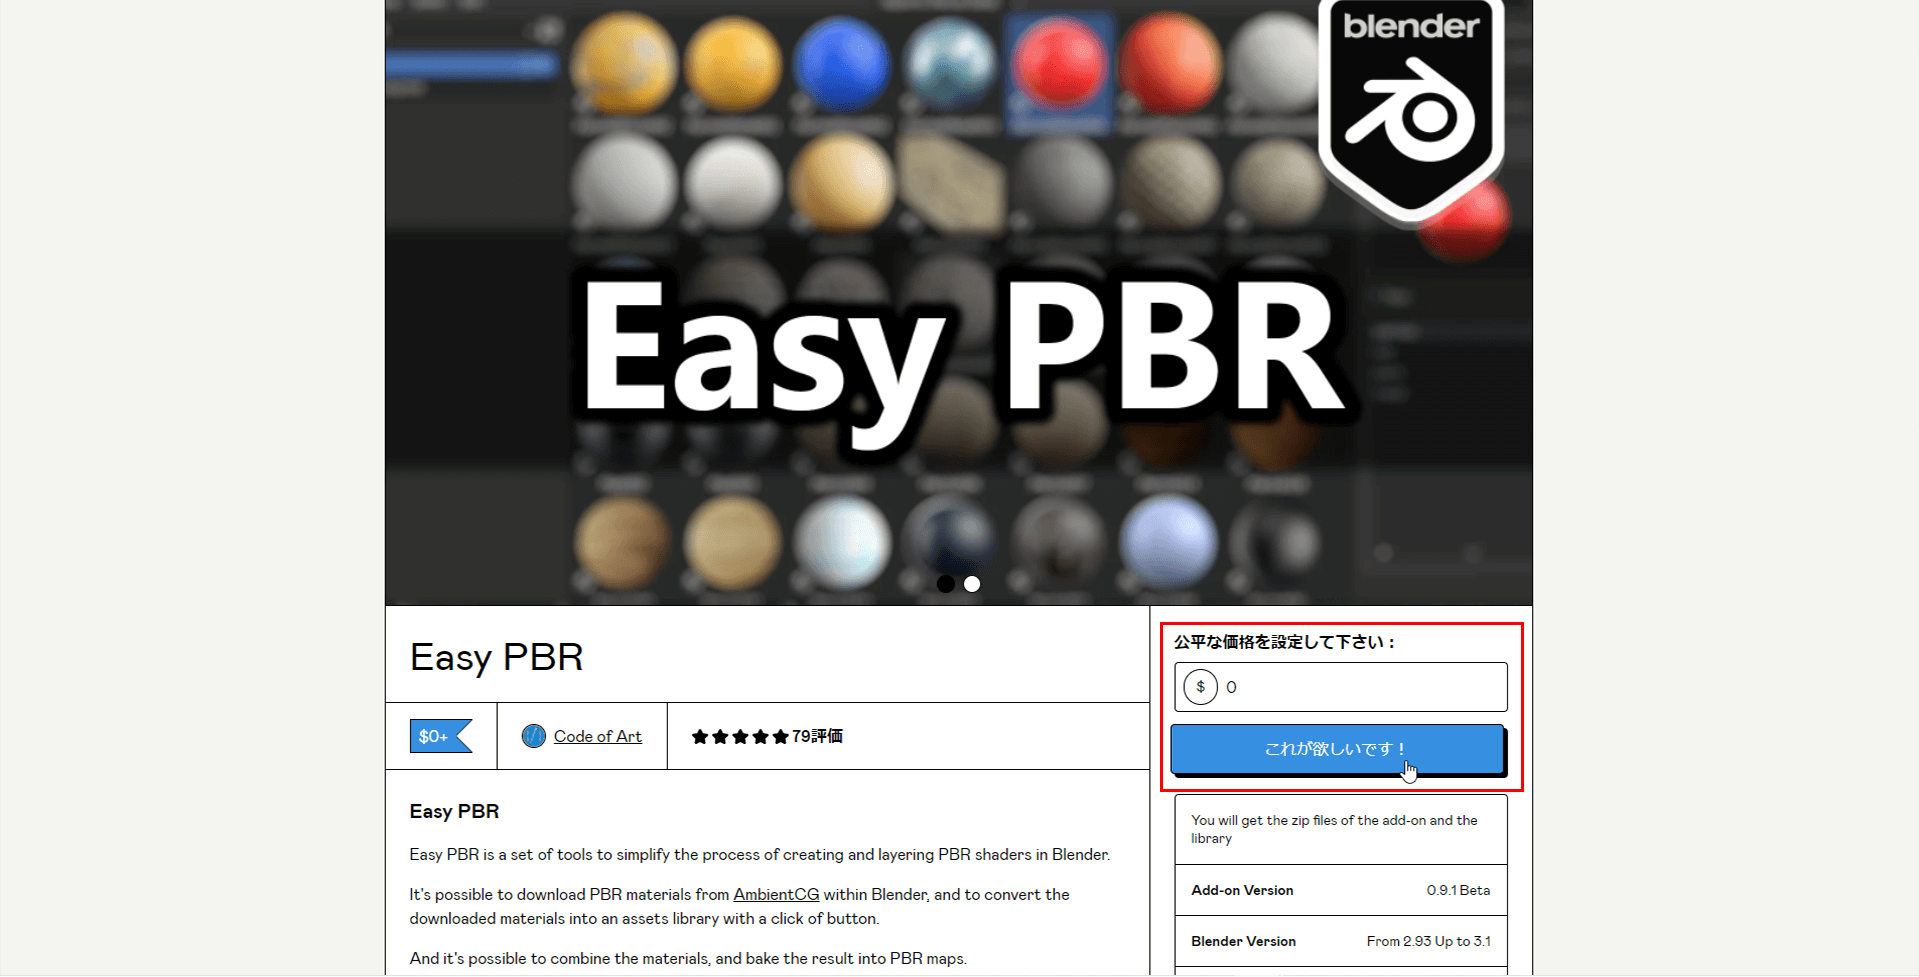
Enter the amount
Please enter your e-mail address and press the button below.
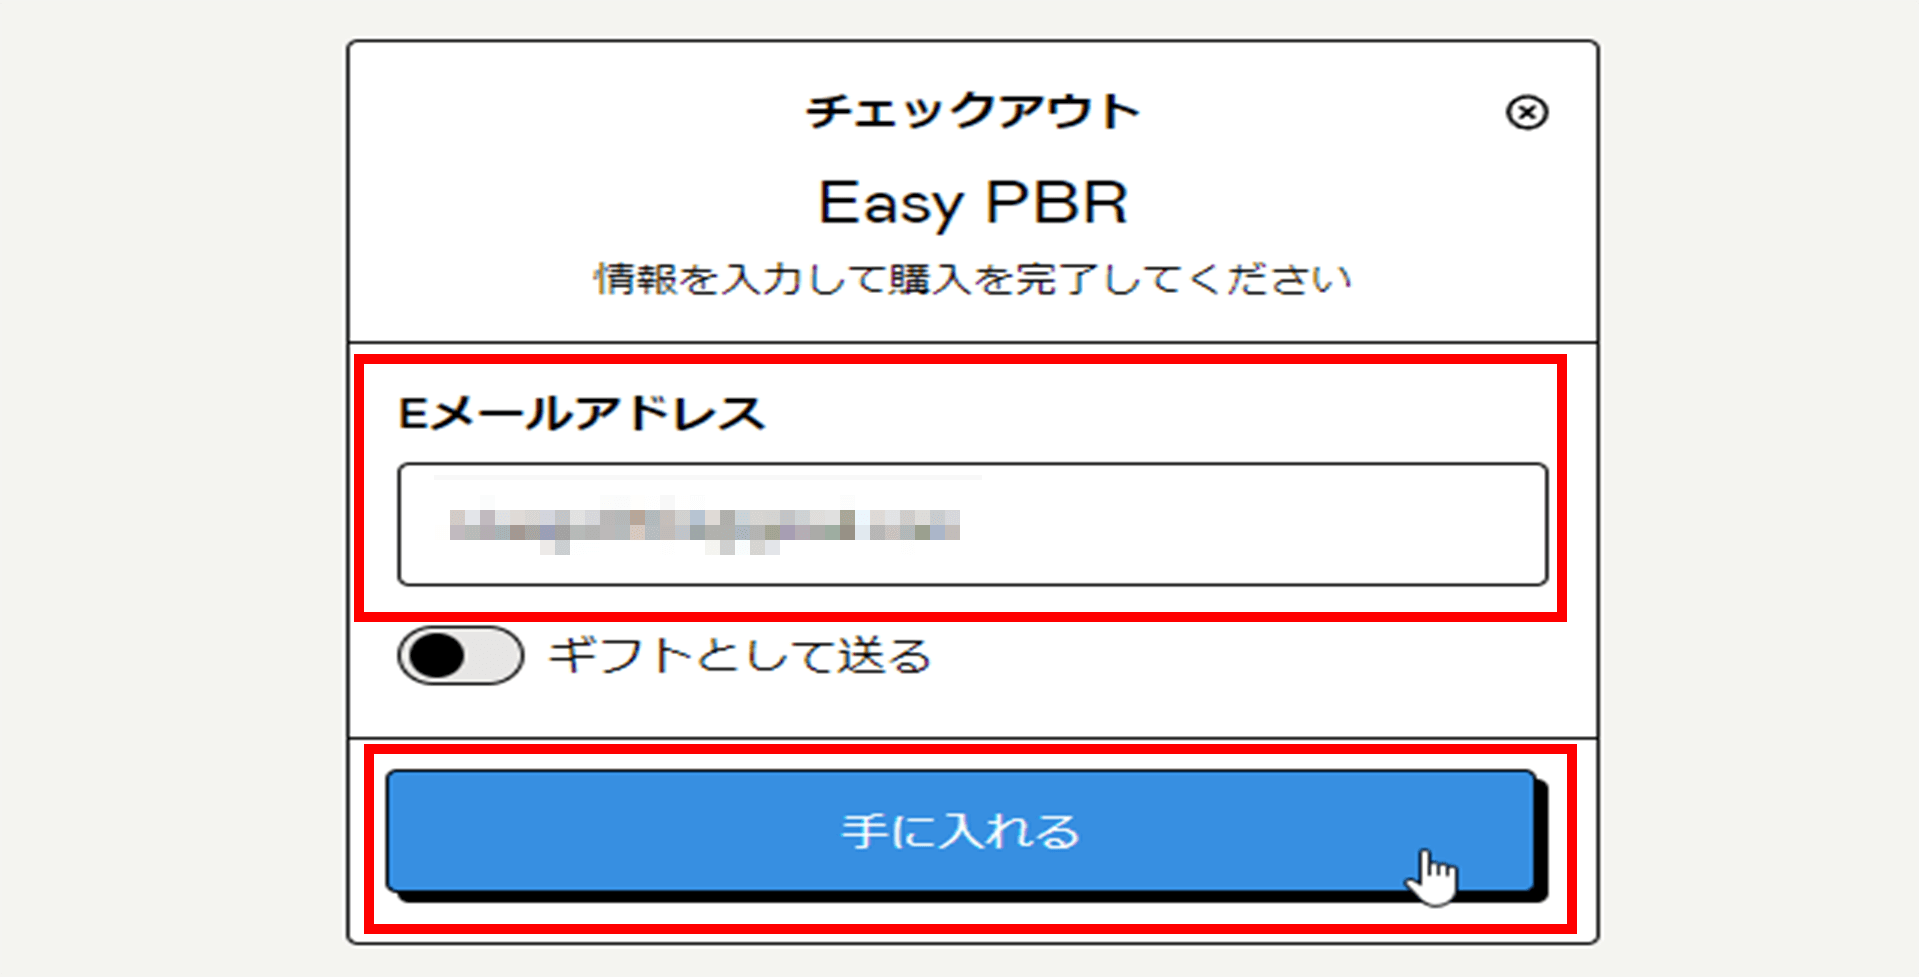
Enter your email address
After completing the purchase, press the View Contents.
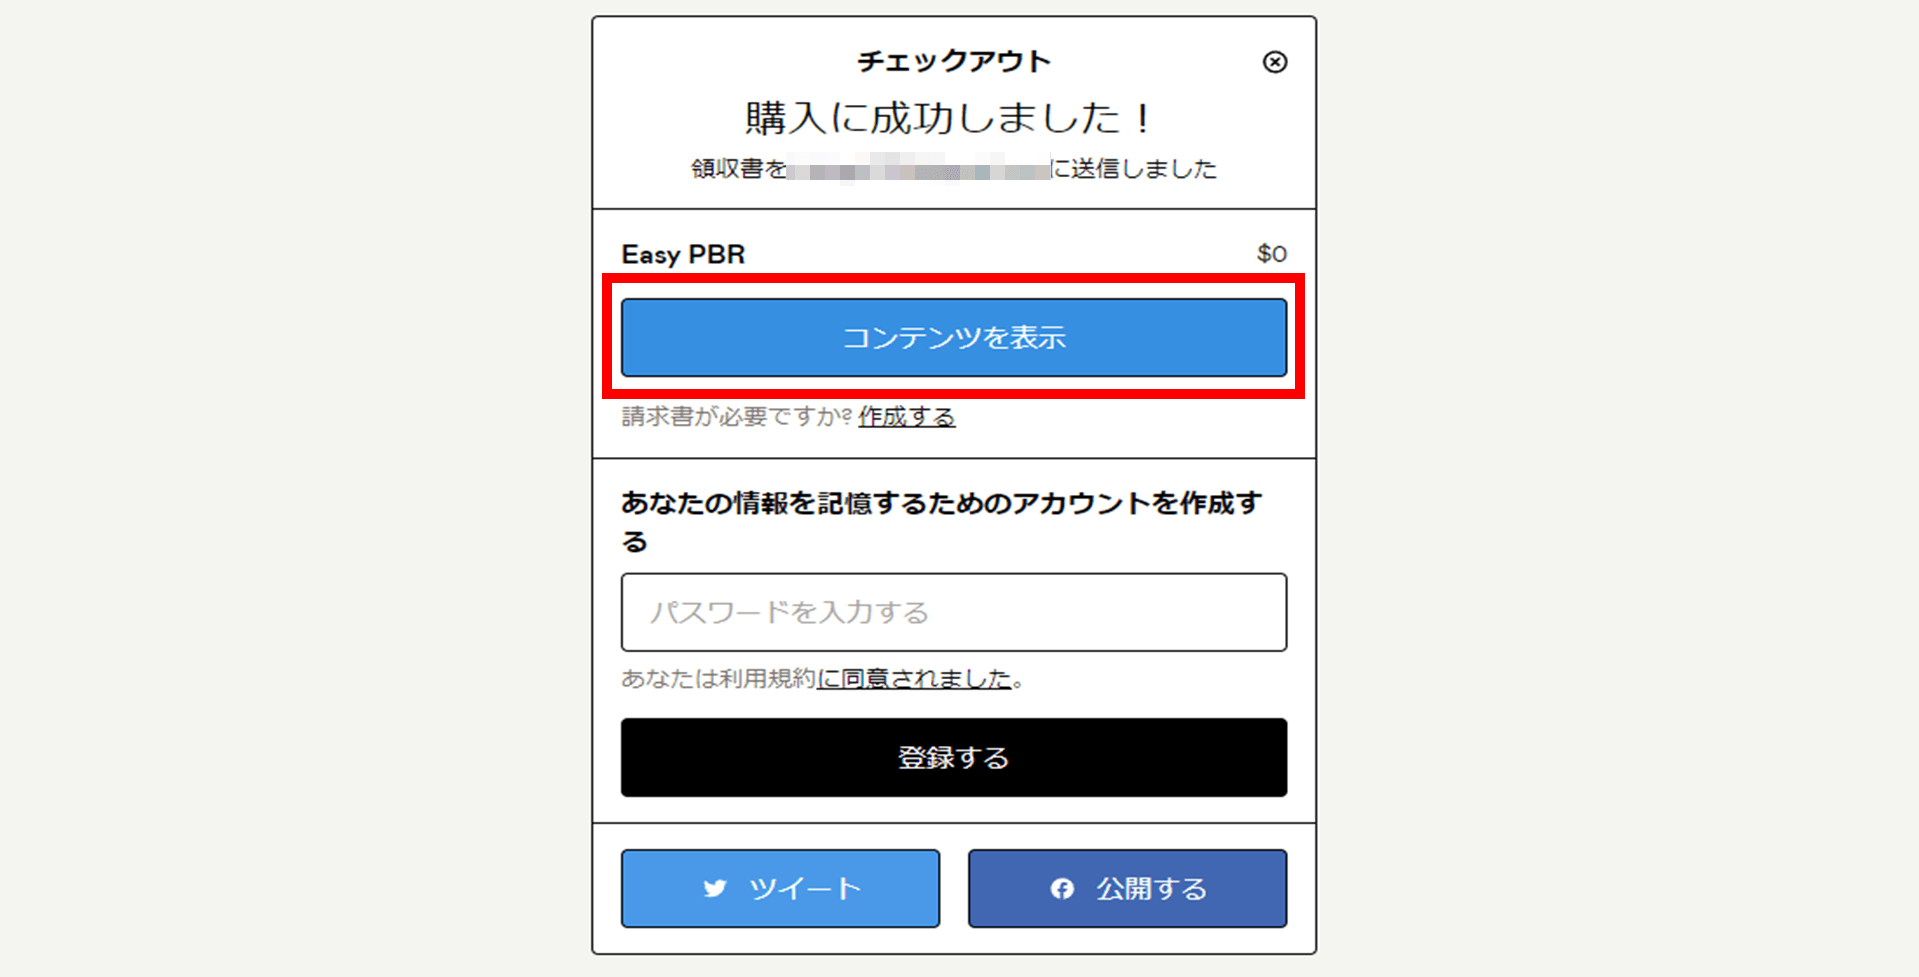
Click on Show Content
You will see two Zip files; download both.
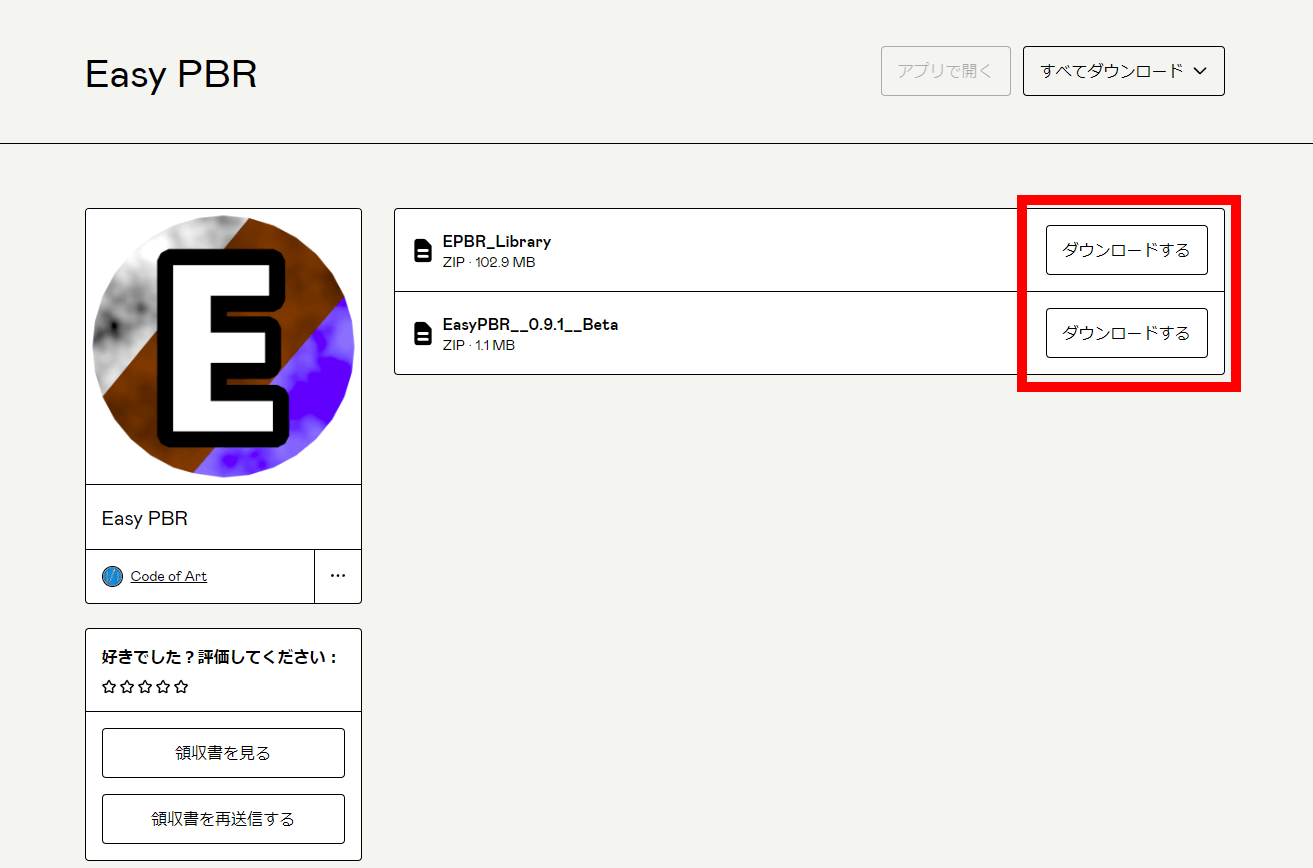
Download both
EasyPBR__0.9.1__Beta is the add-on. Please do not unzip it and save it in any location (the __0.9.1__Beta part of the file name varies depending on the version).
EPBR_Library should be unzipped and saved in an arbitrary location. It is better to save it in the same location as the add-on itself.
Install Add-ons in Blender
Next, install the Easy PBR add-on in Blender.
Start Blender, click on Edit in the upper right corner, and select the Preference order.
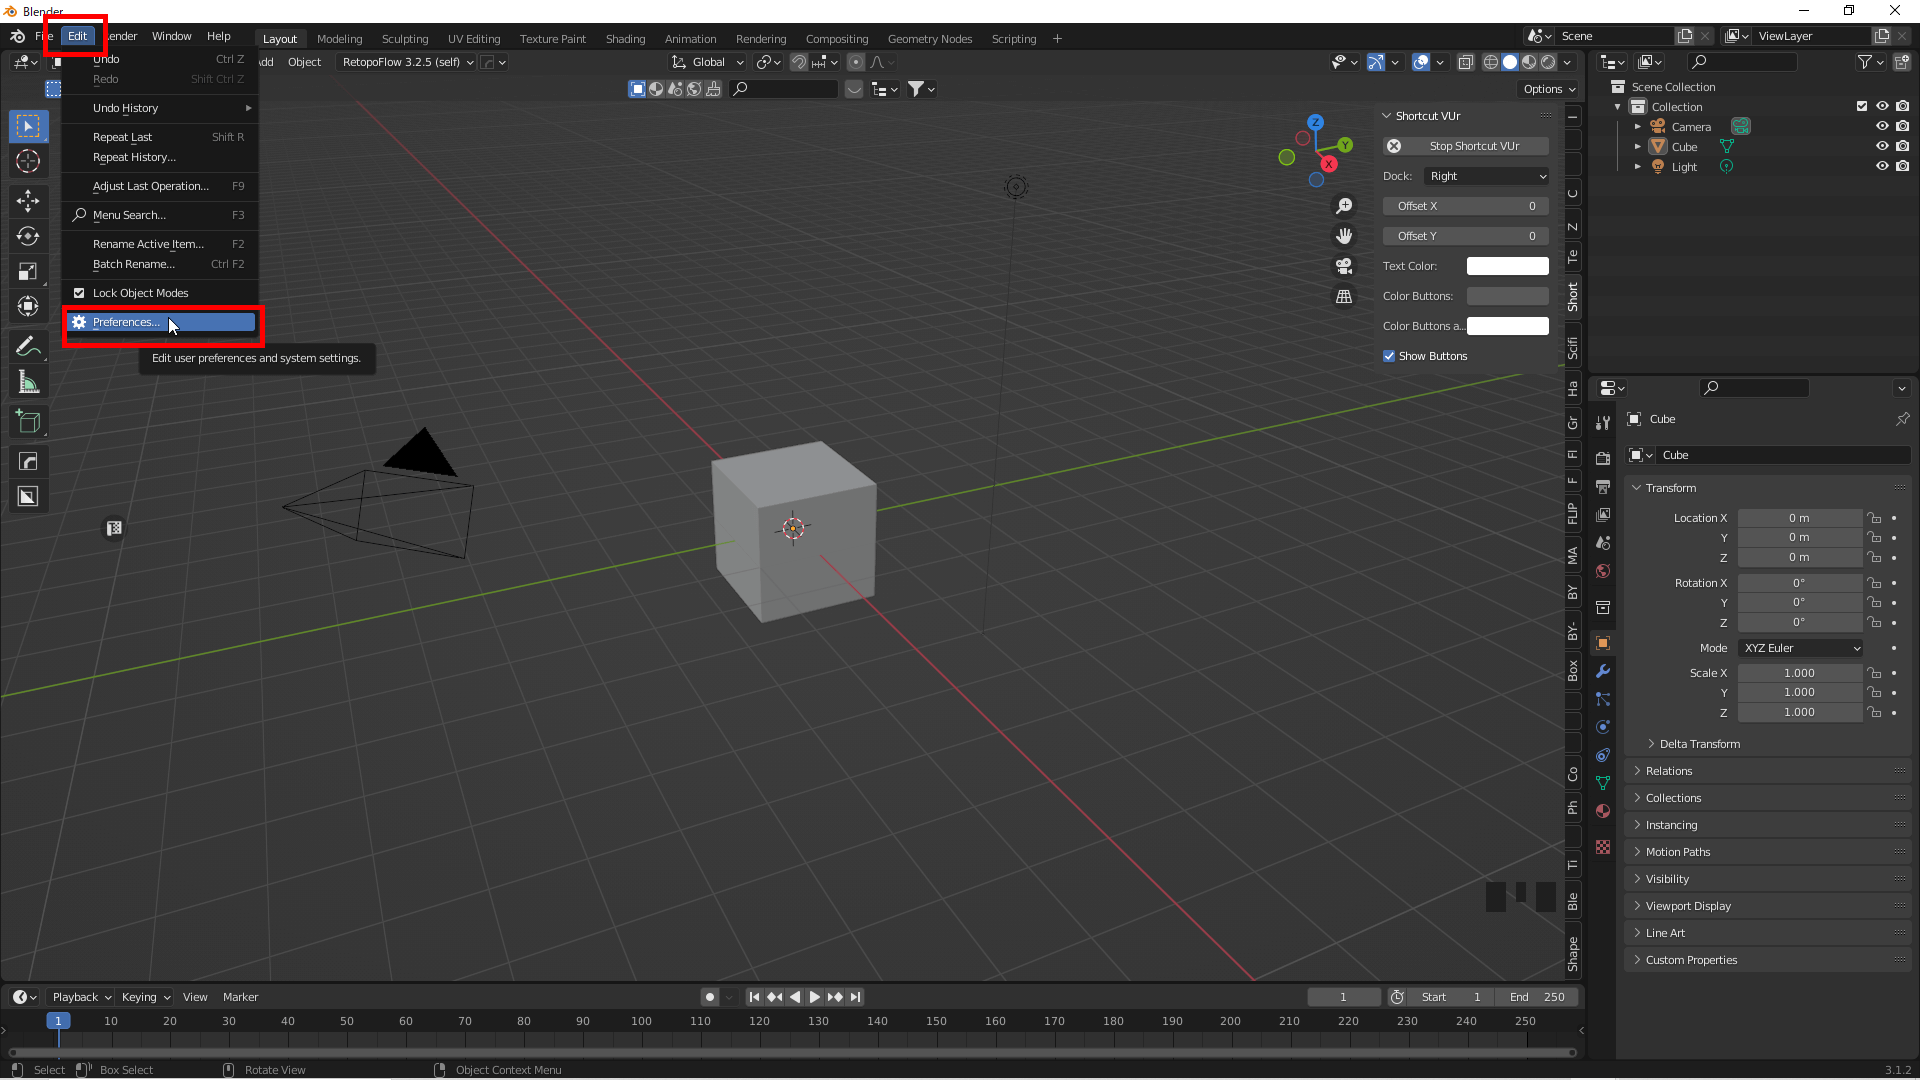
Edit→Preference
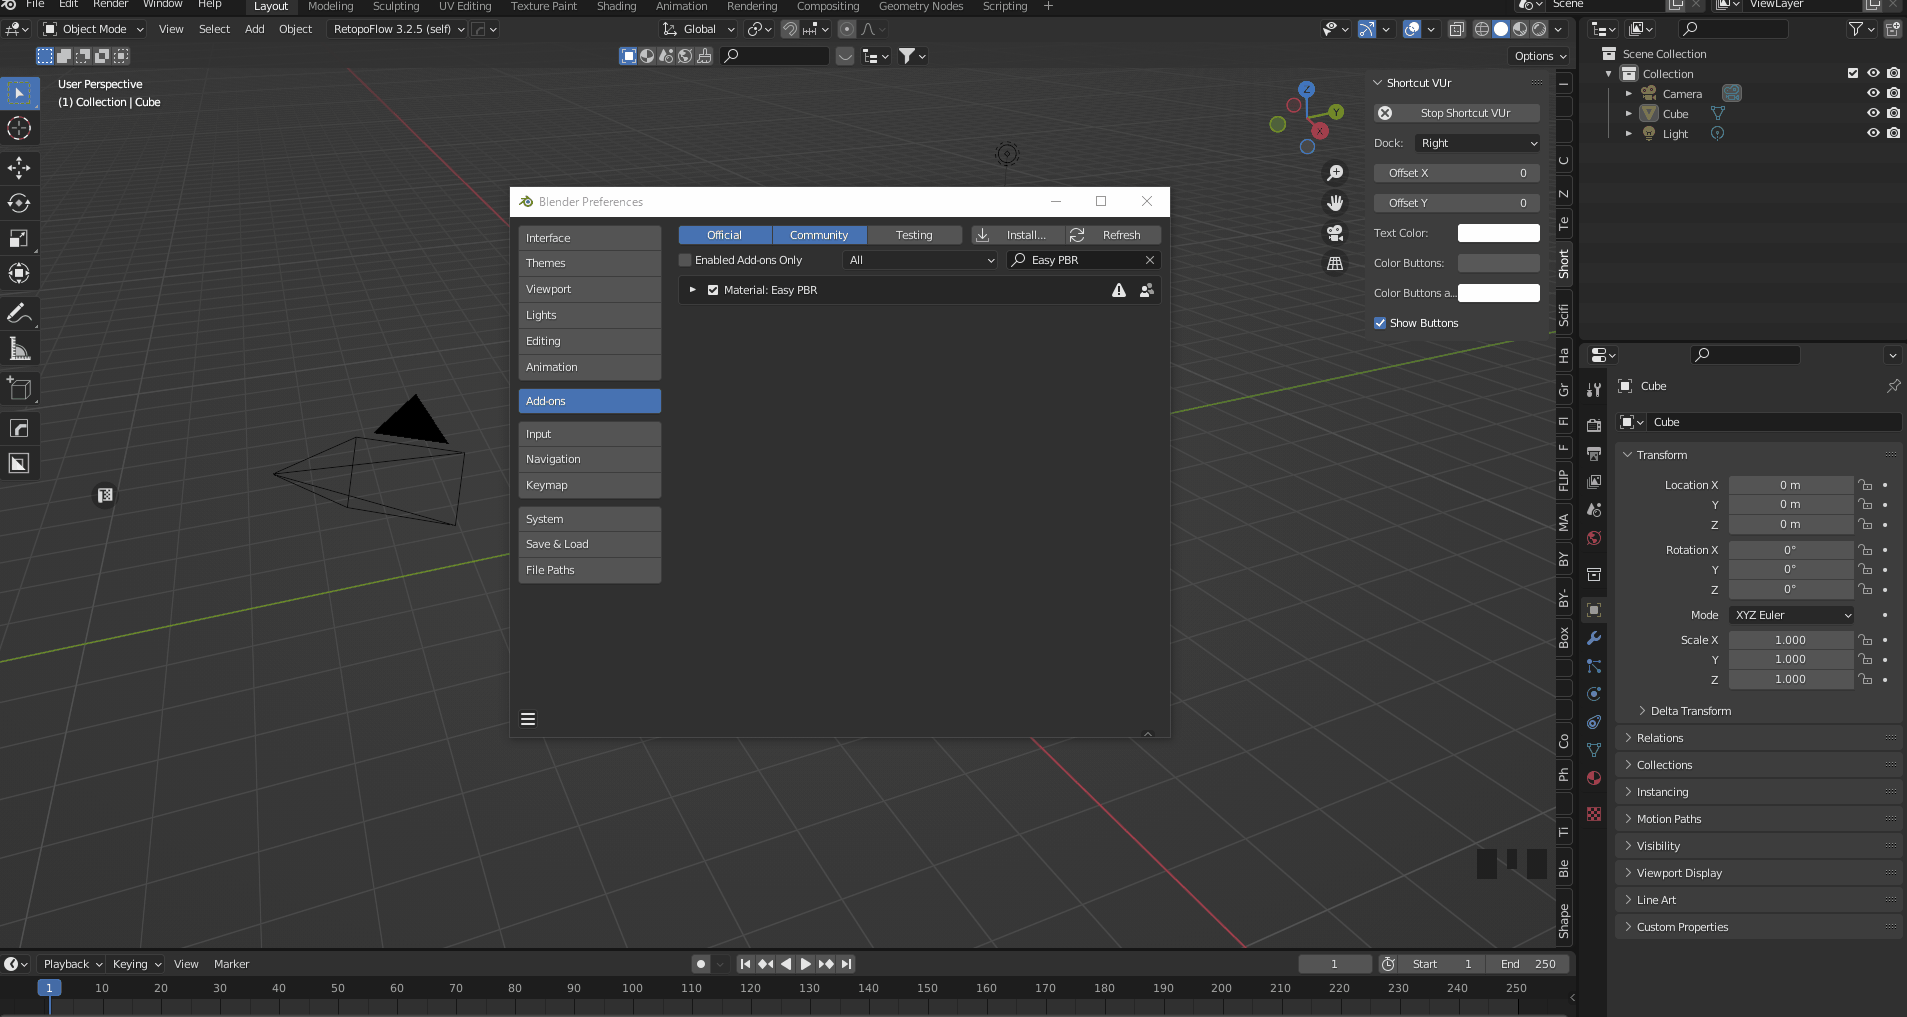
Click Install in the upper right corner and select the Zip file of the Easy PBR add-on that you have just saved.
There is a checkbox to the left of the add-on’s name, check it to activate the add-on.

Activate the add-on
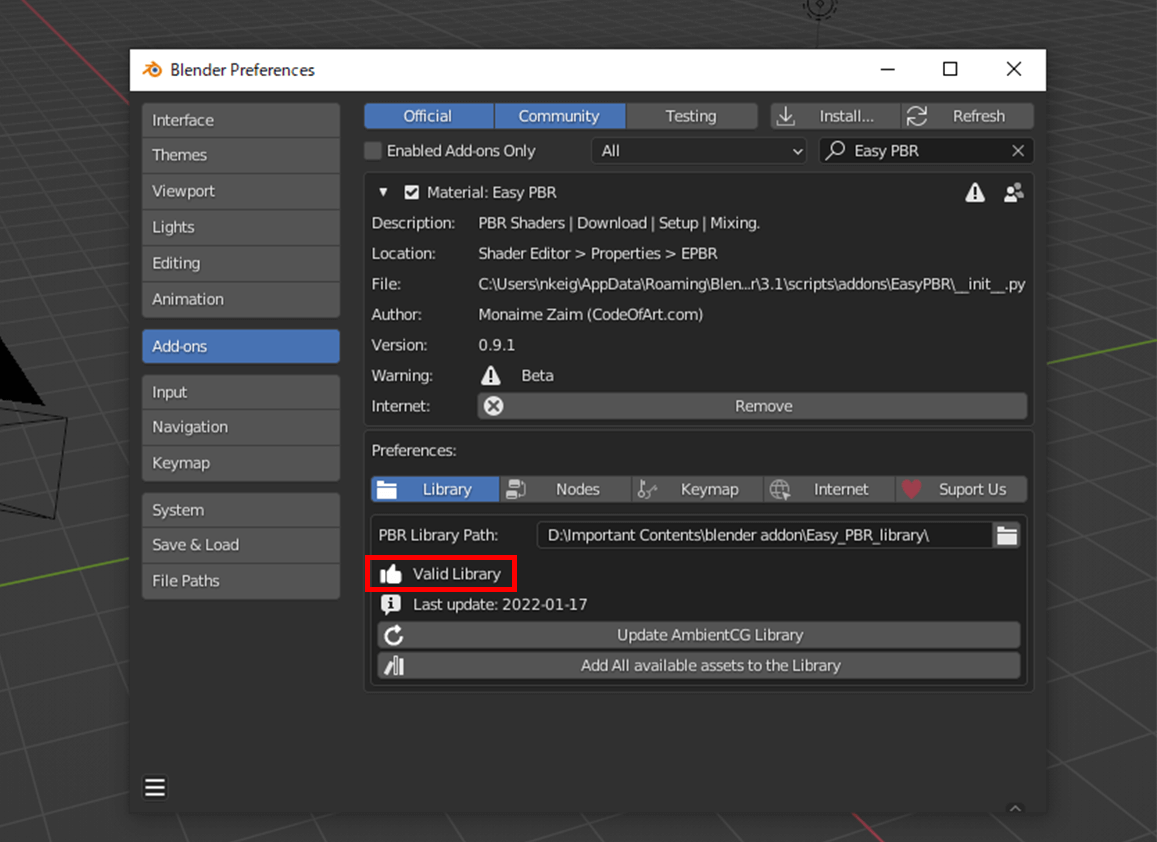
Click on the triangle to the left of the checkbox to view the add-on details.
At the bottom, you will see an item called PBR Library Path, click on the file symbol on the right and select the EPBR_Library folder that you have just saved.
Select the EPBR_Library folder
Do not check Relative Path at this time.

Do not check Relative Path
Select the library path, and when Valid Library is displayed, the add-on installation is complete.
Valid Library
At this point, click Save Preferences to save the add-on settings.
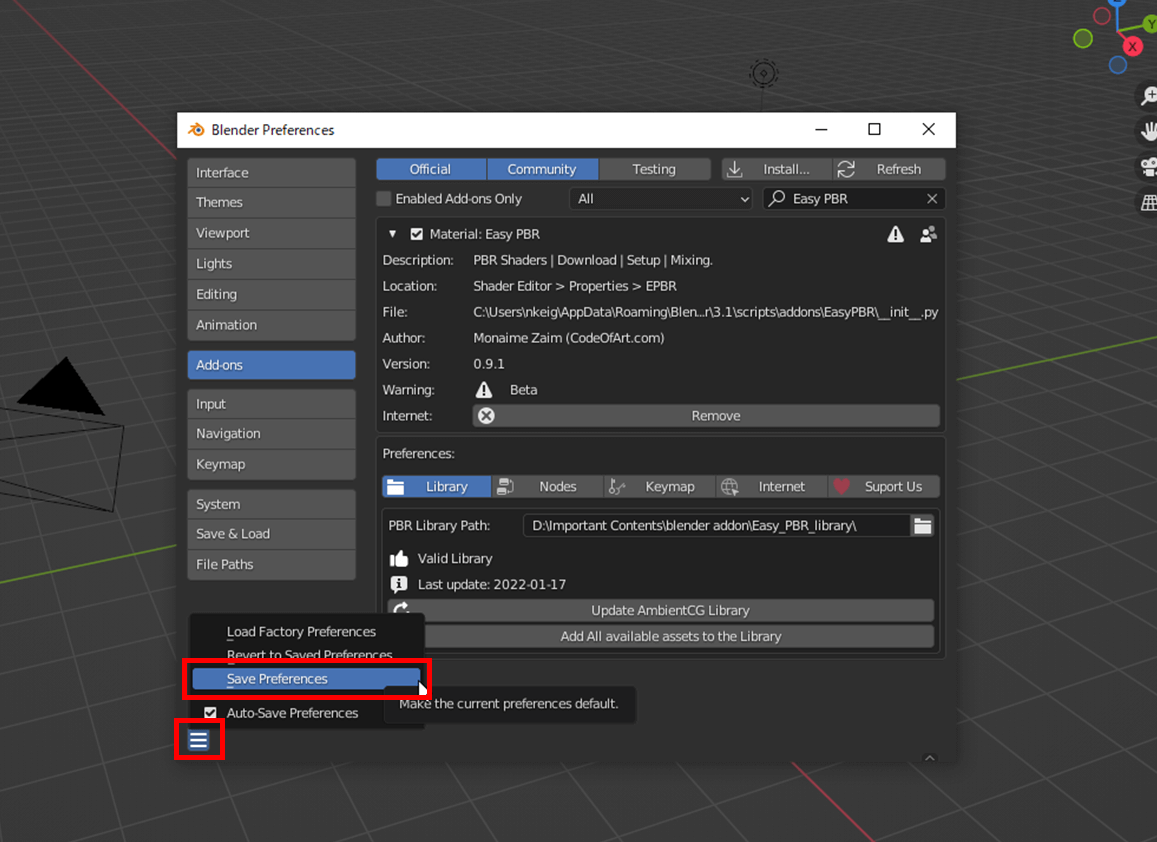
Save add-on settings
How to Use Easy PBR
Set Easy PBR
Render uses Cycles.
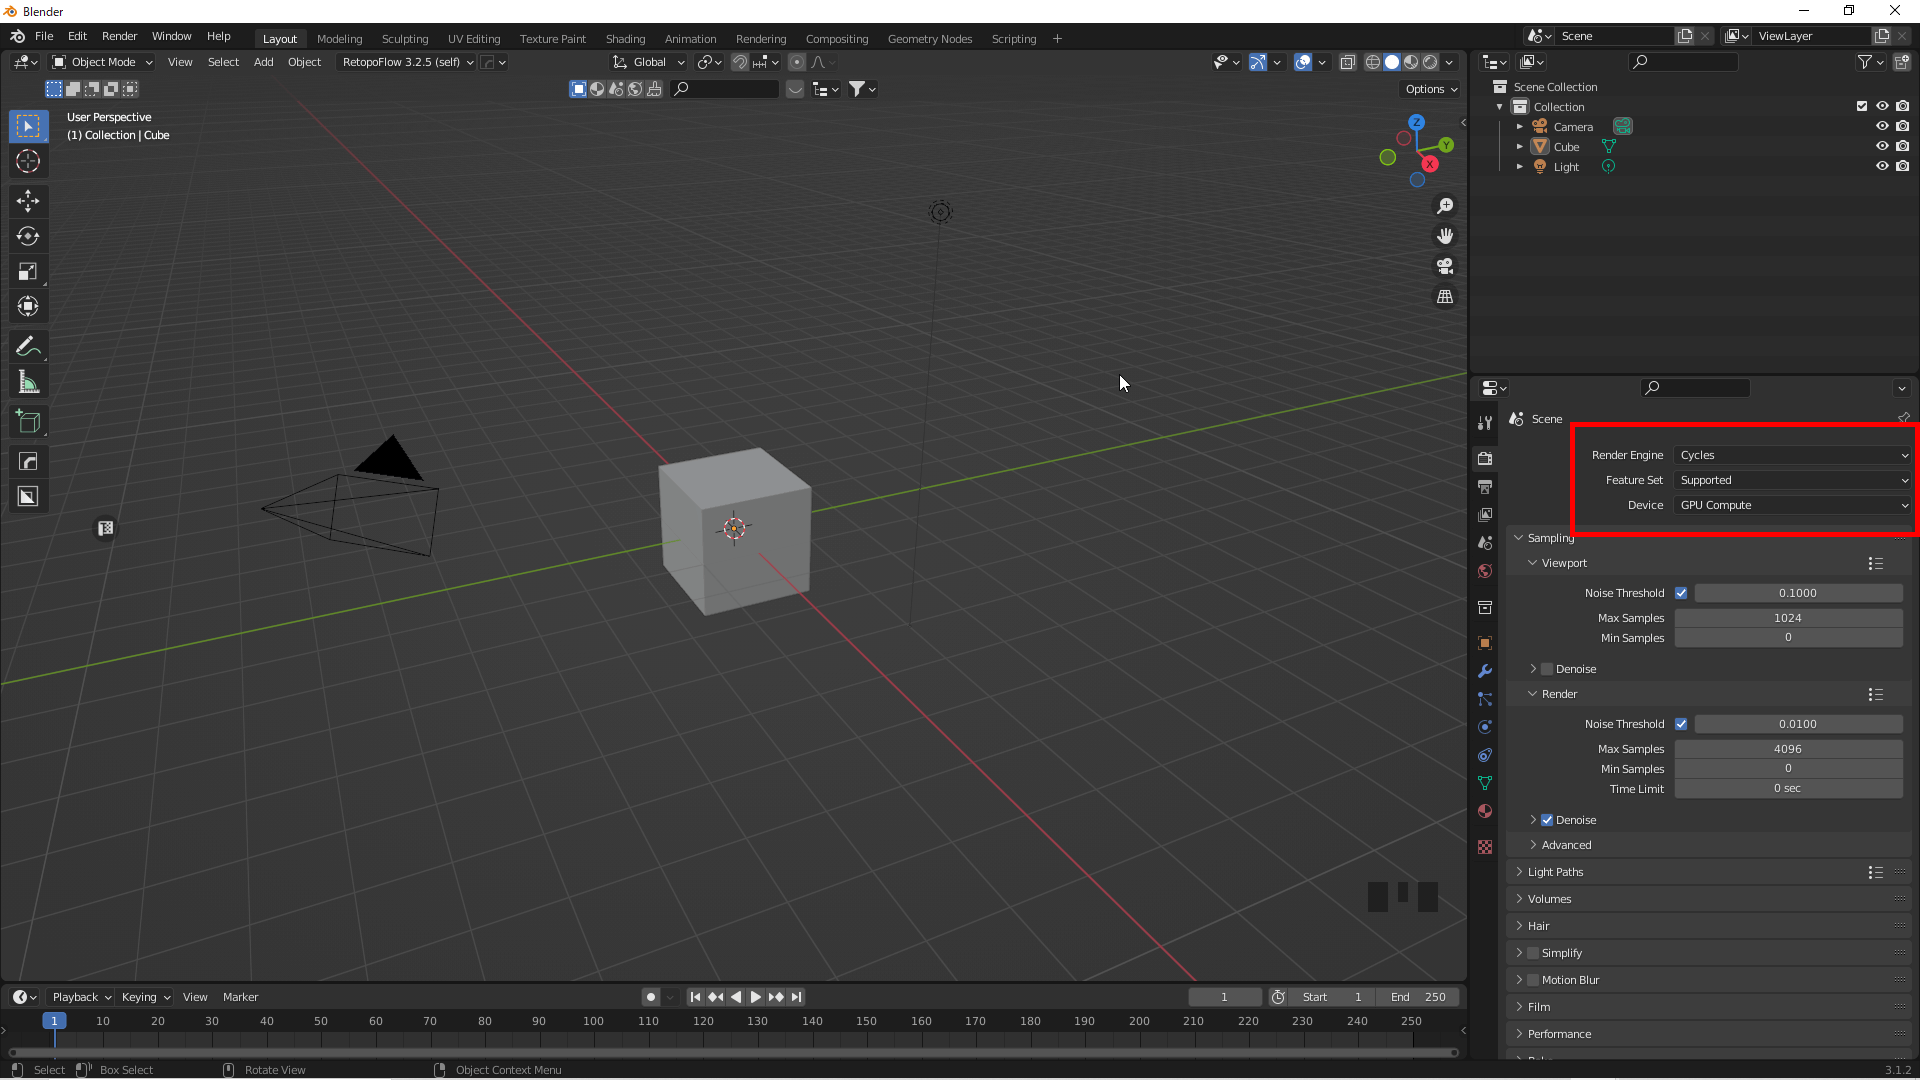
Cycles
Go to the Shading window and press the [N] key to display the Tools tab and select EPBR.
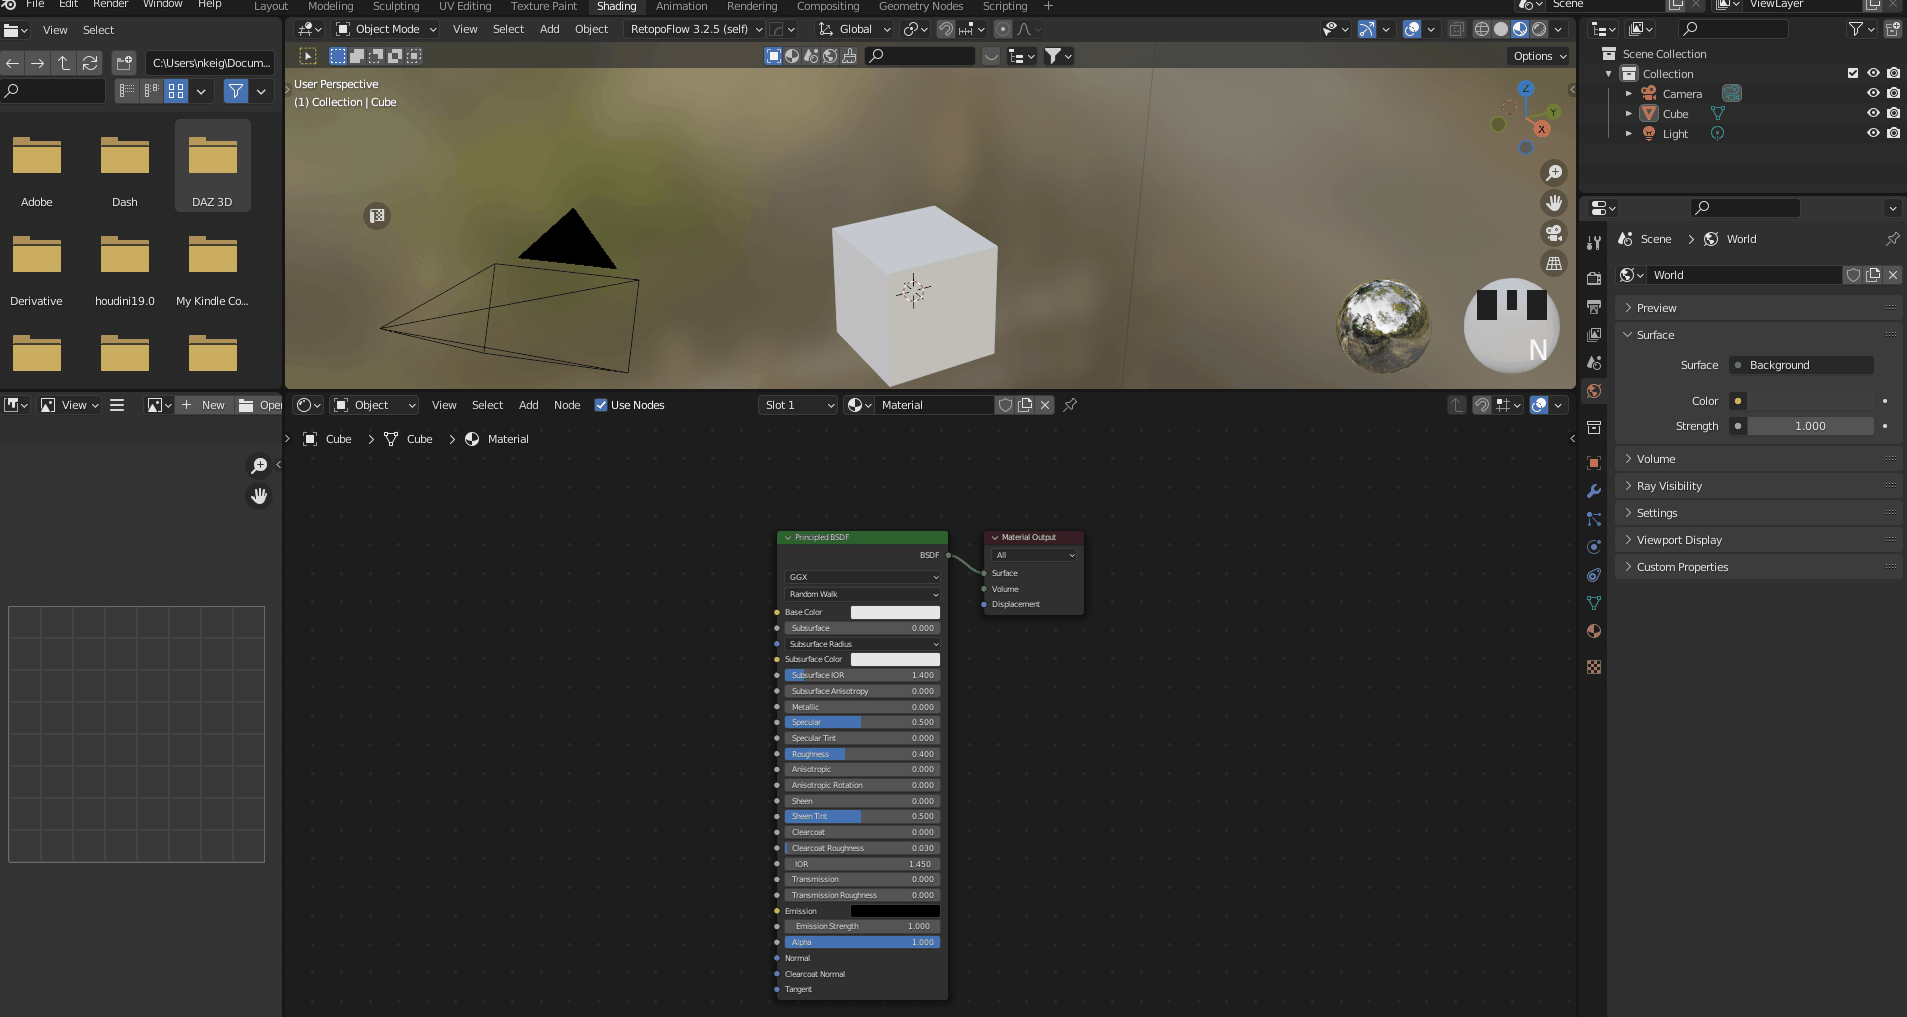
Select EPBR
By default, you can select a material category by clicking where it says AcousticFoam.
Click on the thumbnail to select another material in the same category.

Select a material category
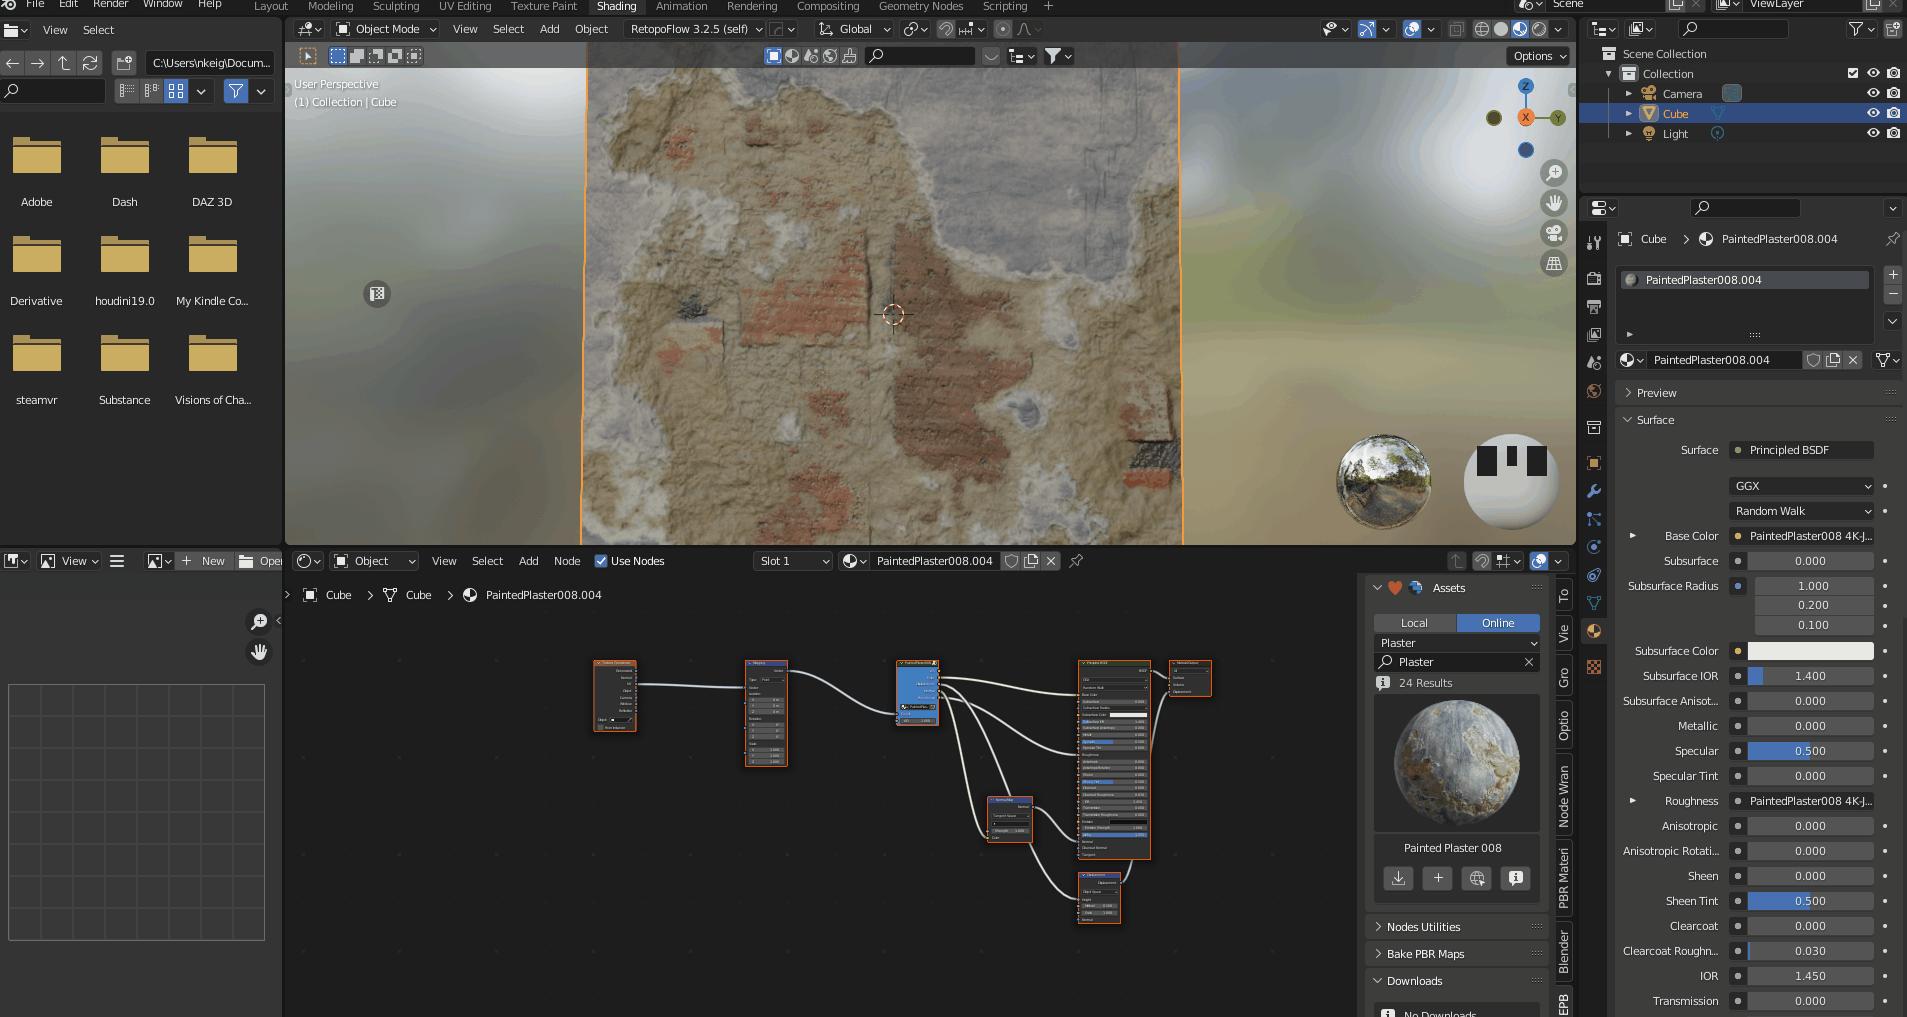
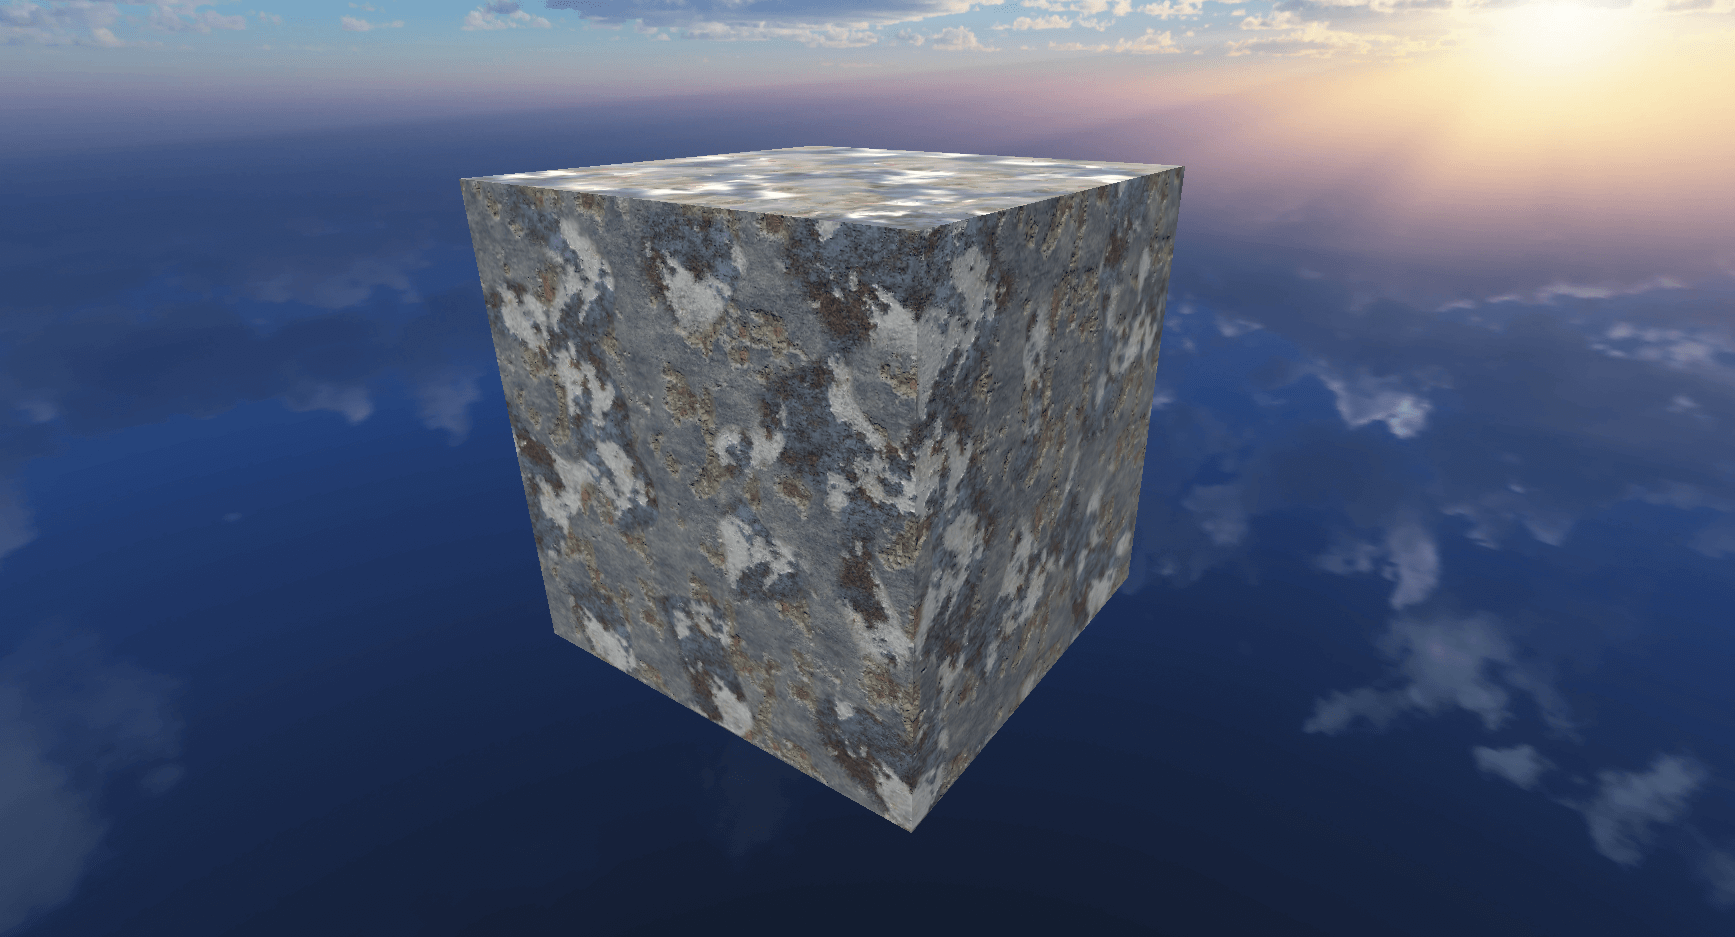
For this example, we will use Painted Plaster008 in the Painted Plaster category.
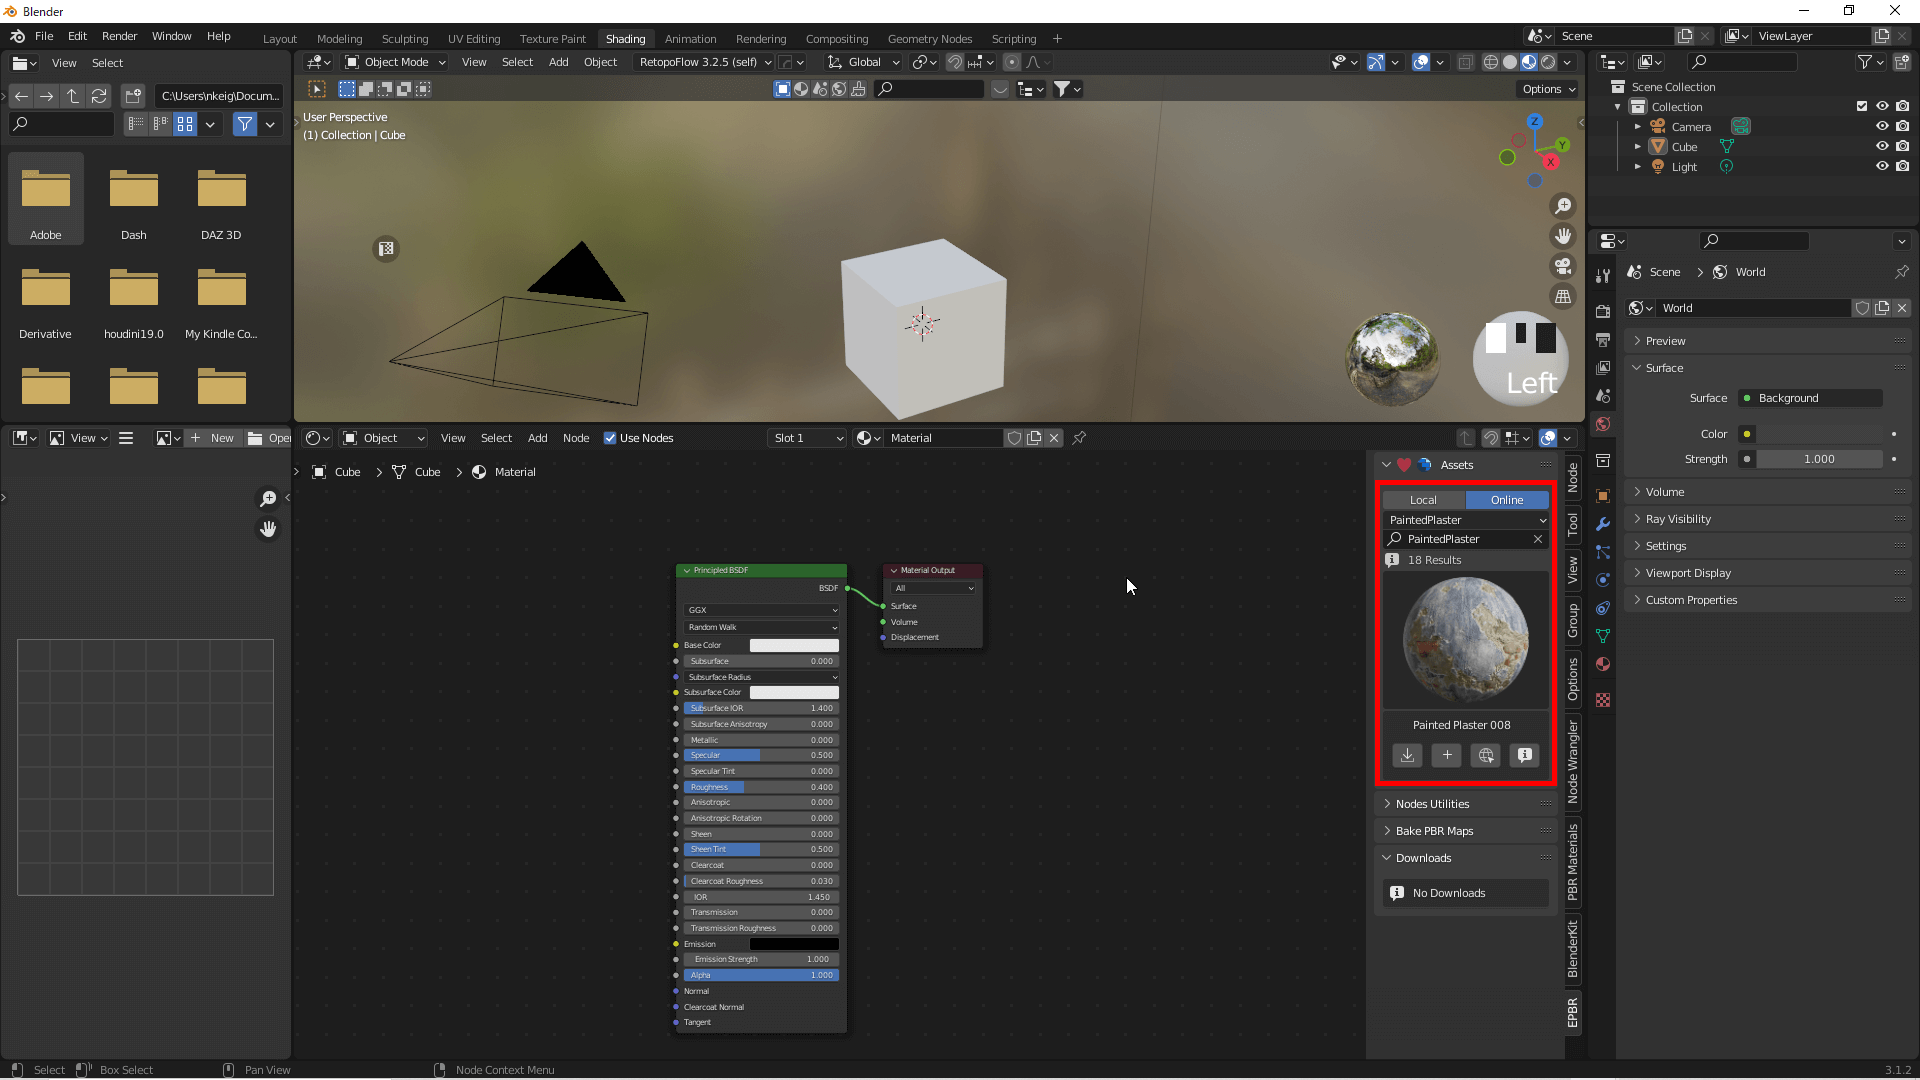
Painted Plaster008
First, download the material to the PBR Library.
Click the Download button on the EPBR tab to specify the resolution, in this case 4K-JPG.
Click OK to start the download and save the material in the PBR Library.

Download the material to the PBR Library
After the download is complete, delete the existing material and press the Add button.
There is a choice between Material and Node Group.
Material adds the complete material as a node group, while Node Group adds only the main group of nodes (the function of Node Group will be explained later).
Below that, you can specify the resolution of the material: use the 4K-JPG you downloaded earlier.
Press OK to add the node group and apply the material.

Add material
Add to Asset Browser
Easy PBR materials can be added to the Asset Browser to simplify material adaptation (available in Blender 3.0 and above).
Select the Easy PBR add-on from Preferences→Add-ons, check the details, click on the Add All available assets to the Library at the bottom, and press OK (this may take a little time).

Add All available assets to the Library
Then select Assets Library in Editor Type, click Current File, and select Easy PBR to add the Easy PBR material that has already been downloaded.
Downloaded Easy PBR material will be added
Materials can be applied by dragging and dropping materials from the Asset Library onto objects.

Materials can be applied by drag & drop
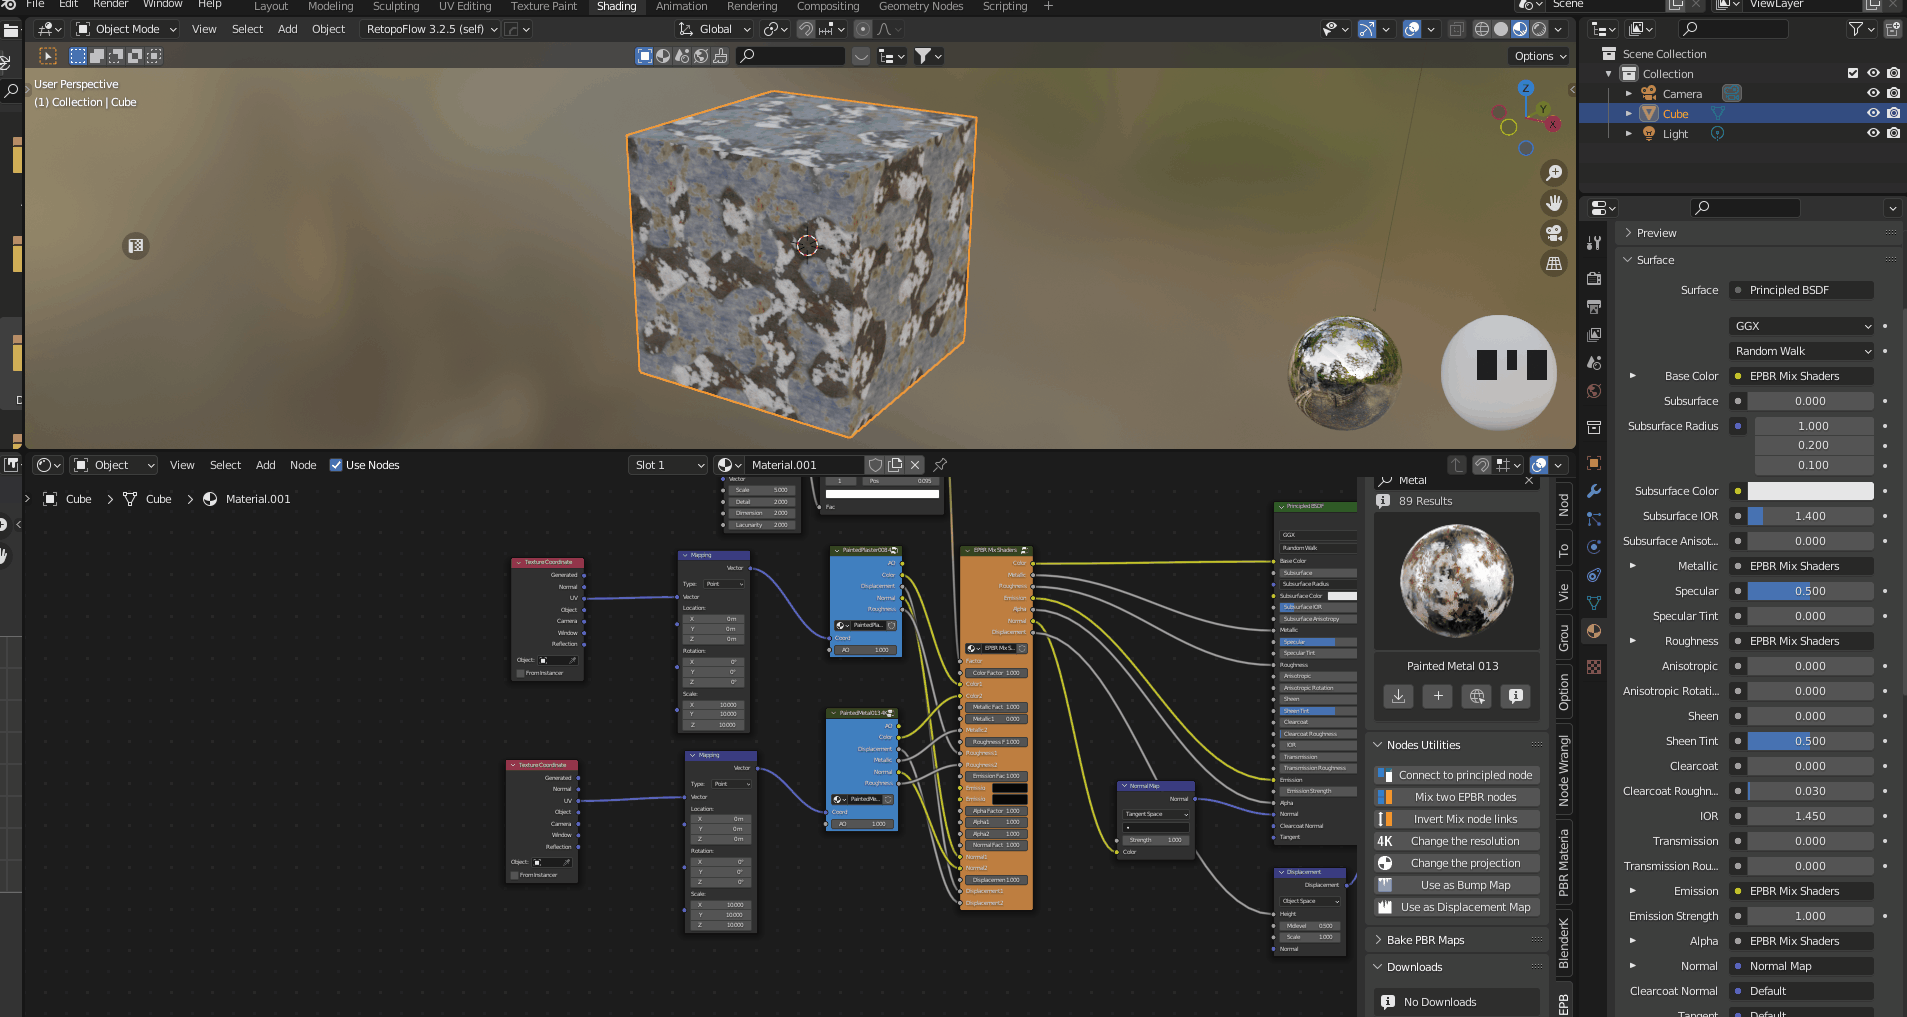
Composite Multiple Materials
Easy PBR allows you to add multiple materials to an object simultaneously.
Add a new material to the object and add a Node Group from Easy PBR’s Add Material.
In this case, we will use Painted Plaster008 from the Painted Plaster category.

Add a Node Group
Open Node Utilities and you will see an item called Connect to Principled nodes.
Select both the group node you just added and the Principled BSDF and click Connect to Principled nodes to connect the nodes (you can select multiple nodes by holding down the [Shift] key and clicking on them).

Connect to Principled nodes
Next, select the material you wish to composite and add a Node Group from Easy PBR’s Add Material menu.
In this case, we will use Painted Metal013 from the Metal category.
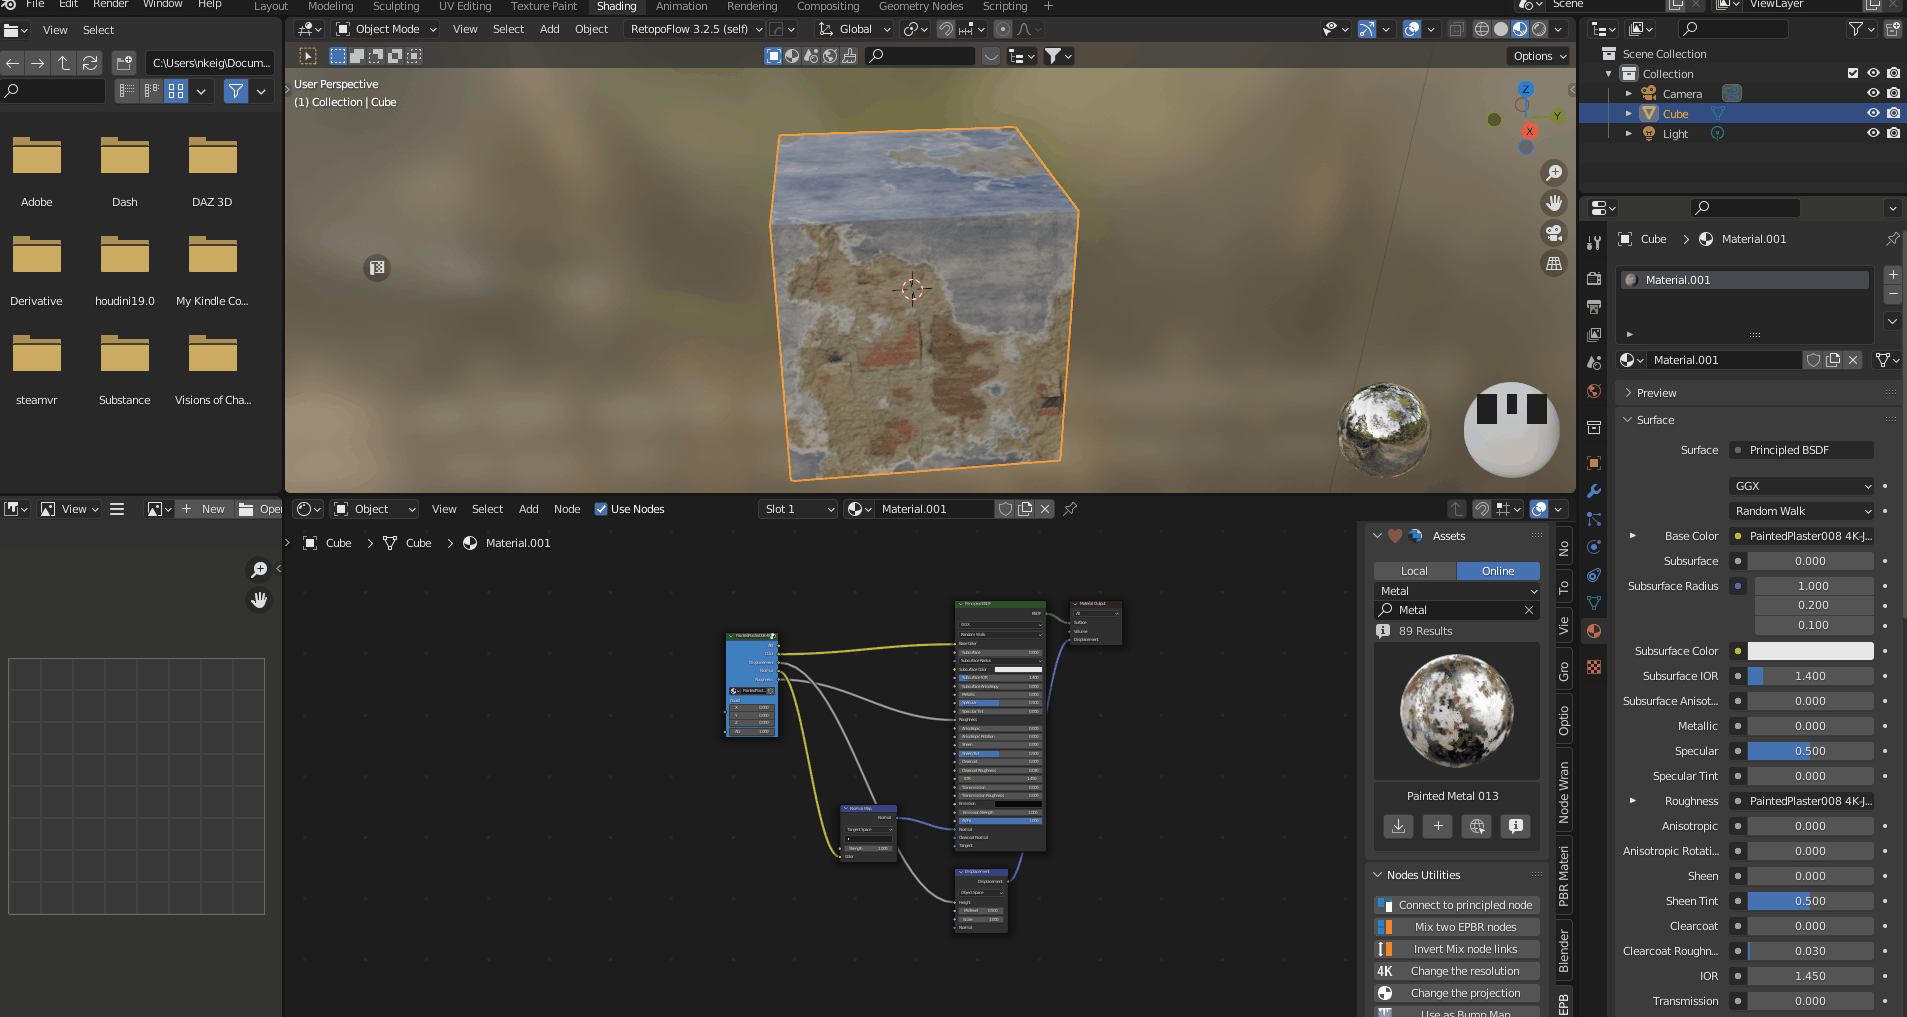
Painted Metal013
With the two group nodes selected, click Mix two EPBR nodes in Node Utilities.
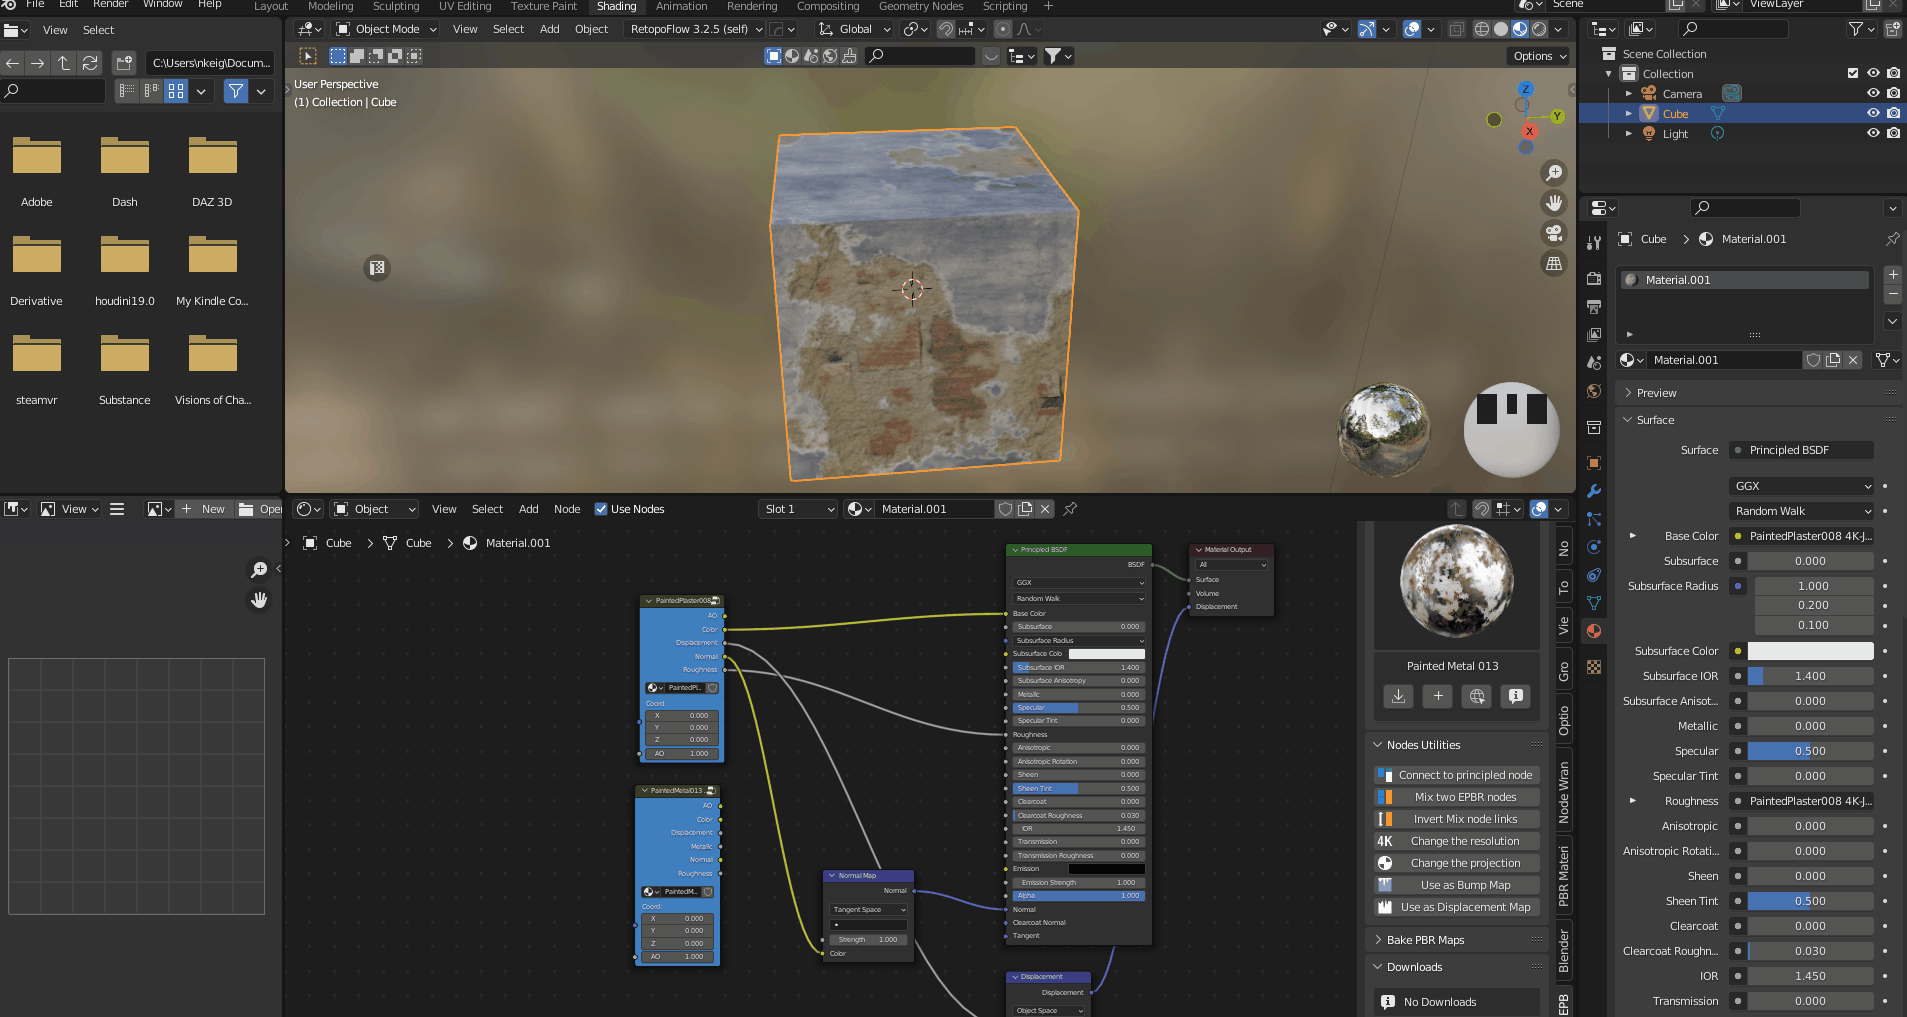
Mix two EPBR nodes
Then a new group node is added. Select the group node and the Principled BSDF and click on “Connect to Principled nodes” to connect the nodes.

Connect to Principled nodes
Since only one material is displayed at this point, add a Musgrave Texture and Color Ramp node by pressing Shift+[A].

Add Musgrave Texture and Color Ramp nodes
Connect the Musgrave Texture and Color Ramp nodes to the Factor of the Mix Shader.

Musgrave Texture+Color Ramp→Mix
By moving the slider of the Color Ramp, you can change the display percentage of the material.

The Color Ramp slider can be used to change the display percentage
The texture can be fine-tuned by adding Mapping and Texture Coordinate nodes to each of the group nodes added earlier and changing the scale values.
In this case, the scale values are all set to 10.
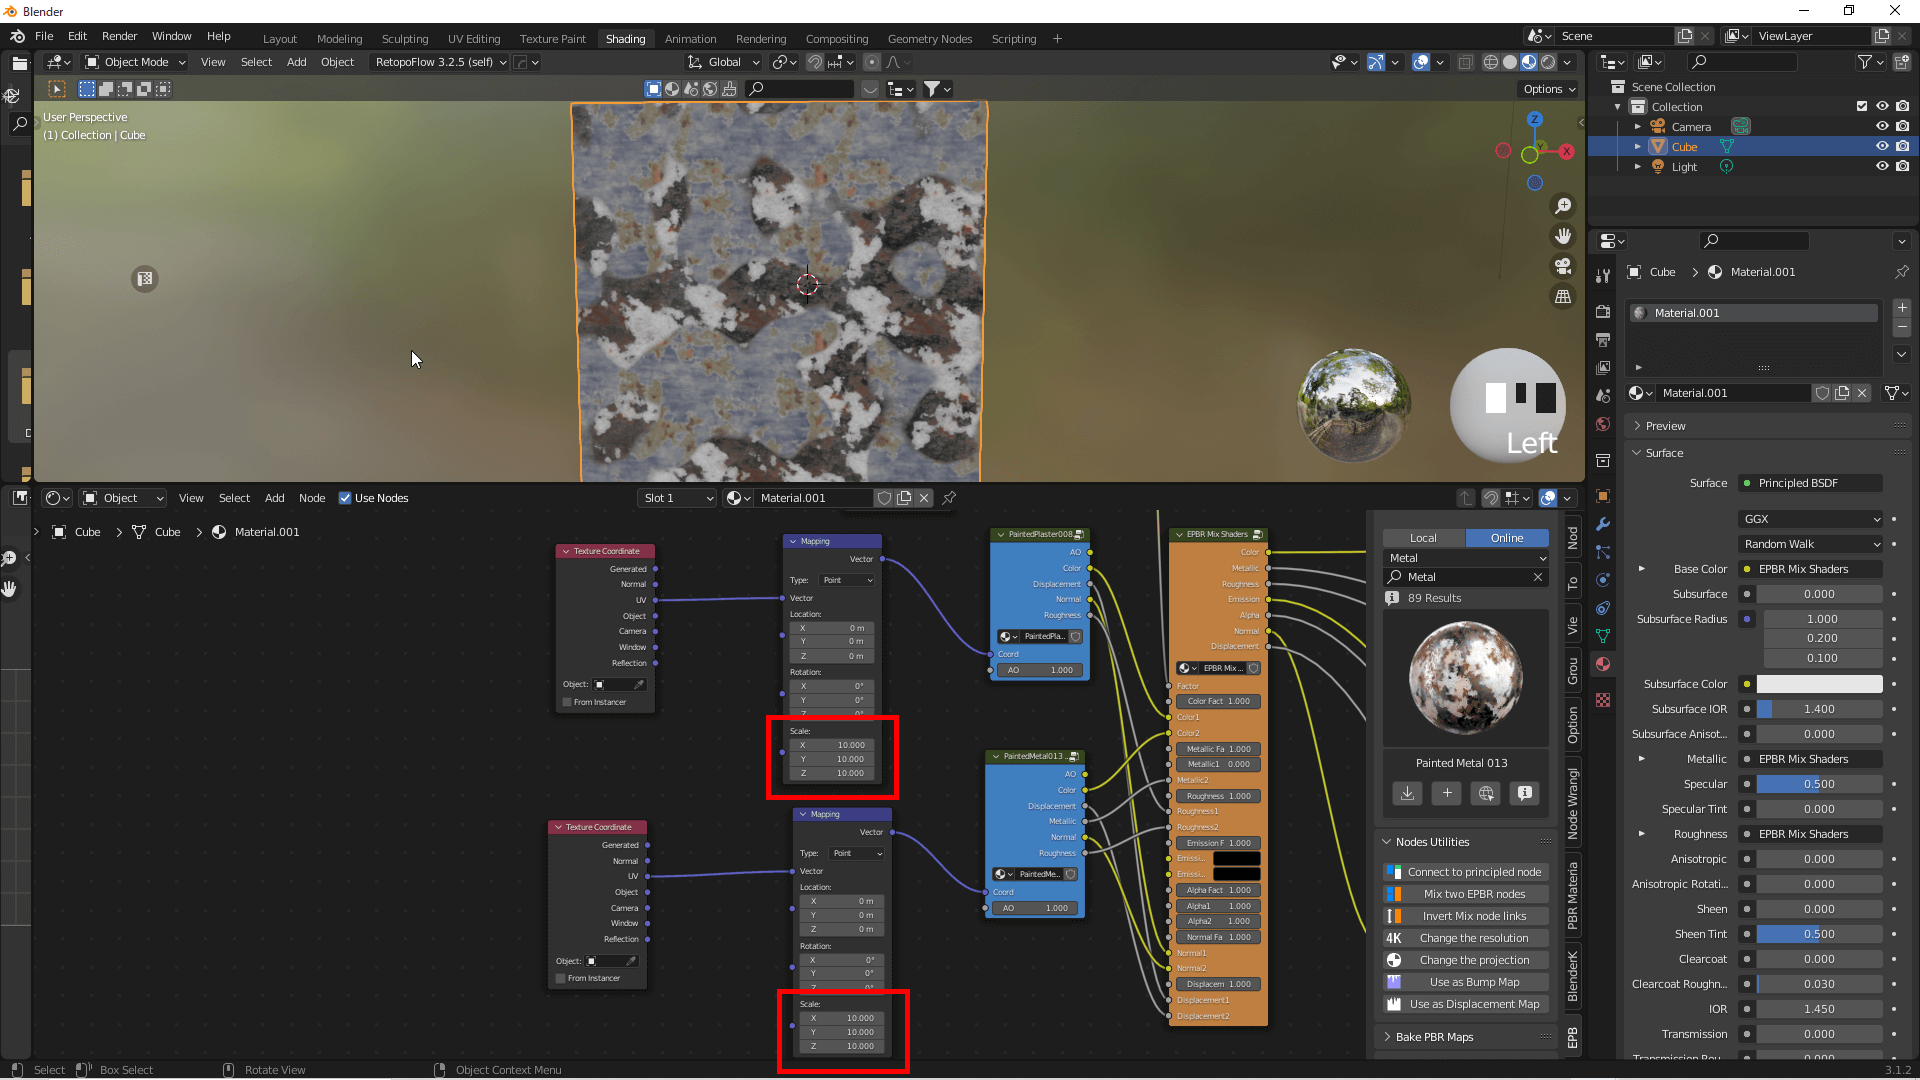
Mapping=10
Bake Textures
Click on the Bake PBR Maps file symbol in the toolbar and select a location to save the texture.
Select a location to save the texture
Once you have made your selections, select all of the textures you wish to export and set the Height and Width to the same resolution you set when you added the material.
In this case, I selected a 4K-JPG, so I set the Height and Width to 4096.

Sets texture type and resolution
Here is an important setting.
In the Render Properties, set the Max Samples value of the Render to 1 and remove the check mark from Denoise.
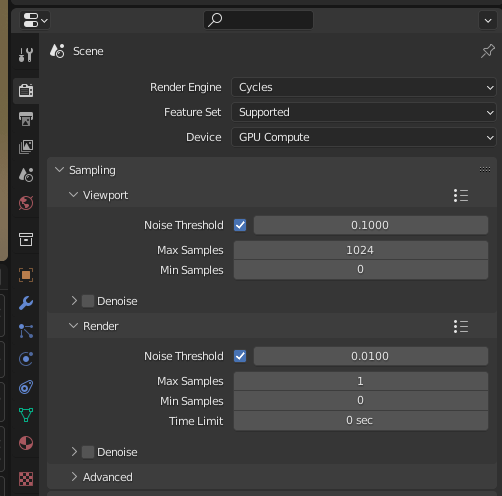
Set the Max Samples value to 1 and remove the check mark from Denoise
When ready, with the object you want to bake the texture onto, select the Principled BSDF node, and click Bake to bake.

Bake it
After baking is complete, check that the texture map is saved in the destination folder you specified earlier and you are finished.
We duplicated the object to check the quality of the baking..
The left side of the screen below shows the object to which the EasyPBR material is applied, and the baked texture is assigned to the object on the right.
We were able to bake to a similar texture.
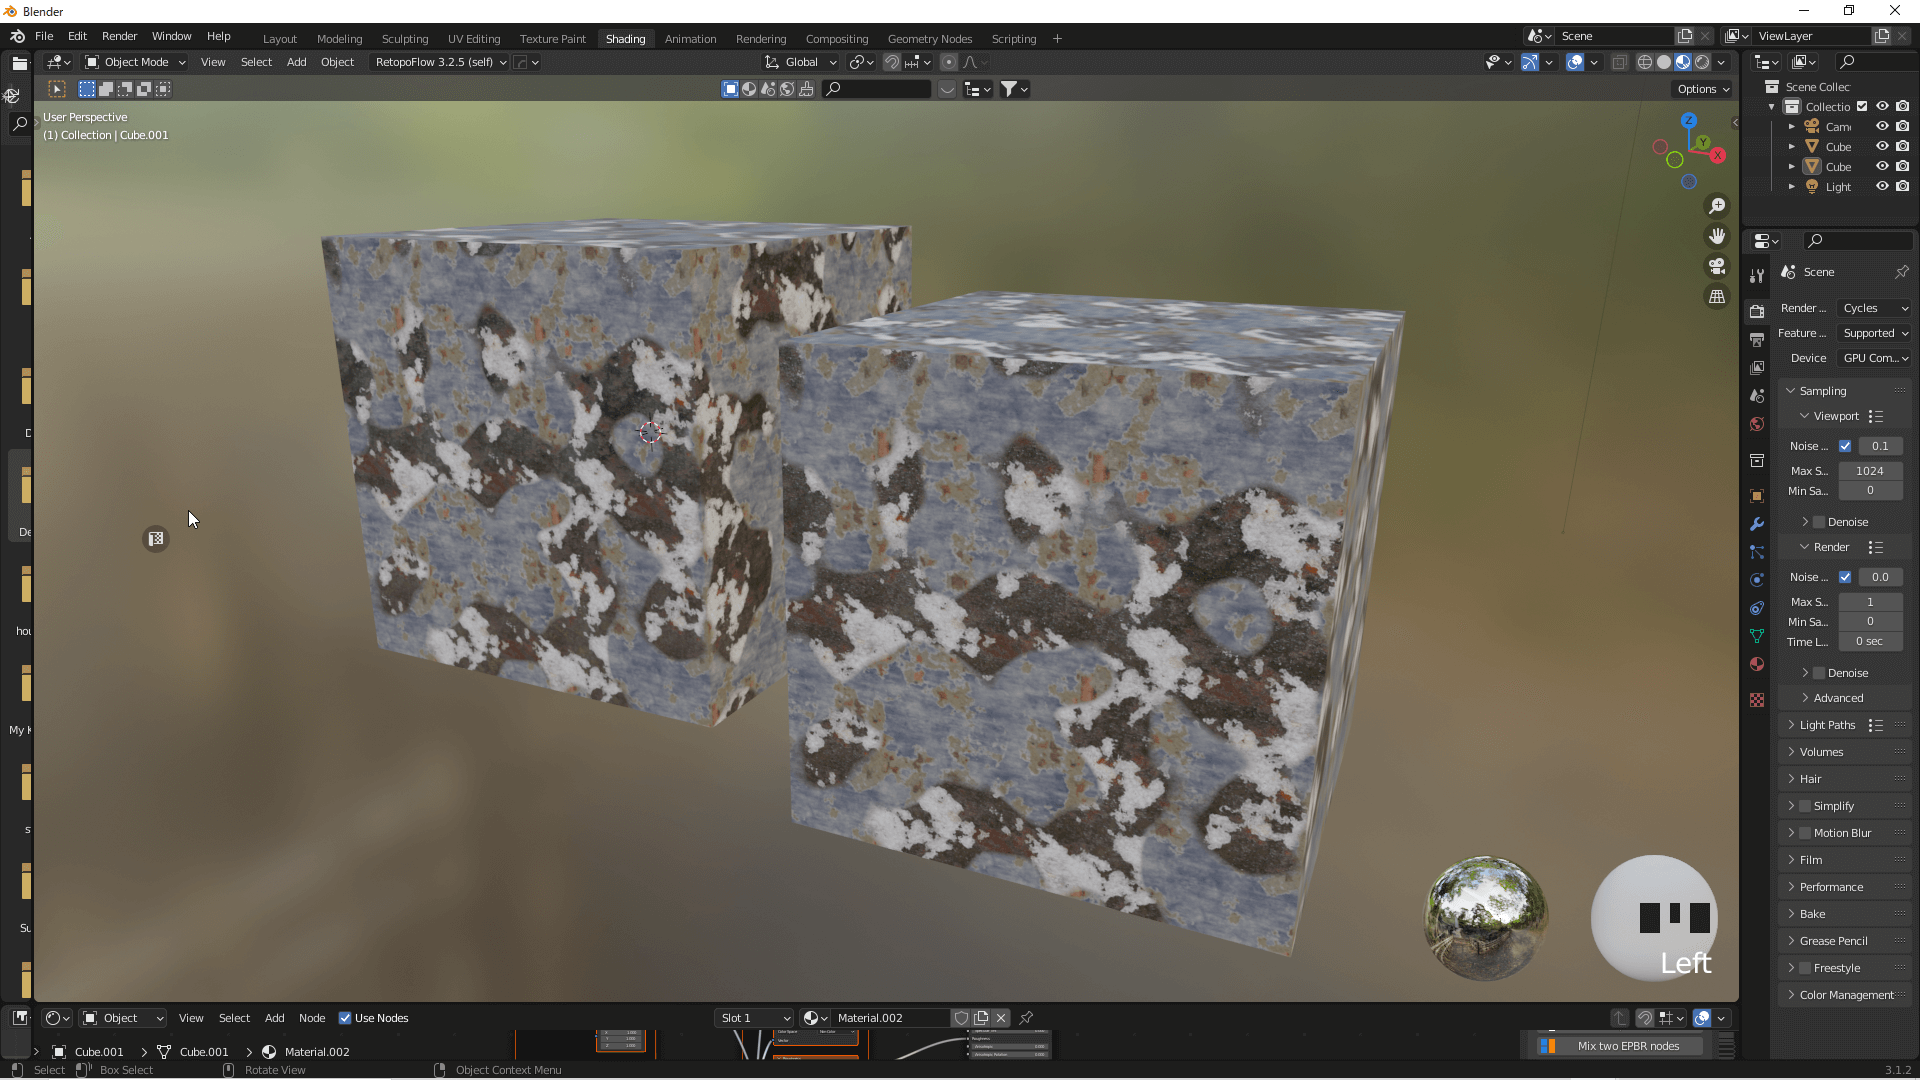
Texture baking is complete.
Export Objects
Select the object and choose File→Export→FBX.
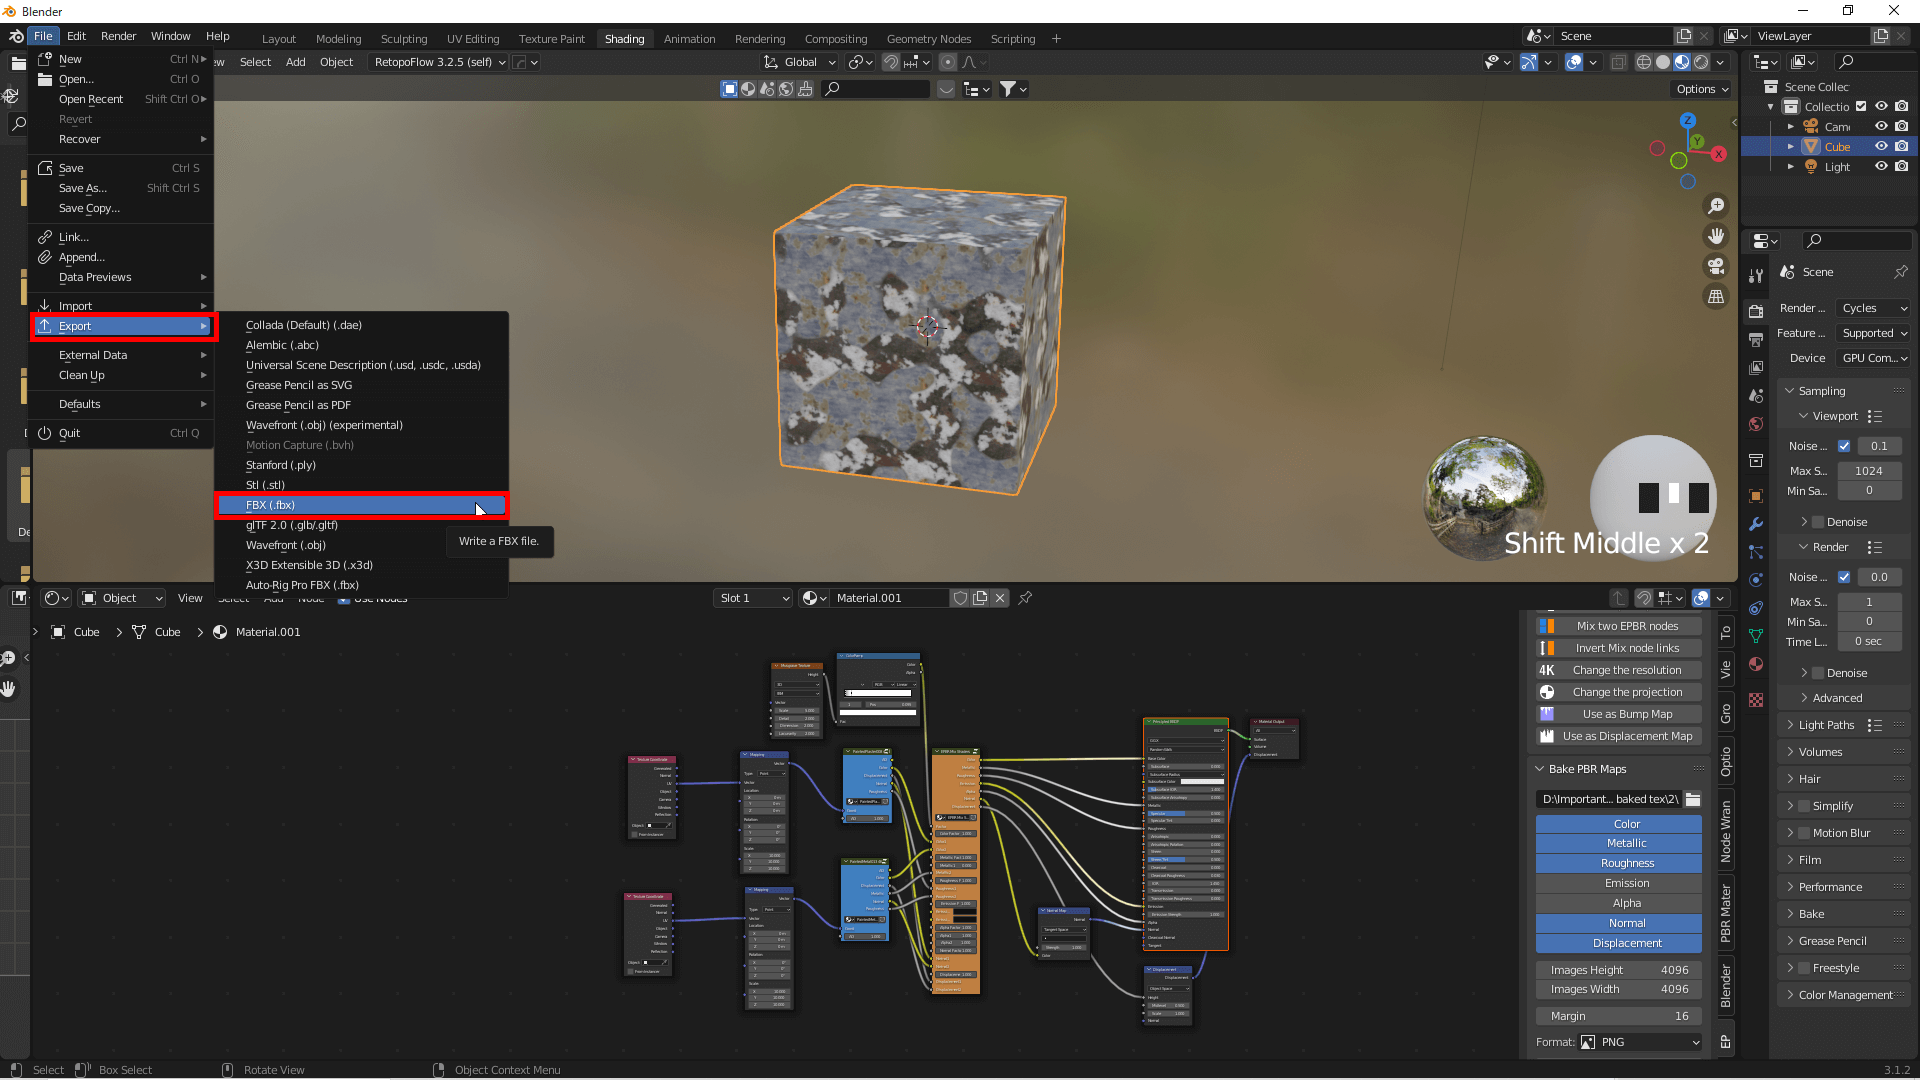
File→Export→FBX
See image below for export settings.
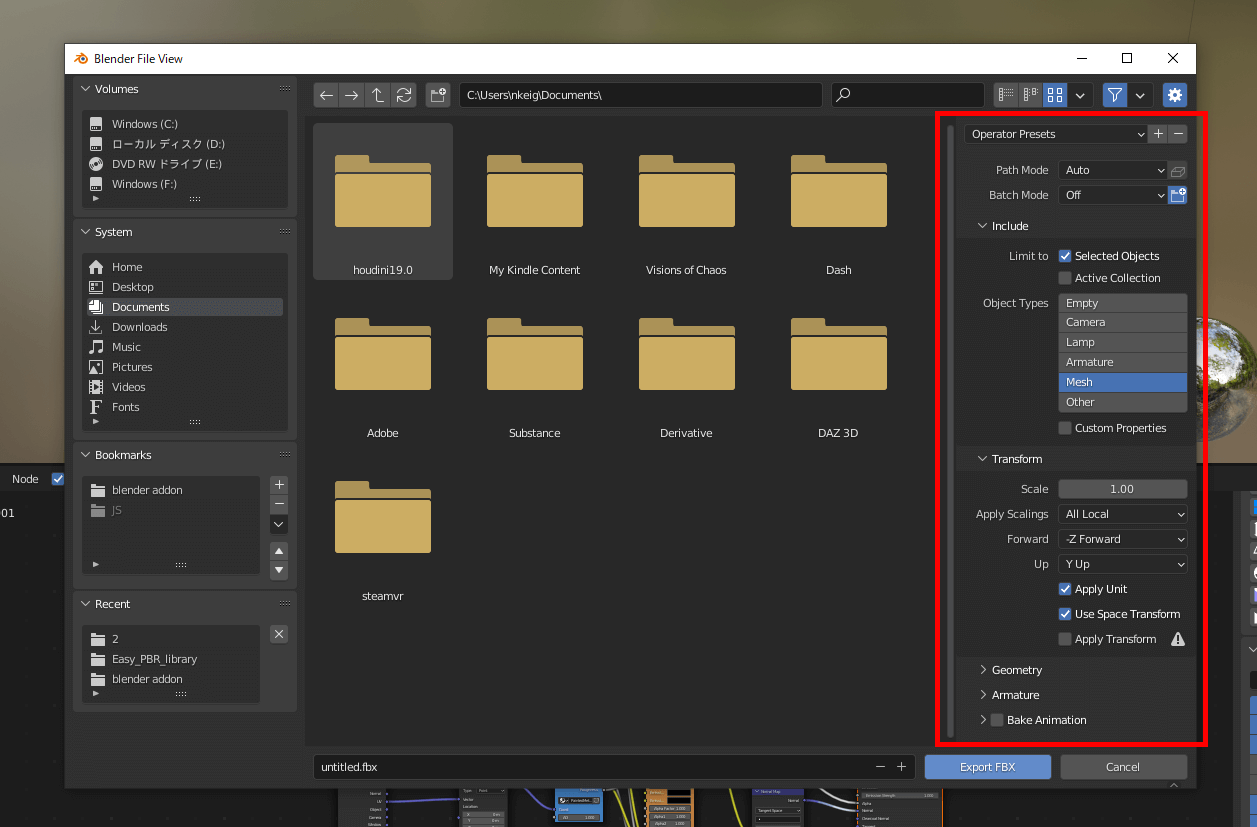
Export settings
Apply Textures in Unity
To upload Prefab to STYLY, you need to install the STYLY plugin.
You can read more about how to upload assets from Unity to STYLY in this article.

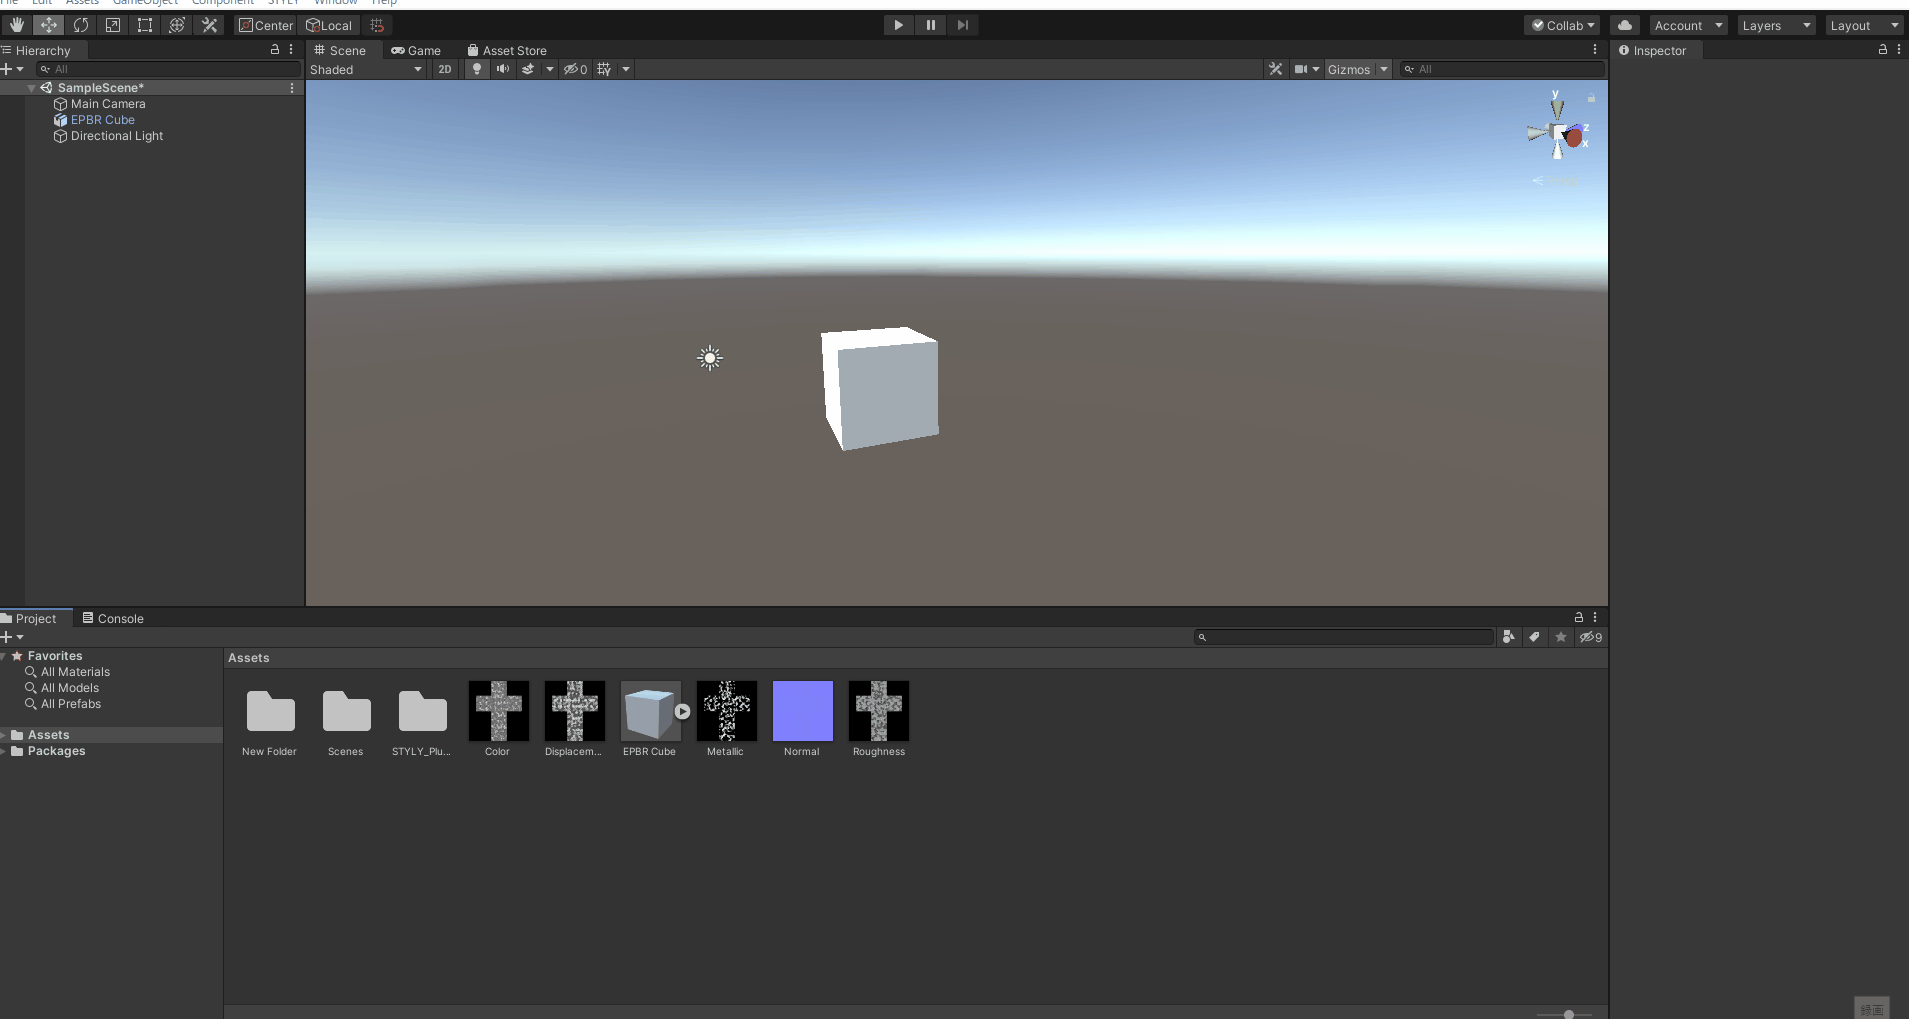
Start Unity, drag and drop textures and FBXs into the Assets folder, then drag and drop the FBXs into the scene.

Drag and drop textures and FBXs
Right-click in the Assets folder and click Create→Material to create a material.
Create materials
Apply each texture to the material.

Apply texture
This is how we set up the material.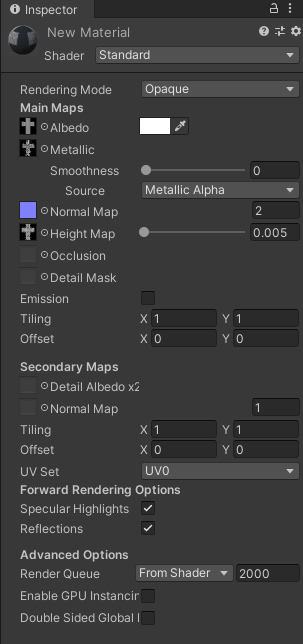
Drag and drop a material onto an object to assign the material.

Assign material
You can also increase the quality of the texture by changing the Max Size value in the inspector of the texture image you are using.
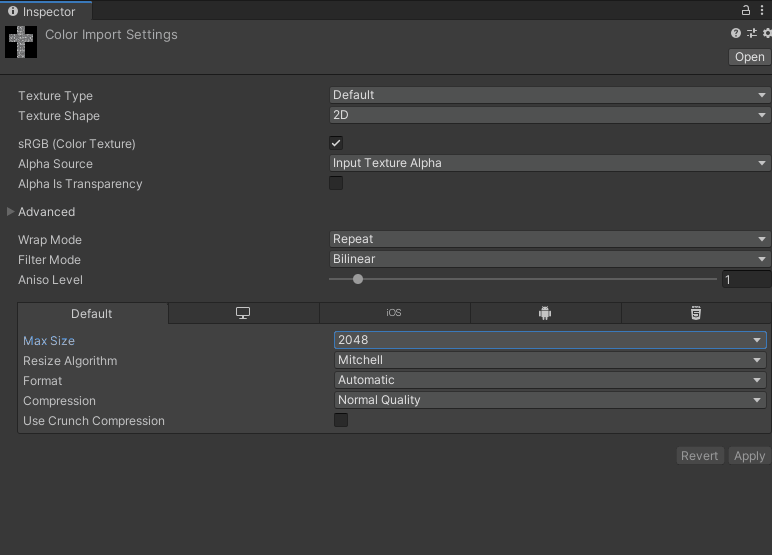
Change the value of Max Size
Once this is done, upload the file to STYLY.
How to Upload to STYLY
How to create an account:

How to upload to STYLY:

How to upload from Unity to STYLY:

You are now ready to upload to STYLY.
Please take advantage of Easy PBR’s wide variety of materials available for free.
Texture can be reproduced STYLY.
If you have any questions about STYLY, bug reports, or requests for improvements, please contact the STYLY FORUM.