This article is part 5 of the series on creating simple games in Unity using PlayMaker, which started with an overview of PlayMaker and how to install and use it.
PlayMaker can be used to easily create Unity/VR content without having to learn the programming language (C#) used in Unity.
In the previous articles, we used PlayMaker to complete a ball rolling game.
In this article, we’ll conclude by showing you how to make the camera follow the movement of the ball.
This can be applied to other games as well, so make sure you understand how it works and use it to your advantage!

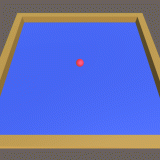
Completed image
You can experience a sample scene of the ball rolling game here.
Prep
Let’s make sure you have installed PlayMaker, a plugin for Unity.
![[Unity Tutorial] Creating a Game Using Playmaker ① From Basic Introduction to Installing](https://styly.cc/wp-content/uploads/2019/06/1200px-160x160.jpg)
If this is your first time using PlayMaker, you can read the following articles in advance to get a better understanding of the software.
![[Unity] Starting Playmaker from Scratch](https://styly.cc/wp-content/uploads/2019/09/PlaymaerCoreConcept-160x160.png)
Getting the STYLY viewpoint (Main Camera)
Before we can create a system to track the camera, we first need to get the STYLY perspective (Main Camera) in PlayMaker, which is necessary to upload to STYLY.
You can read more about obtaining the camera in this article if you want to learn more about it.
![[Unity/Playmaker] How to implement camera acquisition and interaction with camera](https://styly.cc/wp-content/uploads/2020/01/GIF2-4-160x160.gif)
Create an empty GameObject
First, create an empty GameObject in MiniGame in Hierarchy and rename it “Camera tracking”.
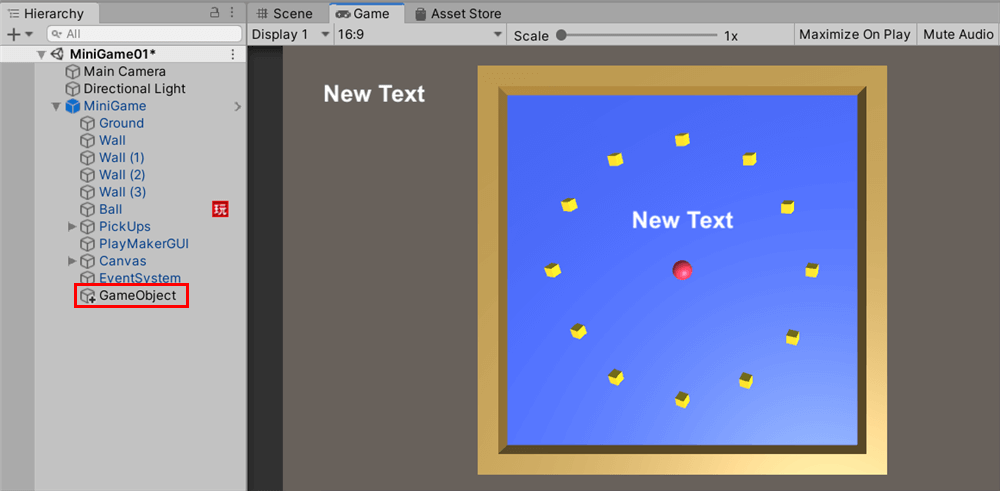
Create an empty GameObject in MiniGame
Add a FSM
Add a FSM to your camera tracking.
Add a FSM to camera tracking
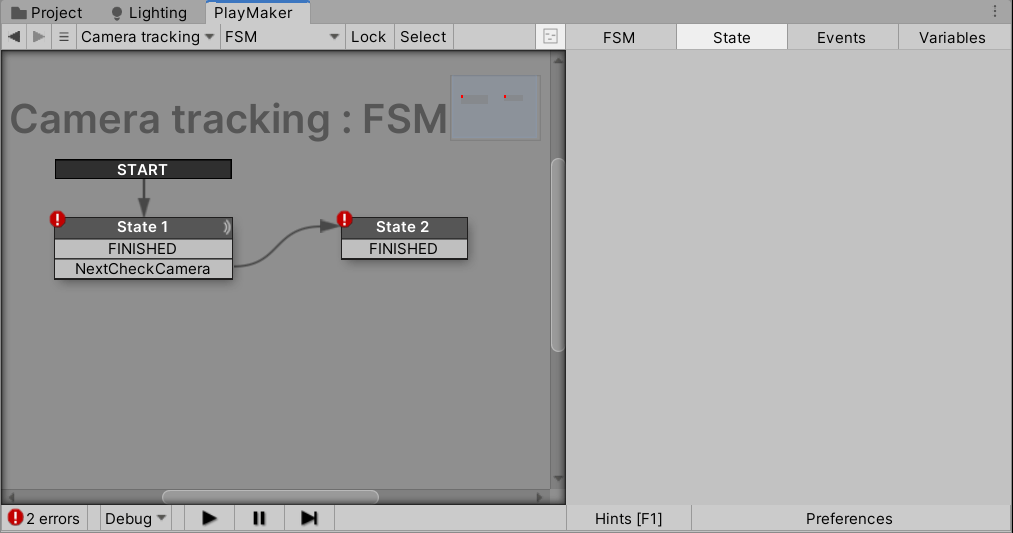
State1 Settings
Added Find Game Object action
Add the Find Game Object action to State1.
Enter [VRTK]_VIVE in the Object Name and define a new mainCamera variable in the Store.
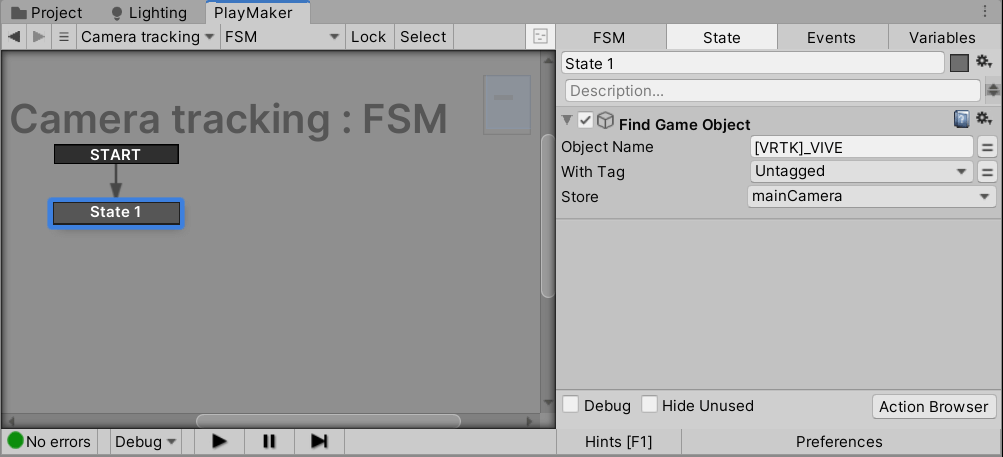
Setting up the Find Game Object
Game Object Is Null action added
Add the Game Object Is Null action.
Select the mainCamera variable for Game Object and set a new NextCheckCamera event for Is Null.
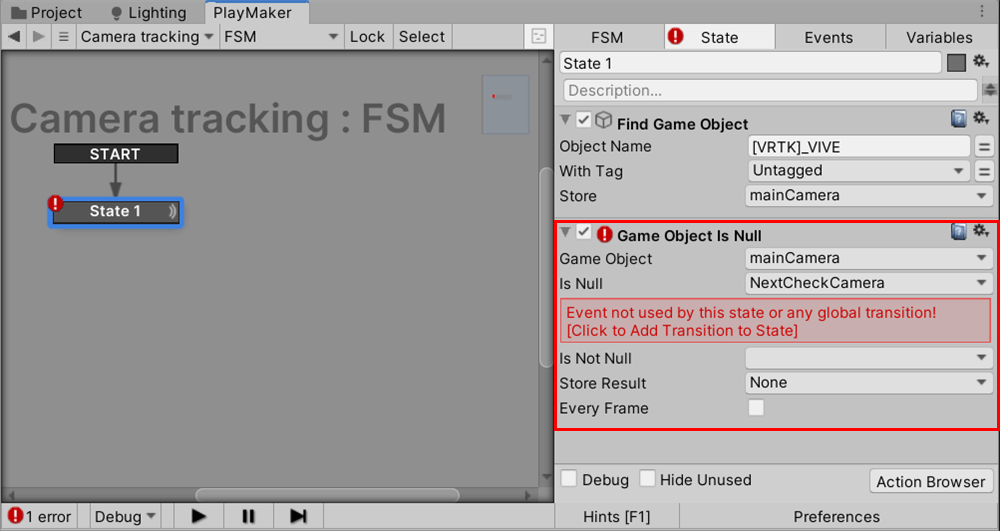
Configuring Game Object Is Null
Add an event
Right-click on State1 and add FINISHED from Add Transition and NextCheckCamera to the event.

Set the event in State1
Go back to the Game Object Is Null action settings and set Is Not Null to FINISHED.
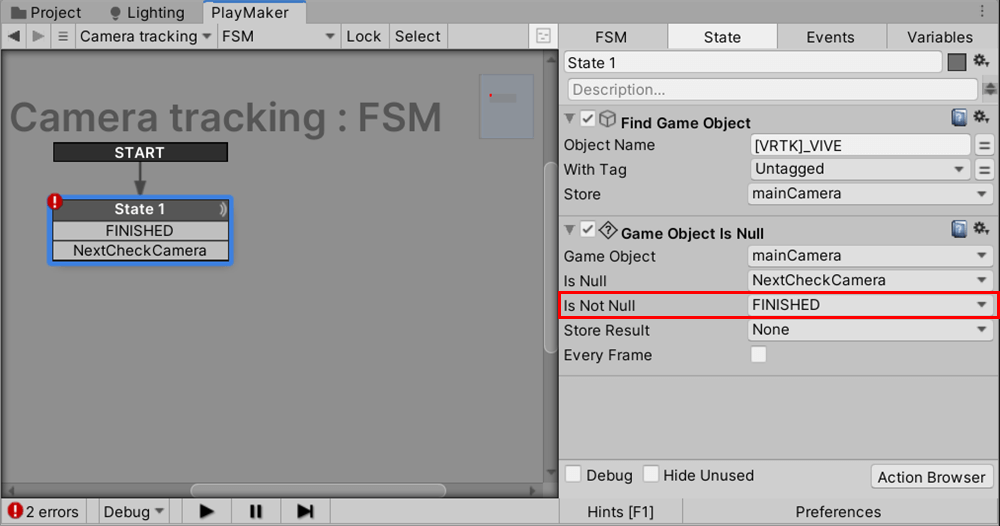
Sets Is Not Null to FINISHED
State2 Settings
Connecting Transitions from NextCheckCamera
Create a new state State2 and connect the transitions from NextCheckCamera.
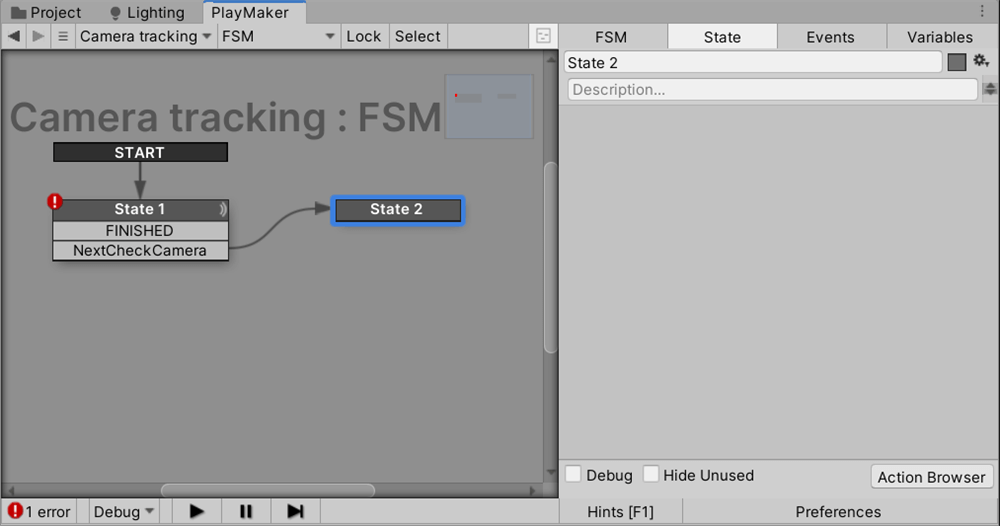
Create State2 and connect the transitions
Add the Get Main Camera action
Add the “Get Main Camera” action to State2.
Set the Store Game Object to mainCamera.
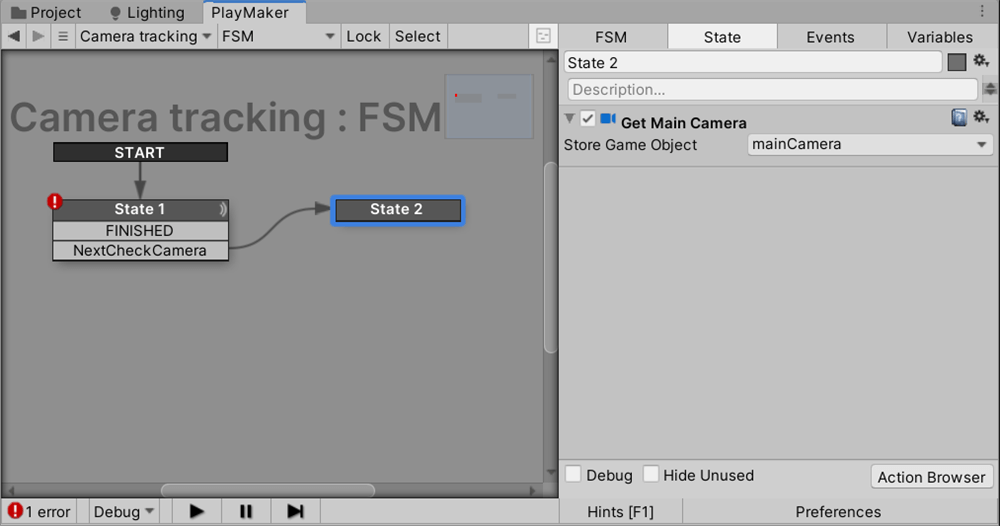
Add the Get Main Camera action
Add a FINISHED event
Add a FINISHED event to State2.
Add a FINISHED event to State2
Creating Tracking States
Create a new state and rename it ‘Tracking’ (I have also renamed State1 and State2 to CameraCheck1 and CameraCheck2 for clarity).
Connect the transitions from the FINISHED events in the CameraCheck1 and CameraCheck2 states.
Linking transitions by creating a Tracking state.
Now you have a FSM that gets a STYLY perspective (Main Camera).
Follow the camera as the ball moves
Create a mechanism for tracking the camera to the Tracking state.
Add Get Position action
Add the “Get Position” action. This action gets the coordinates of the object.
Change the Game Object to a Specify Game Object and define a new “Player” variable.
In Vector, we will create a new variable called PlayerPosition.
Check “Every Frame”.
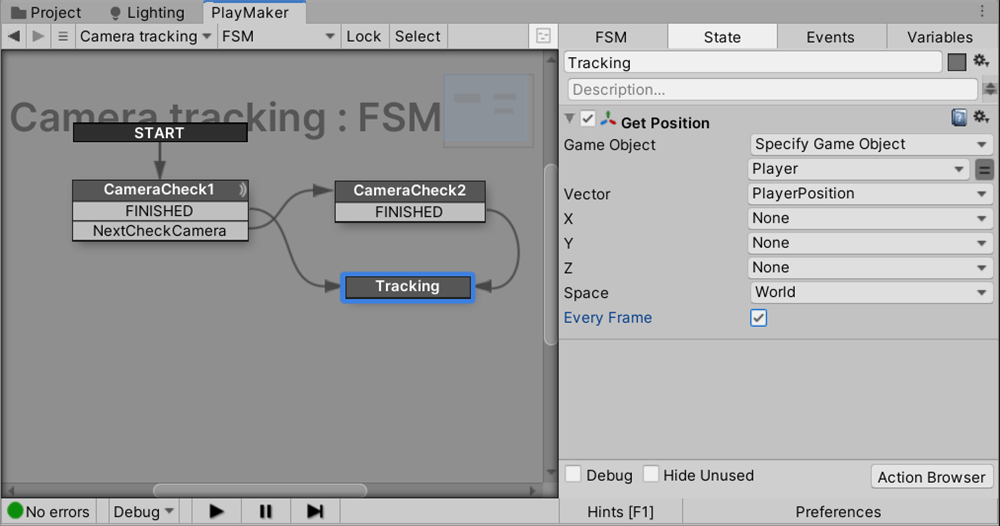
Set up the Get Position action
Add the Vector3 Add action
Adds the action Vector3 Add. This allows you to add any vector component to the variable.
Set the PlayerPosition variable to the Vector3 Variable.
For Add Vector, enter X:0 Y:2 Z:-2.5.
Check Every Frame.
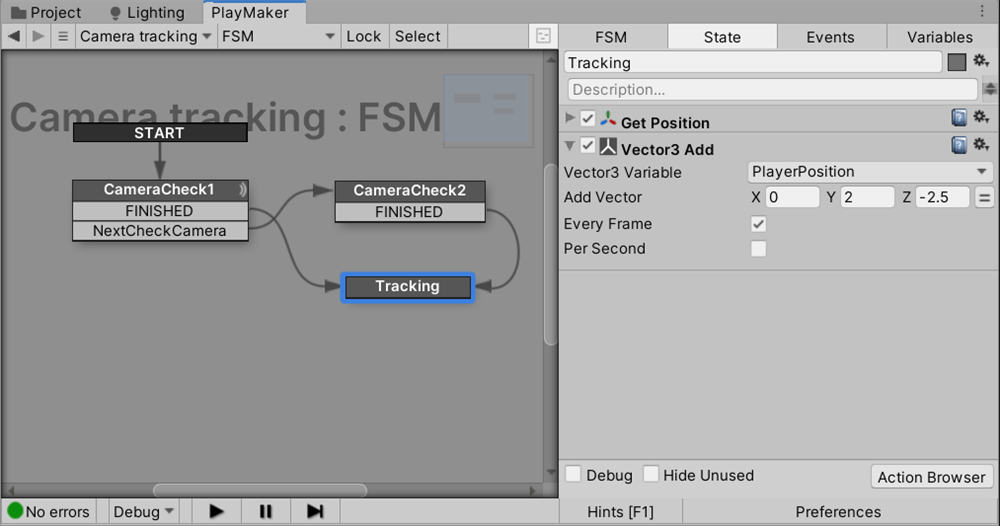
Set the Vector3 Add action
In this article, this Add Vector number is set to X:0 Y:2 Z:-2.5, which refers to the relationship between the ball (moving object) and the camera’s position.
In other words, this number determines the camera’s position.
We recommend that you adjust the value yourself to get a better understanding of the situation.
Add the Set Position action
Add the Set Position action. This will place the camera at the coordinates of the PlayerPosition.
Change Game Object to Specify Game Object and set the mainCamera variable.
Set the Vector to PlayerPosition and make sure Every Frame and Late Update are checked so that the camera is always updated.
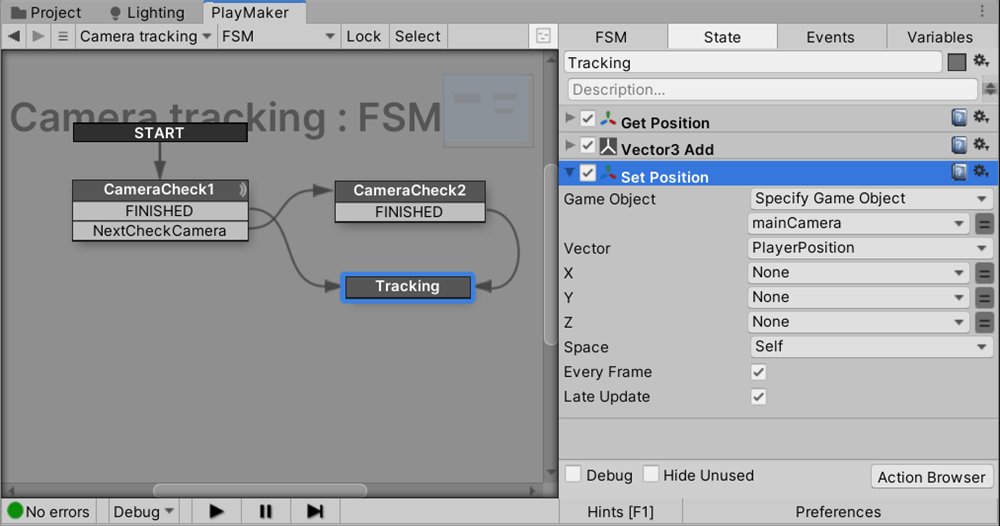
Set Position action settings
Added Set Rotation action
Add the Set Rotation action. This will tilt the camera forward a bit.
Change the Game Object to Specify Game Object and set the mainCamera variable.
Enter 30 in X Angle and check the Every Frame and Late Update boxes.
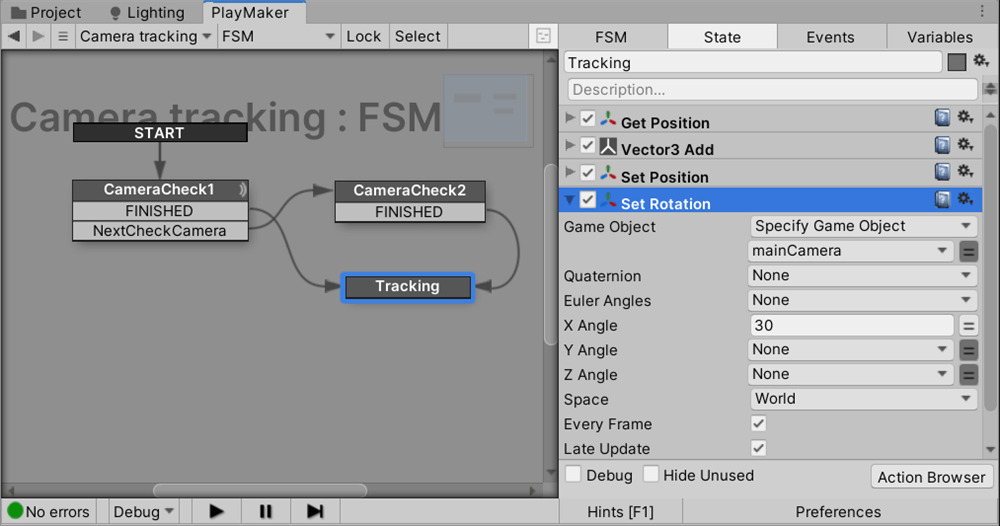
Set Rotation Action
You can also adjust the X Angle “30” value to your liking.
Set the object to follow the player variables
Finally, open the Variables tab of the Tracking state and select the Player variable you created at the beginning.
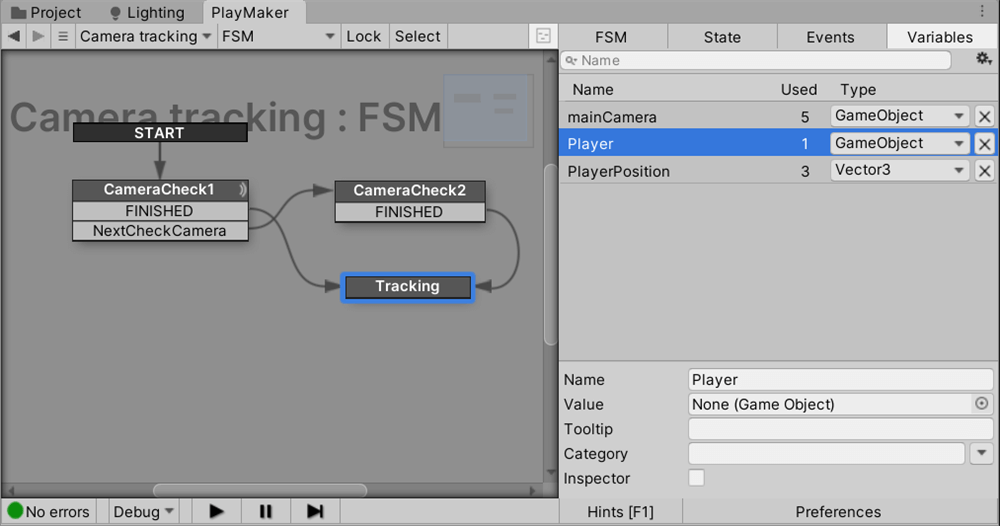
Open the Variables tab
Set the object you want, to make it follow the value of the player variable.
In this case, we want the ball to follow the movement of the ball in the rolling game, so we drag and drop “Ball” from Hierarchy.
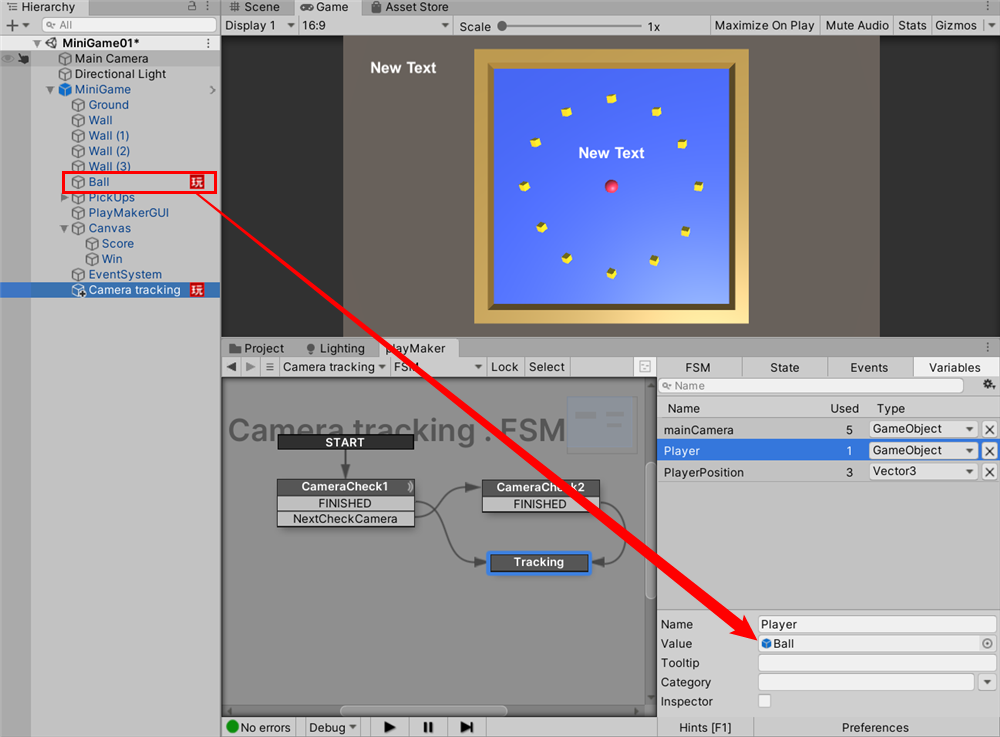
Set “Ball” to Value
This completes the setup for having the camera follow a moving object.
How to upload to STYLY
To learn more about how to create an account and upload to STYLY, please see the links below.
How to create an account

How to upload to STYLY from Unity

Prefabricate the finished ball rolling game “MiniGame” and upload it to STYLY.
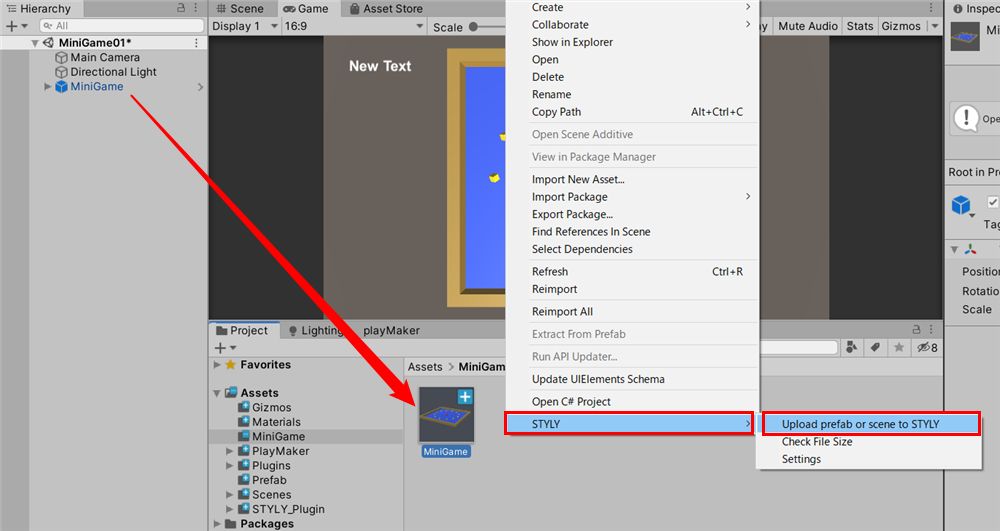
Prefabricate the game and upload it to STYLY
This is what it looks like in STYLYStudio after you’ve uploaded it

Uploading to STYLYStudio
Conclusion
It’s been a long and challenging day, but this concludes our series on making your first game using PlayMaker. Thank you for all your hard work.
Using PlayMaker, I was able to create Unity content without having to learn a programming language (C#).
I created a ball rolling game, which is also a Unity tutorial, but there are other articles on creating VR games that you can try as well!
This series uses a modified version of Unity Technologies Japan, LLC’s [Unity Dojo 2017] first Unity programming slides with PlayMaker.