In this article, I explain how to take photos to create a 3D model by photogrammetry, with some examples shown. I also created VR scenes that show the example models by photogrammetry as dioramas.
Sample
You can taste the sample space from STYLY GALLERY: Photogrammetry_Sample_Scene
Guideline to take photos for photogrammetry
From this section, I am going to show several examples of photogrammetry. The black camera icons around the diorama show the positions where the photos are taken. Please try scanning various things, referring to those examples.
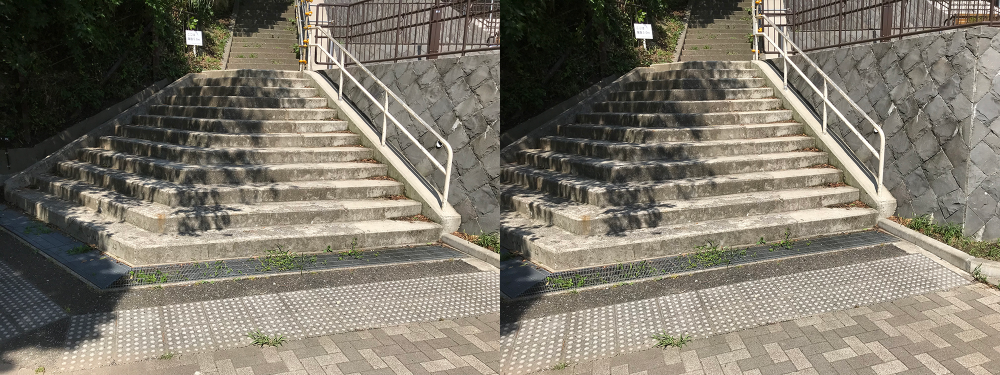
Snapshot of landscape ~stairs in the park

Example – how to take photos
When scanning a part of a landscape, as shown above, I recommend taking photos while moving sideways step by step. There is a common way ‘defining several points and taking photos in various directions from those points’, but I found it gives a cleaner result to take photos while moving sideways step by step. It’s commonly said that you need to overlap adjacent photos by about 60% of their area, so I recommend taking photos with that in mind.
Example – two photos overlapped by 60% of their area.
| The number of the photos taken | 76 photos |
| Camera | iPhone7 |
| Software | Photoscan(Now it’s called ‘Metashape’) |
| The number of polygons | 20000 polygons (It had 1000000+ polygons originally, so they have been reduced) |
| Guidelines | ・Take photos while moving sideways step by step. ・Take photos so that adjacent photos are overlapped by 60% 0f their area. |
The walk-around photographing ~ A stone lantern

Example – photos taken
To create a 360-degree flawless 3D model, you need to take photos while making a full round. I took photos with all the shapes of the lantern, from the top to the bottom, kept within the angle of the view. I recommend taking photos while travelling along a precise circle.
| The number of the photos taken | 94 photos |
| Camera | iPhone7 |
| Software | Photoscan(Now it’s called ‘Metashape’) |
| The number of polygons | 10000 polygons (It had 1000000+ polygons originally, so they have been reduced) |
| Guidelines | ・Keep all the shape of the lantern from the top to the bottom within the angle of the view. ・Take photos while travelling along a precise circle. |
Scan a small object ~Turban shell

Example – photos taken
When scanning a small object, you can put it on a table to take photos. However, you cannot scan the bottom side in that way. Since I wanted to create a flawless 3D model in all directions, I hung it with a wire when taking photos. In this case, you also need to take photos from above and below to cover all the parts of it. And, I paid close attention so that the hanging turban shell wouldn’t rotate. As seen in the image above, the number of photos are not so consistent that it varies with the angle. This is because I forgot which angle I had taken the photo from while I was moving all around to take photos. To take the photos of a hanging object, I recommend taking photos in order so that you can remember which angle you took each photo from.
| The number of the photos taken | 65 photos |
| Camera | iPhone7 |
| Software | Photoscan(Now it’s called ‘Metashape’) |
| The number of polygons | 61848 |
| Guidelines | ・Take photos thoroughly so that they cover all the parts of the object. ・Pay attention so that the hanging turban shell wouldn’t rotate. ・Keep your shadow out of the angle of the view. |
Apply photogrammetry to the photos taken
This article explains about Photogrammetry in detail: How did you find this article? The quality of the generated 3D model highly depends on the way to take photos. I would be pleased if you have a rough image of the way to take photos for photogrammetry. (If you have better knowledge about the way to take photos for photogrammetry, please contact @VR_landscape by Twitter. I really appreciate it.)