In the “How to Host a Session” section, we will introduce the process of hosting a Session, how to edit a Session, and how to connect VRoidHub (for using avatars).
- 1 Process of Hosting a Session
- 1.1 Create New, Edit, Duplicate, and Delete a Scene List
- 1.2 Specify the Available Platforms / Share the Entry Page URL (Session ID) with Participants
- 1.3 After the Session Starts, Host and Participants will Join using the Join Method for Each Device
- 1.4 When you Join a Session, you Wait in the Virtual Lobby
- 1.5 Check Each Participant’s Cache Load Rate
- 1.6 Touring the Scene
- 1.7 End the Session
- 2 Host Operation
- 3 STYLY Session Function Manual “How to Join a Session” (for guests)
- 4 STYLY Session Function Manual “Overview”
Process of Hosting a Session
Prepare, host, and end a Session in the following process.
- The Session host creates the Session and the list of scenes to be included in it.
- The Session host informs each participant of the page URL and Session ID.
- At the start of the Session, the Session host and participants join the Session using the joining method for each device.
- When joining a Session, participants gather in the virtual lobby.
- The Session host keeps track of each participant’s cache load rate.
- The Session host selects the scene and travels around the scenes with the participants.
- The Session host ends the Session.
Create New, Edit, Duplicate, and Delete a Scene List
Creates a new Session and open the Session Management Screen (https://gallery.styly.cc/session).

The session management screen
Click “NEW SESSION” button.
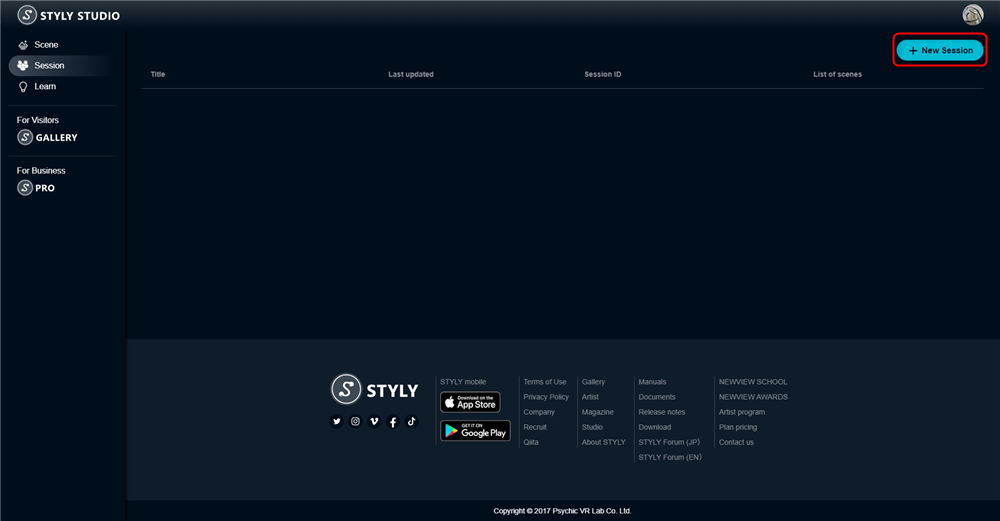
Click “NEW SESSION” button
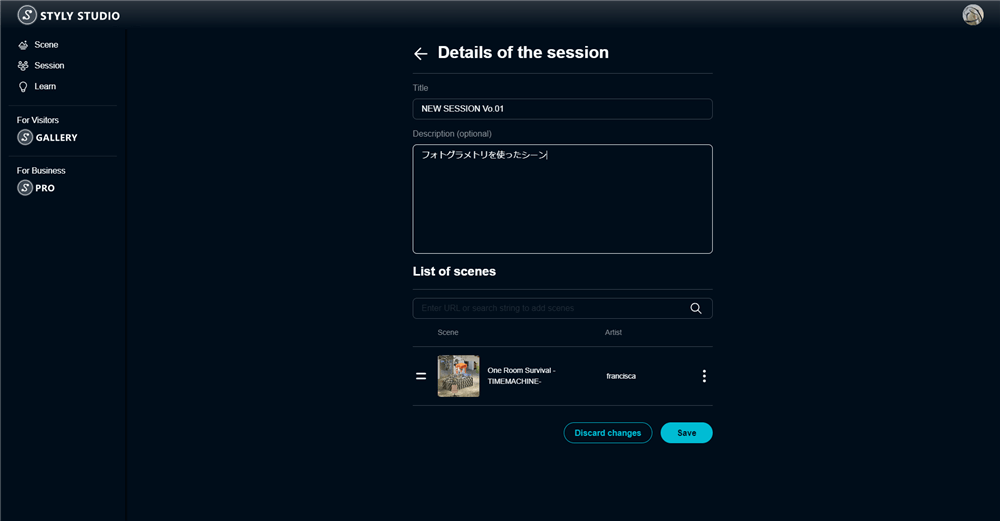
Enter a Session name, a Description of the Session, and a Scene List.
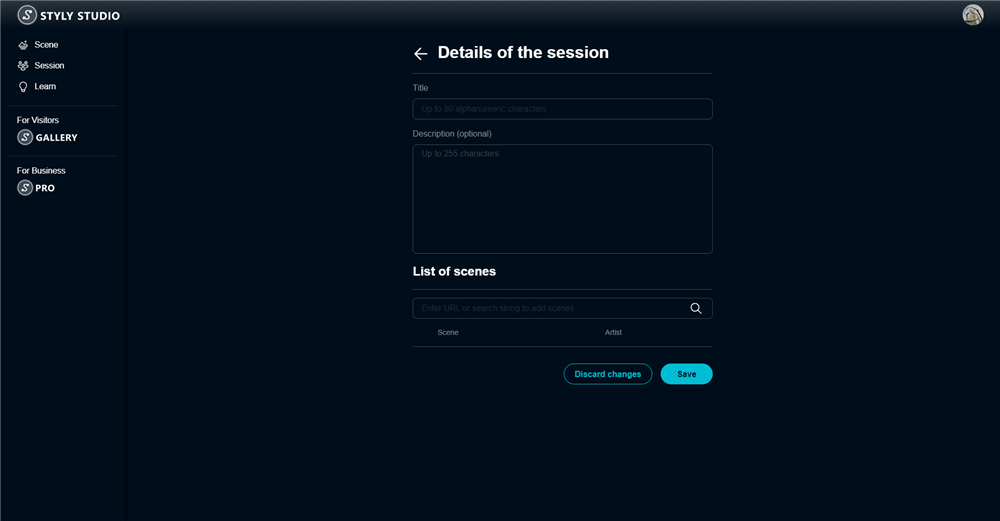
Enter your Session information.
Session name
The Session name will be displayed to the participants on the Join screen.
*Only alphanumeric characters and symbols are allowed, no more than 80 characters.
Description
Will be displayed as a Session description to participants on the Join screen.
*Please enter less than 256 characters.
Scene List
A list of scenes that can be shown to participants in the Session.
You can specify a scene by entering the scene name, a hashtag search, or the gallery URL (or Scene ID) for each scene.
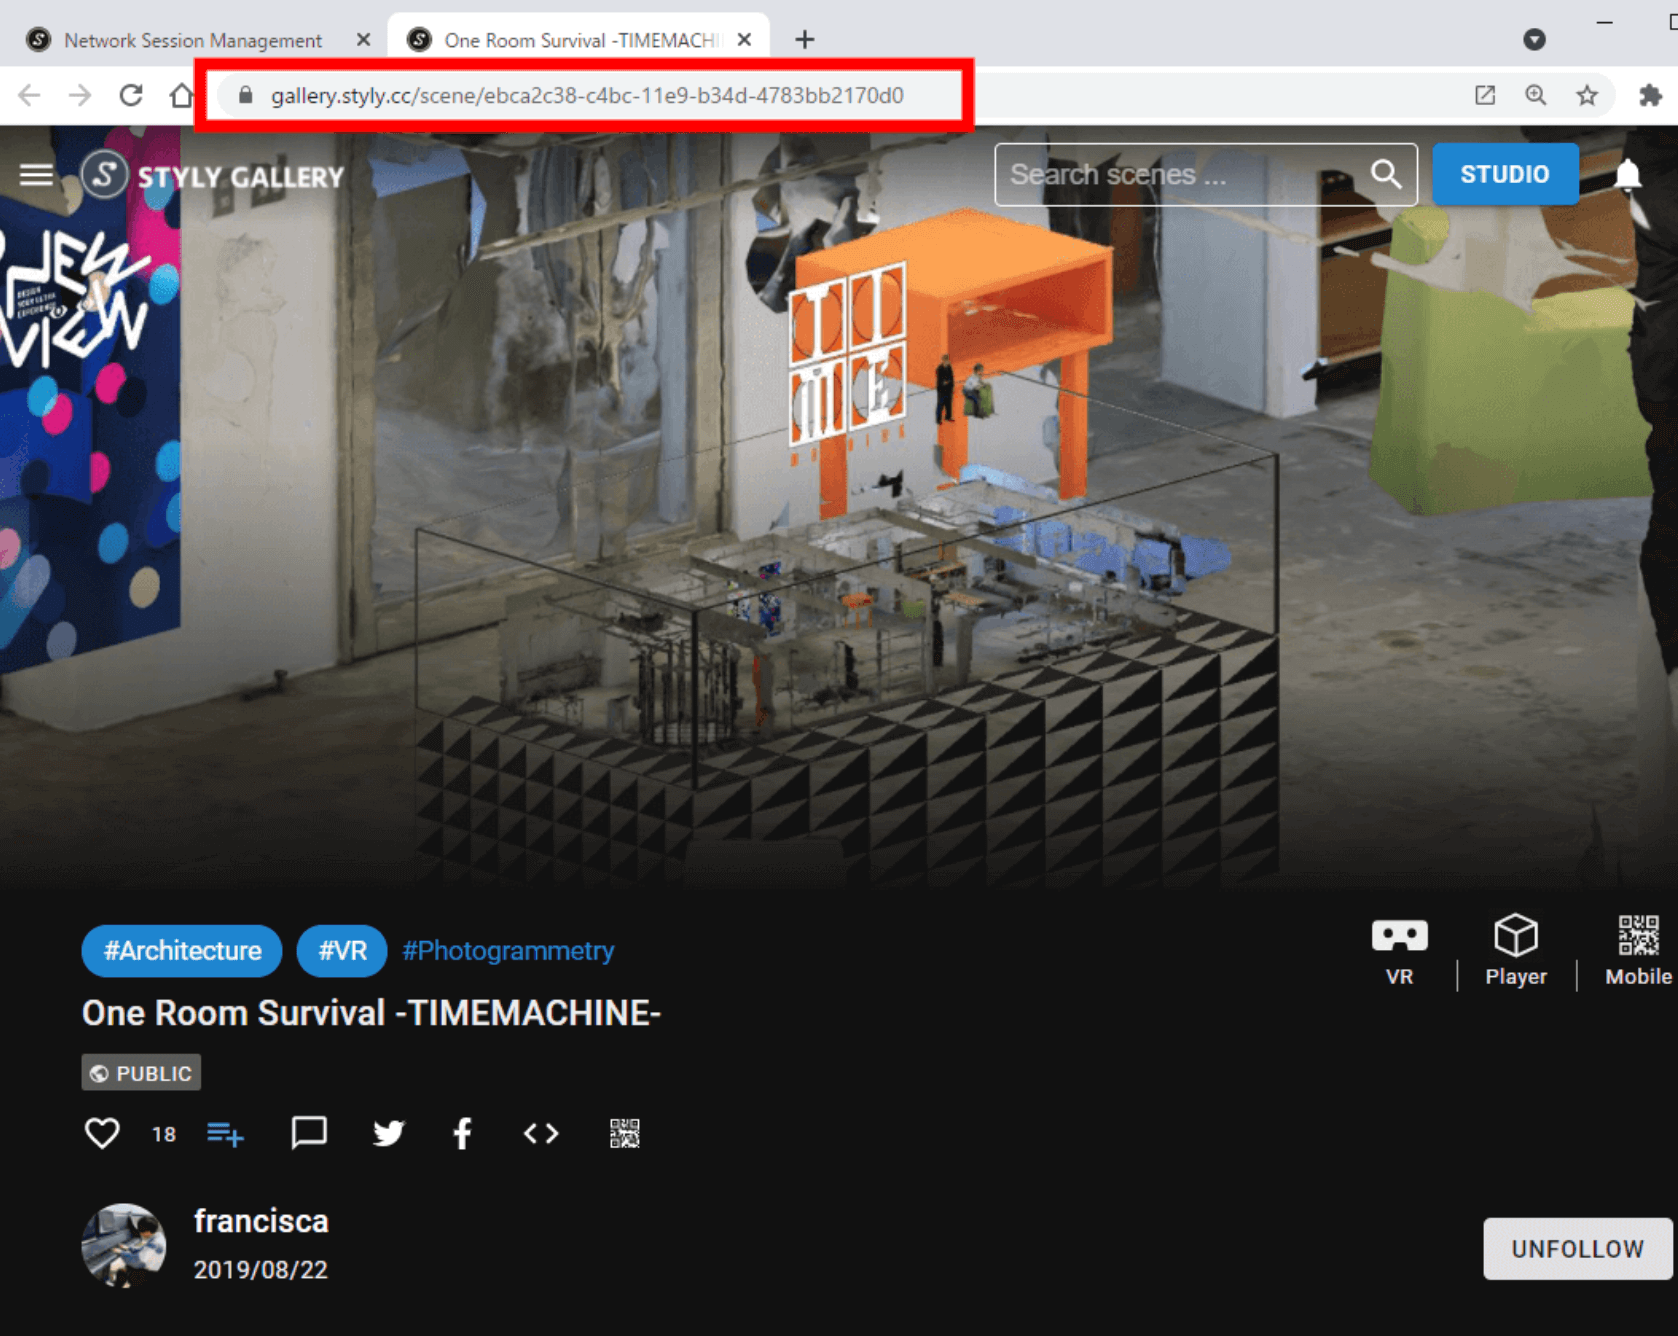
Gallery URL
You can add scenes that you can view in STYLY Gallery or that you have created in STYLY Studio (*must be in the published state) to the Scene List.
We recommend no more than five scenes, because the more scenes you have, the more you will need to download at the start of a Session.
Please note that depending on the content of the scene and the number of devices used, the download capacity may be large, placing a burden on the network and interfering with the loading of the scene. It is recommended that you do some testing beforehand.
After entering a scene name, hashtag search, or gallery URL, click on any scene to add it to the Scene List.
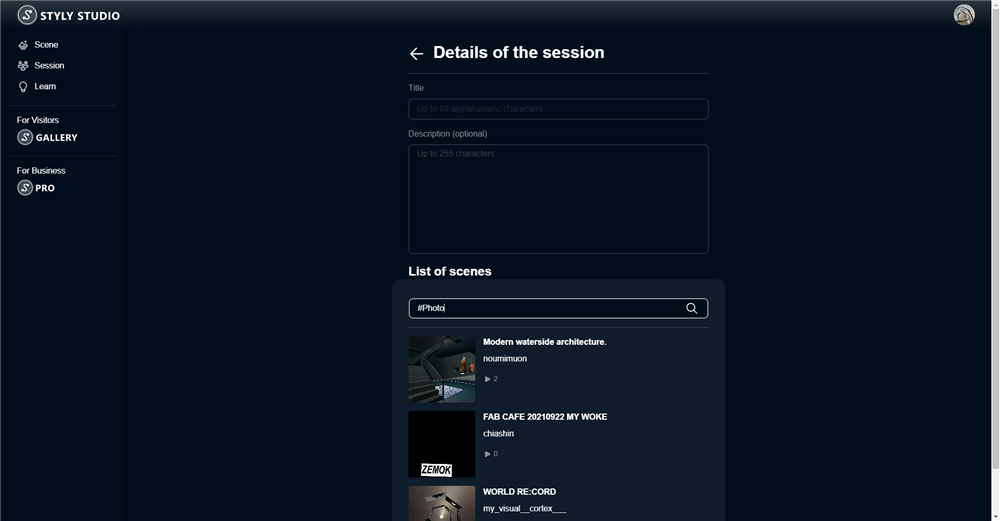
After searching for a scene, click on the desired scene.
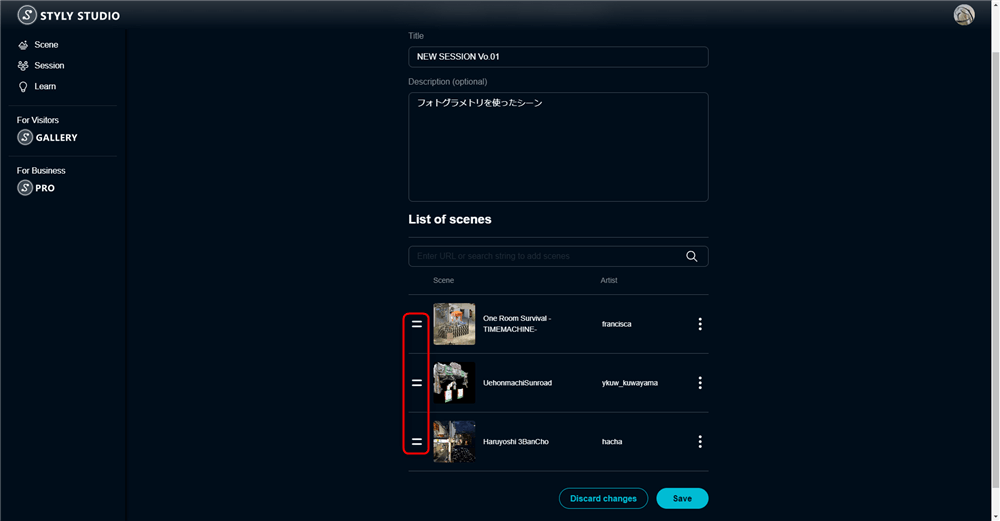
If you want to add more than one scene, please follow the same procedure and include the gallery URLs you want to add.
Multiple scenes
If you want to change the order of the scenes, click on the up and down arrow icons.
Finally, click on the SAVE button to save the settings.
Click the SAVE button to save.
If you want to edit the Session, select the edit icon.
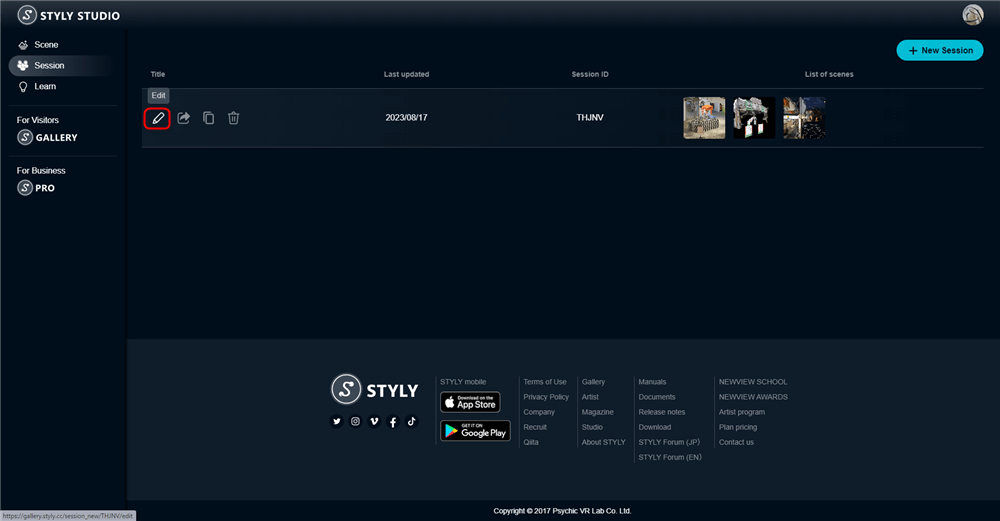
Click an edit icon
If you want to duplicate the Session, select the duplicate icon.

Click a duplicate icon.
If you want to delete the Session, select the delete icon.
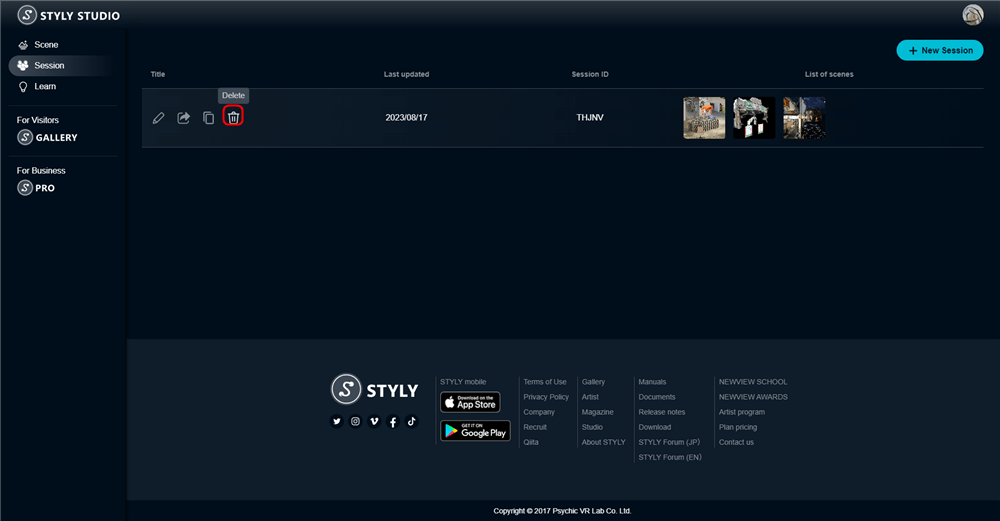
Click a delete icon.
After you created a Session, go to the Entry Page from sharing icon and specify the available devices.
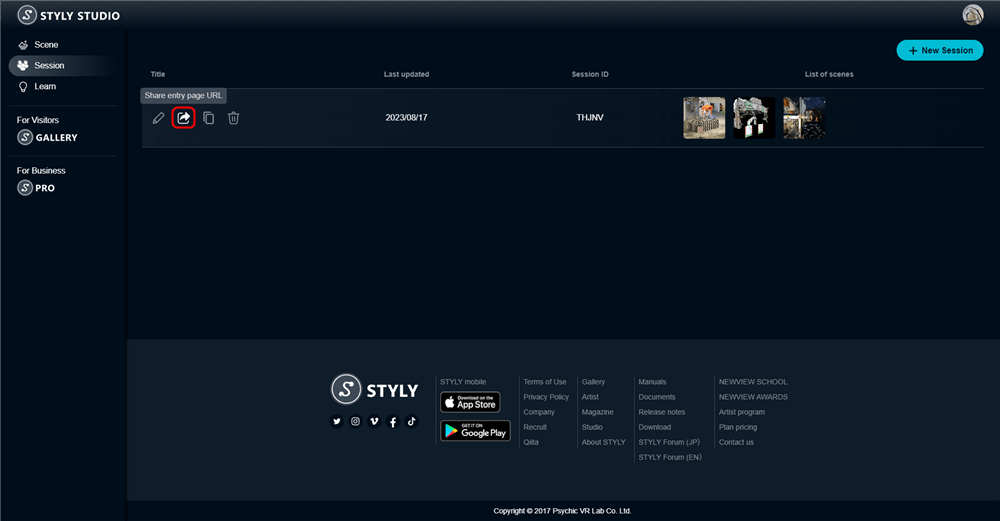
Click the sharing icon.
From left to right, there are icons for PC VR, PC Browser, Mobile, Oculus Quest or others.
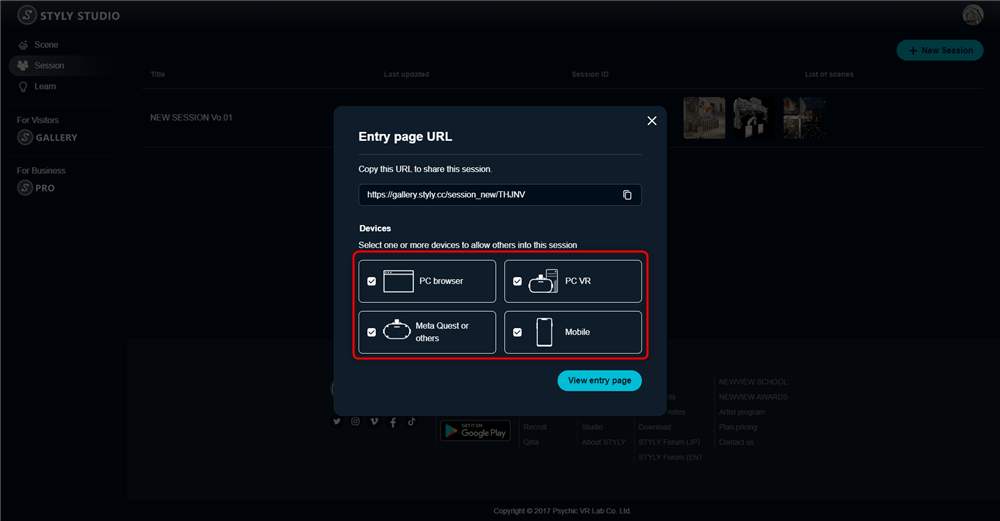
Devices
PC VR

PC VR
Supported Apps
・Steam version STYLY app
・VIVEPORT version STYLY app
PC Browser

PC Browser
Recommended Browser
・Google Chrome
Mobile

Mobile
Supported App
・Mobile version STYLY app (Android/iOS)
Quest or others

Quest or others
Supported Apps
・Oculus Mobile version STYLY app
・Daydream version STYLY app
・Pico version STYLY app
・Nreal version STYLY app
*For more information about supported apps and devices, please refer to the STYLY Session Function Manual Overview.
By clicking on each device icon, you can specify whether or not each device is eligible for the Session. Also, be sure to share the URL of the Entry Page after specifying the devices, since the URL will be automatically changed according to the device specified.

Specify the devices
Then, to share the Entry Page URL (Session ID) with participants, click on the URL copy icon and make the URL known to the participants.
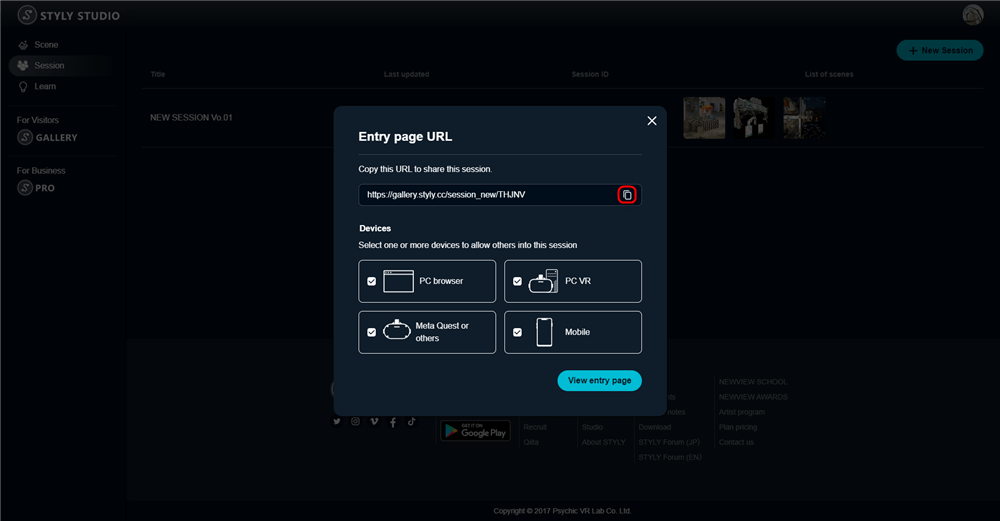
Click Copy URL
You can also check the Session Entry Page by clicking the Open Entry Page icon.

Click Open Entry Page.
Each participant can join the Session by selecting the device to be used from the Entry Page.

Session Entry Page.
If you join with Quest, make sure your Session ID is known to the participants.
The alphanumeric sequence represented in the Session Management Screen is the Session ID.
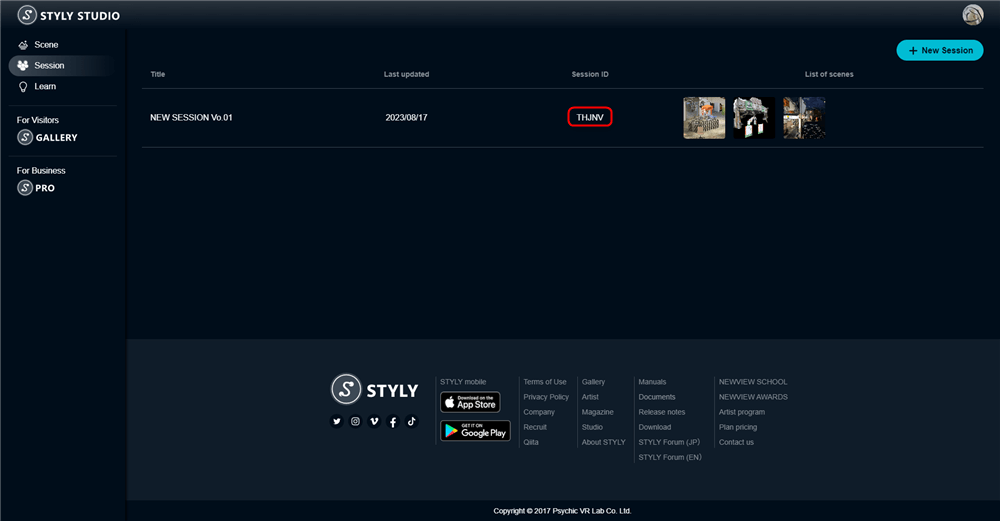
Session ID
You can also check the Session ID on the Entry Page.
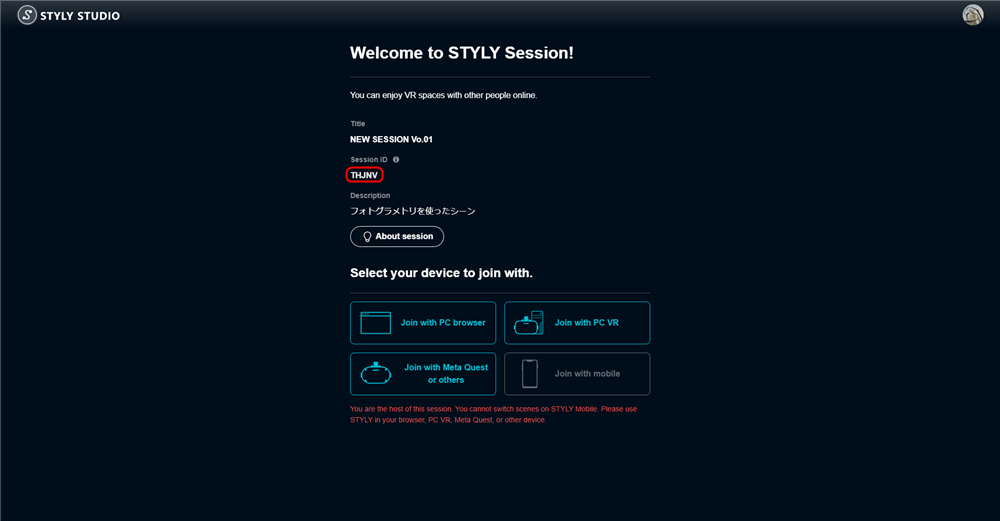
Session ID
Note that the red text message “* The host of this session is you. On STYLY Mobile, you cannot switch between scenes. Please use PC VR, Oculus Quest or other devices.” is displayed only for the host and not for the guest.
After the Session Starts, Host and Participants will Join using the Join Method for Each Device
For details on how to join a Session, please refer to the STYLY Session Function Manual “How to Join a Session” (for guests).

The Session host must join with a STYLY XR client or the Web version of STYLY Session.
STYLY XR Client is a generic term for the following STYLY applications.
- Steam version STYLY app
- VIVEPORT version STYLY app
- Oculus Mobile version STYLY app
- Daydream version STYLY app
- Pico version STYLY app
- Nreal version STYLY app
When you Join a Session, you Wait in the Virtual Lobby
When you join a Session, you will initially enter a lobby.
The wires of the cube are rotating, and the message “Session Will Start Soon” is displayed.
Wait until all participants have joined in this scene.

Waiting scene
Check Each Participant’s Cache Load Rate
The Session host can see the cache load rate of each participant in the Display Status Screen.
Loading a scene that is not cached may take a long time, so it is recommended to make the scene transition after the cache load rate of all participants become 100%.
How to Open the Display Status Screen and Check the Cache
In the case of *Oculus Quest 2, use the left hand Y button and right hand B button to show (or hide) the menu for the Session, and move the stick button up or down to select Display Status. Pull the trigger button to confirm.
*Session Menu Operation Method List for Each Device
| Action name | Buttons by device |
| Menu switching (show/hide) |
Steam version STYLY Oculus Mobile version STYLY |
| Move the cursor up and down in the menu |
Steam version & VIVEPORT version STYLY Oculus Mobile version STYLY |
| Select button |
Steam version & VIVEPORT version STYLY Oculus Mobile version |
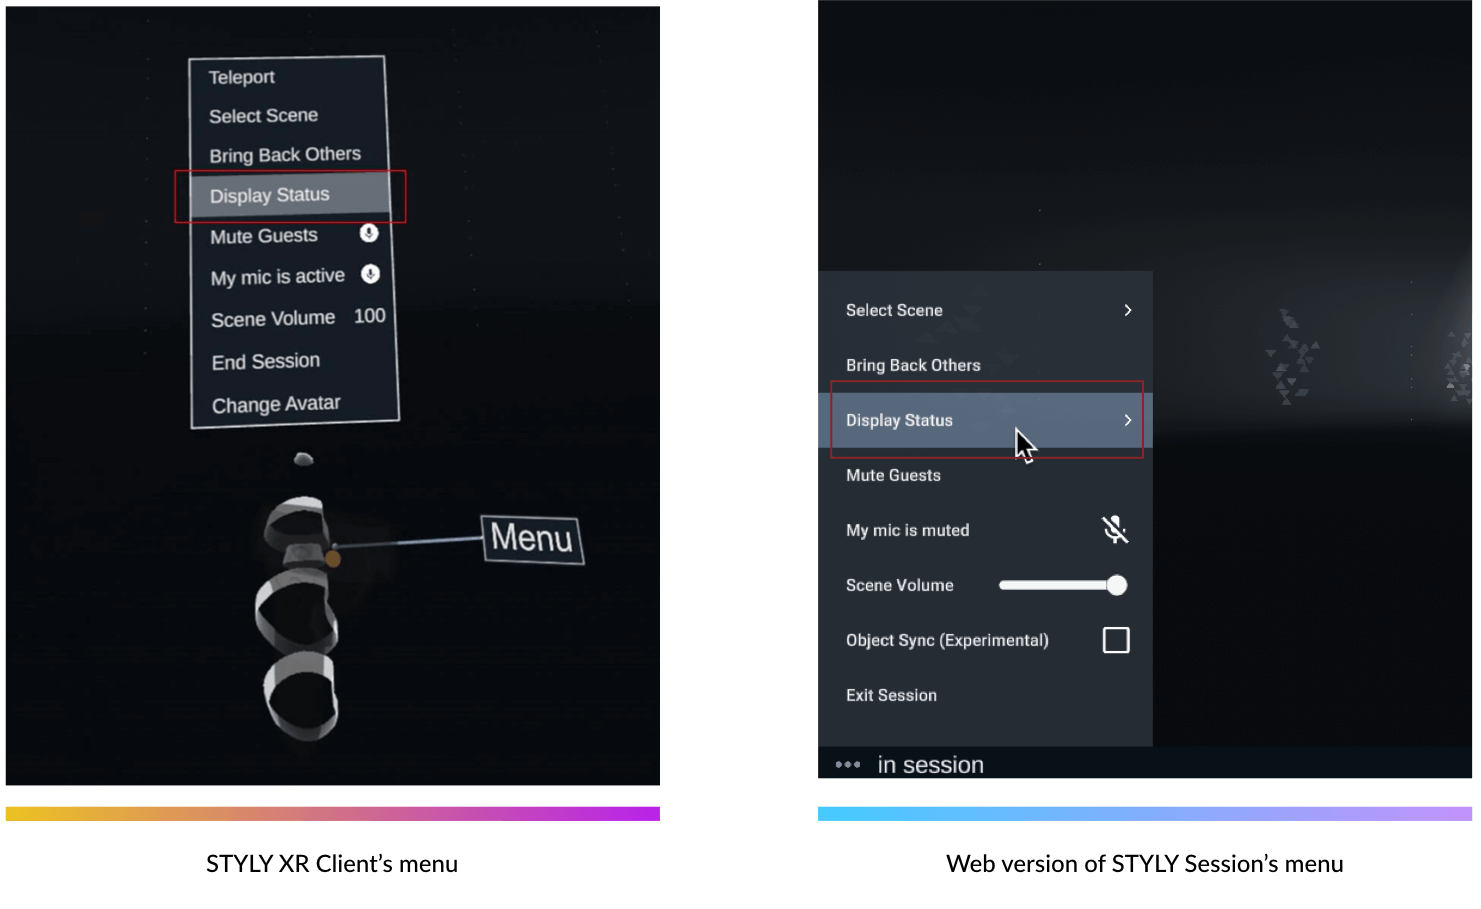
Select Display Status.
Make sure that everyone in the Cache column has 100% cache.
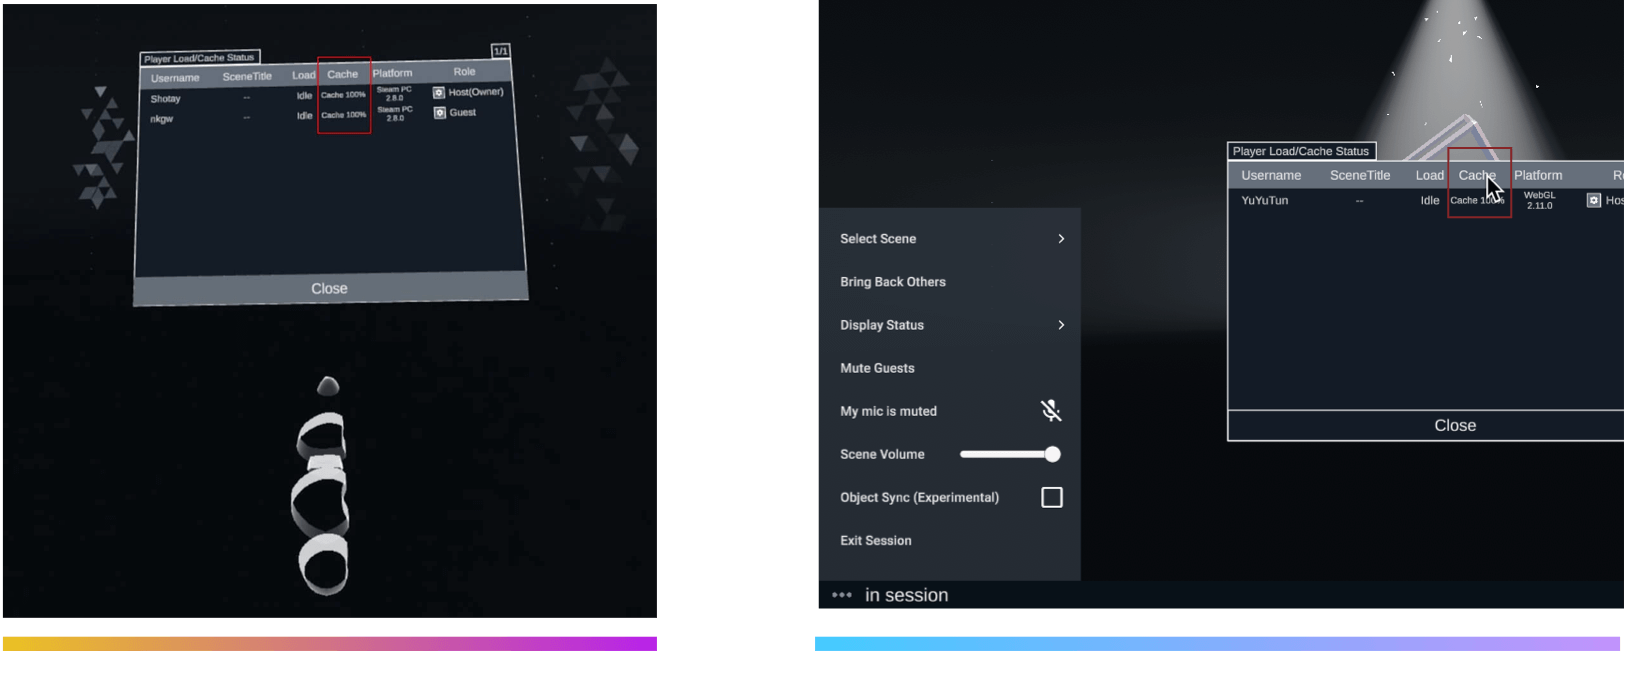
Check the cache load rate.
Touring the Scene
When the Session host selects a scene and transitions to it, the scene loads on all participants’ devices, changing the scene they are looking at and allowing them to move around the scene with the participants.
Open the menu and select Select Scene.
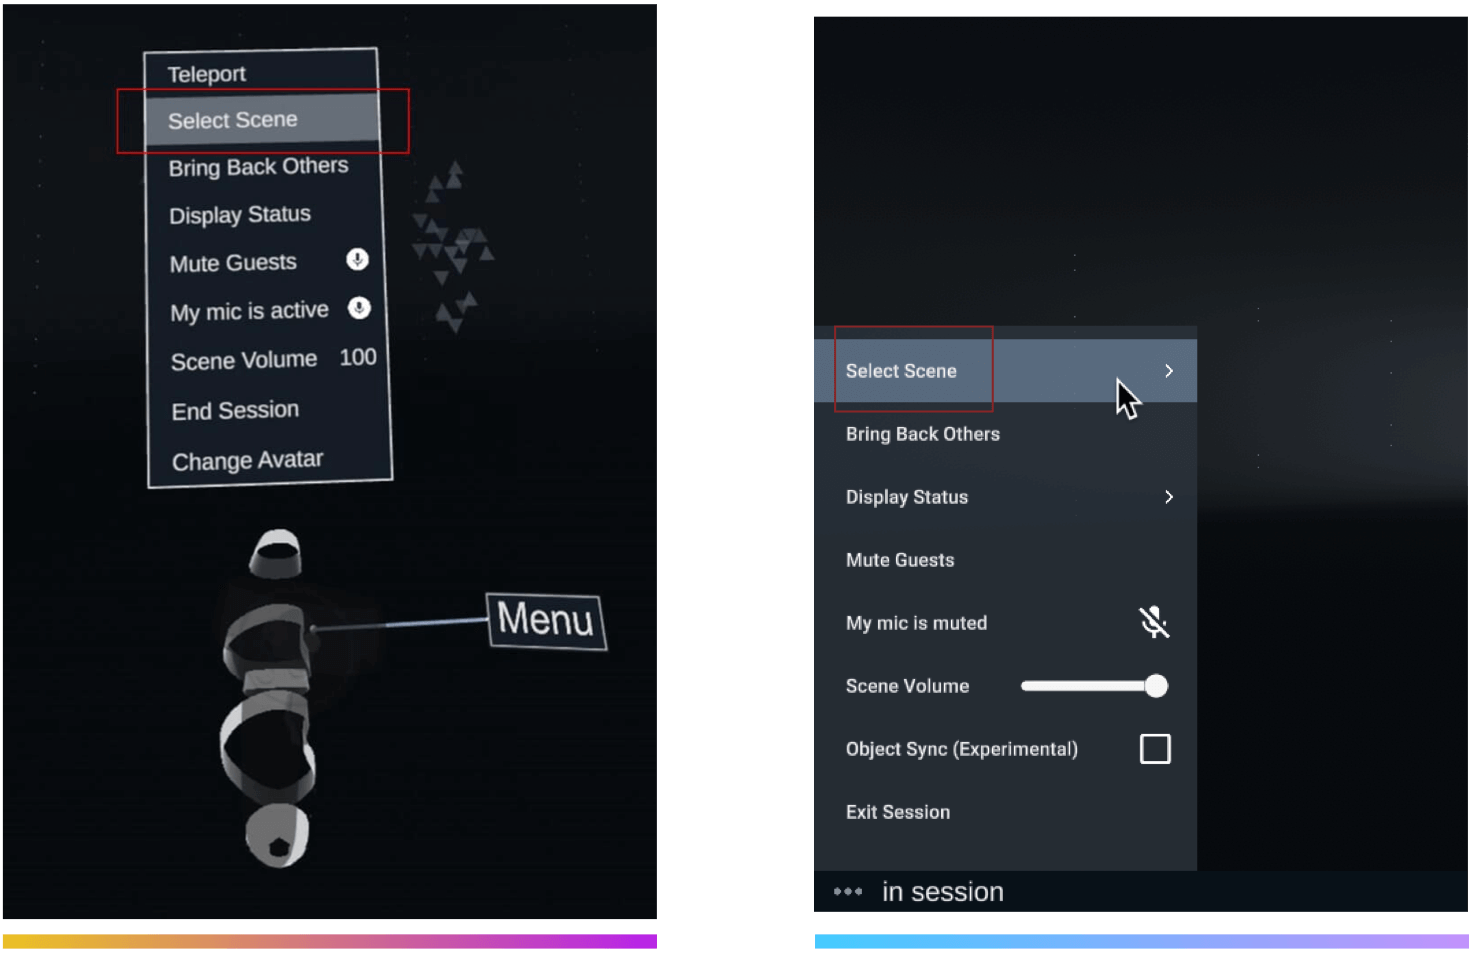
Select Scene.
Move the stick button to the left or right to determine the scene to which you want to transition, and then pull the trigger button to confirm.
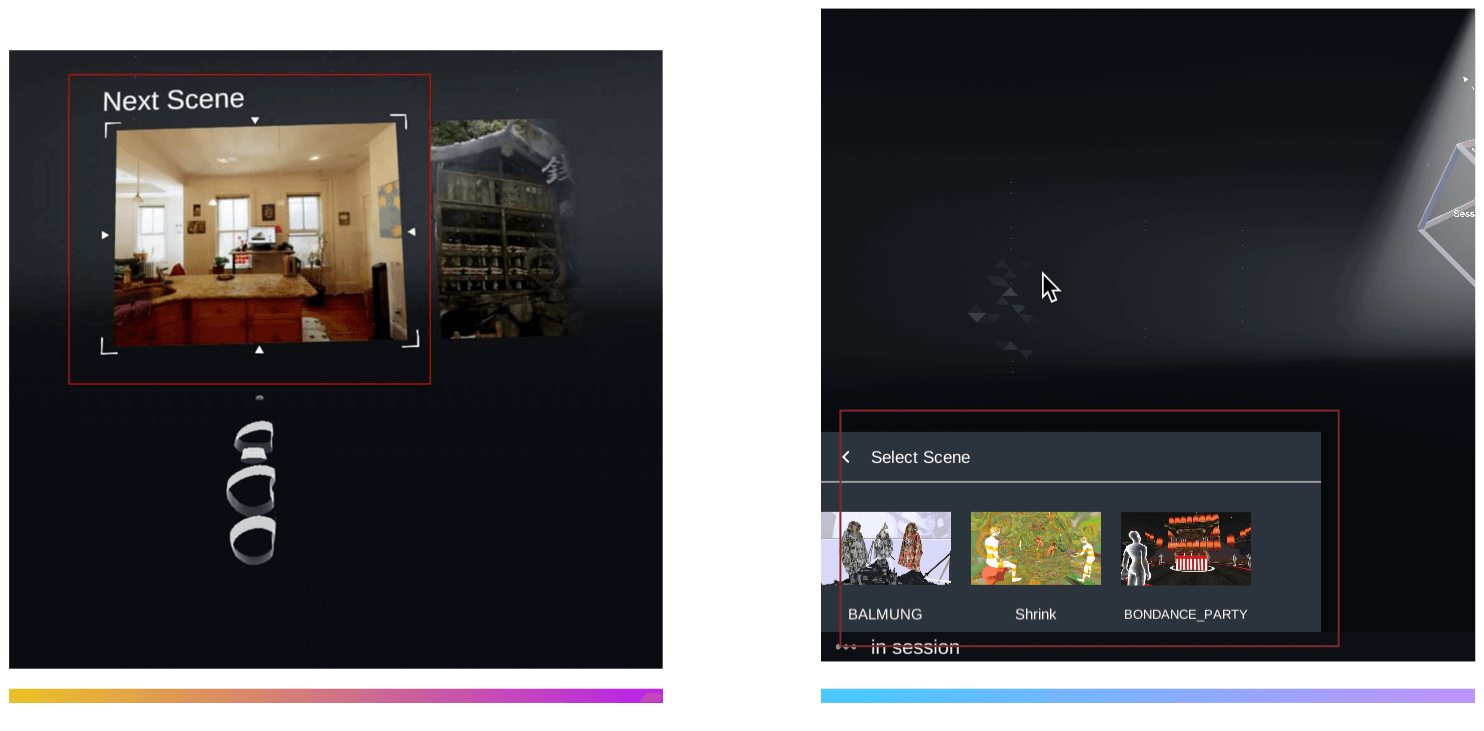
Select any scene.

Scene transitions
End the Session
You can close the Session with the End Session option.
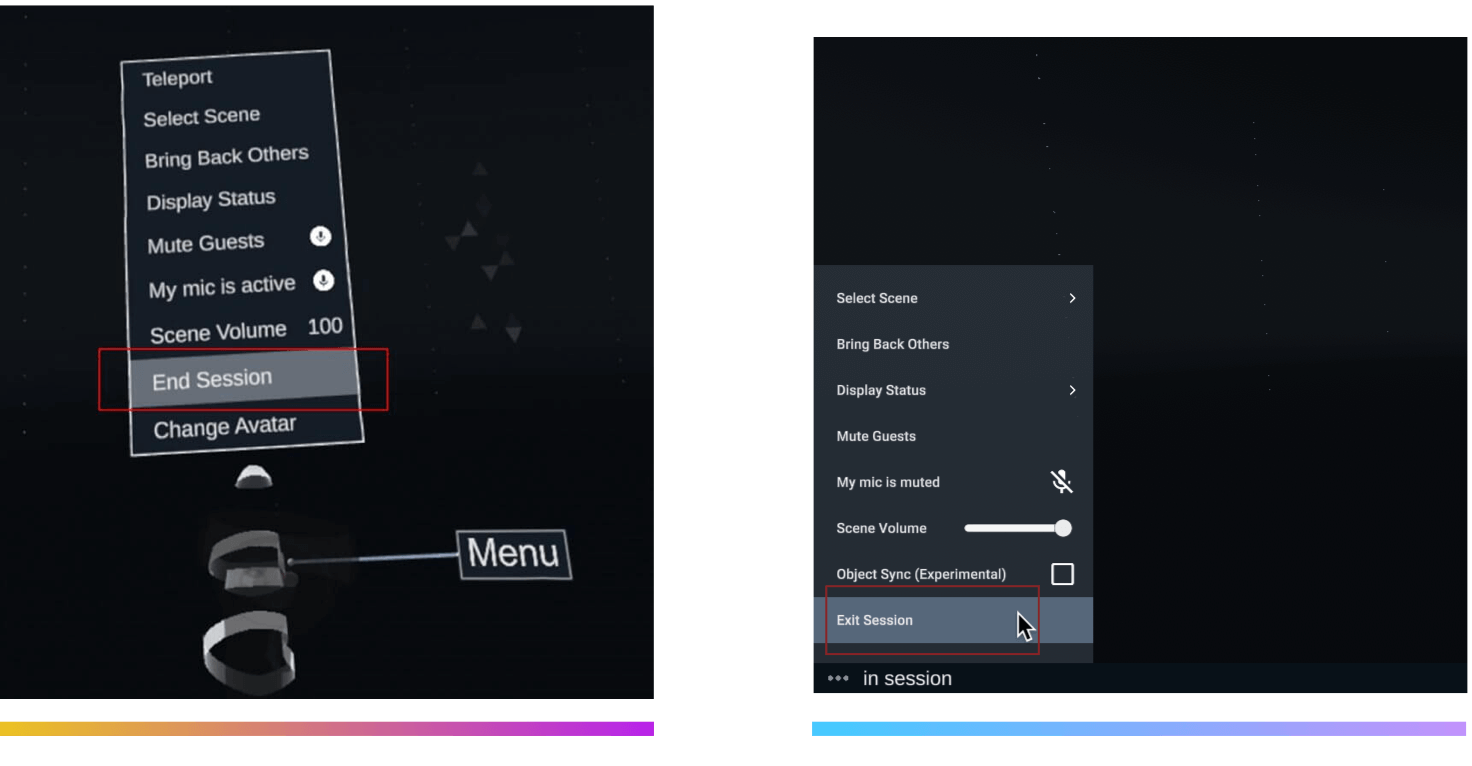
End Session.
When the message “End this session?” appears, select “End session” to end the Session.

Select End session.
Host Operation
The host can perform the following operations via a STYLY XR Client or the Web version of STYLY Session (Hosted operations are not available in the Mobile version STYLY app).
Mute the Voice Chat of All Guests
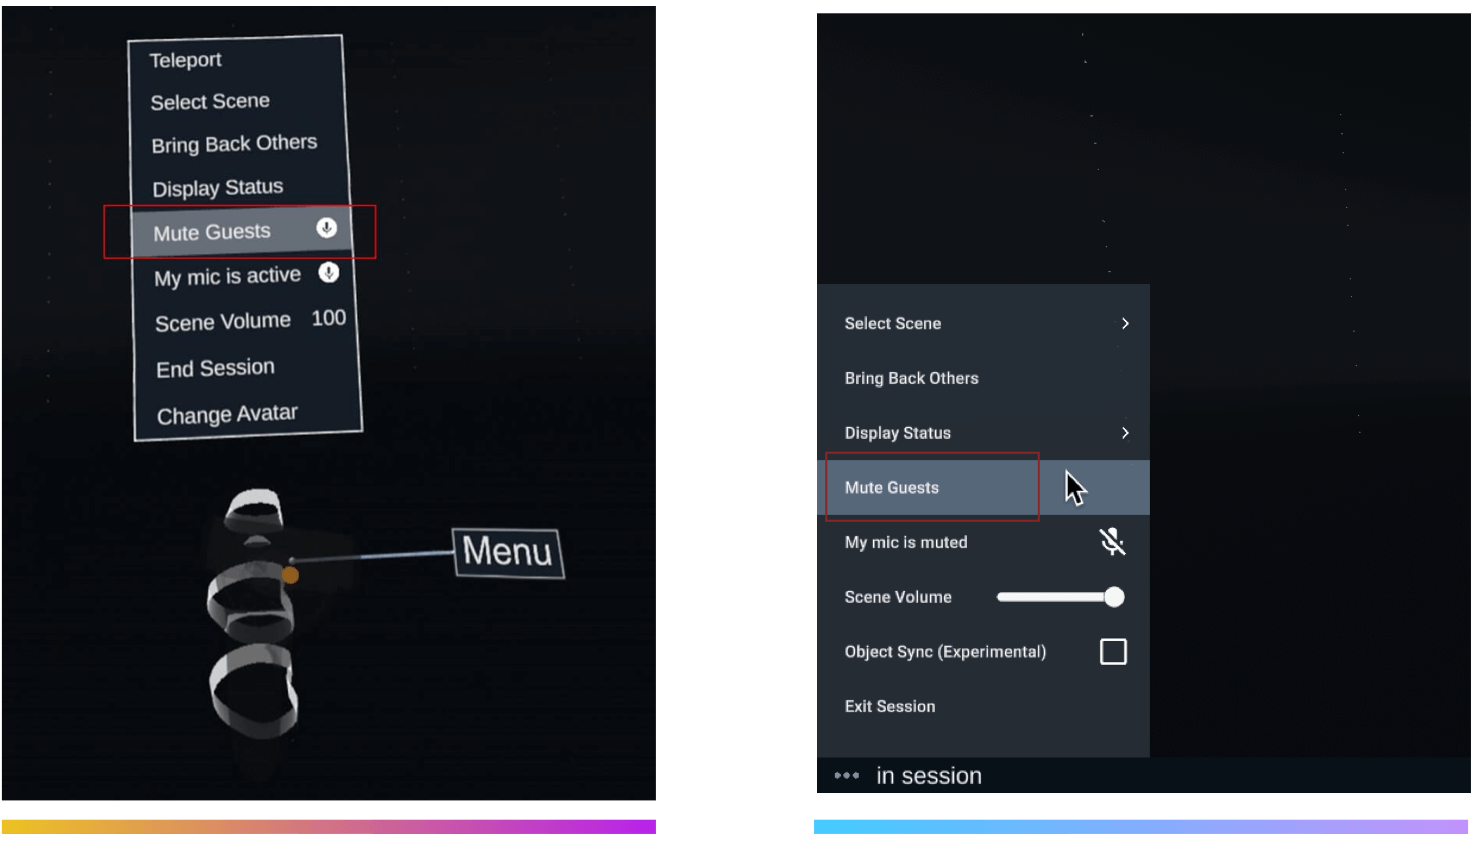
Menu > Mute Guests to confirm / unmute status
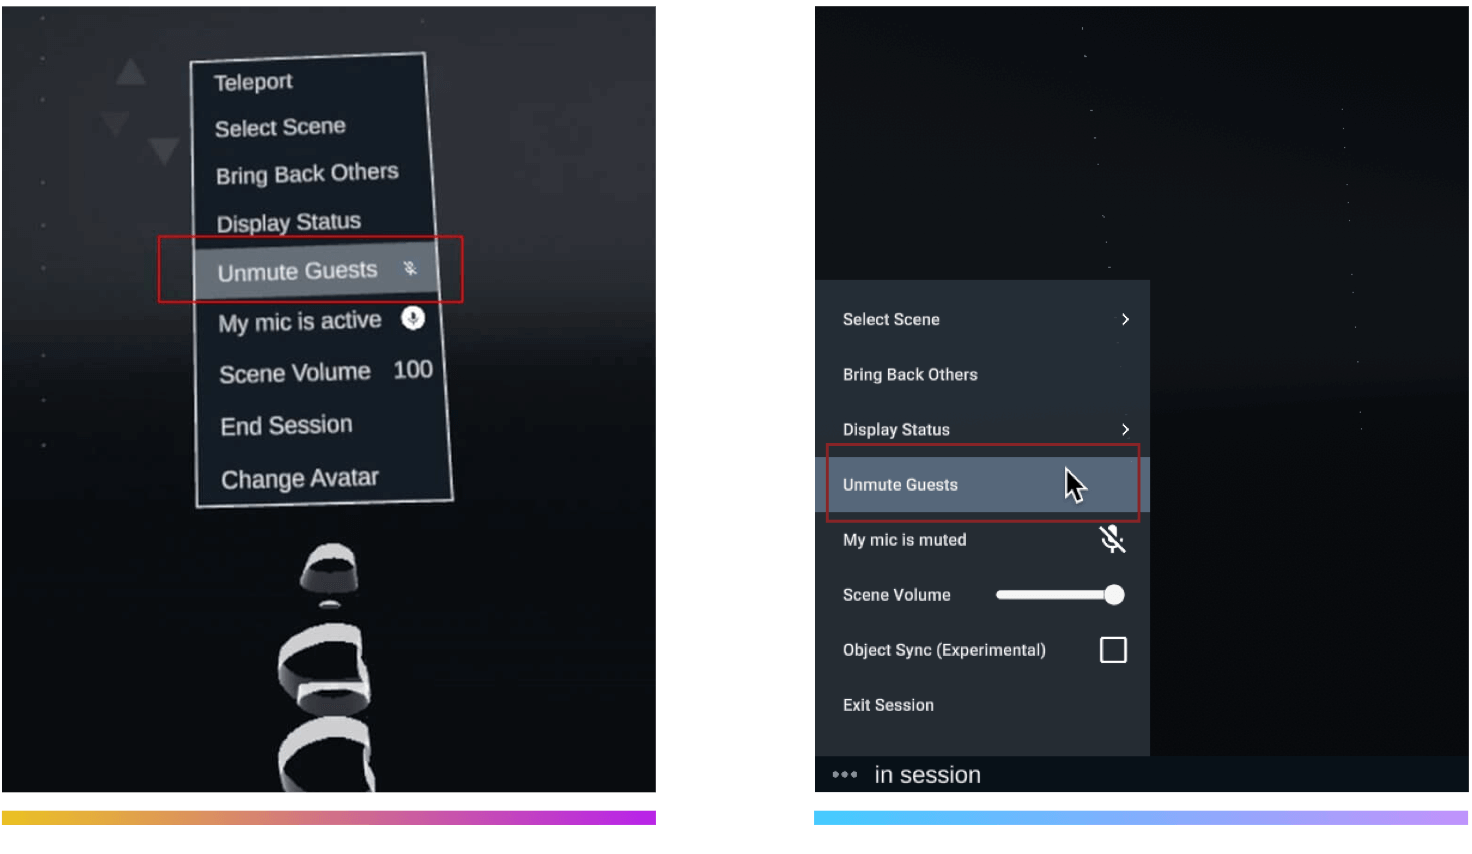
Select Menu > Mute Guests / Mute state
Change the BGM Volume of a Scene
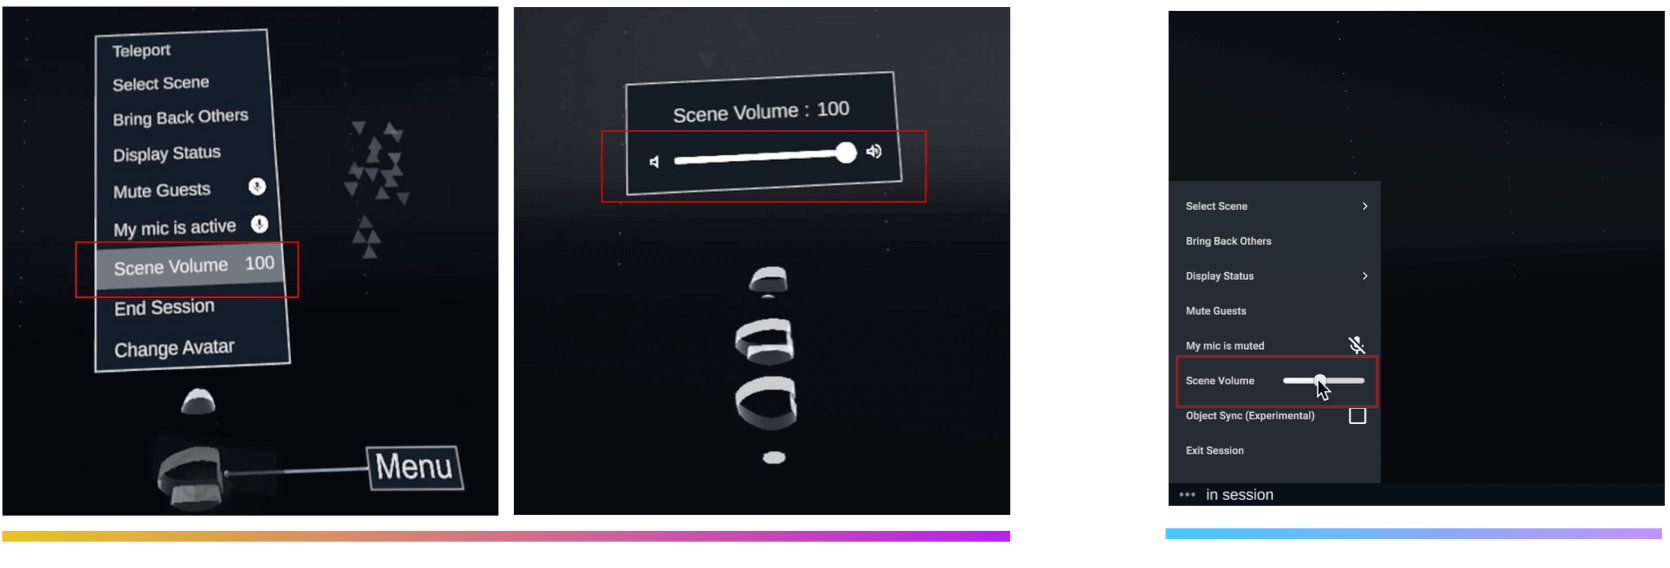
Select Menu > Scene Volume. Adjust with meter.
Forcing Session Participants to Gather in the Same Place (Bring Back Others)
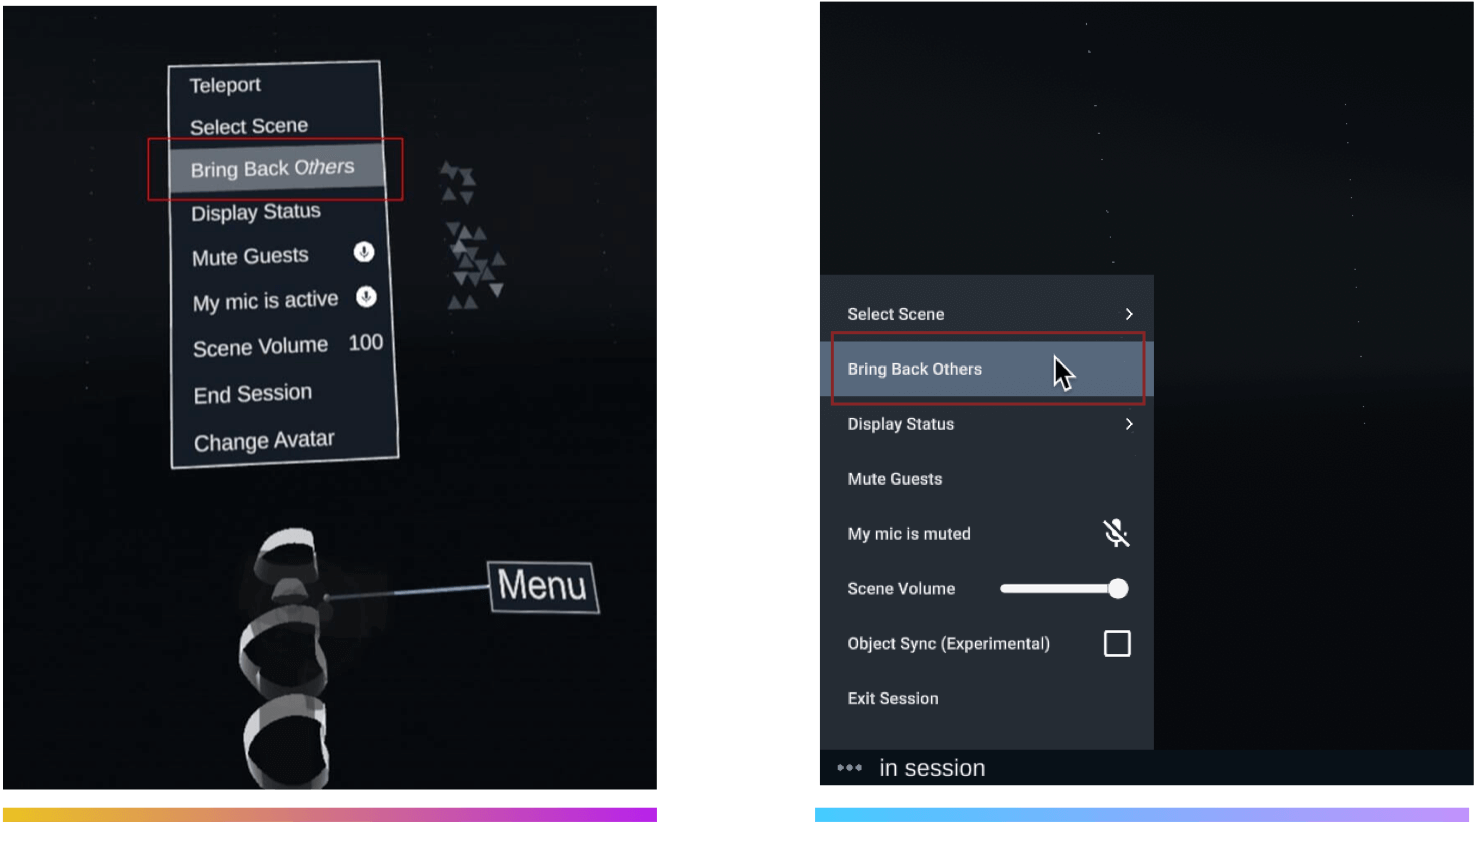
Select Menu > Bring Back Others.
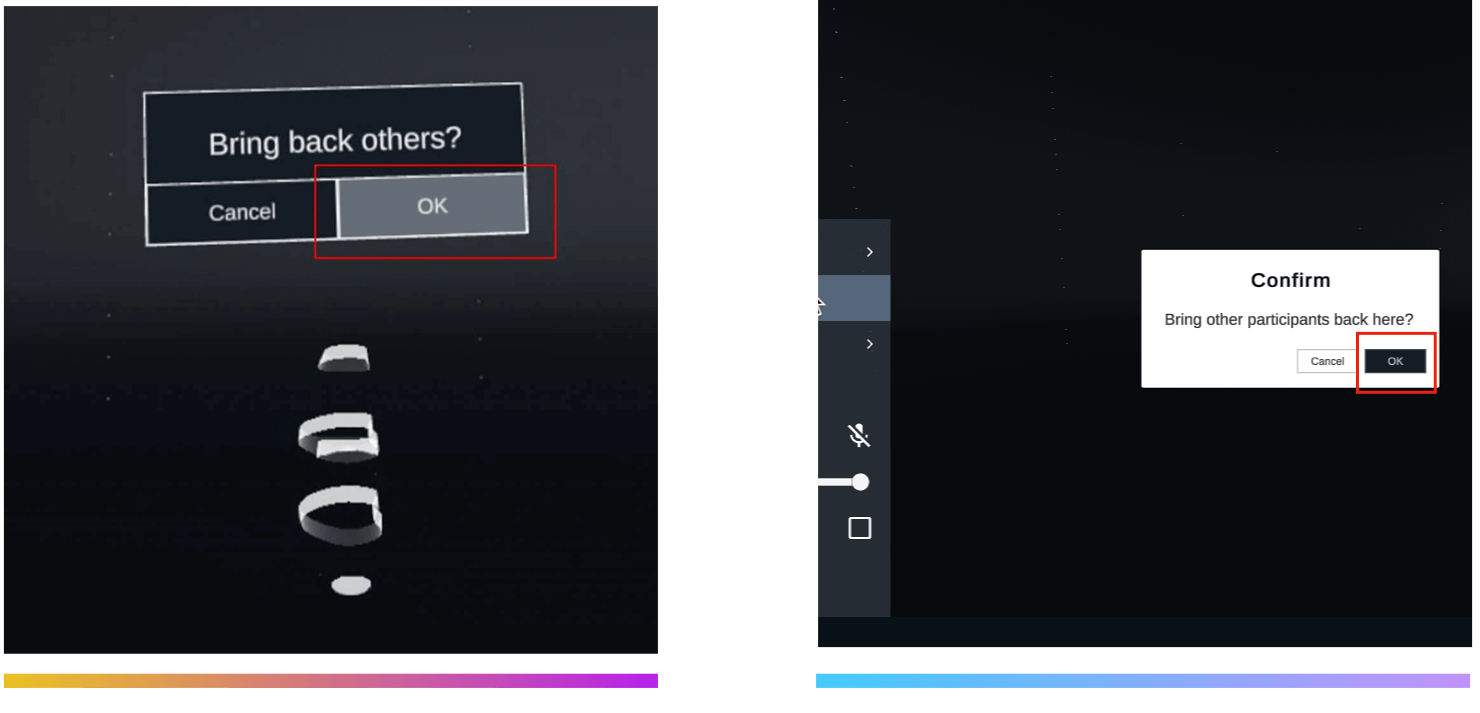
Select OK.
Delegation of Host Authority
Host authorities are held by the Session creator, and only the session creator can set host authorities.
The session creator can also grant host authorities to other participants and make the host’s functions available to other guest users.
From the host’s UI, you can view the Display Status member list, select a member by flicking the stick upward or swiping upward, and choose whether or not to grant host authorities to the member.
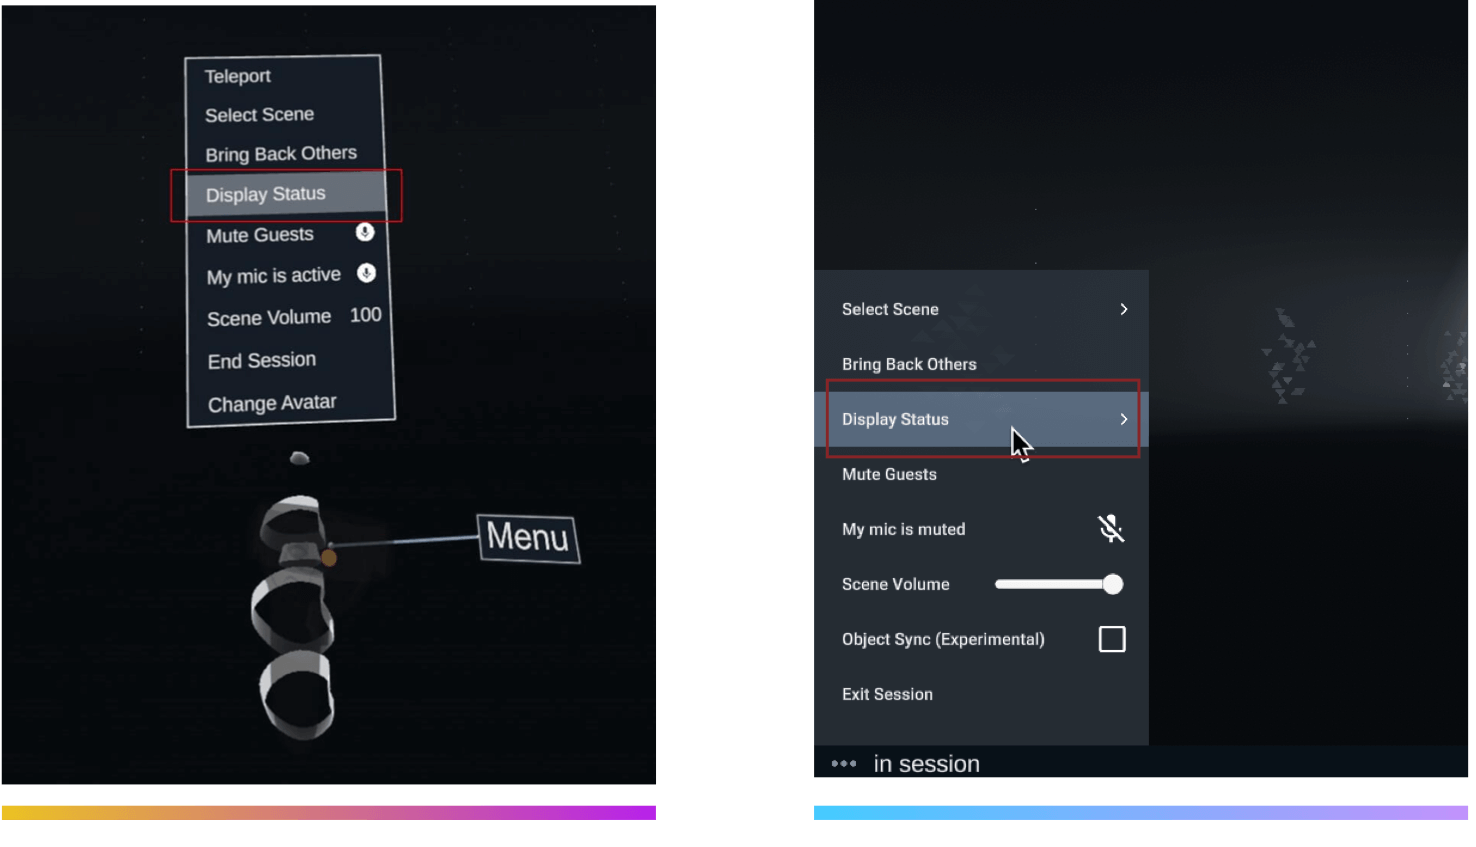
Select Menu > Display Status
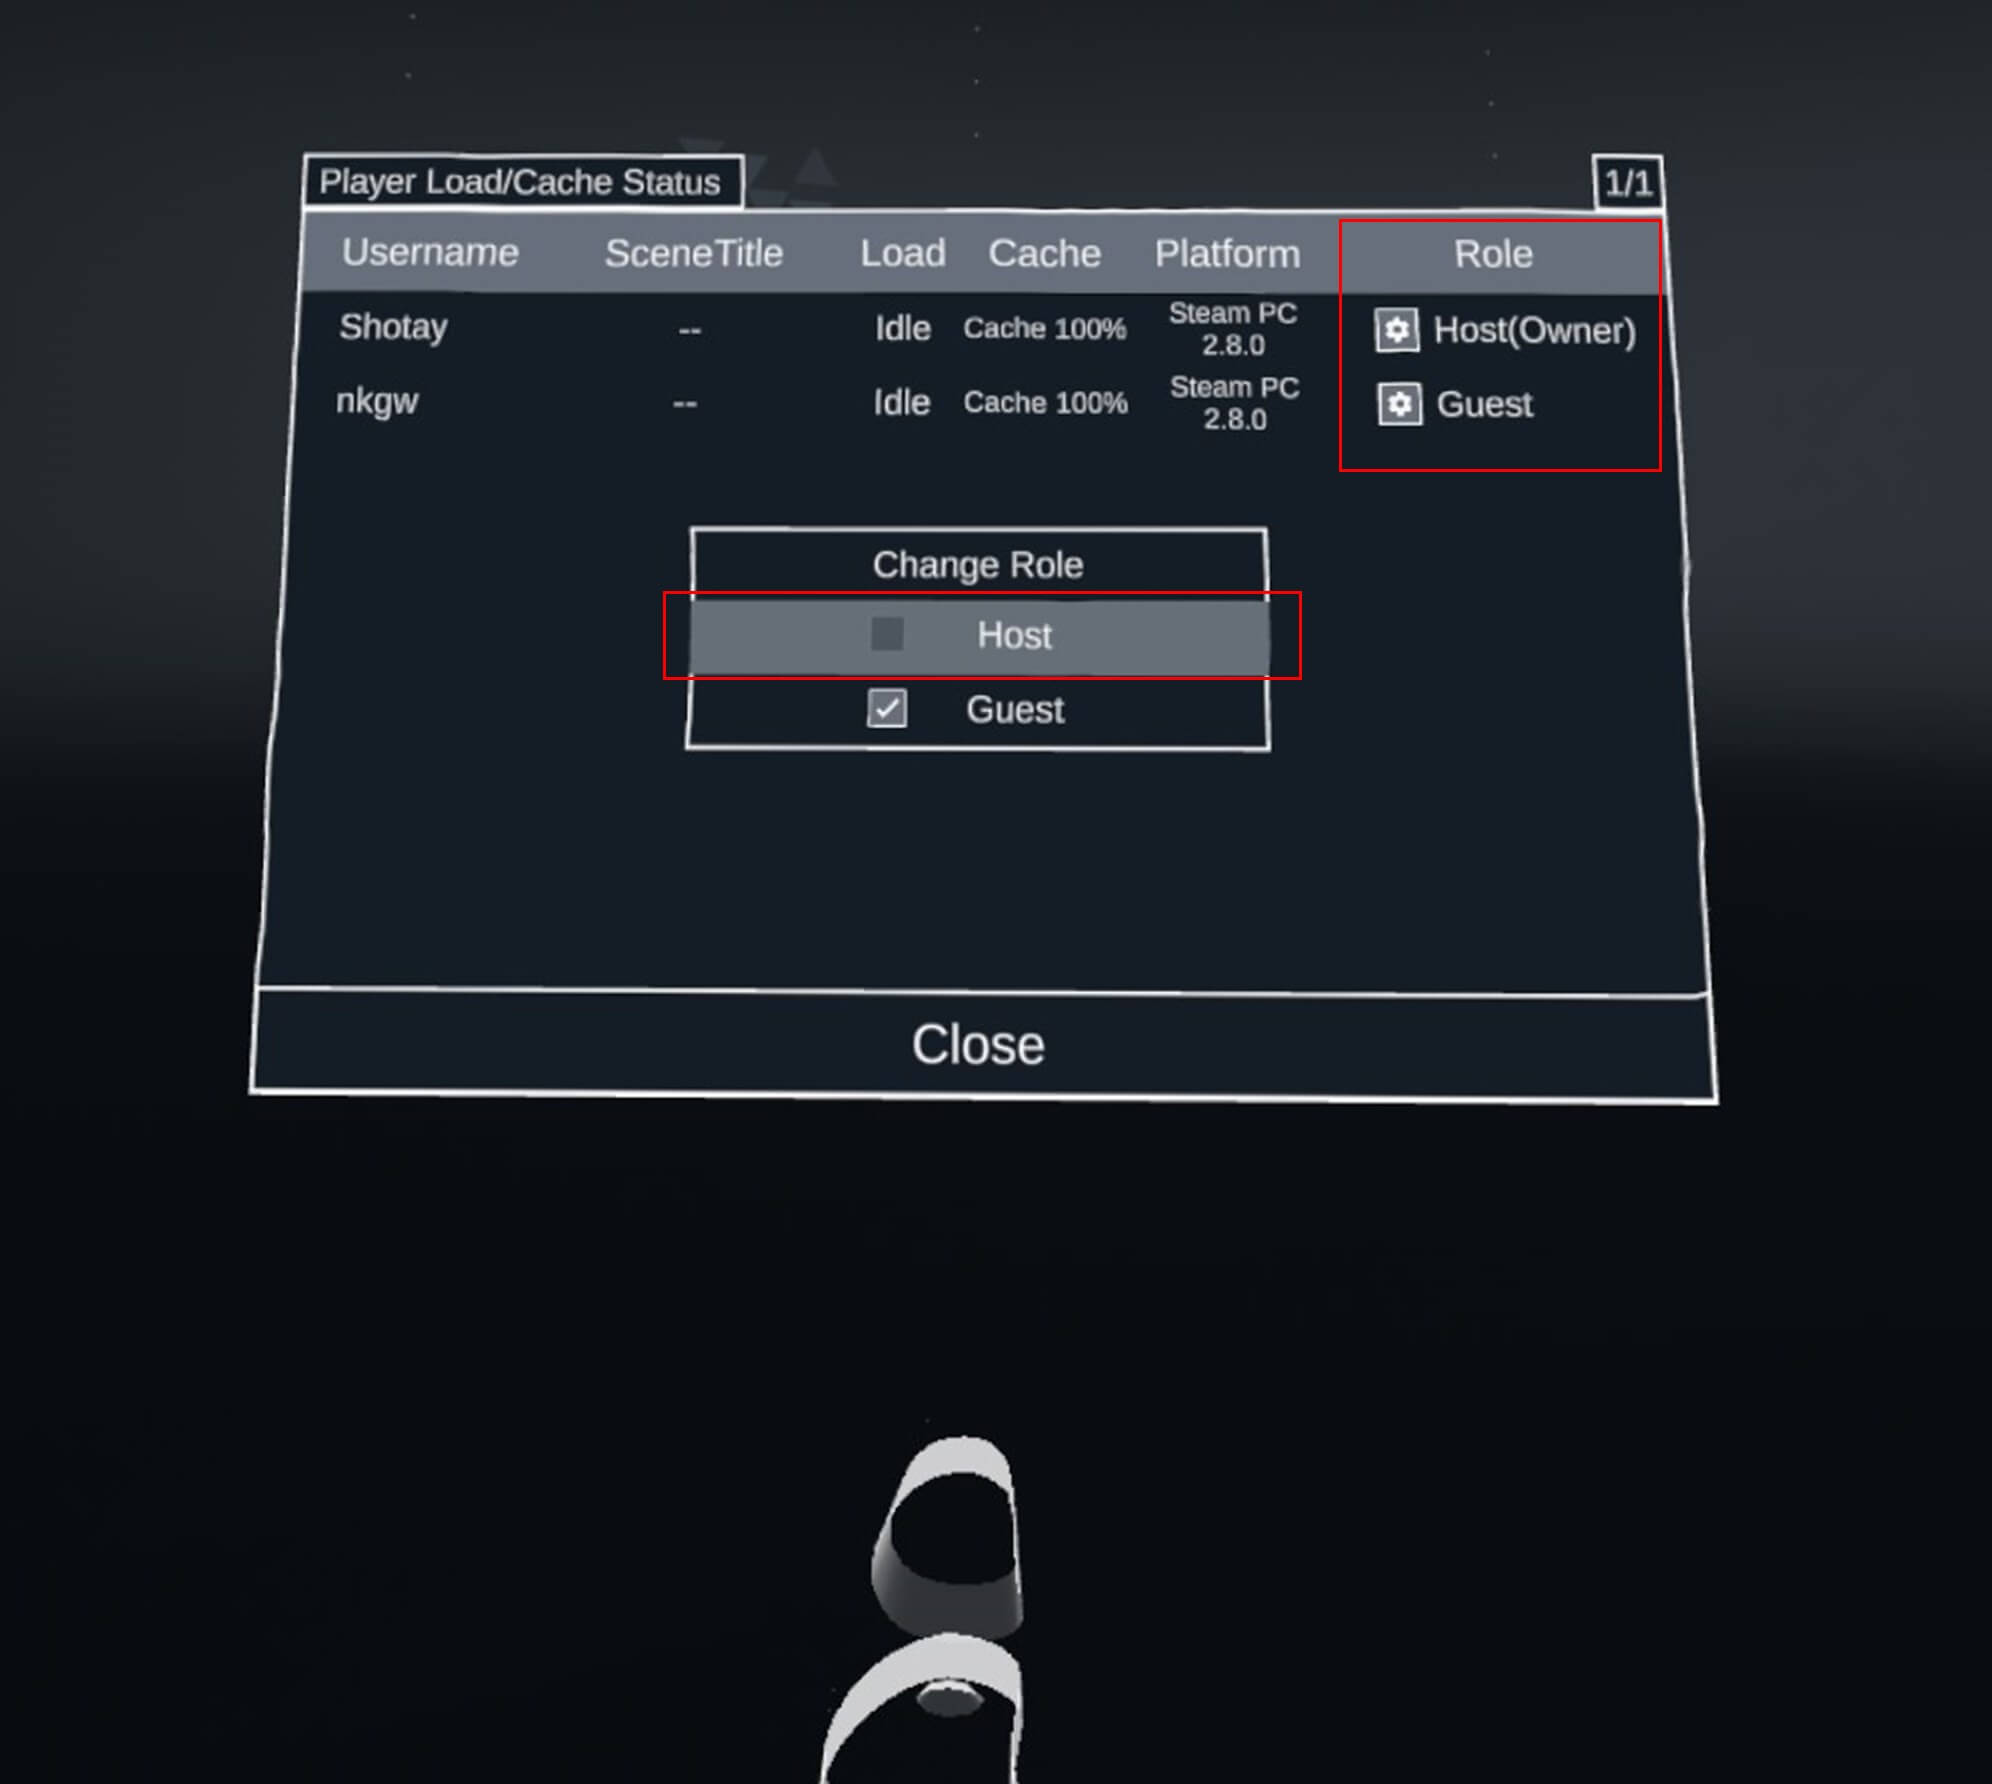
Delegate host authorities to guests.
Note that even if you delegate host authorities to a participant who join in the Mobile version STYLY app, he/she will not be able to use the host functions.
VRoidHub Link Function (using avatars)
The host can change his or her appearance to the avatar of VRoidHub by connecting with VRoidHub.
Your appearance as seen by other participants will change in the same way (participants in the web version of STYLY sessions will not be able to see your avatar).
You can use this function from the Change Avatar in the UI at hand.
*Change Avatar functionality is currently only available on PCVR. Please try with the following devices
|
App name |
Supported Devices |
|
Steam version STYLY app |
Valve Index |
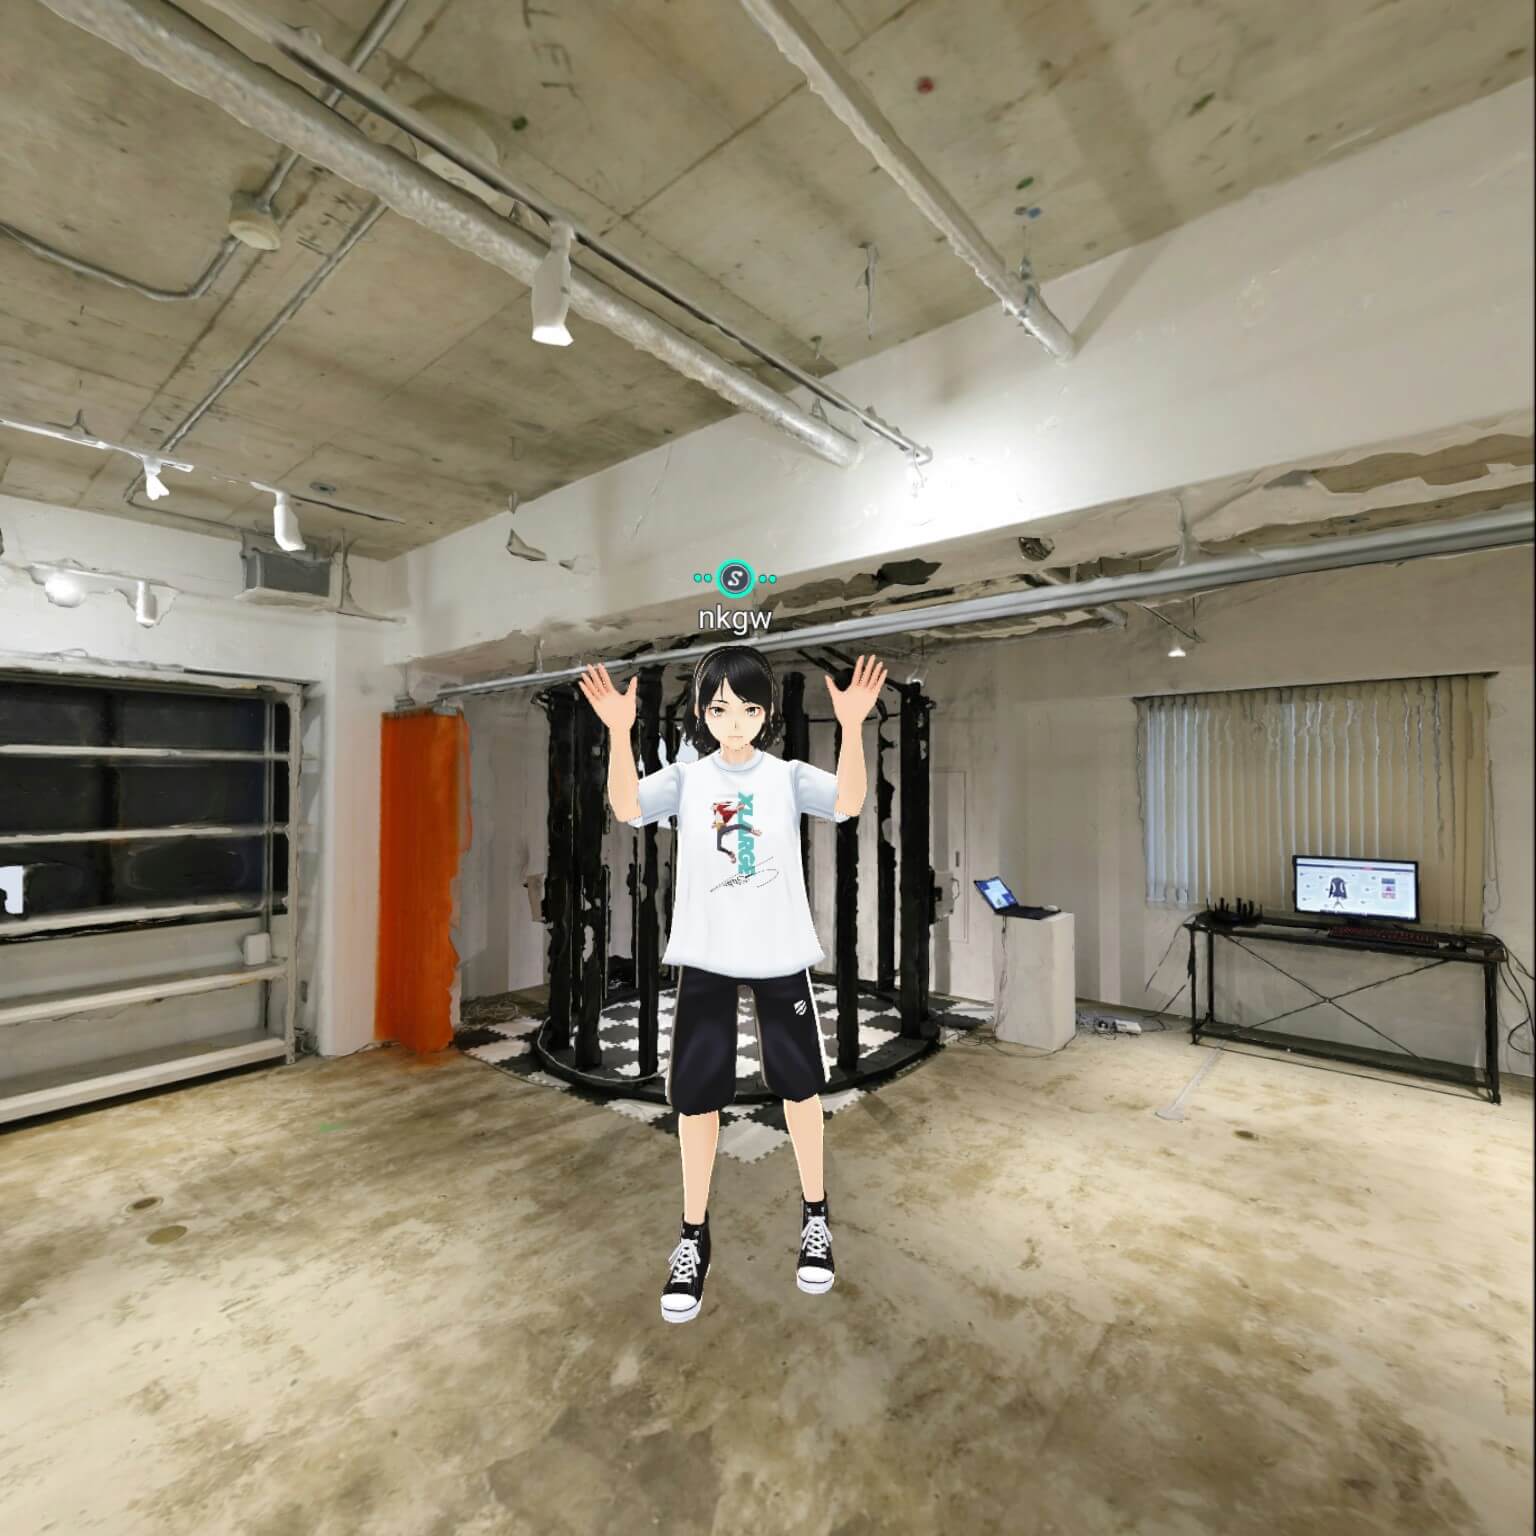
Example of avatar change (objective).
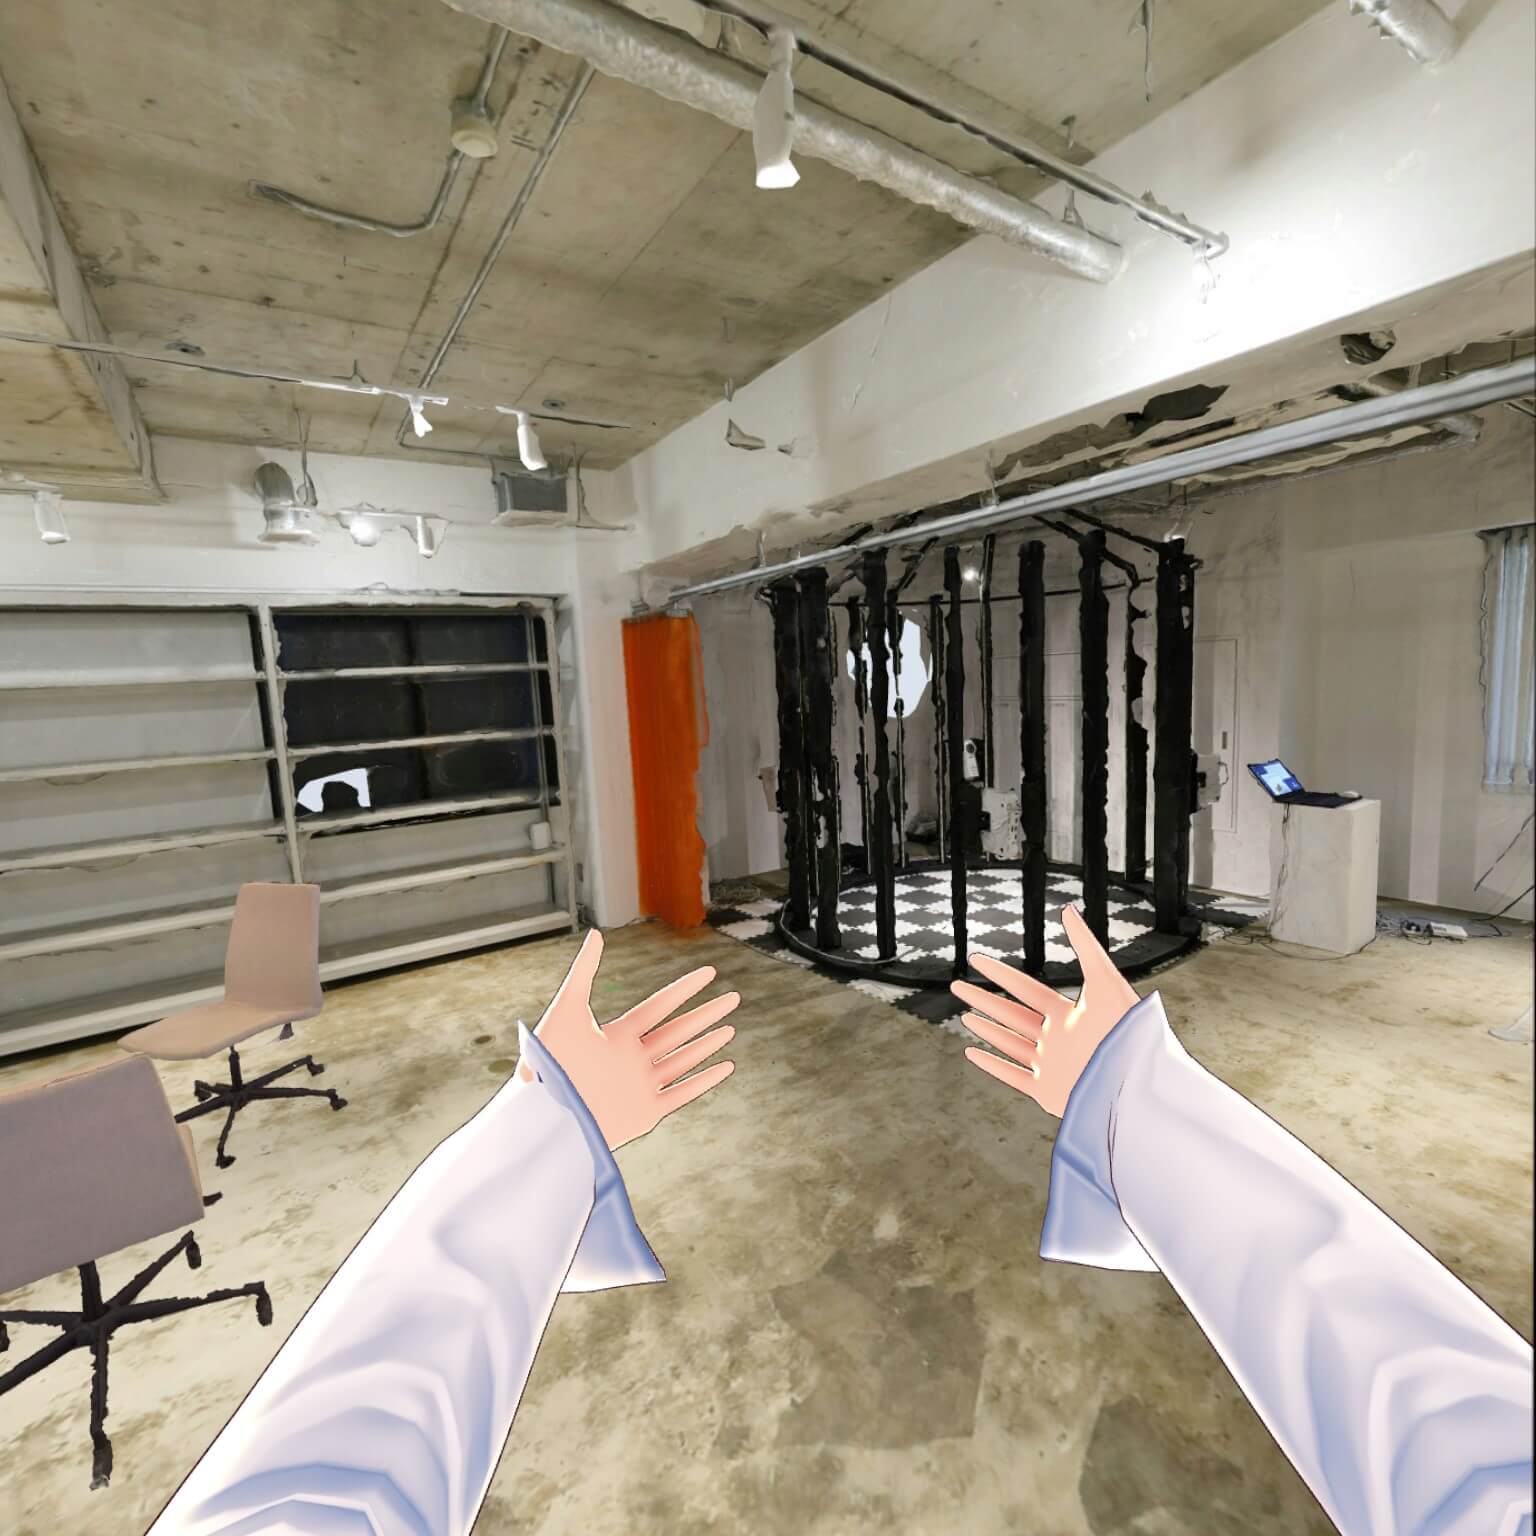
Example of avatar change (subjective).
Select Change Avatar.
Select Menu > Change Avatar.
A warning dialog will appear on your desktop screen (*only the first time it is started).
Warning Dialog Content
To use an avatar of VRoidHub, you must agree to the following conditions:
- Please use only models that you have uploaded yourself.
- Please be aware that if there are malicious users among the participants, there is a possibility that your avatar model data will be leaked.
Click OK.
Click “SELECT AVATAR” on the desktop screen.

The authorization code input screen will be displayed on STYLY and the VRoidHub linkage permission screen will be displayed on the browser.

Authorization code entry screen.
Select your browser and click “Log in and link”.

When the login screen appears, log in with your Pixiv account.
The authorization code screen will appear, and copy the authorization code.

Select Copy.
In the STYLY window, paste the authorization code into the authorization code field and click the login button.

Click Login.
You will be taken to a screen where you can select your avatar.
However, if you haven’t registered an avatar, nothing will be shown in the Yours section.

Select an avatar of your choice.
About Avatar Registration
Open https://hub.vroid.com/ in your web browser and log in to display your user page.
You can upload a VRM file by clicking the “Submit character” button in the upper right corner.
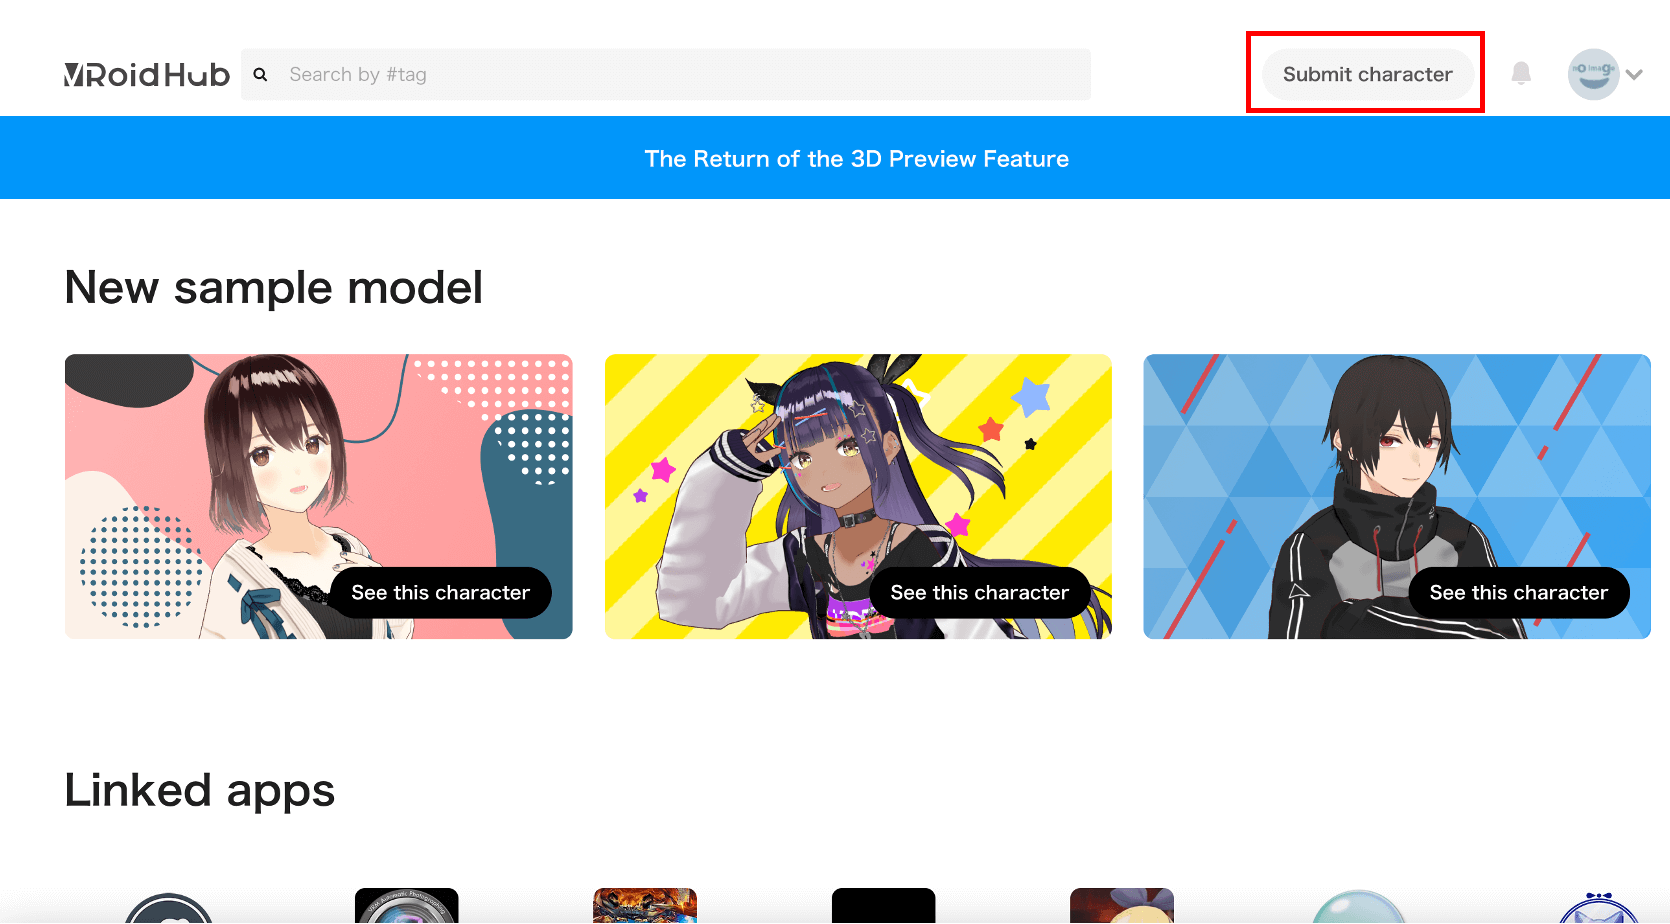
VRoidHub website.
The character upload screen will appear.
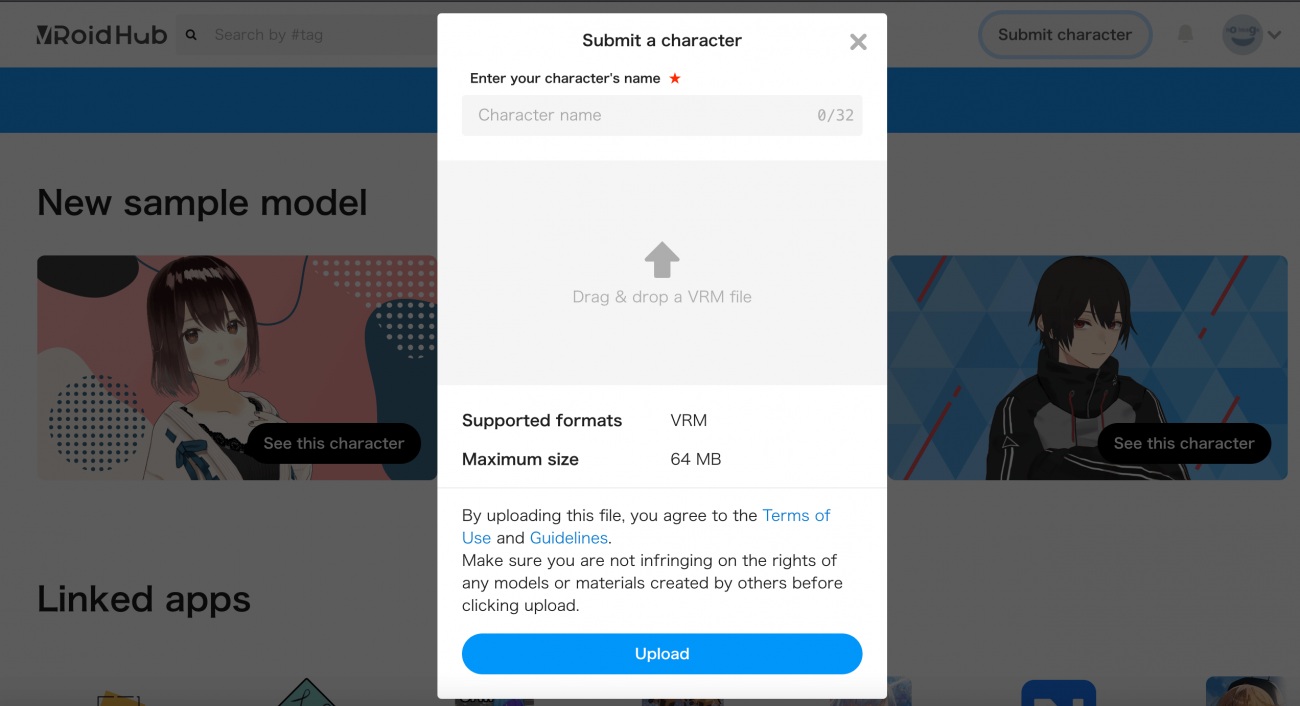
Upload the VRM file.
Click “Upload” to upload the file.
Once uploaded, you will be able to use your avatar STYLY via the Yours page.
*STYLY Session is a beta function. The appearance and function may change without notice.
*The JP/EN language setting on the session management screen reflects the language setting on STYLY GALLERY.
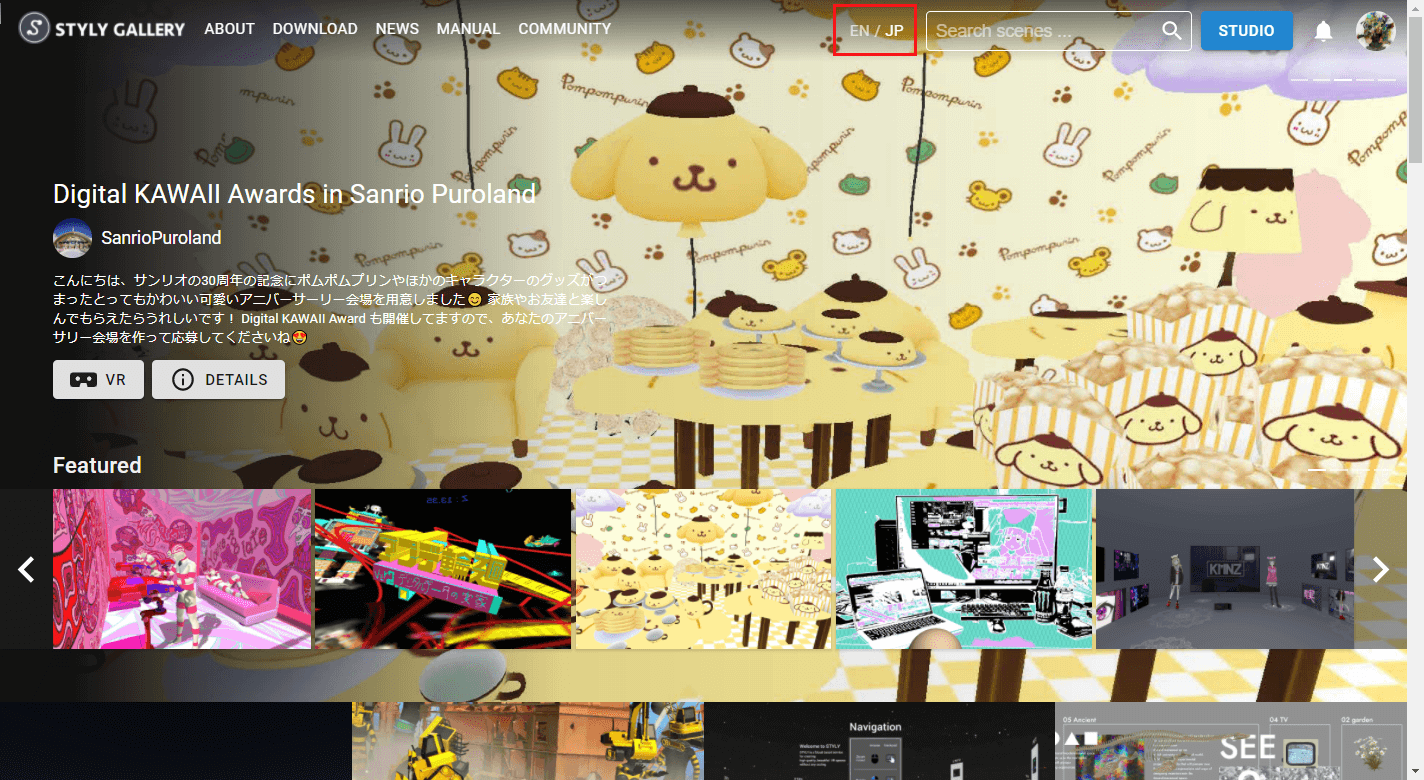
Switch JP/EN.
STYLY Session Function Manual “How to Join a Session” (for guests)
In the “How to Join a Session” section, we introduced the process of joining a session for each device, and how to operate the device during the session.
STYLY Session Function Manual “Overview”
In the Overview section, we introduced the Session functions from the overall understanding to the specific functions.

You can use STYLY FORUM to solve the problem. STYLY FORUM is a place where people can discuss a service or technical issue on STYLY, or provide bug reports on STYLY.
https://en.forum.styly.cc/support/discussions