In this article, I would like to show you how to download 3D modeling software “SketchUp”, how to create your modeling, and how to upload it to STYLY.
I’ll show you how to download SketchUp, how to create a model, and how to upload it to STYLY. I’ll also show you how SketchUp is special compared to other 3D software.
What is SketchUp?
SketchUp is a 3D modeling software.
There are two types of SketchUp: one that you download as an application, and one that is a service that you can use on the web. This time, I’d like to use the free downloadable version of SketchUp for 30 days to create my modeling. Of course, you can proceed with the web version or the paid version.
Click here to access the downloadable version of SketchUp. (English)
Click here for the Japanese version.
Access to the web version of SketchUp is here. (English)

SketchUp home screen
Download SketchUp
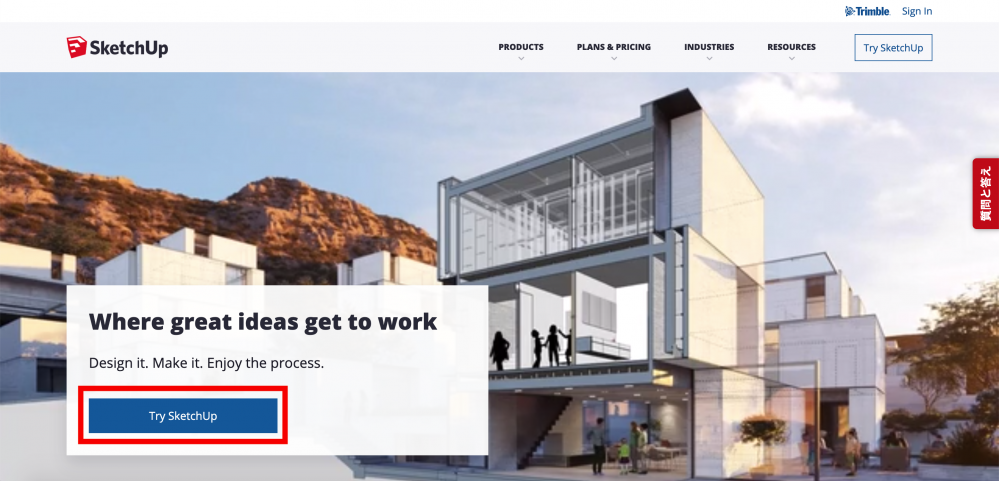
Access the official SketchUp website, and click “Try SketchUp” in the image below.
You can do the same thing with the Japanese version, but this time we are using the English version.
Download SketchUp (1)
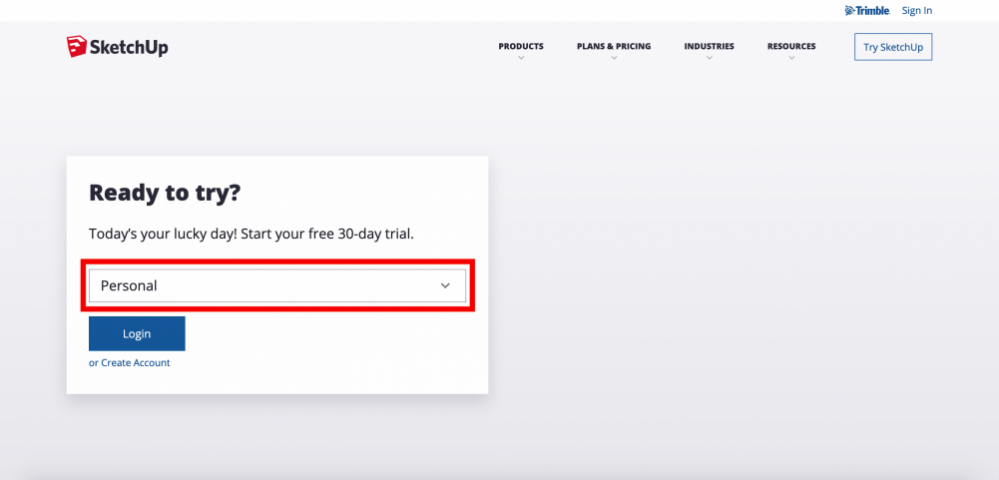
At this point, SketchUp will ask you what you want to use it for, so select the closest option. In this case, select “Personal” and proceed to login.
Download SketchUp (2)
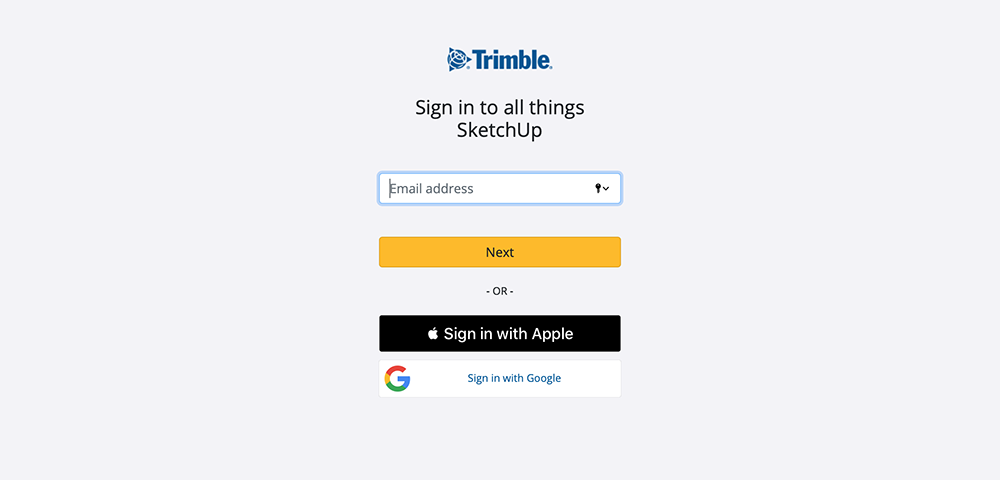
Enter your email address, or sign in with your Google account or Apple ID to create an account for SketchUp.
Download SketchUp ⑶
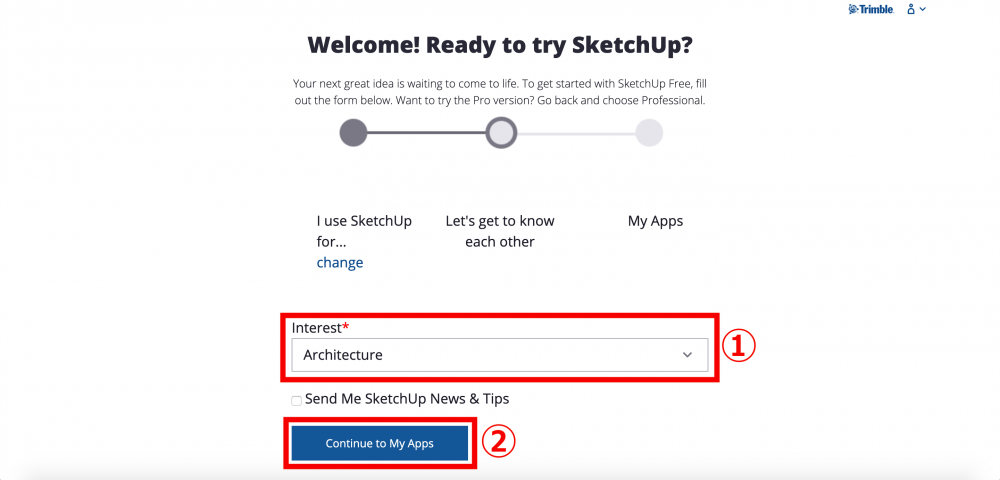
In ①, select your area of interest. If you wish, check the box to receive SketchUp-related news and information. In ②, click “Continue to My Apps” to continue.
Download SketchUp (4)
As I mentioned at the beginning of this article, SketchUp has two types of apps: apps that you download to your computer and services that you can use on the web. This time, we will download the downloadable version of SketchUp, which is shown in the red frame.
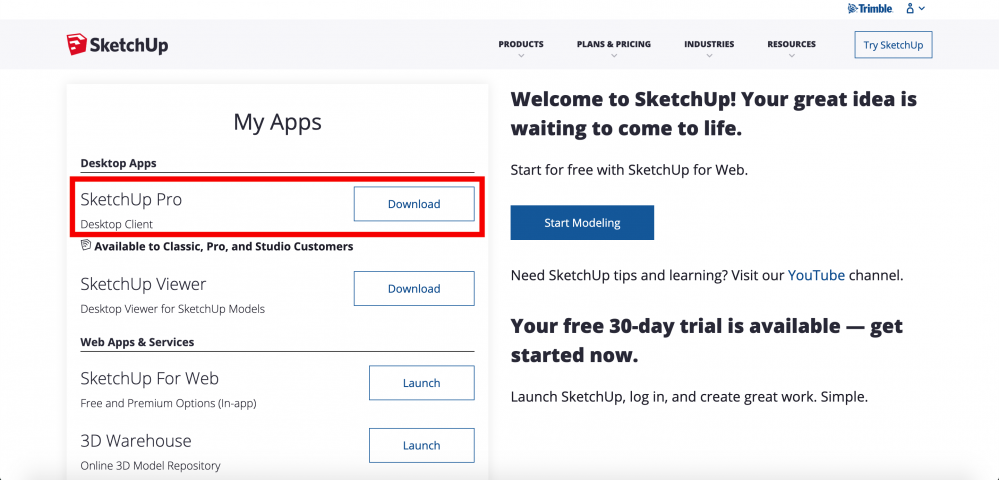
Downloading SketchUp (5)
The SketchUp installer will then download as a zip file named SketchUpPro-2020.zip. Unzip it and then run the installer.
Click the OK button to start the installation.

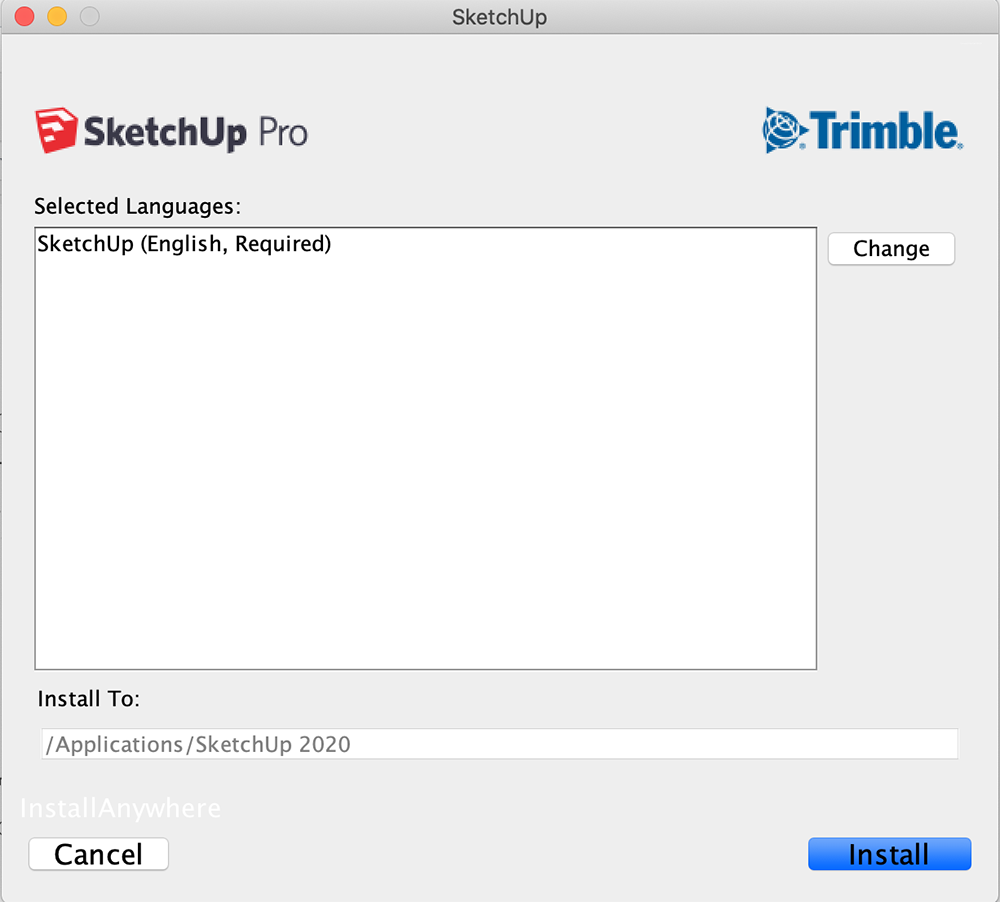
Download SketchUp (5)
The language and location of the installation will be displayed.
Click “Change” to go to the language selection screen.
If there are no problems, click the Install button.
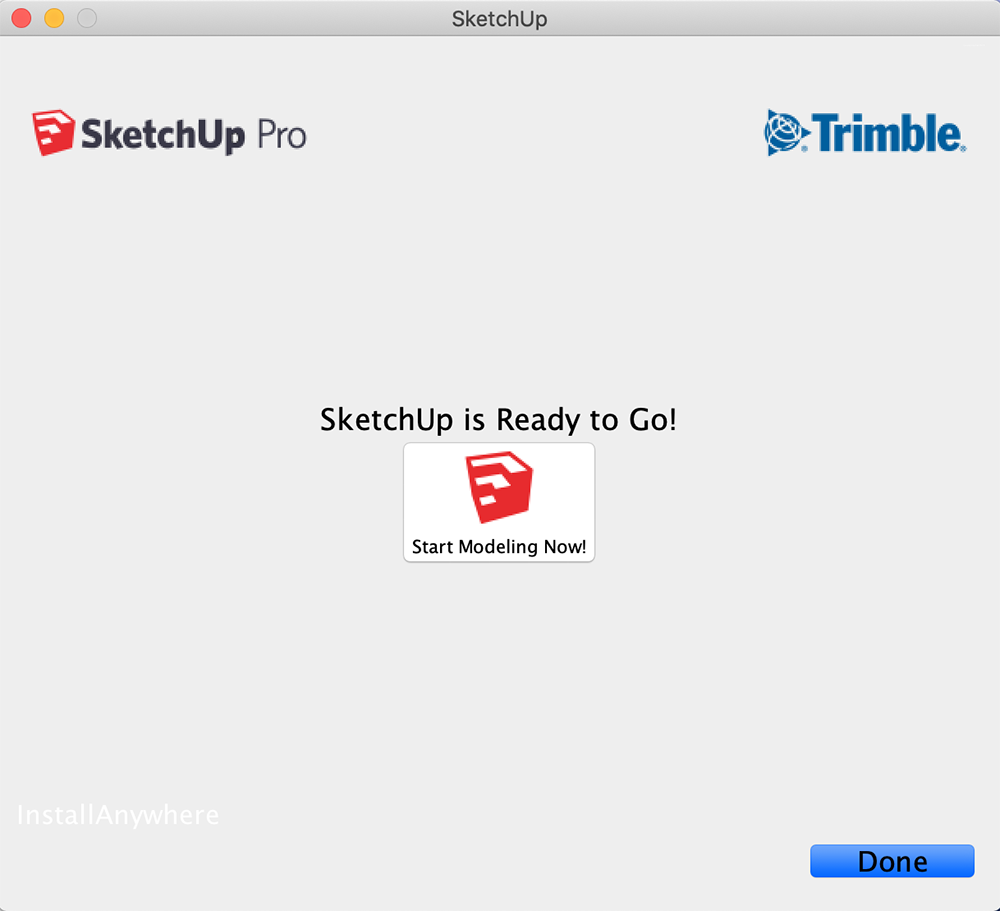
Downloading SketchUp (6)
Click Dane to close the installer and start SketchUp from the application folder.
Download SketchUp ⑦
Then you will see a pop-up asking for your consent as shown below. Check the agreement checkbox at the bottom, and press “Continue” to continue.
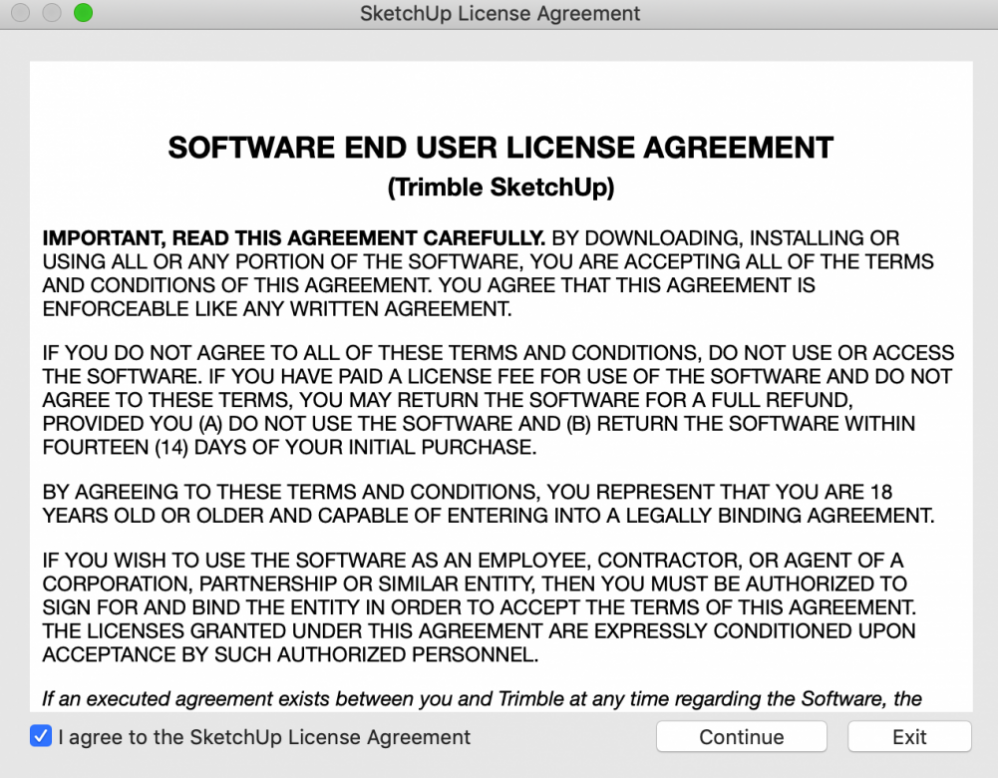
SketchUp License Agreement
Once SketchUp is launched, sign in to SketchUp. Enter the email address, Google account, or Apple ID you entered earlier.
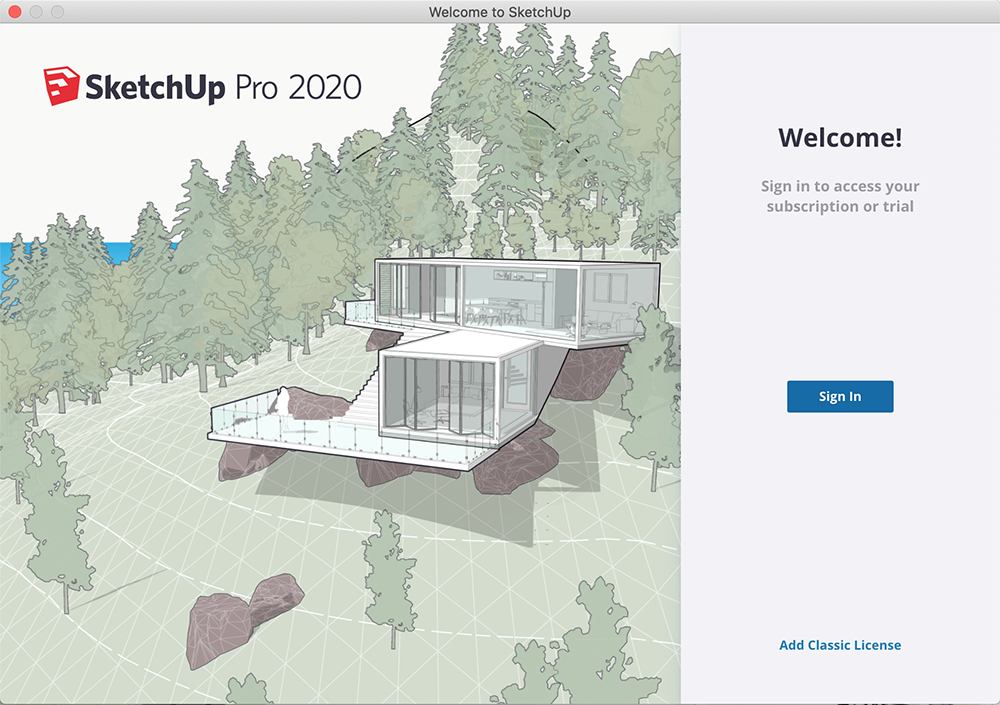
Sign in to SketchUp
By the way, the web version of SketchUp looks like the image below. If you want to check the digest, go to Start tour, and if you want to start modeling immediately, click “Start modeling”.
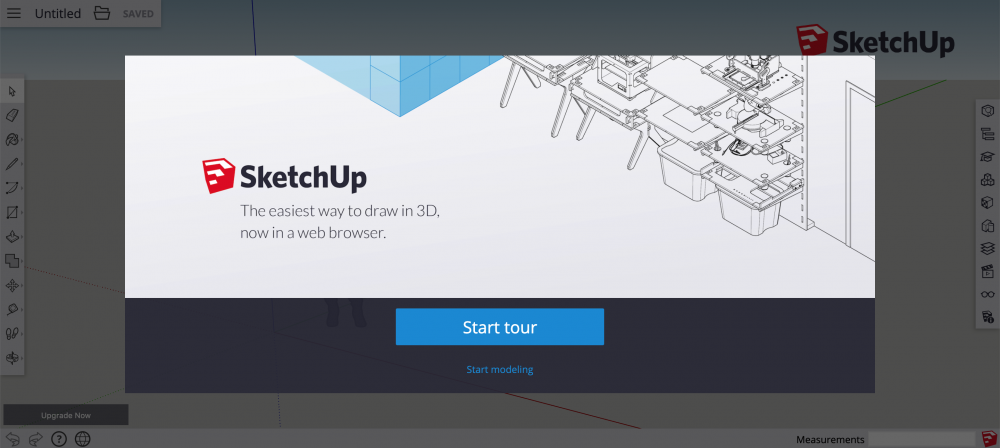
SketchUp_Web version
That’s how to download SketchUp.
Now, let’s actually start SketchUp from the next step.
Basic operation of SketchUp
How to create a new scene
When you start SketchUp, you will see a screen like the one below.
The two scenes on the left are Simple, the default green scene. They are divided into inches and meters. The four gray scenes on the right, called Architectural, are for architectural drawings.
This time, since the content is for SketchUp beginners, I used metric units for the simplicity. If you are more comfortable with architectural notation, you can choose that one.
Once you have decided which scene you want to use, click on the icon to automatically generate the corresponding scene.
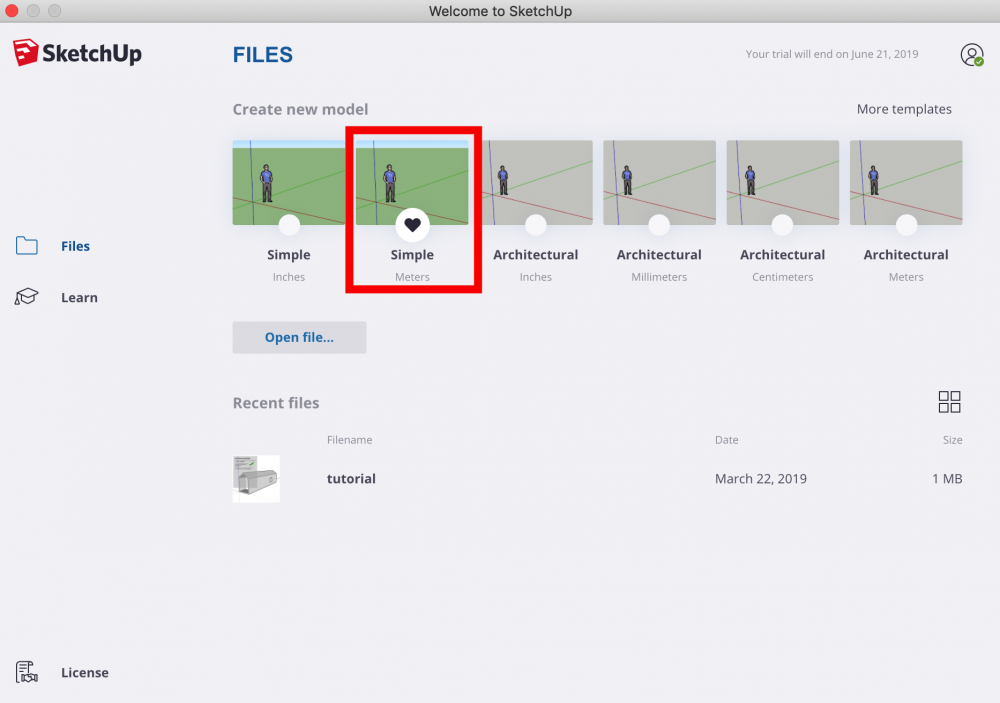
SketchUp scene selection (1)
You can also select File→New Form Template… from the menu bar. in the menu bar to generate a scene in the same way.
In addition to the templates that appear automatically by default, there are various other templates available here, such as for floor plans, interiors, woodworking, 3D printing, etc. Select a scene according to your purpose.
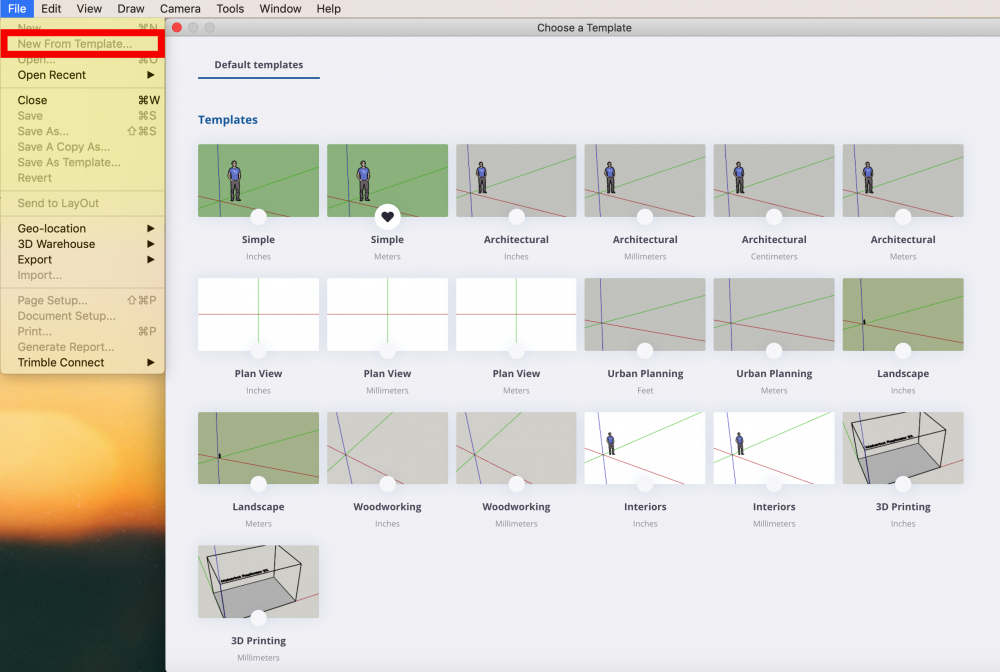
SketchUp scene selection (2)
The image below is a scene created by SketchUp.
1) Toolbar > Tools menu for 3D modeling
(2) Work area > Displays the created model, tool effects, etc.
The UI is not much different from other 3D software, but I think SketchUp is easy to use for beginners because of its simple icons and colors.
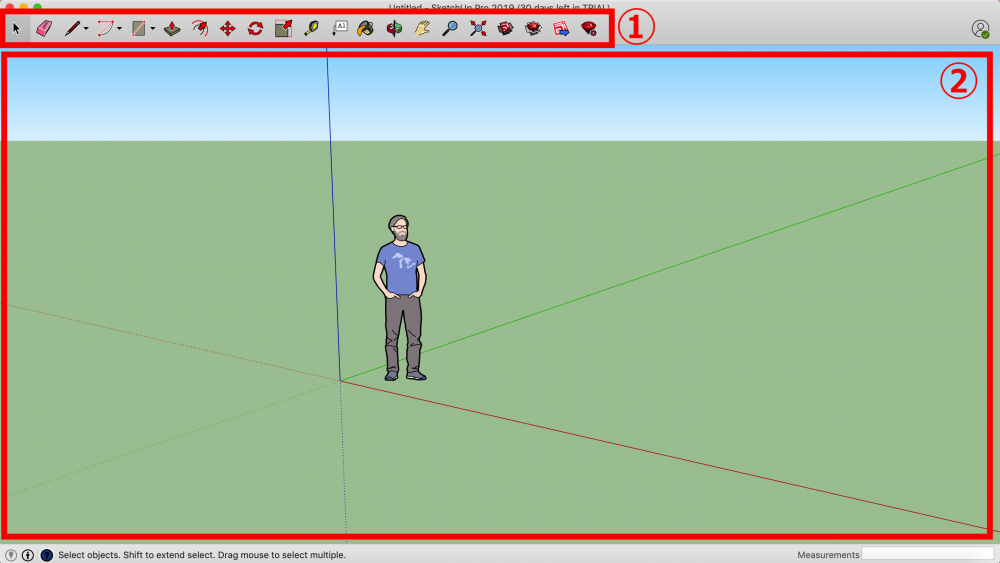
SketchUp new scene (Simple, Meters)
Basic mouse operations in SketchUp
When working with SketchUp, it is recommended to use the mouse because the middle button is convenient.
You can also work with a trackpad, but it’s tedious to switch from one toolbar to another, so let’s use the mouse!
Rotate > Hold down the middle button and rotate
To rotate, move the mouse over the scene while holding down the middle button.
Zoom > Wheel Middle Button
Wheel the middle button as if you were scrolling to zoom in and out of the scene.
Pan > Middle button + Shift
Press the middle button + Shift to pan while keeping your eyes fixed on the scene.
Creating a model in SketchUp
Now that everything is ready, let’s start creating the model. First, select Rectangle from the toolbar.
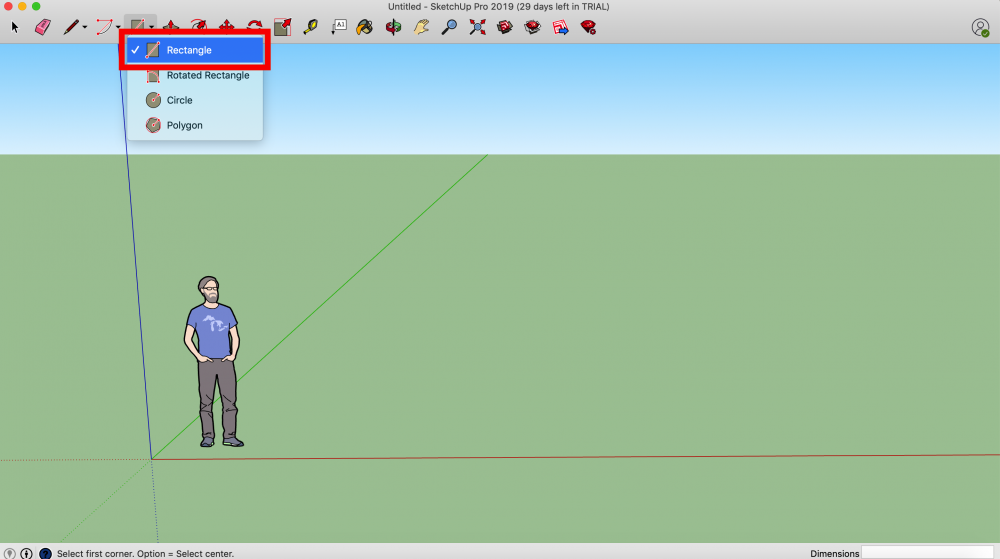
Model creation_01
Draw a rectangle on the Z-axis plane. If it is difficult to draw, rotate the scene to find the ground.
After drawing the rectangle, enter 4m, 4m in the Dimentions box at the bottom left of the screen.
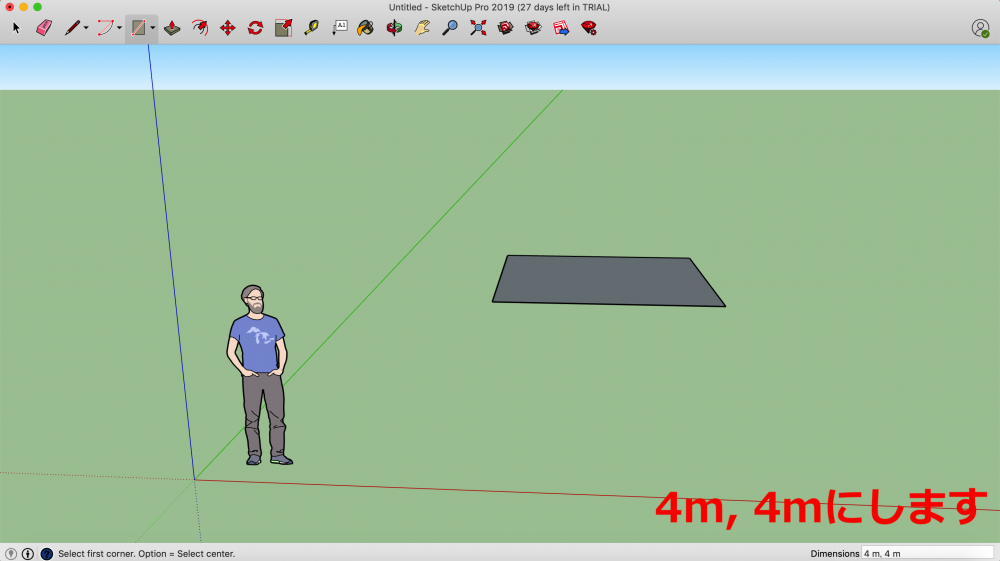
Model Creation_02
Select the extrude icon from the tool bar. Keep going.
Select the surface you want to pull up and pull it up. This is basically all you need to do. All you have to do is “draw a line and pull it up. It’s that simple!
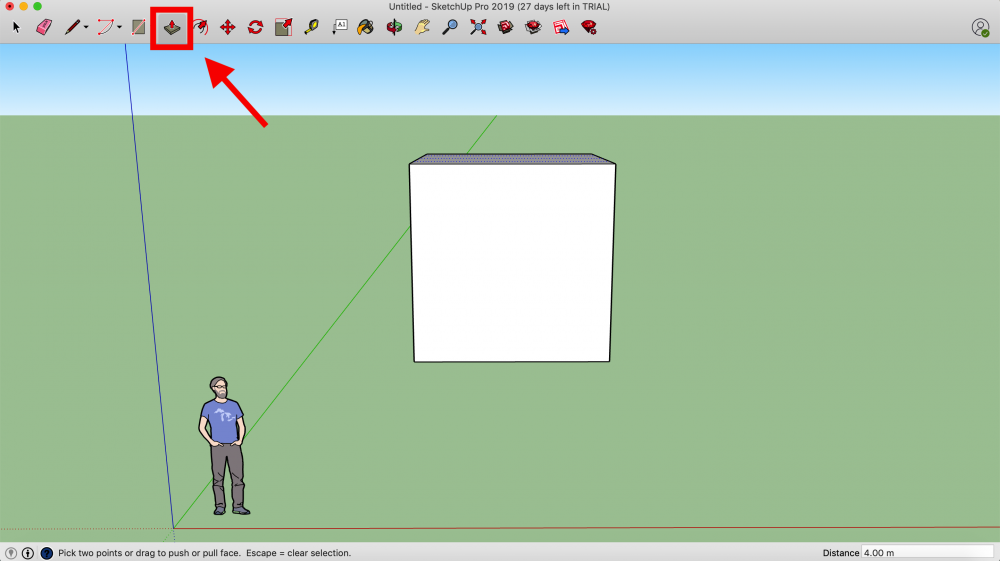
Model Creation_03
Next, select Line from the toolbar.
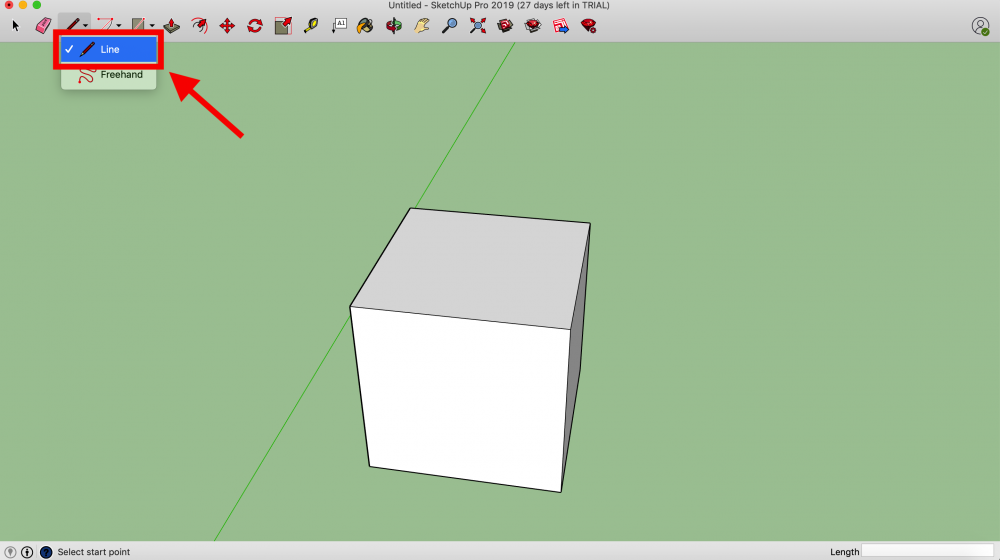
Model Making_04
Continue to add lines to the diagonal of the top surface.
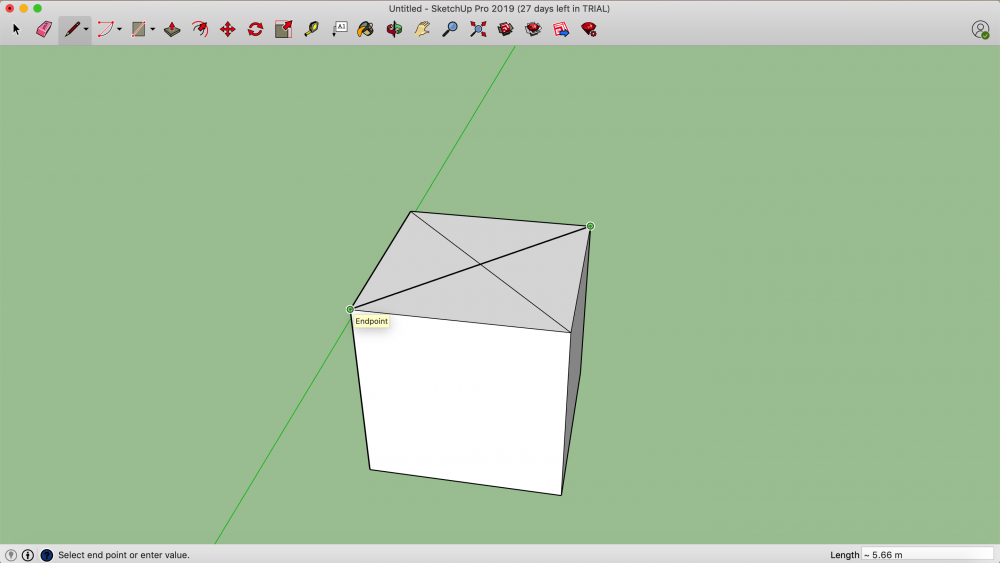
Model Making_05
Next, select the Move tool from the toolbar and pull up the vertices that are crossed by the diagonal lines.
This will create a triangle like the roof.
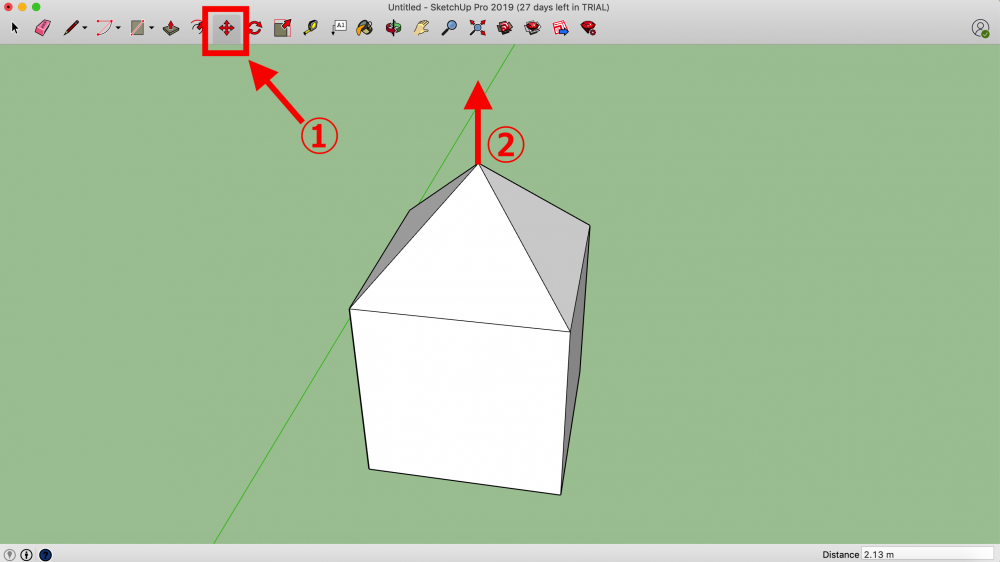
Model Making_06
Next, we will create a window.
Select Circle from the tool bar. Use this to create a round window.
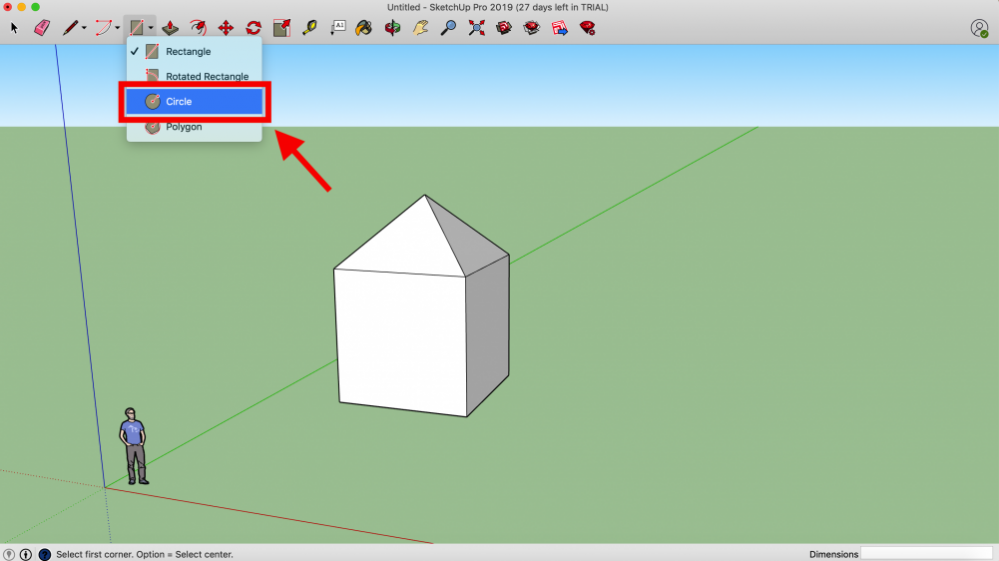
Model Making_07
By making a double circle and extruding the space between the circles, we have created a window frame. This is a large drawing for clarity, but everyone is encouraged to create their own balance as they see fit.
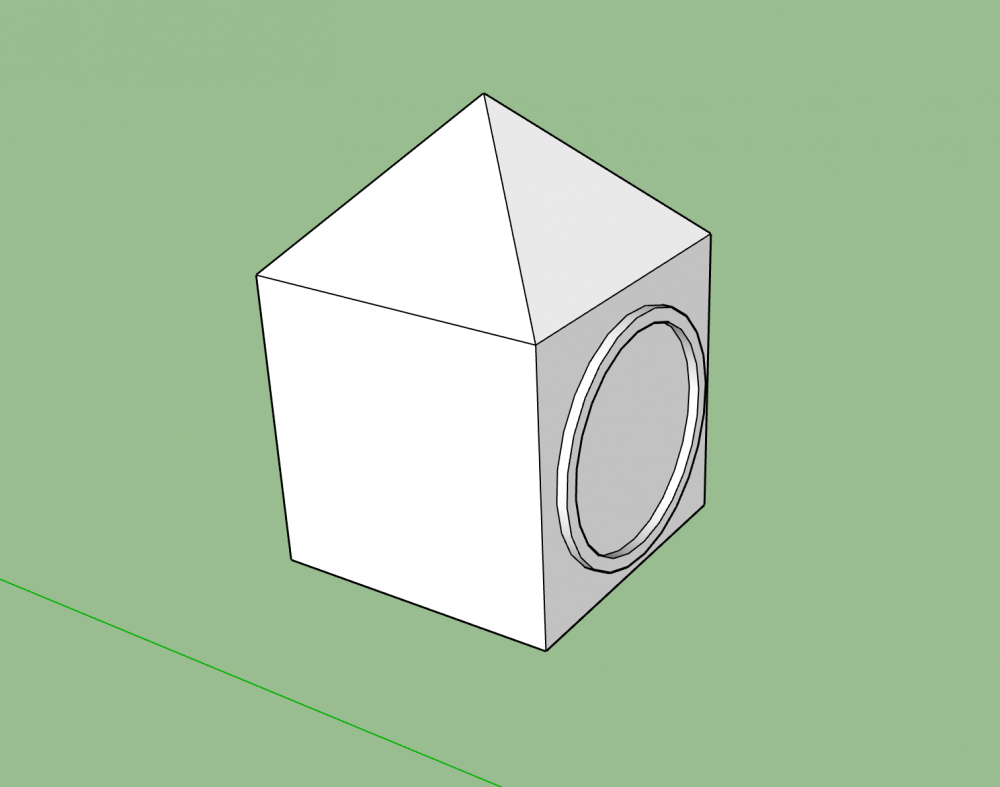
Model making_08
Next, let’s draw the door behind the window. You can follow the same procedure as before.
Please refer to the image below for an idea.
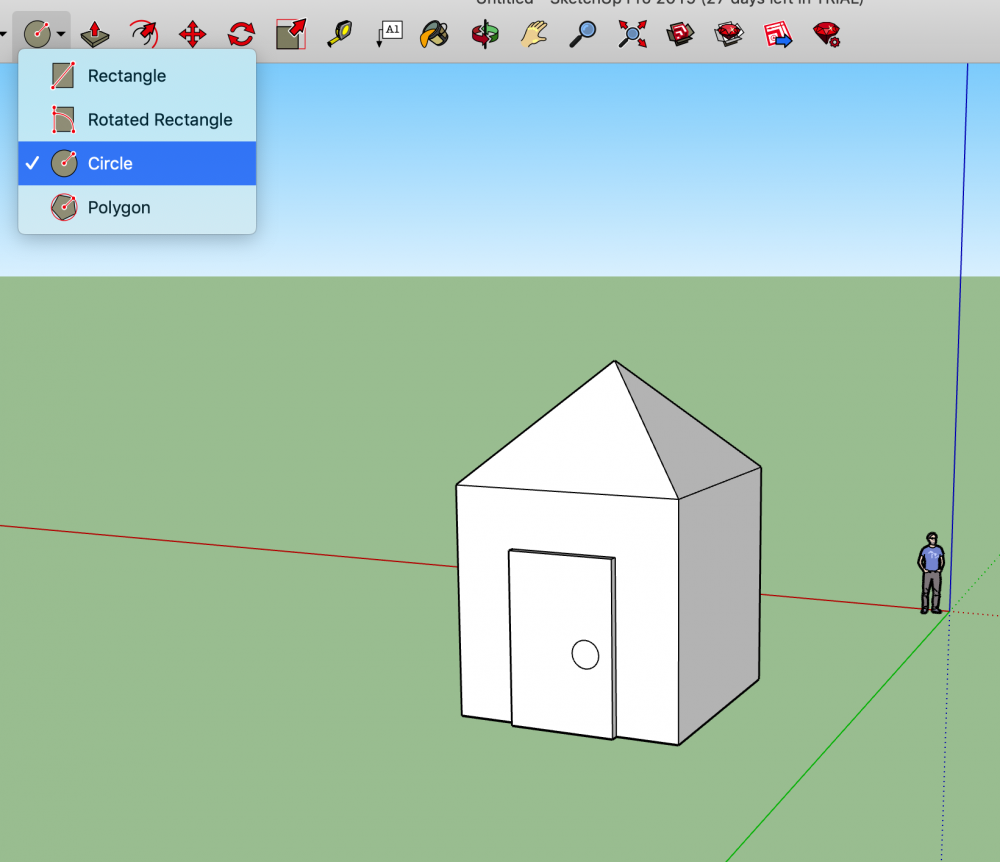
Model creation_09
Next, let’s add color to the model we created.
Select the paint bucket icon from the toolbar, and the Colors palette will appear. Select any color from the palette. The selected color will be displayed in the lower left corner of the palette, and is the color that will be output.
To add a color, simply click on the surface. You can continue to apply the same color by continuing to click on the edge unless you change the color.
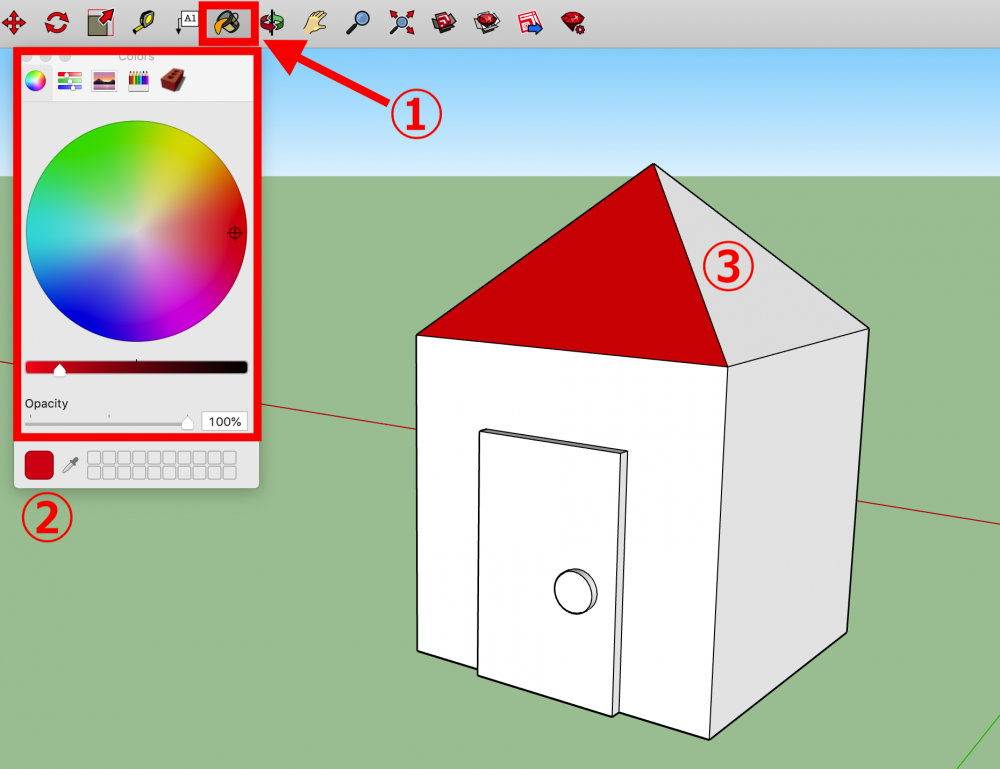
Model creation_10
This is what it looks like when you apply a color to the whole model.
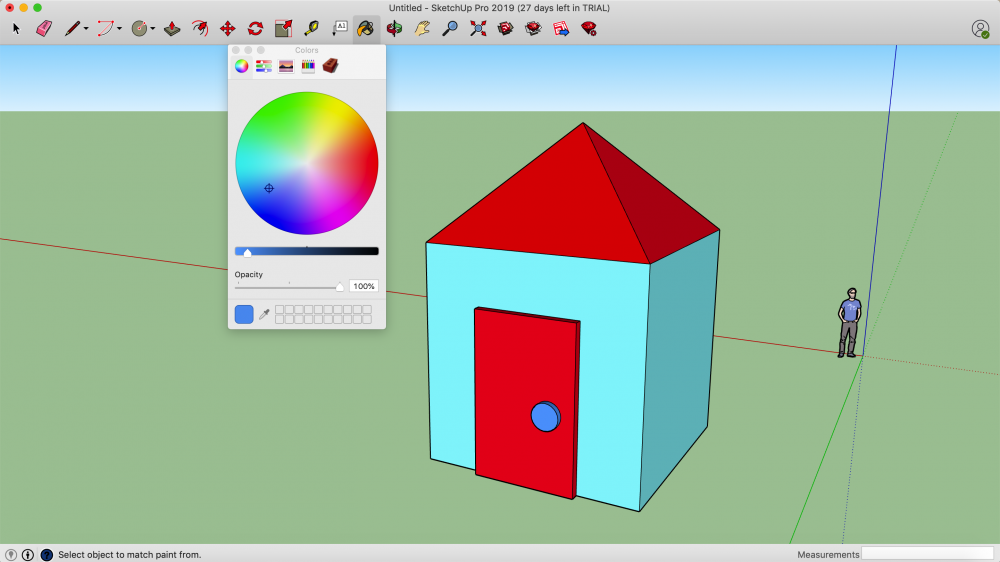
Model making_11
Although we are using plain colors here, there are many textures available by default, such as carpet, brick, rug, water, glass, rock, flooring, tile pattern, etc., which are necessary for architecture. There is a wide variety of them, so you can model close to your image.
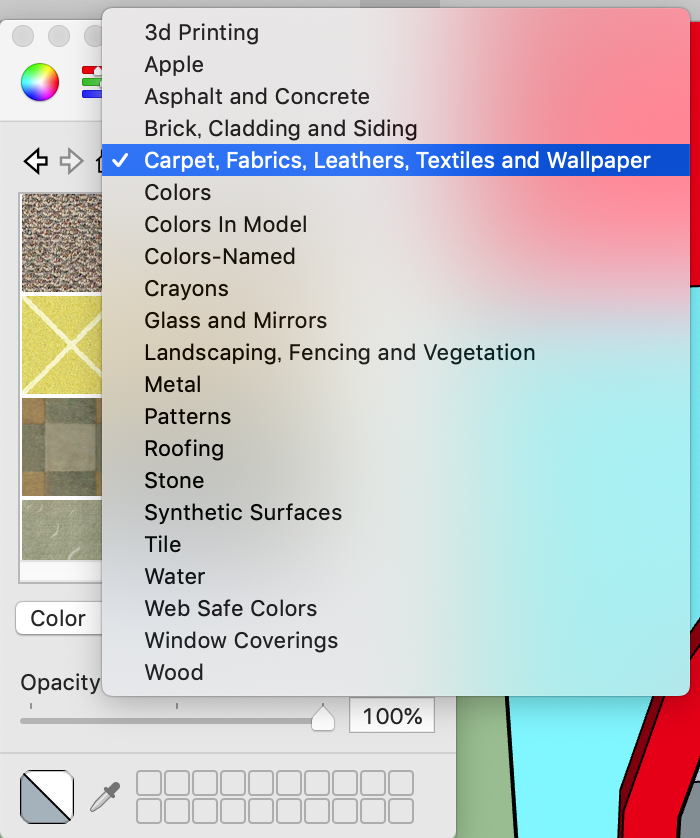
Model Creation_12
The above is a simple modeling in SketchUp.
Exporting the model
Let’s export the model when it is completed.
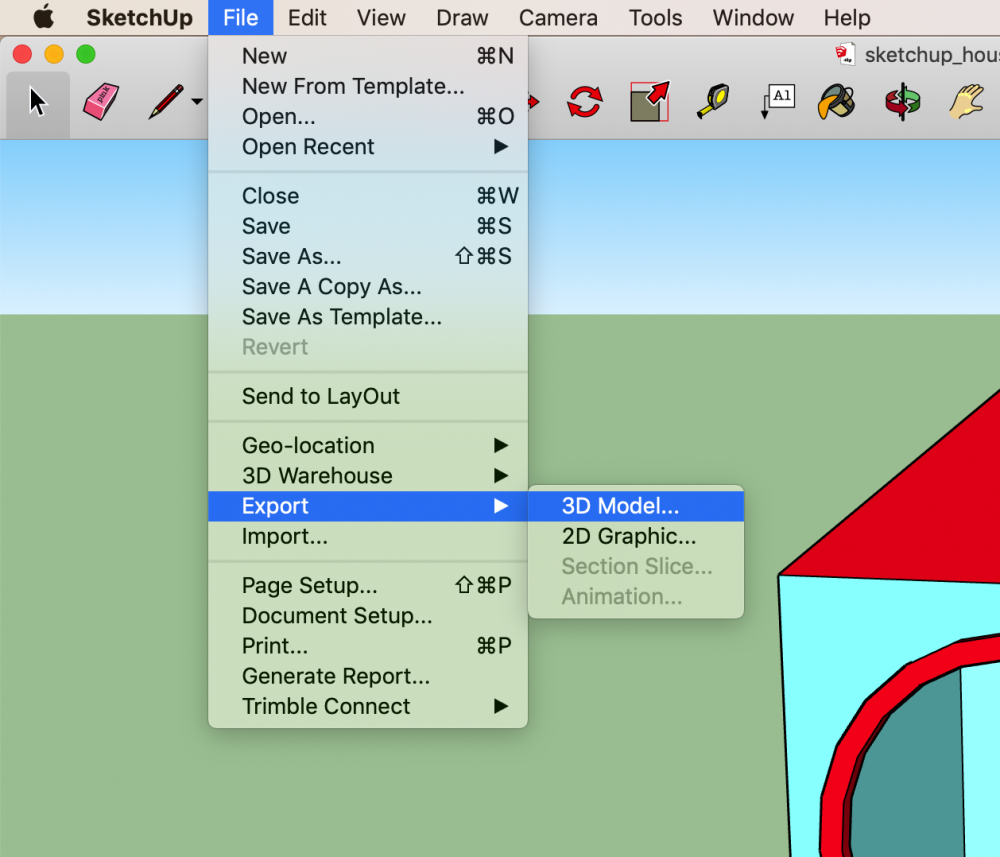
File > Export > 3D Model
Select File > Export > 3D Model.
Exporting a model_01
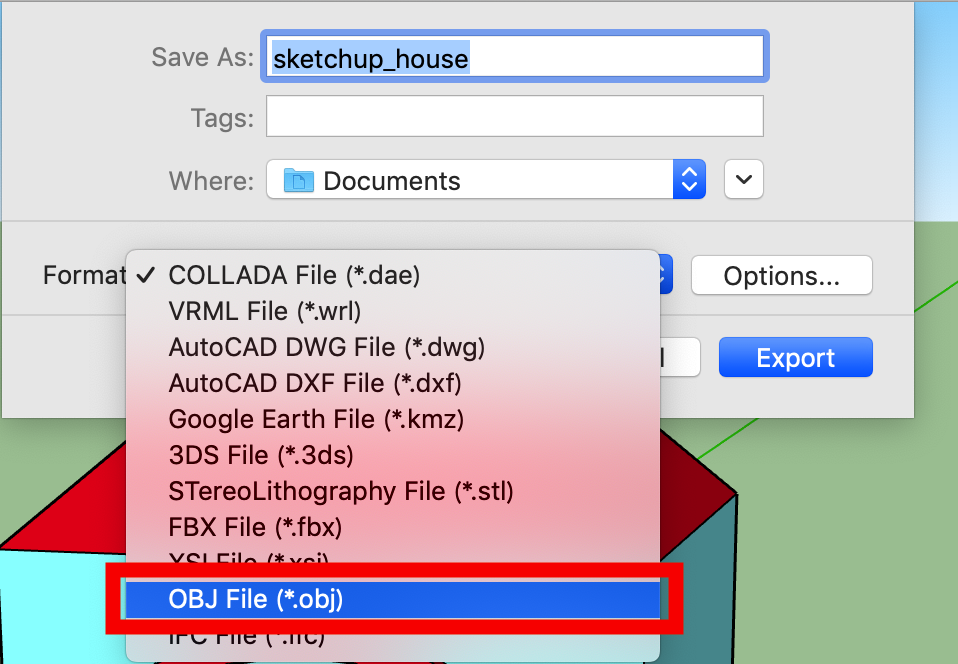
When the export window appears, select OBJ File and proceed to Export.
The model will then be exported as a 3D object anywhere you want.
Exporting a model_02
This is how to export a model. This completes the series of operations from model creation to exporting.
Importing the created model to STYLY
Once your 3D model is ready, let’s put it into STYLY to check the finished model.
Login to STYLY and import the model you created.
Please refer to the following article for the process of creating a STYLY account and logging in.

For information on how to import 3D models, please refer to the following article.

How did you like it?
The UI and operation are quite simple even among 3D modeling software, so some of you may have been able to understand how to operate it somewhat just by playing with it.
In addition, SketchUp has a separate scene called “architectural drawing notation” and default textures such as carpet and window frame patterns, which made me think that it is a 3D software that specializes in creating inorganic models such as architecture and furniture.
It might be interesting to use different software for different purposes of models from the many 3D software available.
Introduction to NEWVIEW SCHOOL ONLINE
NEWVIEW SCHOOL ONLINE is now open! Learn the basics of Unity and PlayMaker, necessary for creating VR/AR content, and learn the process (and creation techniques) for developing attractive content available on STYLY.
Create VR/AR content without writing any programming code.
Professionally supervised Unity courses available.
Explore additional elements, such as photogrammetric production methods and content lightening.
Learn the concept of creating VR/AR content.
