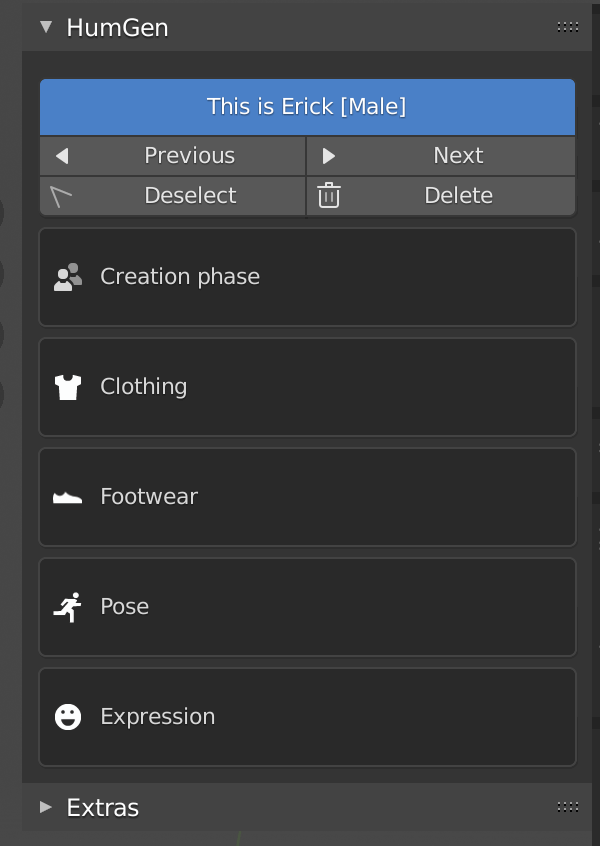
For those of you who want to use original virtual humans in Unity or STYLY, this is a good news article!
I found a paid add-on that allows you to make them in Blender.
A similar software is Daz3D, which I have written about before.
This time, HumGen3D is an add-on for Belnder, so once you download and install it, you can complete your work using only Blender.
Let’s use HumGen3D to create some virtual humans!
The version of Blender used in this article is 2.92.
What is a virtual human?
Virtual humans have been featured in various advertisements lately, so I’m sure many of you have seen them or know about them.
A virtual human is a “non-existent person” made with computer graphics.
They are so real and unique that they are indistinguishable from real people, and even though they are virtual, they blend in with the real world and use social networking sites just like us.
Download and install HumGen3D
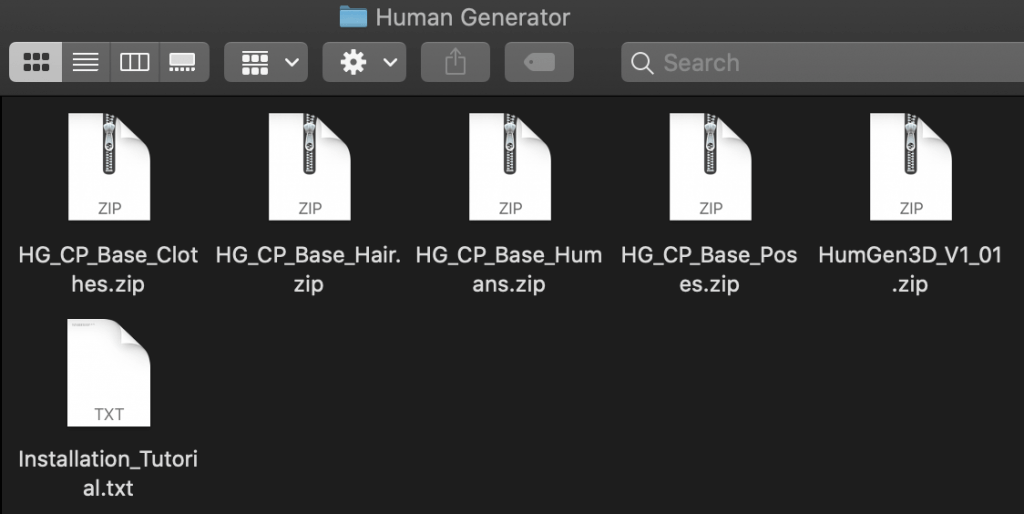
You can download it from here.
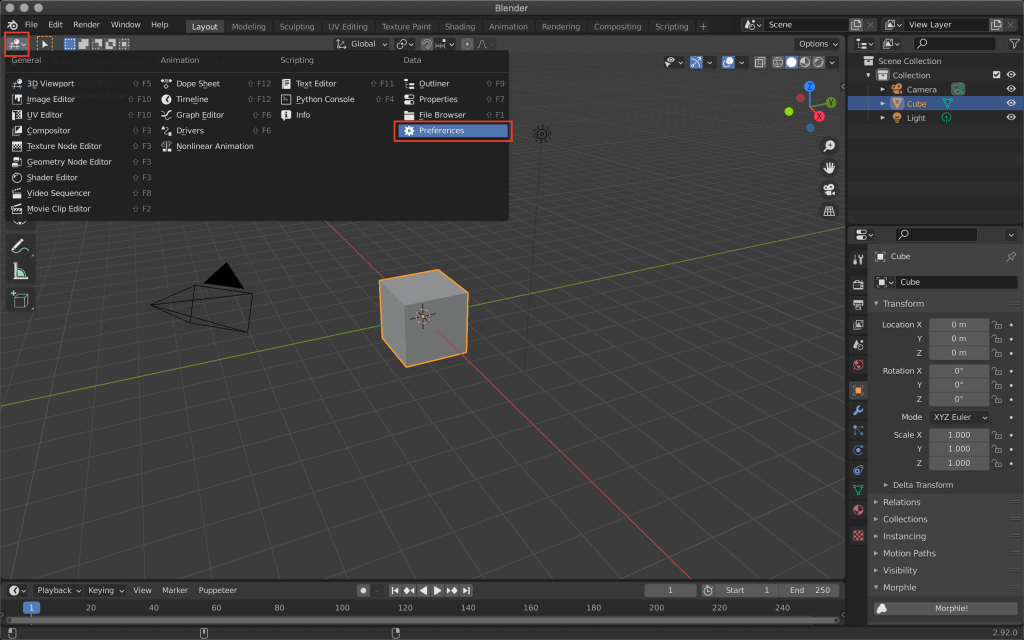
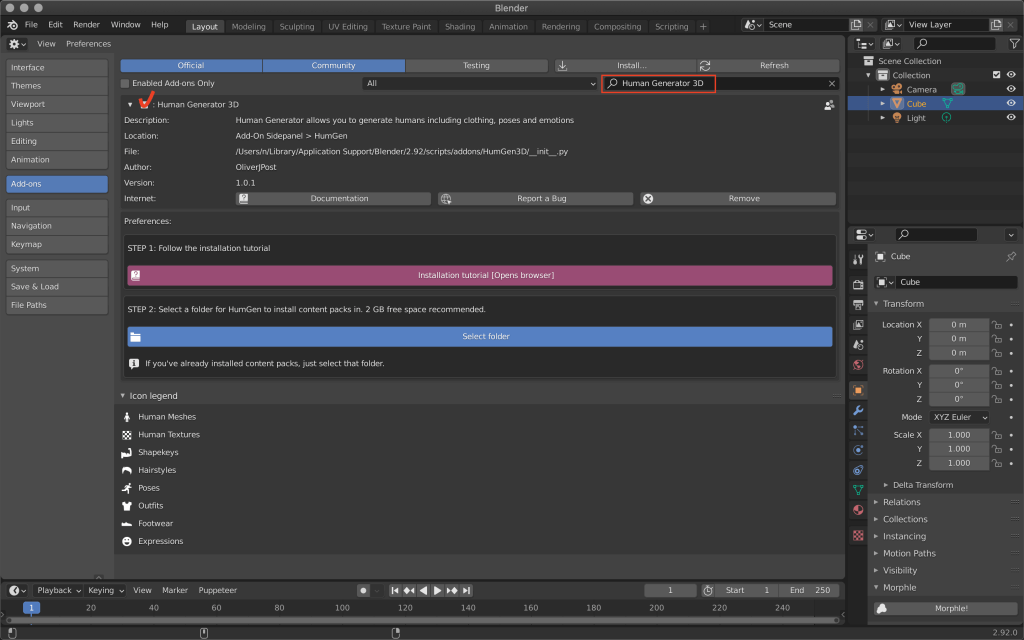
Open Preferences from the top left icon of Blennder.
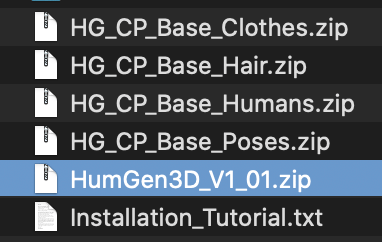
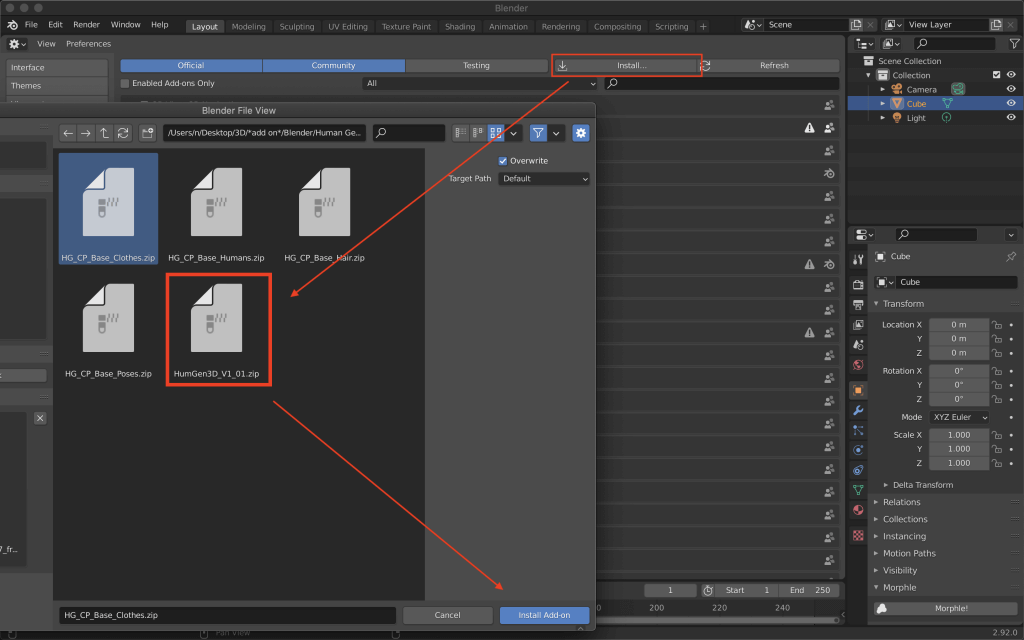
Click “Install”, and install only one zip named HumGen3D_V1_01.zip in the one you just downloaded.
Check the installed add-on, and the screen will change as shown below.
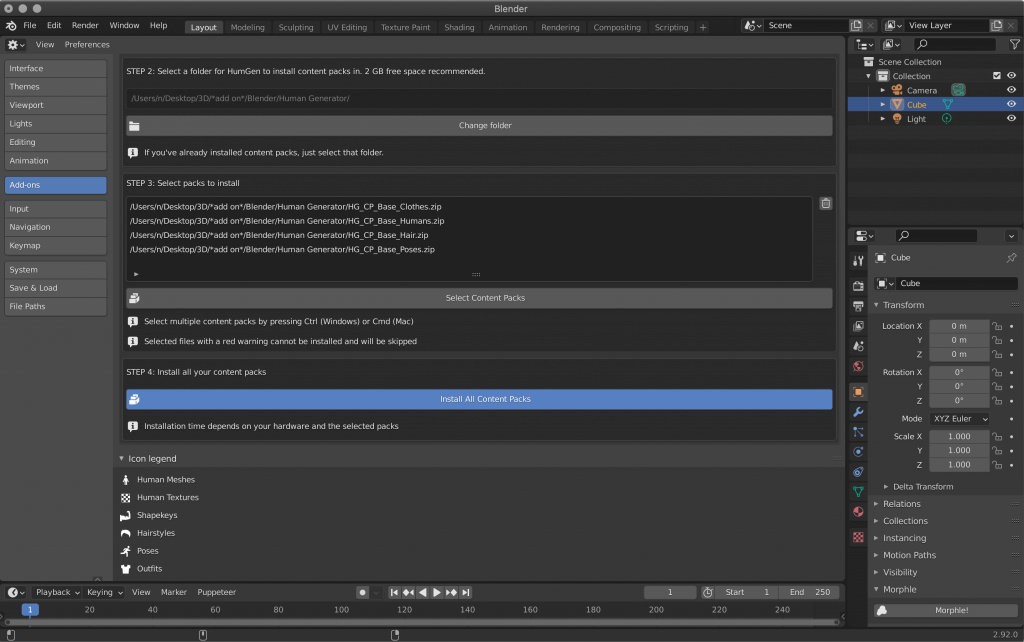
Click on the blue “Select Folder” button and choose where you want to save the HumGen content pack.
Note that you need to have 1GB of free space.
I specified the downloaded zip folder for clarity.
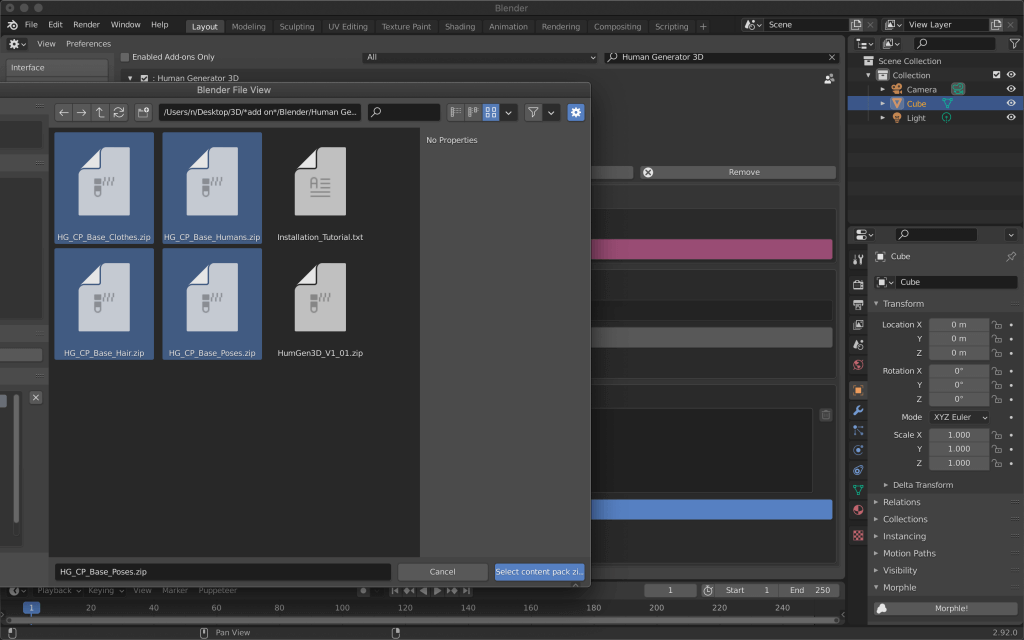
After that, click “Install All Content Packs”, select the ZIPs you just downloaded (four ZIPs starting with HG_CP), and install them.
And finally, click “Install all content packs” to complete the entire installation.
Let’s try it out right away!
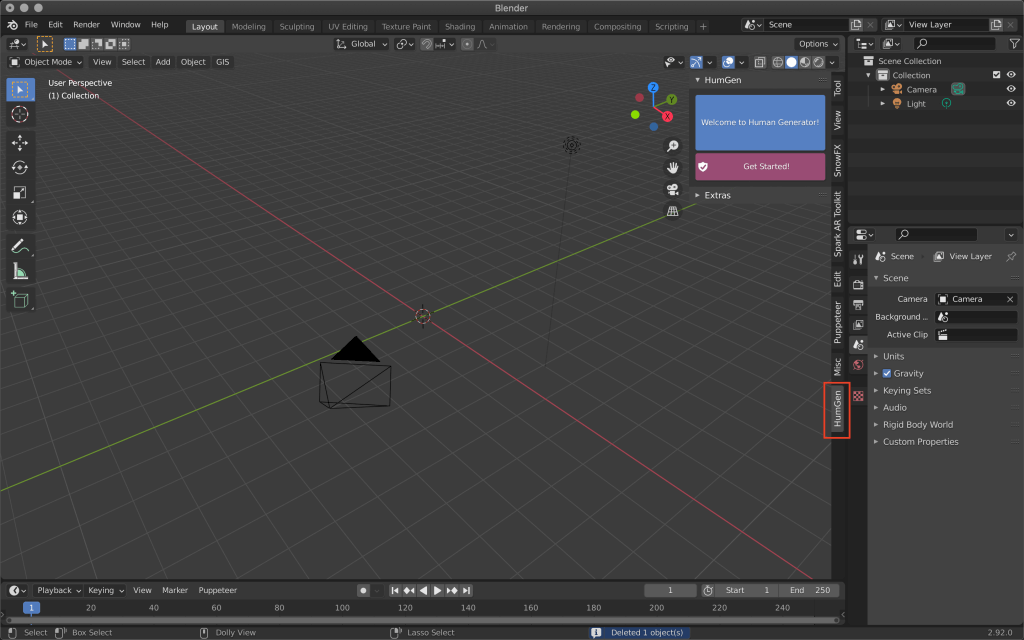
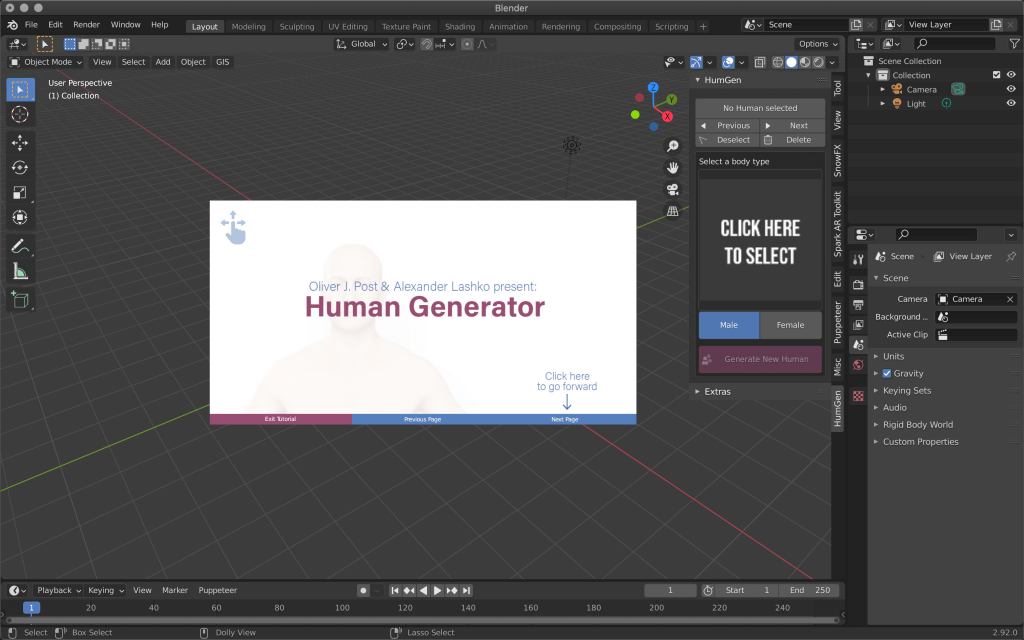
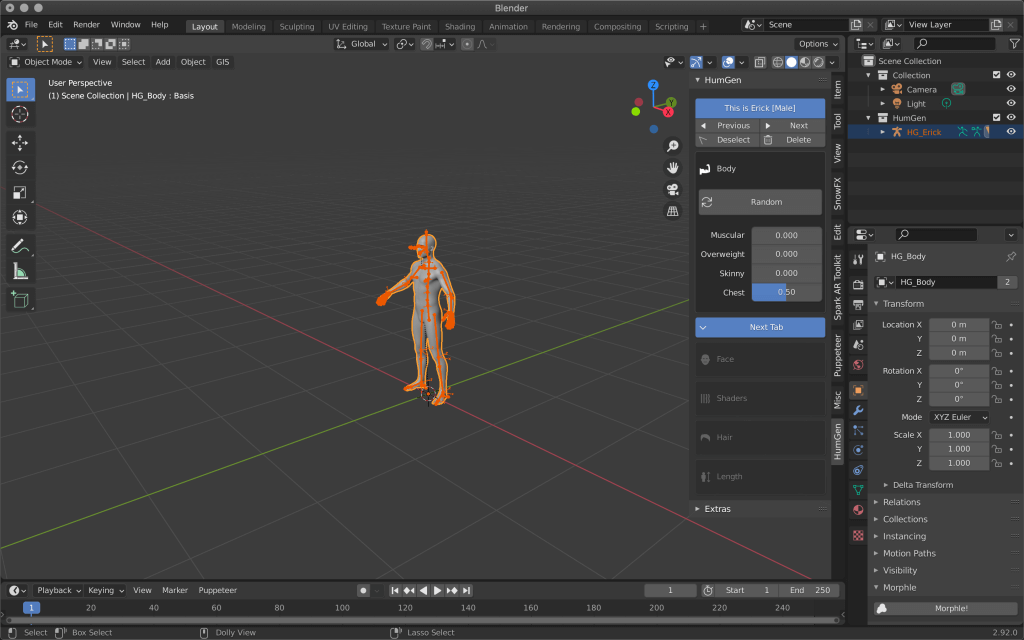
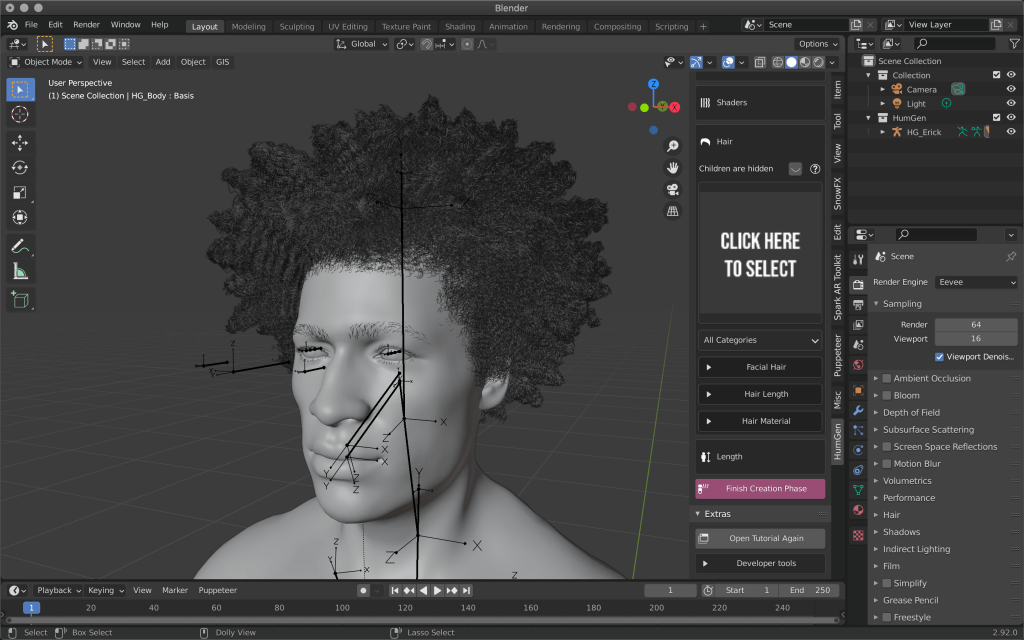
You can use the 3D Viewport from the menu on the right side of the main screen.
If you don’t see it, click < to bring up the menu.
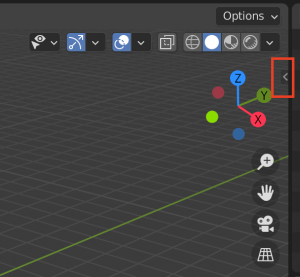
Click on <.
When you click the Get Started button, the screen will look like this and the tutorial will be displayed.
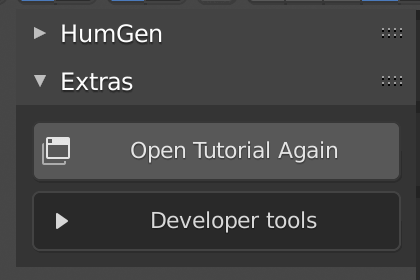
You can view this tutorial again from the Extras section.
Installing on a Mac
As of May 2021, there is a problem with the textures not showing up when used on a Mac.
Please contact HumGen3D and they will send you a revised version.
Creating a Human Body
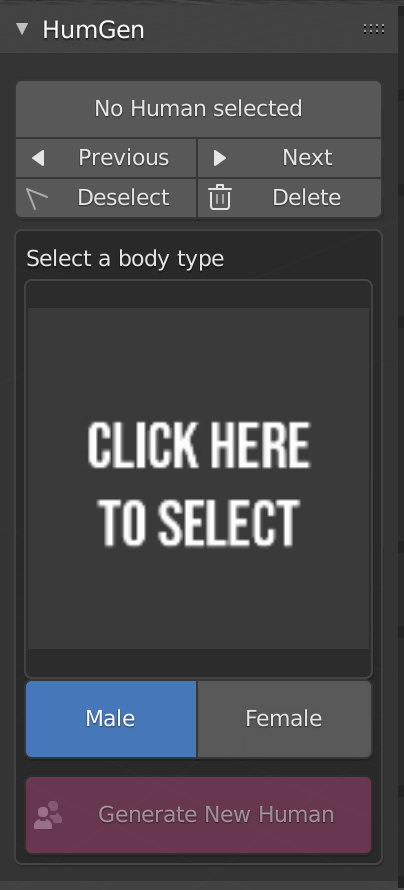
Select either Male or Female.
Click on CLICK HERE TO SELECT, and now choose your race.
In this article, I selected Male, so some of the items will be different for Female.
Once you have decided, click “Generate New Human”.
Decide on the body type
First, let’s change the body type in the Body section.
| Random | The following four items are random. |
| Muscular | Muscle |
| Overweight | Obese |
| Skinny | Skinny |
| Chest | Chest |
When you are done, click on the Next Tab to edit the next item.
You can also go back and edit the previous item until you are satisfied with the final result.
Creating a face: Modeling
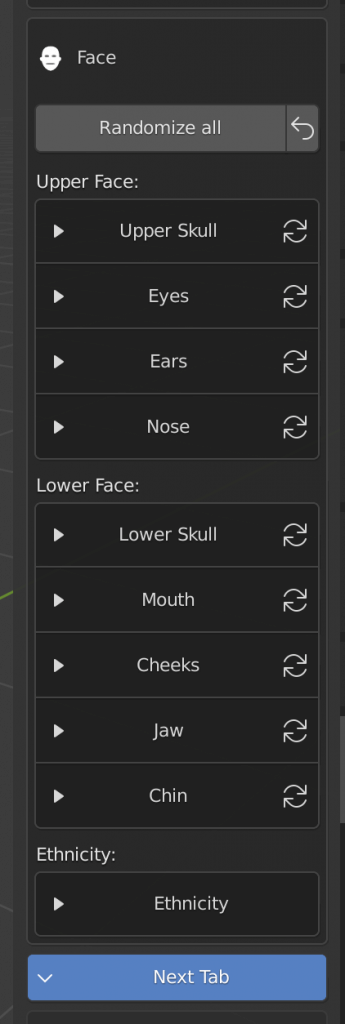
There are two parts to the face: Upper Face and Lower Face, and each part has its own menu where you can change the parameters in detail.
As with the body shape, Randomize all allows you to set all parameters randomly.
Upper Skull
| Forehead Size | Size of the forehead |
| Temple Size | Size of the temples |
| Browridge Loc Horizontal | Eyebrow location (carving depth) |
| Browridge Loc Vertical | Eyebrow location (carving height) |
| Browridge Center Size | Height between eyebrows |
Eyes
| Lid Fat Pad | Upper Eyelid Thickness |
| Height | Size of the eye |
| Orbit Size | Size of the eye socket |
| Tilt | Angle of the eye |
| Width | Horizontal size of the eye |
| Lid Shift Horizontal | Upper eyelid position (top of eye) |
| Lid Shift Vertical | Upper eyelid position (height) |
| Lid Rotation | Upper Eyelid Angle |
Ears
| Antihelix Shape | Shape of the edge of the ear |
| Height | Ear Size (vertical) |
| Lobe Size | Size of the earlobe |
| Turn | The angle of the ear when viewed from the front. |
| Width | Ear size (horizontal) |
Nose
| Angle | Angle of the nose |
| Bridge Height | Height of the nose root |
| Bridge Width | Width of the root of the nose |
| Height | Height of the nose |
| Location | Height of the base of the nasal wings |
| Nostril Flare | The width of the nostrils |
| Nostril Turn | Height of the nose |
| Tip Angle | Angle of the tip of the nose |
| Tip Length | Length of the tip of the nose |
| Tip Size | Size of the tip of the nose |
| Tip Width | Width of the tip of the nose |
Lower Skull
| Muzzle Location Horizontal | Position of lower half of face (front to back) |
| Muzzle Location Vertical | Location of lower half of face (up and down) |
Mouth
| Cupid Bow | Center of the lips |
| Height | Size of mouth (vertical) |
| Location | Position of the mouth (front to back) |
| Offset | Angle of the lips (front to back) |
| Width | Size of the mouth (left to right) |
Cheeks
| Fullness | Fullness of cheekbones |
| Zygomatic Bone | Cheekbone size (front-back) |
| Zygomatic Proc | Zygomatic bone size (left and right) |
Jaw
| Location Horizontal | Position from nose down (anterior-posterior) |
| Location Vertical | Size of gills (left to right) |
| Width | Size of the area below the nose (left to right) |
Chin
| Dimple | Hollow |
| Height | Length |
| Size | Overall size of chin |
| Width | Size of chin (left and right) |
Ethnicity
| Asian | Asian |
| Black | Black |
| Caucasian | Caucasian |
Creating a Face: Advanced Settings
You can edit not only the shape of the face, but also various other settings.
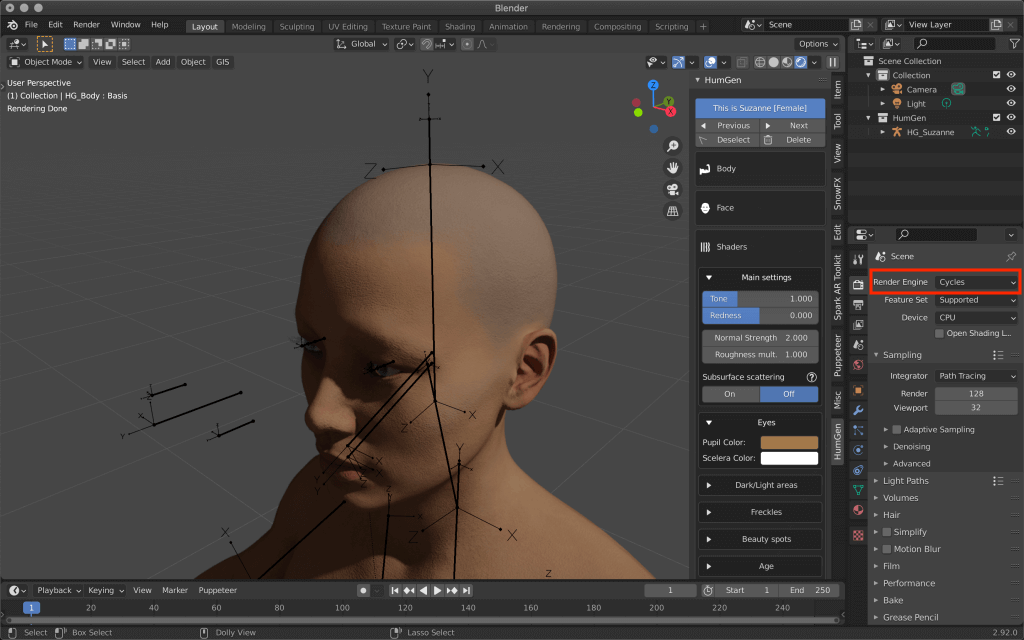
- Shaders: Allows you to set skin wrinkles and subsurface scattering.
Subsurface scattering is a material that recreates a transparent object and can be used to represent realistic human skin.
It is best to set this last, as it takes a long time to process and can cause slowdown and noise. - Eyes: Changes the color of the eyes and whites of the eyes.
- Dark/Light areas: Adjusts the dark/light areas of the skin.
- Freckles: Add freckles or edit the amount.
- Beauty spots: Add or edit the amount of moles.
Use “Seed” to change them randomly. - Age: Adjusts sagging and wrinkles of the skin.
- Beard shadow: Add shave marks.
Selecting the hair and beard (male version)
In the male version, you can edit the Beard section.
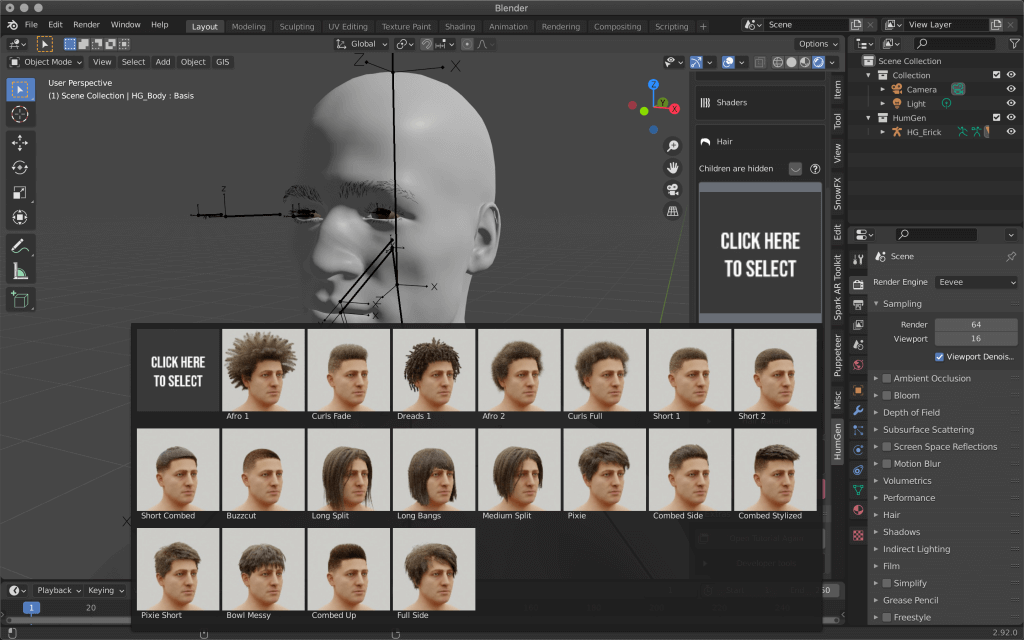
In the Hair section, click CLICK HERE TO SELECT.
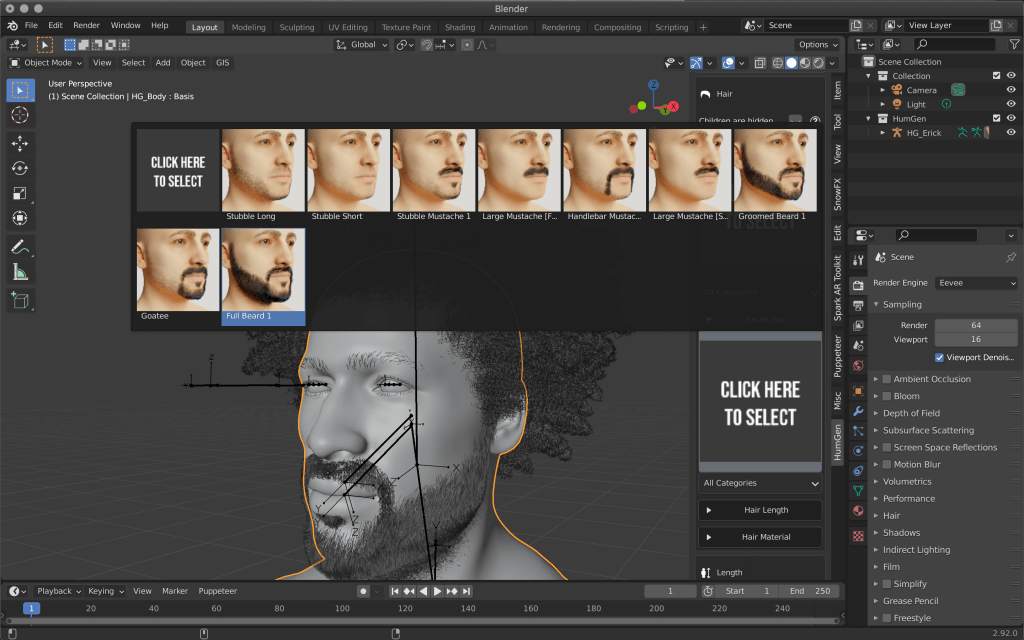
A list of hairstyles will appear, so choose the one you like.
Click CLICK HERE TO SELECT in Facial Hair to select a beard.
Hair Length
| Eyebrows Male | Eyebrows Male |
| Eyelashes Male | Eyelashes Male |
| Hair Afro | Afro |
| Mustache High | Mustache above the mouth |
| Side Lines | Mustache on the side of the mouth |
| Soul Patch | Beard below the lower lip |
| Sideburns Low | Cheek to Chin Beard |
| Beard Medium | Beard below the Soul Patch |
| Neck | Neck Beard |
Hair Material
- Eyebrows & Eyelashes
- Facial Hair
- Hair
Adjust each material.
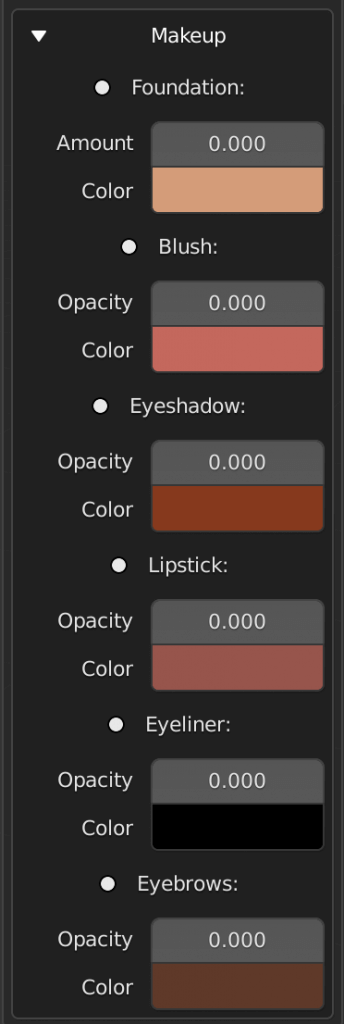
Selecting makeup shades (female version)
In the female version, you can edit your makeup.
| Foundation | Foundation (face) |
| Blush | Blush (cheeks) |
| Eyeshadow | Eyeshadow (eye lid) |
| Lipstick | Lipstick |
| Eyeliner | Eyeliner (eye contour) |
| Eyebrows | Eyebrows |
| Opacity/Amount | Opacity/Amount |
| Color | Color |
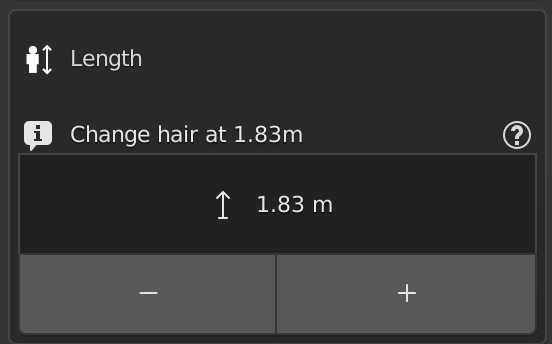
Set the height
You can freely set the height.
When finished
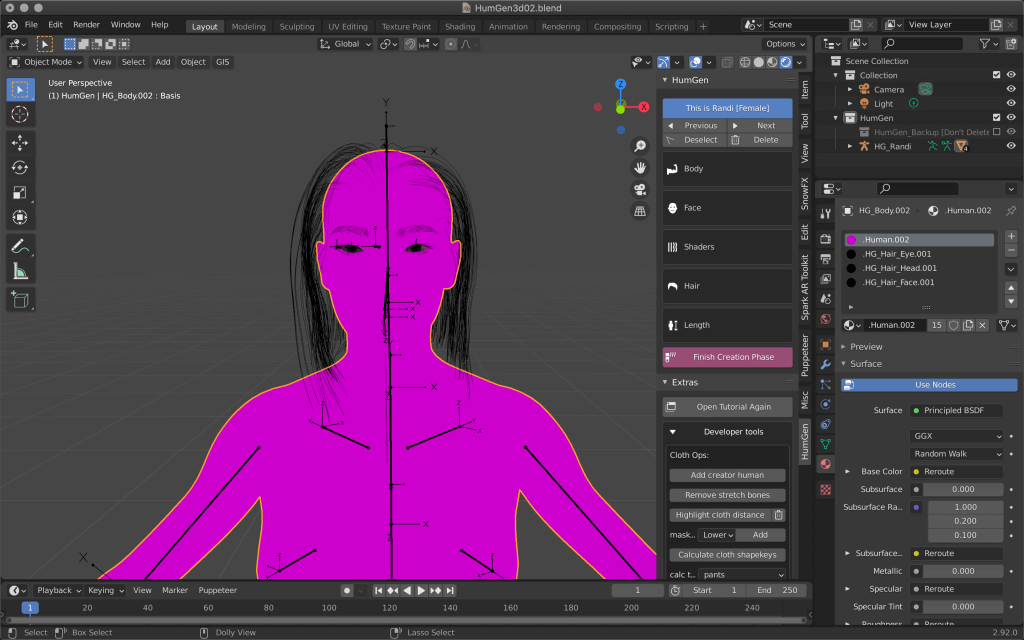
When you have finished editing all the items, click Finish Creation Phase.
If you want to go back and edit again, you can re-edit from the Creation phase.

Click again to confirm.
In the next article, I will introduce clothing, poses, and expressions.
![[DAZ Studio] (1) How to download / Basic operation / Creating a human body model](https://styly.cc/wp-content/uploads/2021/01/IMG_9201-1-160x160.png)
