TRIPO Update Contents
The Tripo Ai introduced in the above article now has the ability to do automatic rigging, and we will show you how to use the contents of this update.
For detailed information on how to use Tripo Ai, please refer to the above article.
First, access Tripo and generate a humanoid model. At this stage, the auto-rig function only supports humanoid models.
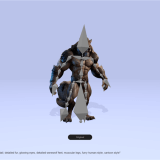
In this case, we will generate a werewolf.
After generating a humanoid model and making a decision, you will be taken to a screen like this.
Click “Rig” (spend 20 coins) in the Rigging & Animation tab on the right side of the screen, and the rigging will be done automatically.
Rigging takes a little time.
When the rigging is finished, the bones will be displayed and you can choose between a static pose and one of three different animations to use.
Select Unity from Custom, select med for Retopologize, Format:fbx, and click the Download button.
The animation downloaded here is the animation selected in the Rigging&Animation tab, so be sure to select a static pose and each of the three animations to download.
Please refer to the following article for a detailed explanation of how to import the animation into Unity and use it STYLY.
Uploading to STYLY
Let’s actually upload the scene to STYLY and use it.
This time we will upload the Unity scene directly to STYLY.
account


![[Unity / Mixamo] How to make smooth transitions in animation.](https://styly.cc/wp-content/uploads/2021/08/スクリーンショット-2021-08-11-18.41.06-160x160.png)

