In this article, you will learn how to combine Event Trigger and animation. As an application of the combination, we will be creating a door that opens automatically when you press a button.
You will learn how to control an Animator with events and how to generate animation when a particular event is triggered. We will go from basic event firing to its application to the Event Trigger.
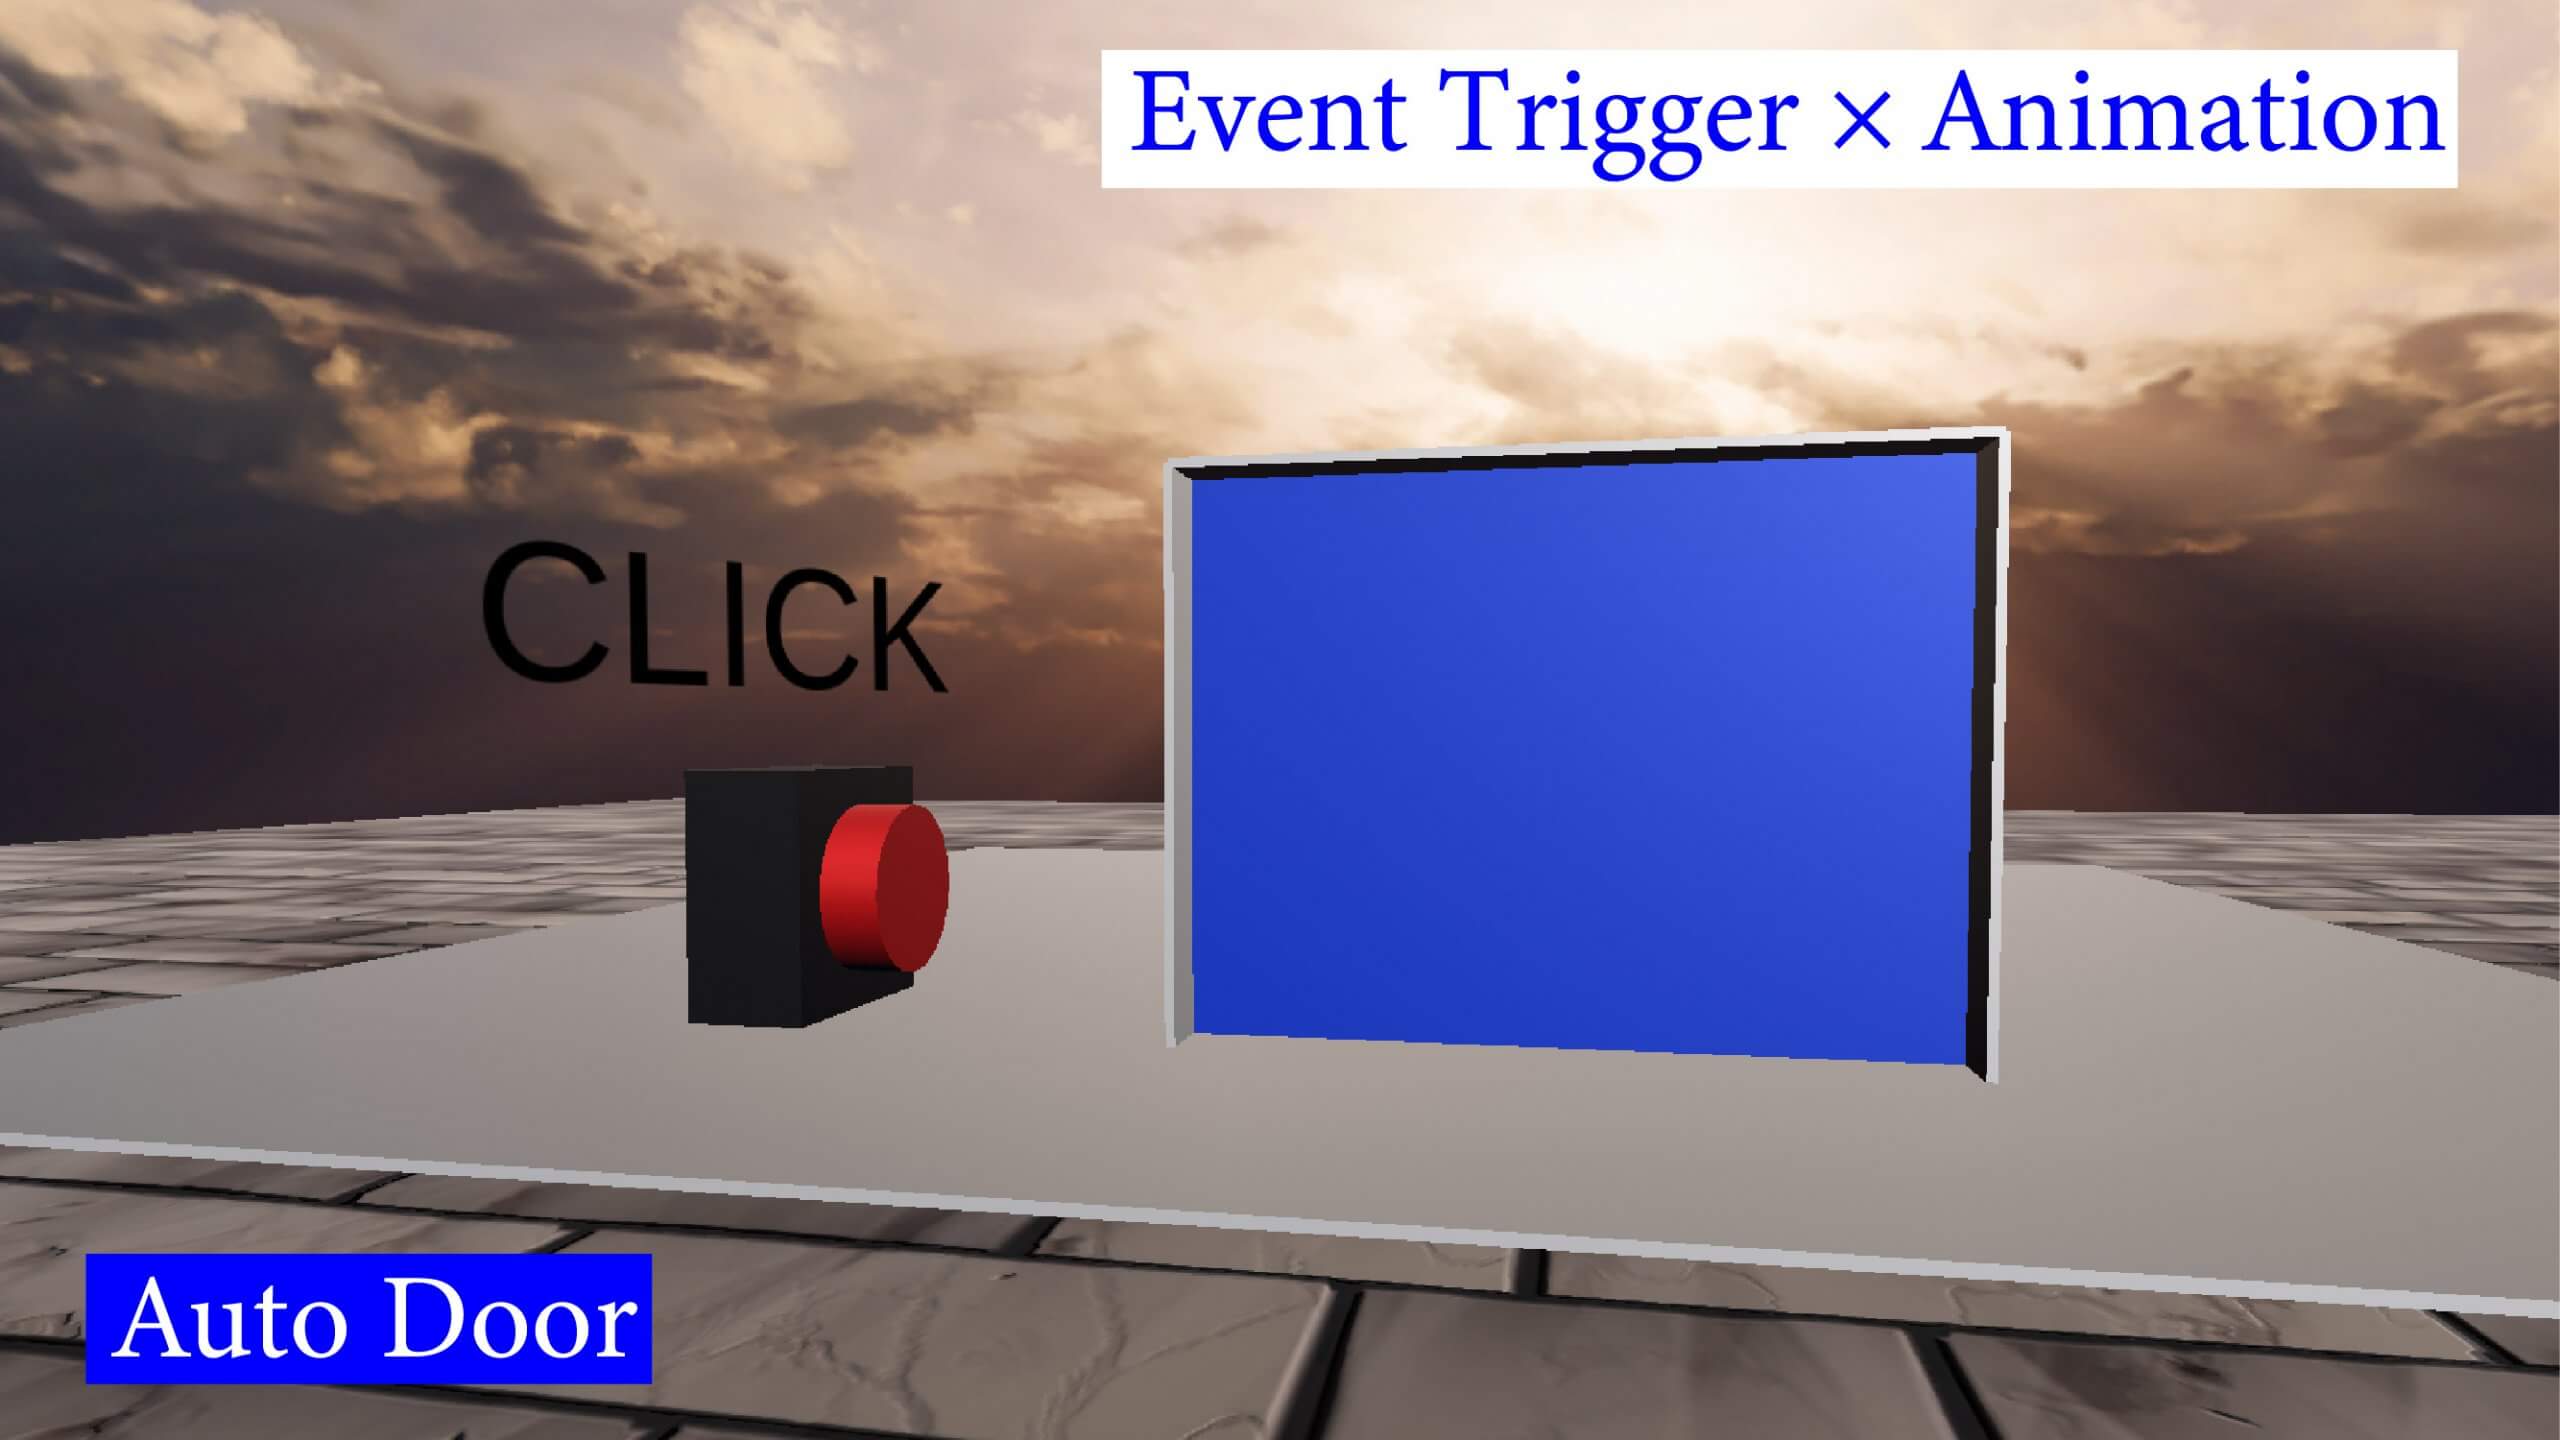
Sample Scene
This is a sample scene featuring the automatic door we will create. Let’s experience it.
Overview
How it works
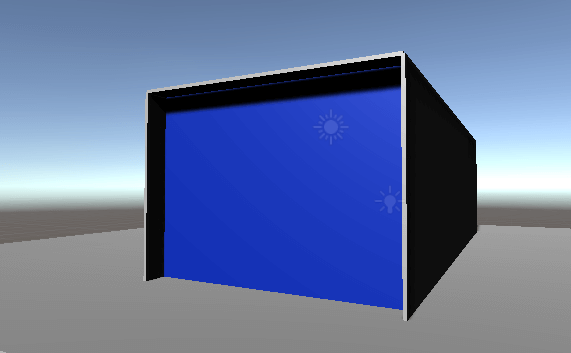
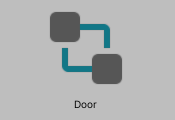
The automatic door to be created.
- Click the button with the mouse.
- The automatic door-opening animation will be operated.
This is how it works.
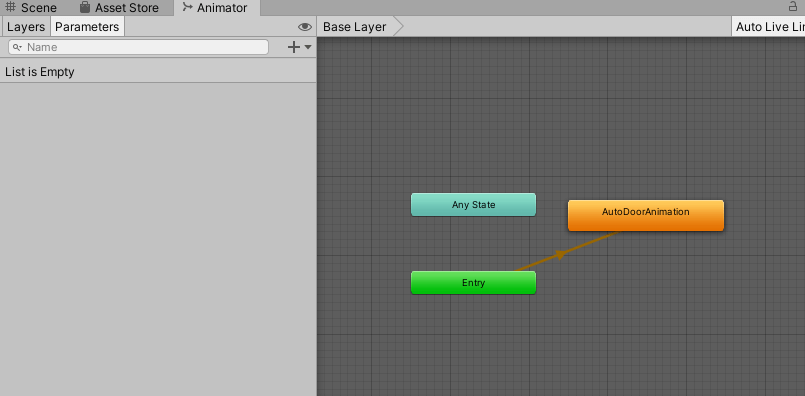
In the Animator, there is a “Default State” for the first state to which to transition. The yellow state is the Default State.
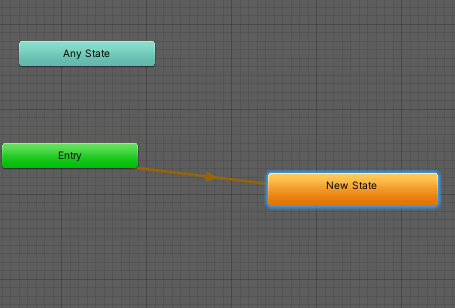
From this Default State, you can create an automatic door by creating a state that contains the animation of the door opening and an event for the Event Trigger.
We will create this system following this model.
Creating a 3D Model
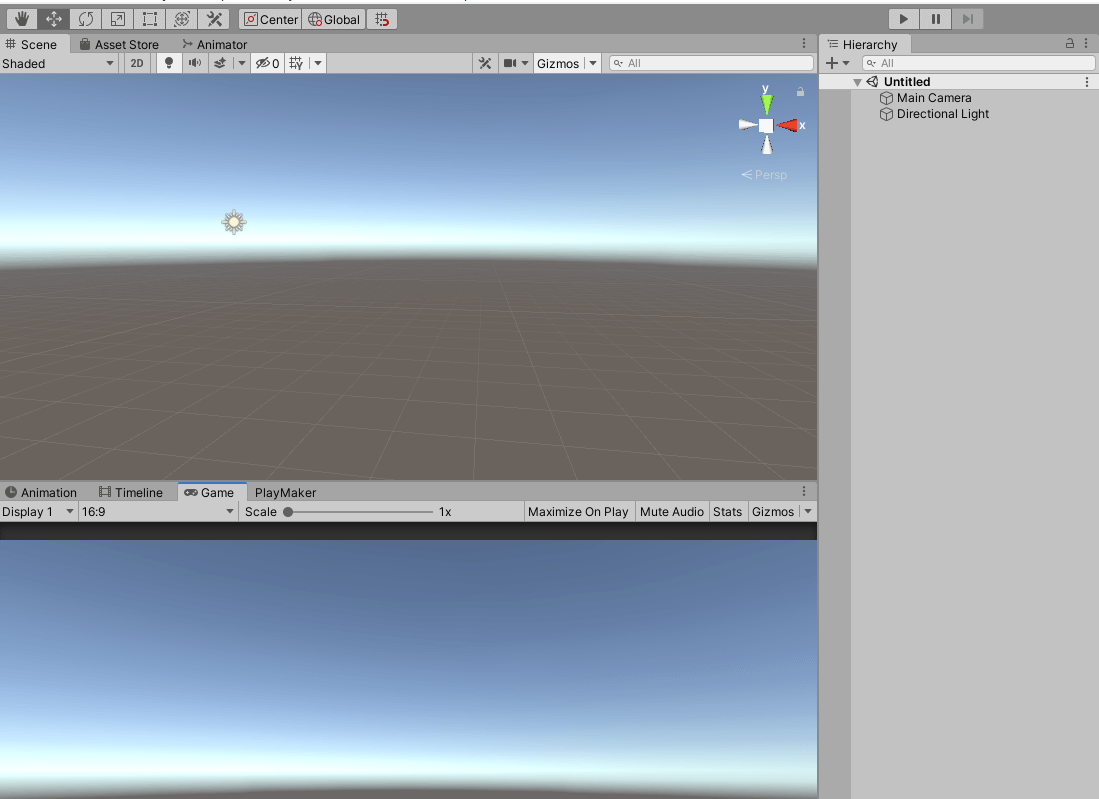
Create the doors and buttons for this project: start a Unity project and create a new scene.
Creating the door
This time, let us simply create a simple door and a building using the Unity 3D model.
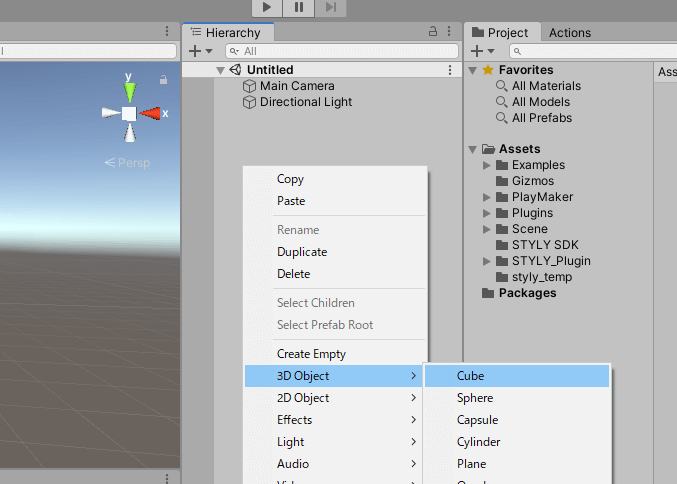
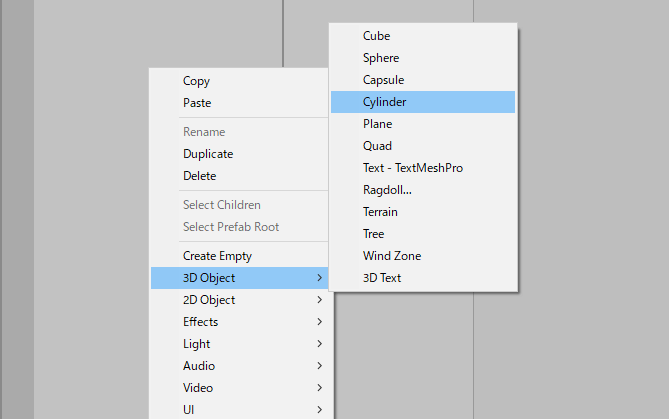
First, create the ground. Right-click in the Hierarchy window (we will call it the Hierarchy) and place the Cube.
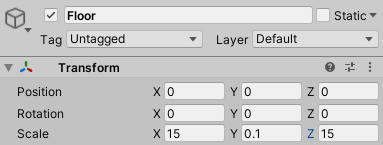
Name it “Floor” and set the transform as follows:
Next, let us create the building.
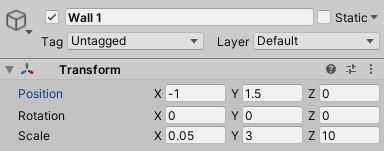
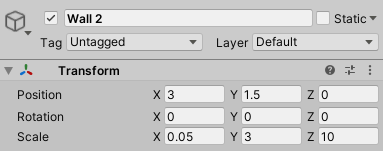
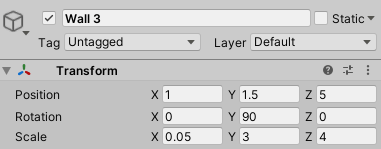
Create four walls. Place four cubes from the hierarchy and name them and the transform as follows:
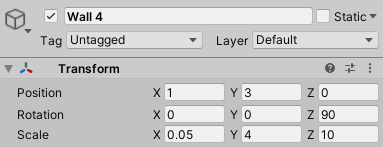
It will look like the following picture.
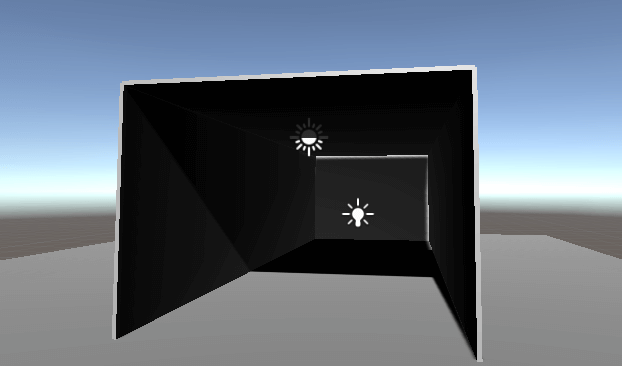
I have added a Point Light to make it easier to see inside.
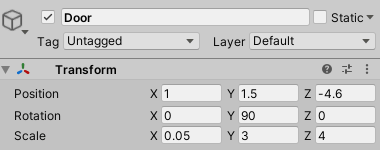
Next, create the doors.
In the same way, place the cube from the hierarchy and name it and the transform as follows.
Let us change the material to distinguish it from the others.
Then, let us create the material by selecting Create > Material on the project window. Change the color to a color of your choice and name it “Door Material.”
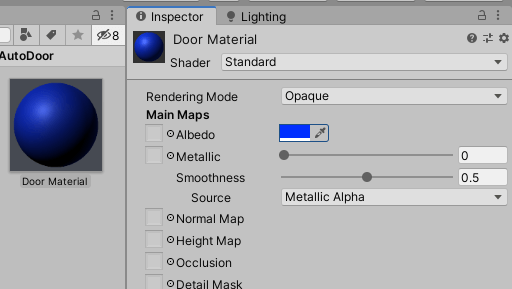
We have changed the color of the door.
Creating the Button
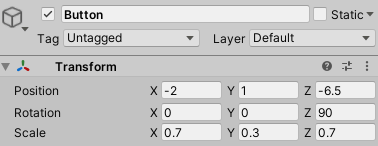
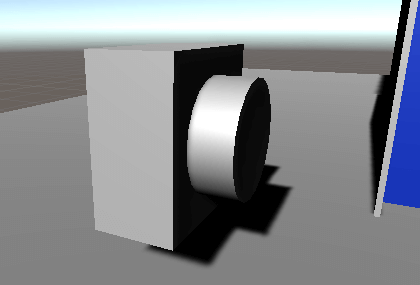
Create a Button to open the door. Let us place the clan and the cube from the hierarchy.
Transform and name them.
Cylinder
Cube
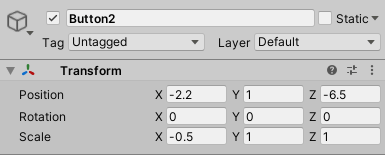
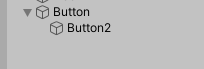
Make Button2 a child object of Button.
When it looks like the picture, the Button is complete.
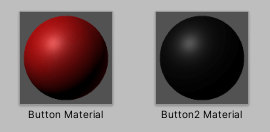
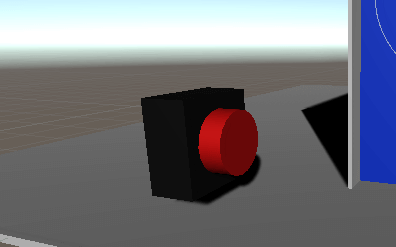
Let us color it with material.
Let us color the Button red.
Let us make Button2 black.
Create red and black materials and attach them.
If it looks like the picture, you are done!
Creation of Animation
Create an animation of the automatic door.
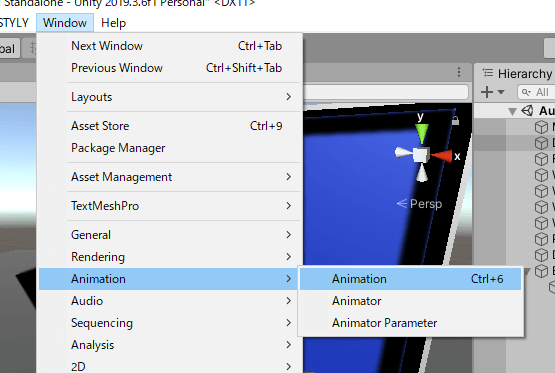
Choose Window > Animation > Animation from the top menu bar to make the animation window appear anywhere.
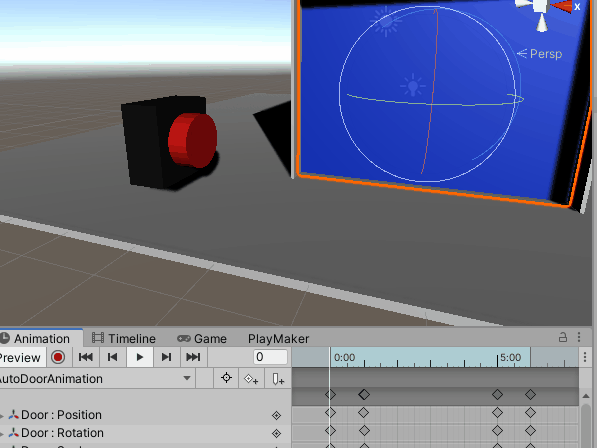
Select Door and choose Create for the animation window.
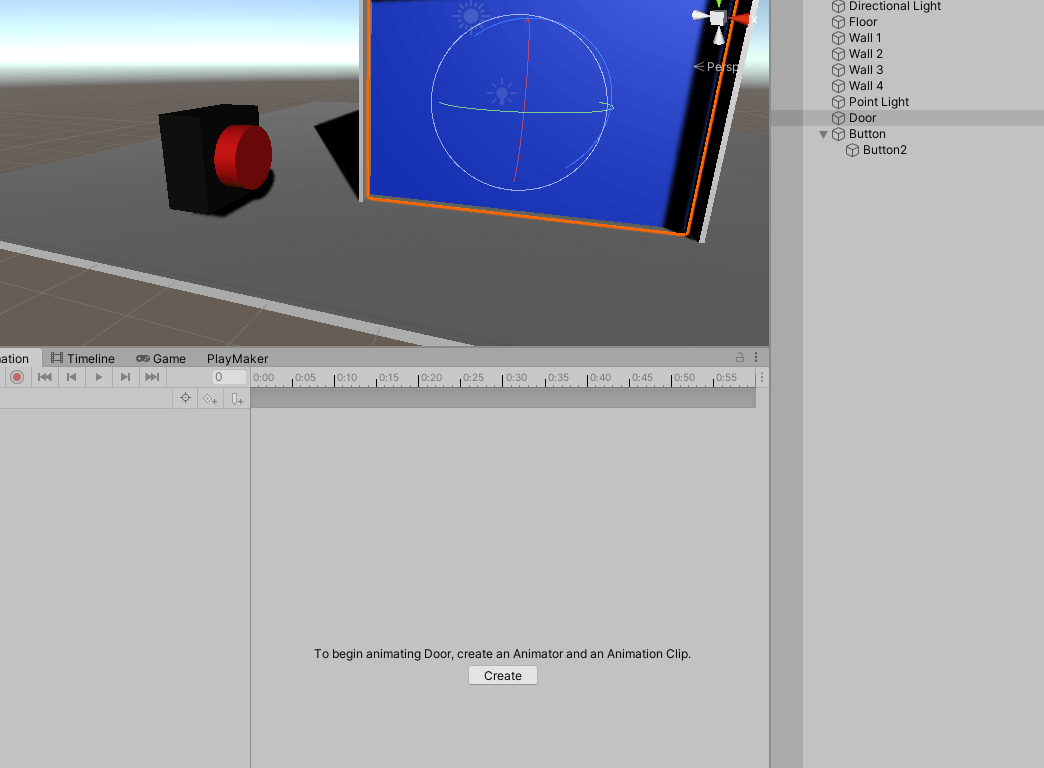
Save the animation data to the desired location. You can choose any name, but we will call it “AutoDoorAnimation.”

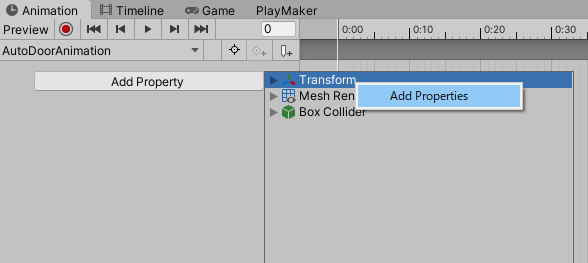
Add a transform from Add Property.
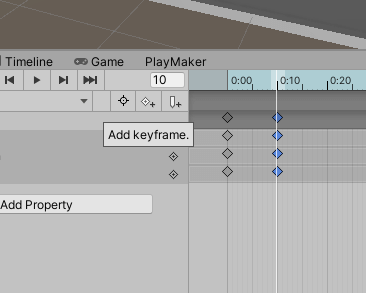
Set the sequence bar to 0:10.

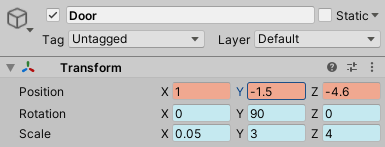
Set the transform of the door to the following:
With this state, let us type a keyframe.
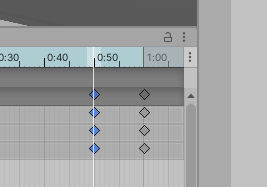
Copy the key at 0:10 and paste it at 0:50.
Let us select the whole thing and set the last keyframe to the 6:00 position.
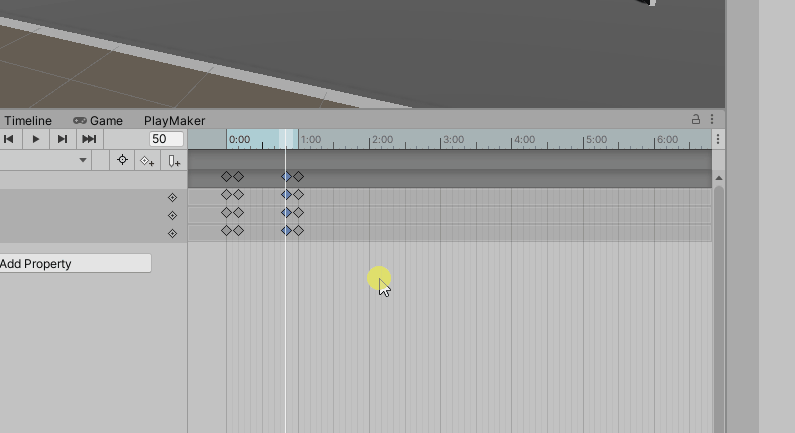
Now, let us play it back.
We have created an animation that opens in 1 second, leaves 4 seconds empty, and closes at the end.
Next, let us set up the Animator.
Select the door Animator you have just created.
Display the Animator window.
The window looks like the one in the image.
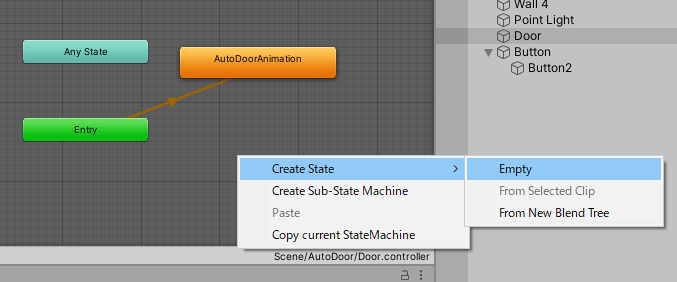
In this case, the animation will play as soon as you play the scene.
To prevent the animation from playing even after playing the scene, create a blank state first.
Right-click on the Animator window and select Create State > Empty.
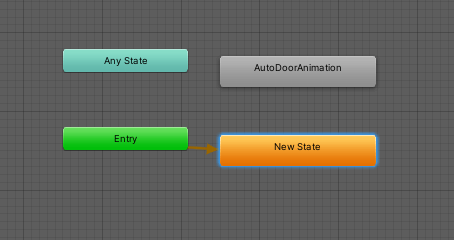
Once you have a gray New State, right-click on the state and select Set as Layer Default State.

You are now in the Default State.
Once this is done, you are done setting up. We will be setting up the events and transitions later.
Set up the Event Trigger
To set up Event Trigger, select Button and select Event Trigger from the Add Component in the Inspector window (hereinafter referred to as the Inspector).
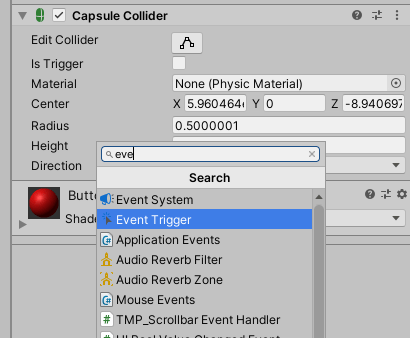
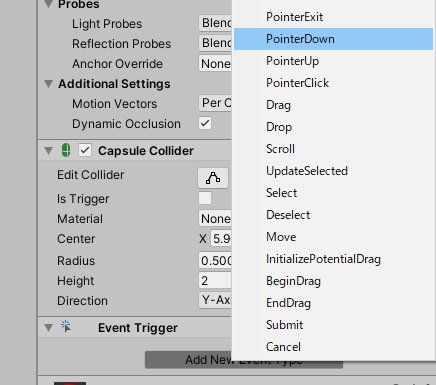
Select “Pointer Down” from the “Add New Event Type” of Event Trigger.
Add a List. Select “+”.

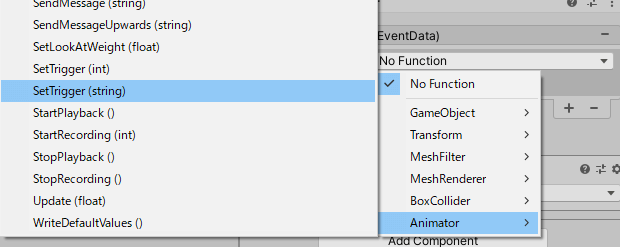
In the None (Object) column and drag and drop the door from the hierarchy.
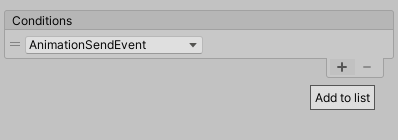
In the No Function field, choose Animator > SetTrigger(string).
The blank part is set to a variable.
In this case, let us set it to AnimationSendEvent.
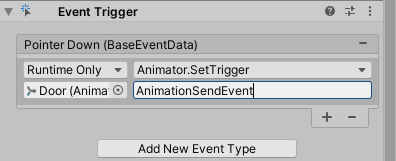
We have finished setting up Event Trigger.
Set up the Animator of the door.
Display the Animator window, open the Parameters tab on the left of the window and add a List. Select “+.”
Select “Trigger.”

In the New Trigger section, enter the variable you have just set up: “AnimationSendEvent.” Enter “AnimationSendEvent.” Be careful not to make a single mistake as this will prevent the event from happening.
Next, let us set up the transition.
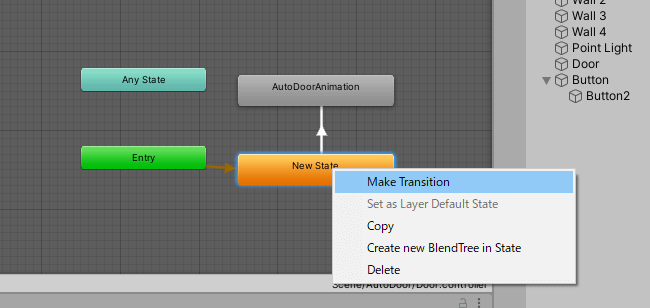
Right-click on New State and choose Make Transition. A white arrow will appear to connect to AutoDoorAnimation.
Select the arrow (Transition) to bring up the inspector.
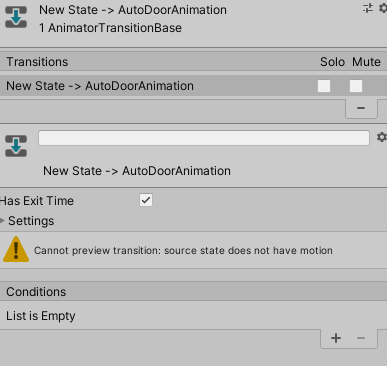
Display conditions.
Add a List. Select “+”.
Now, we have a mechanism to generate an animation when the button is pressed.
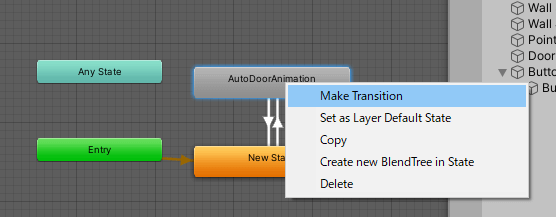
Finally, we can create a transition back to the Default State when the animation ends, the
Right-click on AutoDoorAnimation, select Make Transition, and connect to the New State.
Now we have set up the Event Trigger and Animator.
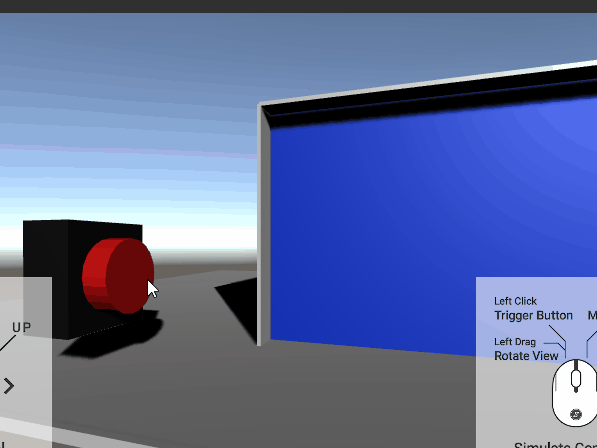
Let us try to play it out.
You will need to launch the STYLY Simulator to play.
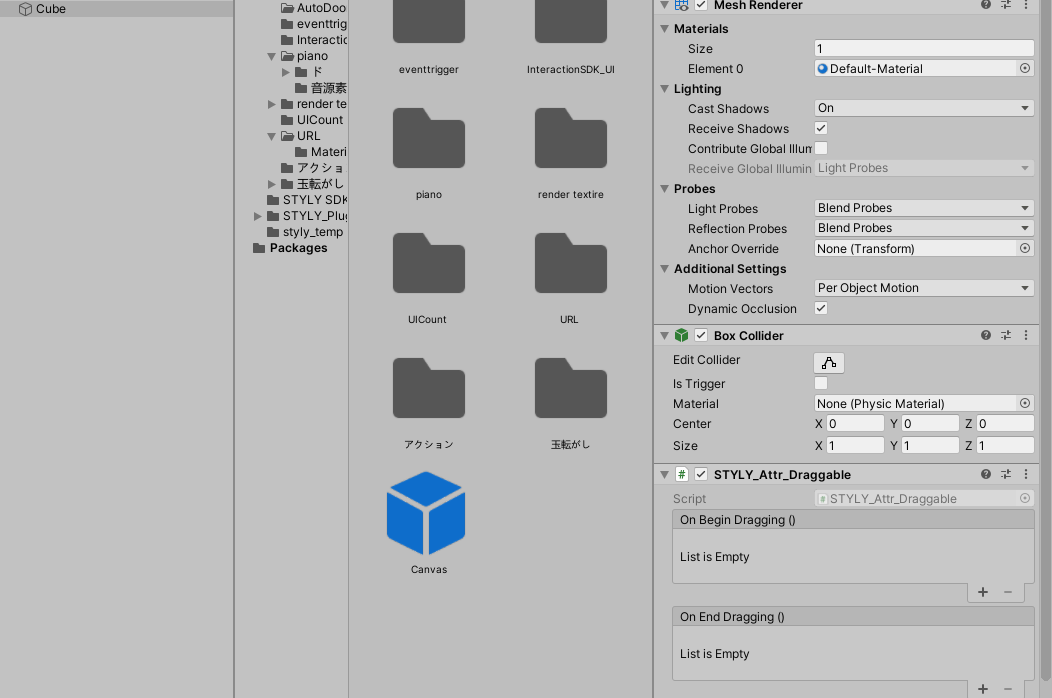
Place a cube or other object and add the STYLY Interaction SDK components. In this case, place the cube properly and attach it to the Inspector by selecting STYLY_Attr_Draggable from the Add Component menu.
When you play it back, you should see the following:
Now you are done!
Upload to STYLY
You can actually upload your scene to STYLY and use it.
Here is how to upload your Unity scene directly to STYLY:
If your Unity file is too large to upload STYLY, you can reduce the size of your Unity file by referring to this article.
How to create an account

How to upload a prefab from Unity to STYLY

Introduction to NEWVIEW SCHOOl ONLINE
NEWVIEW SCHOOl ONLINE, where you can learn the basics of Unity and PlayMaker necessary for creating VR/AR content, from the basics to the application of PlayMaker, and learn the process of creating the fascinating content available on STYLY (we’ll also expose the production techniques).
