This article covers the basics of Unity’s Event Trigger, which is also used in the STYLY Interaction SDK.
As an application, we’ll modify the Interaction SDK samples so that you can create your own interaction objects.
We hope you will make use of it for your VR/AR scene.
Please refer to the following article for details on the Interaction SDK, including its operating environment.

Event Trigger
Sample
We are exposing the interaction object we will create.
Let’s experience it.
About Event Trigger
What is Event Trigger?
Event Trigger is one of Unity’s components.
Event Trigger can be triggered by entering a specific condition (Event Type) for an interaction, such as entering a VR controller button.
These include interactions such as “Enter the VR controller button”.
By firing an event, you can recall a script of a specified game object.
This sequence of events allows you to trigger interactions with objects in your scene.
STYLY implements interaction by combining the Interaction SDK, the scripting component that generates the action, with the Event Trigger.
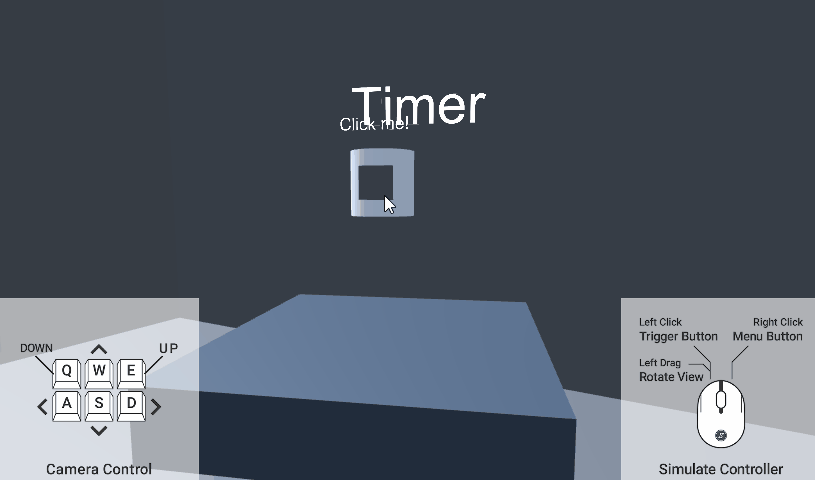
Interaction SDK’s Timer
The process of creating an interaction
This section explains how to use Event Trigger while actually creating a simple interaction object.
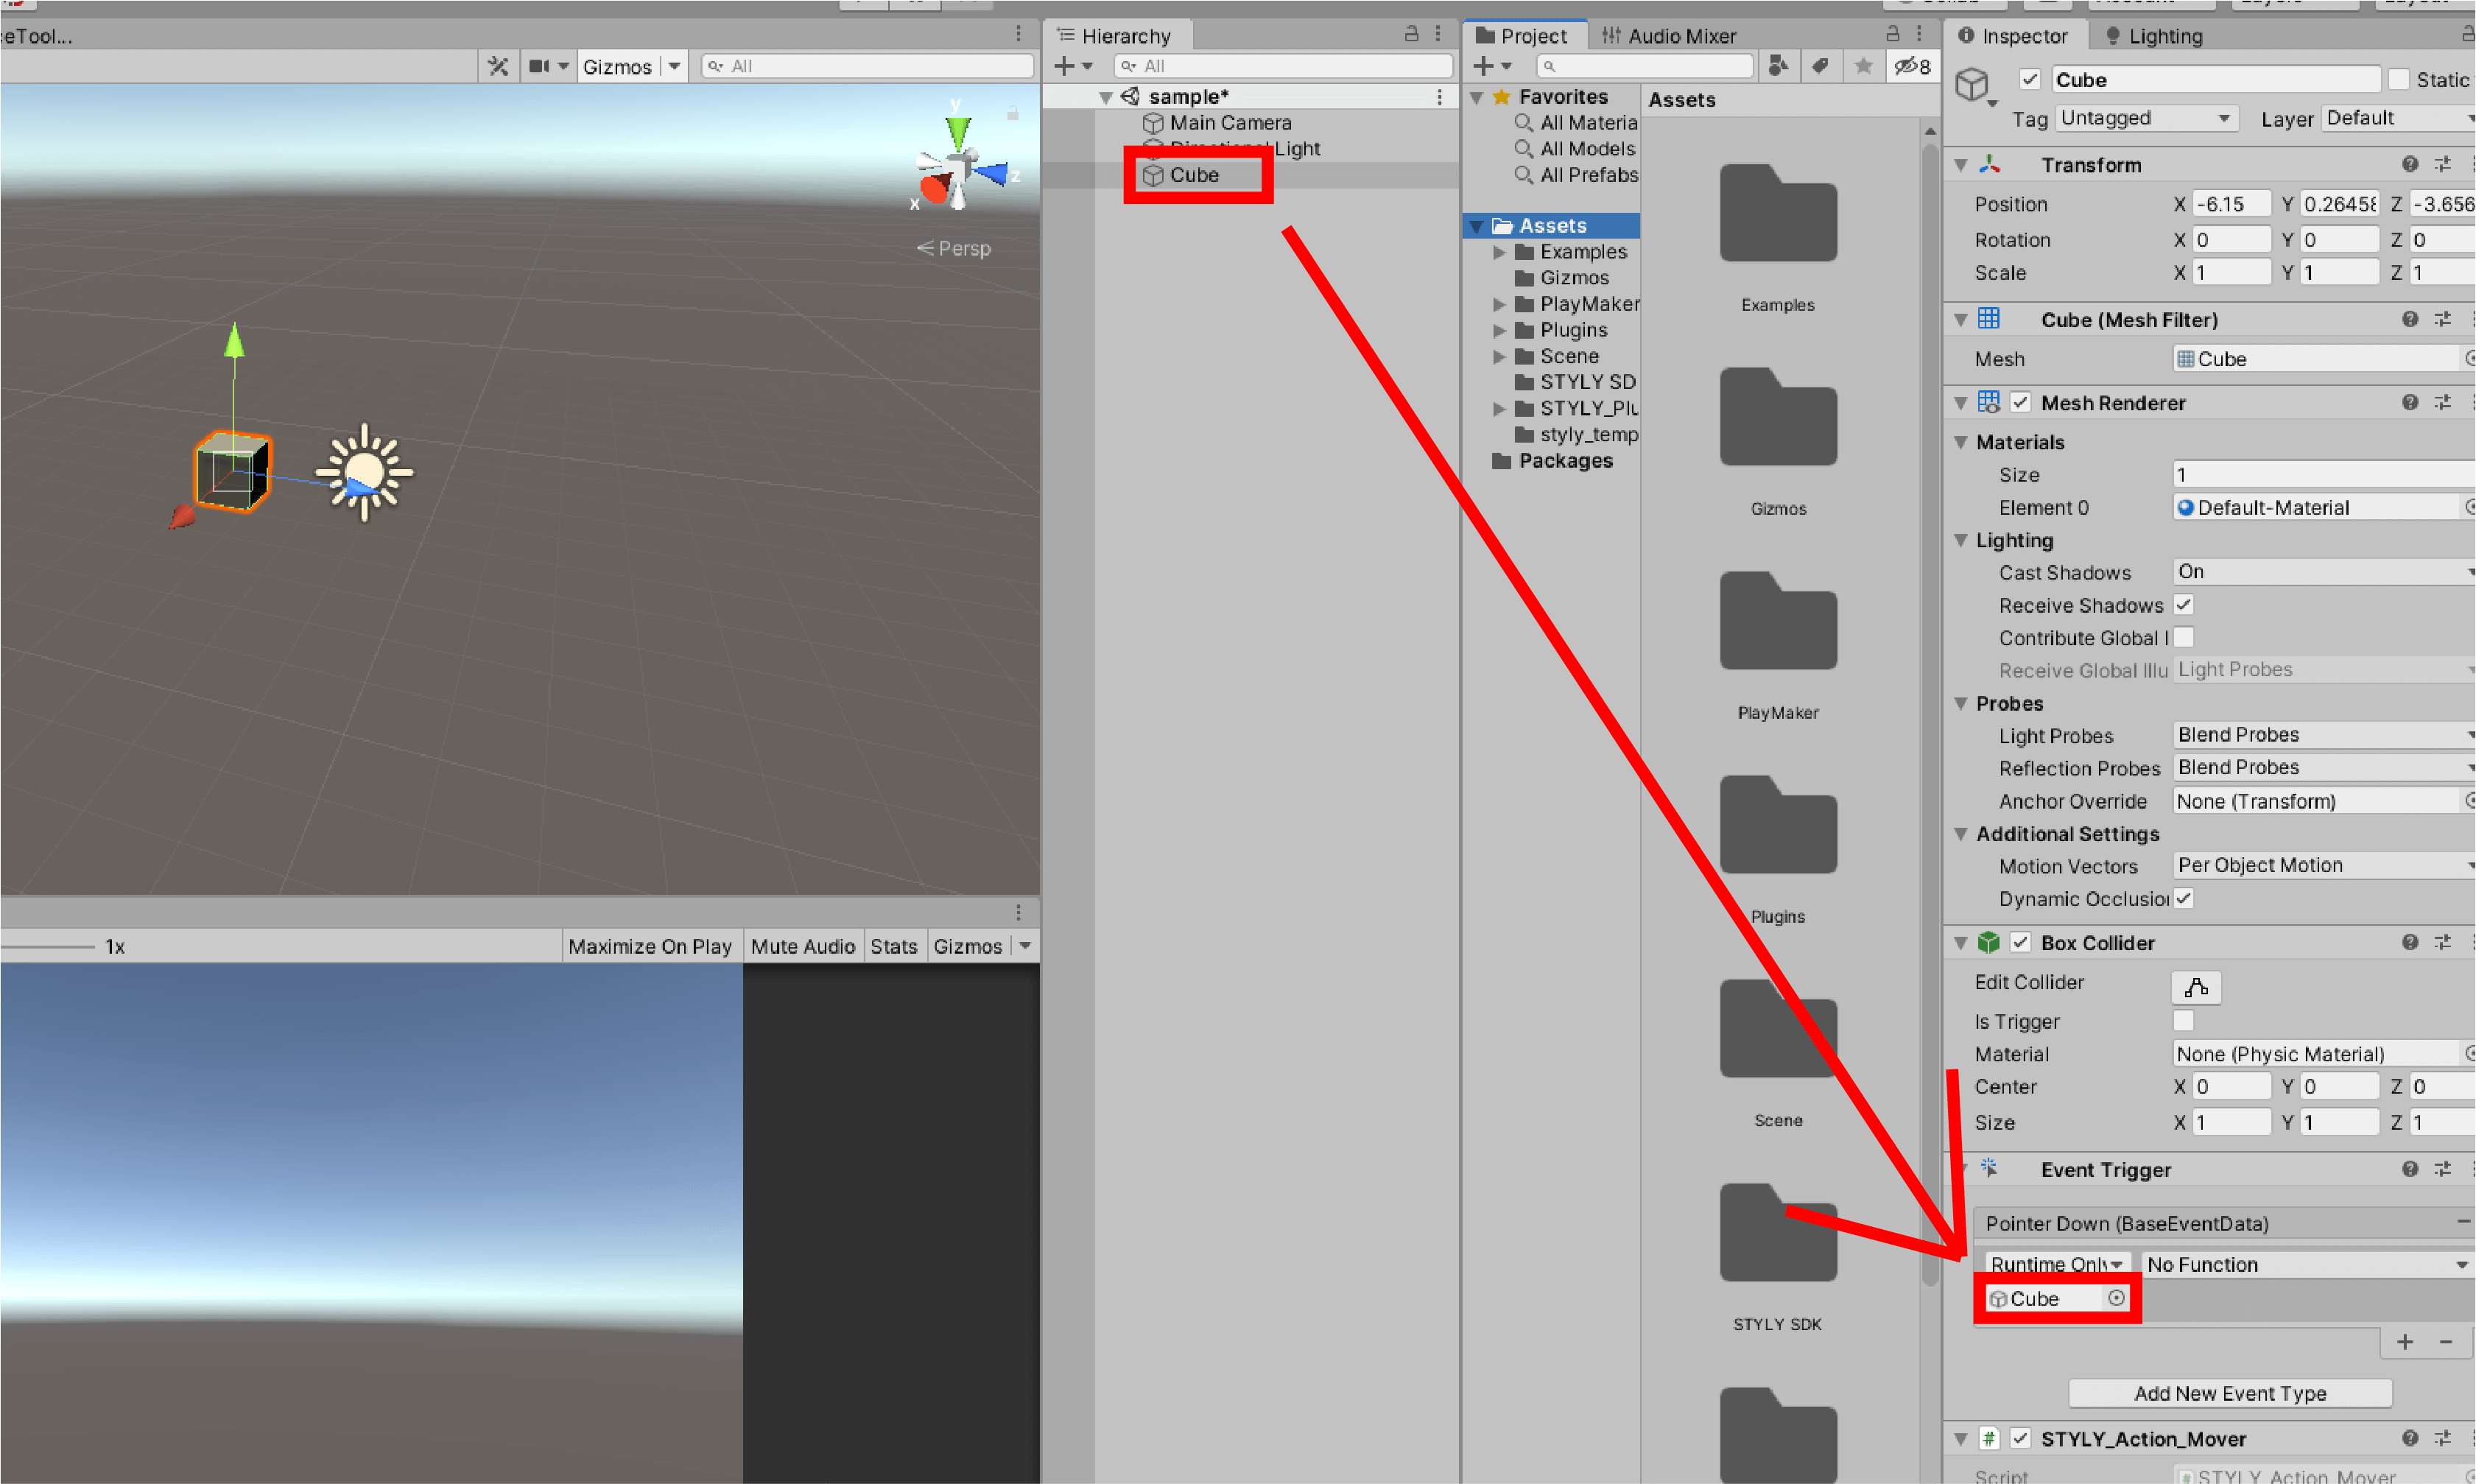
Adding an Event Trigger
The Event Trigger can be added from the Add Component in the Inspector window of the game object.

Let’s set up the event in the game object to which we have added Event Trigger.
In this case, we will create a Cube and add an Event Trigger.
Launch Unity and create a Cube on your scene.

Let’s add an Event Trigger to the Cube.

We have now added an Event Trigger.
Add an Event Type
Event Type is a variable of the operation that the player causes.
Typical variables that are mainly used are
| Event Type | Content |
| Pointer Enter | controller when Ray gets on the object |
| Pointer Exit | when the controller’s Ray leaves the object |
| Pointer Down | controller’s Ray riding on the object and pushing the trigger button |
| Pointer Up | controller Ray riding on the object and releasing the trigger button |
Note that there are various other variables, some of which are not STYLY supported.。
The variables can be found in the Unity manual.
Let’s actually add an Event Type.
In this case, we will use PointerDown. Select “Add New Event Type” and add Pointer Down.

We have added an Event Type.

Add the script
Choose a script to be triggered by Event Trigger.
Here is a script for the Interaction SDK to trigger an interaction STYLY.
In this case, we will use STYLY_Action_Mover.
In Cube’s Inspector window, select STYLY Action_Mover from Add Component and add it.

We will also need to configure STYLY_Action_Mover.
STYLY_Action_Mover is an interaction SDK that moves the specified object to the Target position.
Let’s decide on a Target. In this case, let’s use a simple game object to set the position.
Click Create > Create Empty to create a Game Object.
Set the position of the Cube to (0, 0, 0).
Set the Game Object to (0, 5, 0).
Name the Game Object as Target.

Drag and drop the target object you just created to the target of STYLY_Action_Mover.
Set a Time value. This represents how long it takes to move. Let’s say it takes 5 seconds, and Time is 5.
Now the Interaction SDK is ready.
Add a List
After adding the script, add the List in the Event Type.
Initially, it’s in the state “List is Empty” because of the state from

Let’s add the List by pressing the “+” button at the bottom.

If you want to delete the List, you can delete it by pressing the “-” button.
Now that the List has been added, let’s set it up.
In the “None (Object)” column, select the game object to which the event will be applied. In this case we select Cube.
Let’s drag and drop it from the hierarchy window.
In the No Function column, select STYLY Action_Mover > Move().

The List is now ready to be set up.
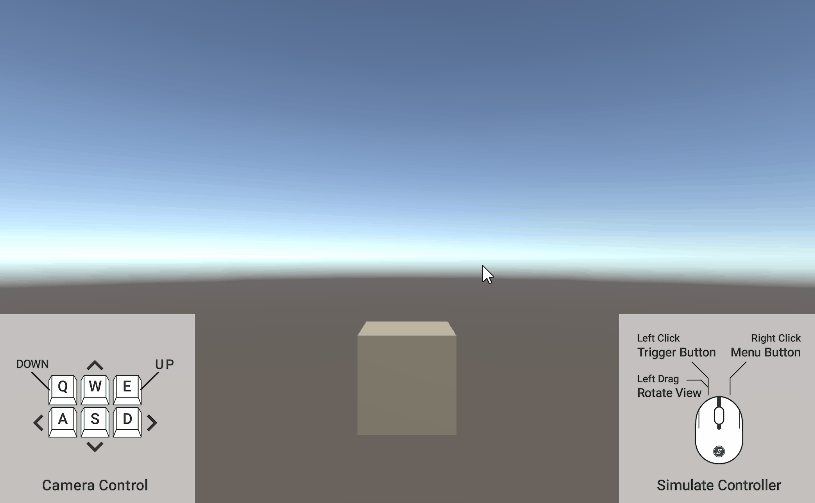
Playback
Now the Event Trigger and Interaction SDK is ready.
Let’s actually play it back.
Drag the mouse to the object and click. Then an action is triggered (actually click the trigger button on the VR controller).
(Actually, click the trigger button on the VR controller)
This is the sequence of Event Trigger.
You can easily trigger an event by adding Event Trigger as a component.
Event Trigger in the STYLY Interaction SDK
Now that you understand the basic usage of Event Trigger, let’s get a better understanding of Event Trigger by briefly modifying the Event Trigger and Interaction Objects in the STYLY Interaction SDK.
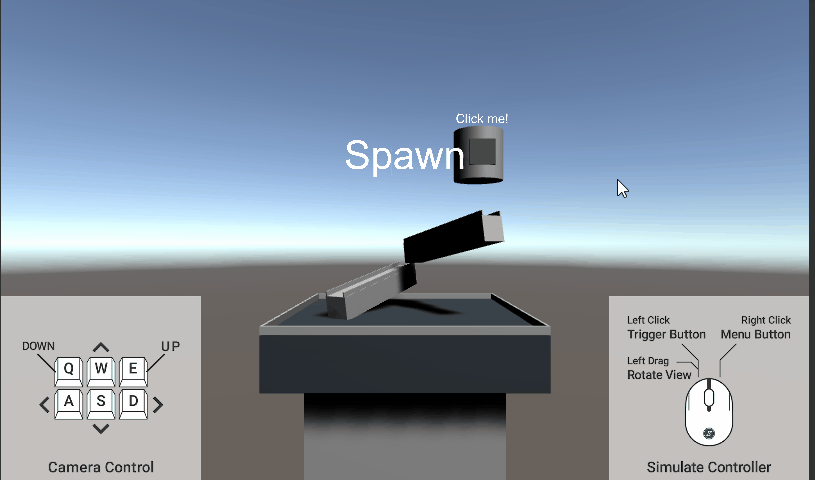
Preparing the Spawn object
In this case, we will use Spawn, a sample object from the Interaction SDK.
Let’s prefab Spawn to be used in another scene.

Create a New Scene and start it up.
Place the Spawn object we just created in the scene.

In this Spawn object, we’ll use the
-
Enter the trigger button (Pointer Down)
-
The ball is produced (STYLY_Action_Spawner_Spawn()) and
-
The color of the button changes to blue (MeshRender.material)
-
The text changes (TextMesh.text)
interaction is implemented.
Also,
-
Releasing the trigger button (Pointer Up)
-
The button color will return to the original (MeshRender.material)
-
Text reverted (TextMesh.text)
This is how the system works.

Let’s modify this system to create an original interaction object.
This time, we’ll modify Pointer Down and convert it to a different Event Type.
The system
This time the modifications are
“Enter trigger button (Pointer Down) / Release trigger button (Pointer Up)”.
The
“When the controller’s ray is on the object (Pointer Enter) / When the controller’s ray leaves the object (Pointer Exit)”.
Change to
Let’s study the procedure while actually creating the object.
Empty the List
First, let’s empty the list of Event Trigger of Button object, then select the “-” mark on the right side of Event Type to delete it.
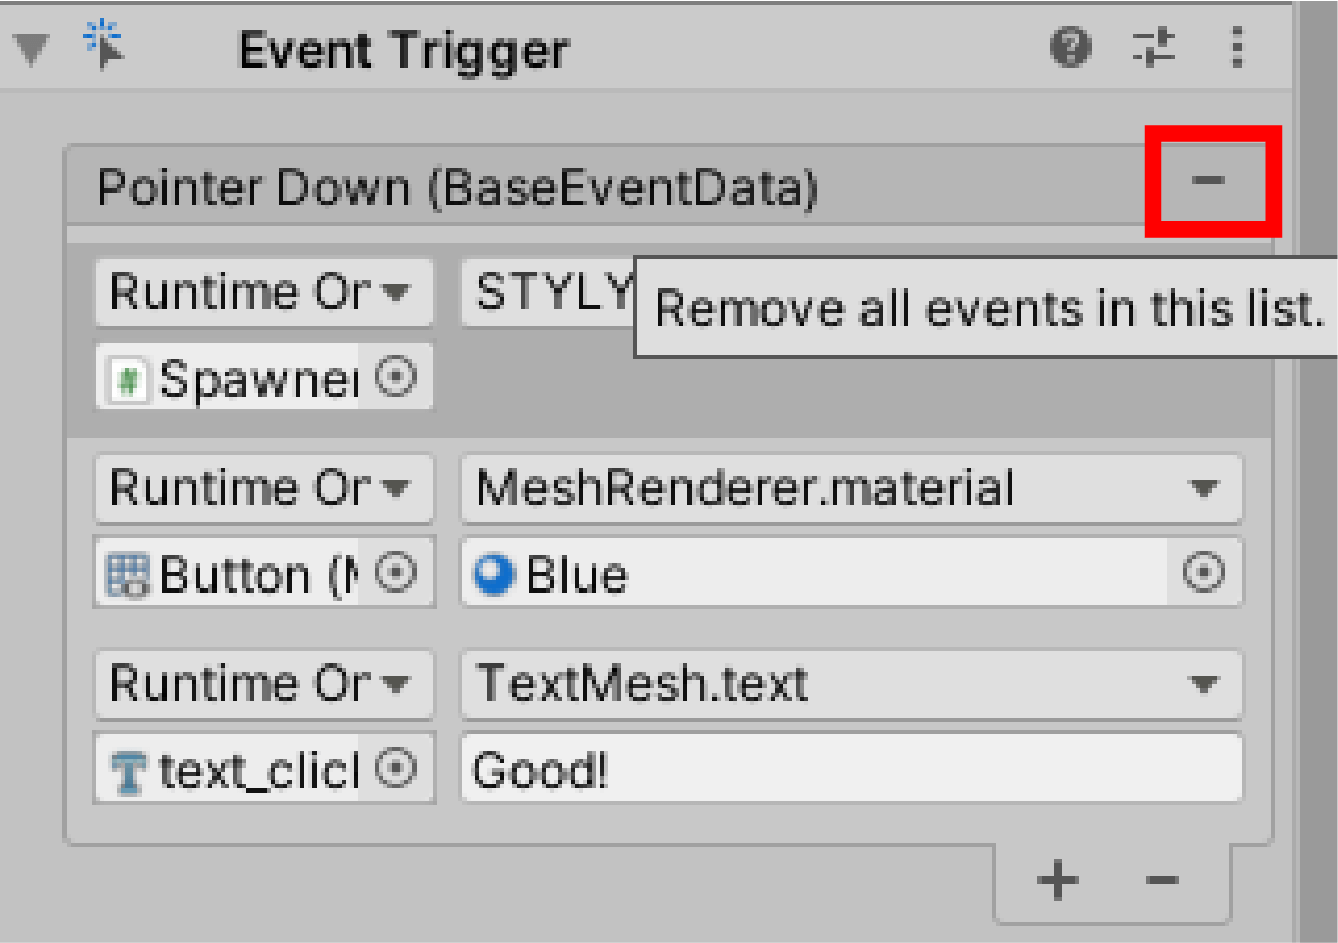
Delete the Event Trigger.

Now we are ready to go.
Adding an Event Type
Add Event Type This time
The button rides on the object (Pointer Enter) and the button leaves the object (Pointer Exit).
Use the following table to add Pointer Enter and Pointer Exit from Add New Event Type.
Let’s add Pointer Enter and Pointer Exit from Add New Event Type.

The Event Type has been added.
Add List
Next, we add a List to each Event Type.
In this case, we’ll base it on the unmodified List.
When the button is in the Pointer Enter state (the button gets on the object), we’ll add
-
Ball object is spawned
-
The color of the material changes
-
The text changes
List and
When the state of the Pointer Exit (button leaves the object)
-
The material becomes the original color (Gray)
-
Text revert to the original
Create a List of
Let’s add three Lists to Pointer Enter and two to Pointer Exit.
You can add a List from the “+” in the bottom right corner.

Setting Pointer Enter
STYLY_Action_Spawner Settings
Set the action of the Spawner object in the first List of Pointer Enter.
Drag and drop Spawner on the hierarchy window to the None(object) column of the Event Trigger.
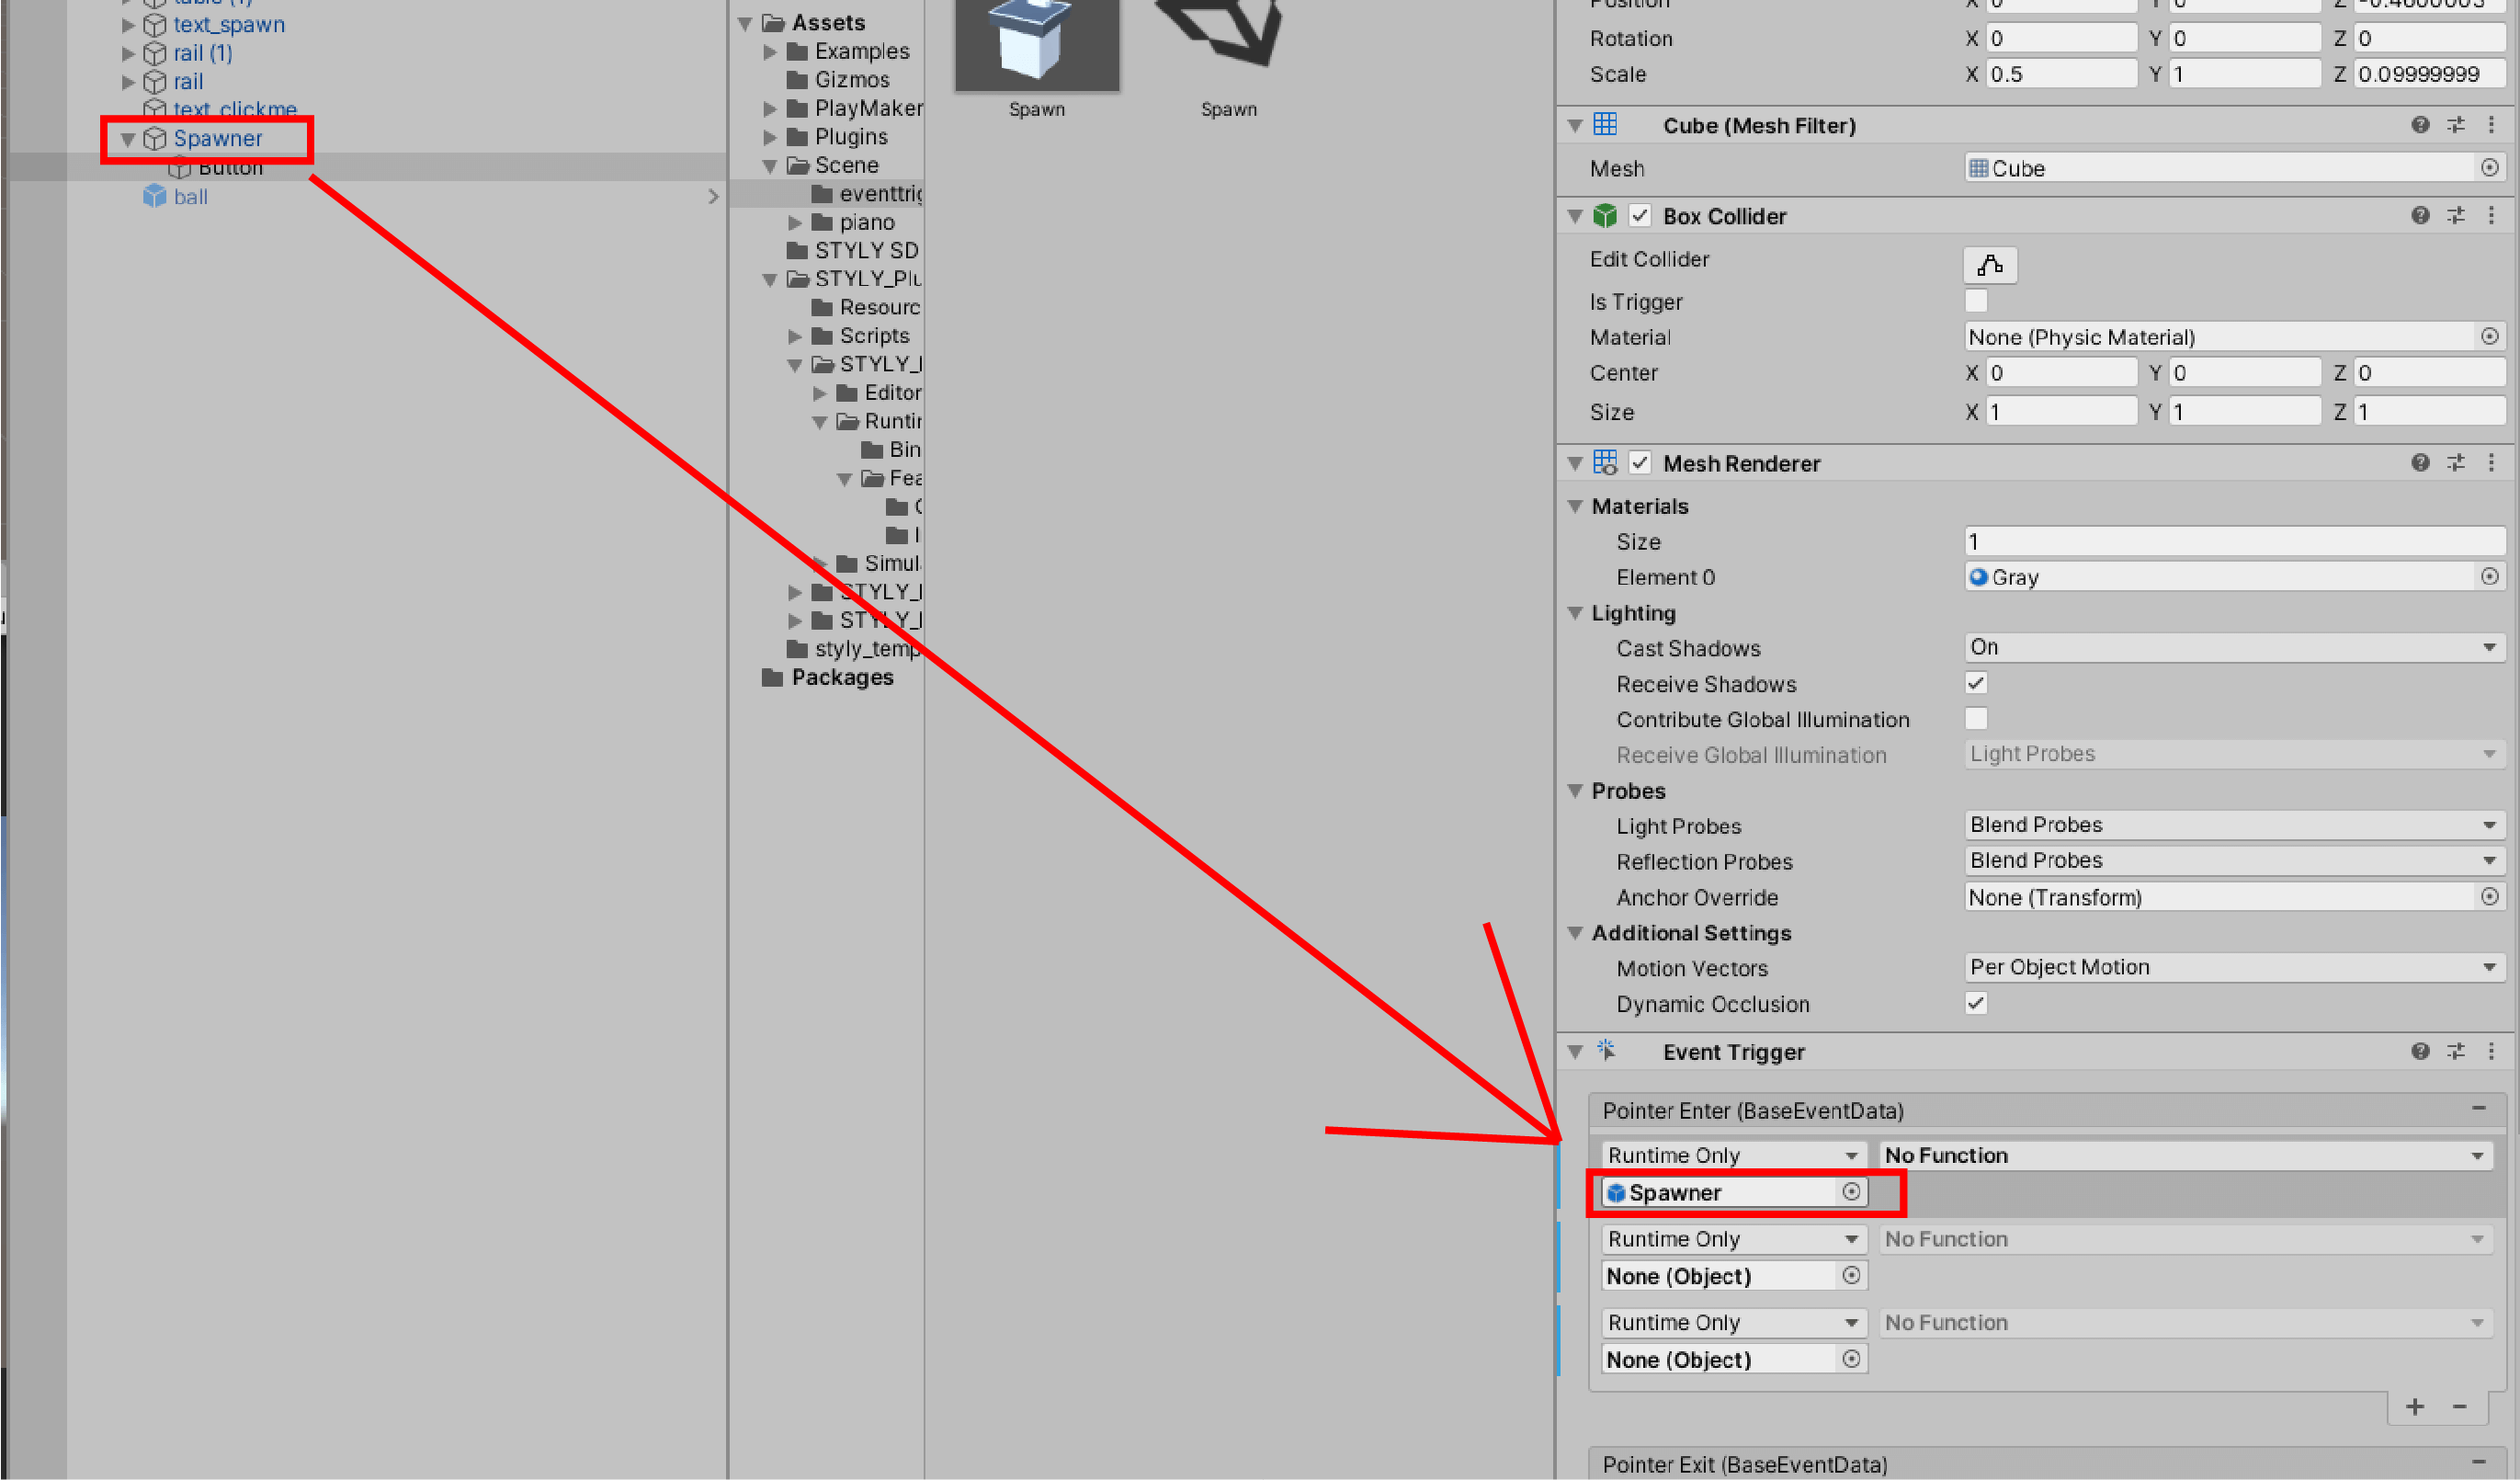
In the No Function column, select STYLY_Action_Spawner > Spawn().

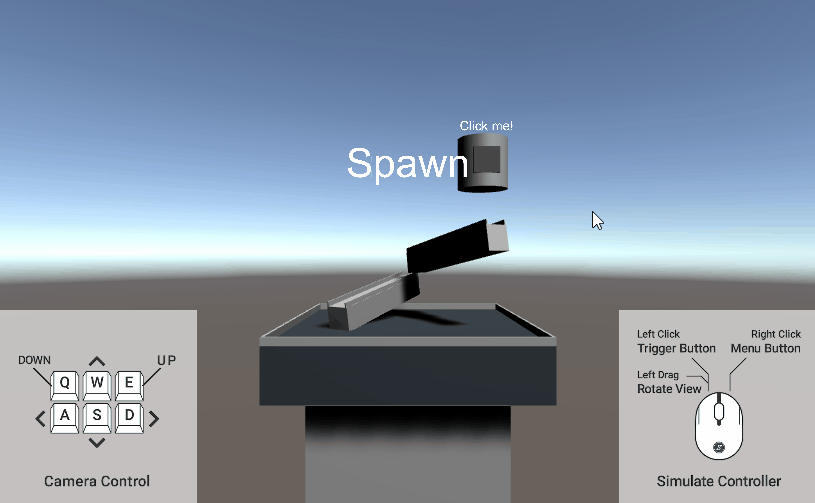
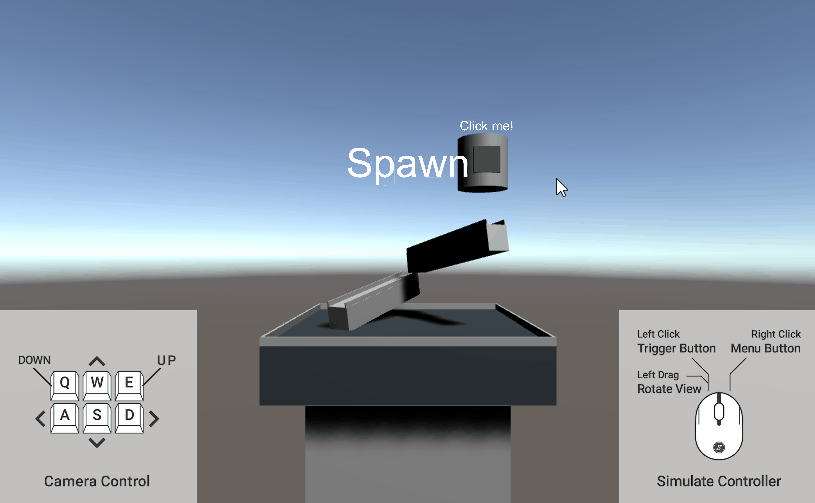
When you play the game in this state, the ball is spawned when the mouse touches the button.
(Actually, click the trigger button of the VR controller)
Material Settings
Set the action to change color at the touch of a button.
Before the modification it changed to blue, but this time we want it to change to yellow.
Prepare the material. Create a material in the project window via Create > Material.
Set the material’s Color to yellow.

Name the material “Yellow”.
The material has been created.
Set up the List.
Drag & drop the Button to the None(object) column of the second List of Pointer Enter.
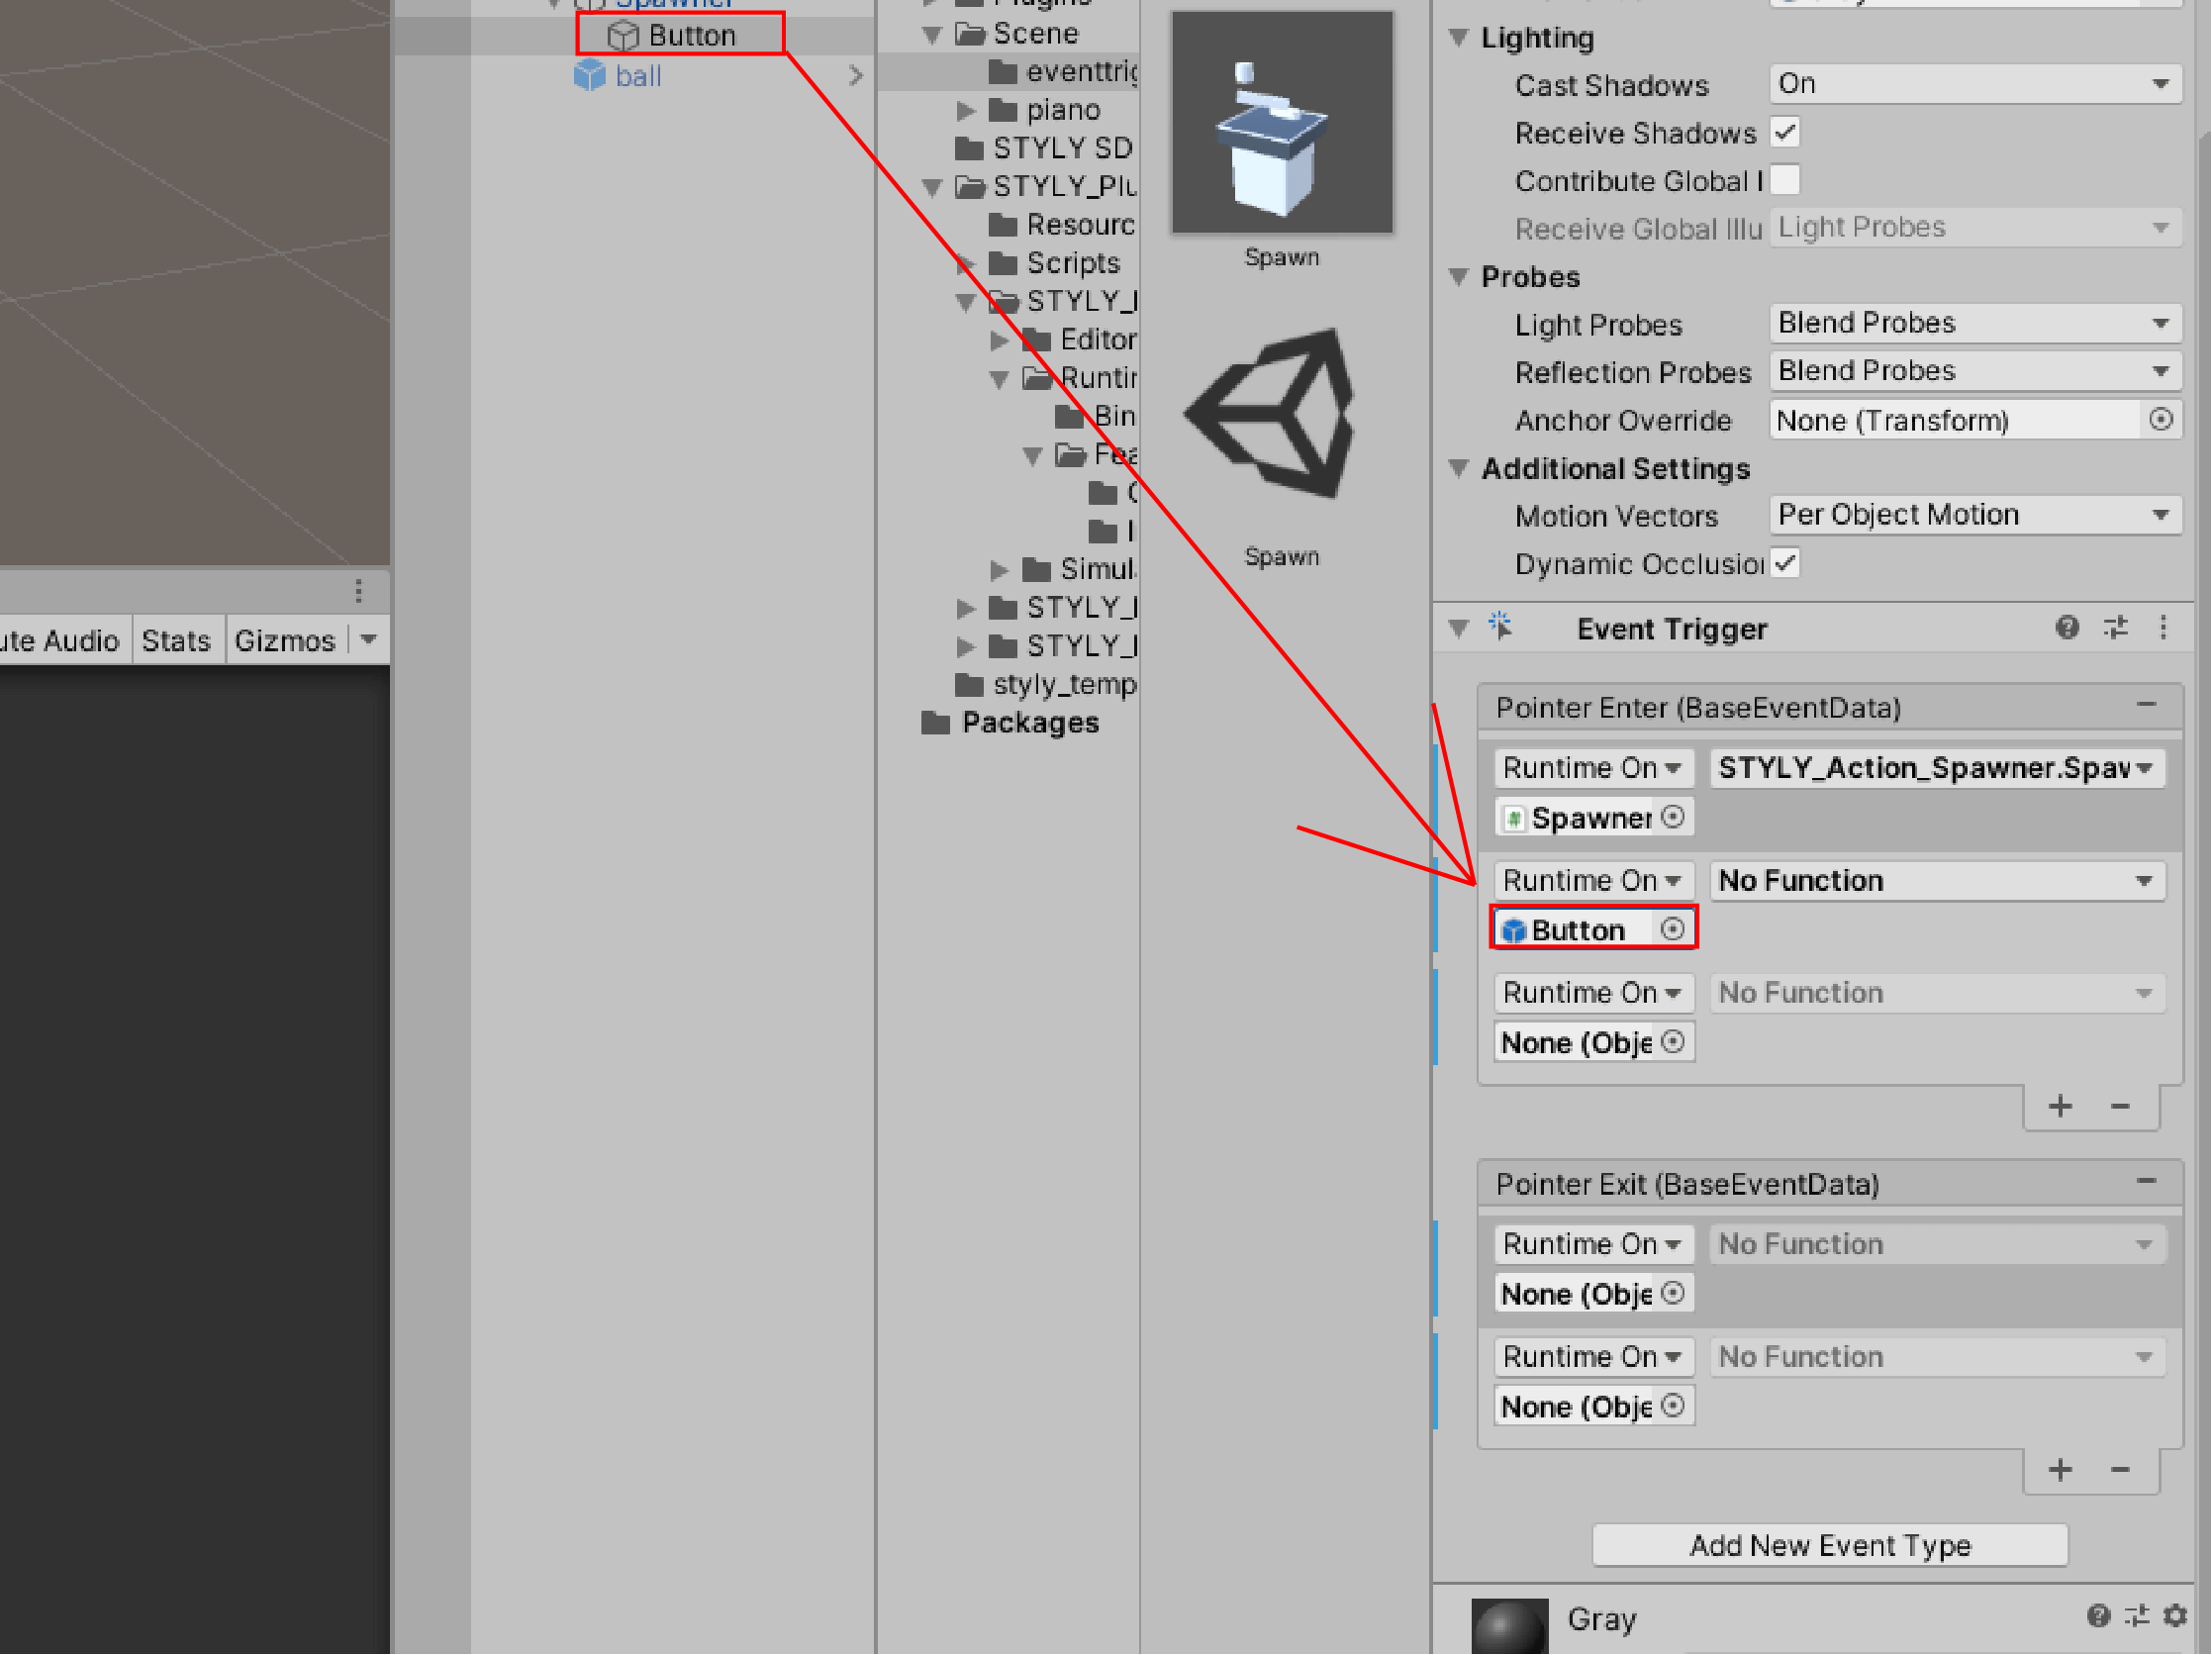
Set No Function to “MeshRenderer > Material.material”.

Select a material and drag and drop the Yellow material to the None object.

The material is now ready to be used.
Text settings
Set up the text.
Drag and drop “text_clickme” in the hierarchy window to None(object) in the third column of the List.
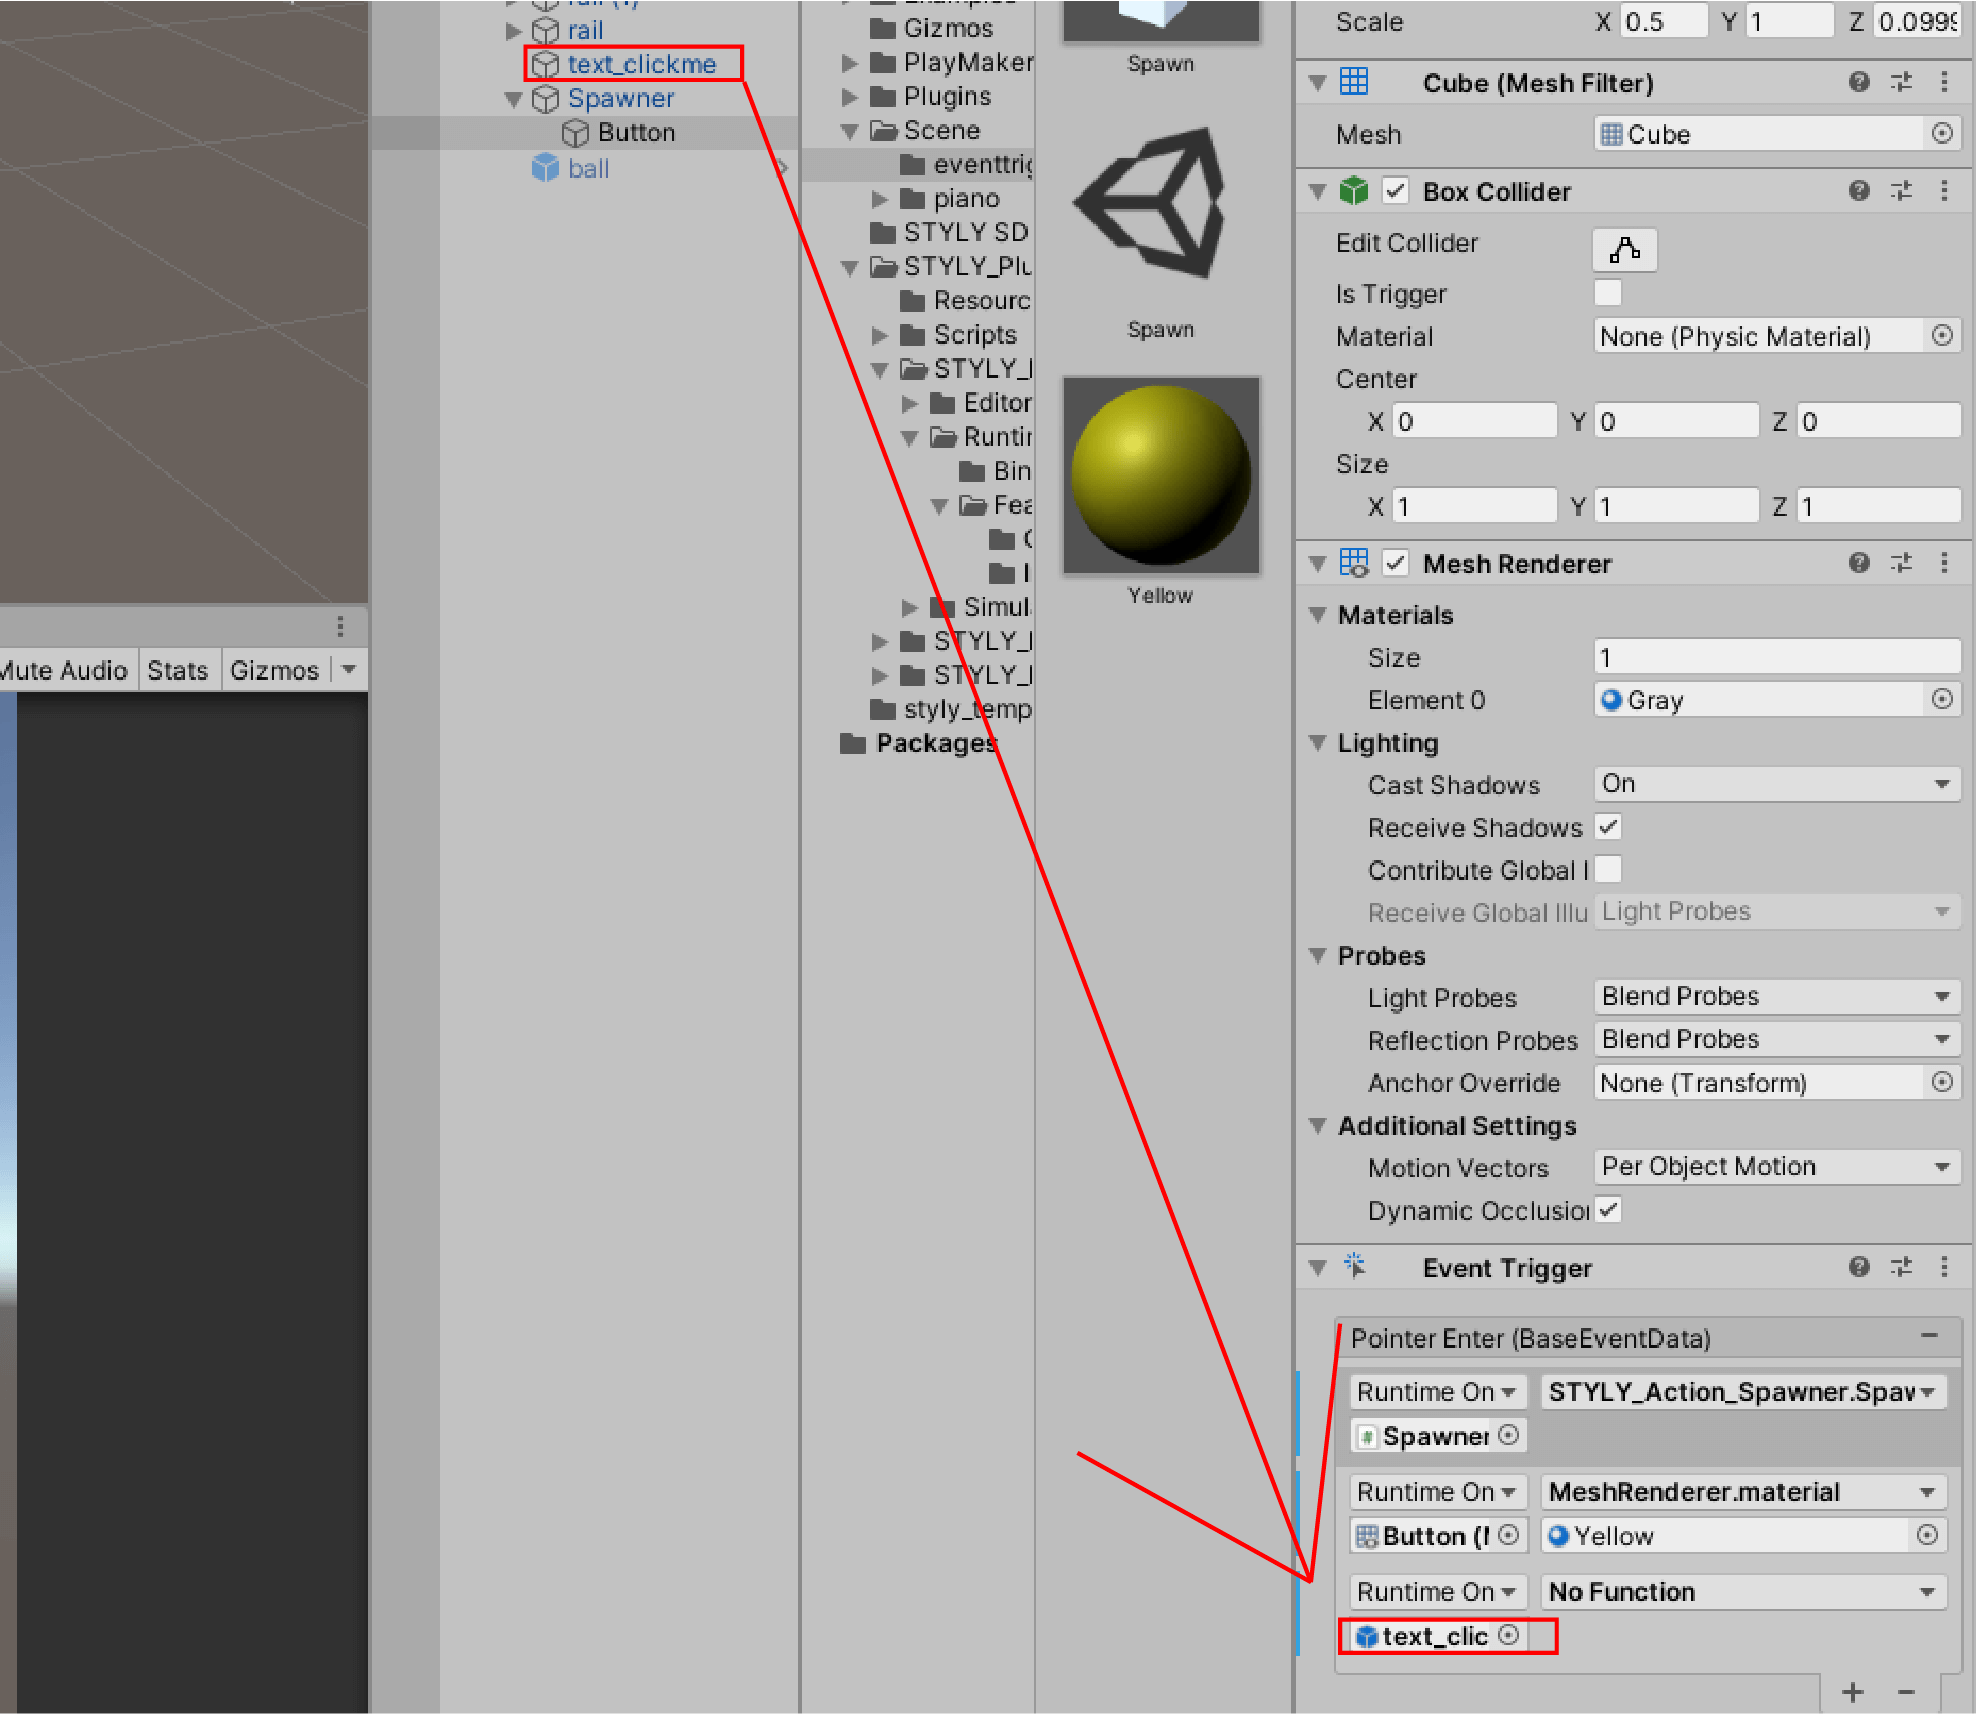
Next, set the No Function field to TextMesh > string.text.

A rectangle is displayed. Decide the message to be displayed when the button is touched. You can enter any message you want here, but in this case, we’ll choose “Good”.

Now you have set up Pointer Enter. Let’s play it back.
Next, let’s set the color of the button and the text to return when the mouse leaves the screen.
(Actually, when the controller’s ray leaves.)
Pointer Exit Settings
Material Settings
Since the color of the button is still yellow, we set it to turn gray when the controller’s ray leaves the object.
Drag and drop the Button to the first “None(object)” in the List of Pointer Exit.
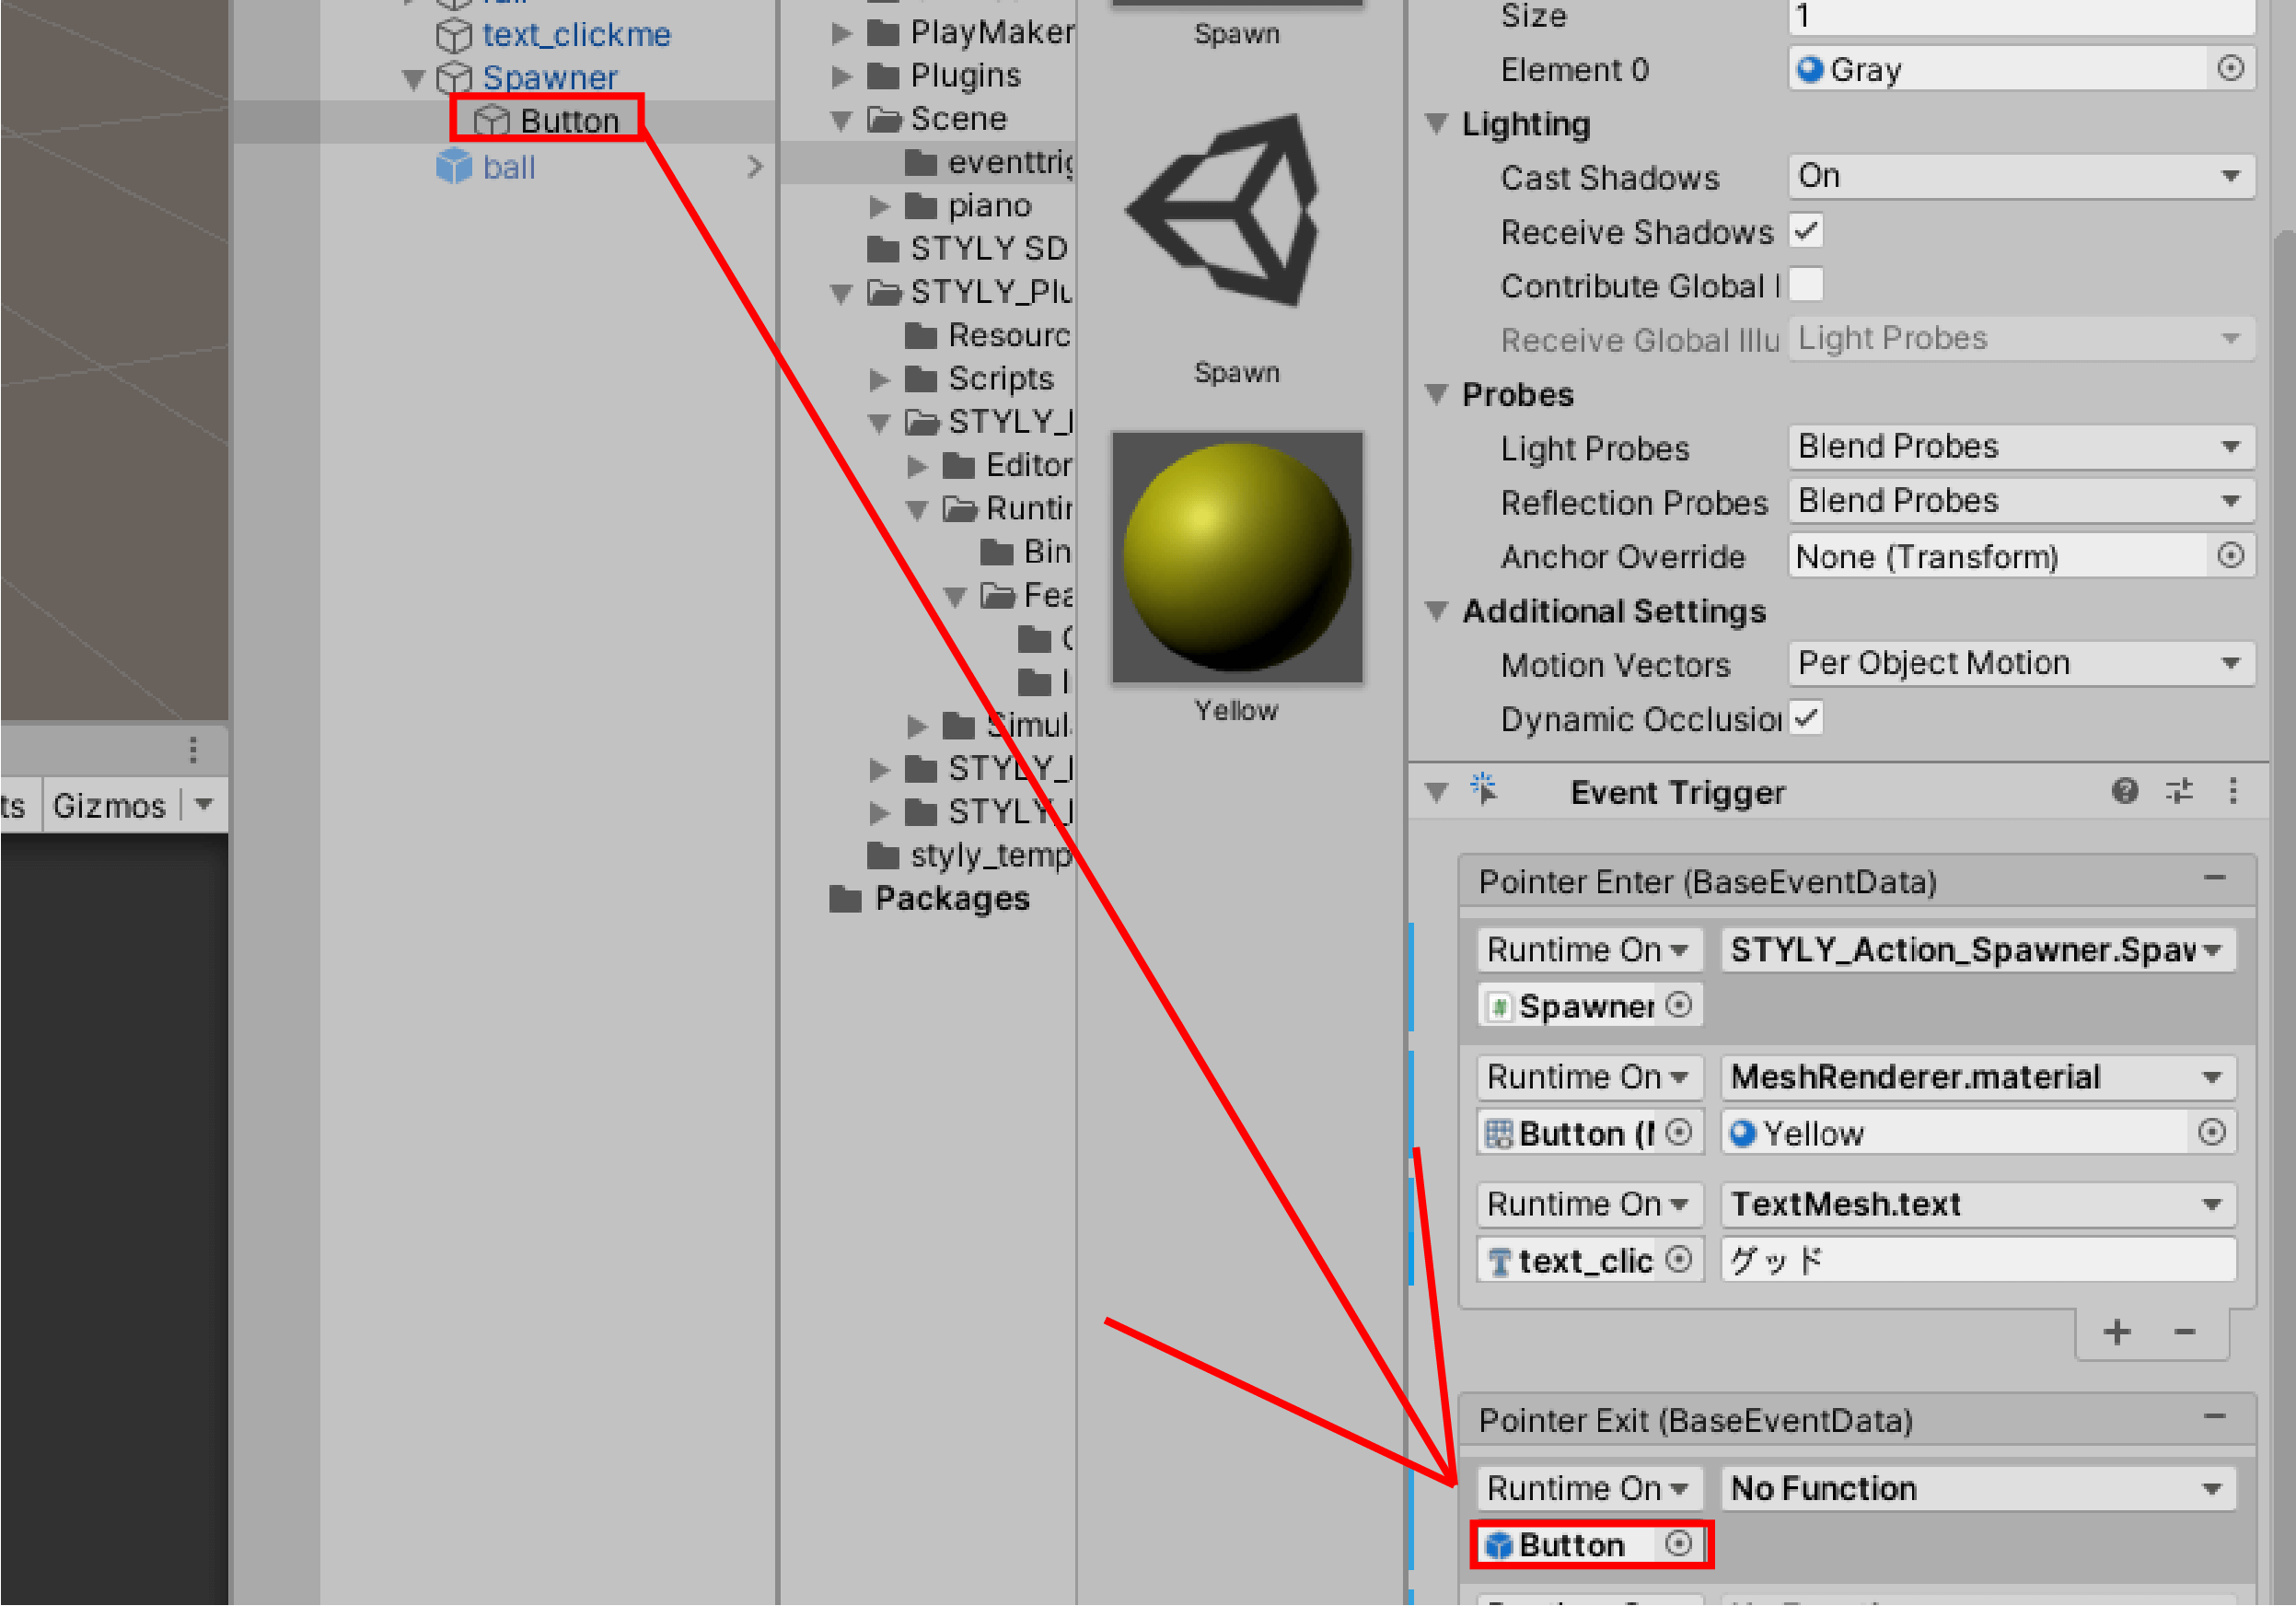
Set the No Function field to MeshRenderer > Material material material.

Drag and drop the original material, Gray.

You are now ready to set up the material.
Text settings
Drag and drop “text_clickme” on the hierarchy window to None(object) in the second List.
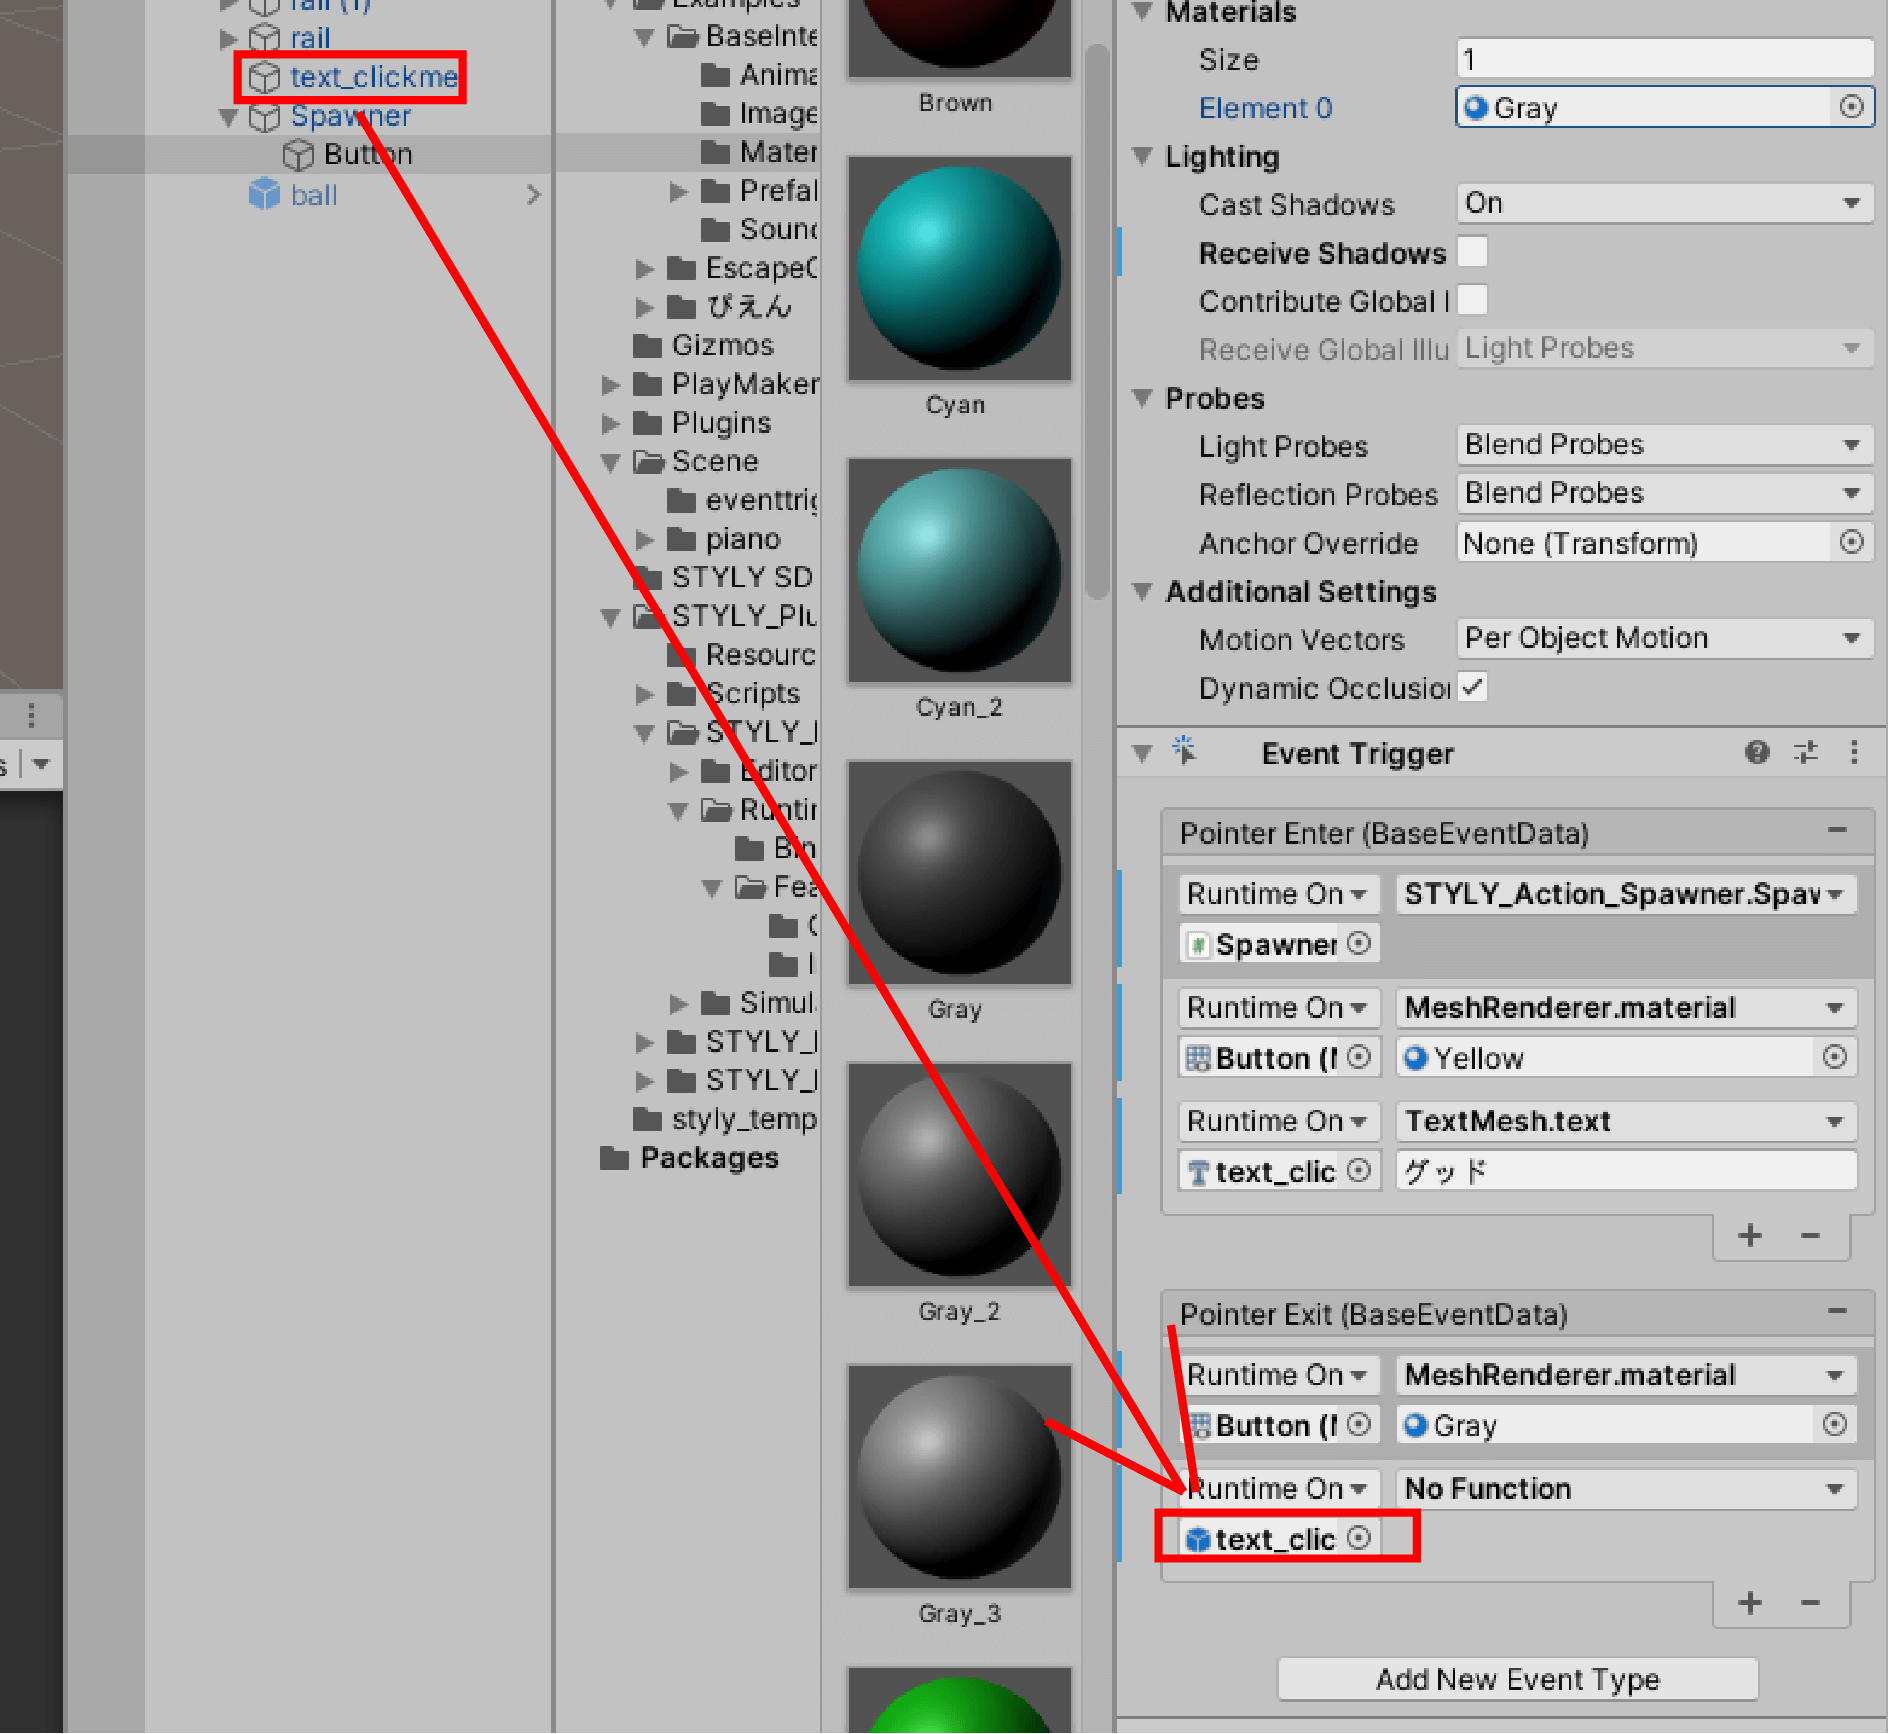
Set the No Function field to TextMesh > string.text.

Copy and paste the original text into the text field.
Select “text_clickme” in the hierarchy window and copy “Text” Click me!

Paste the copied text into List of Pointer Exit.

All settings are now complete.
Playback
Let’s actually play it out in Unity.
We’ve modded it!
In this way you will be able to create your own system based on the Interaction SDK.
Upload to STYLY
Upload the interaction object you have created to STYLY.
This time we will upload a modified Spawn as a pre-fab.
Name it “Spawn2” and turn it into a prefab so that you can experience it in a VR scene.
Upload your 3D model to STYLY.
How to create STYLY account

How to upload to STYLY from Unity

Introduction to NEWVIEW SCHOOL ONLINE
NEWVIEW SCHOOL ONLINE, where you can learn the basics of Unity and PlayMaker necessary for creating VR/AR content, from the basics to the application of PlayMaker, and learn the process of creating the fascinating content available on STYLY (we’ll also expose the production techniques).
