Tips for creating VR/AR scenes using 3DCG materials.
- 1 Preparation
- 2 AR Template and Principles of AR Scene Creation
- 3 VR/AR] Tip 01 Searching and placing STYLY 3D models
- 4 VR/AR] Tip 02 Uploading and placing 3D models
- 5 VR/AR】Tips 03 Putting textures on spheres and cubes
- 6 VR/AR】Tips 04 Using mixamo to animate 3D models of the human body
- 7 VR/AR] Tip 05 Creating materials from photos using Adobe Capture
- 8 VR] Arrange Idea 01 Changing the color of the lights
- 9 VR/AR] Arrange Idea 02 Using Unity to add simple animations to 3D models
Preparation
Log in to STYLY Studio.
https://gallery.styly.cc/?login
If you want to learn VR, please copy the 3DCG VR Template.
Click the following URL while logged into STYLY to copy the graphic template scene for 3DCG.
https://gallery.styly.cc/scene_copy?s=df0fa597-7d48-4dc4-86a0-d98a6e91a1a6
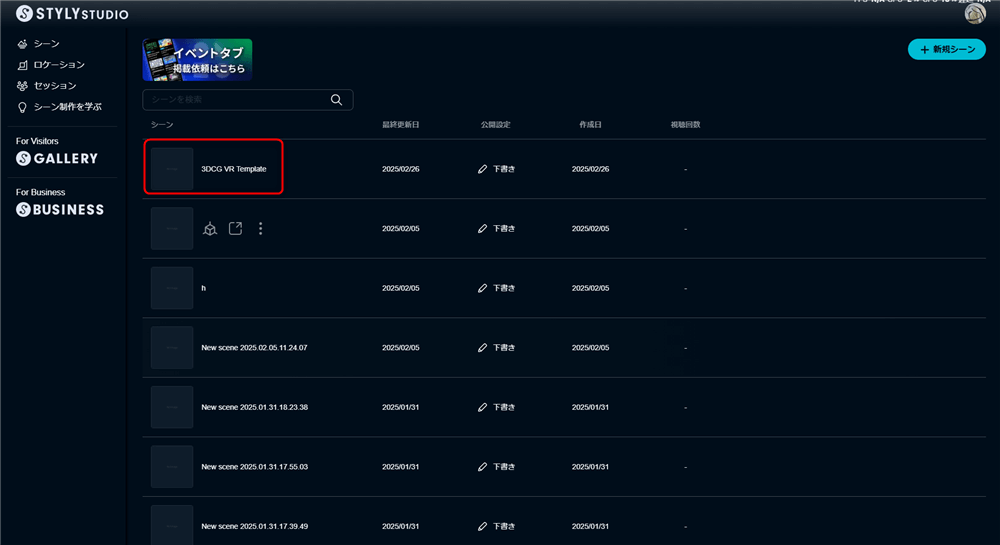
If you want to learn AR, please copy AR Template.
If you click the following URL while logged in to STYLY, the template scene for AR will be copied.
https://gallery.styly.cc/scene_copy?s=5c87f60b-3ed2-402c-9ca4-4bb0bfb1e51d
While using the template scene, please learn Tips and ArrangeIdea.

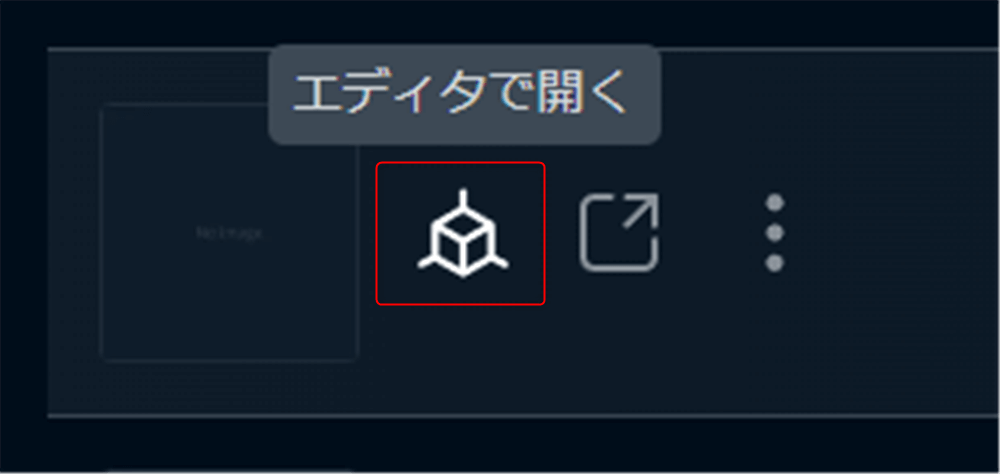
Click the Edit Scene button in Studio.
If you want to create an AR scene, please proceed after learning 1. Principles of AR Template and AR Scene Creation.
VR】・・・・You can learn mainly the contents that can be used in creating VR works.
VR/AR】・・・・You can learn the contents that can be utilized in both VR and AR productions.
Let’s learn the skills you want to acquire by referring to these tags.
AR Template and Principles of AR Scene Creation
Please proceed below only if you are creating AR scenes.
You may skip this section if you are creating VR scenes.
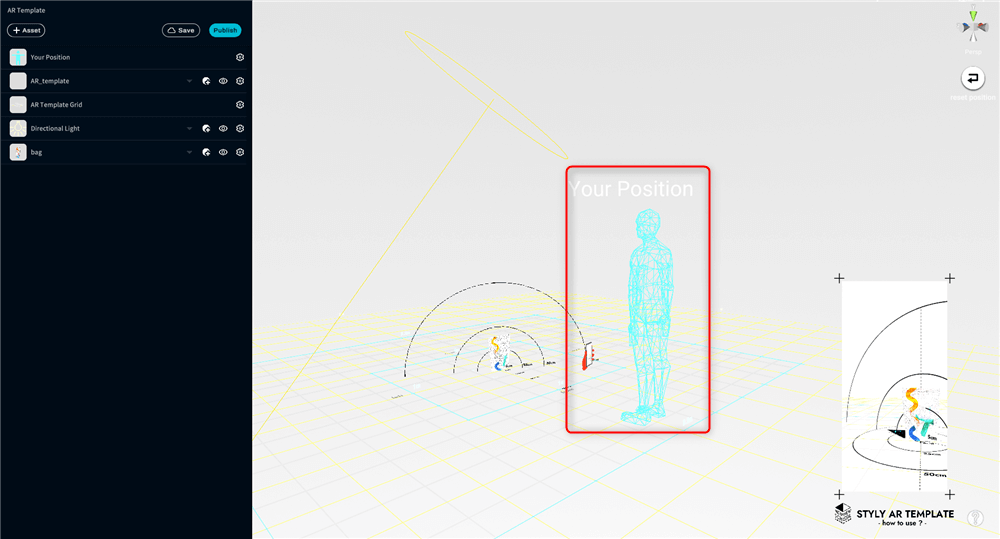
The center of the AR Template is called the origin.
STYLY displays AR contents around the origin.
The origin is the position where the origin mark is displayed after the AR scene starts and plane detection is performed.
Therefore, keep in mind that the center of the AR Template is the same as the position of the origin mark that is displayed when the AR scene is launched in the smartphone version of STYLY.
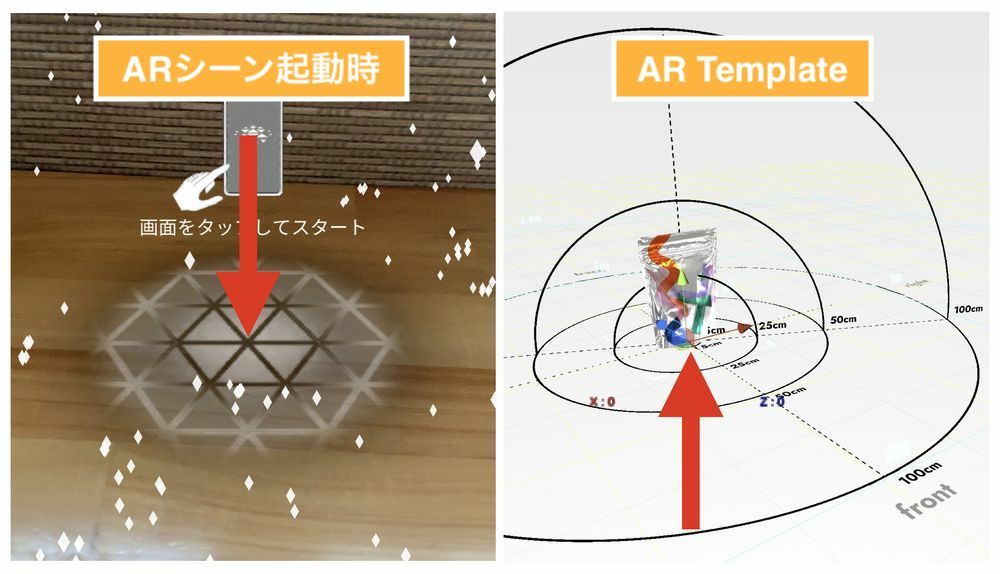
Your Position is not used (and does not work) in AR.
When creating an AR scene, understand that the assets should be placed in alignment with the origin.
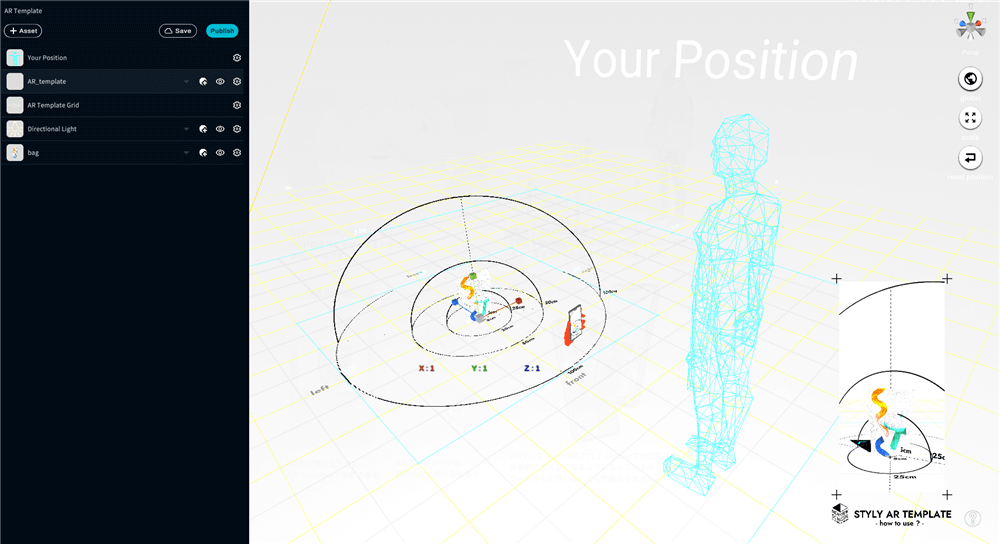
There are items in the AR Template that can help you align with the real world.
The first is the content zone layout (named AR_tempalte in the hierarchy menu).
It allows you to measure the width and height.
The second is the preview screen.
You can see the screen reflecting the hand holding the smartphone in front of you and the scene.
While looking at the preview screen, check the contents of your work to see how the AR scene will look in the real world and whether it matches your image.

You can expand the range of width and height you can figure out by scaling up or down the content zone layout.
The preview screen also moves to a distant distance in conjunction with the scaling of the content zone layout.
Use this function when creating contents that are large in scale.
To use, with AR_Template selected from the hierarchy menu, press the [R] key and select the center of the gizmo with a left click to zoom in or out.
When creating an AR scene, do not delete the AR Template Grid.
If you delete it by mistake, press [Ctrl] + [z] key (one backward operation) to restore it.
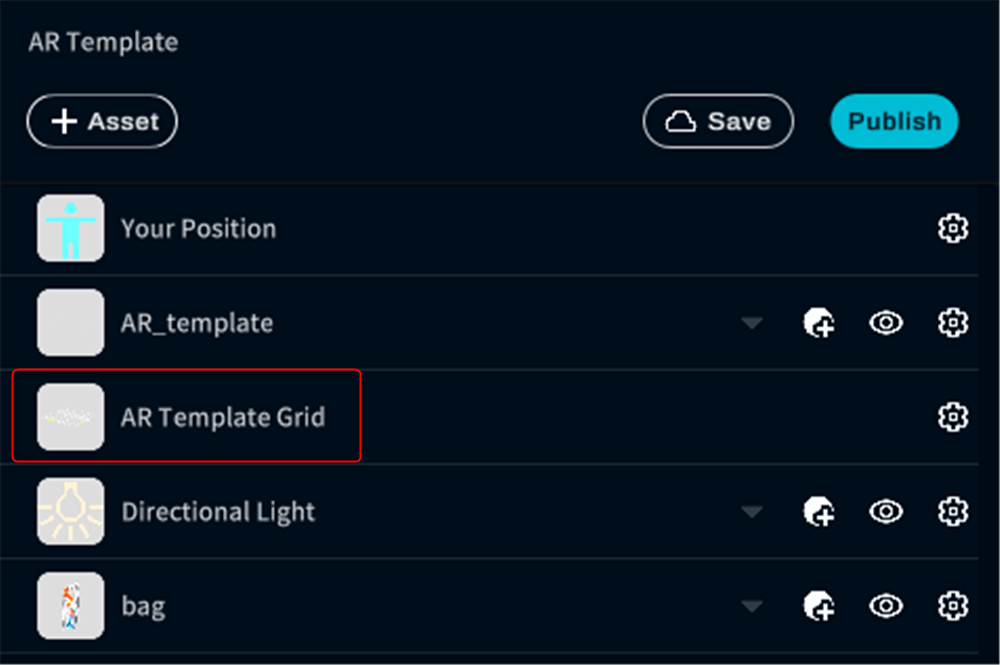
Also, do not use Skybox (celestial) and Ground (ground) as they are not used in AR scenes.
Summary of points to note when creating an AR scene
- The center of the VR Template and the origin mark of the AR scene are the same
- Your Position cannot be used.
- Do not delete the AR Template Grid.
- Do not place Skybox and Ground in the scene. (If Skybox is placed, the scene will be in VR scene mode.)
VR/AR] Tip 01 Searching and placing STYLY 3D models
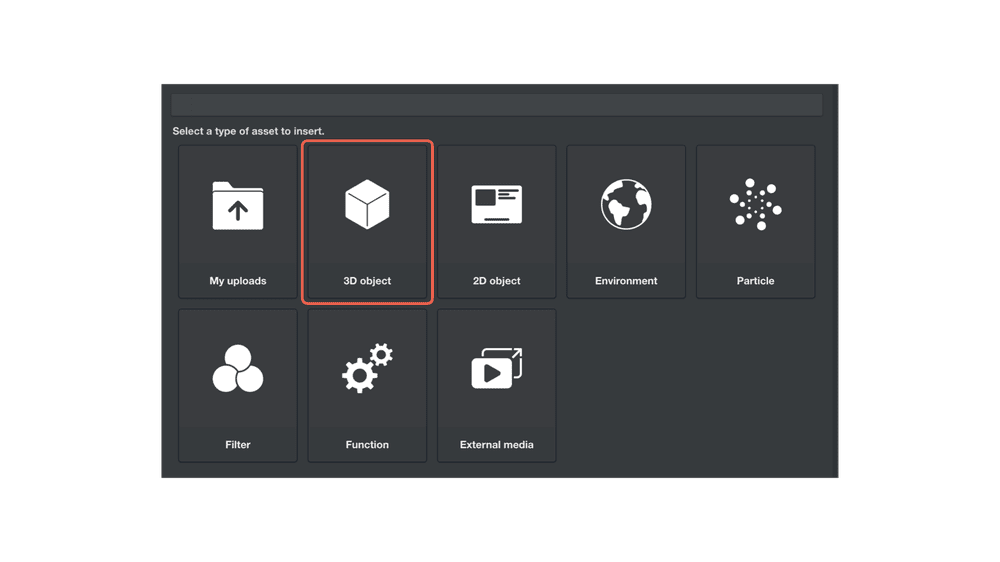
You can use 3D models prepared by STYLY in advance in the 3D object menu.
Select 3D object from Assets.
You will find a list of freely available 3D models such as Primitive / Official Model / Model / Featured.

You can also search by genre by selecting the tags at the top of the page.
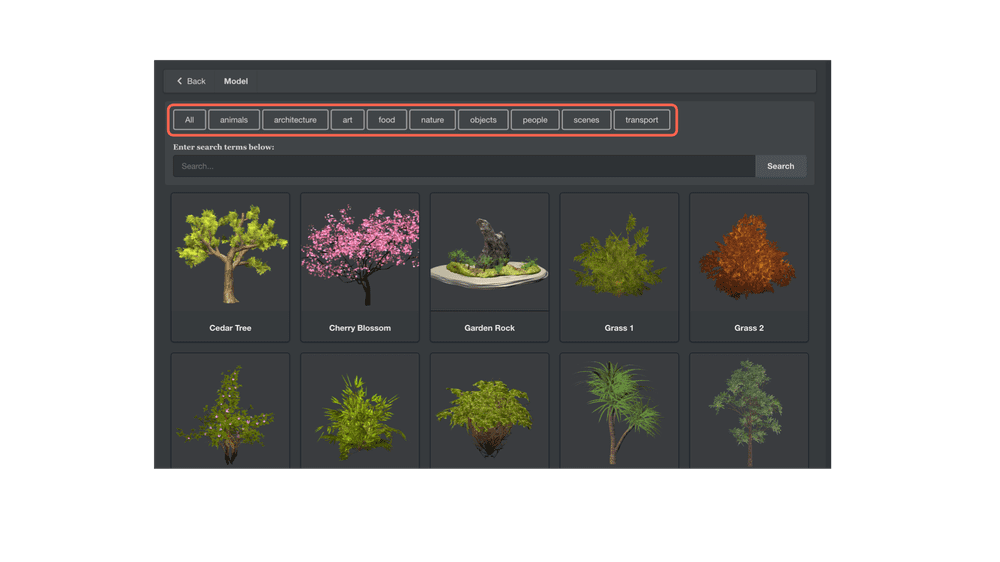
You can also search by word in the search box.
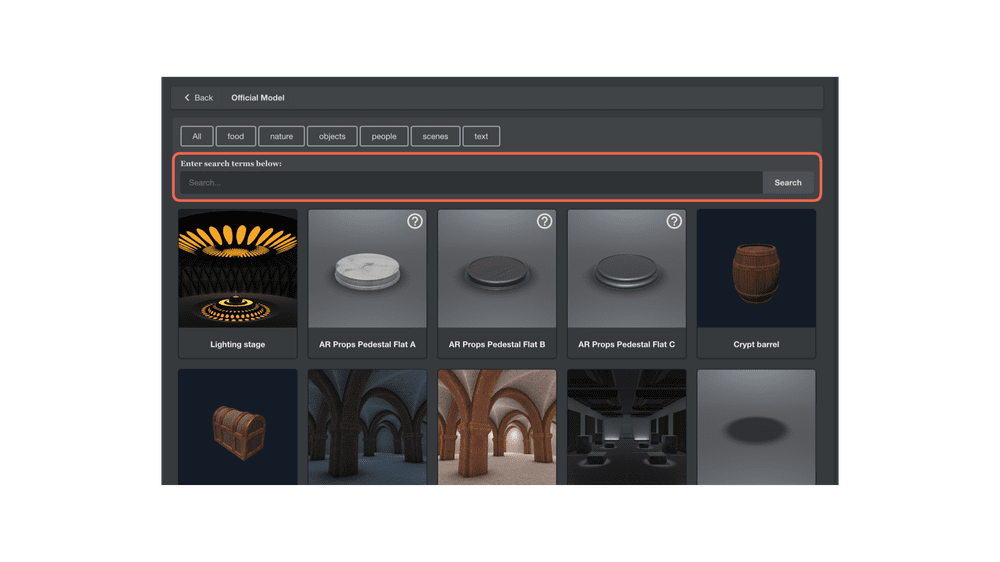
Once you have decided on the 3D model you want to use, select it and place it in the scene.
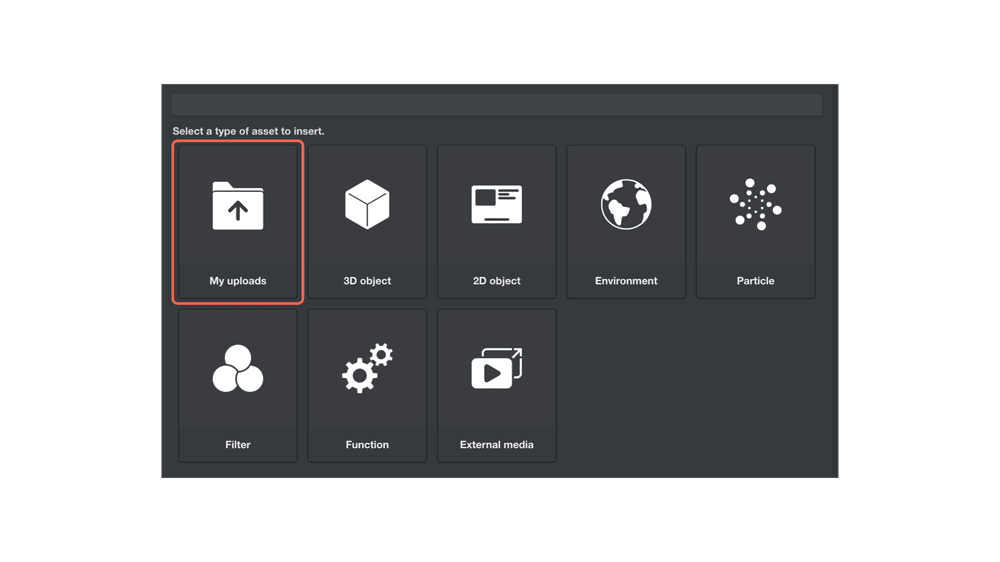
VR/AR] Tip 02 Uploading and placing 3D models
STYLY allows you to upload 3D models saved in your local files.
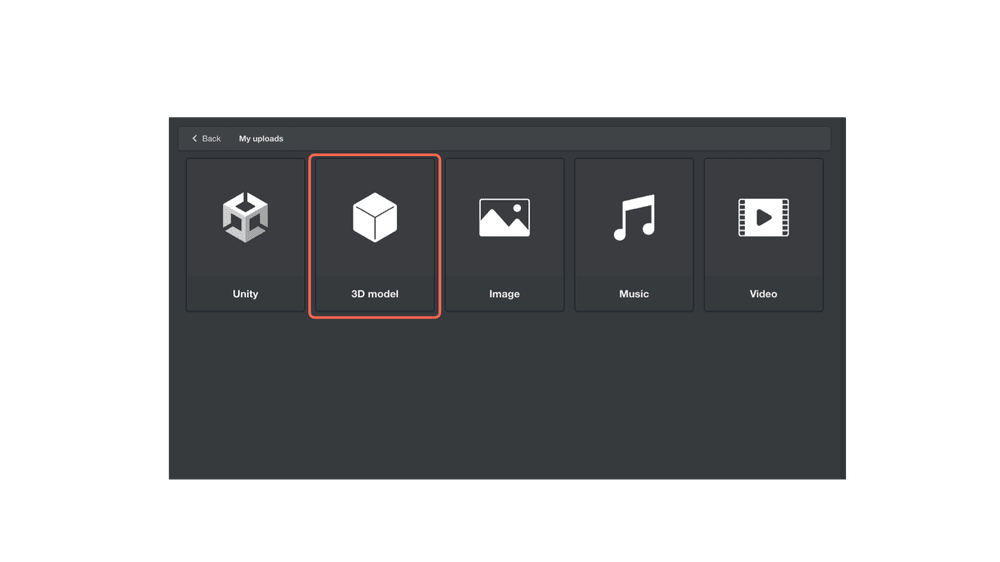
Select [ My uploads ] > [ 3D model ] in Assets.
The following data formats are supported for 3D models:
The upload limit is 200MB.
FBX
Blender
OBJ + MTL + JPEG
glTF (zip file)
Here is the Upload method for OBJ+MTL+JPEG files.
Other formats can be Uploaded in the same way.
*Only glTF, Upload as zip or glb file including glTF file.
Click the [Select …] button.
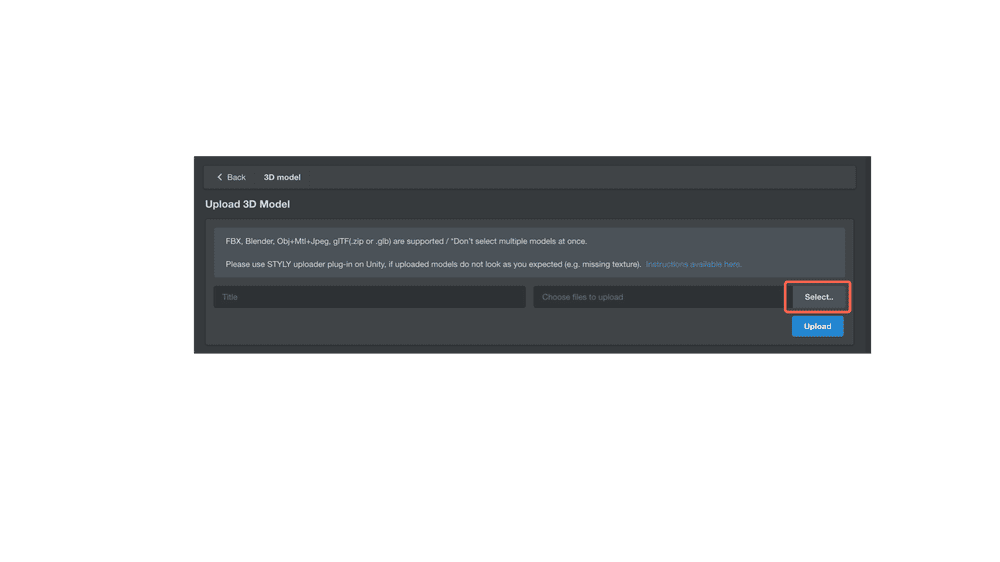
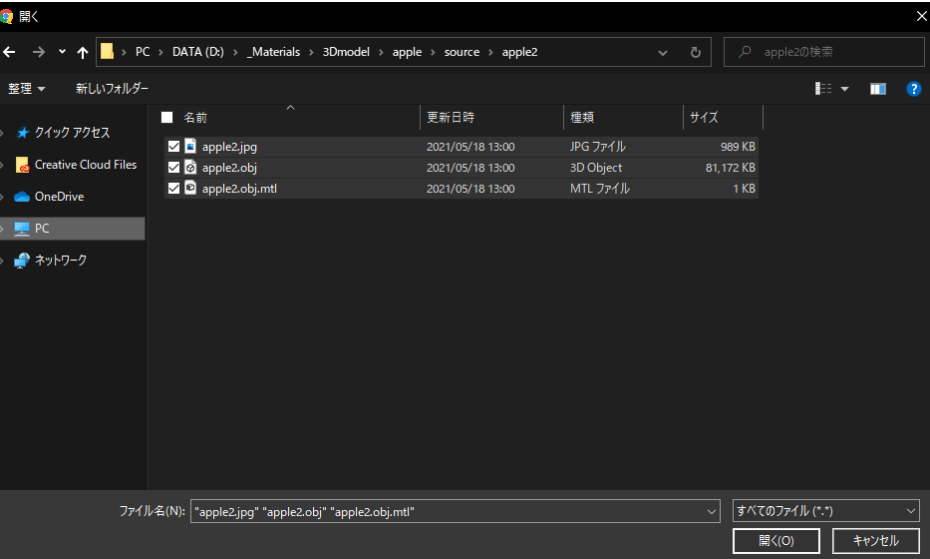
Select OBJ file, MTL file, or JPEG file.
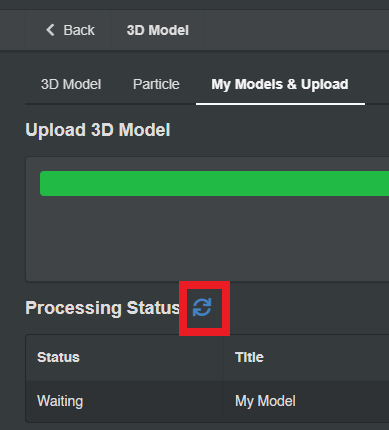
Enter the file name in the Upload File Name form and click the [Upload] button.
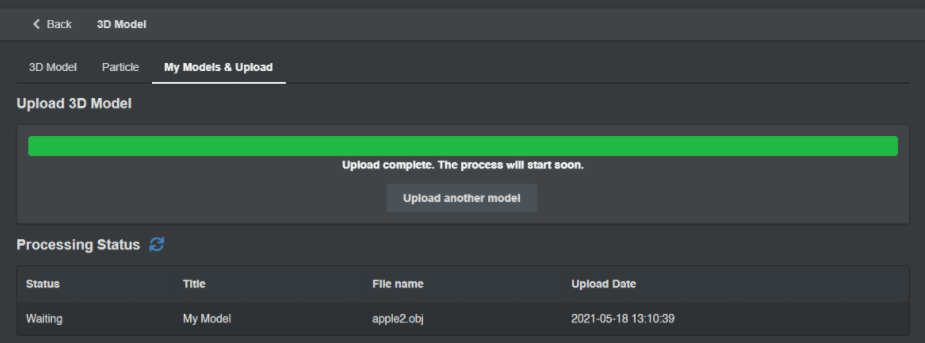
You can check the status during Upload. Here are the status types
Waiting: Waiting for processing
Processing: Processing in progress
Completed: Processing completed
Failed: Processing failed
Upload is complete when the status becomes Completed.
During uploading, click the Update Status button to display the latest status.
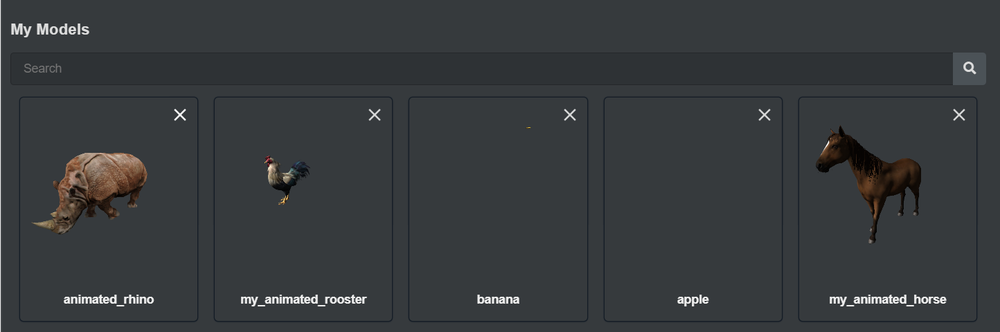
Uploaded 3D models are displayed in My Models and can be placed in Scenes.
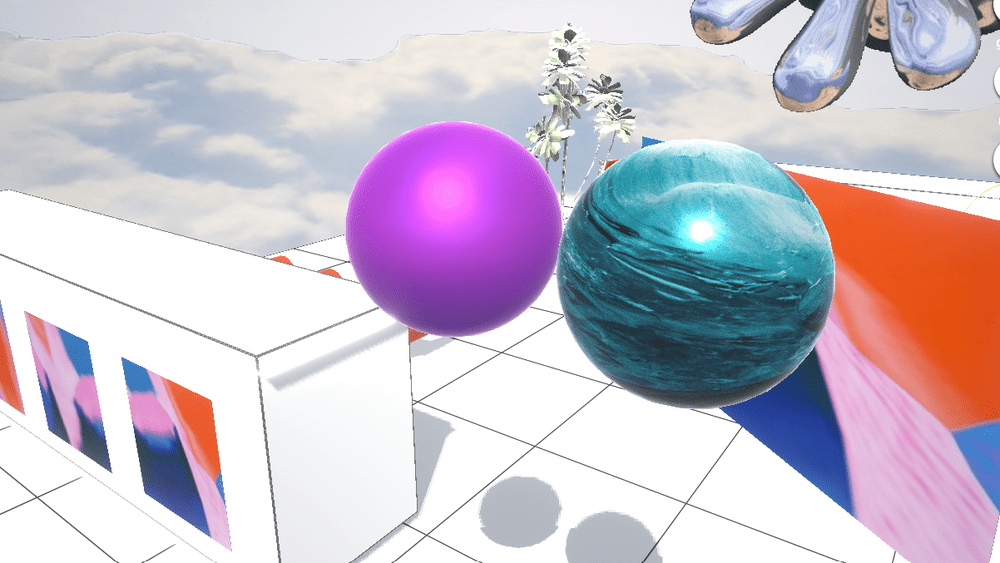
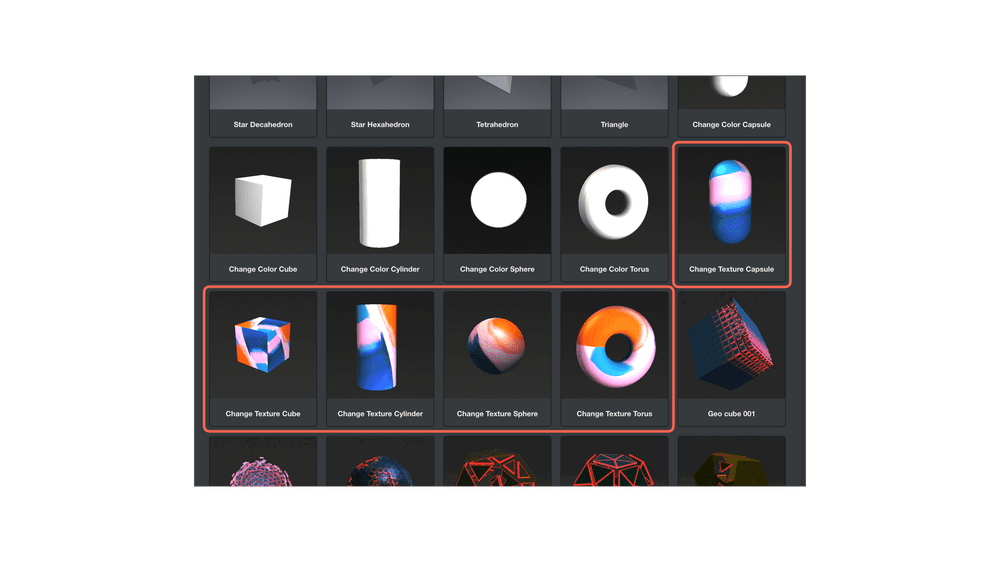
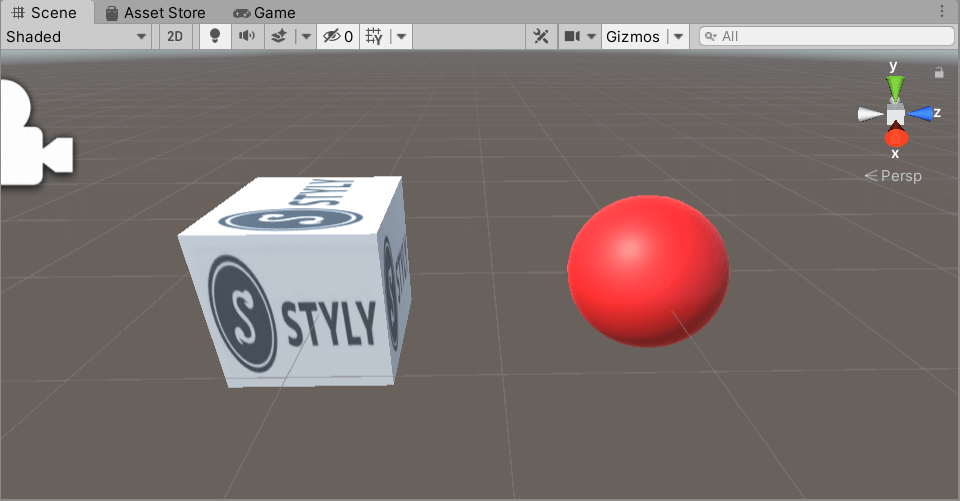
VR/AR】Tips 03 Putting textures on spheres and cubes
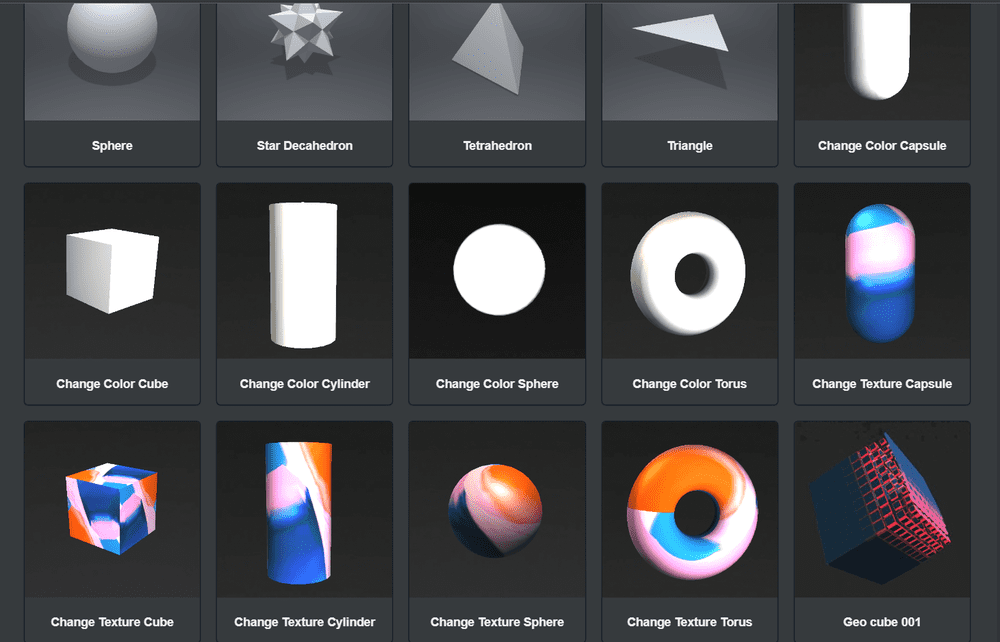
STYLY’s custom assets include assets that allow you to set textures and colors based on primitive objects.
From STYLY Studio’s Assets, select [ 3D object ] > [ Primitive ].
Change Color ●● is an object for which color can be set.
Change Texture ●● is an object for which you can set the texture.
The following items can be set for Change Color ●● assets.
Color: The color of the object.
Metalic: Metal texture; the higher the value, the more metallic the texture.
Smoothness: Surface smoothness.
Rotate Y Angle: Speed of Y-axis rotation.

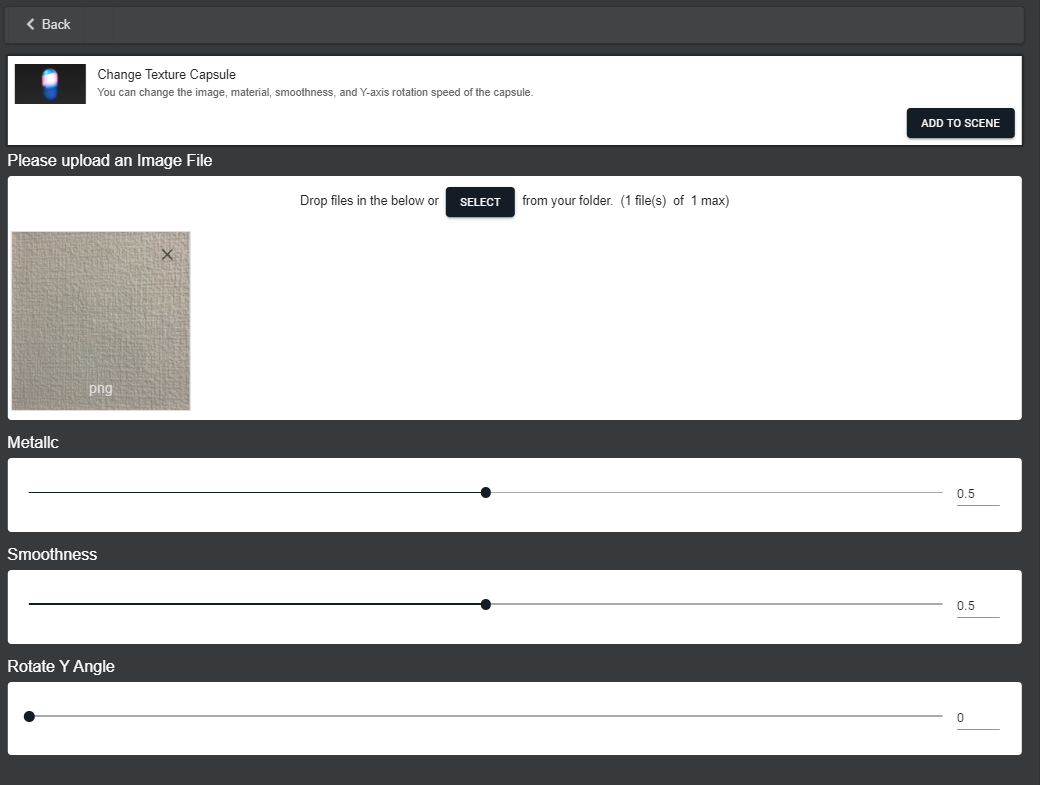
Change Texture ●● assets can set the following items.
Please upload an Image File: Upload the image data to be attached to the texture.
Metalic: Metal texture; the higher the value, the more metallic the texture will be.
Smoothness: Surface smoothness.
Rotate Y Angle: Speed of Y-axis rotation.
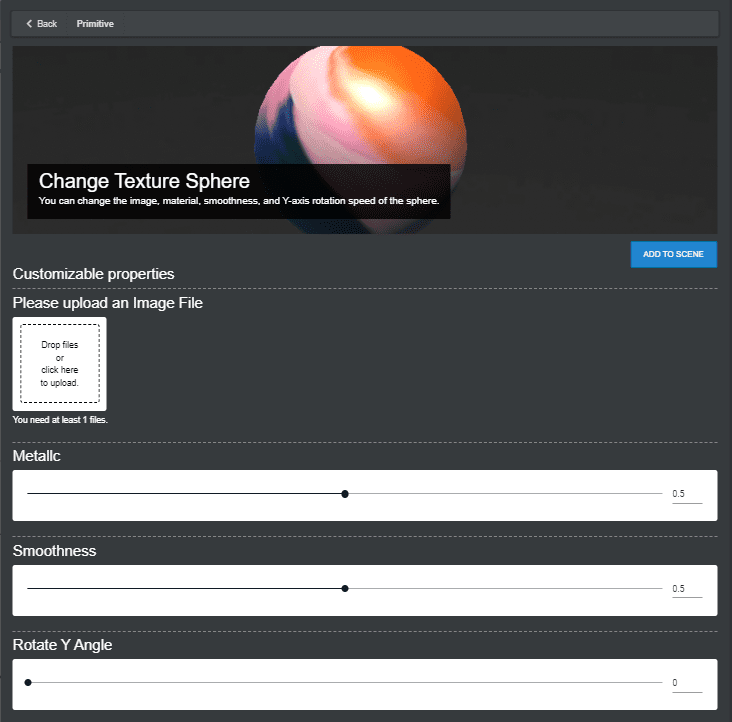
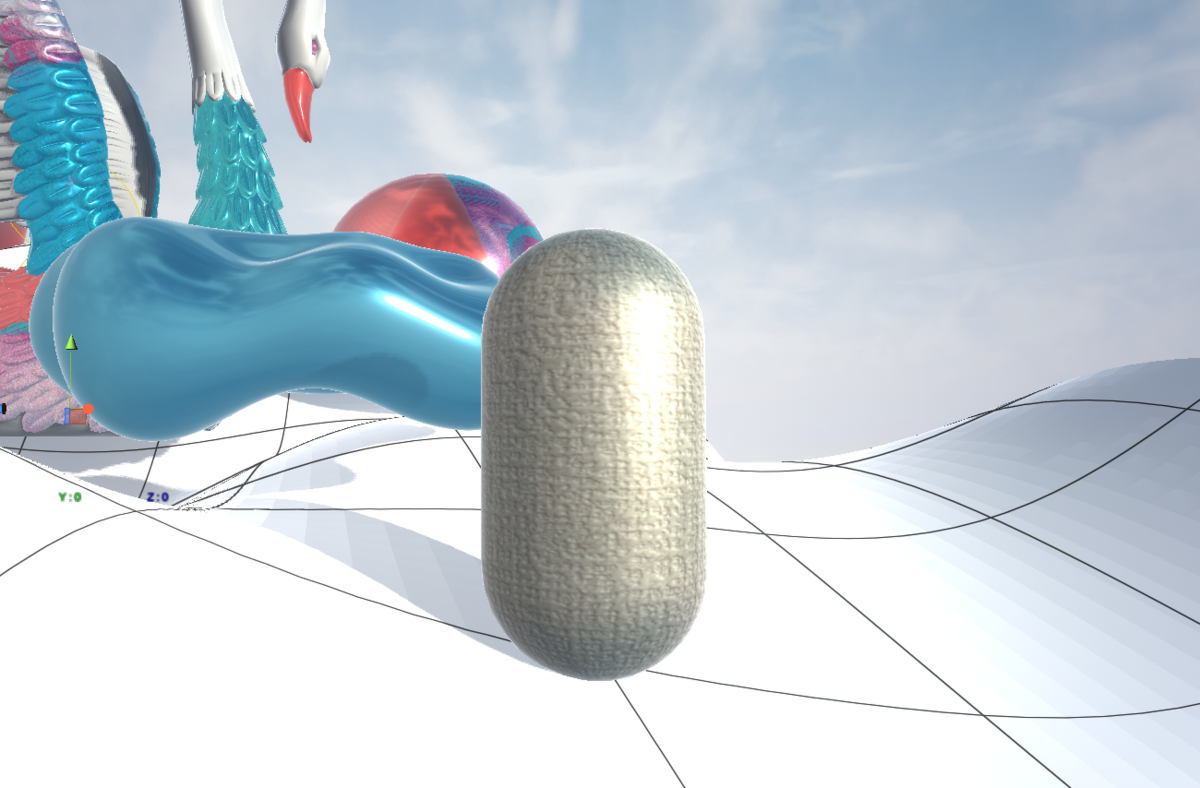
After completing the settings, click ADD TO SCENE to place the image in the scene.
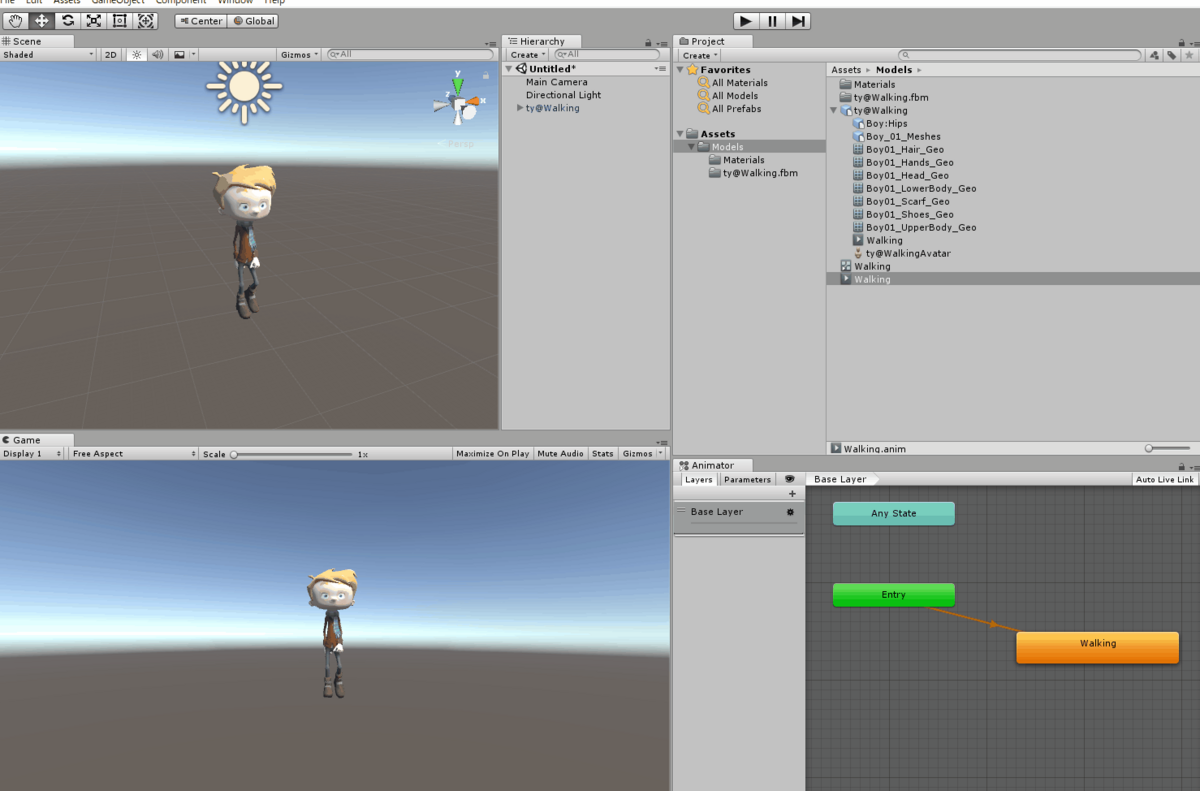
VR/AR】Tips 04 Using mixamo to animate 3D models of the human body
mixamo is a web service acquired by Adobe in 2015 that allows users to customize and animate 3D characters.
Even if you do not have any special skills, you can easily rig (create a mechanism to move 3D characters) and animate 3D characters with 3D character data, allowing you to give 3D characters a variety of movements such as running, dancing and sports.
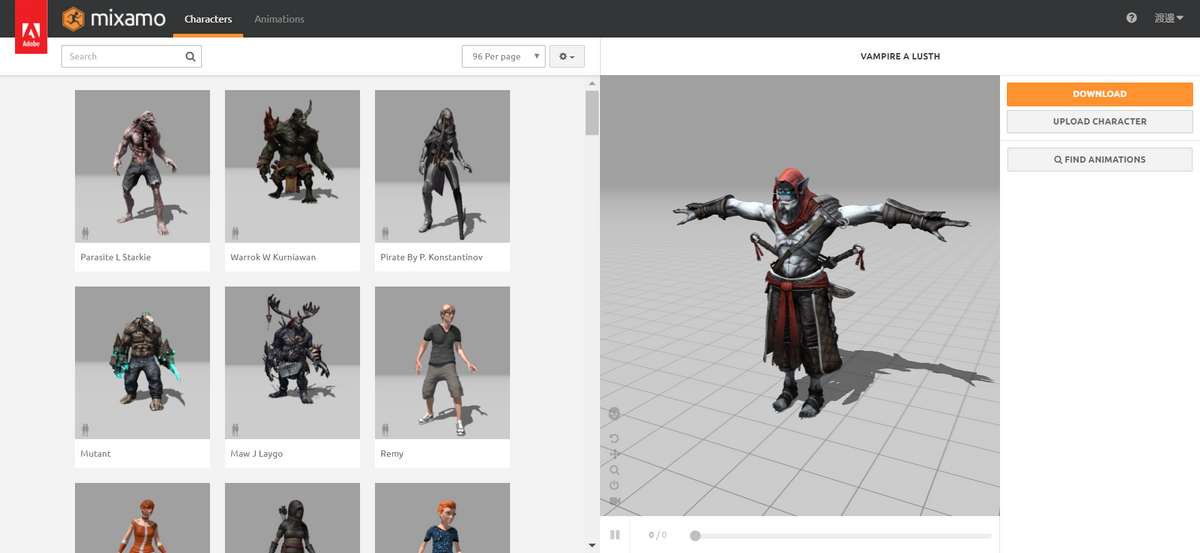
If you want to use mixamo character data (with motion) STYLY, you basically need to use Unity.
For more information, please check the Learning the Basics of Unity Avatar Animation (Humanoid Animation) course.
VR/AR] Tip 05 Creating materials from photos using Adobe Capture
This video shows how to create a material from a photo using Adobe Capture and attach it to a 3D model in Unity to create a scene.
You only need to take a photo of the object you want to make into a material, so you can create a material very easily.
It will help you create a scene.
Adobe Capture is one of the smartphone applications provided by Adobe.
You can create brushes, color themes, etc. from photos.
In this article, we will use one of Capture’s features, the Create Material function, to create a material and import it into Unity to create a scene.
Adobe Capture can be downloaded from here (for both IOS and Android).
https://www.adobe.com/jp/products/capture.html
Take a picture with your smartphone / iPad as soon as possible.
Select the item “Material” at the bottom of the screen and take a picture.
A preview of the material that will be created in the center will be displayed.
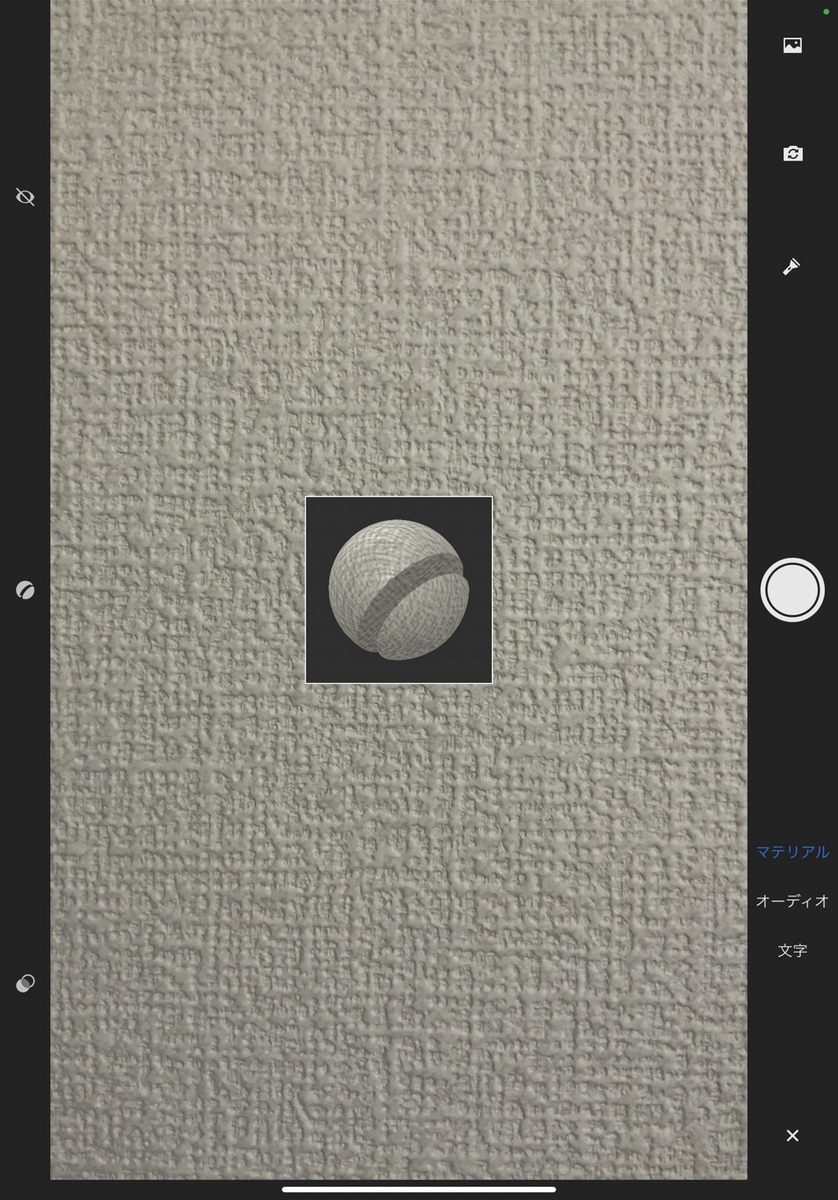
Once you have taken the picture, you will be taken to the screen where you can edit the material.
Make fine adjustments here and output the material.
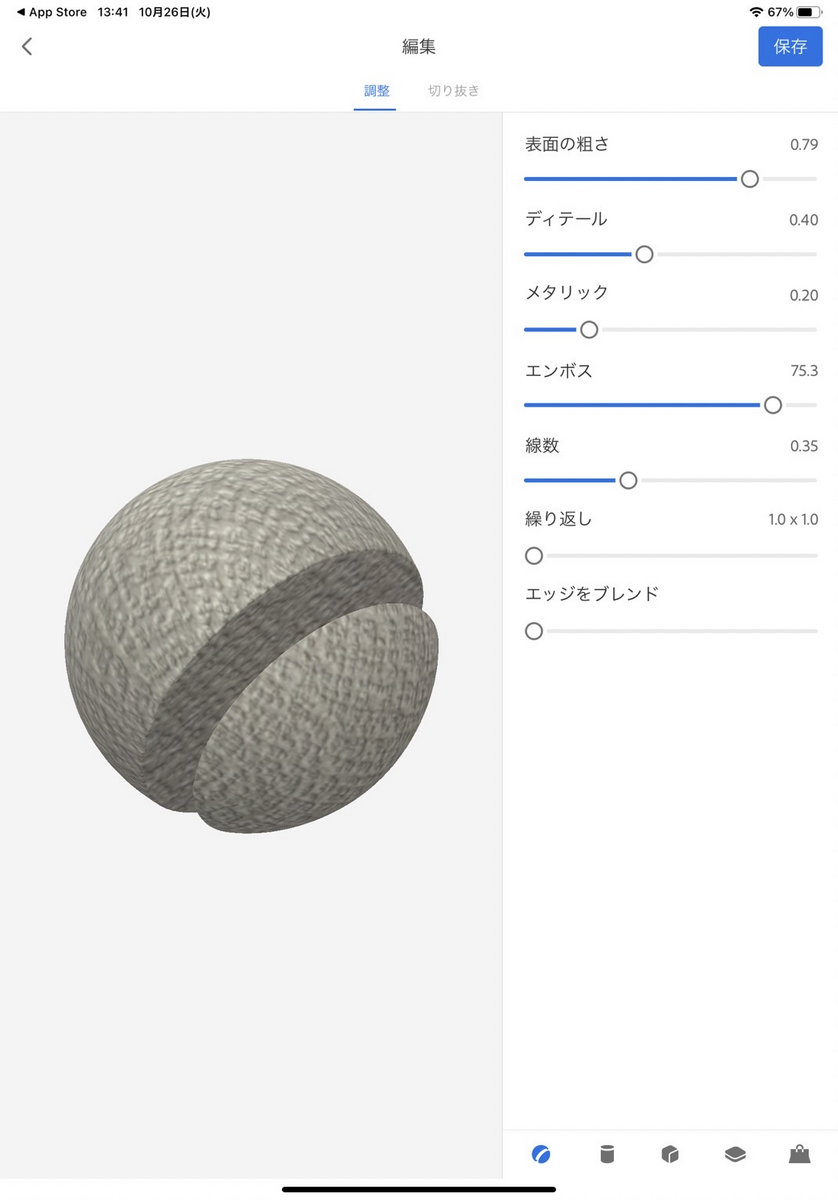
In the Adjustment tab, you can adjust the texture and details of the material.
Surface Roughness
Shows the roughness of the material’s surface.
Lowering the value will reduce the roughness and give the material a smooth texture.
Detail
Shows the detail of the image displayed on the surface of the material.
If there is a fine pattern, you can increase the value to maintain the texture.
Metallic
Shows the level of metallic texture of the material.
Increasing the value will give the material a metallic sheen.
Emboss
Shows the level of unevenness of the material.
The value ranges from -100 to 100. The closer the value is to 0, the flatter the material is.
Line Count
Shows the number of lines on the material’s surface.
The higher the value, the more detailed the lines.
Repeat
This allows you to repeat an image on the surface of the material.
This is useful when you want to apply a pattern evenly.
Blend Edges
Blends the color boundaries of the material.
The higher the value, the milder the color change.
The Crop tab allows you to crop the photo to be used for the material.
By cropping only the parts of the material you want to create, you can create a material that is close to your ideal.
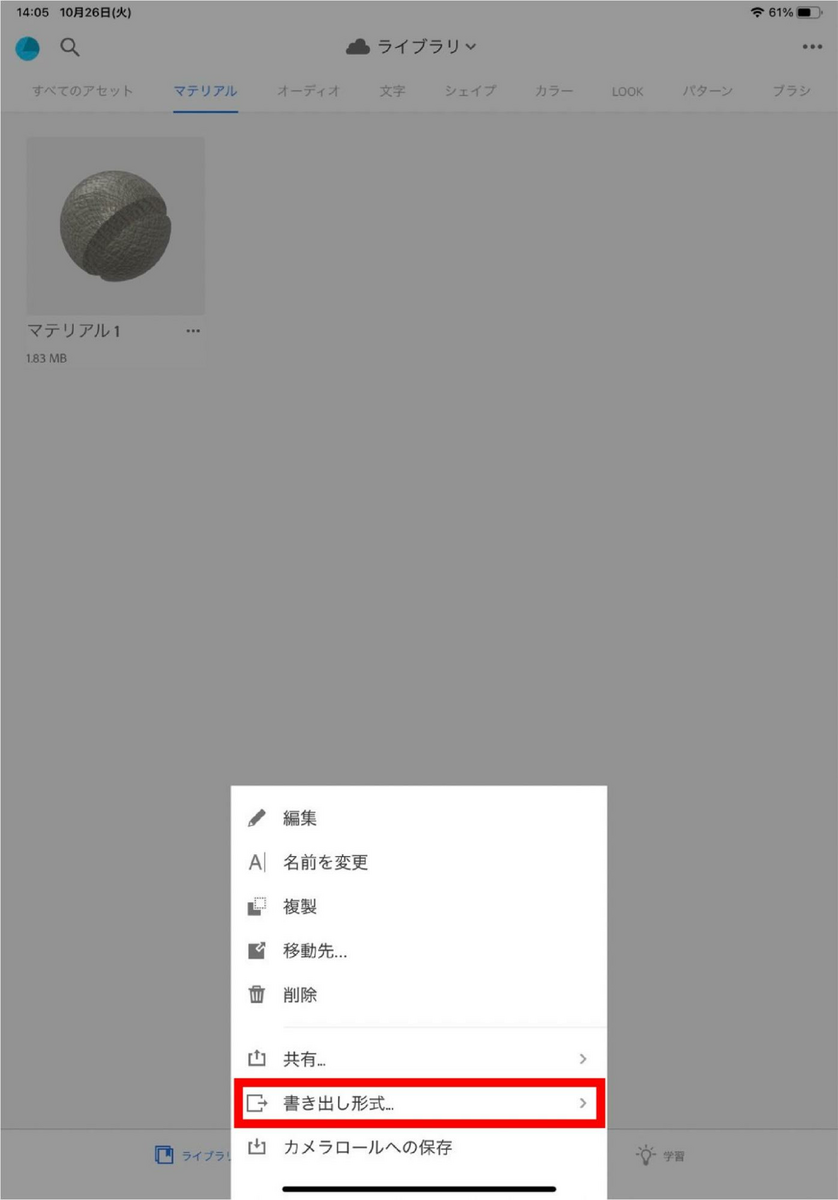
Preview and set up your material, and save the material when you are done.

Export the material and send it to your PC.
Click on the three dots in the lower right corner of the material and select the export format.
Next, select the material.
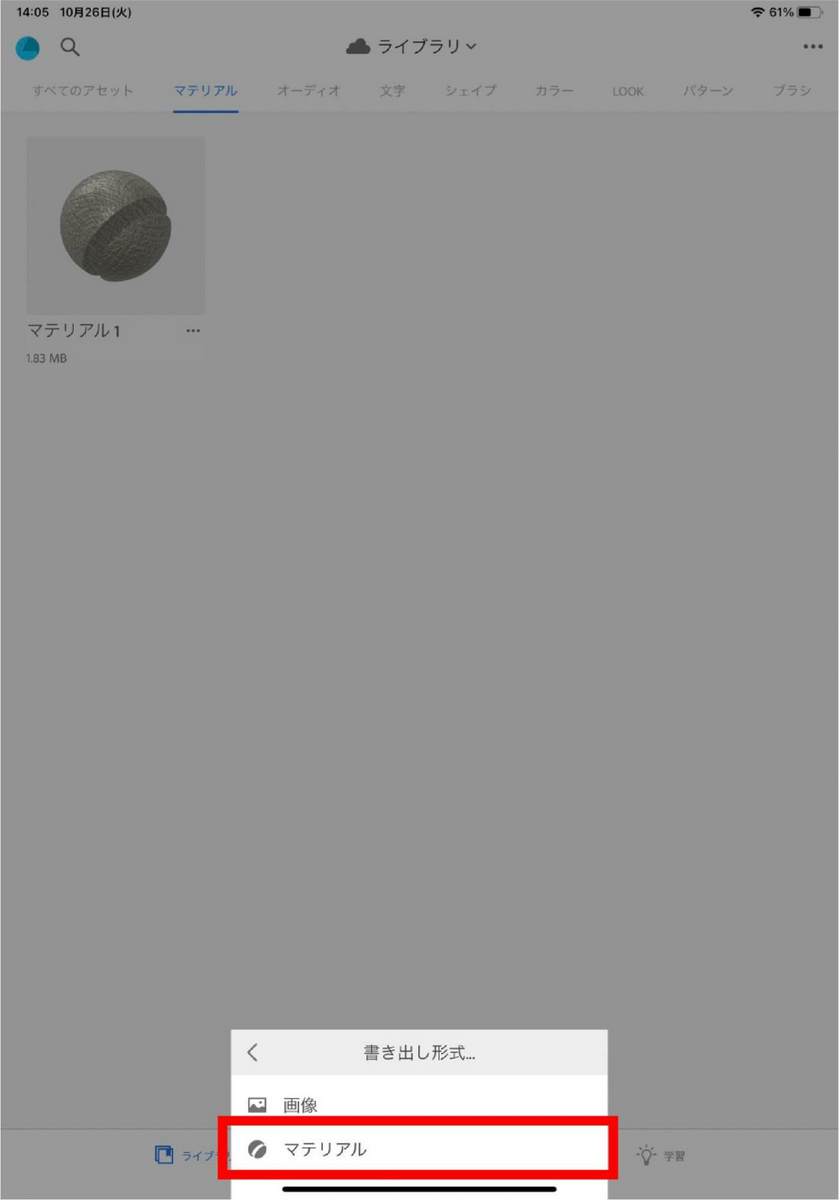
The image data will be compiled in a ZIP folder and sent by e-mail.
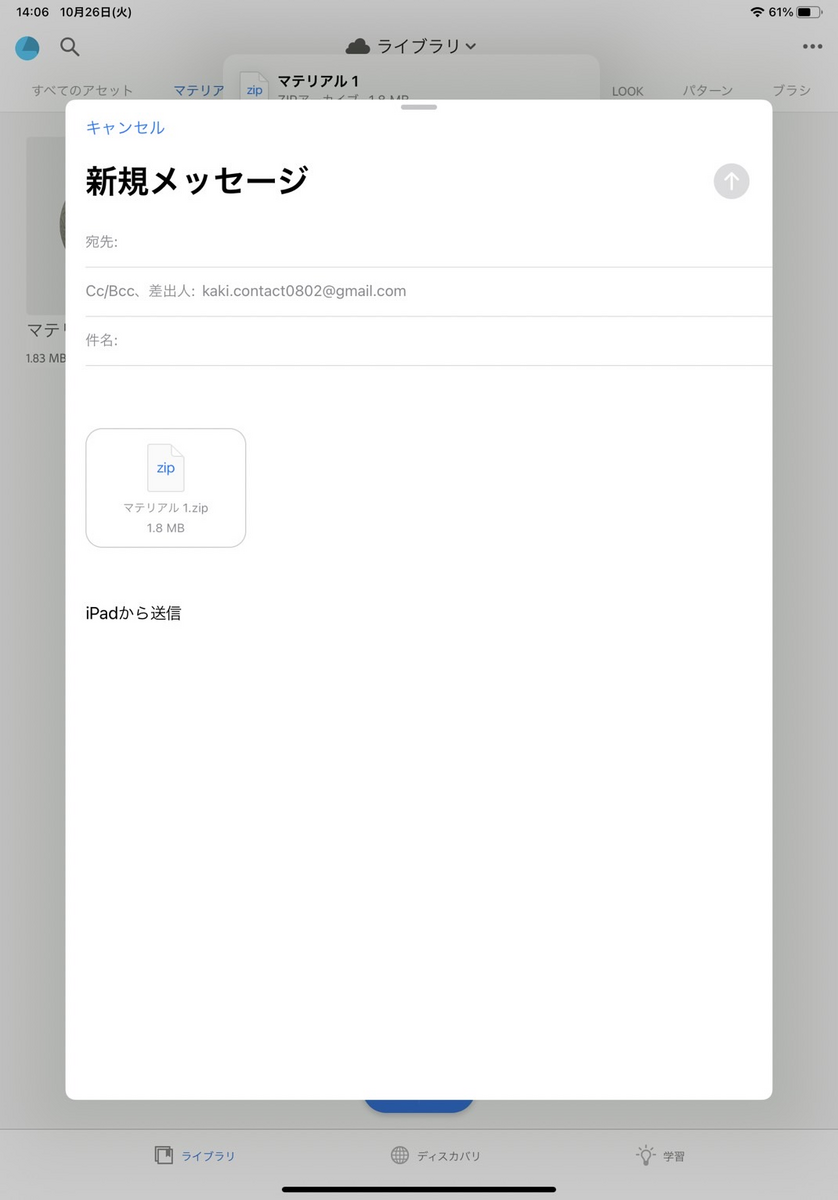
After the transmission is complete, download the data to a folder of your choice and extract the ZIP folder.
Use STYLY Studio to attach the texture to the object.
From Assets in STYLY Studio, select [ 3D object ] > [Primitive] Select the 3D model with “Change Texture ●●”.
The adjustment list will appear.
Select SELECT and choose the Base Color of the material data you have just downloaded.
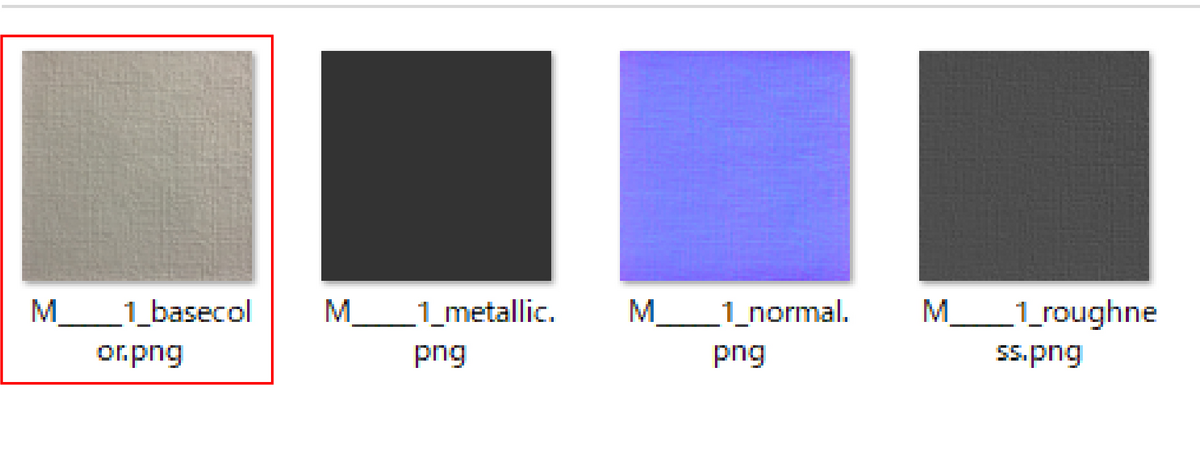
After the upload is complete, click “ADD TO SCENE” to place the material in the scene.
The upload is complete.
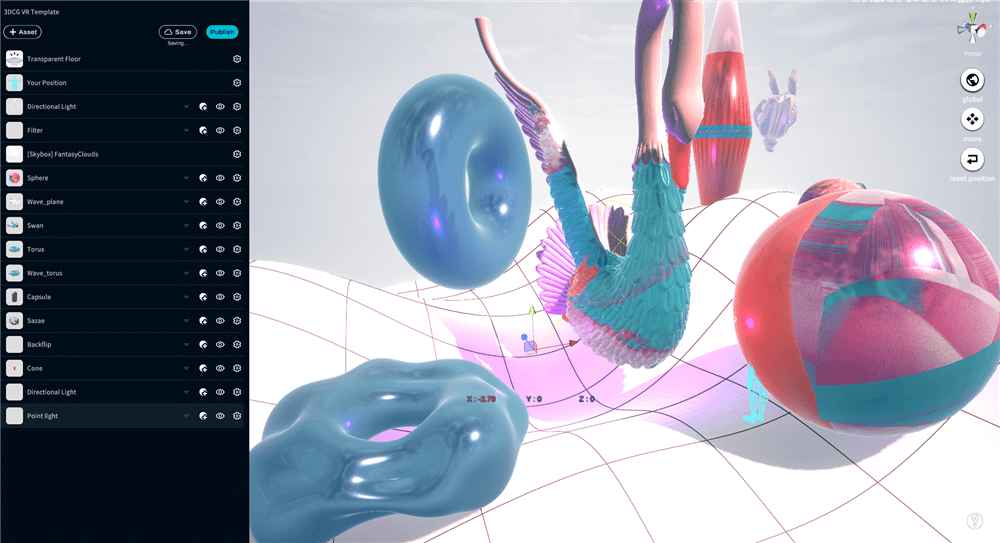
VR] Arrange Idea 01 Changing the color of the lights
Various lights are placed in [ Emvironment ] > [ Light ] in STYLY.
Usually, “Directional Light” is pre-positioned on the scene.
The Directional Light is a large light source that comes from infinity and illuminates the entire scene.
This means that the lighting effect can be considered equivalent to the real sun.

In addition to the normally placed Directional Light, let’s add another light.
Select the Directional Light under [ Light ].

Change the Color of the Light and set the color to red.
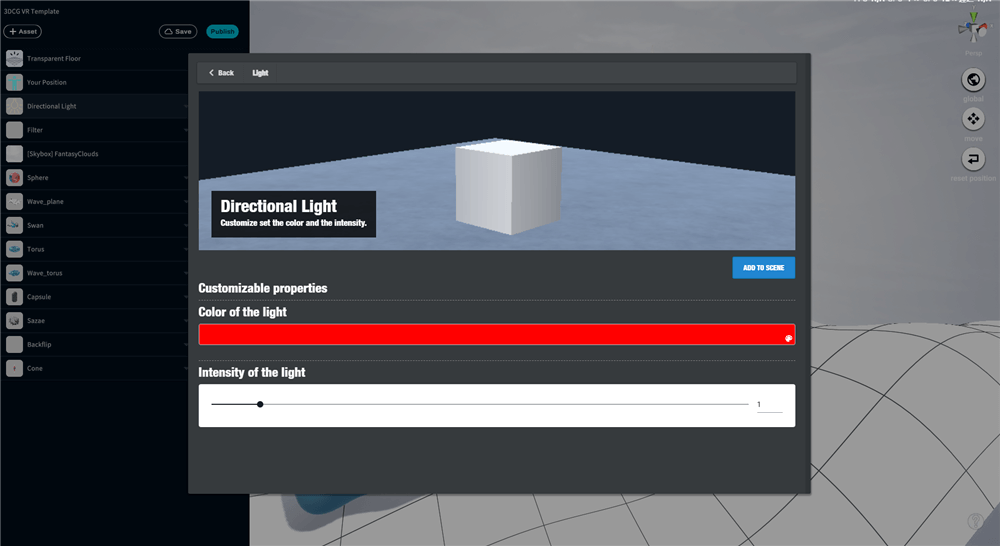
Click the Add to Scene button to place it on the scene.
Change the Rotate of the added Directional Light to change the way the light hits the scene.
For a red light, you can make the entire scene red.
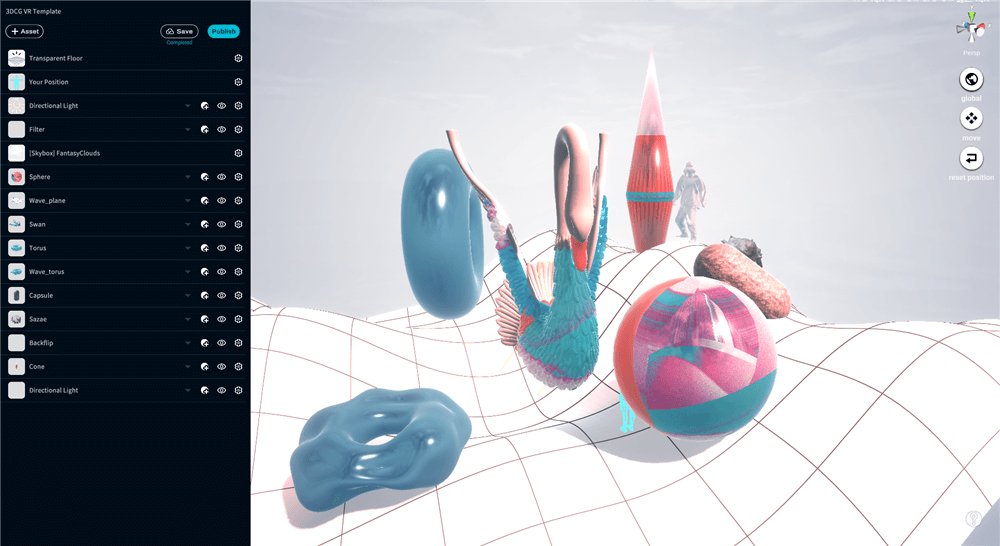
Let’s place other lights as well.
Point Light is a light source that emits rays of light from one point in space in all directions.
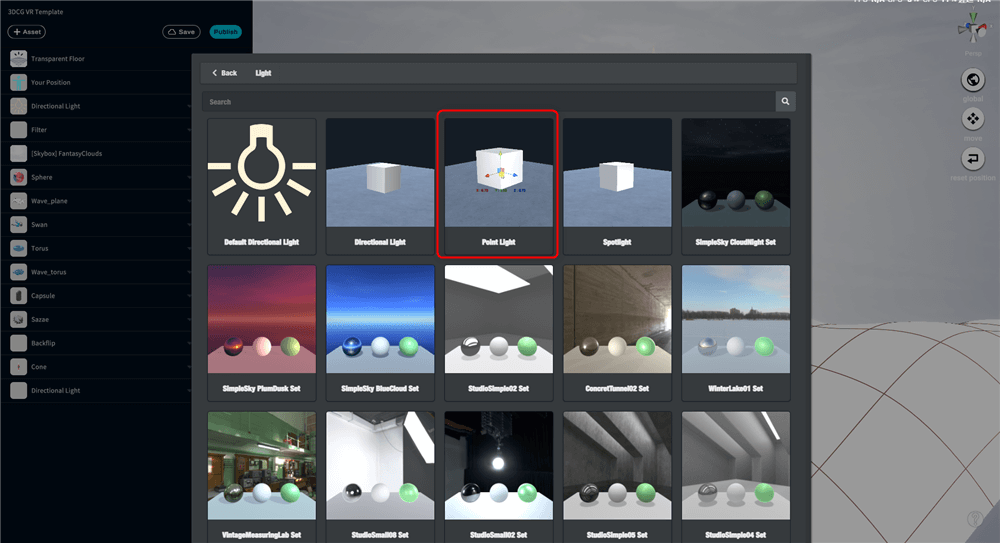
Let’s place a Point Light whose color is purple.
Let Reach of the Light be 30.
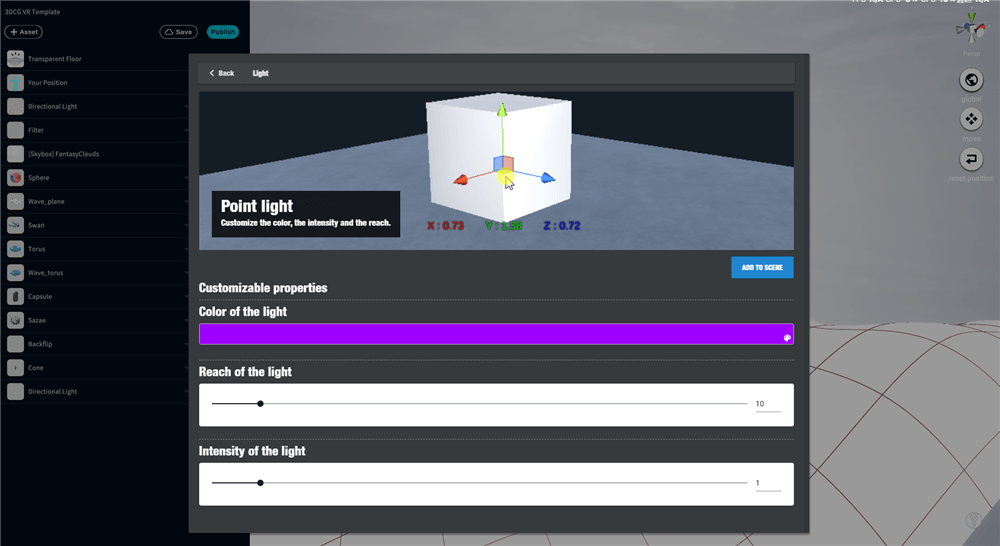
We have successfully placed a purple Point Light in space.
Since light shines in all directions, objects near the Point Light will be illuminated with purple light.
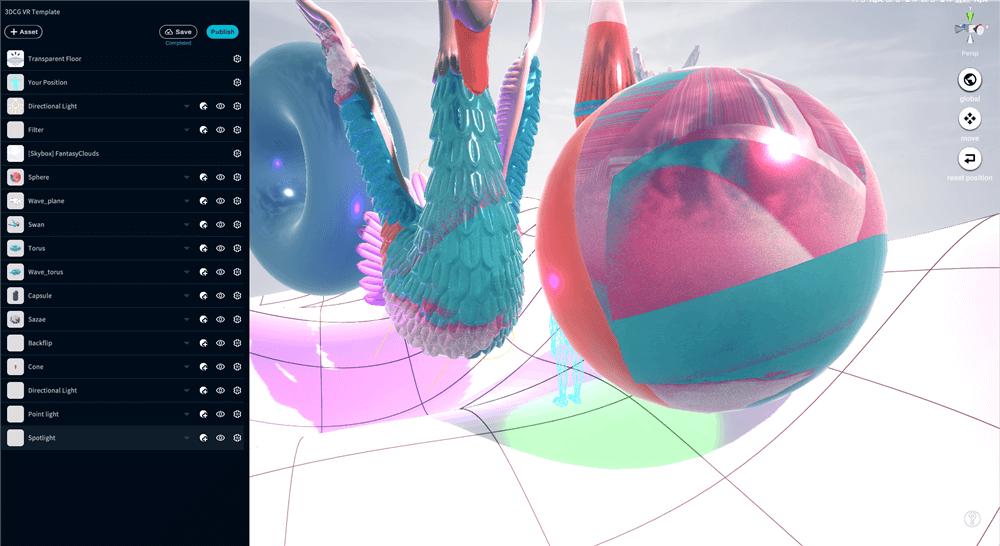
Next, let’s place the Spot Light.
This is a light source that illuminates the positive direction of the Z axis from a point in space in a conical shape.
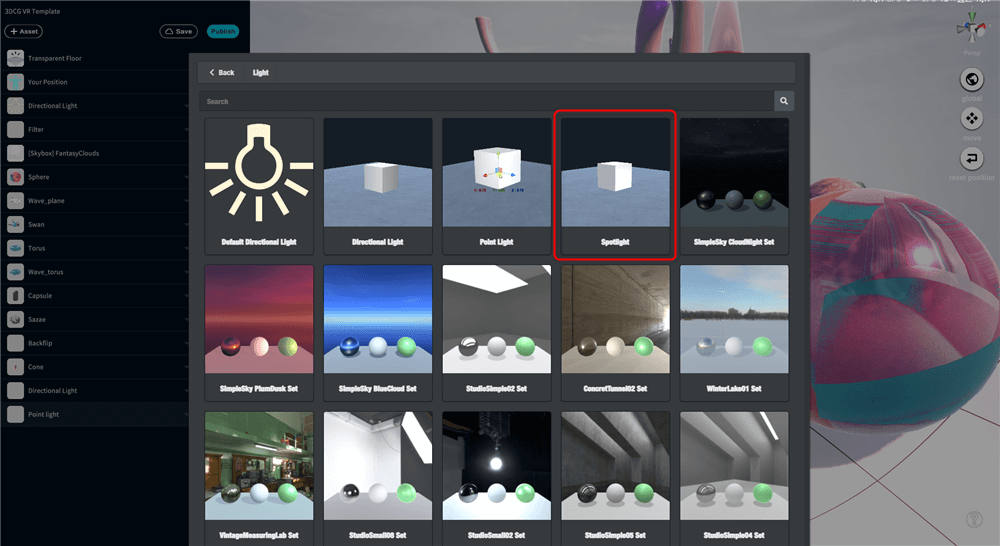
Set the color to green and the Reach of the Light to 30.
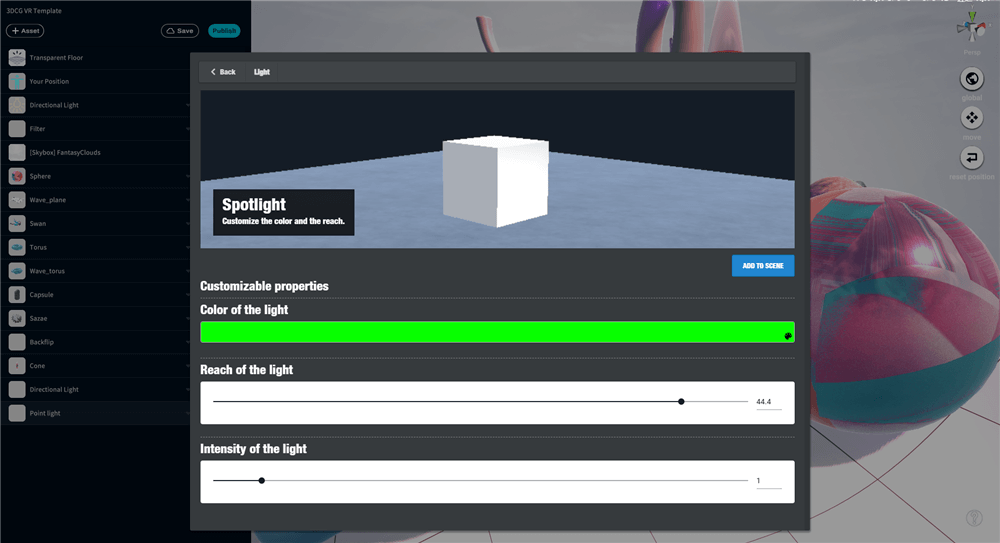
We can now place a green Spot Light on the space.
The light shines downward, so the light illuminates the object below the Spot light.
This is a basic use of the light.
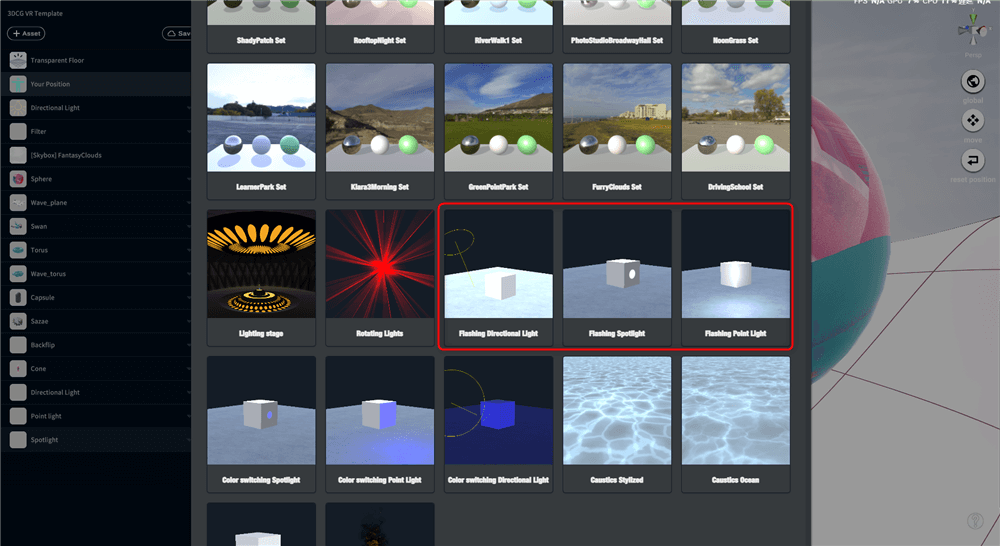
There are various other lights in [ Light ].
Color Switching ~ Light is a light that changes color at a certain time.
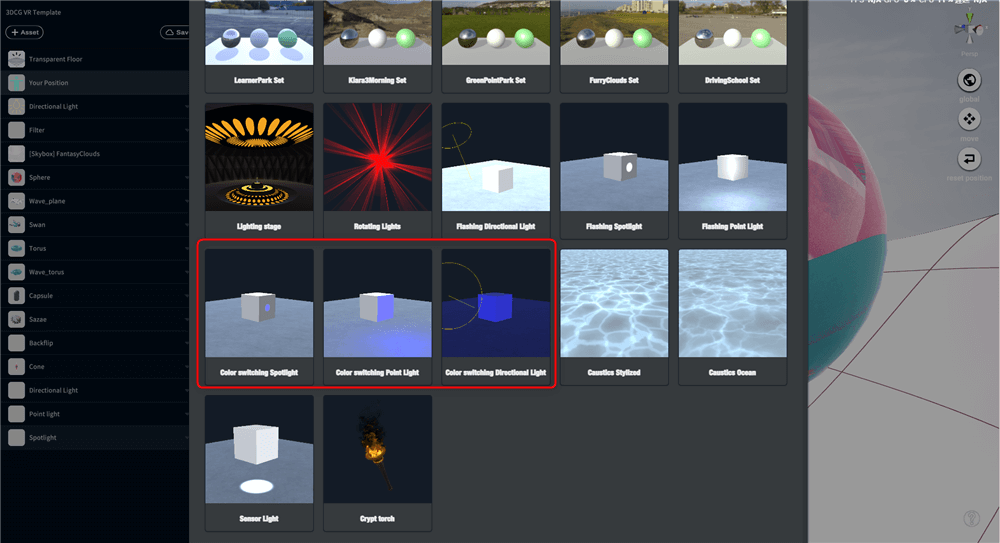
Flashing ~ Light is a light that flickers at a certain time.
Sensor Light is a light that turns on and off depending on distance.
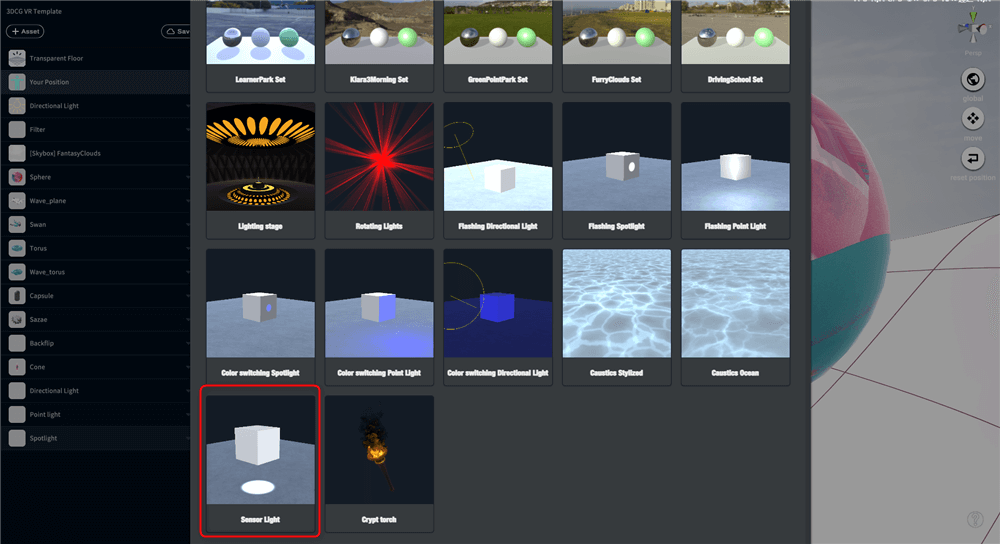
Make good use of the lights in [ Emvironment ] > [ Light ] to enrich the light expression in the space.
VR/AR] Arrange Idea 02 Using Unity to add simple animations to 3D models
STYLY supports the game engine Unity, which allows you to upload 3D models and scenes created with Unity.
Using Unity, you can create game-like scenes.
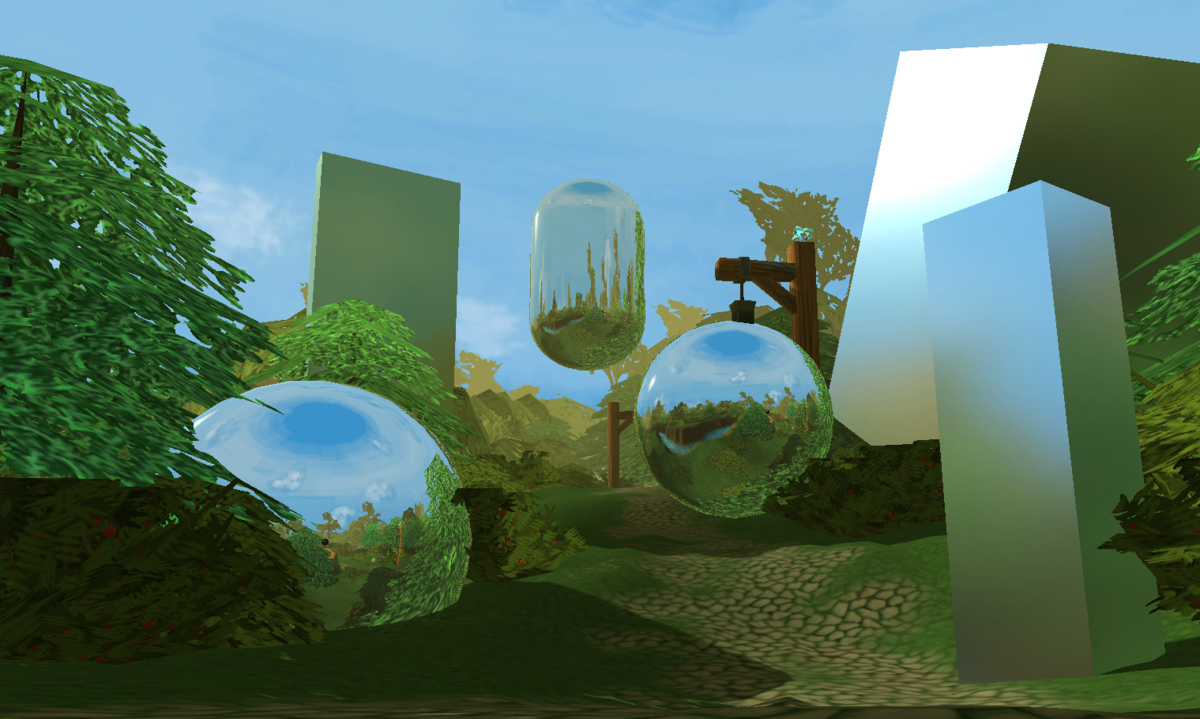
Example of a scene using Unity
T-R-I-P – SAKI TAKEGAWA
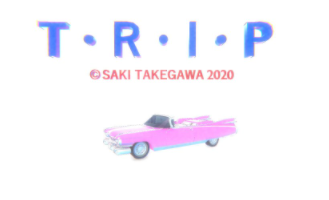
https://gallery.styly.cc/scene/789e5ac3-6868-4322-a552-be68a32c866c
Here are some of the things you can do with Unity.
Freely customize materials
Materials that reflect the colors and textures of 3DCG can be finely adjusted in Unity.
Metal textures can also be expressed.