How to Add Unity Installation Modules After Installation

To upload a Unity-created prefab or scene to STYLY, the following modules must be installed in advance:


  • Windows Build Support (If you are using Windows, it will be installed by default)
  • Mac Build Support (If you are using a Mac, it will be installed by default)
  • Android Build Support
  • WebGL Build Support
  • iOS Build Support

There are two main ways to add these modules after installing the Unity Editor.
One is to use Unity Hub and the other is to use Unity installer.
In this article, we will explain how to add modules step by step.

① Addition using Unity Hub

Unity Hub is an application that allows you to manage multiple versions of Unity Editor and their projects at once.
By installing Unity Hub, you can easily add / remove modules.
If the article does not work, try adding a module using the installer in ②.

If you originally installed Unity using Unity Hub, please read the section “Adding Modules”.
If you would like to reinstall Unity using Unity Hub, please read the section “Installing Unity Hub”.

Install Unity Hub

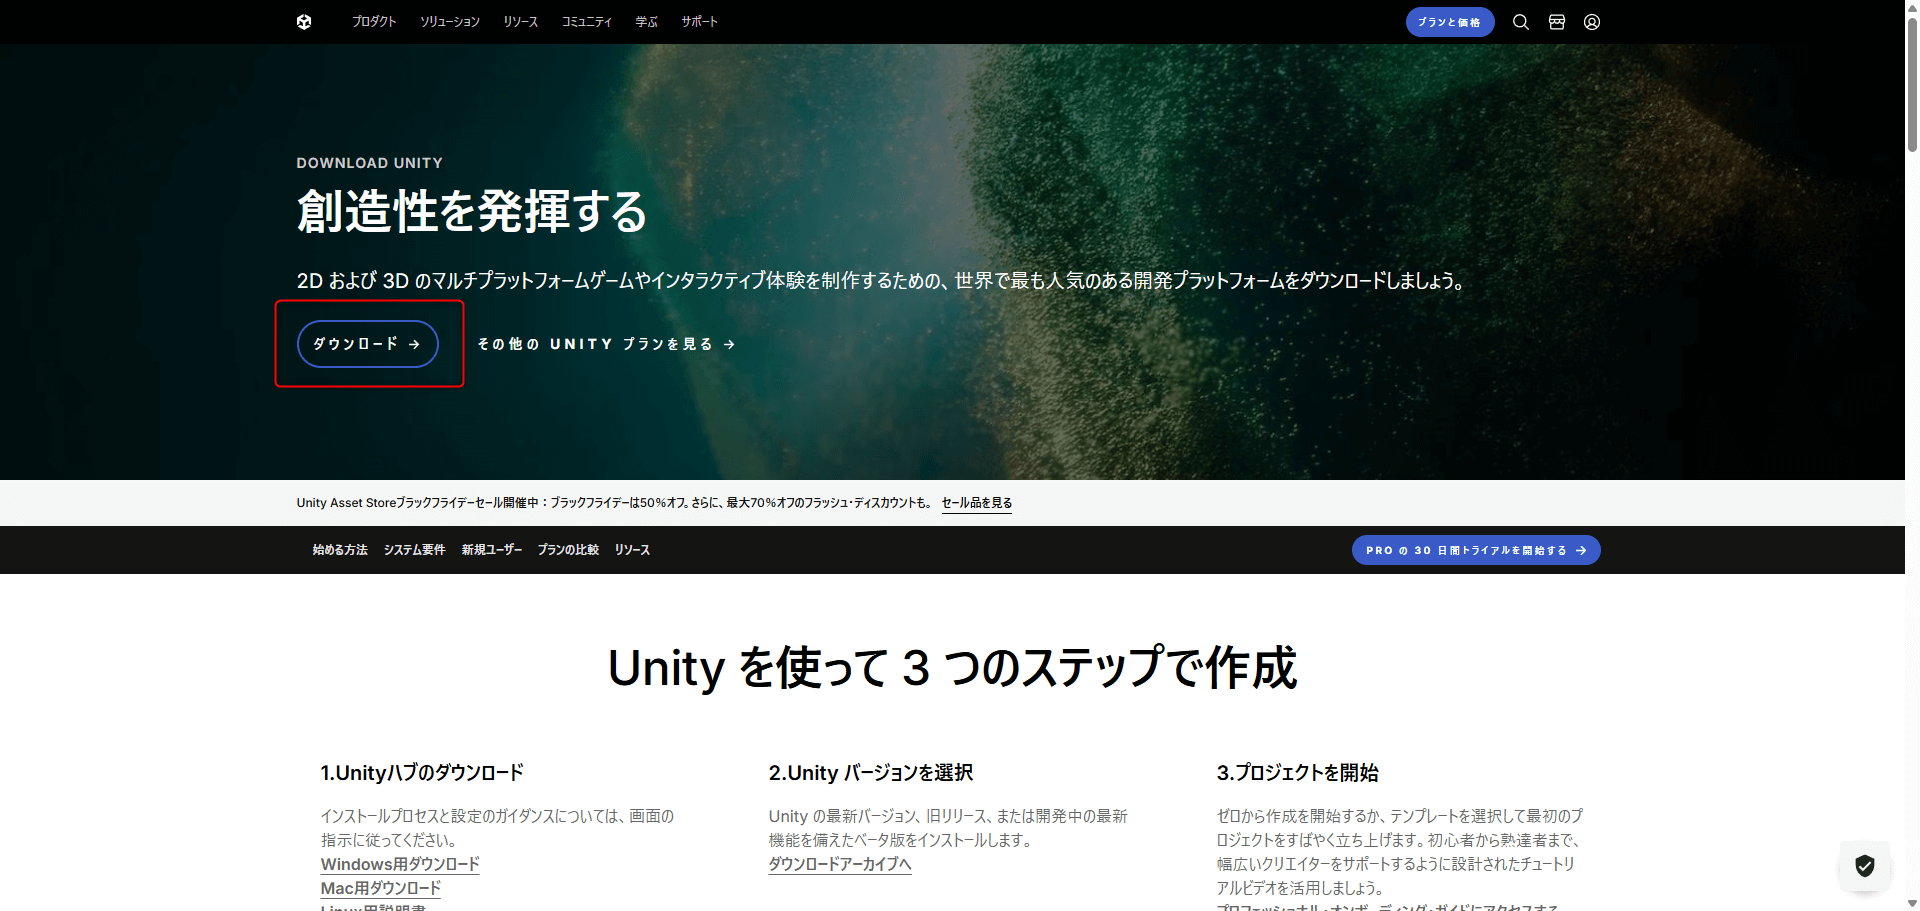
Go to the download page below to download and run the Unity Hub installer.

https://unity3d.com/jp/get-unity/download


Download Unity Hub


License agreement


Folder specification


Installation completion screen

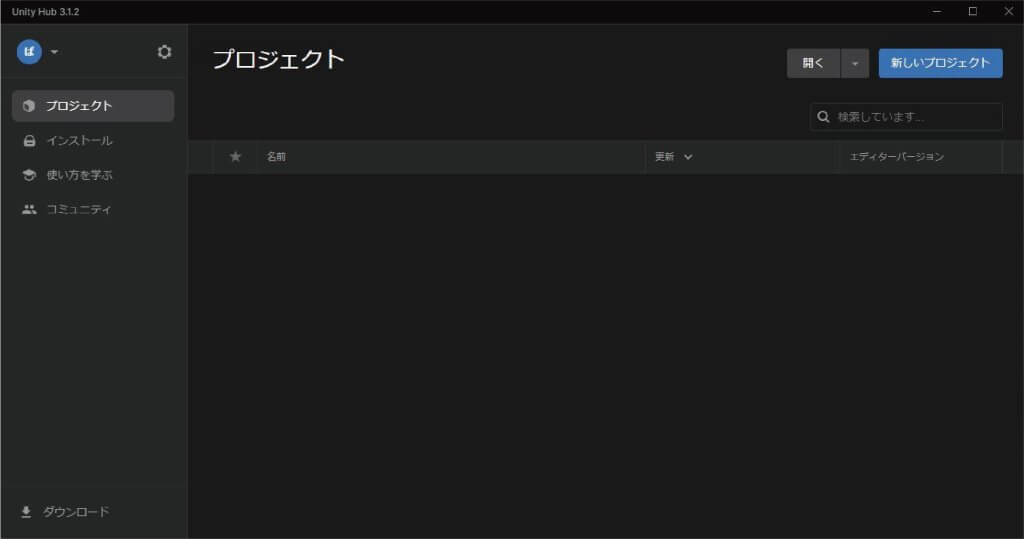
After proceeding and the installation is complete, when you start Unity Hub, the following window will appear:


Launch Unity Hub

Unity installation

If you are considering uploading a prefab or scene to STYLY, click here to check which Unity versions are compatible with STYLY.
https://document.styly.cc/doc/docs/en-US/creator/creator_plugin_intro/#about-the-corresponding-unity-version

Access the download site from here:

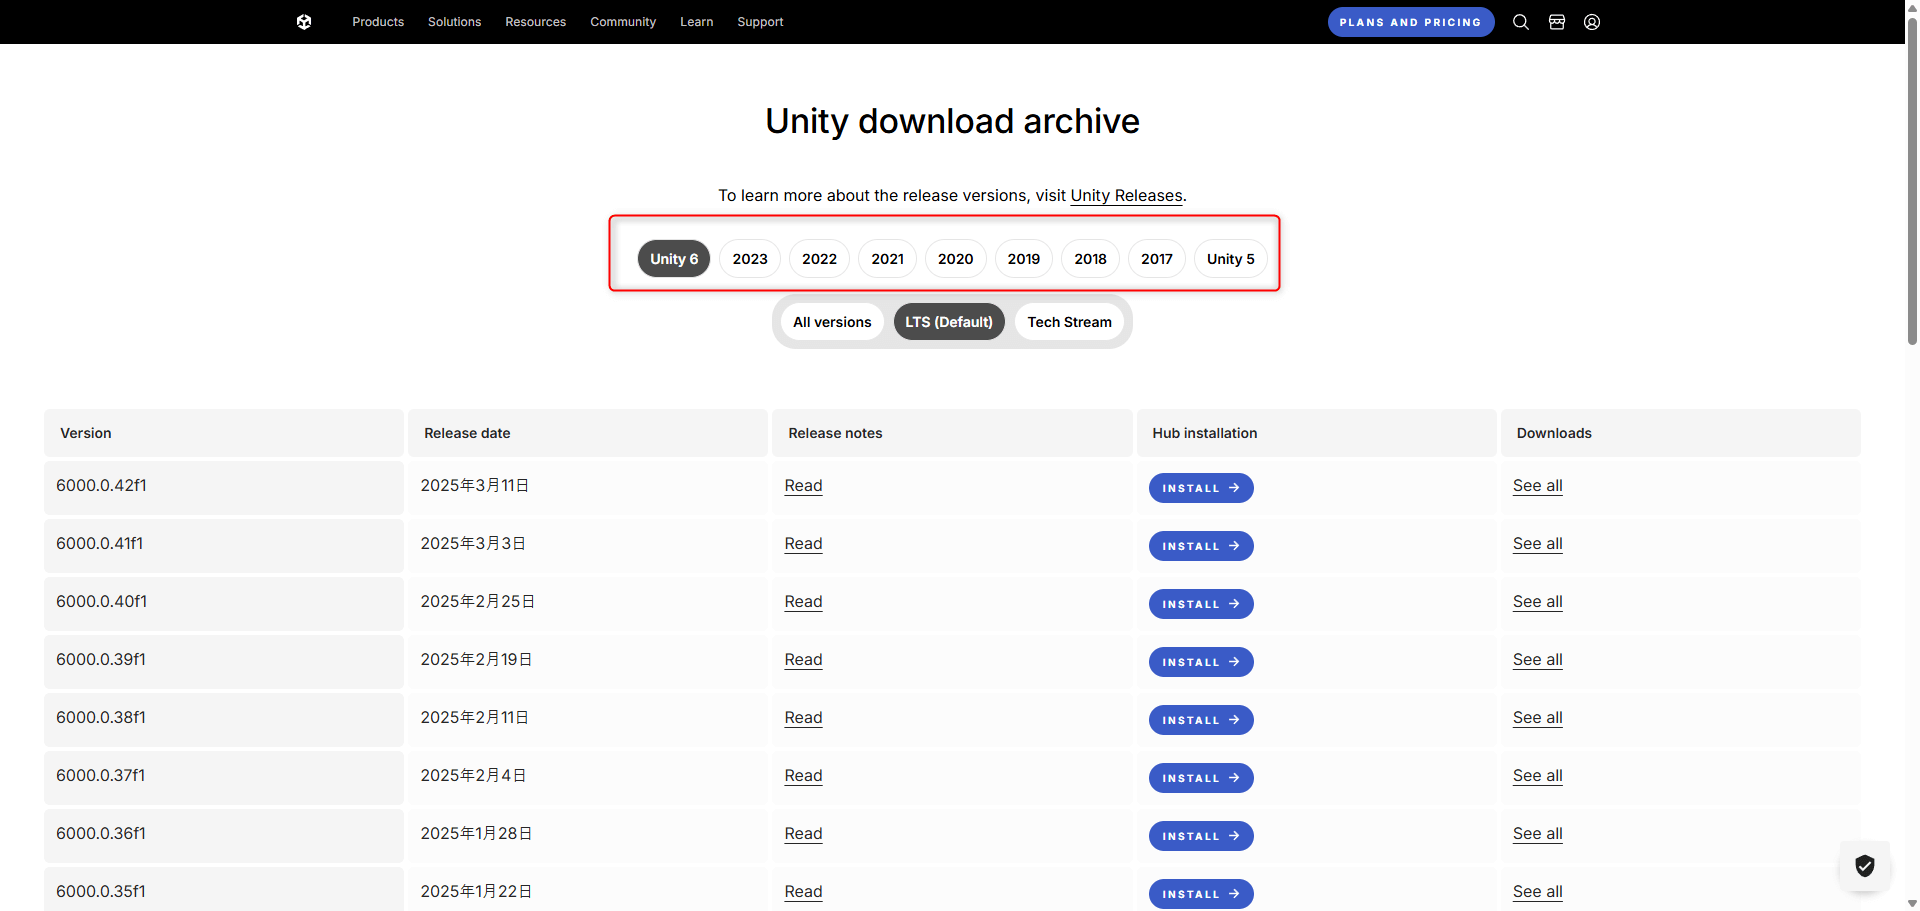
https://unity3d.com/jp/get-unity/download/archive

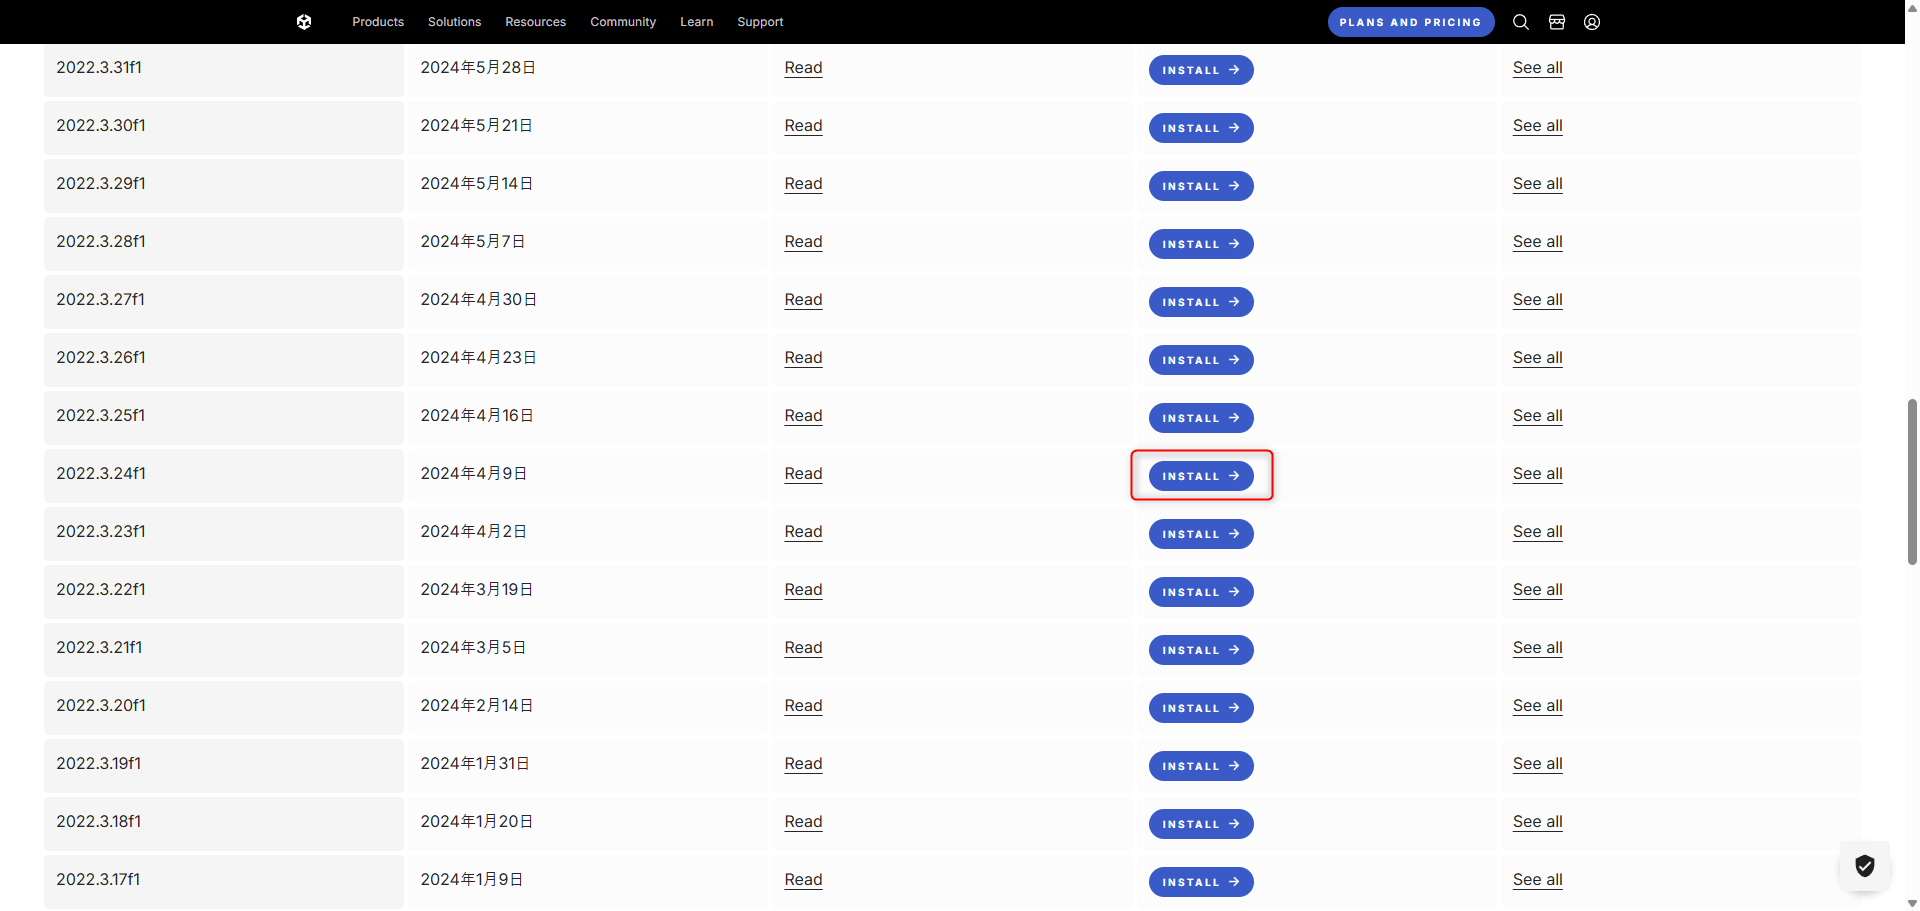
To install Unity 2019.4.29f1 on Unity Hub, you can download it by narrowing down the version to “Unity 2019.X” on the download page above, clicking Unity Hub in the line Unity 2019.4.29 and opening Unity Hub. 
*In some parts of the image, the notation is “Unity 2019.3.6f1”, but the procedure is the same for “Unity 2019.4.29f1”.

Select Unity Hub

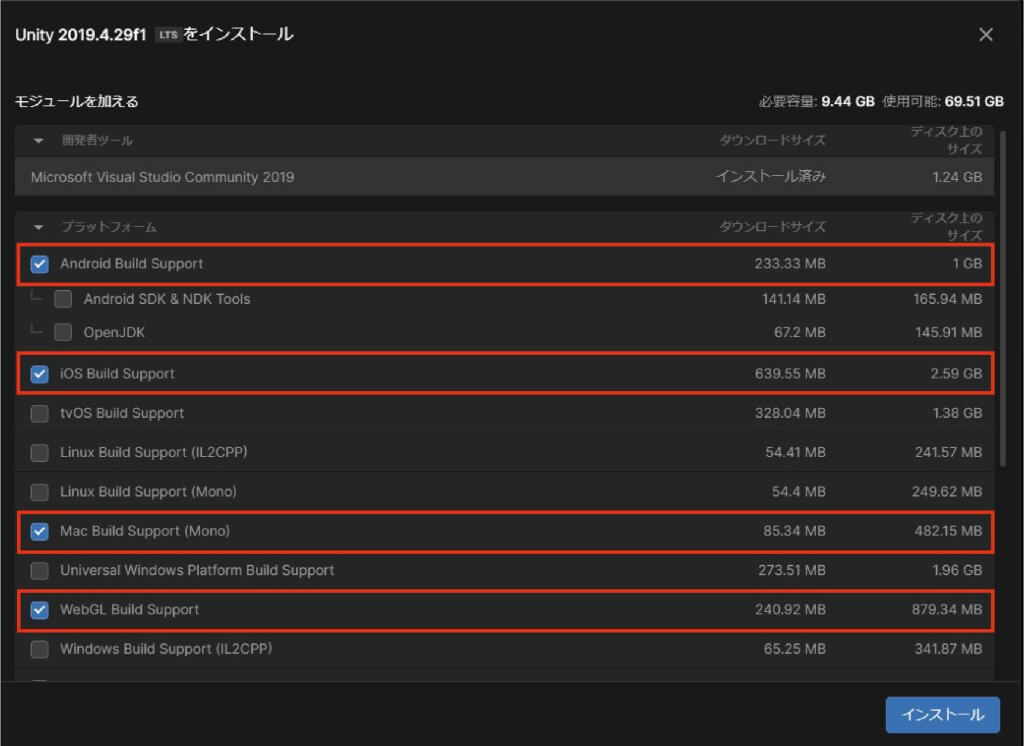
Then you will be asked to select a module, select the required module.

Select the required module

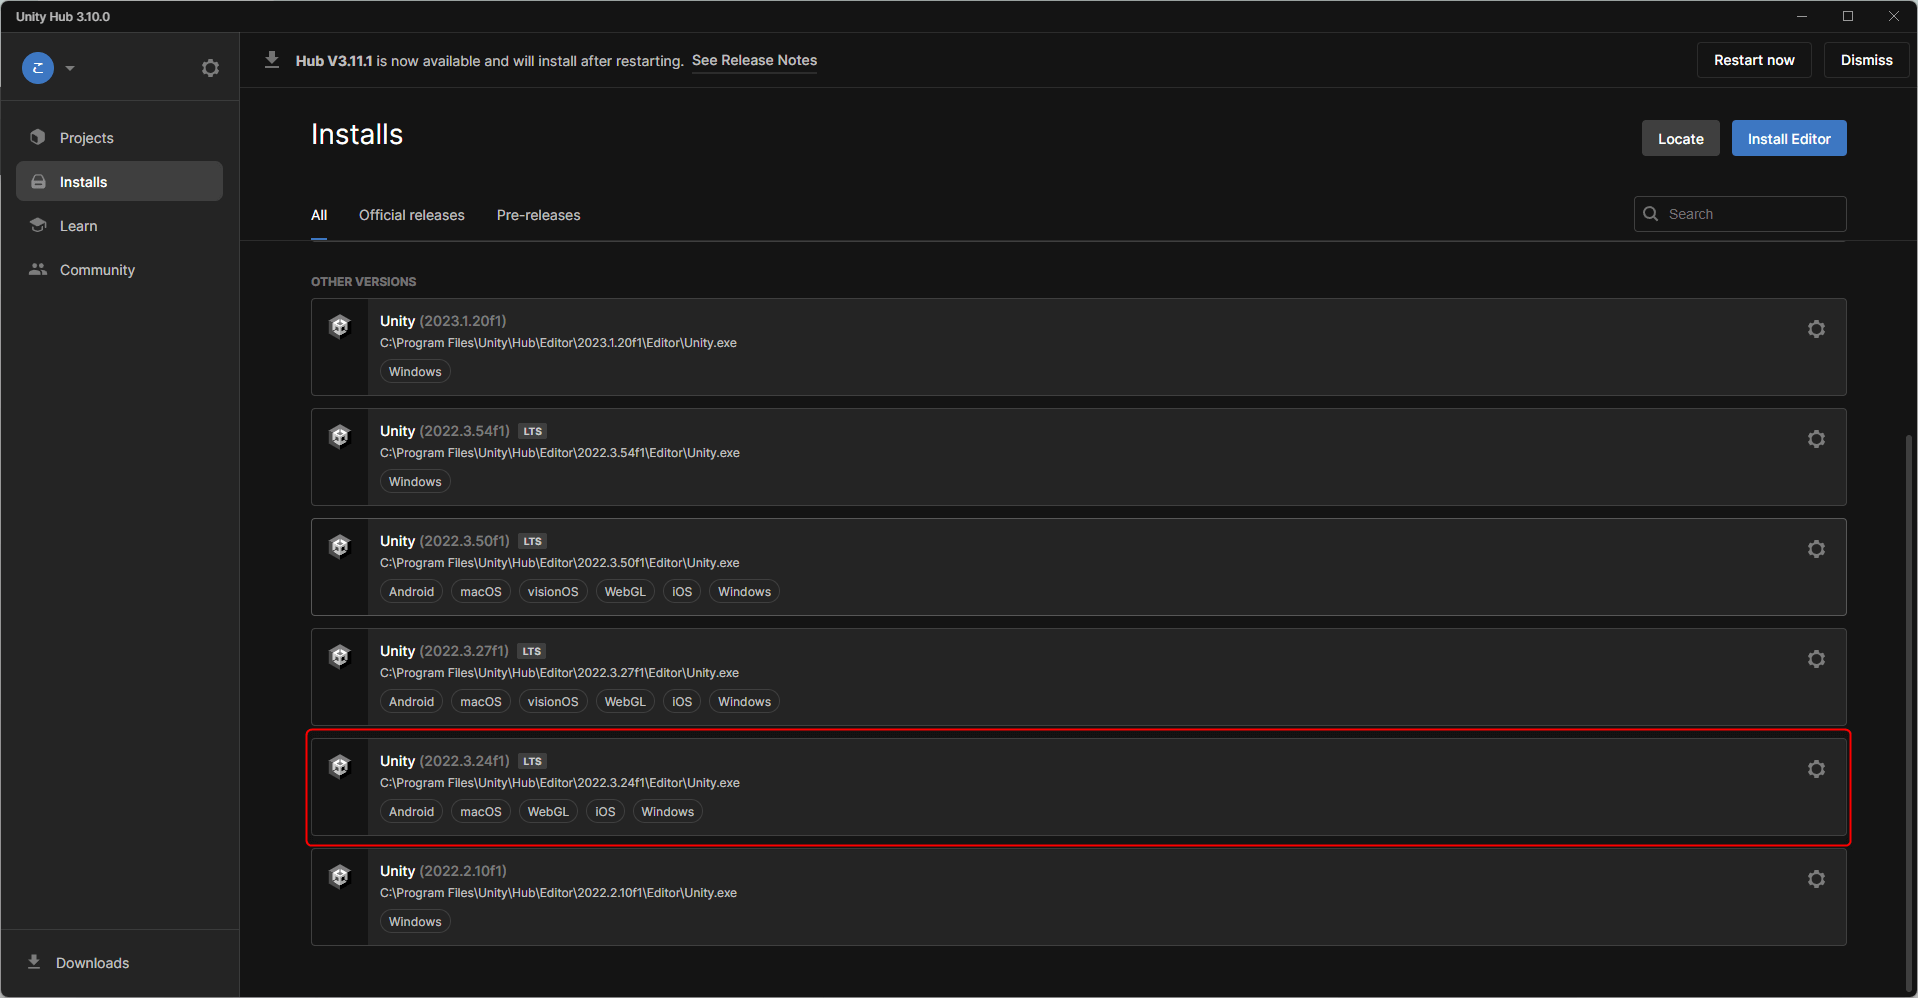
After installation, the installed version will be displayed as below.

After installation

Also, if you forget to select the module you need, read the next section.

Add Module

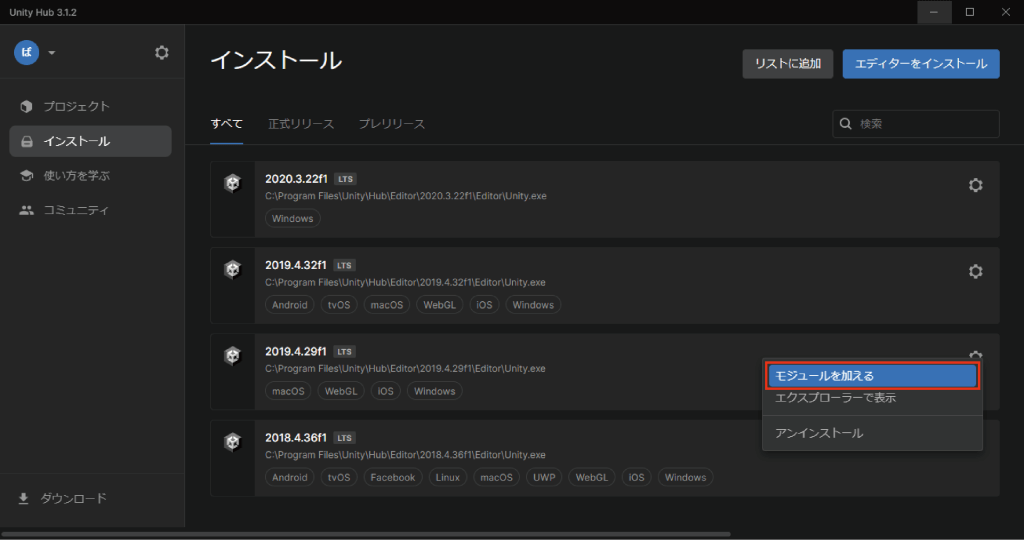
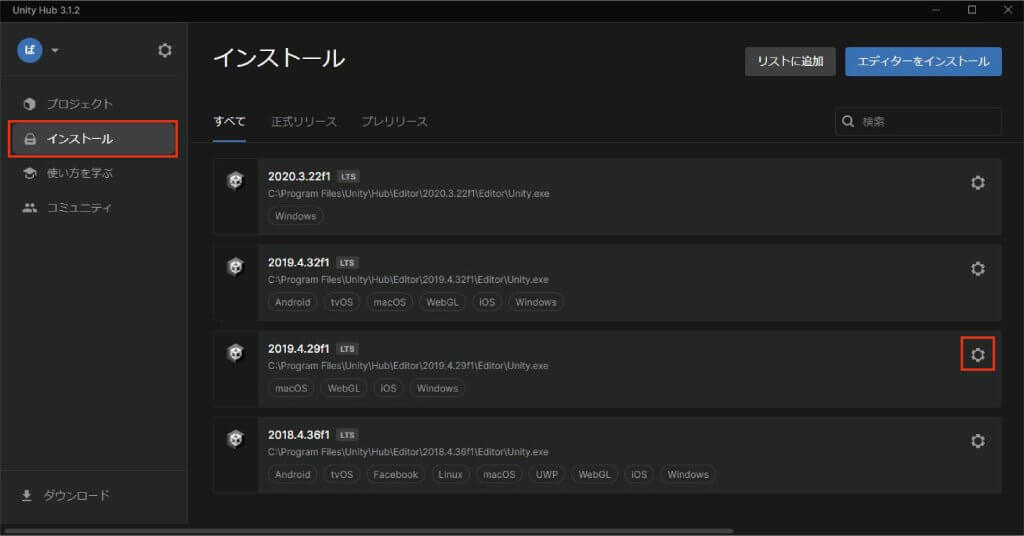
Select Install from the tab on the left.
Then select the three-point reader in the upper right corner of the version you want to add the module to.

Unity Hub

Select Add Module.
* Addition of modules will be displayed only when the target Unity is installed using Unity Hub.

Add module

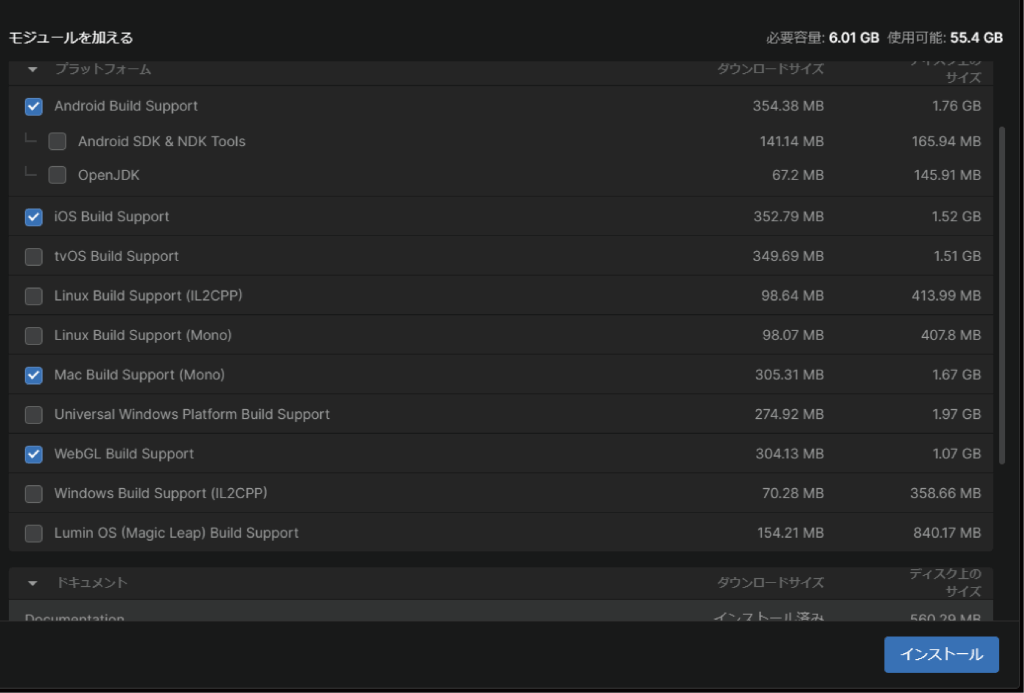
Select the module you want to add.

Module selection screen

To use prefabs and scenes created with Unity on STYLY, the following modules must be installed.


  • Windows Build Support (If you are using Windows, it will be installed by default)
  • Mac Build Support (If you are using a Mac, it will be installed by default)
  • Android Build Support
  • WebGL Build Support
  • iOS Build Support

See the article below for more information on the environment required to upload prefabs and scenes to STYLY.

After selecting, it will be added by clicking “Run” at the bottom right.
After adding, you can check the module in the added version with the following icon.

Module confirmation screen

②Addition using the installer

Here, we will explain how to reinstall the module properly by reinstalling Unity Editor.
It seems that the simple method is less likely to cause problems, so if you have trouble with other methods, please try this.
(Since the editor will be installed, the created project will not disappear basically.)

Unity version

If you are considering uploading a prefab or scene to STYLY, click here to check which Unity versions are compatible with STYLY.
https://document.styly.cc/doc/docs/en-US/creator/creator_plugin_intro/#about-the-corresponding-unity-version
*In some parts of the image, the notation is “Unity 2019.3.6f1”, but the procedure is the same for “Unity 2019.4.29f1”.
In the following, we will explain using Unity 2019.3.6f1 as an example.

Download~Start installation

Access the download site from here.

https://unity3d.com/jp/get-unity/download/archive

For the Unity 2019.3.6f1 installer, narrow down the version by “Unity 2019.X” on the above download page, click Download (Win) or Download (Mac) in the Unity 2019.3.6 line, and click the Unity installer. You can download it at:

Select Unity installer

When you start the downloaded installer (UnityDownloadAssistant-2019.3.6f1.exe), the installation will start.

Module selection

You will be prompted to select a module. Go ahead and select the module(s) you want to install.

Select the module you want to install


To use prefabs and scenes created with Unity on STYLY, the following modules must be installed.


  • Windows Build Support (If you are using Windows, it will be installed by default)
  • Mac Build Support (If you are using a Mac, it will be installed by default)
  • Android Build Support
  • WebGL Build Support
  • iOS Build Support

In this example, “Mac Build Support” is checked because it is a Win environment, but in the case of Mac environment, there is no Mac Build Support item and “Windows Build Support” is selected instead.

See the article below for more information on the environment required to upload prefabs and scenes to STYLY.

Directory specification

Next, specify the installation destination.
If it is already installed, it will be overwritten by specifying the same folder.
If you left the defaults during the previous installation you do not need to change them again.

Directory specification

You can edit an existing project with the specified module added.