This manual explains how to install STYLY on Meta Quest / Quest2 (formerly : Oculus Quest / Quest2) from App Lab.
Until now, you could install STYLY on Meta Quest / Quest2 (formerly : Oculus Quest / Quest2) only via SideQuest, but now you can install STYLY on Meta Quest more easily by releasing the official version of STYLY on App Lab.
*If you have already installed STYLY on Meta Quest / Quest2 (formerly : Oculus Quest / Quest2) via SideQuest, we recommend you to uninstall STYLY and reinstall STYLY on App Lab. Unlike unofficial SideQuest, App Lab is Facebook’s official app distribution service, so its safety and ease of use are superior.
What is App Lab?
App Lab is Meta’s official app distribution system made for Meta Quest / Quest2 (formerly : Oculus Quest / Quest2) separately from the existing Oculus Store.
App Lab allows you to install apps that are not certified by the Meta Store through the Meta Store mechanism.
There are two ways to install STYLY on App Lab, and I will explain each of them.
There is no difference in the use of STYLY after installation regardless of which method you use, so please choose the method that seems easier.
Method 1: Install from URL on Your Smartphone or PC
From your smartphone or PC,
access the STYLY page in App Lab.
When you access the page, the following pop-up window will appear. Click “OK”.

Click “OK”.
Click on “Get “

Click “Get”
If you are not logged in to your Meta account, a popup will appear asking you to log in, so please enter your Meta account information or your Facebook account that is linked to your Meta account.
You can also log in with your Instagram account or email address on the screen after selecting “Log in with Facebook.
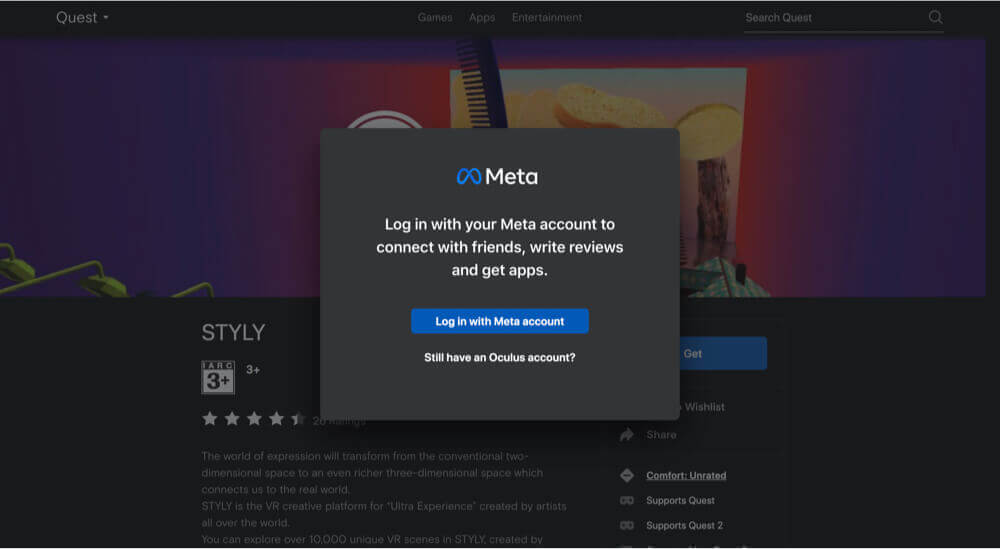
Log in Meta

Screen after selecting “Login with Meta
Once you have logged into your Meta account, go to the STYLY page again and click on “Get it”.
*At this point, the software has not yet been installed on Meta Quest / Quest2.
If the “Get” section is set to “Purchased or Purchased” as shown below, the work on the smartphone or PC side is complete.
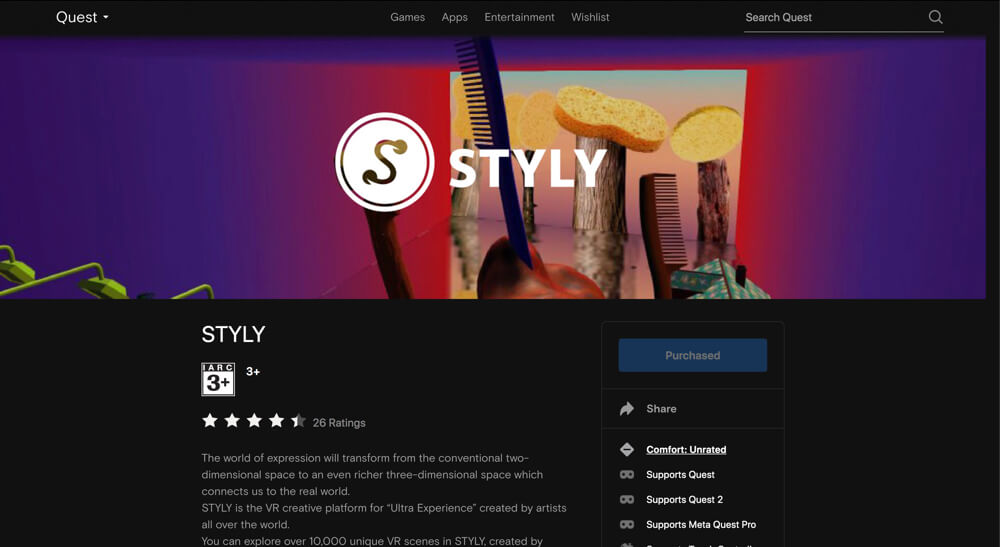
Install is complete
Start Meta Quest / Quest2, open “Apps” and you will find STYLY in the list of applications.
Since it is not yet installed, move the cursor over the STYLY application and click “Install”.
Installation will start.

STYLY VR APP installed on Meta Quest / Quest2
Method 2: Search for STYLY from the Store and Install it.
Launch Meta Quest / Quest2 (formerly : Oculus Quest / Quest2), and click “Store,” and search for “STYLY” in the search field on the upper right.
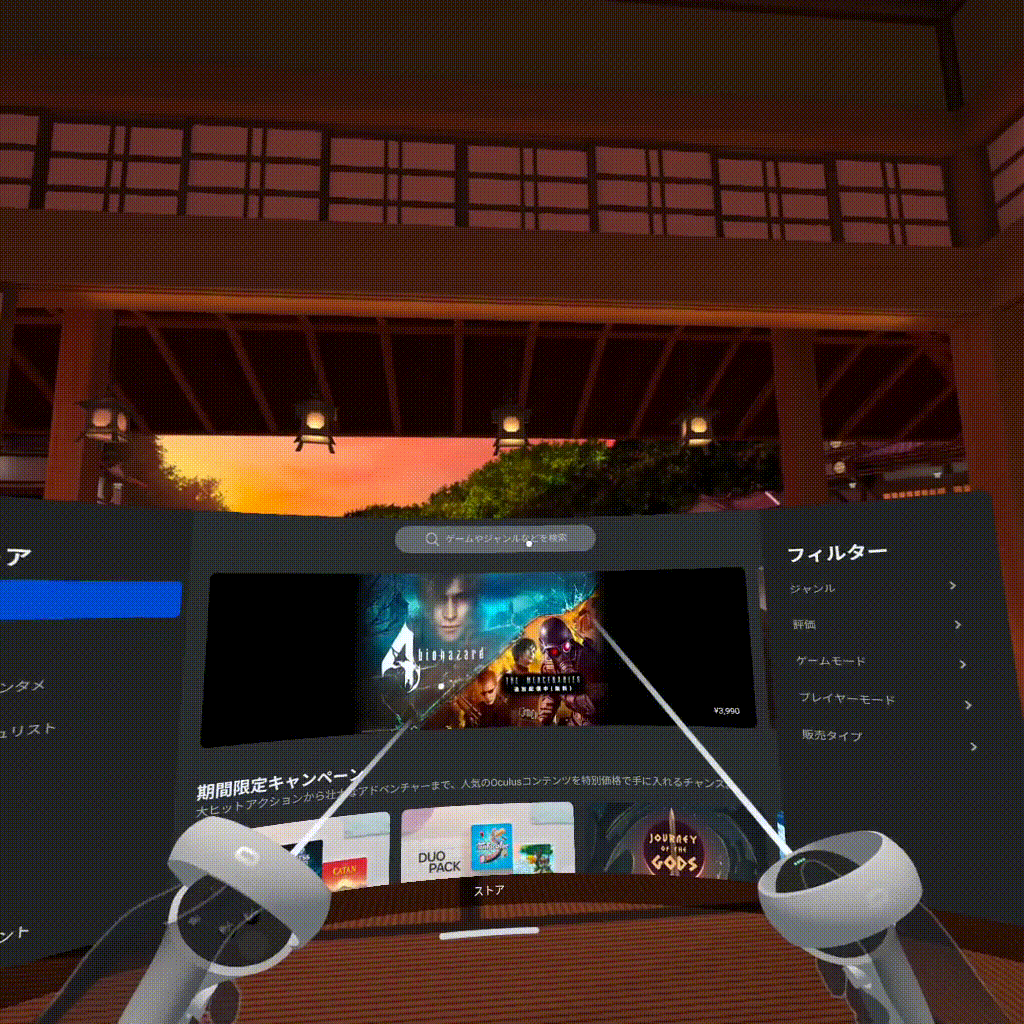
search for “STYLY”
Open the STYLY application that came up in the search and click “Download” to start the installation.
Launch STYLY
Once STYLY has been installed, click on STYLY from the “Apps” menu in Meta Quest / Quest2.
Launch STYLY
When STYLY starts up, click “Login”, enter the e-mail address and password registered with STYLY, and click the black mark “Login” to complete login to STYLY in Meta Quest / Quest2.

Enter your STYLY account information
How to use STYLY VR APP
Please note that the STYLY VR APP has two different ways to experience scenes: PCVR and standalone VR devices.
Please refer to the following article for more information on how to experience each.
![[Summary] How to experience STYLY scenes VR/AR(Mobile) / Web Browser Introduction by step](https://styly.cc/wp-content/uploads/2020/04/スクリーンショット-2020-04-10-12.53.04-160x160.png)
Once the STYLY VR APP is launched, please log in.
The login procedure is described in the following article.
Here is how to use the STYLY VR APP.
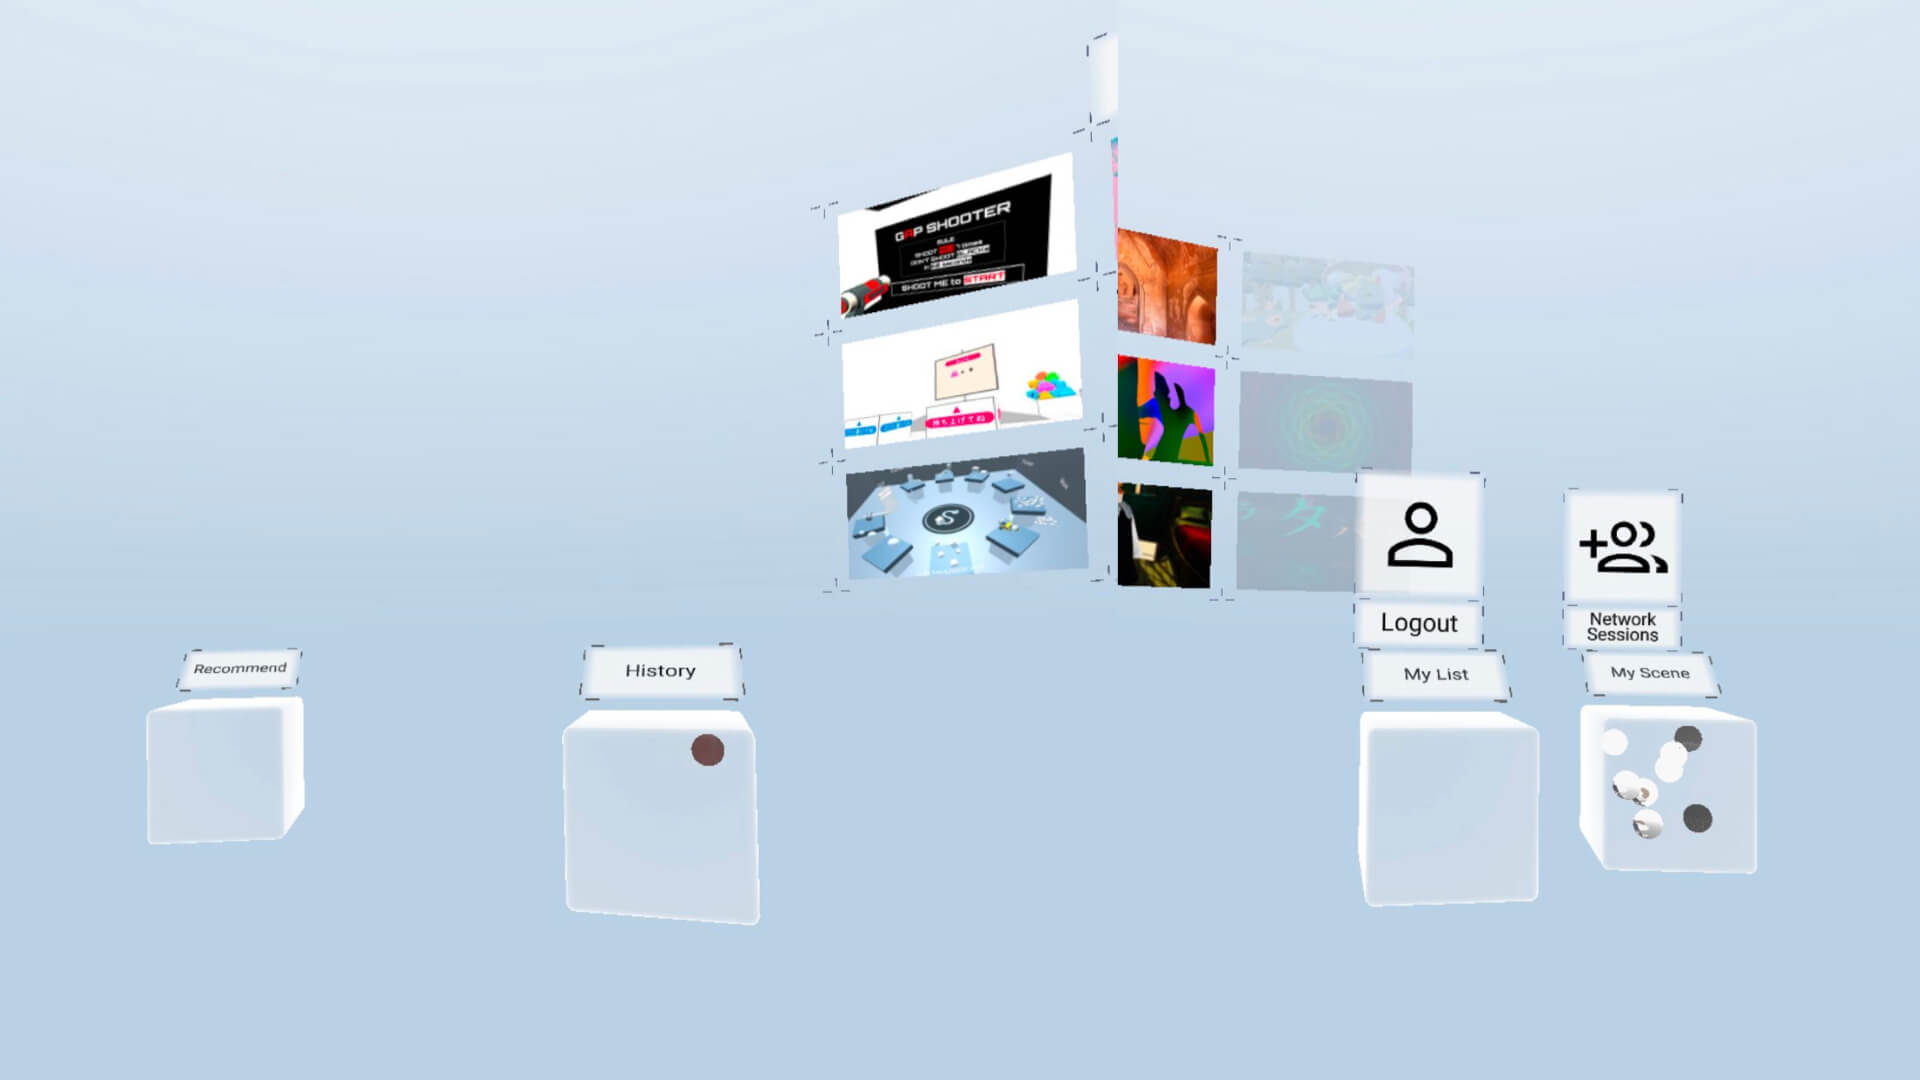
STYLY VR APP Menu
STYLY VR APP Menu
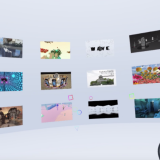
When the STYLY VR APP is launched, four cube menus will appear.
- Recommend”: List of recommended scenes
- History”: Viewing history of the scenes.
- My List”: List of scenes checked in My List in STYLY Gallery and STYLY VR APP
- My Scene”: List of scenes created by you
Place the pointer over the cube and pull the trigger button to display the list of each scene.
If you like scenes created by other artists, you can add them to My List and experience them without having to search for them in STYLY VR APP.
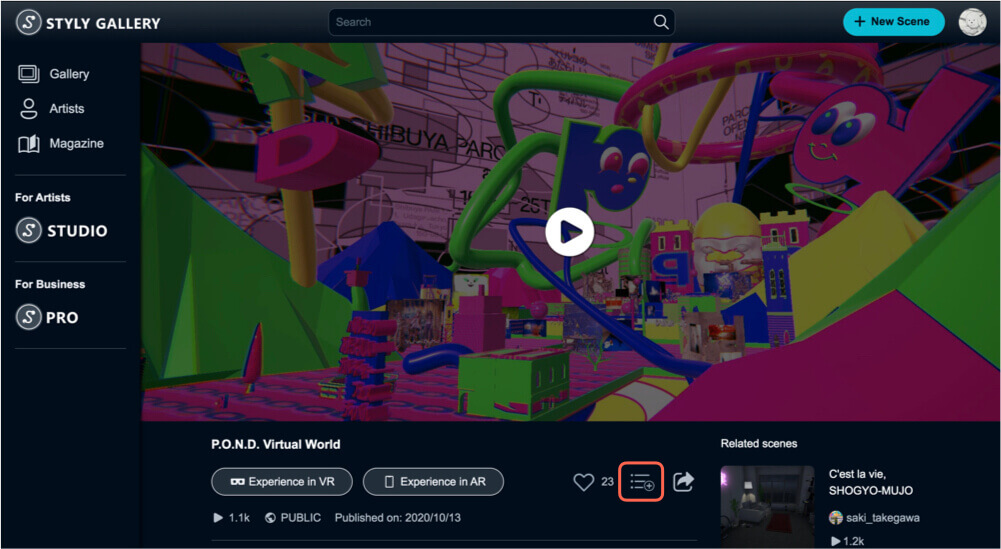
Add scenes to MyList at STYLY Gallary
Select the scene you want to experience, point to the playback button, and pull the trigger button to activate the scene.

Start a scene
Rotation
Press the stick left or right to rotate the viewpoint in that direction.
Rotation
Move
When you point the controller in the direction you want to move and press the stick, a green parabola and a border will appear.
The green parabola means “moveable,” and you can move to the border area by releasing the stick.
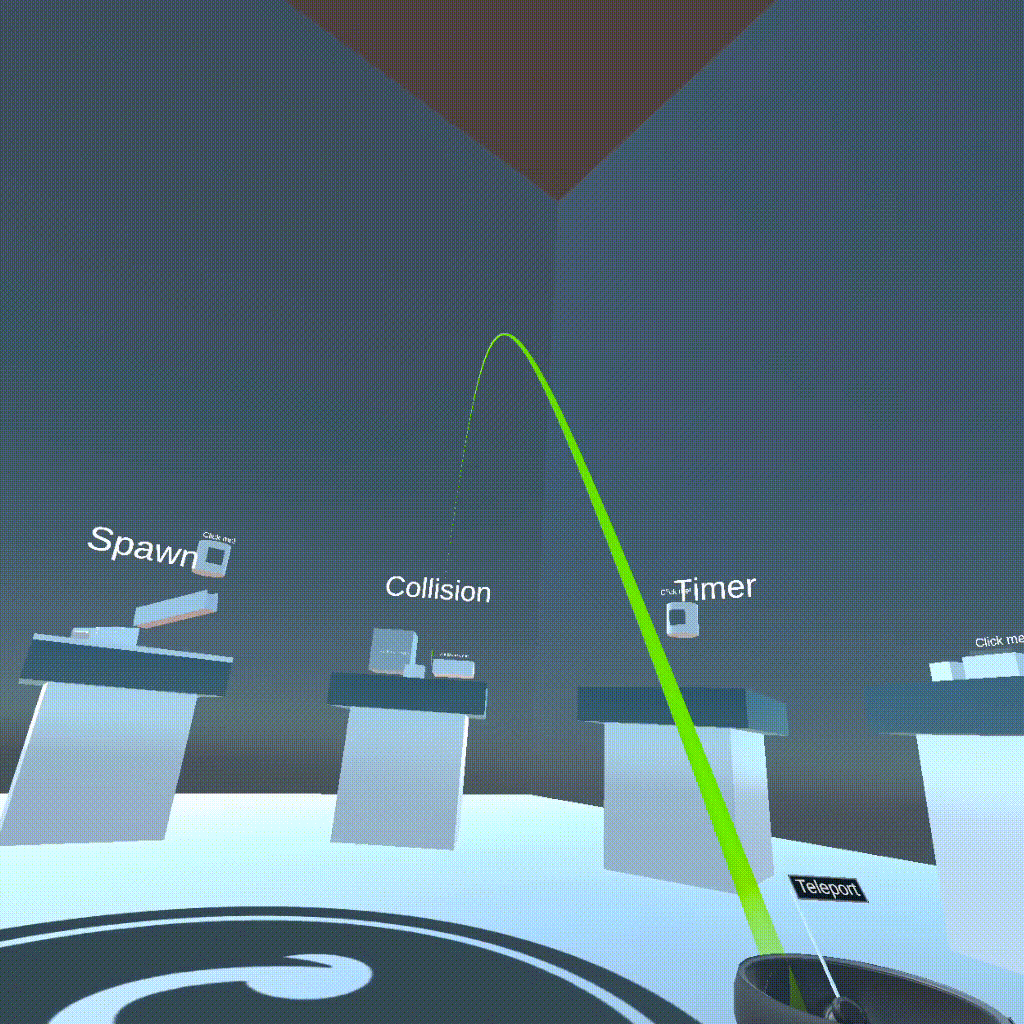
Moving within a scene
If a gray parabola appears, you cannot move to that point.

You cannot move to the gray cursor area.
VR Edit Mode
There is a “VR Edit Mode” feature that allows you to edit scenes within the STYLY VR APP.
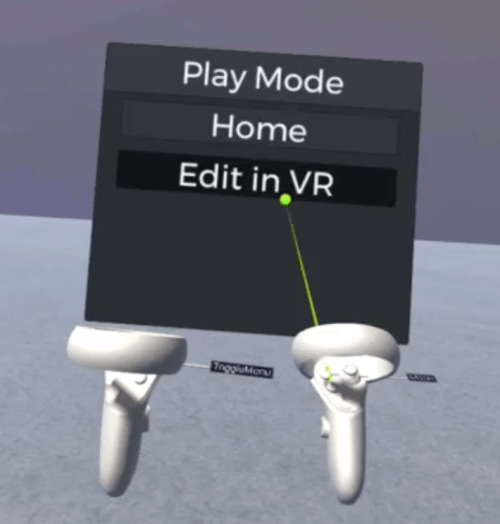
Start VR Edit Mode
It is very useful to edit a scene in VR space while actually checking the size and distance of objects.
The following is a manual article on VR Edit Mode, so please refer to it when using this function.
System Requirements at the Time of Experience
- Requirement: 64-bit processor and OS required
・OS: Windows 10
・Processor: Intel Core i5-4590 or equivalent or higher
・Memory: 8GB RAM
・Graphics: NVIDIA GeForce GTX 970 equivalent or higher
・Network: Broadband Internet connection
・Storage: 8GB of free space System Requirements for the Experience