In this article, I will introduce the function to get a string by web request.
For example, you can get the weather information and change the weather in a scene, or get the time around the world and make a world clock, using the custom action “Get Http Request” included in the STYLY Unity Plugin v1.3.0.
Sample
This is a sample scene created to reflect the content presented in this article.
Operating Platforms
Get Http Request can be used on all platforms.
| Platform | Work |
| VR | 〇 |
| Web | 〇 |
| Mobile | 〇 |
Preparing to use a custom action
In order to use Change STYLY Scene, you need the Unity asset PlayMaker.
![[Unity] Starting Playmaker from Scratch](https://styly.cc/wp-content/uploads/2019/09/PlaymaerCoreConcept-160x160.png)
Use PlayMaker’s custom action “Change STYLY Scene” which is stored in the Unity Plugin for STYLY.
If you haven’t downloaded the Unity Plugin for STYLY, you should do so.
![[Unity / PlayMaker] How to use the custom action “Get Http Request”.](https://styly.cc/wp-content/uploads/2021/08/img_6113aee6097f8-160x160.png)
If you have already imported the Unity Plugin for STYLY, you can use it from version 1.3.0 or higher.
You can check the current version by going to STYLY -> Check for Updates in Unity and opening the Update Checker.
If your version is lower than 1.3.0, please download the latest version of Unity Plugin for STYLY again.
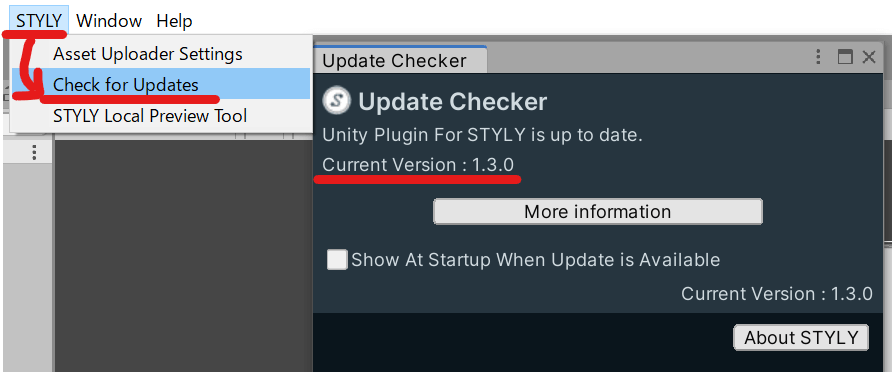
Check the version of STYLY Plugin for Unity
About Get Http Request
For your reference, here is a video of how to implement Get Http Request.
(Please note that the configuration of uGUI is slightly different since this is the first time I implemented it.)
Get Http Request is a function to make a GET HTTP request in a STYLY scene.
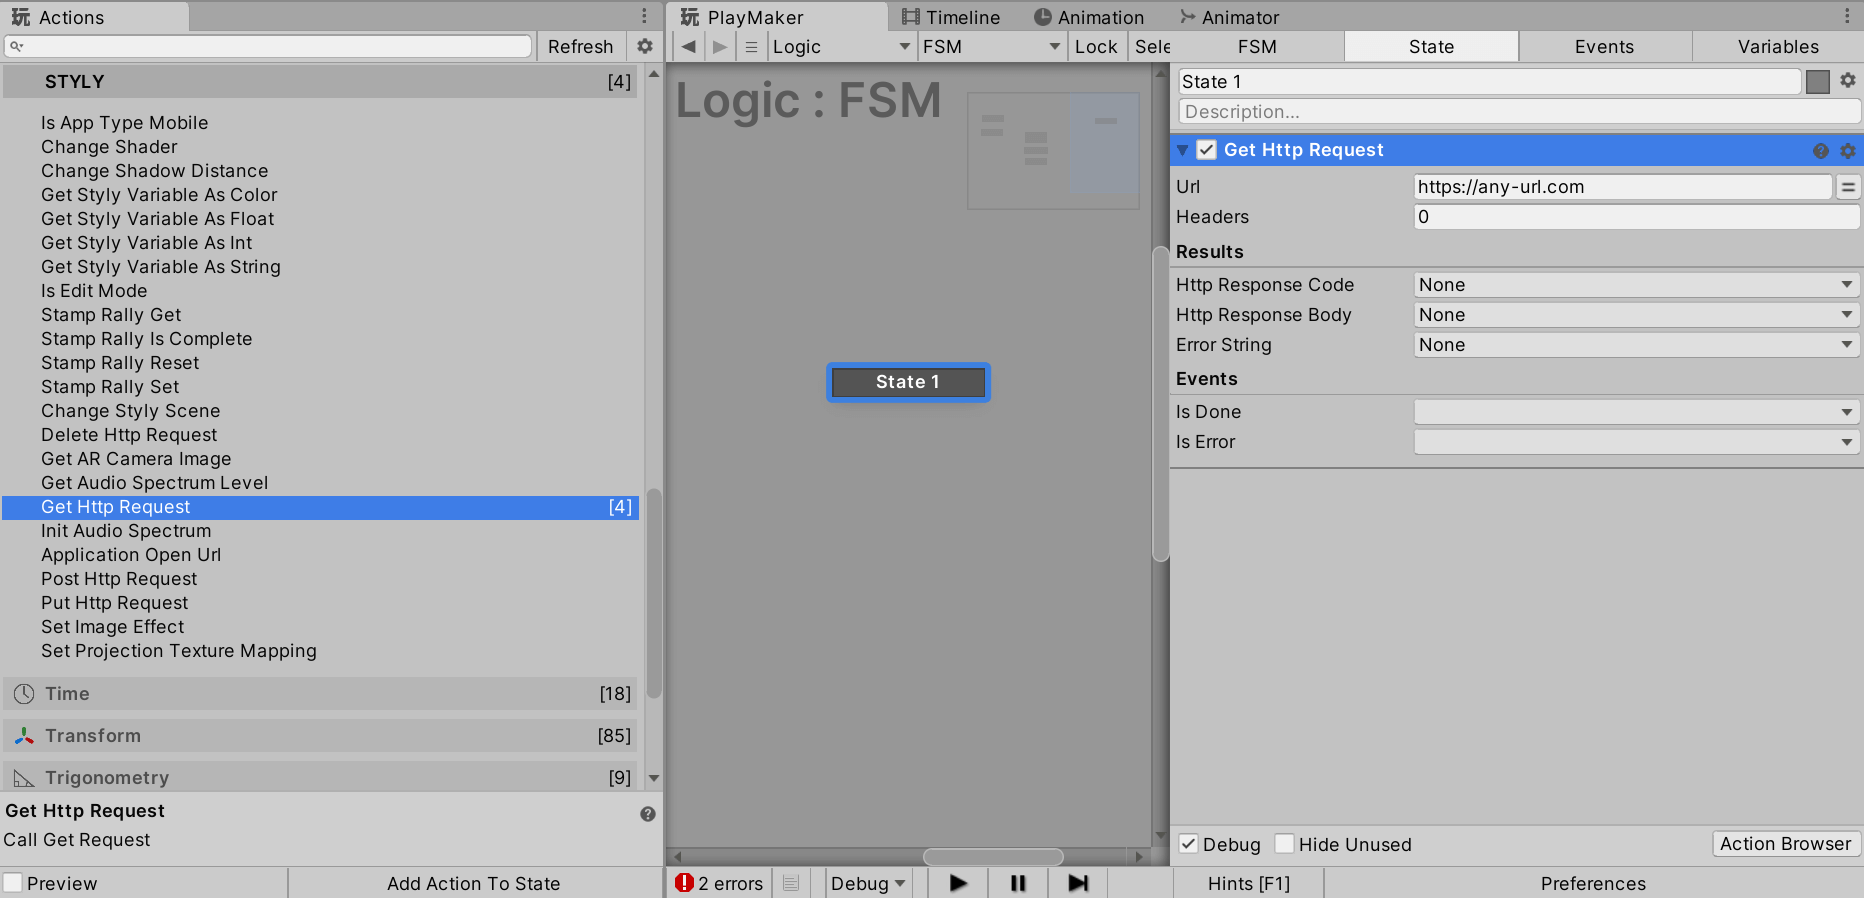
Location of CustomAction in Get Http Request
You do perform HTTP GET by setting String as Url.
Also, any number of Key-Values can be set as Header.
When the response from the server is normal, the Done event will be called.
When an error occurs, the Error event would be called.
The response from the server will be saved in the Http Response Code/Body, and in case of an error, the error content will be saved in the Error String.
In case of an error response code such as 404, the Error event will be called.
In case of a normal Response Code such as 200, the Done event will be called.
If necessary, you can implement an error system using Response Code.
One limitation of WebGL is that it requires CORS setting on the server side.
If a request is made for a URL that does not have CORS settings, the Error event would be called.
Creating a Sample Scene
In this article, I will create a scene in which you can see URL settings and results in uGUI so that you can easily check the operation.
Preparing URL input field and result display field with uGUI
Let’s create a Canvas as a ground for making input and display fields.
By right-clicking on the Hierarchy in Unity and selecting UI->Button, etc., a Canvas will be generated automatically.
Change the settings so that the generated Canvas is placed in space so that it can be viewed in VR.
Set the Render Mode to World Space and the Transform settings to Scale = 0.005, Width = 800, and Height = 600, respectively, to get a good size.
If you want to use it as a Prefab, change the Layer to Default here.
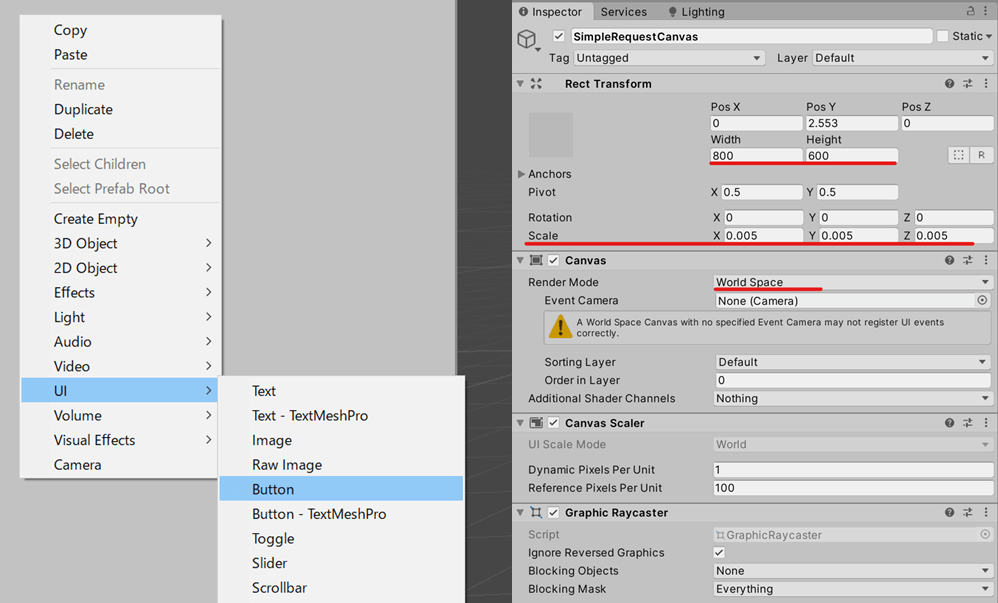
Adding a Canvas and Setting the World Space
Now that the Canvas has been created, place an InputField as the input field, a Text for displaying the result, and a Button for starting the request underneath it.
Place them where you like.
You can also change the names of the GameObjects in the Hierarchy to make it easier to understand.
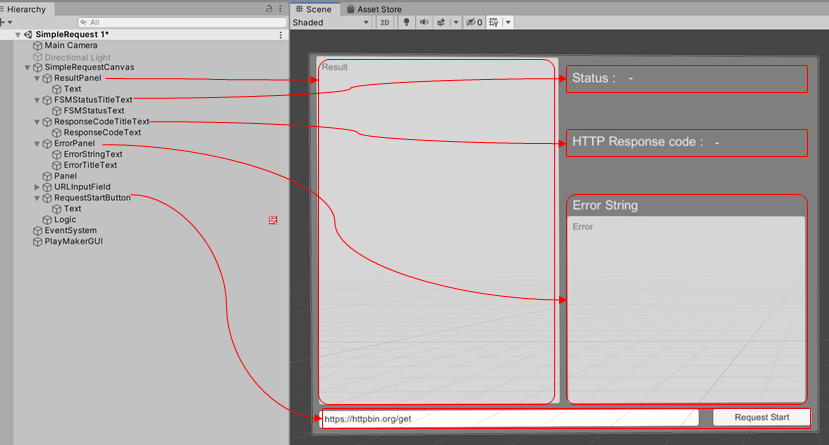
Adding each UI element to the Canvas
For InputFiled, if you have an initial access URL, you can set it here.
You can set it in the Inspector under Input Filed Component Text.
In this case, we’ll use “https://httpbin.org/get” which can be used to test a simple HTTPS request.

Configuring Input Filed in Inspector
PlayMaker Settings
To implement those in PlayMaker, we will add an FSM Component.
Select the GameObject you want to add the FSM Component to and right-click on the PlayMaker Editor->Add FSM to add it.
The PlayMaker Editor can be opened from the Unity menu by going to PlayMaker -> PlayMaker Editor.
You can add the GameObject to an existing Canvas, or if you plan to use it in the future, you can create an empty GameObject that you can rename to Logic or something similar.
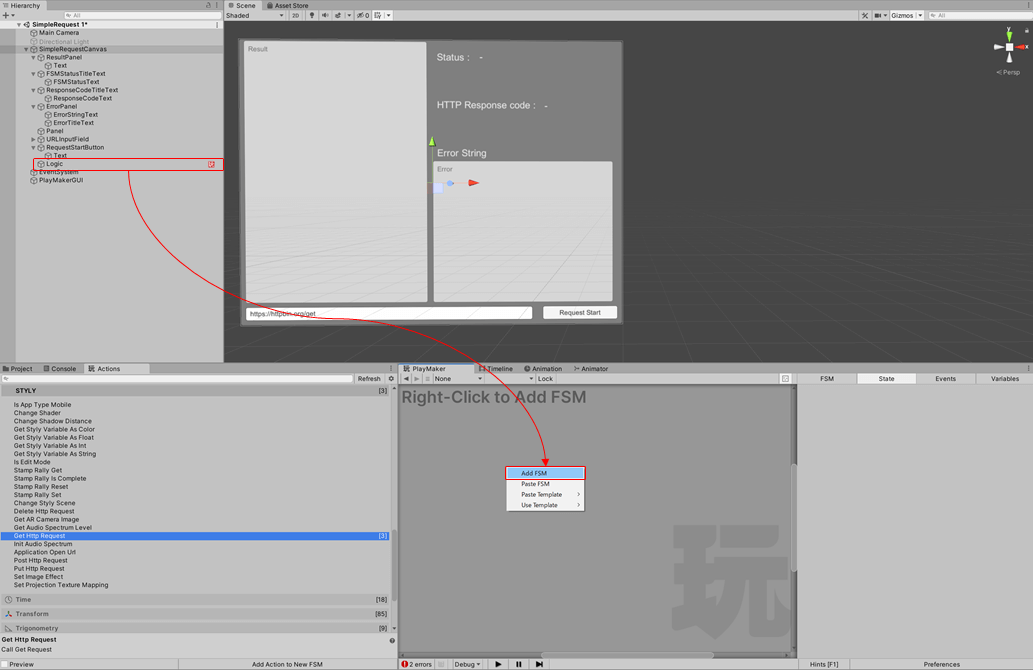
Adding the FSM Component
Implementing PlayMaker
Here are what we are going to implement.
- init:Status for initializing variables (we don’t have anything in particular to initialize, but we’ll put it there.)
- Wait:Wait until the button is pressed.
- Request:When the button is pressed, get the URL from the InputField and call Get Http Request.
- Show Result / Show Error:When Done event/Error event is fired, show Http Response Code/Body and Error String.
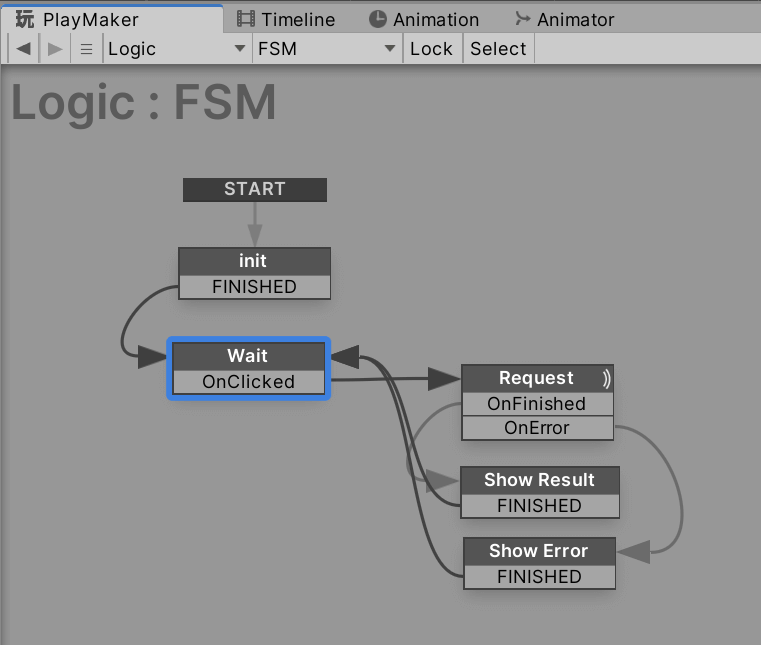
FSM to be implemented this time
PlayMaker: Wait Status Implementation
First, create a custom event OnClicked to detect when a button is pressed.
From the PlayMaker Editor, open the Event tab and type in Add Event and press Enter to add it.
We will also create a custom event OnFinished/OnError to receive the result of the HTTP Request.
The name of the custom event is optional, so you can implement with a name as you like.
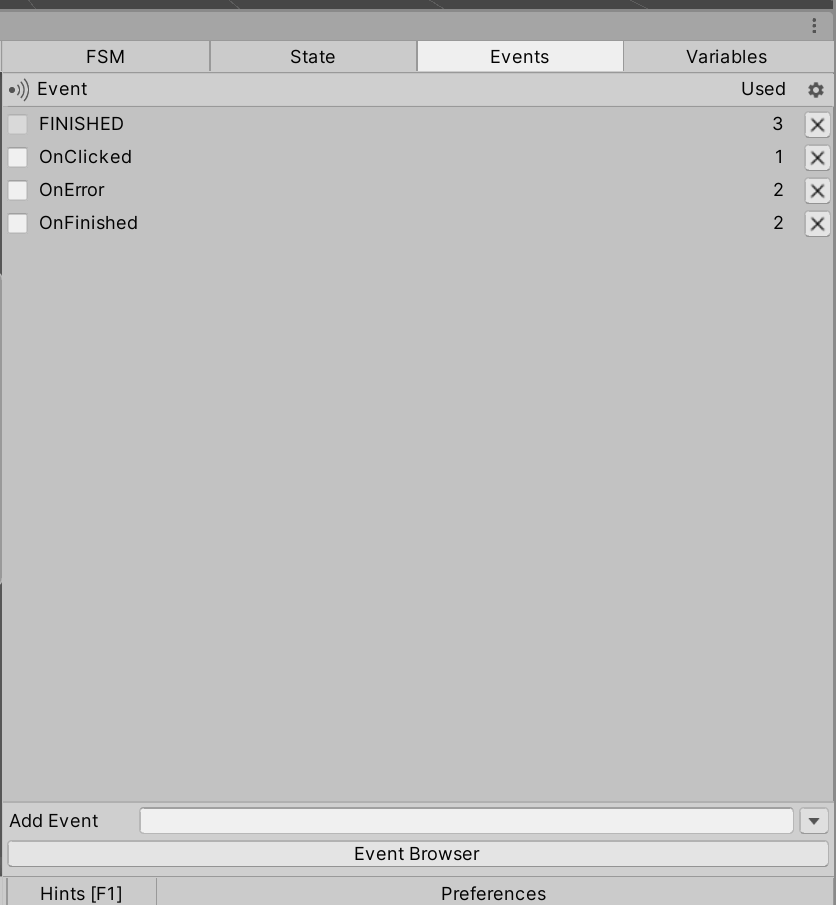
Adding a custom event to the FSM
After creating the Wait status, right click on the Wait status and select Add Transition -> OnClicked to add an Event.
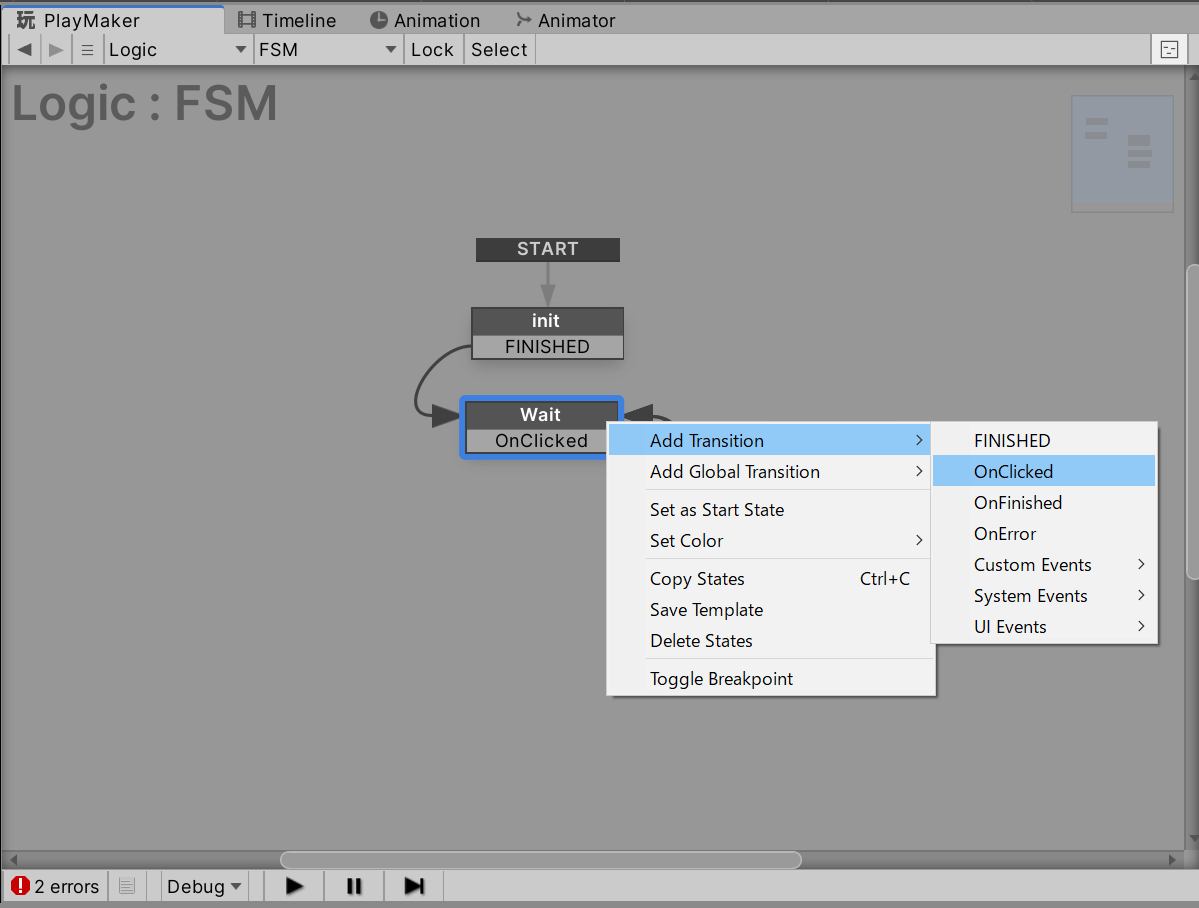
Adding Transition to State
We’ll set up the FSM to receive events from the Button in uGUI.
You can set up a GameObject by pressing the + button for On Click() in the Button Inspector.
Once the GameObject containing the FSM is set, select PlayMakerFSM.SendEvent and type OnClicked.

Setting up the Button in uGUI
PlayMaker: Implementing the Request Status
We will now implement the Action.
Before calling Get HTTP Request, update the Text display with UI Text Set Text Action to optionally display the status of the FSM.
We will also use the UI input Field Get Text Action to retrieve the URL from Input Filed and store it in the url variable.
Finally, we add a Get HTTP Request Action to set the Url retrieved from Input Filed.
Also, save the Http Request Code/Body and Error String as the Result to the respective variables.
For Event, set the OnFinished / OnError events that we added earlier.
Finally, don’t forget to add OnFinished / OnError as Transition Event!
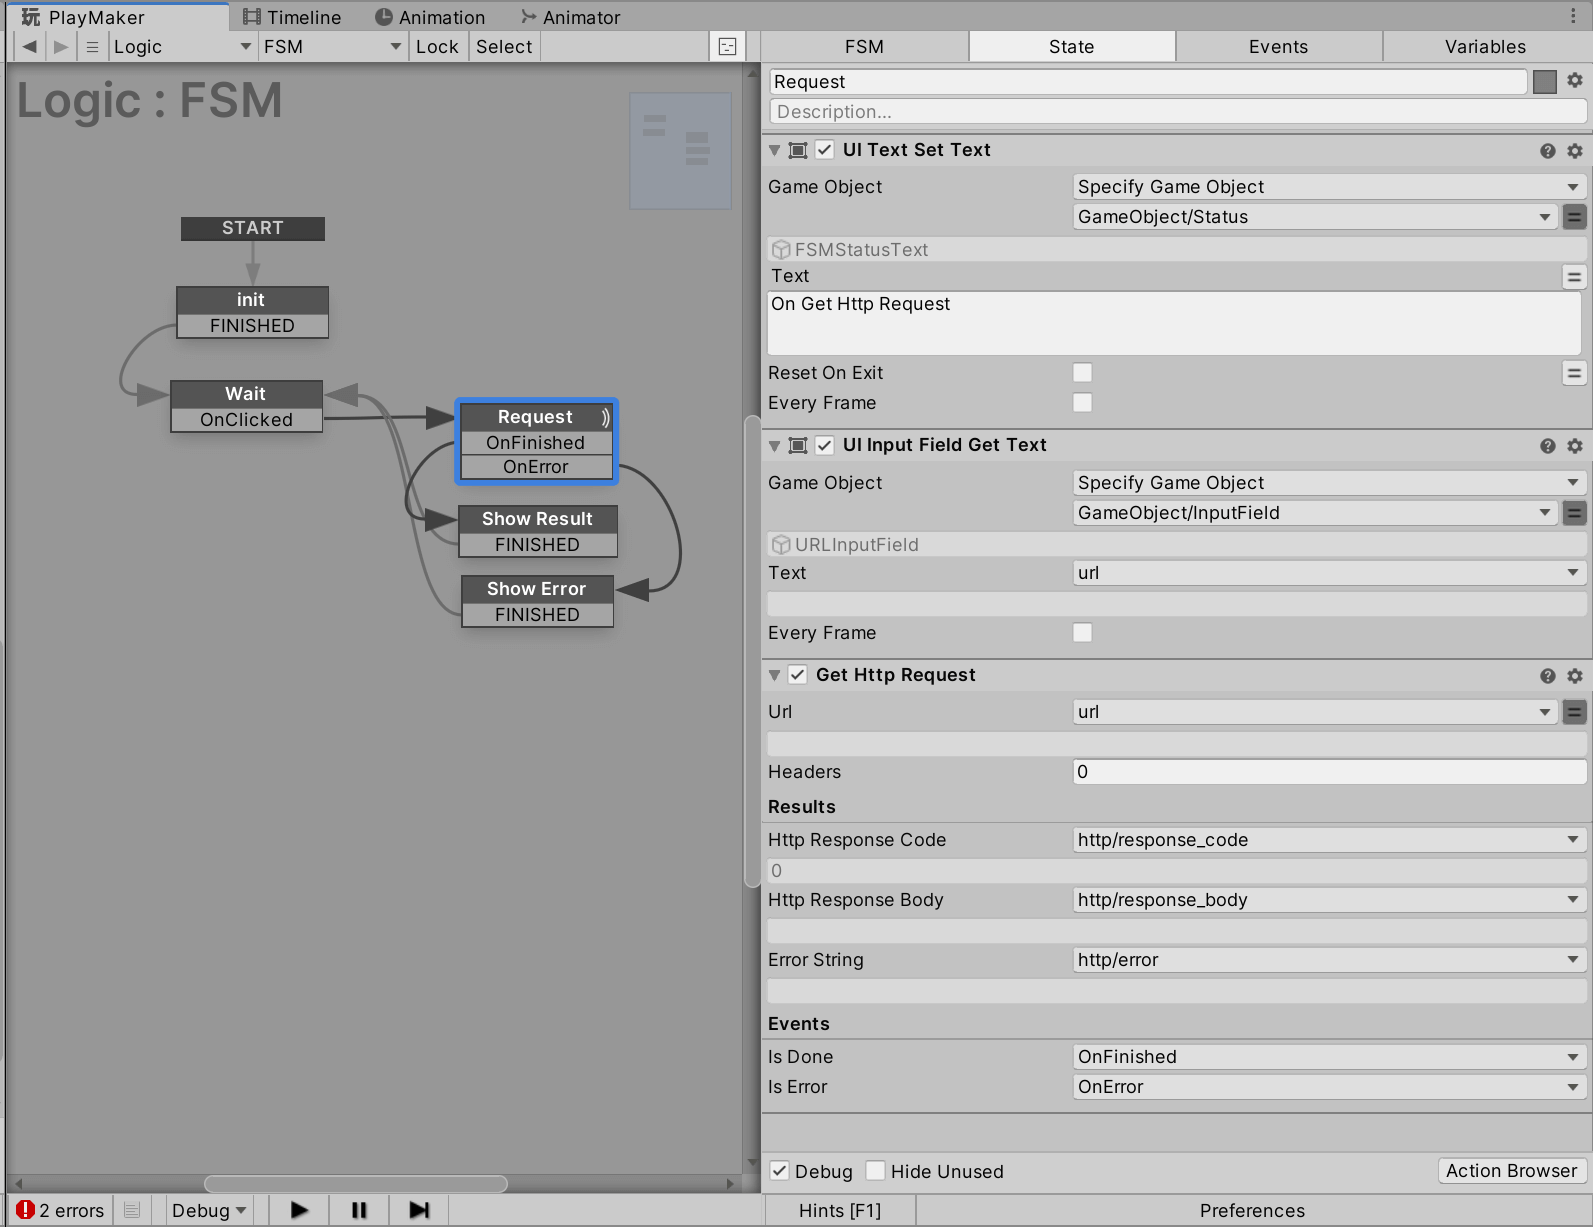
Action implementation for Request state
PlayMaker: Implementing Show Result / Show Error Status
We will update the result according to the displayed result.
In this case, we will only update the uGUI Text, so we will display the Http Request Code/Body and Error String variables obtained as the Result of the Get HTTP Request Action.
UI Text Set Text Action is used to update the Text.
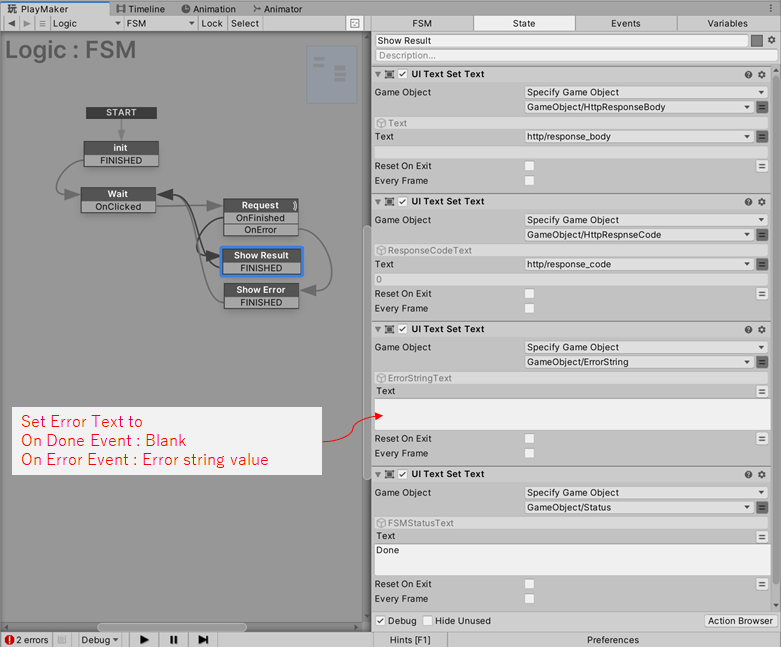
Displaying the Result of a Request
This time, we just display the result as it is, but if you want to process the result data or branch depending on the content, you may want to implement it here.
Explanation of the sample behavior
First, let’s use the default “https://httpbin.org/get”.
When I clicked the Start button with the Input Filed URL as it is, I got the Response Code 200 and the Body without any problem.
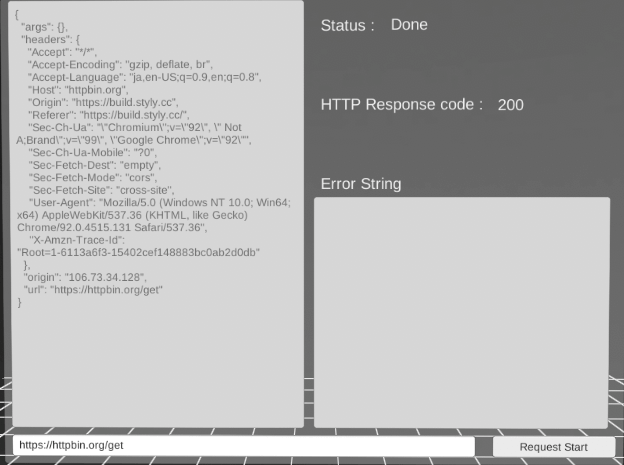
If you can get it successfully
Next, go to “https://httpbin.org/get2”.
The Error event was called and the server returned Response Code 404 as a non-existent URL.
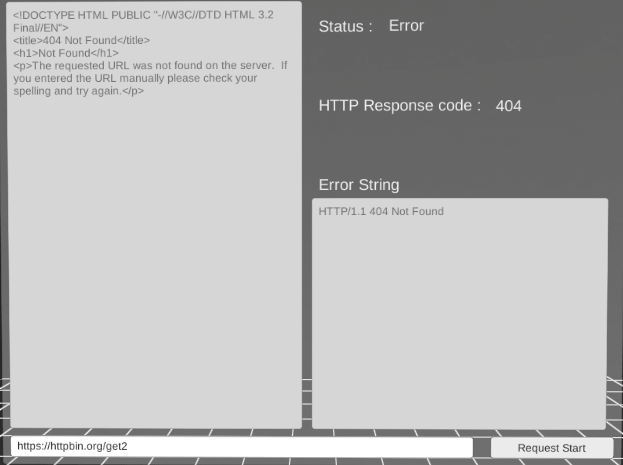
In case of server error
Finally, try accessing a non-existent URL or a server that does not have CORS settings.
Then the Error event will be called and the HTTP Response code/body will be empty.
You cannot check if CORS settings are configured in Unity, so upload the file to STYLY and then check it on the web(STYLY Studio).
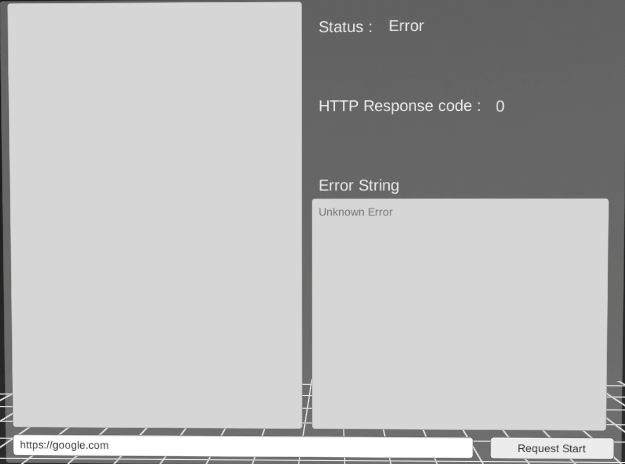
If you are accessing a non-existent server
Upload to STYLY
Let’s actually upload the file to STYLY and use it.
In this case, we’ll upload the Unity scene directly to STYLY, so please refer to this page.

How to create an account
