Tips for creating VR/AR scenes using graphic materials (JPG, PNG, GIF).
- 1 Preparation
- 2 AR Template and Principles of AR Scene Creation
- 3 VR/AR] Tips 01 Uploading and placing images
- 4 VR】Tip 02 Create an exhibition space by arranging boxes and images
- 5 VR/AR] Tip 03 Using RotatingObject to create a scene in motion
- 6 VR/AR】Tips 04 Making a flat image look three-dimensional
- 7 VR/AR] Tip 05 Using GIF to place objects in motion
- 8 VR] Arrange Idea 01 Pasting an image on the ground
- 9 VR] Arrange Idea 02 Pasting an image into the Skybox
- 10 [VR] Arrange Idea 03 Wrapping the space with RotatingObejtc
Preparation
Log in to STYLY Studio.
https://gallery.styly.cc/?login
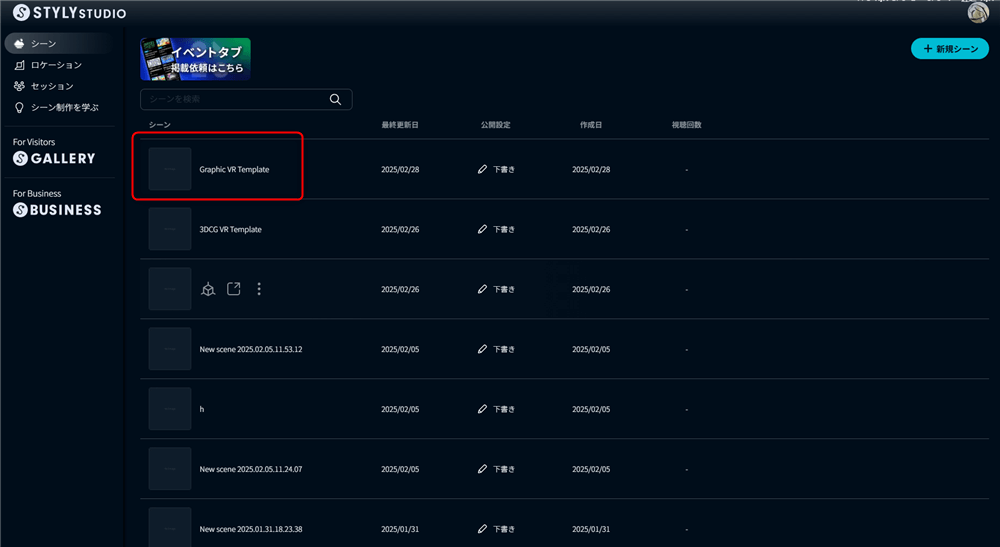
If you want to learn VR, please copy Graphic VR Temaplate.Click the following URL while logged into STYLY to copy the graphic template scene for VR.
https://gallery.styly.cc/scene_copy?s=70cdae0b-e3b8-48f7-b99d-c4b24b60535
Please use the template scene while learning Tips and ArrangeIdea.
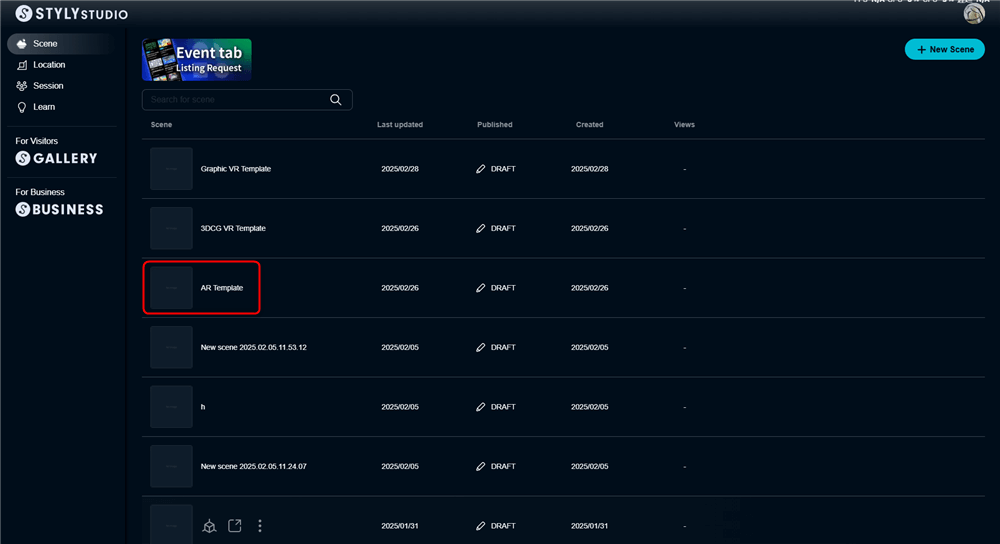
If you want to learn AR, please copy AR Template.
Click the following URL while logged in STYLY, and the template scene for AR will be copied.
https://gallery.styly.cc/scene_copy?s=5c87f60b-3ed2-402c-9ca4-4bb0bfb1e51d
While using the template scene, please learn Tips and ArrangeIdea.
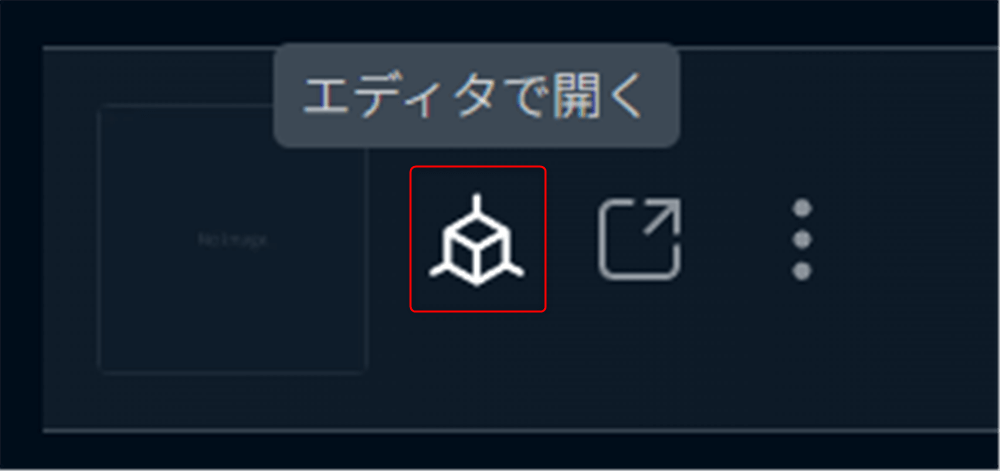
Click the Edit Scene button in Studio.
If you want to create an AR scene, please proceed after learning about AR Templates and Principles of AR Scene Creation.
Finally, we will explain about the 【VR/AR】 tag in front of the section name from now on.
VR】・・・・You can learn mainly the contents that can be used in creating VR works.
VR/AR】・・・You can learn contents that can be used in both VR and AR productions.
Let’s learn the skills you want to acquire by referring to these tags.
Preparation is above.
AR Template and Principles of AR Scene Creation
Please proceed below only if you are creating an AR scene.
You may skip this section if you are creating a VR scene.
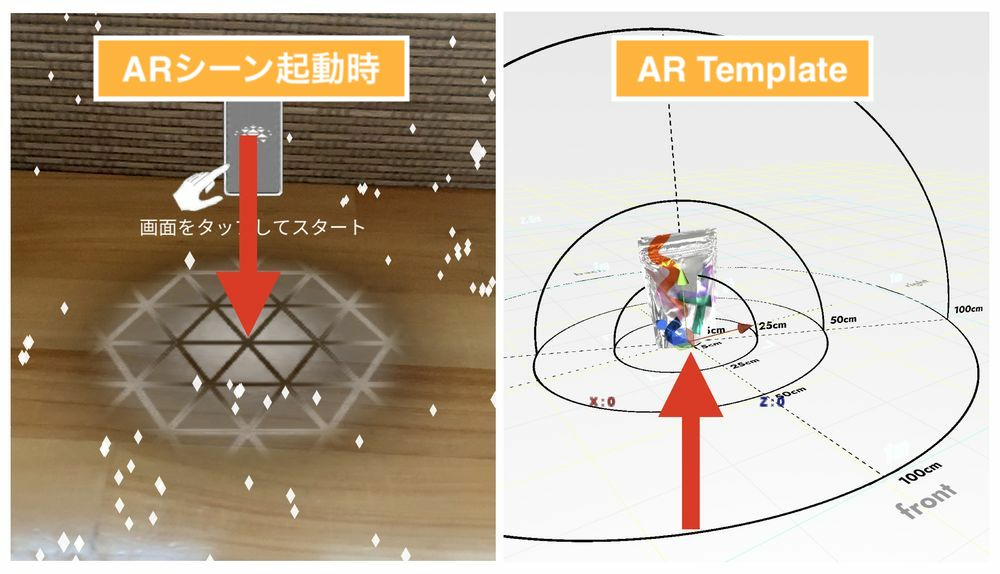
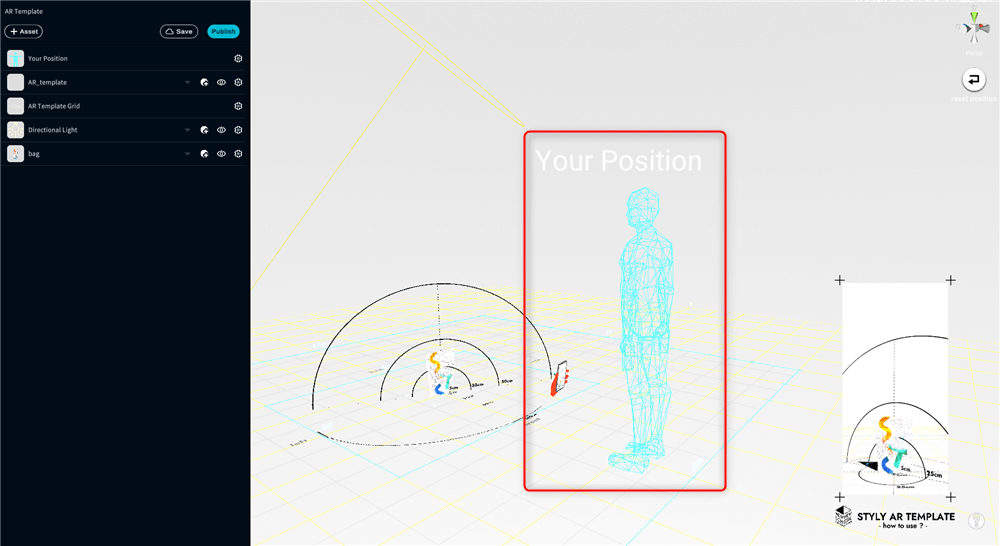
The center of the AR Template is called the origin.
STYLY displays AR contents around the origin.
The origin is the position where the origin mark is displayed after the AR scene starts and plane detection is performed.
Therefore, keep in mind that the center of the AR Template is the same as the position of the origin mark that is displayed when the AR scene is launched in the smartphone version of STYLY.
Your Position is not used (and does not work) in AR.
When creating an AR scene, understand that the assets should be placed in alignment with the origin.
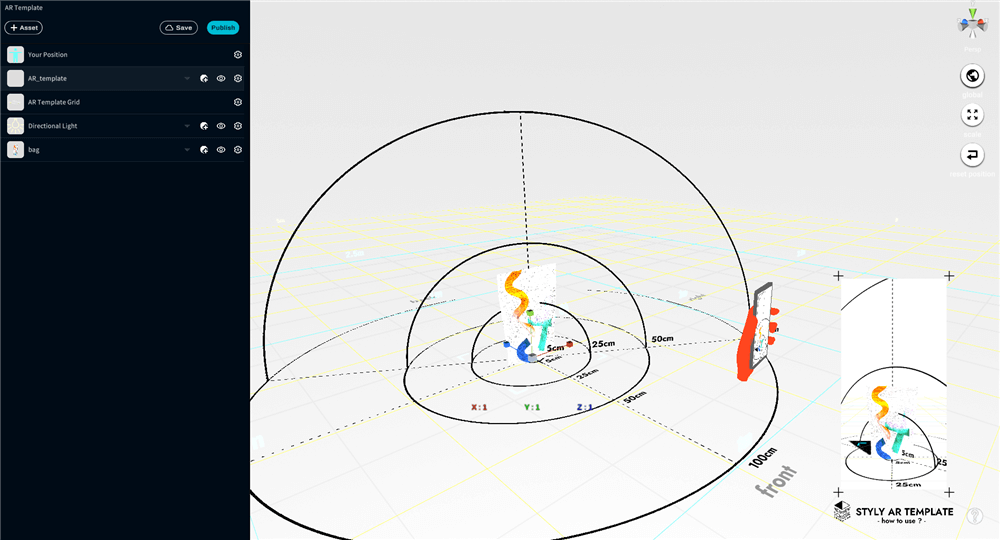
There are items in the AR Template that can help you align with the real world.
The first is the content zone layout (named AR_tempalte in the hierarchy menu).
It allows you to measure the width and height.
The second is the preview screen.
You can see the screen reflecting the hand holding the smartphone in front of you and the scene.
While looking at the preview screen, check the contents of your work to see how the AR scene will look in the real world and whether it matches your image.
You can expand the range of width and height you can figure out by scaling up or down the content zone layout.
The preview screen also moves to a distant distance in conjunction with the scaling of the content zone layout.
Use this function when creating contents that are large in scale.
To use, with AR_Template selected from the hierarchy menu, press the [R] key and select the center of the gizmo with a left click to zoom in or out.
When creating an AR scene, do not delete the AR Template Grid.
If you delete it by mistake, press [Ctrl] + [z] key (one backward operation) to restore it.
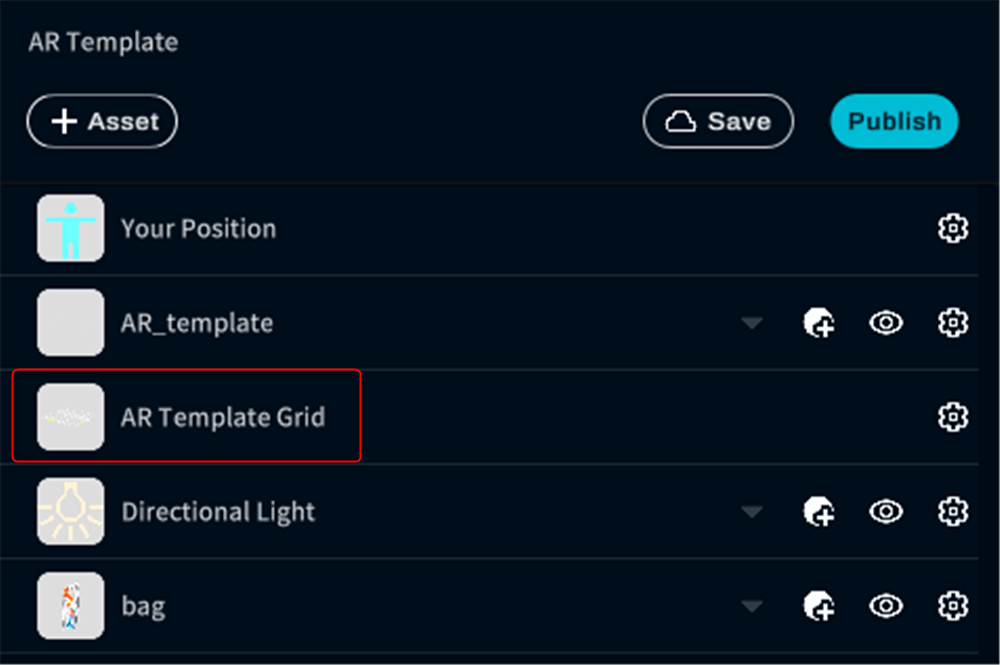
Also, do not use Skybox (celestial) and Ground (ground) as they are not used in AR scenes.
Summary of points to note when creating an AR scene
- The center of the VR Template and the origin mark of the AR scene are the same
- Your Position cannot be used.
- Do not delete the AR Template Grid.
- Do not place Skybox and Ground in the scene. (If Skybox is placed, the scene will be in VR scene mode.)
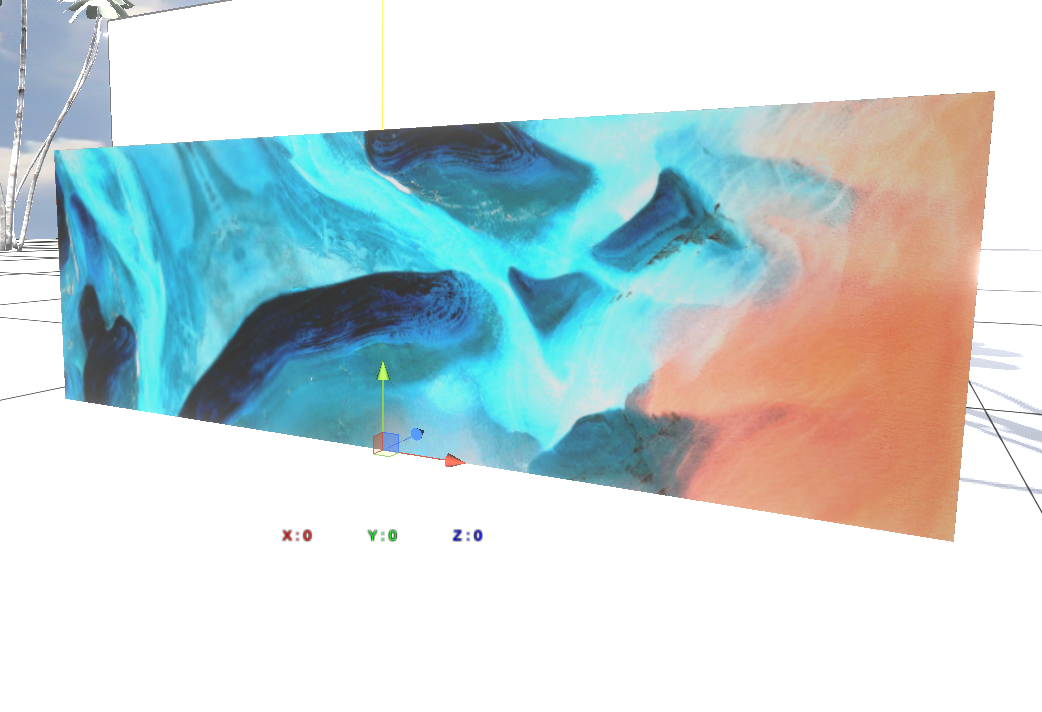
VR/AR] Tips 01 Uploading and placing images
Let’s actually upload image data and place the artwork on the scene.
Image data can be JPG / PNG / GIF.
Please note that if the size of the image is too large, the scene itself will become larger.
As a sample, we will use data from Pexels, a free site for images and videos that do not require license-free or exhibit display.
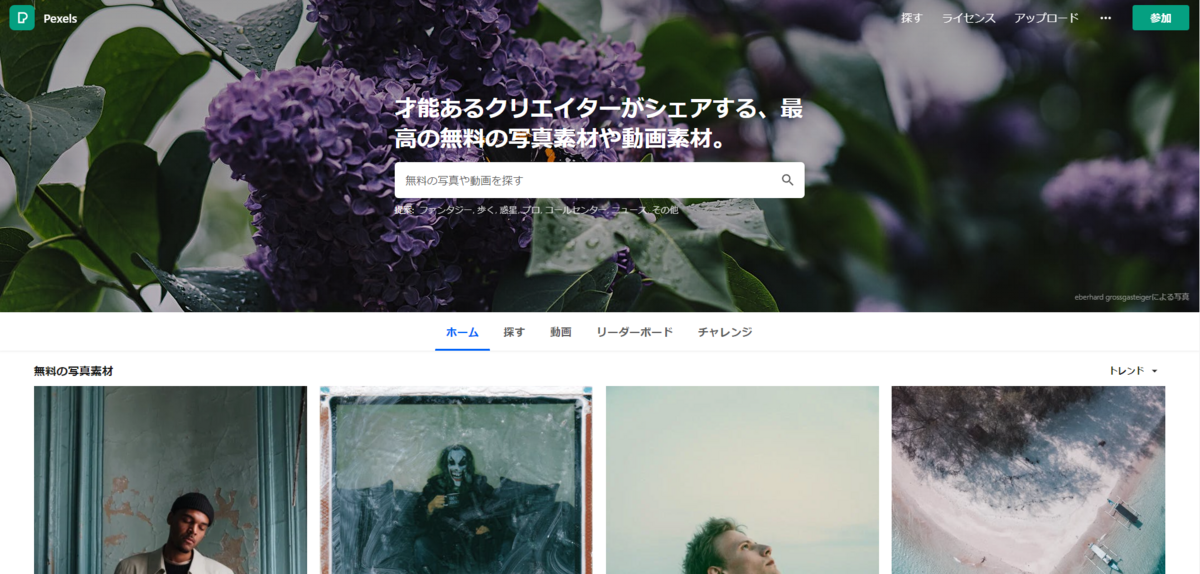
The license is described below.
https://www.pexels.com/ja-jp/license/
Let’s actually upload the image data to STYLY.
Select the asset icon in the menu.
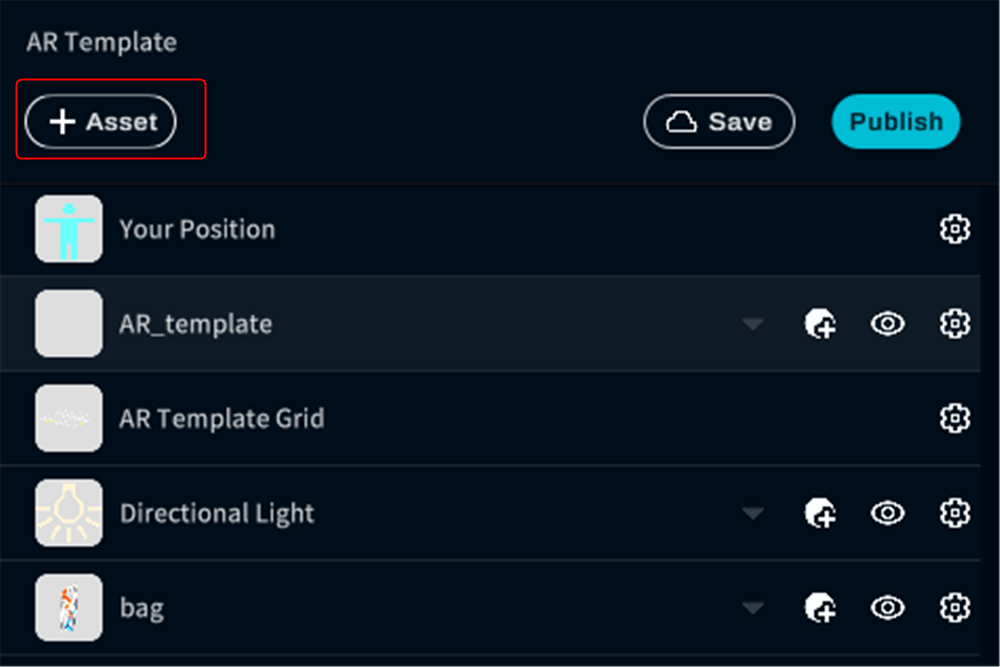
A list of assets will be displayed.
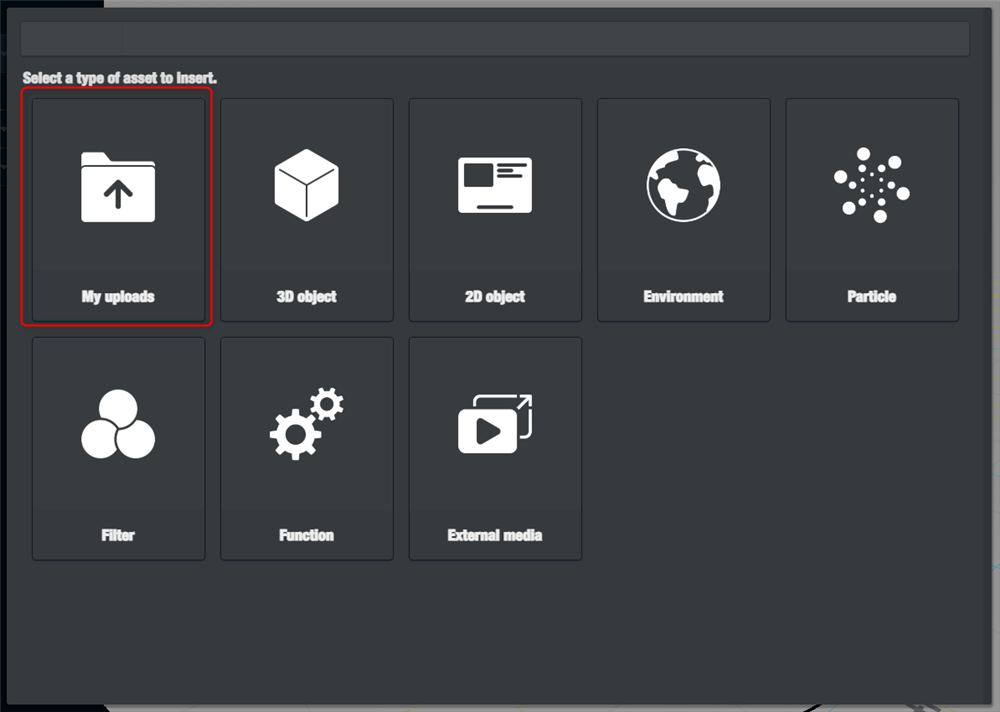
Select [ My uploads ] > [ Image ].
Upload the image data.
Select SELECT.
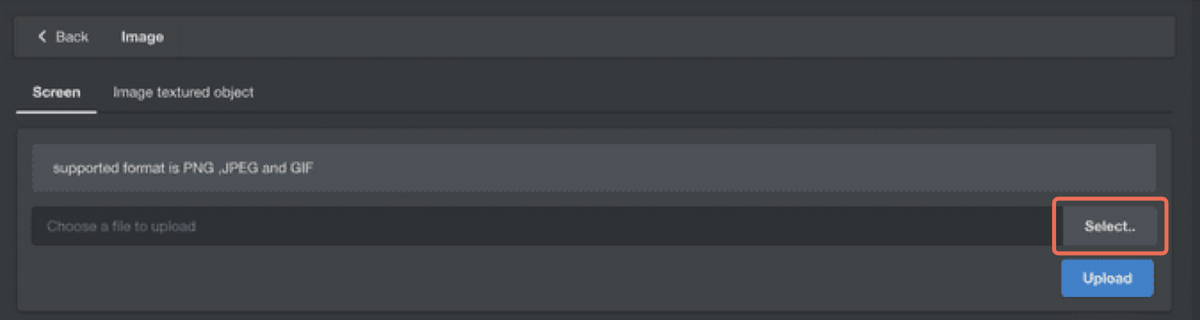
A folder dialog will appear, so select the data you wish to upload.
After completing the selection, press the Upload button.
When you select the Upload button, a blue bar will appear to indicate the progress of the upload.

Next, when the upload is complete, a blue button labeled “Next” will appear,
Select it.
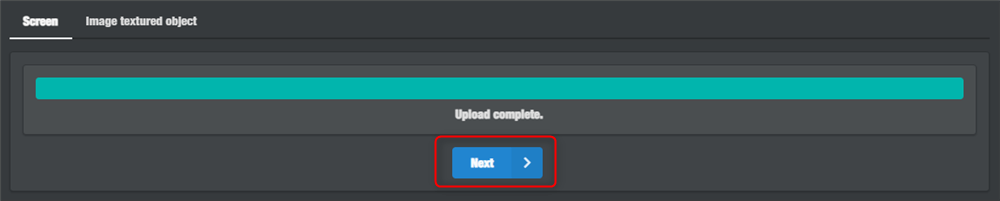
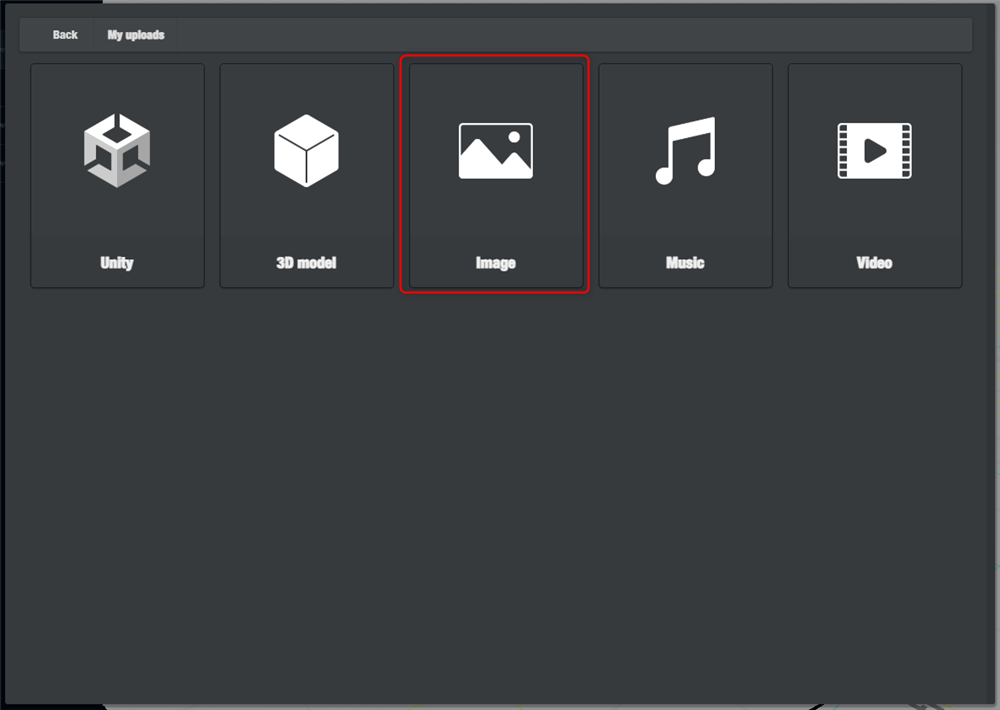
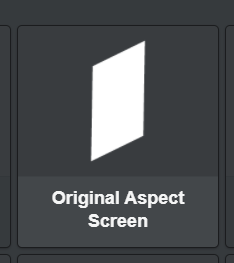
After the selection is made, select the screen for the image.
In our sample, we chose Original Aspect Screen.
Once the screen is selected, the image data will be displayed in STYLY Studio.

Now that you have uploaded the image data,
Now that the image data has been uploaded, you can place it anywhere you like in the template scene.
VR】Tip 02 Create an exhibition space by arranging boxes and images
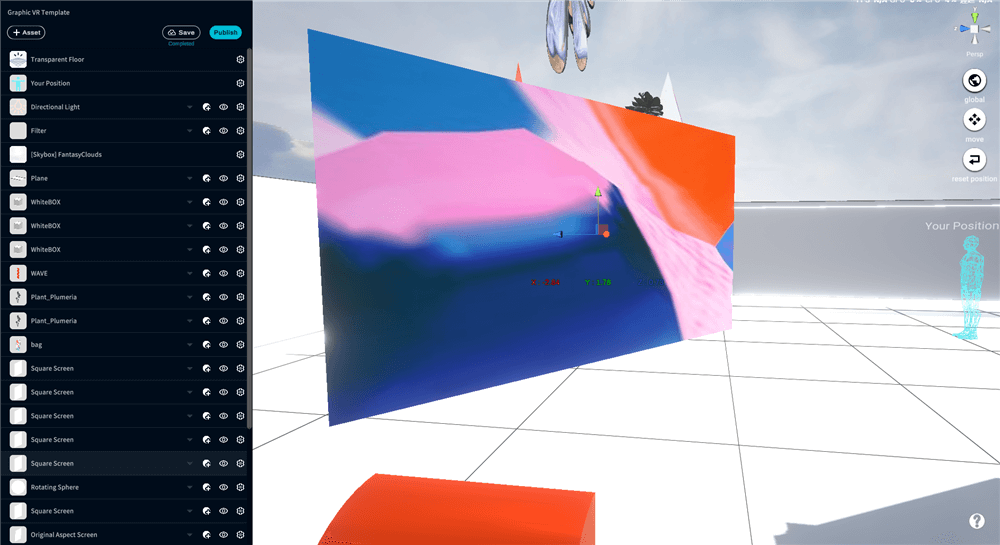
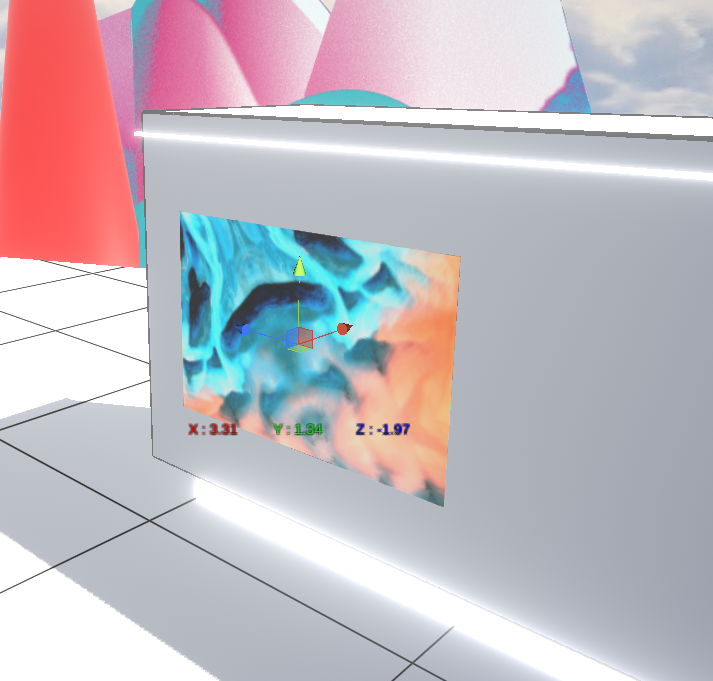
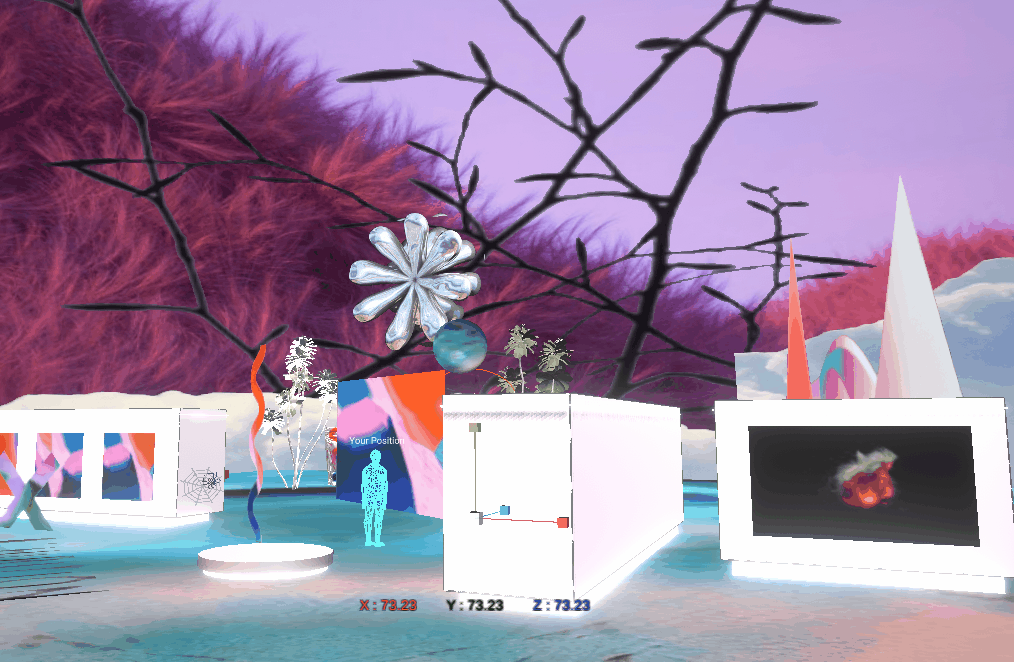
Let’s place the image objects we just uploaded along the white boxes already placed on the scene, first explaining how to freely move, rotate, and resize the assets in STYLY Studio.
Select the image object you just uploaded.
(Selected assets will be gray.)
To select an asset, click on the asset in the Hierarchy menu, or
Click on an asset in the Hierarchy menu, or click on an asset in the Scene.
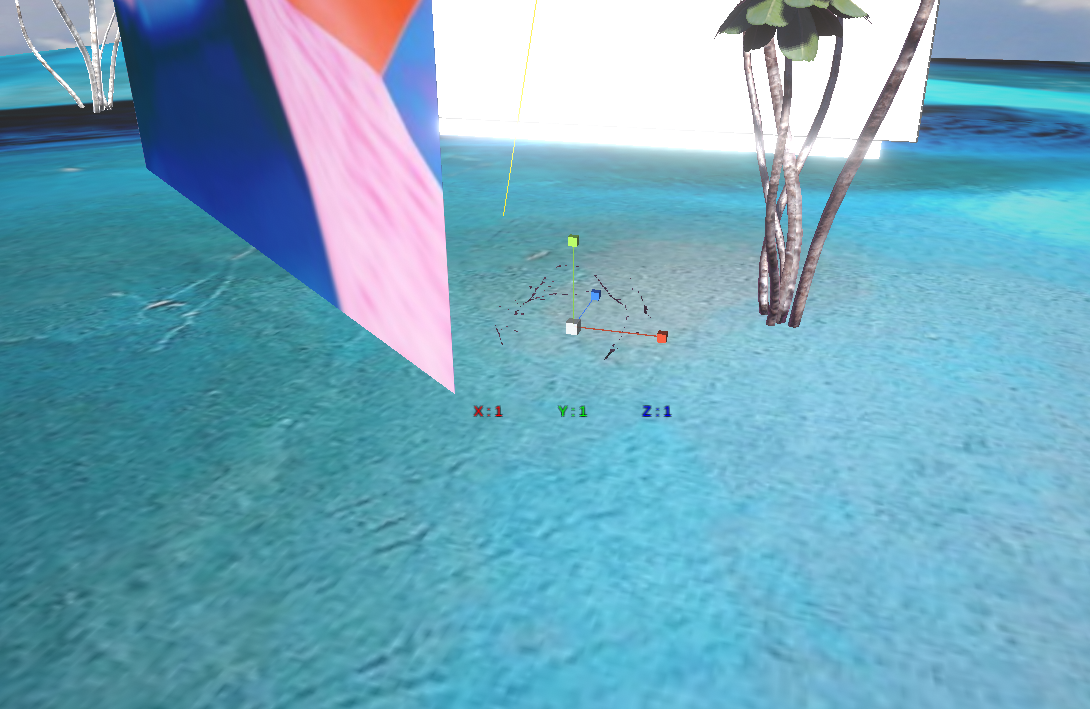
When an asset is selected, manipulators will appear on the asset.
Manipulators are the three directional arrows (red, green and blue).
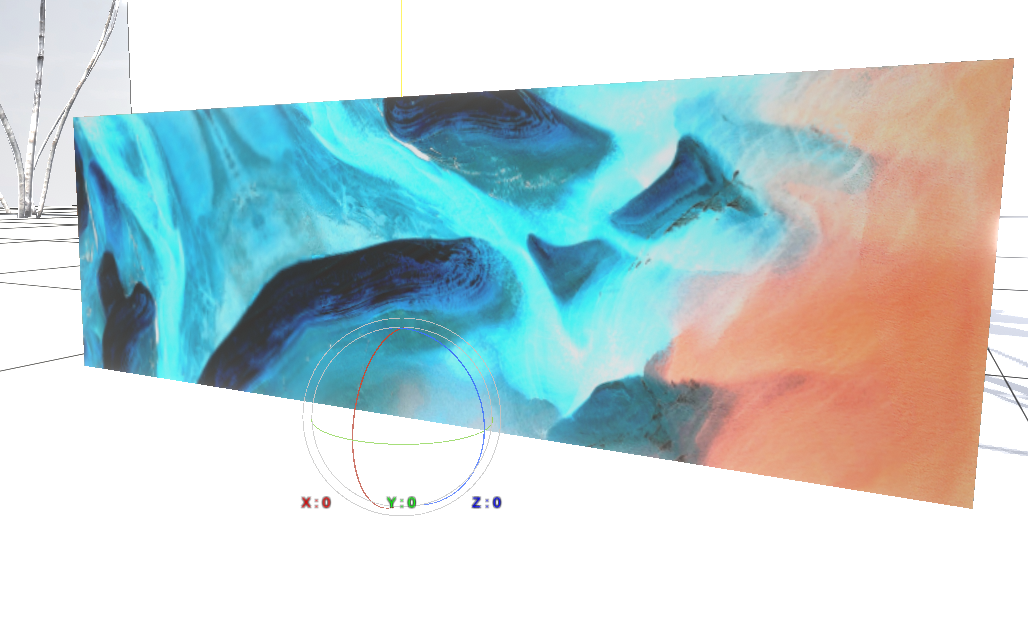
From the side menu, click on the move/rotate/scale button,
You can switch between move, rotate, and scale from the move/rotate/scale buttons in the side menu.
Alternatively, the following shortcut keys can be used to switch between them.
[W key: move
[E key: rotate
[R key: Scale
Movement
Switch to Move mode and drag the manipulator to move the asset, or press Ctrl + Z (command + Z) to return the asset to its previous state.
Rotation
Switch to Rotate mode and drag the manipulator to rotate the asset.
Scaling
Switch to Scale mode and drag the manipulator to zoom in or out.

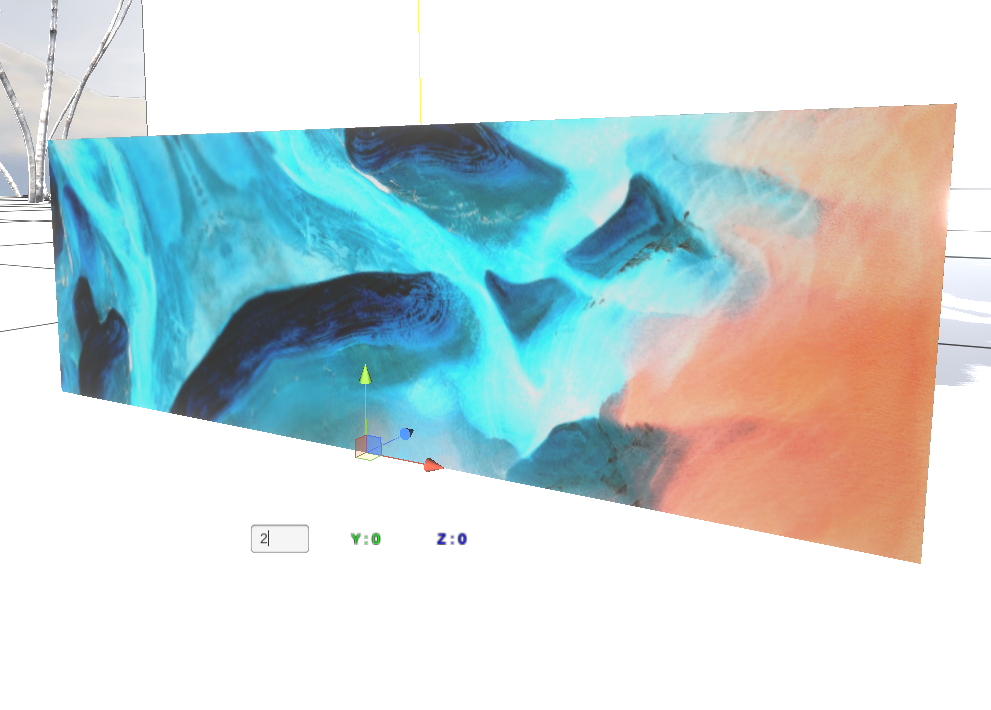
Direct Numeric Input
Click on the numerical value portion of the manipulator to directly edit the numerical value.
After entering the numerical value, click the [Enter] key to complete editing.
(All movement, rotation, and scaling modes are supported).
If you wish to undo the operation, click [Ctrl]+[Z] to do so.
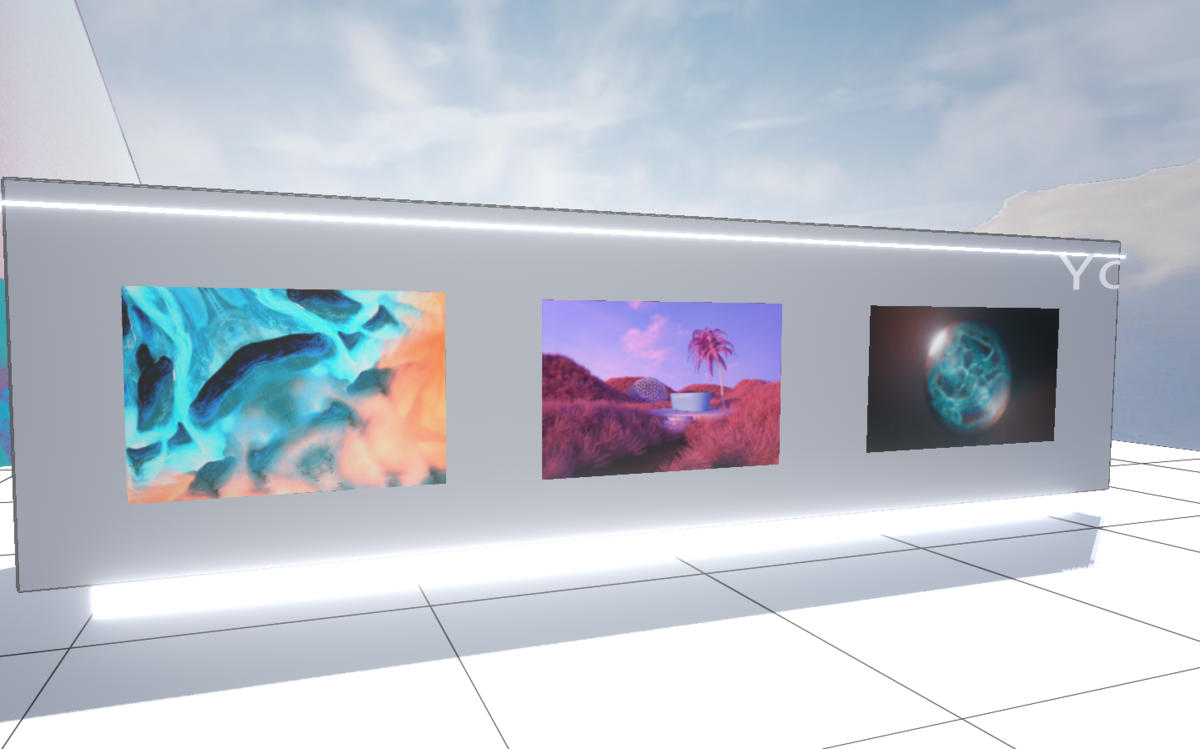
Let’s use this operation to place the image data uploaded earlier in front of the white cube in the manner explained above, as shown below.
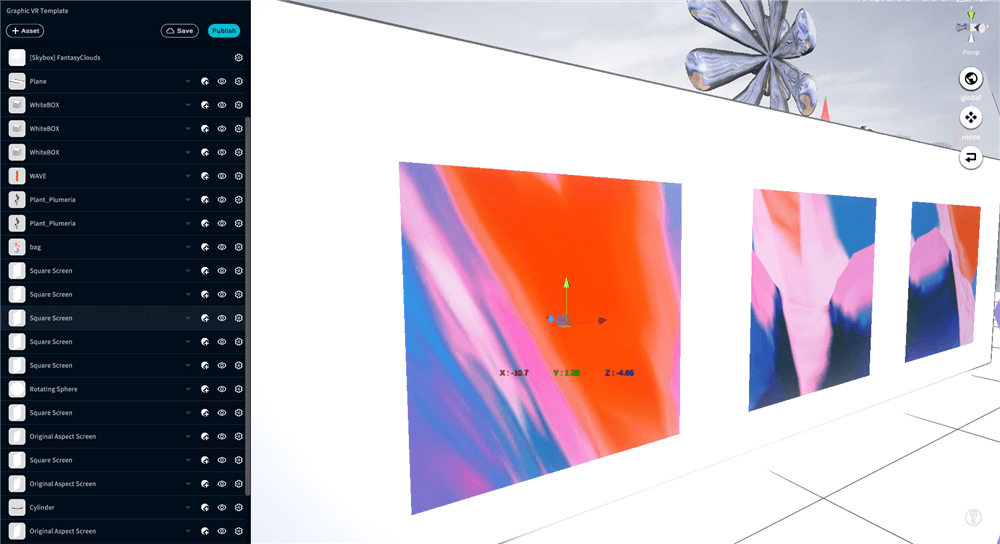
If three images are uploaded and placed at equal spacing, it will look like the gallery.
Let’s duplicate the white cube and add an additional wall to the exhibit using the asset transformation method described earlier.
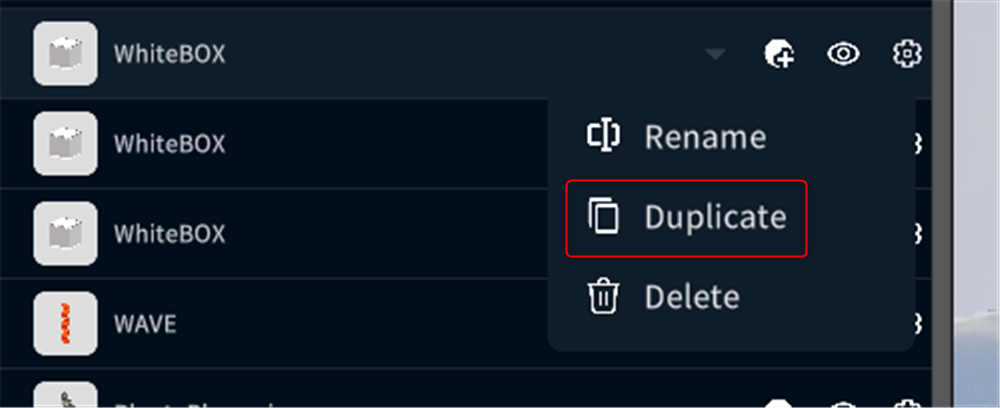
Select the WhiteBOX asset.
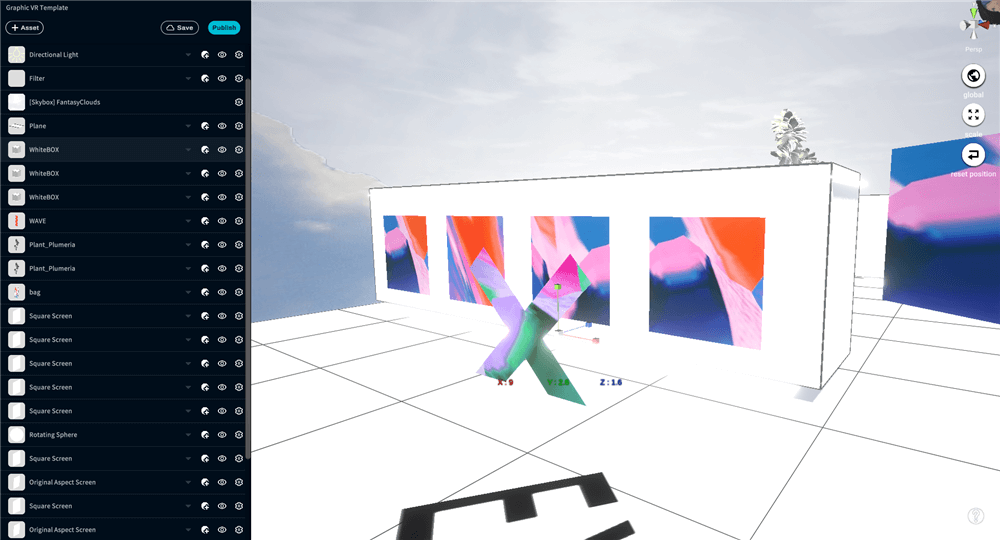
Click on the gear symbol and click “Duplicate.
Duplicate” is an icon that allows you to duplicate an asset.
When the duplication is complete, the asset will be added to the bottom layer.
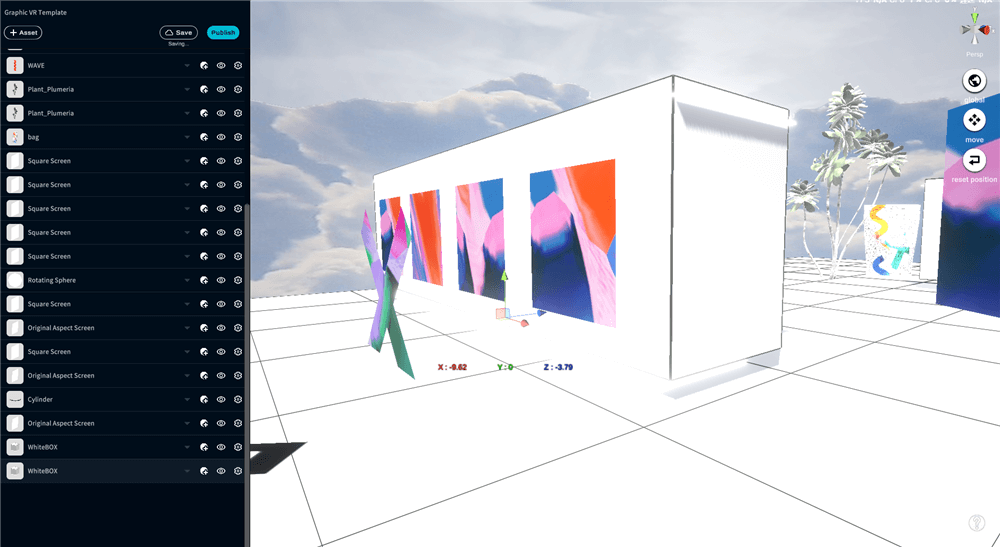
Shift the WhiteBOXes along the X-axis to make them parallel.
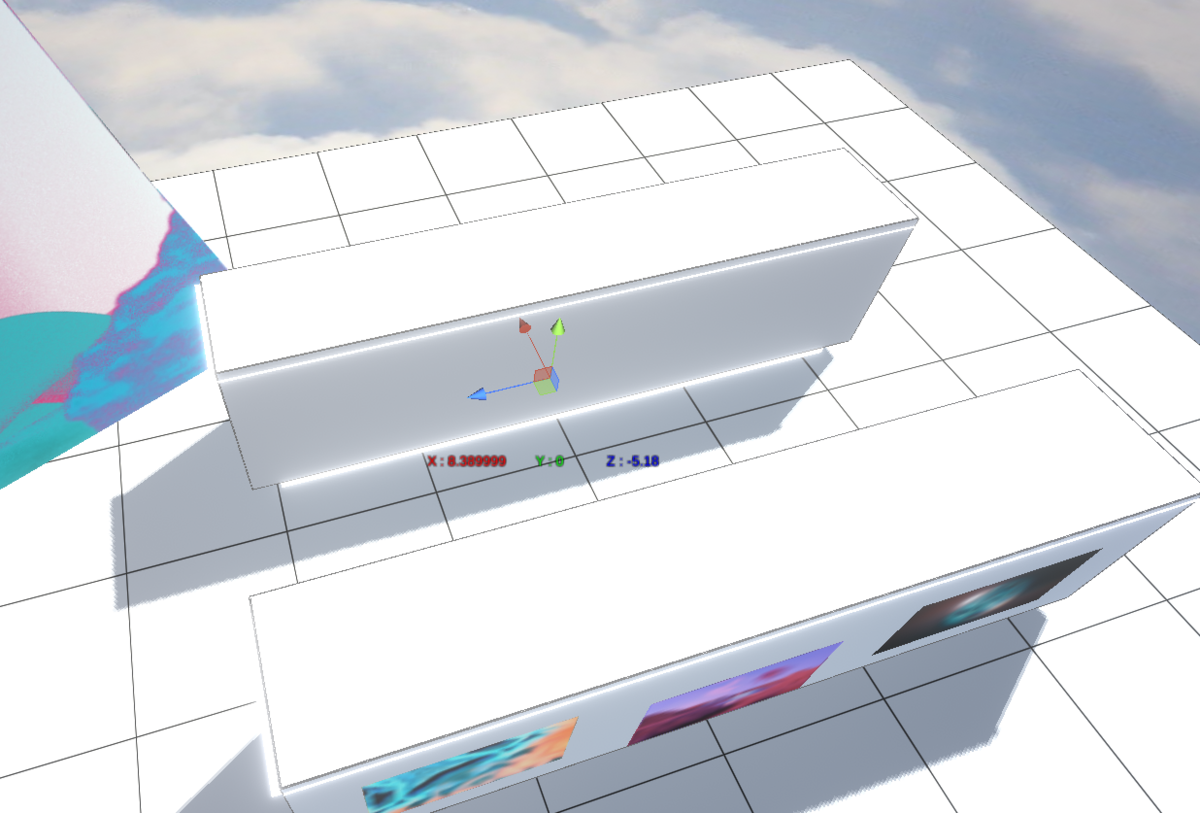
Change the size of the box to a size that will allow one image to be posted.
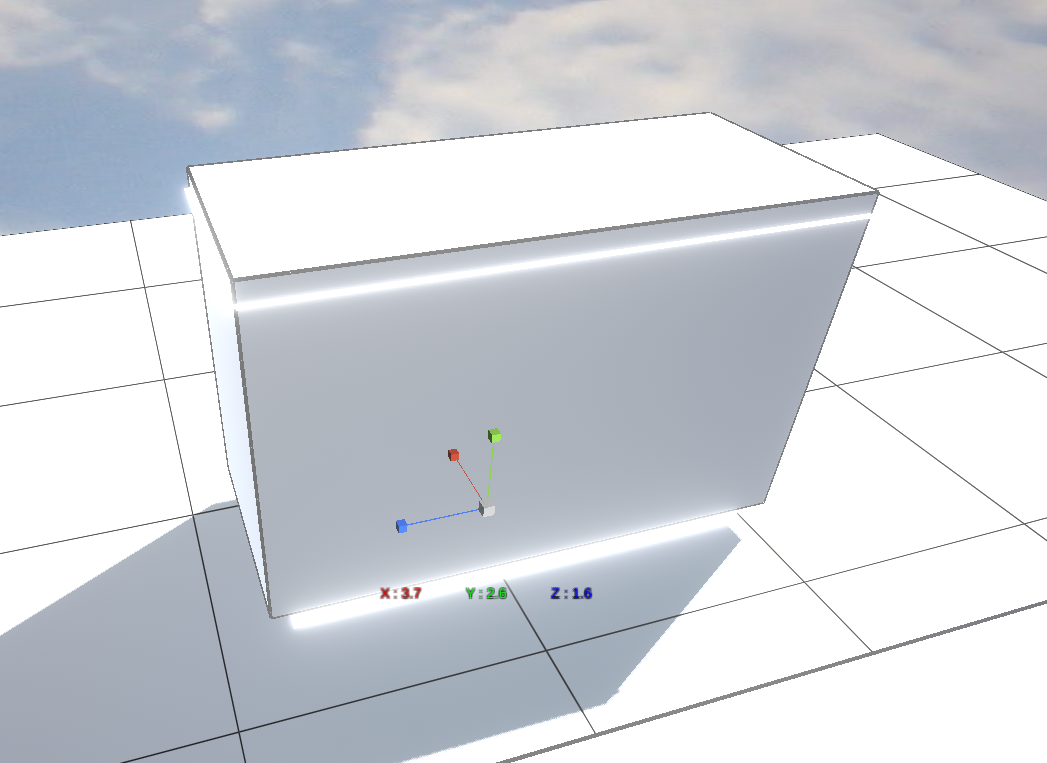
Finally, rotate it.
We set the X, Y, and Z values to 0 and placed it perpendicular to the previous WhiteBOX.
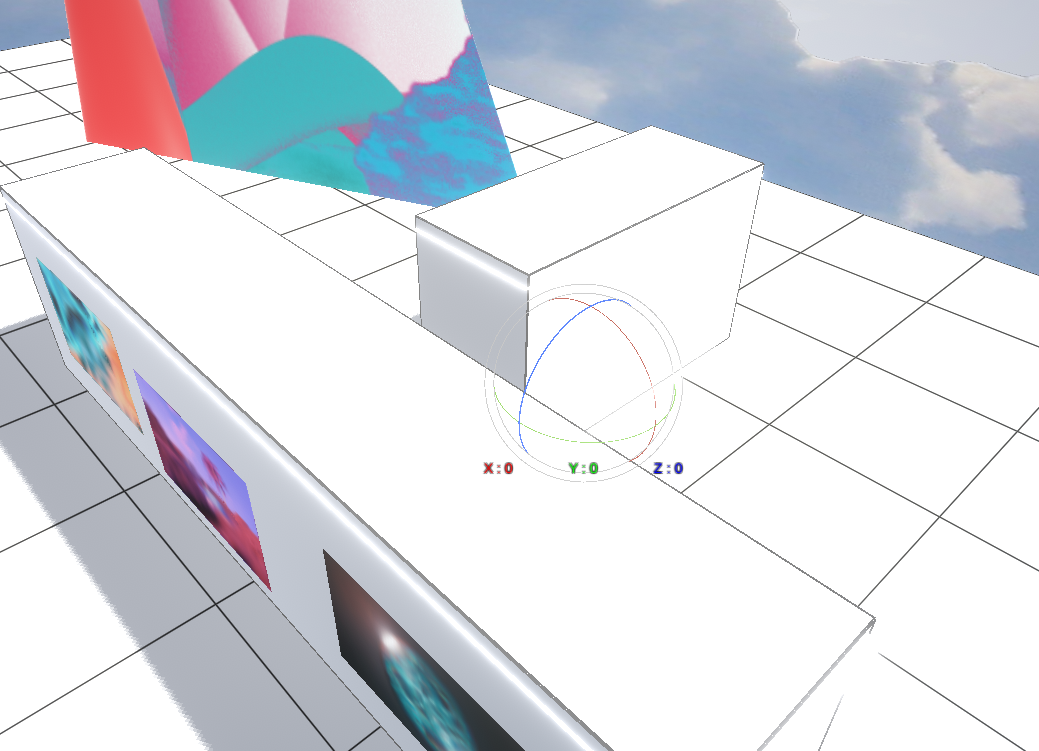
Now we can add a display location.
Let’s add an image object and display it.
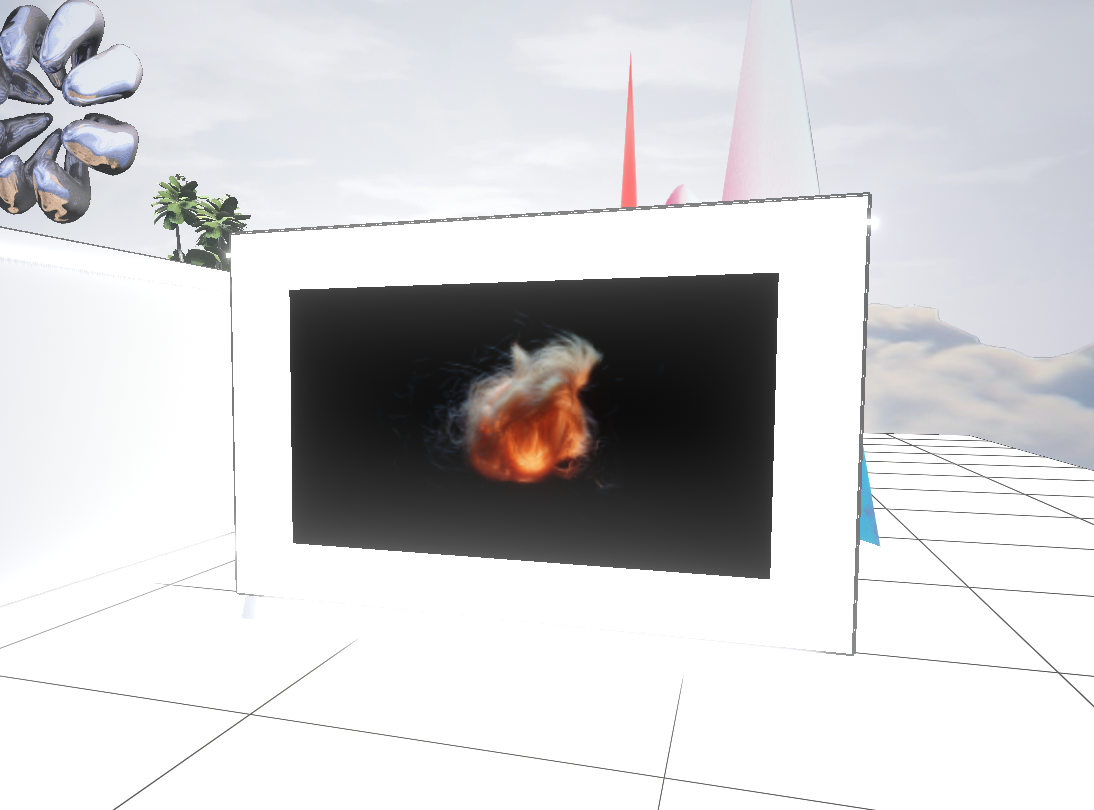
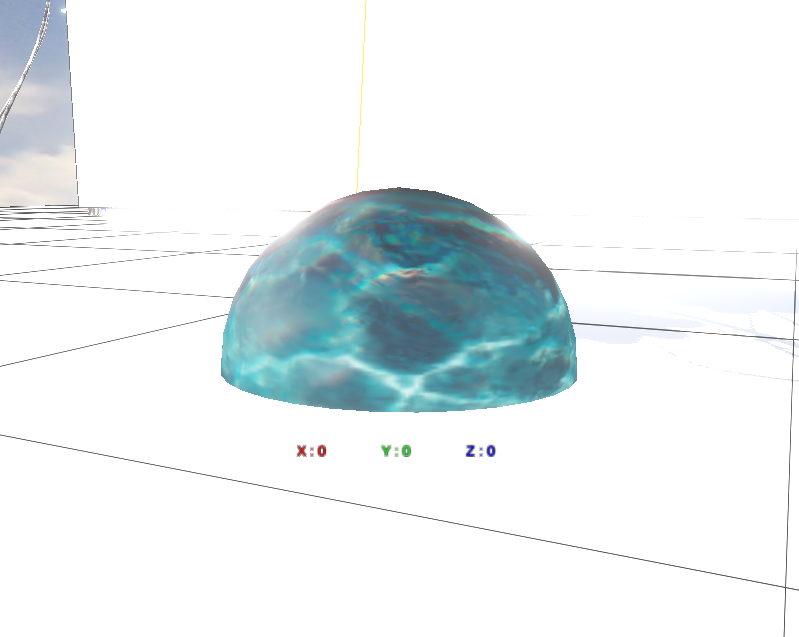
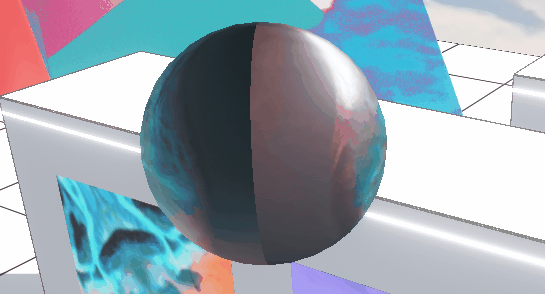
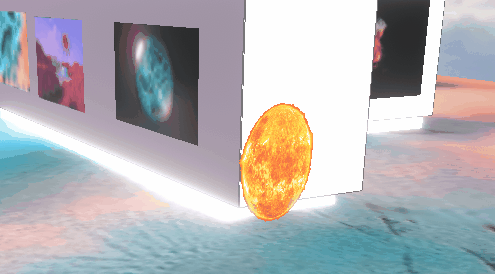
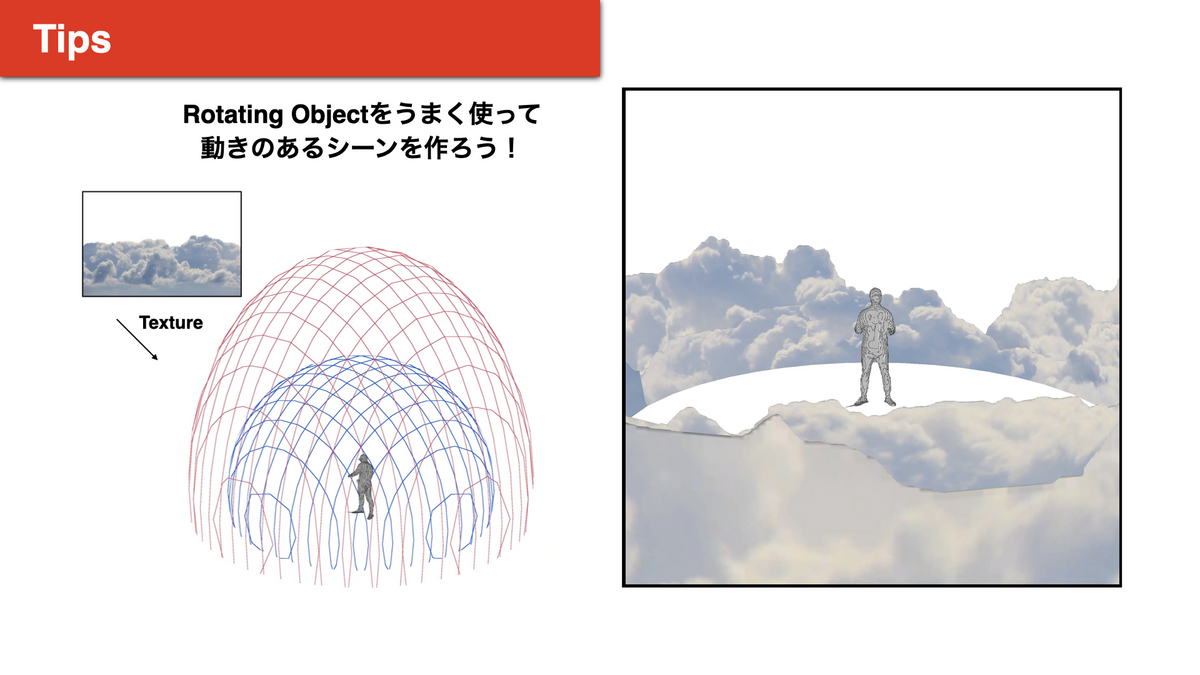
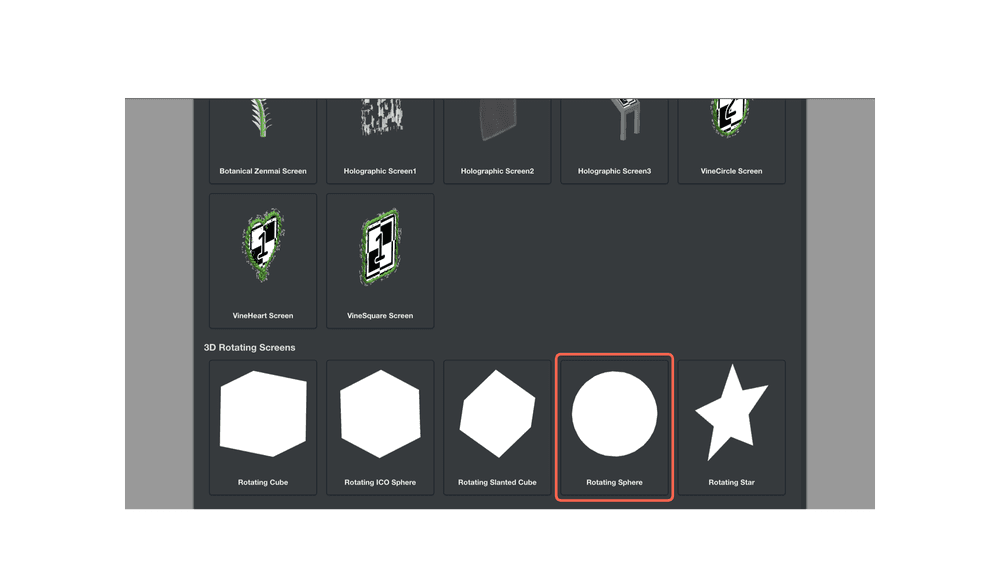
VR/AR] Tip 03 Using RotatingObject to create a scene in motion
When uploading an image object, you can rotate the image data by selecting the rotating screen.
The rotating screen will appear at the bottom of the screen menu.
The Screen menu can be accessed by clicking [ My uploads ] > [ Image ] and selecting an uploaded image.
In this case, select Rotating Sphere.
It will be displayed in STYLY Studio as shown below.
Even those who cannot use 3DCG software can place animated 3DCG in a space.
Make effective use of materials you have created, etc., and create a space with 3DCG.
In the Image custom assets, there is an asset that allows you to rotate an image object, which can be selected from [ My uploads ] > [ Image ] > [ Image textured object ].
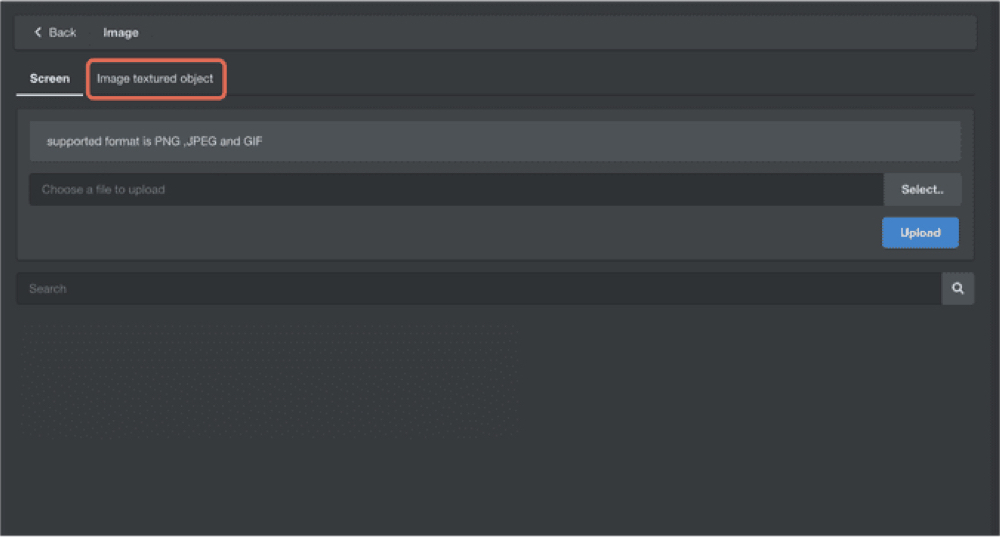
Y / Z Rotating Image is the asset for images that can be rotated.
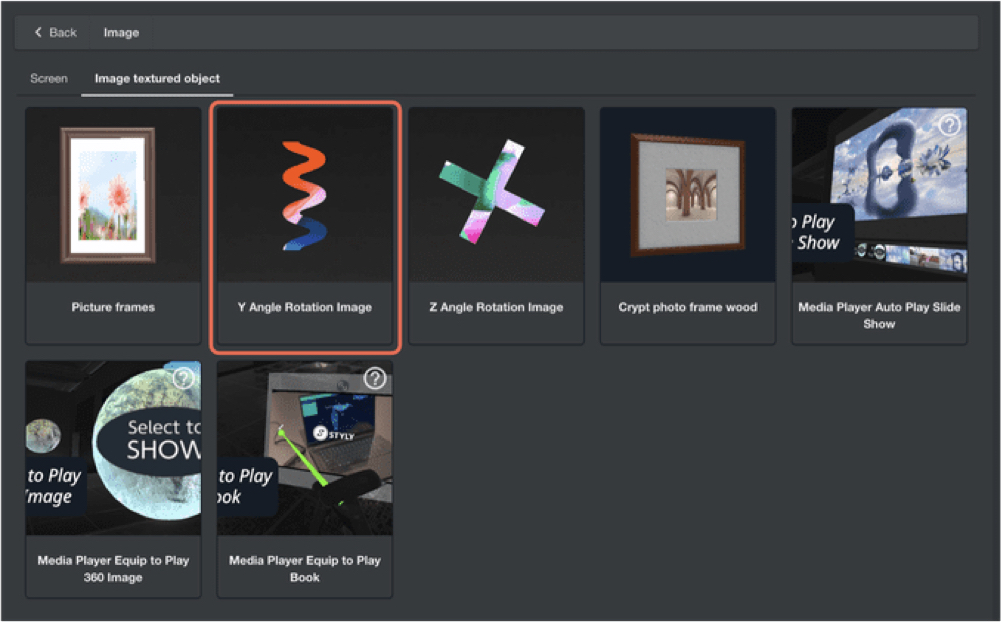
Select the image you wish to upload with SELECT.
The Y / Z Angle value is the speed of rotation.
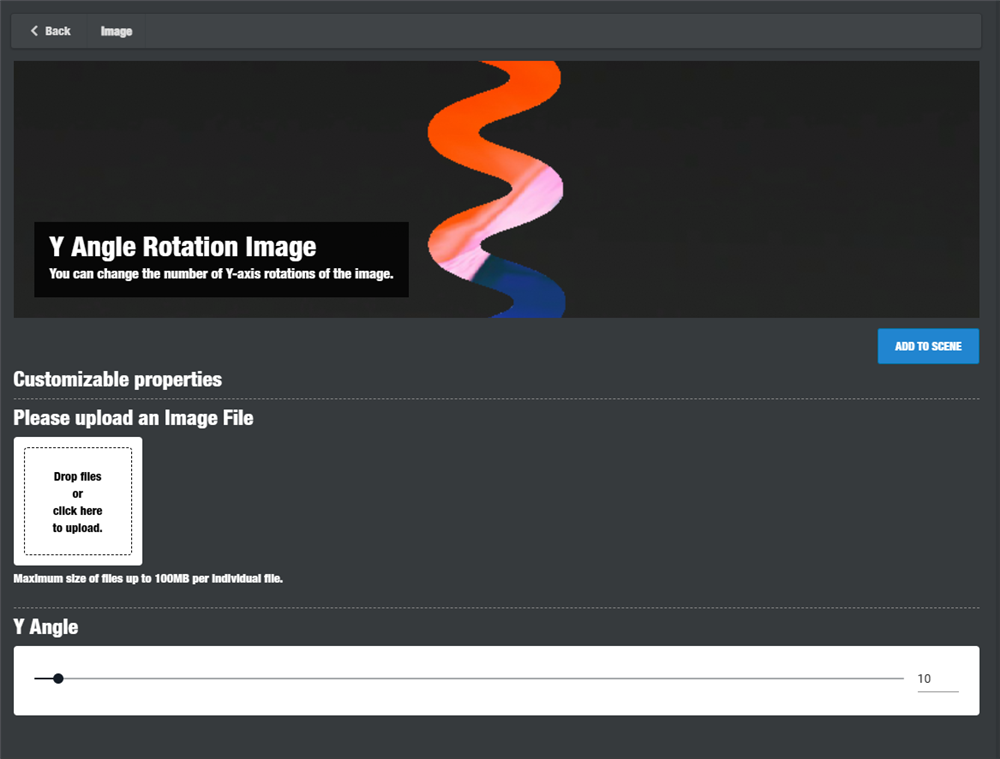
Once the image has been uploaded, use ADD TO SCENE to place it in the scene.
VR/AR】Tips 04 Making a flat image look three-dimensional
This section introduces a technique that uses images to make two flat images look three-dimensional by overlapping them.
Trees and plants, in particular, tend to look more three-dimensional.
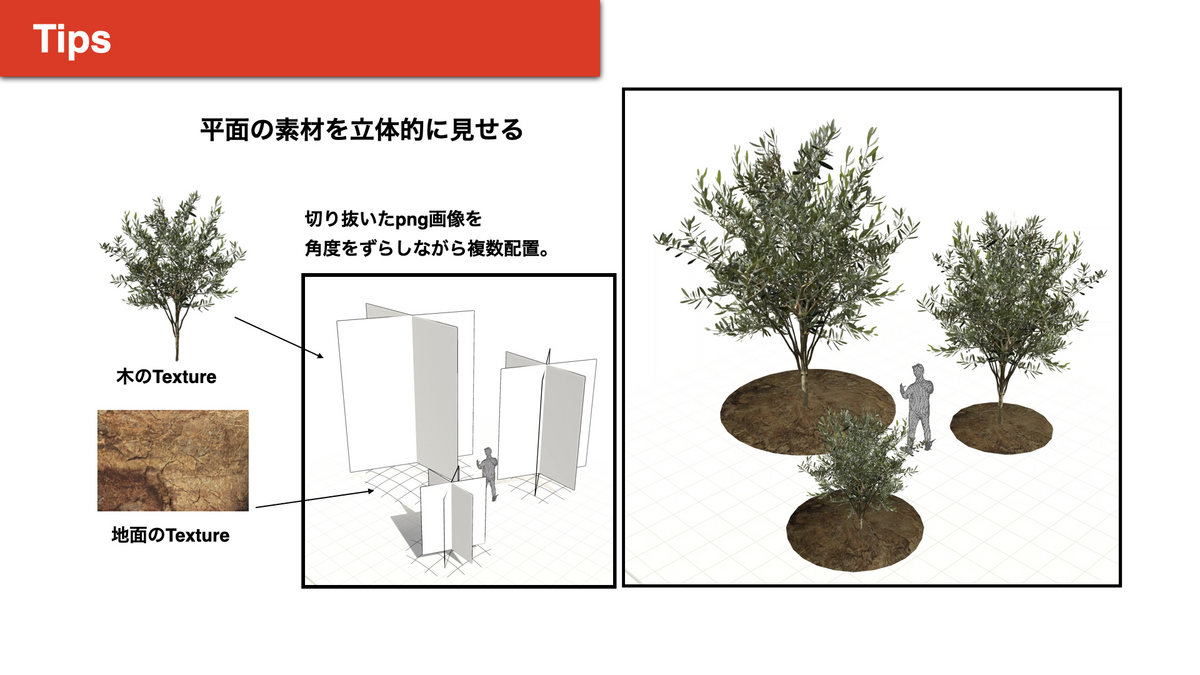
Upload a PNG image of a grass with a transparent background.
Duplicate it with Duplicate.

Place it vertically.
The image is now placed in a way that it looks three-dimensional.
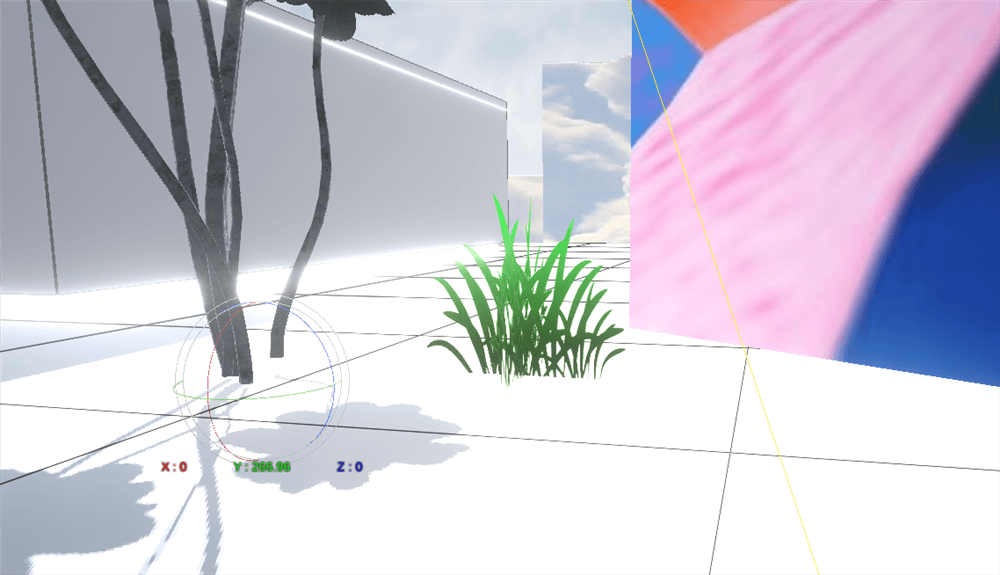
Also, by placing the ground texture with Sphere Screen and arranging it like the ground, it can be expressed more realistically.
VR/AR] Tip 05 Using GIF to place objects in motion
STYLY’s image assets also support GIFs, and GIF image assets can be used to place graphics with motion in space.
Since animations can be expressed in space, they can be effectively expressed by the way they are placed or in combination with 3DCG.
Original Aspect Screen can be used to create GIF image is not displayed, please use a screen other than Original Aspect Screen.
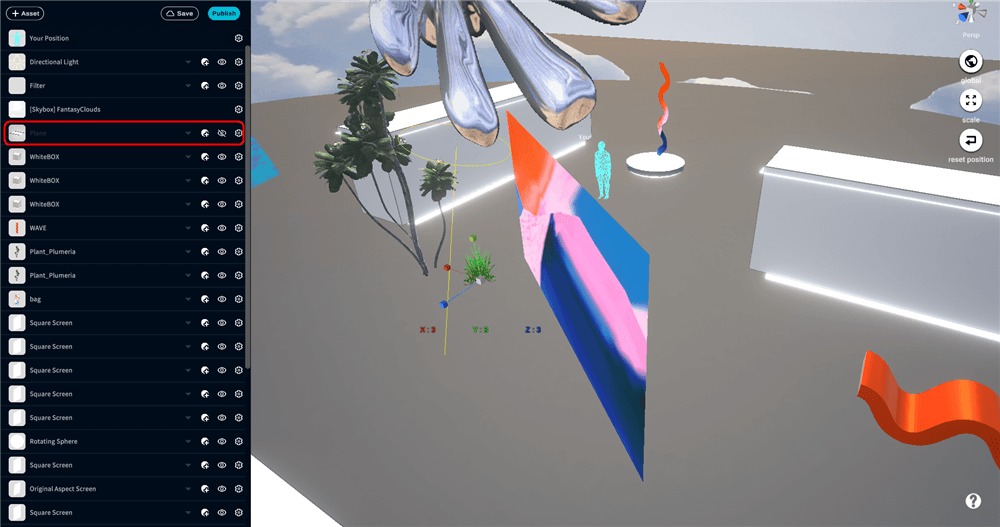
VR] Arrange Idea 01 Pasting an image on the ground
One of the arrangement techniques is to use image assets as the floor.
Upload the image data and choose “Floor Square Screen” when selecting a screen.
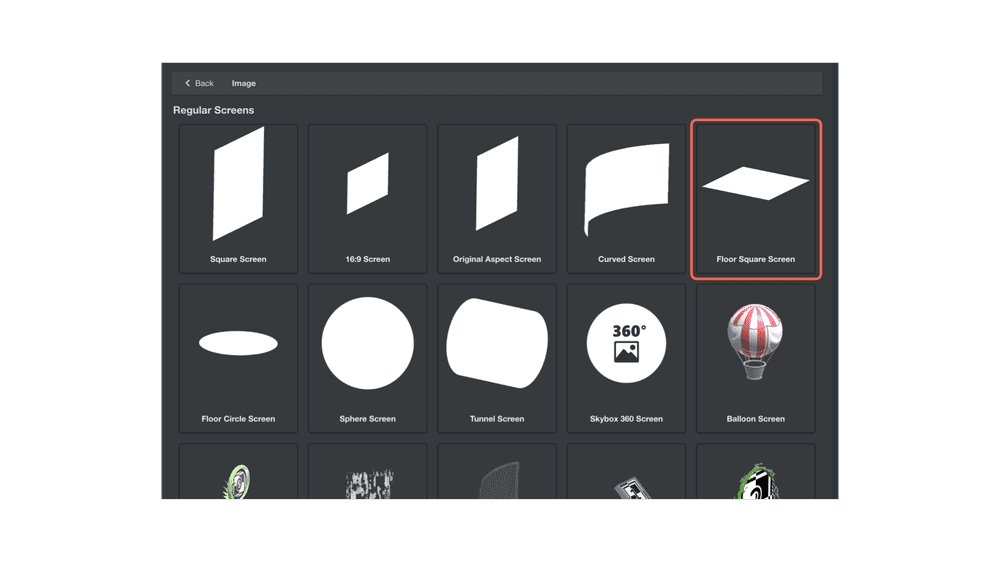
You will see the following.
Currently, the original Plane object is overlapped.
Hide the Plane and enlarge the Floor Square Screen.
The floor object is now in place.
VR] Arrange Idea 02 Pasting an image into the Skybox
Image data can be displayed as a Skybox in an all spherical view.
Select the screen [Skybox] 360 Screen.
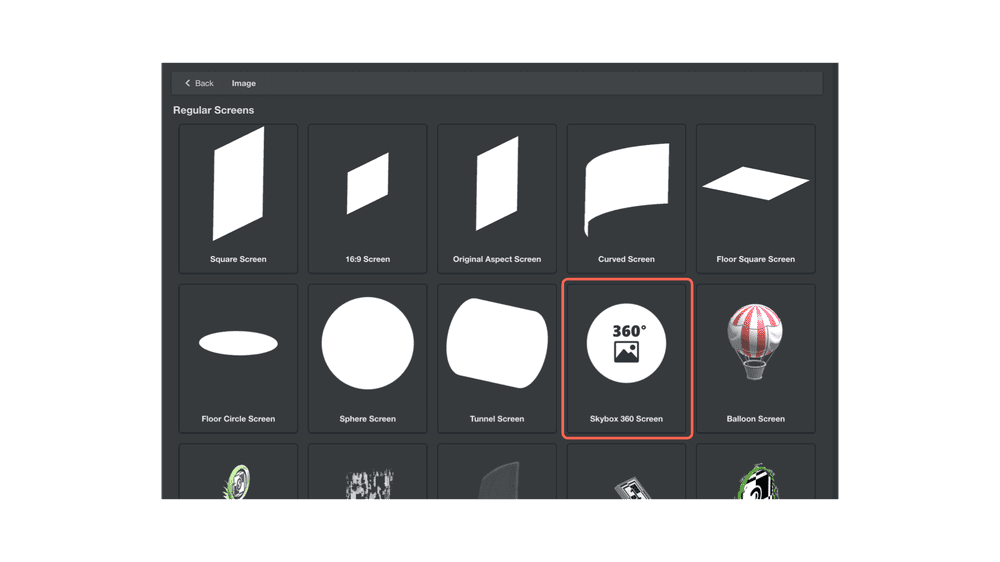
Skybox is now the uploaded image.
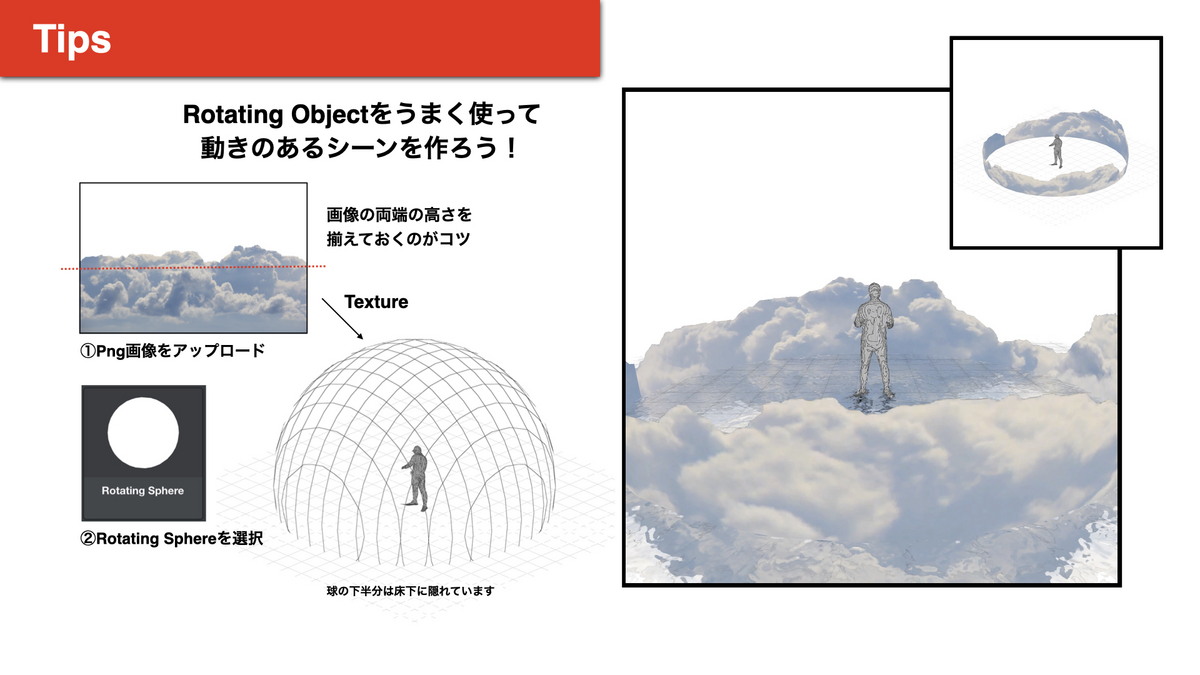
[VR] Arrange Idea 03 Wrapping the space with RotatingObejtc
As one of the techniques for arranging spatial expression, you can create a moving background by wrapping the image assets with Rotating Spheret in space.
Also, if you use an image with a transparent background, such as a PNG, you can express depth in the background as if it were a layer.
Select Rotating Sphere.
At first, the image will appear small.
Increase the Scale and try to wrap the space.
Express the background well and create the space.