Have you ever heard of cloth simulation?
Cloth simulation is useful when making clothes in Blender. Let’s try to make a simple shirt with this function.
I’ll show you how to make it in two parts, as follows!
- Basics – Preparation (How cross-simulation works and how to prepare for shirt modeling)
- Production – Simulation section (from shirt modeling to simulation)
Blender version used: 2.93.1
What is cloth simulation?
As the name “Cloth Simulation” suggests, it is a function that performs physical operations on cloth.
By using cloth simulation, you can create realistic models with movement, such as wrinkles on clothes when people move, or flags flapping in the strong wind.
This function can be used not only in Blender but also in most CG software.
How does cross simulation work?
In the real world, there are various physical laws such as gravity.
To reproduce them in CG software (in this case, Blender), we need to prepare models for cloth and obstacles, and assign physics to each of them.
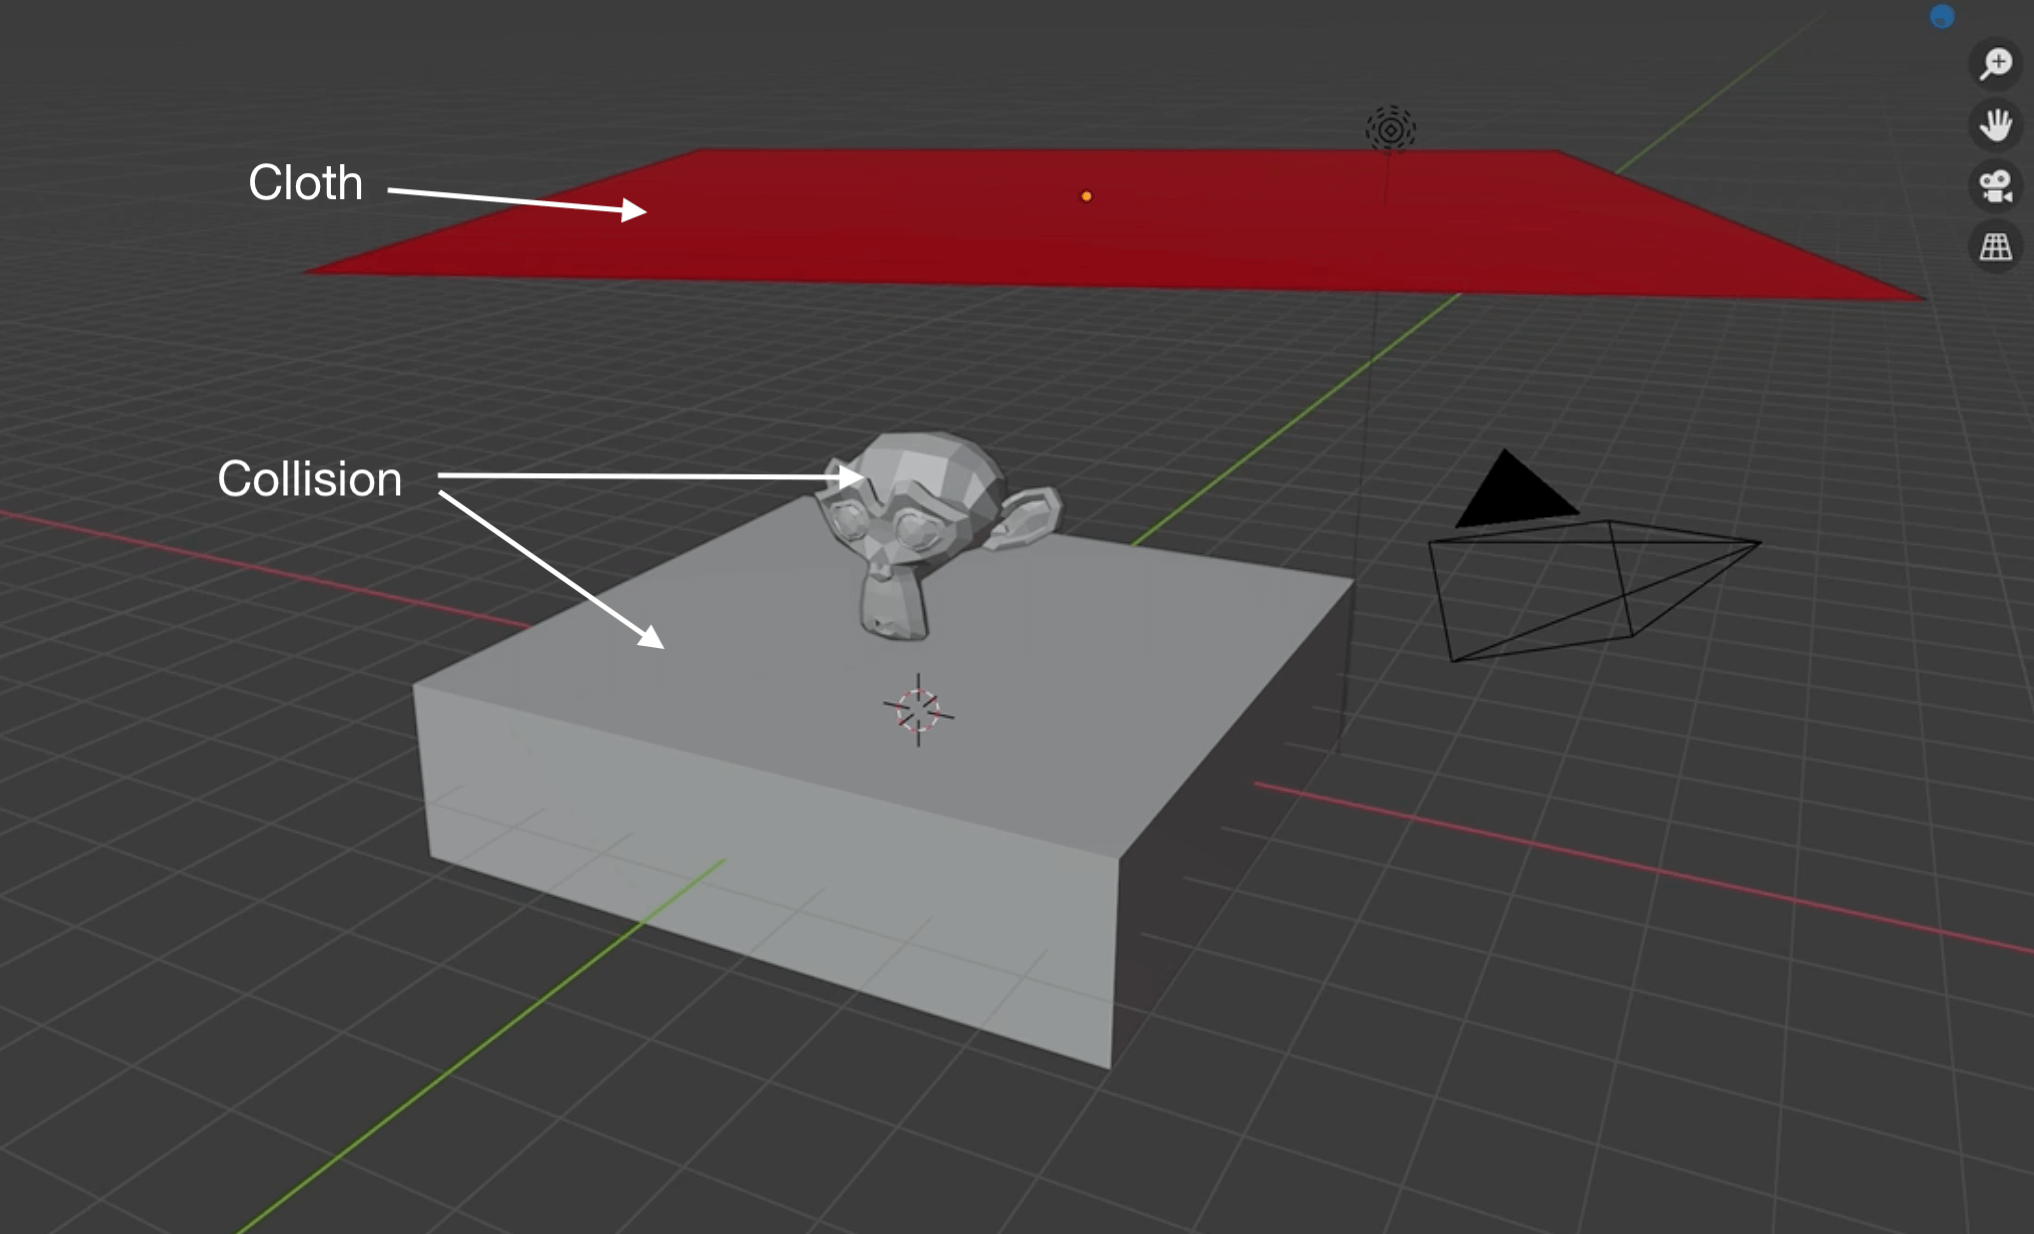
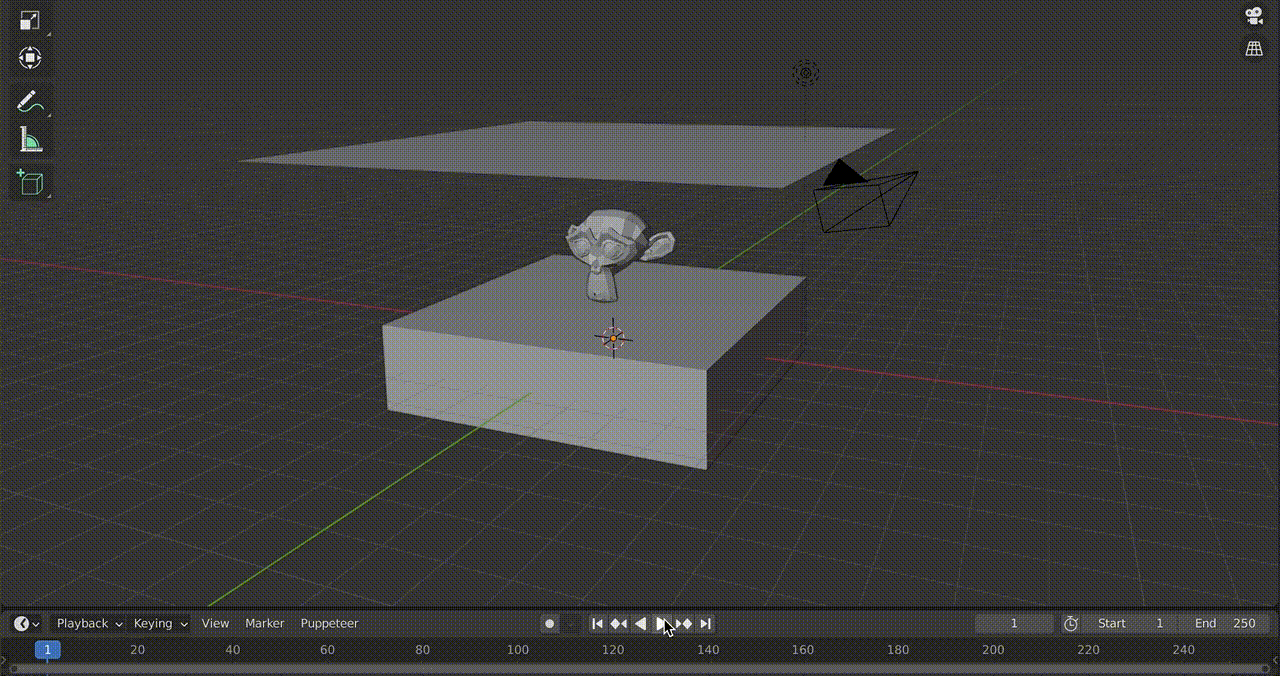
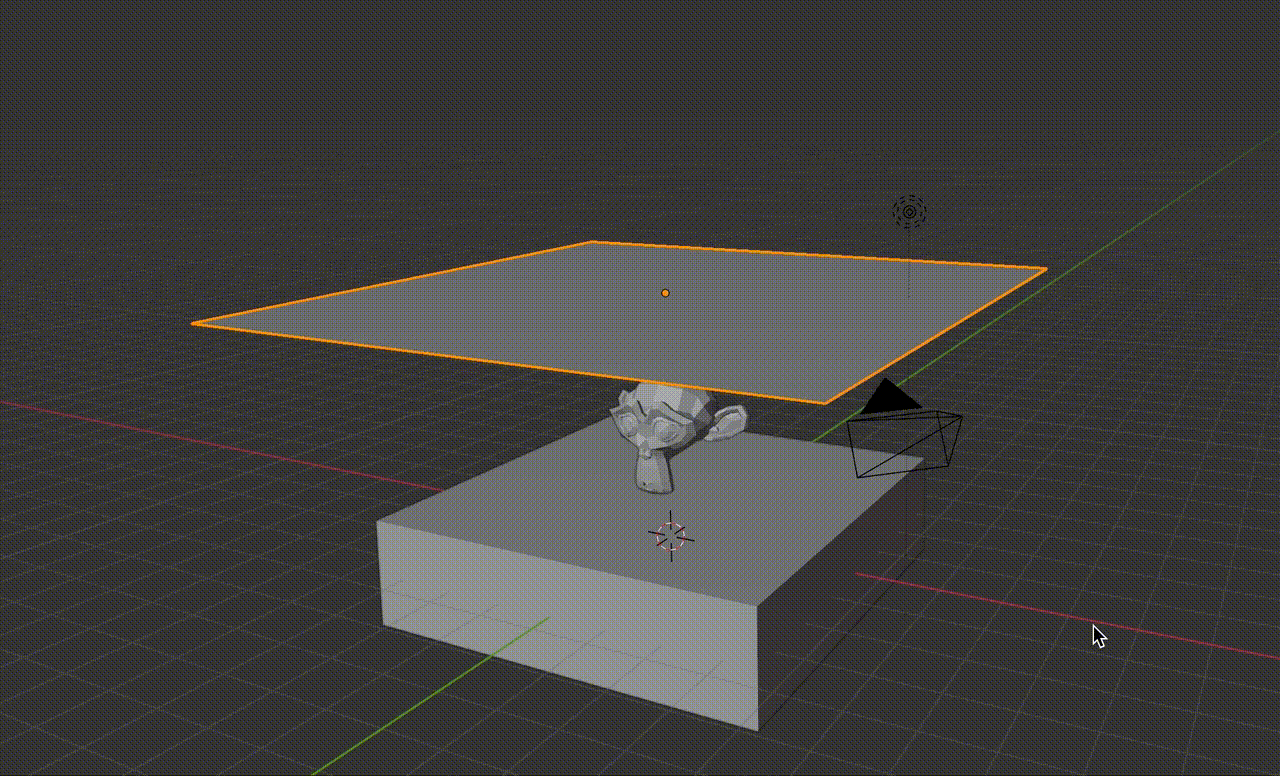
Preparing models for cloth and obstacles

Plane with crosses assigned and Suzanne & Cube with collision assigned
(For clarity, only the angle of the red model has been slightly changed to make it asymmetric)
Add a model for the obstacle
![Press [Shift+A] to add a cube mesh](https://styly.cc/wp-content/uploads/2021/10/Screenshot-297.png)
Press [Shift+A] to add a cube mesh
![Click to select → [S] key, move the cursor to zoom in → click again to confirm / [S] key → [Z] key to change only the height](https://styly.cc/wp-content/uploads/2021/10/Untitled-2.gif)
Click to select → [S] key, move the cursor to zoom in → click again to confirm / [S] key → [Z] key to change only the height
Deselect the cube and press [Shift+A] key to add a monkey.
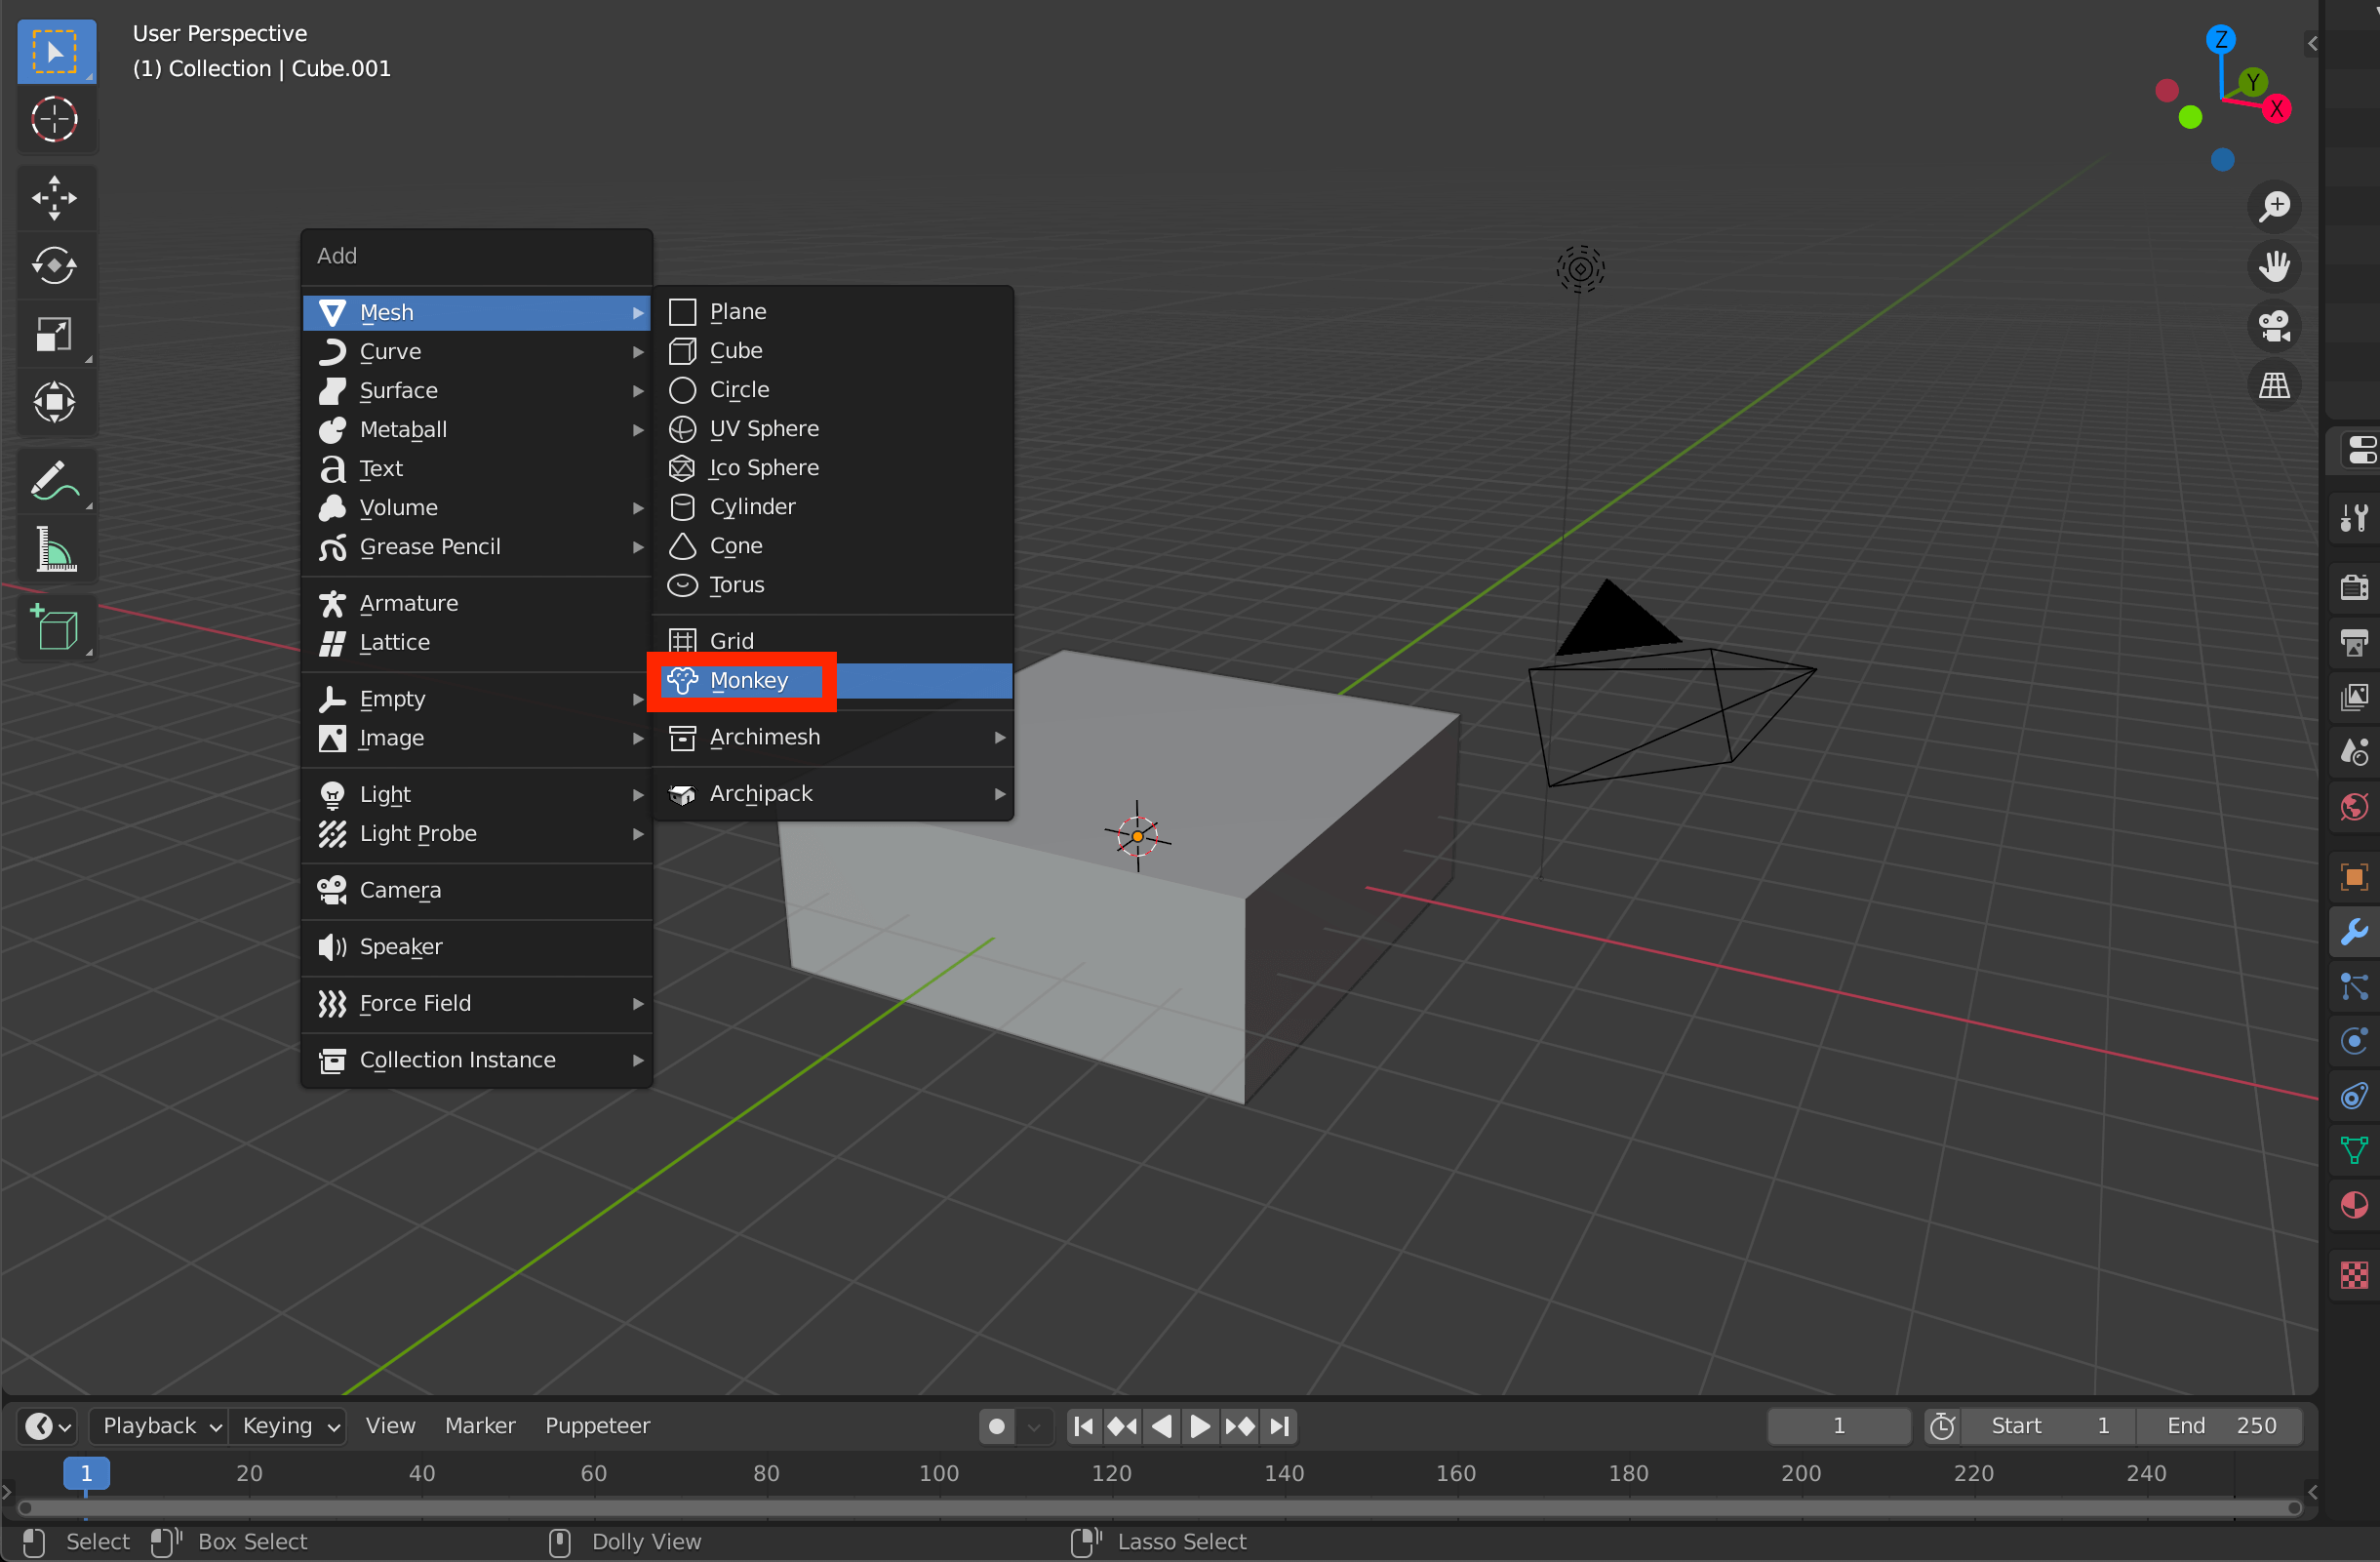
Add a monkey
![Select → [G] key → [Z] key to move in Z direction → Click or Enter key to confirm](https://styly.cc/wp-content/uploads/2021/10/Screen-Recording-31.gif)
Select → [G] key → [Z] key to move in Z direction → Click or Enter key to confirm
Add a model for cloth
![[Shift+A] key to add a new plane](https://styly.cc/wp-content/uploads/2021/10/Screenshot-299.png)
[Shift+A] key to add a new plane
![Press [G]→[Z] key to move to Z direction, press enter to confirm / [S]→move cursor to zoom in, press enter to confirm](https://styly.cc/wp-content/uploads/2021/10/Plane.gif)
Press [G]→[Z] key to move to Z direction, press enter to confirm / [S]→move cursor to zoom in, press enter to confirm
It looks like we are ready to go, but if we don’t, there is only one plane and the cross-simulation will not work properly.
We need to subdivide the plane.
So, let’s subdivide it so that the plane will move smoothly.
Select a plane and switch to edit mode by pressing the [Tab] key.
![Change to edit mode by pressing the [Tab] key (or the upper left button) while in object mode.](https://styly.cc/wp-content/uploads/2021/10/Screenshot-300.png)
Change to edit mode by pressing the [Tab] key (or the upper left button) while in object mode.

Switched to edit mode
Then, right-click to bring up the menu, and select Subdivide.
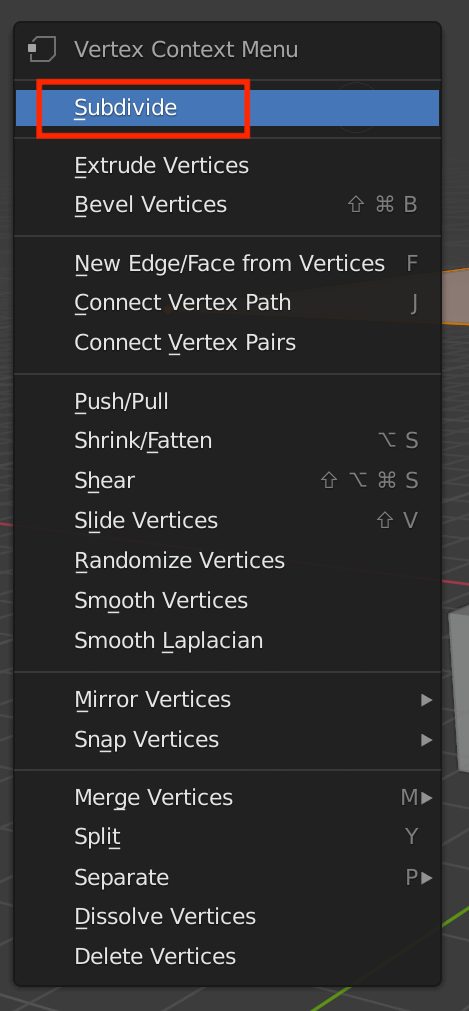
Select Subdivide from the menu that appears when you right-click.
Right-click -> Subdivide to subdivide, and click or enter to confirm.
In this case, we are subdividing twice.
The more times you subdivide, the smoother the cross simulation will be, but the slower it will be, so be careful.
Assigning Cloth and Collision
Assign crosses to the prepared planes and collisions to the other monkeys and cubes.
To assign them, simply click on the model and select one of the simulations from the properties on the right.
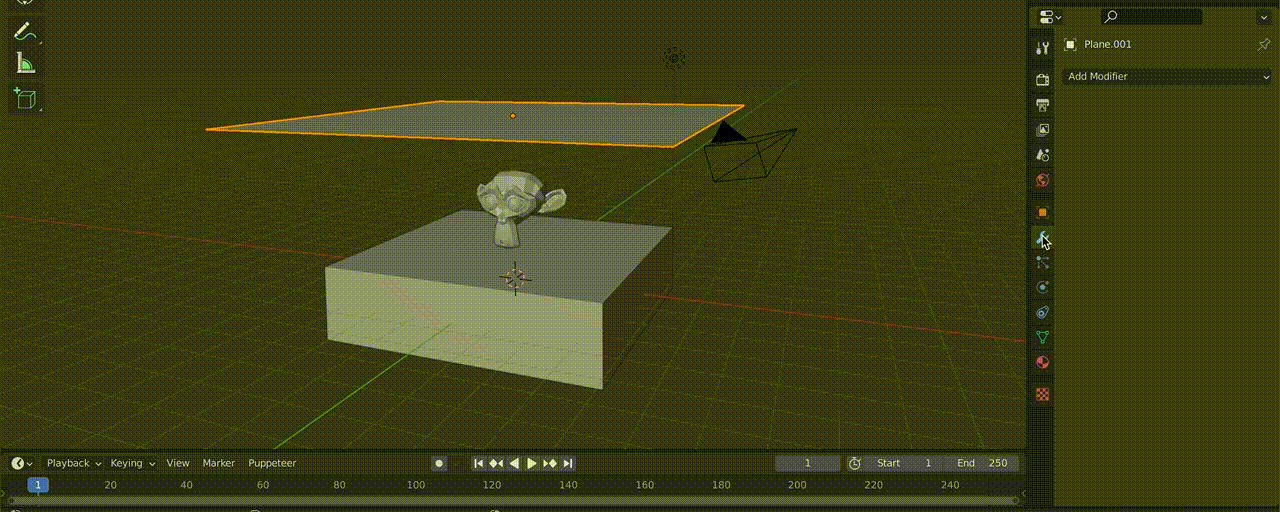
Select the model -> tool icon -> modifier -> select Cross or Collision
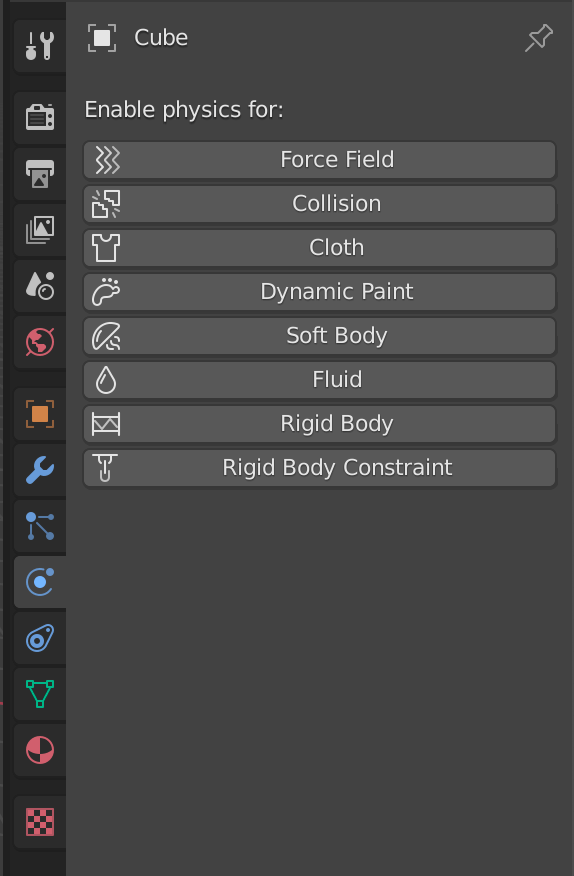
You can also assign a simulation from the Physics tab.
Playing the animation
Click on the Play button at the bottom center of the screen to play the animation.
The model (cross) will automatically fall on top of the other model (collision).
If it slips through cubes, etc., check if the collision is properly reflected.

Cloth Simulation
Creating a Shirt
Prepare the model to be dressed.
First, we need to prepare a CG model to be dressed.
In this case, I downloaded a free model (fbx) from cgtrader and used it.

Click “Free Download” and wait for a while, then the download item will appear.
After opening Blender and erasing the cube, import the model you just downloaded from File in the upper left corner.
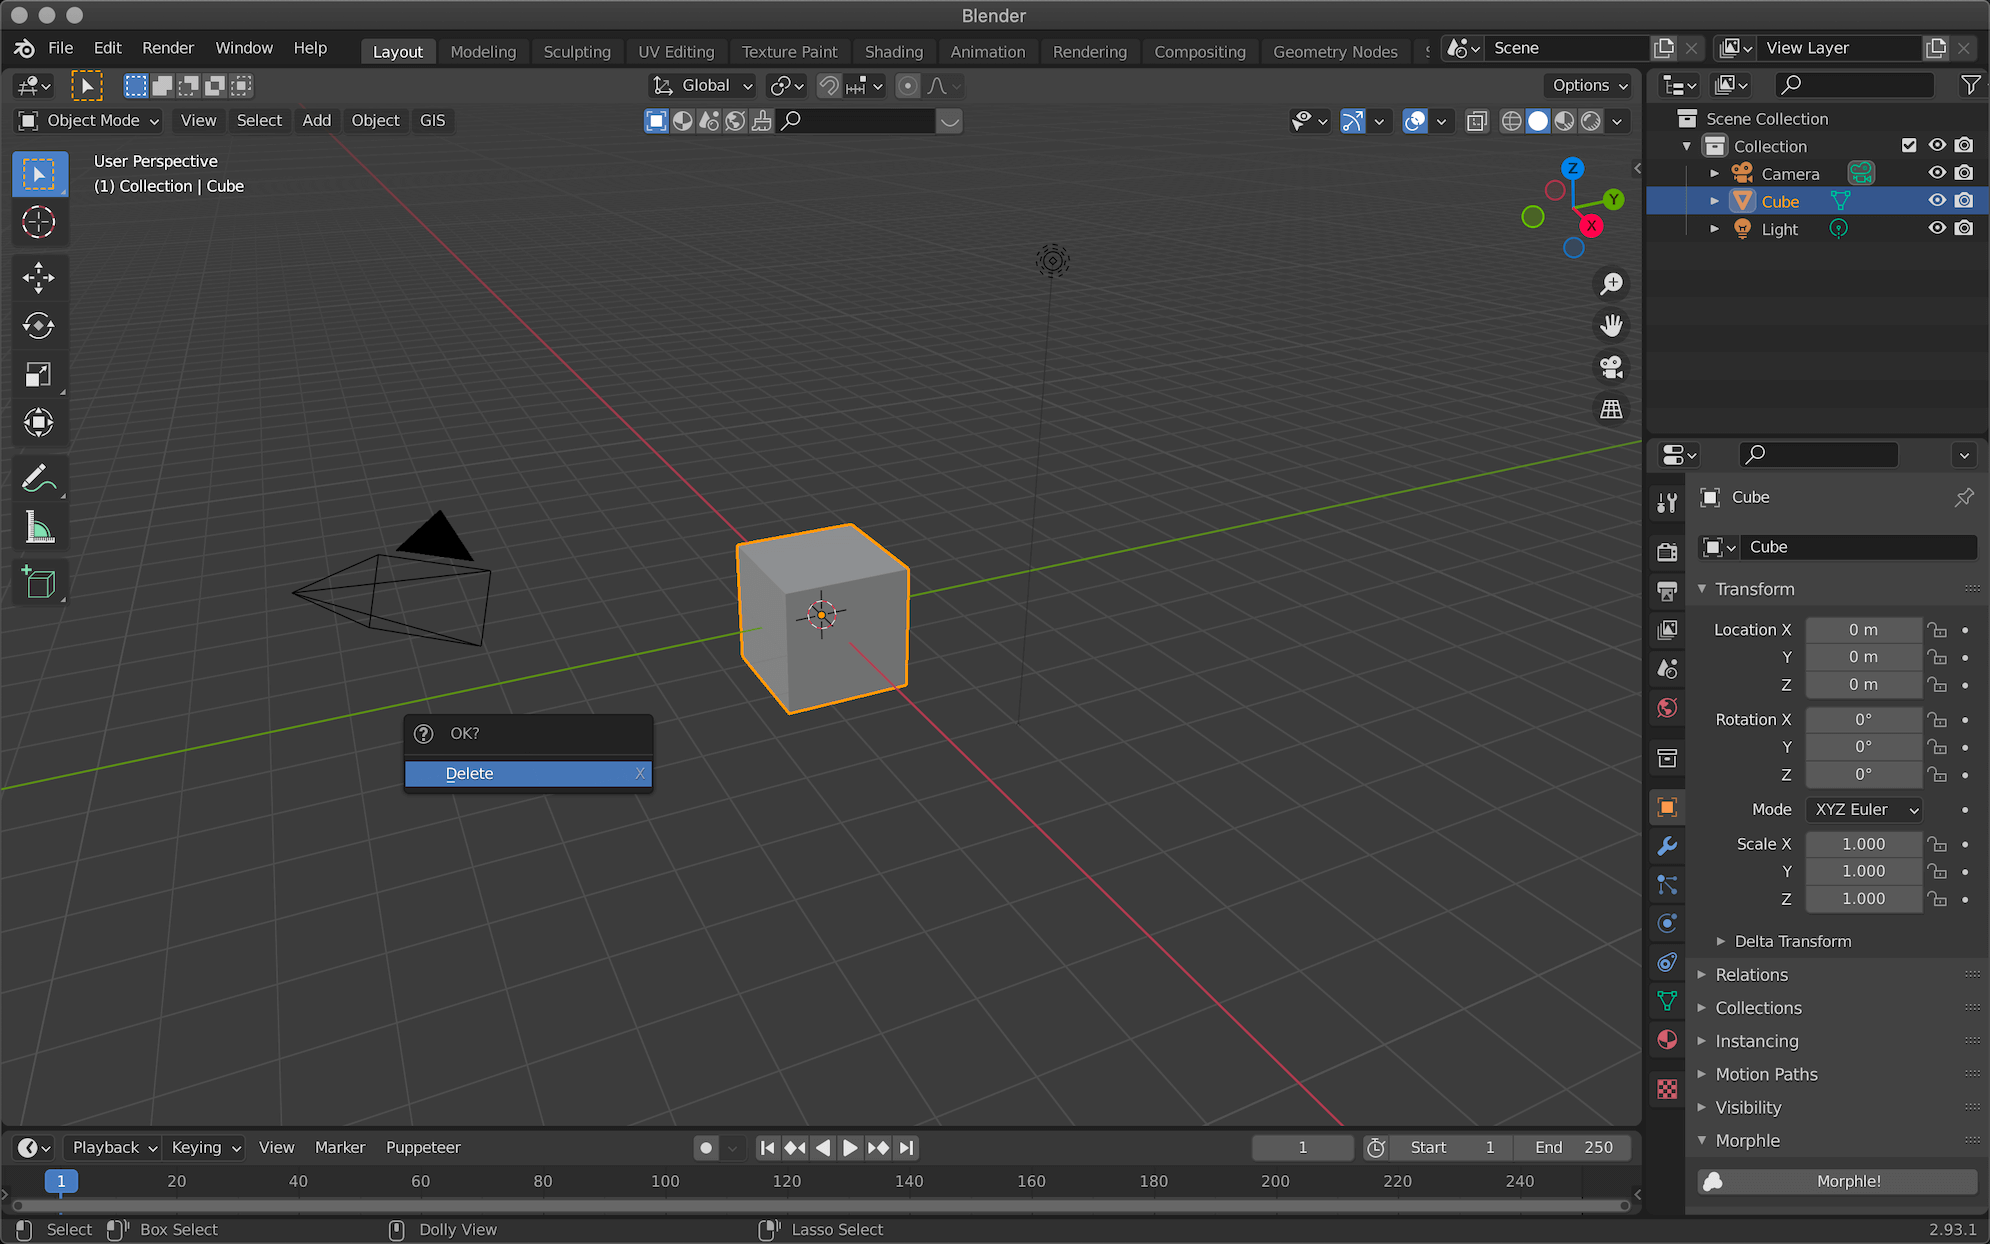
Delete with X key
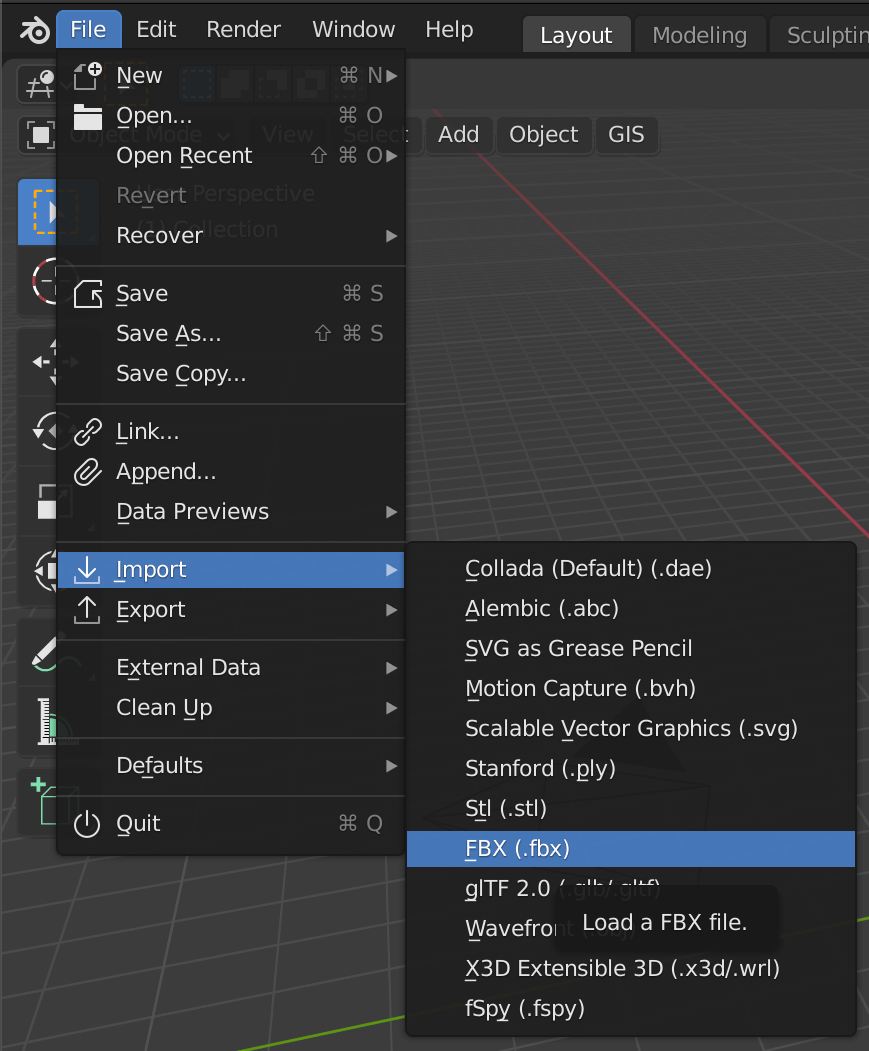
Select File→Import→FBX
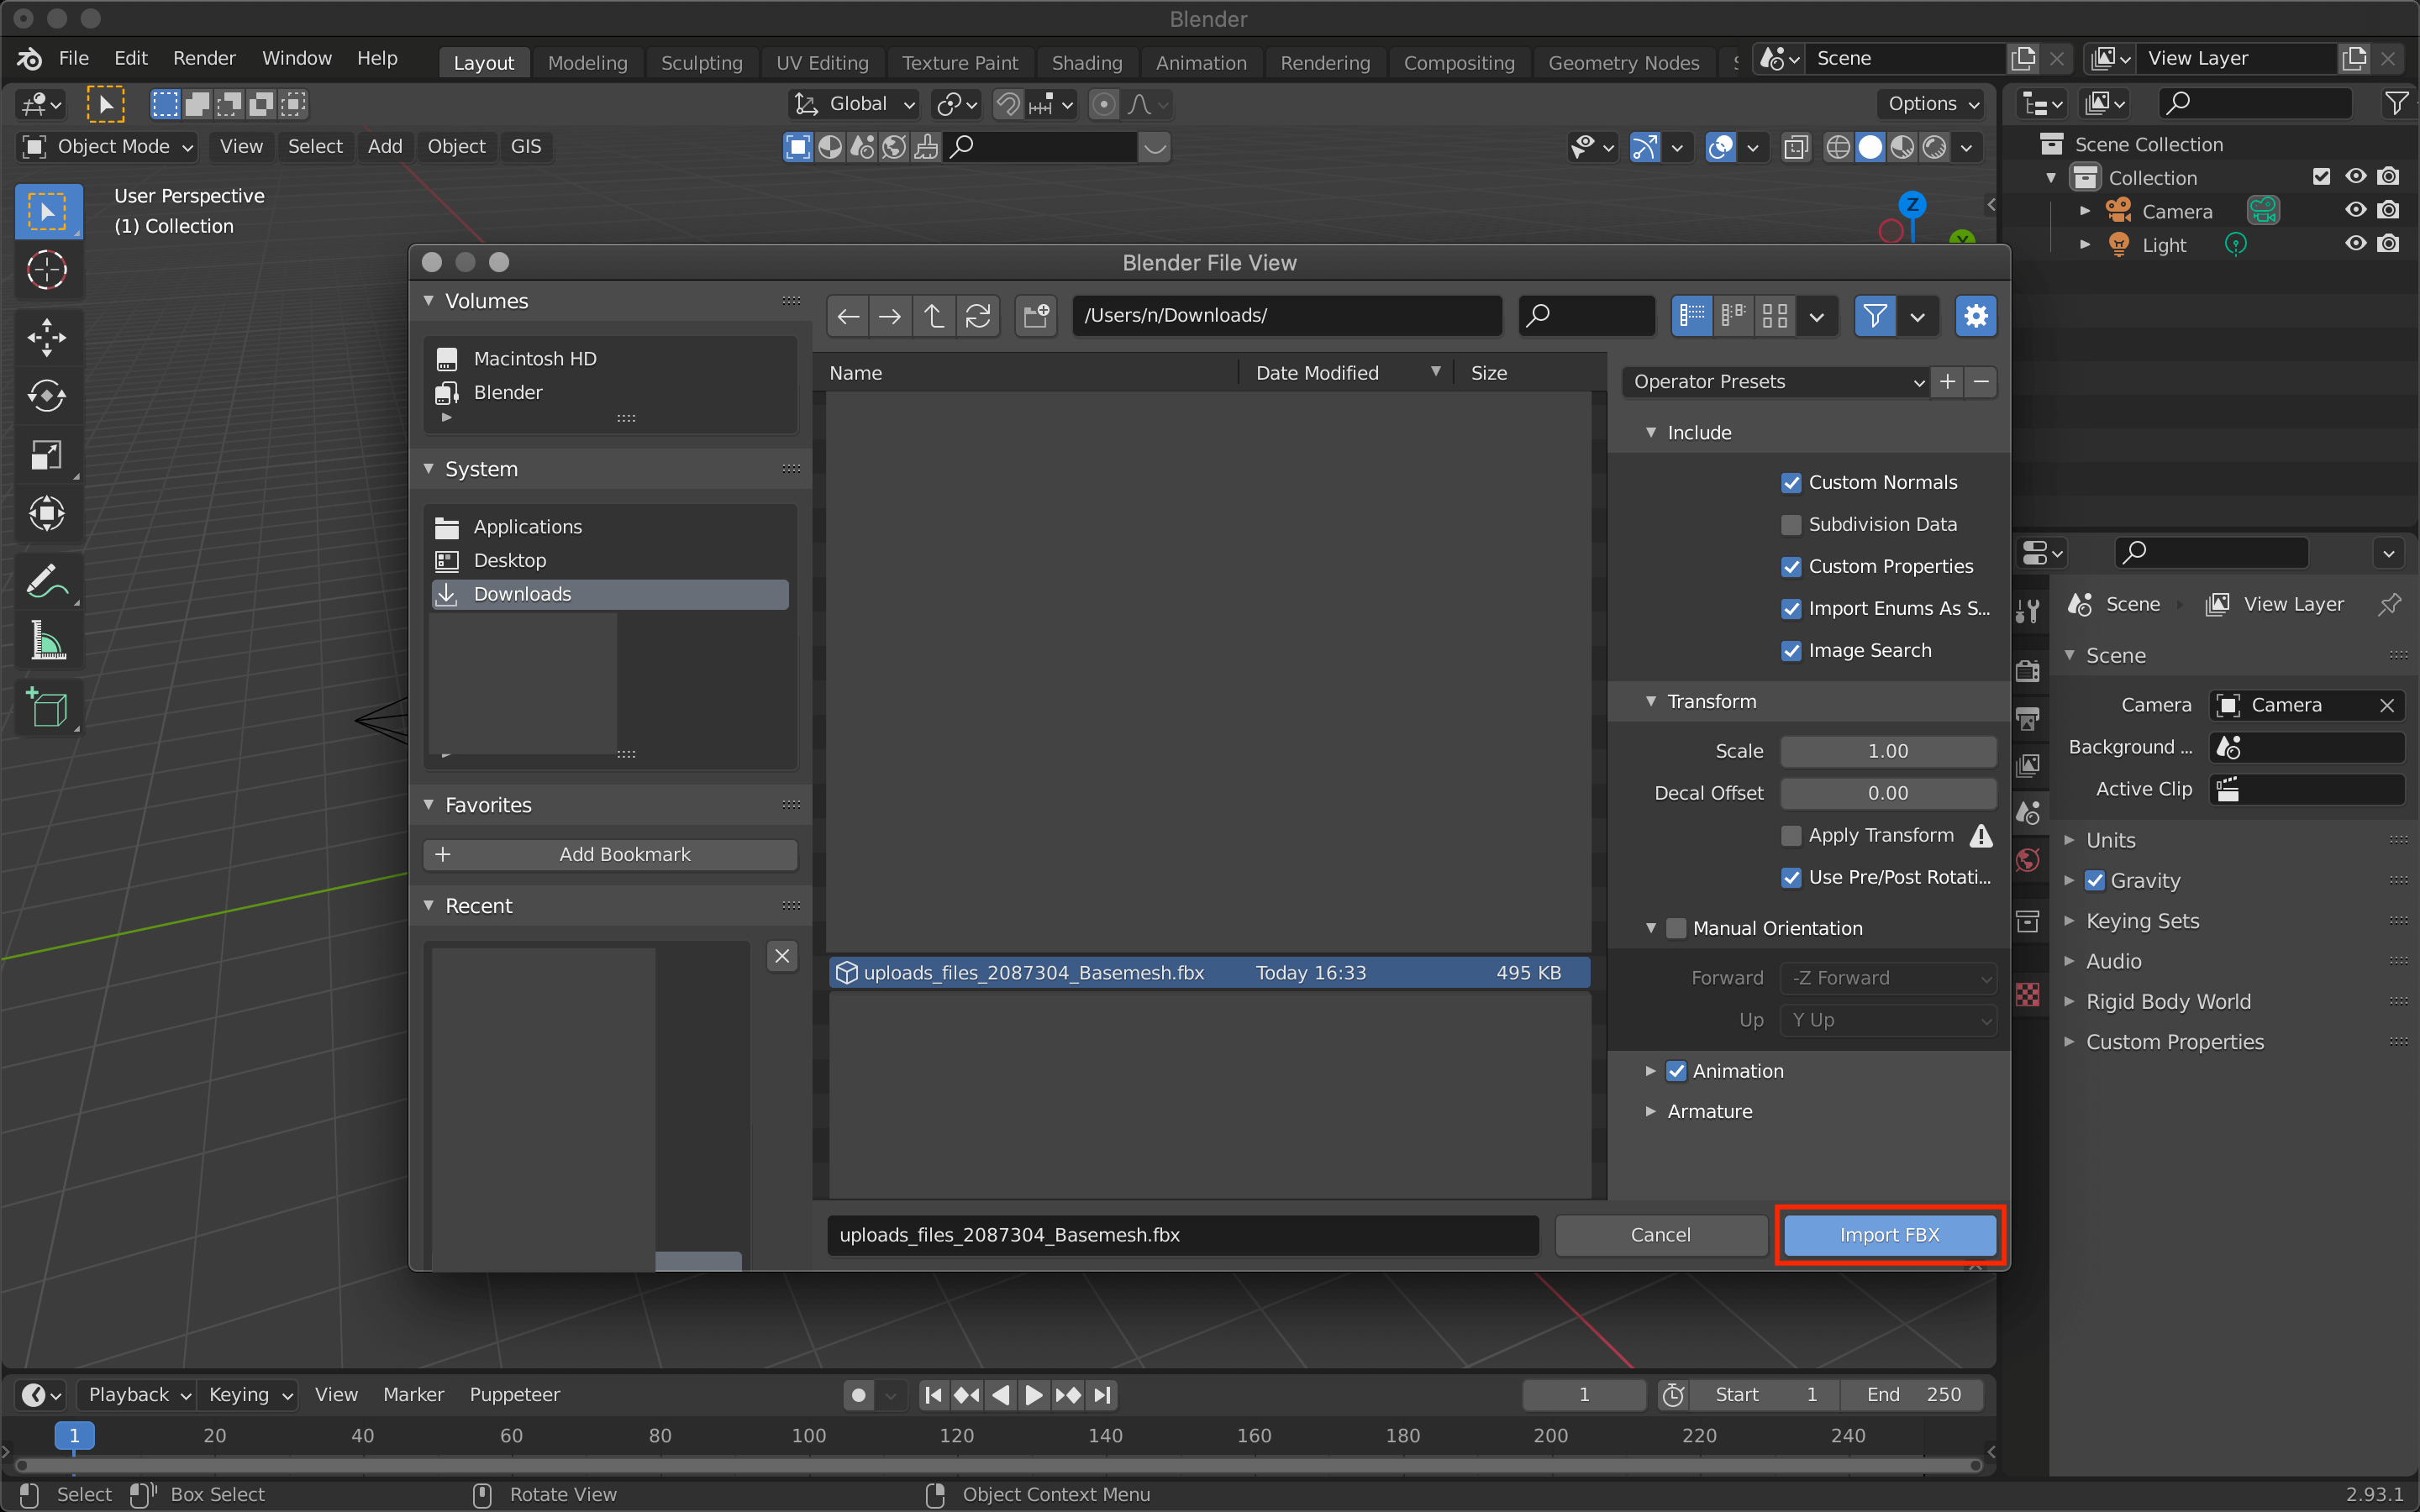
Select the model you downloaded and import it.
If the model is too small, the cloth simulation won’t work, so click to select it, then press [S] key → move the cursor to change the size.
![Press [S] key, move the cursor to resize, and press Enter key to confirm.](https://styly.cc/wp-content/uploads/2021/09/Screenshot-292.png)
Press [S] key, move the cursor to resize, and press Enter key to confirm.定
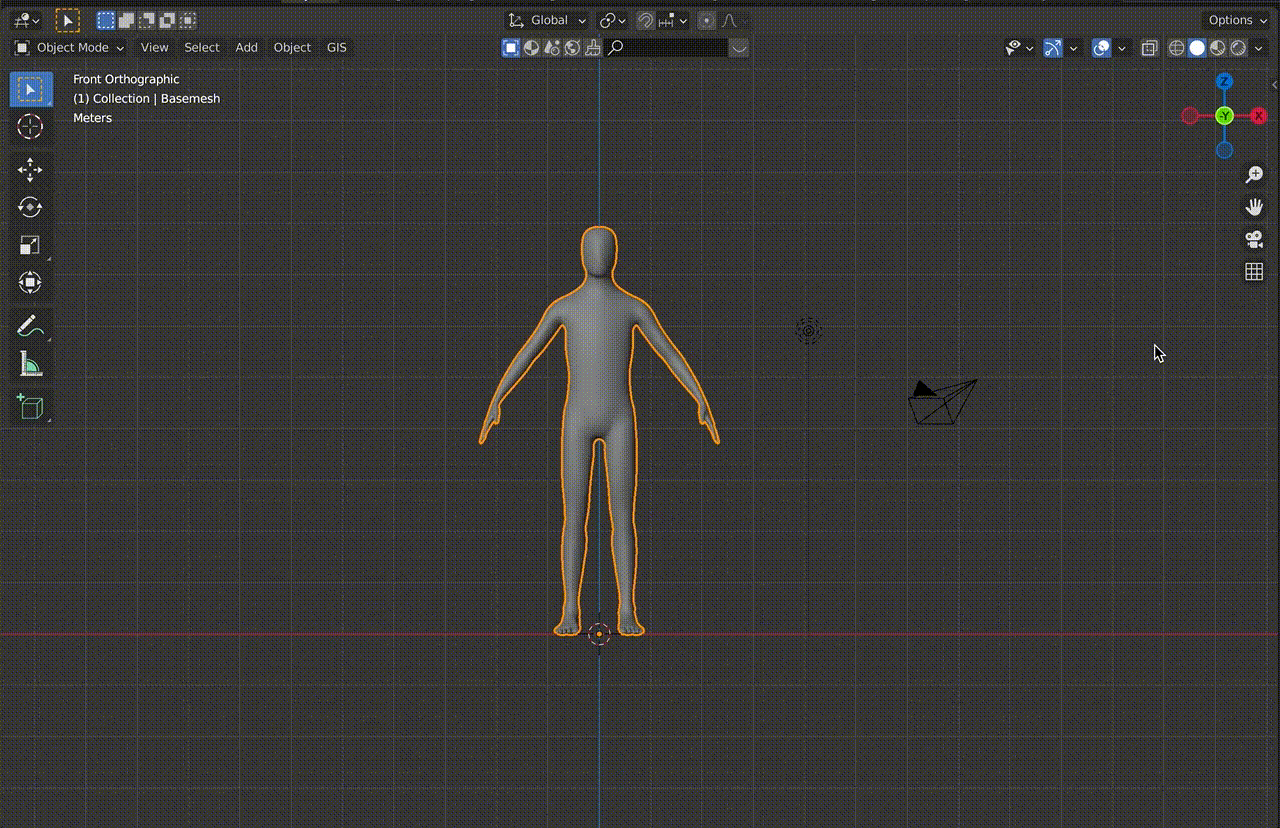
Set the camera view to the front.
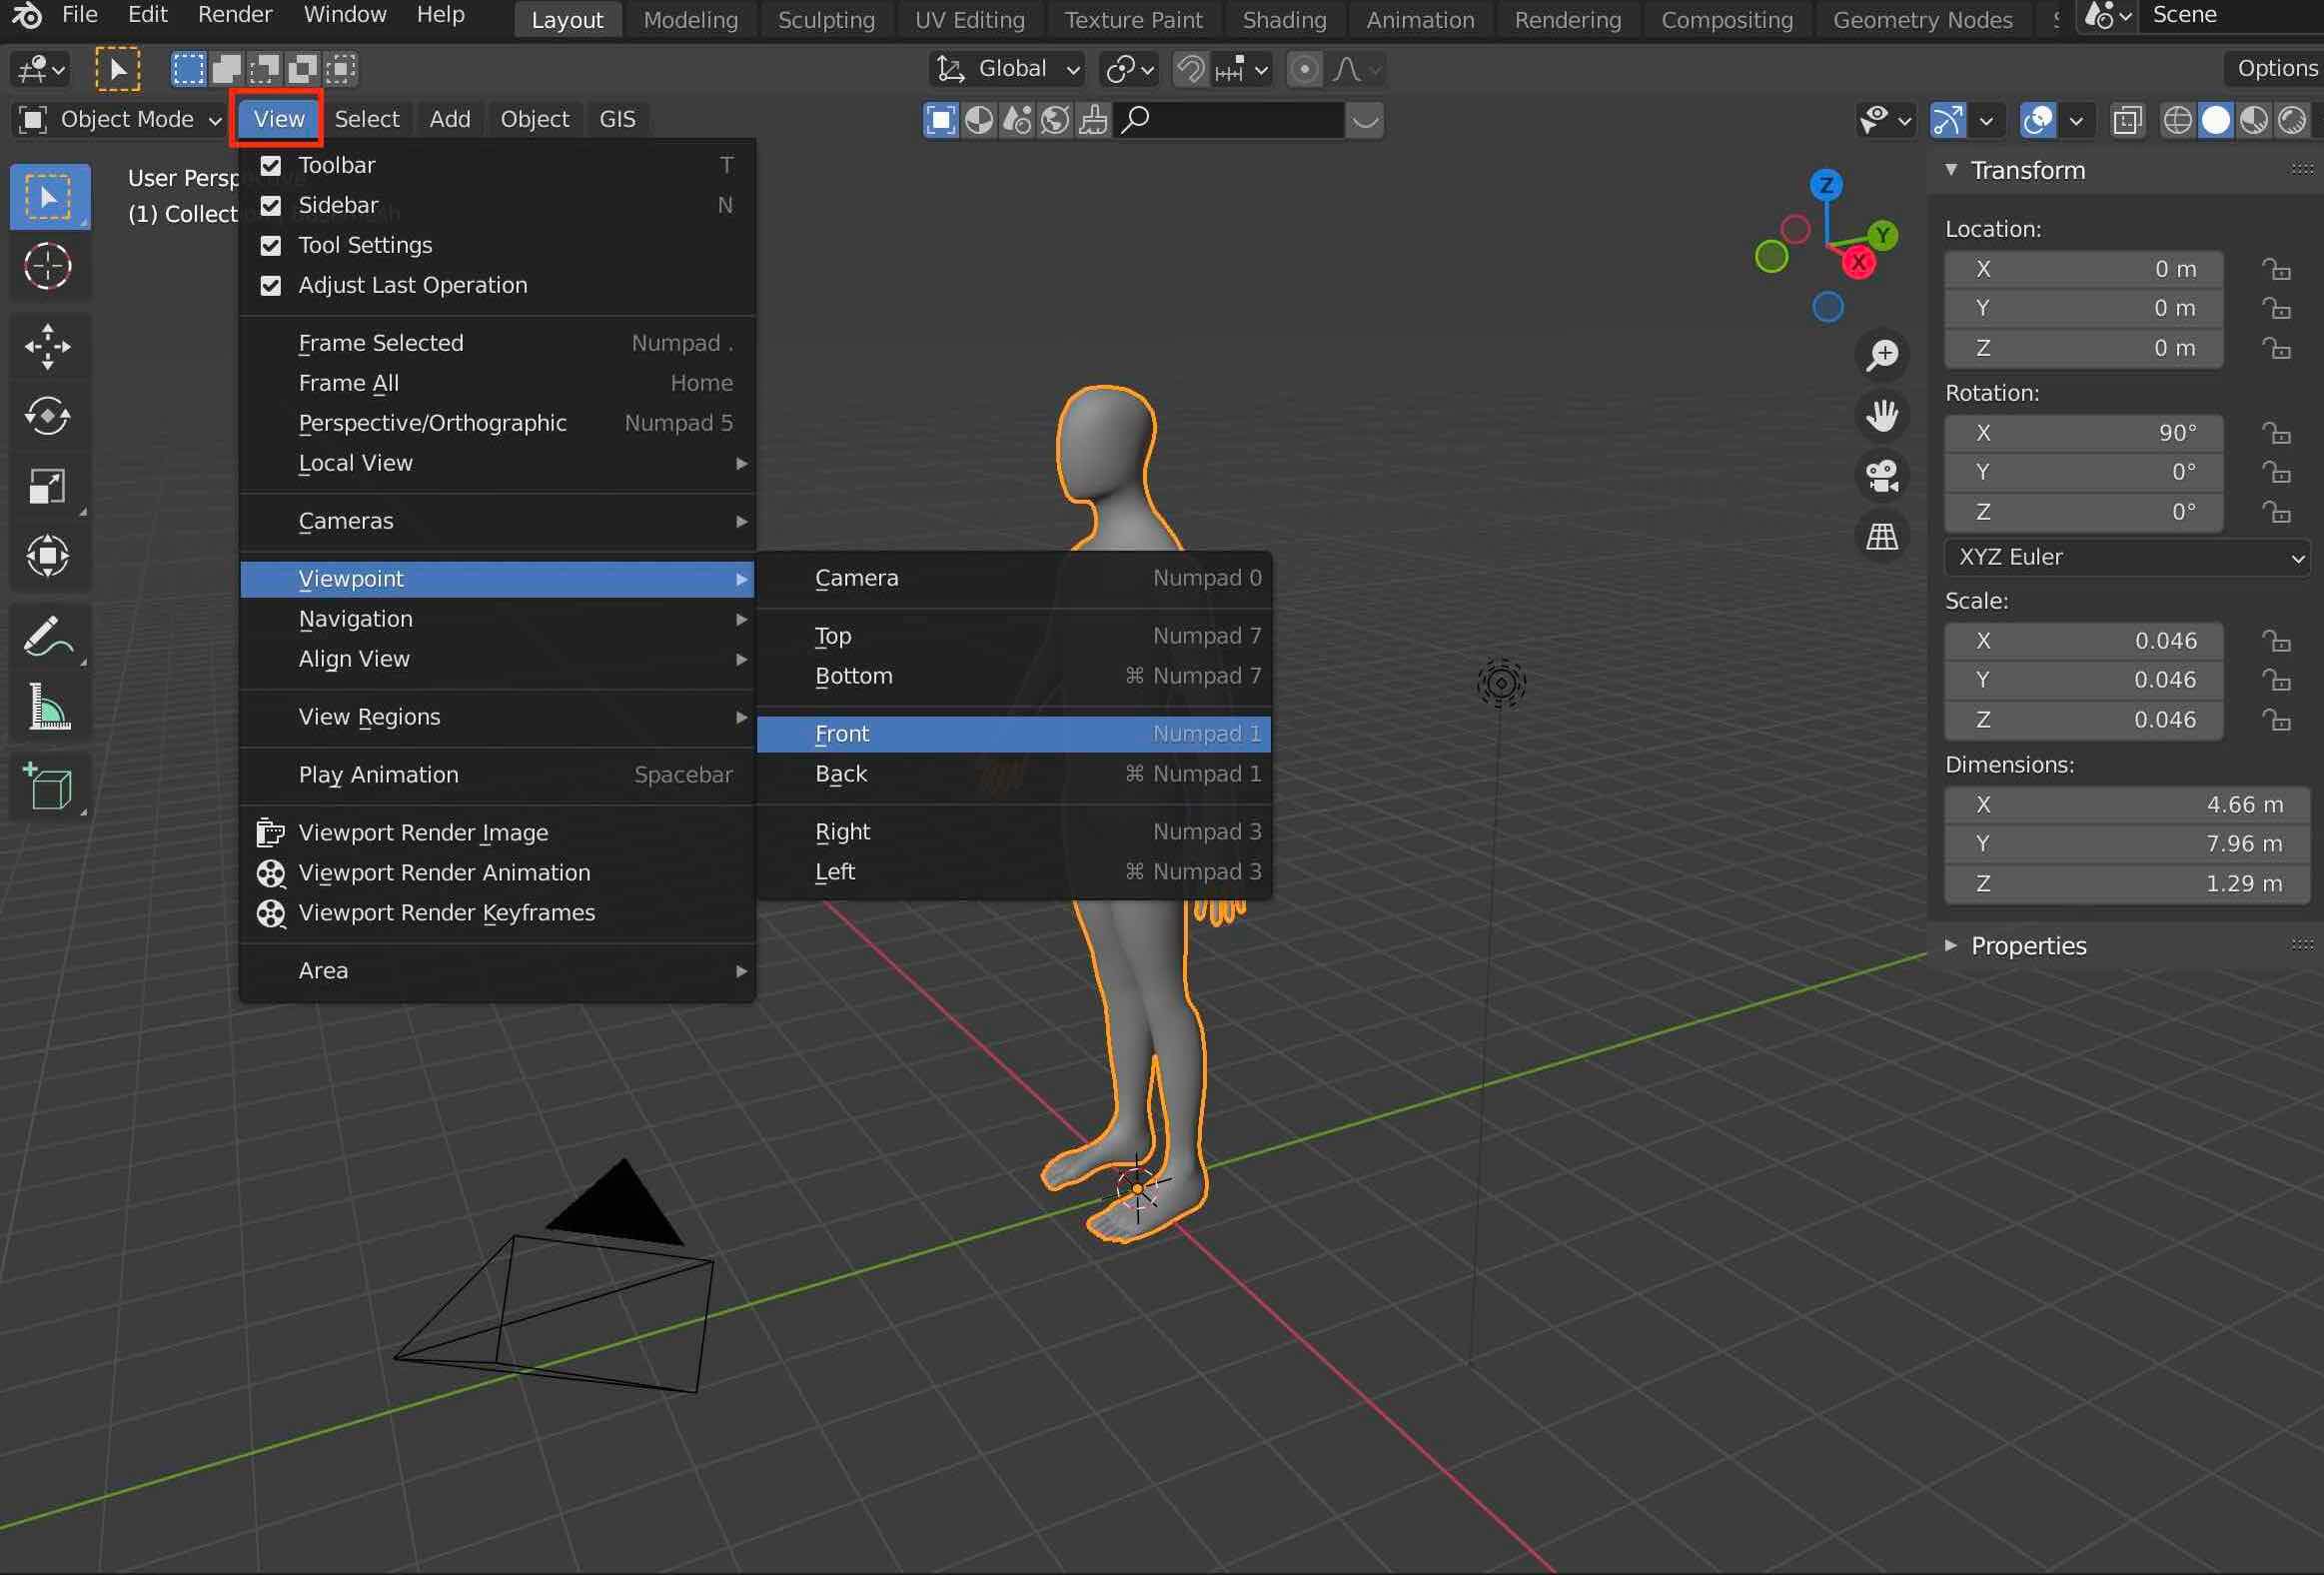
Select from the upper left menu View.
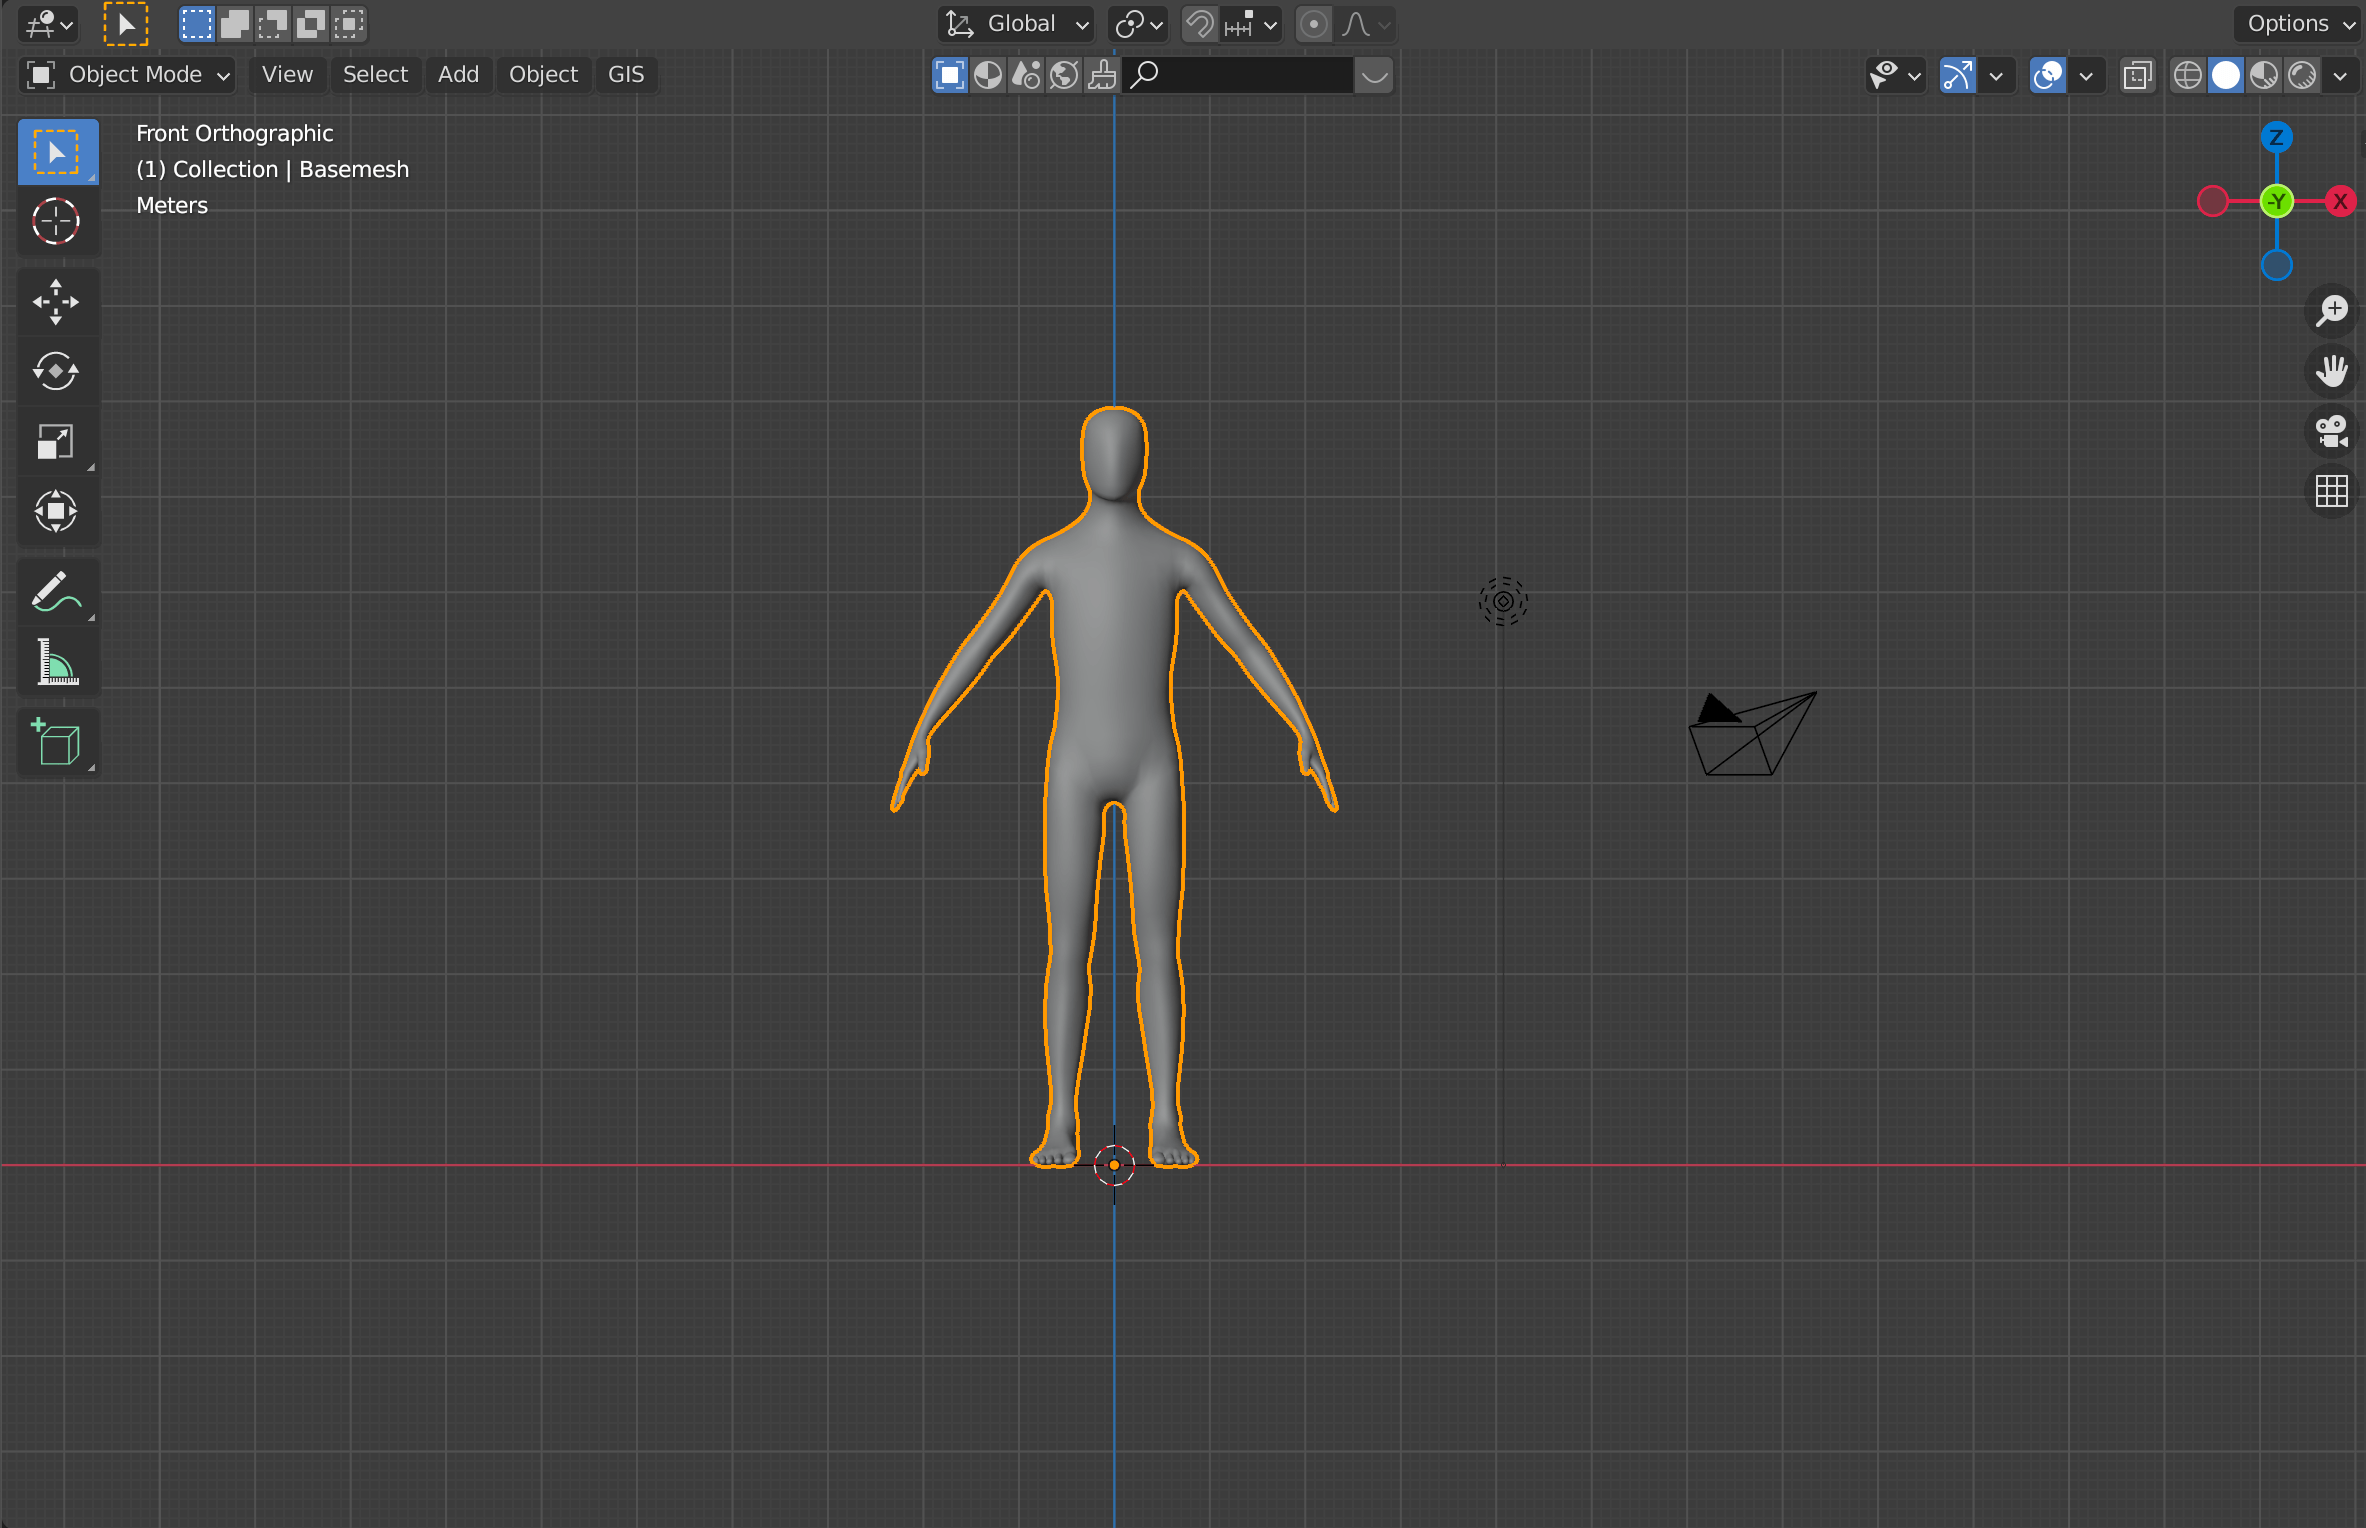
The screen is now switched to the front view.
It is convenient for modeling if you split the screen so that you can check from other angles at the same time.
Click and drag the upper right corner of the screen.
The modeling and simulation of the shirt will be described in detail in the next article.
![[Introduction to Blender] Let’s make clothes with cloth simulation (Modeling – Simulation)](https://styly.cc/wp-content/uploads/2021/10/eyecatch02-160x160.png)