Have you ever heard of Cloth Simulation?
Cloth Simulation is useful when making clothes in Blender. Let’s try to make a simple shirt with this feature.
I’ll show you how to make it in two parts, as follows!
- Basics – Preparation (How cloth simulation works and up to shirt modeling)
- Modeling – Simulation (from the continuation of shirt modeling to simulation and movement)
In this article, I will show you how to model a shirt and a cushion, and how to create wrinkles using cloth simulation.
I’m using Blender version: 2.93.1
For the previous article, please see here.
![[Introduction to Blender] Let’s Make Clothes with Cross Simulation (Basics – Preparation)](https://styly.cc/wp-content/uploads/2021/10/eyecatch01-160x160.png)
Modeling a shirt
Add a new plain
First, add a new plane by pressing [Shift+A].
After that, move, rotate, and transform the plane, and bring it in front of the human body model.

Add a new Plane and move it
And here’s what I did.
- Press [G]→[Z] key to move the Z axis.
- Press [R]→[X]→90 (numeric key) to rotate 90 degrees to the X axis.
- Press [S]→[Z] key to increase the plane on Z axis.
- Press the [G] key again, then the [Z] key to fine-tune the location on the Z axis.
Use the Enter key at the end of each move to confirm.
| Rotate | [R] key |
| Move | [G] key |
| Zoom in/out | [S] key |
After pressing the [G], [R], or [S] key, press the [X], [Y], or [Z] key to edit the axis in that direction.
Creating a collar
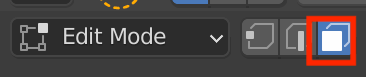
First, use the [Tab] key to switch from object mode to edit mode.
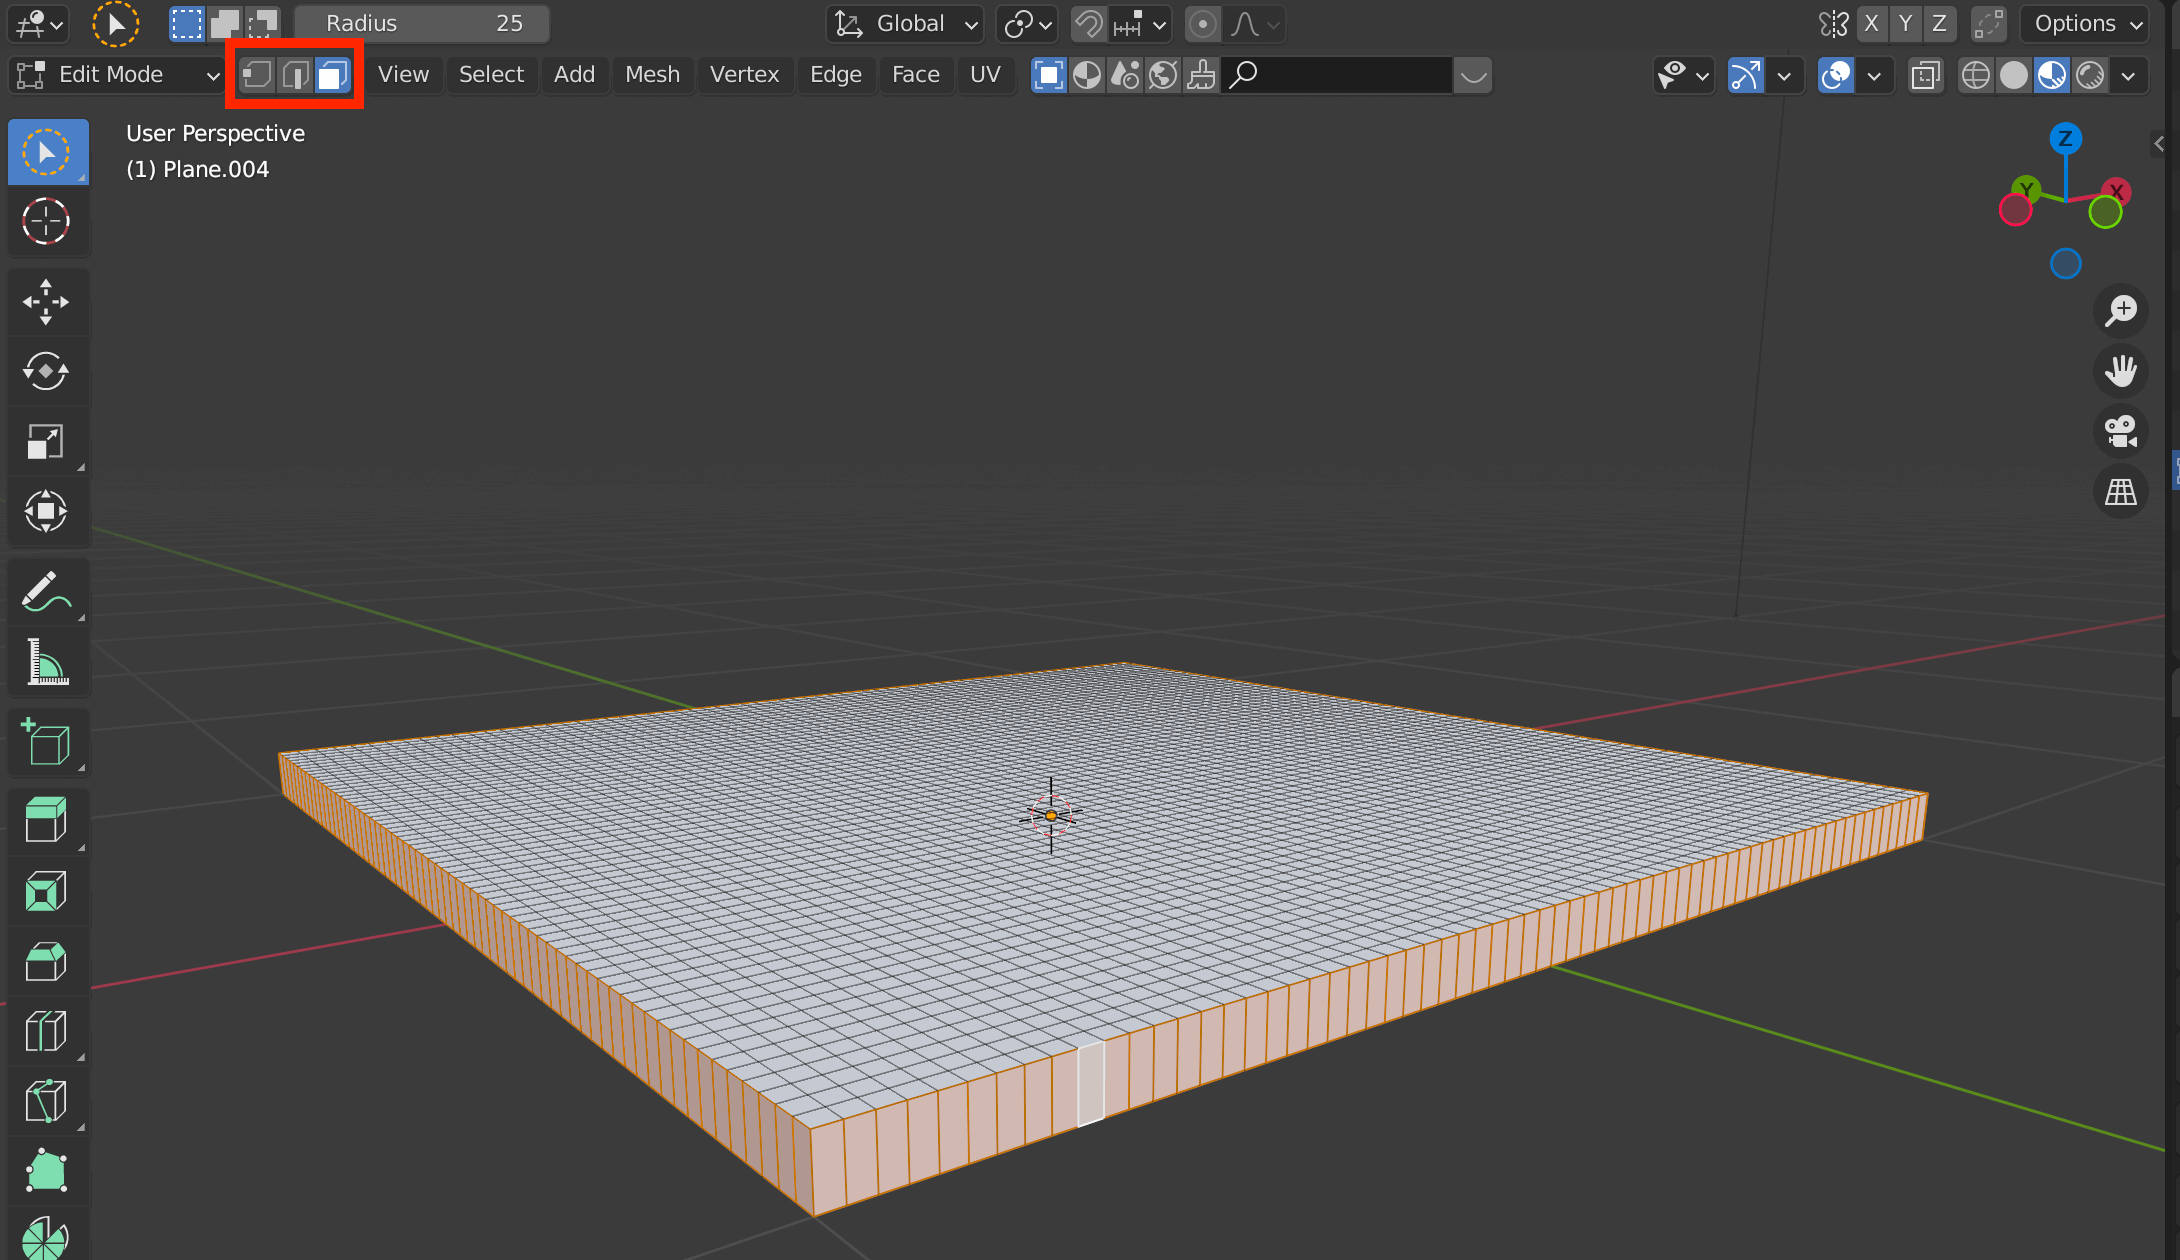
![Click on the upper left button or press [Tab] key to switch](https://styly.cc/wp-content/uploads/2021/10/Screenshot-315.png)
Click on the upper left button or press [Tab] key to switch
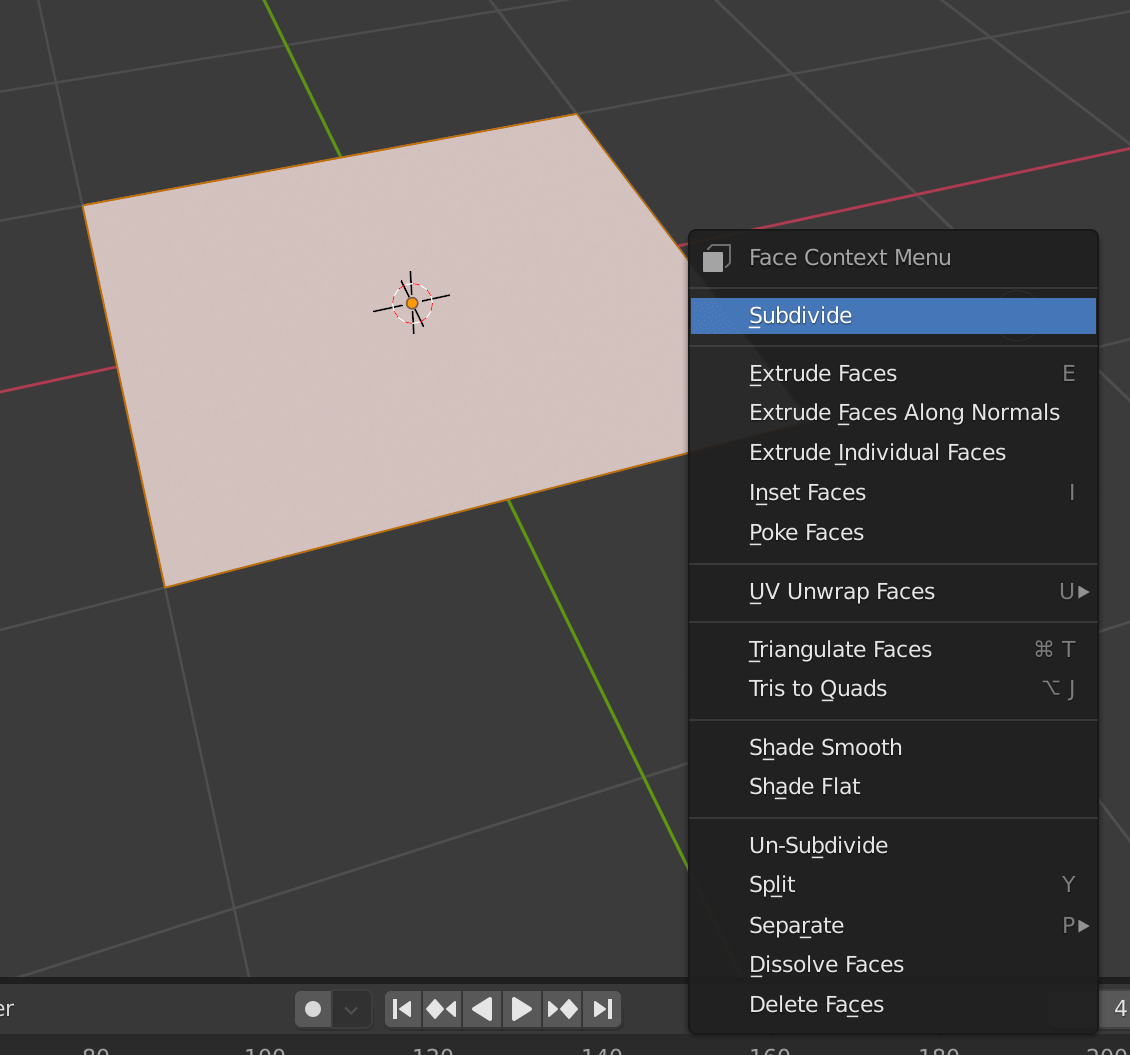
Right-click and select Subdivide.
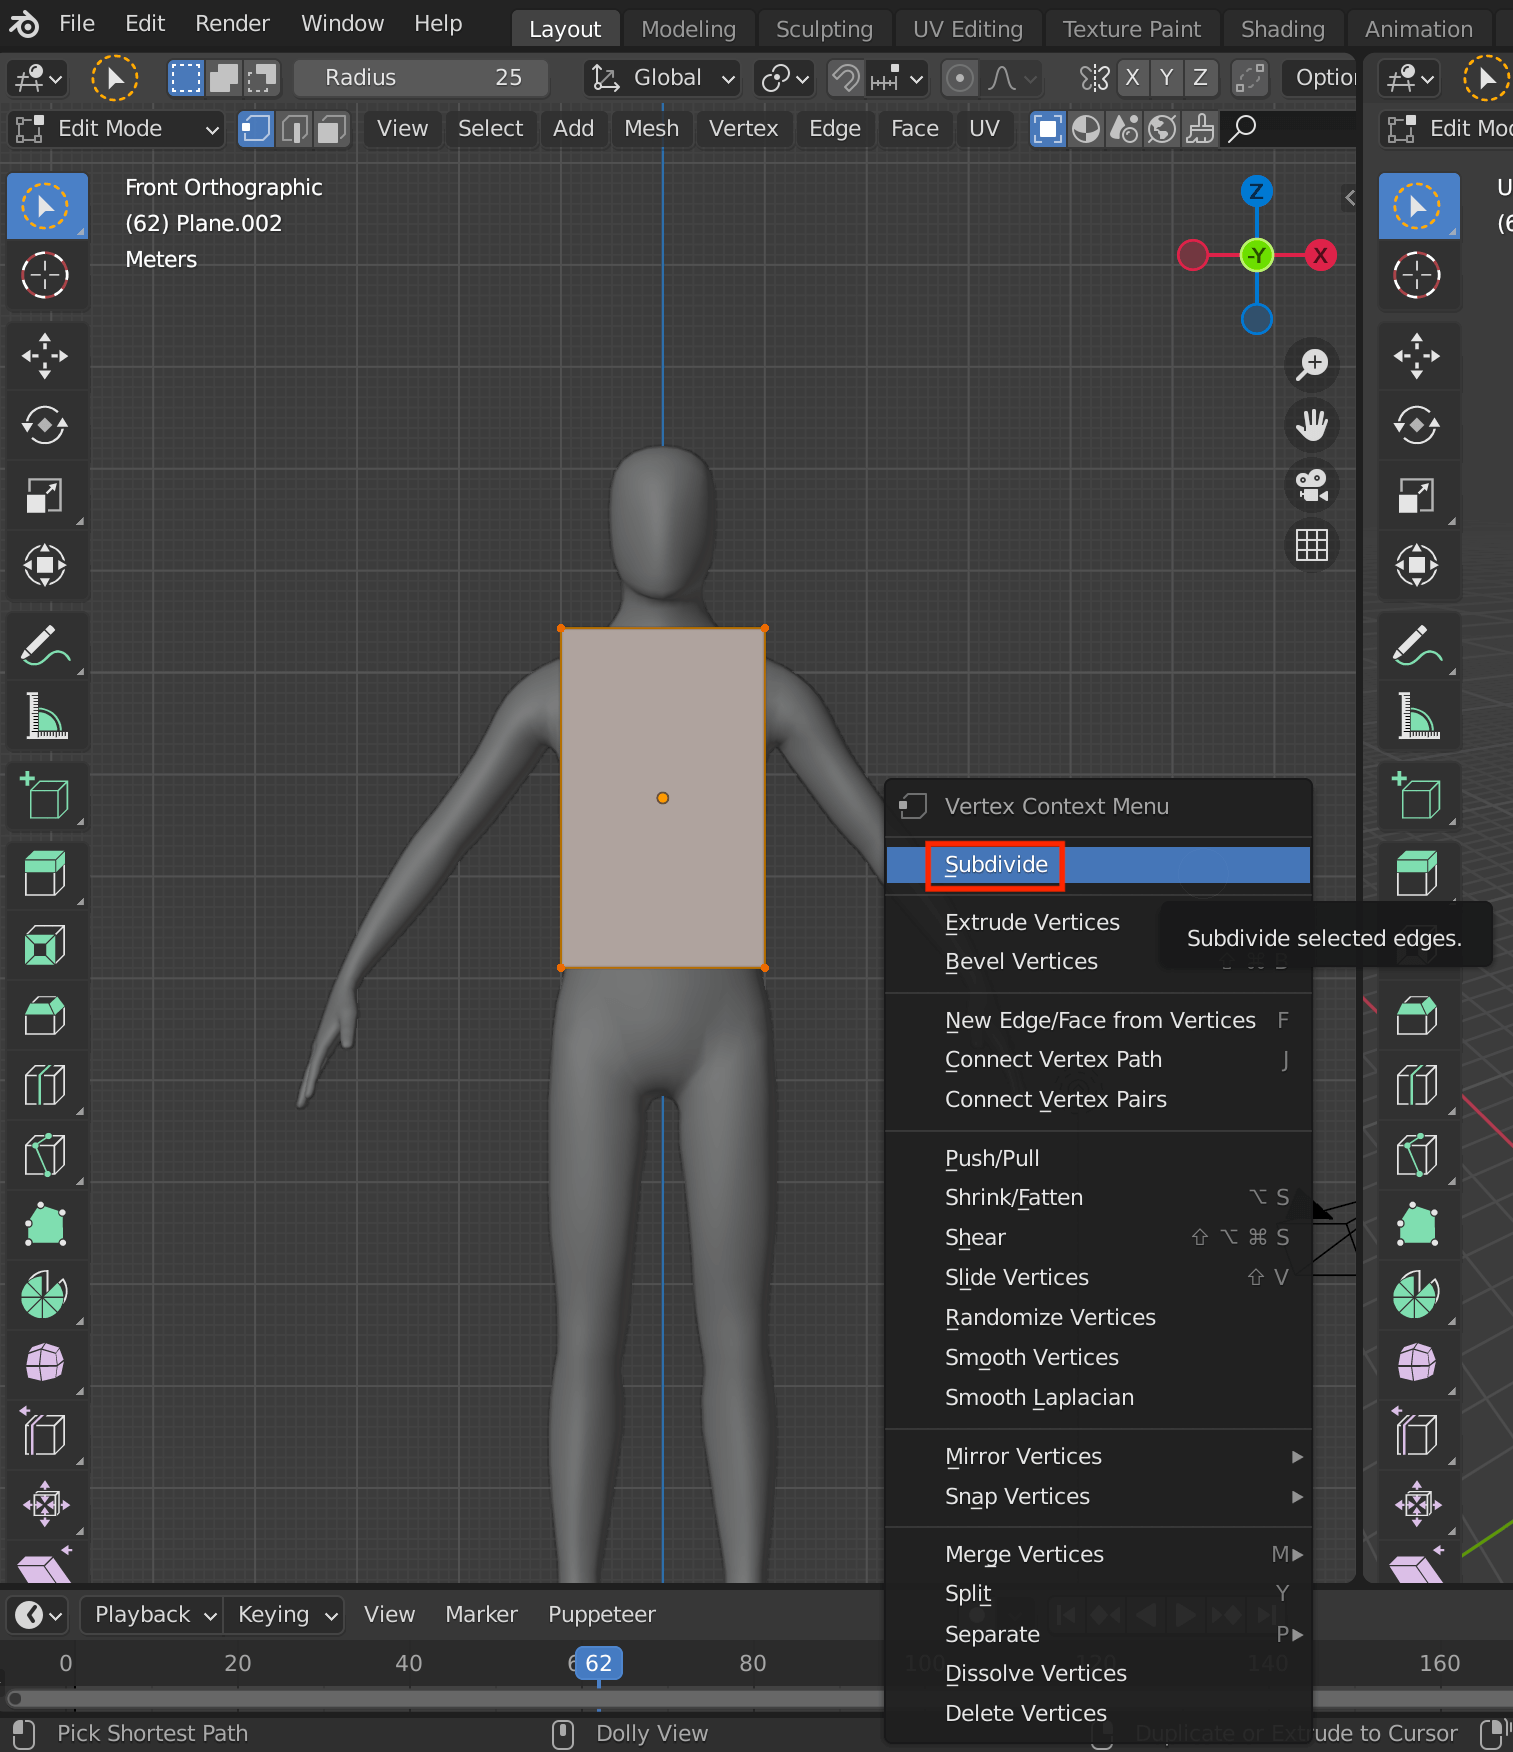
Subdivide
Change the value of Number of Cuts in the lower left corner.
Since you are editing the shape of the plane, it is best not to be too detailed.
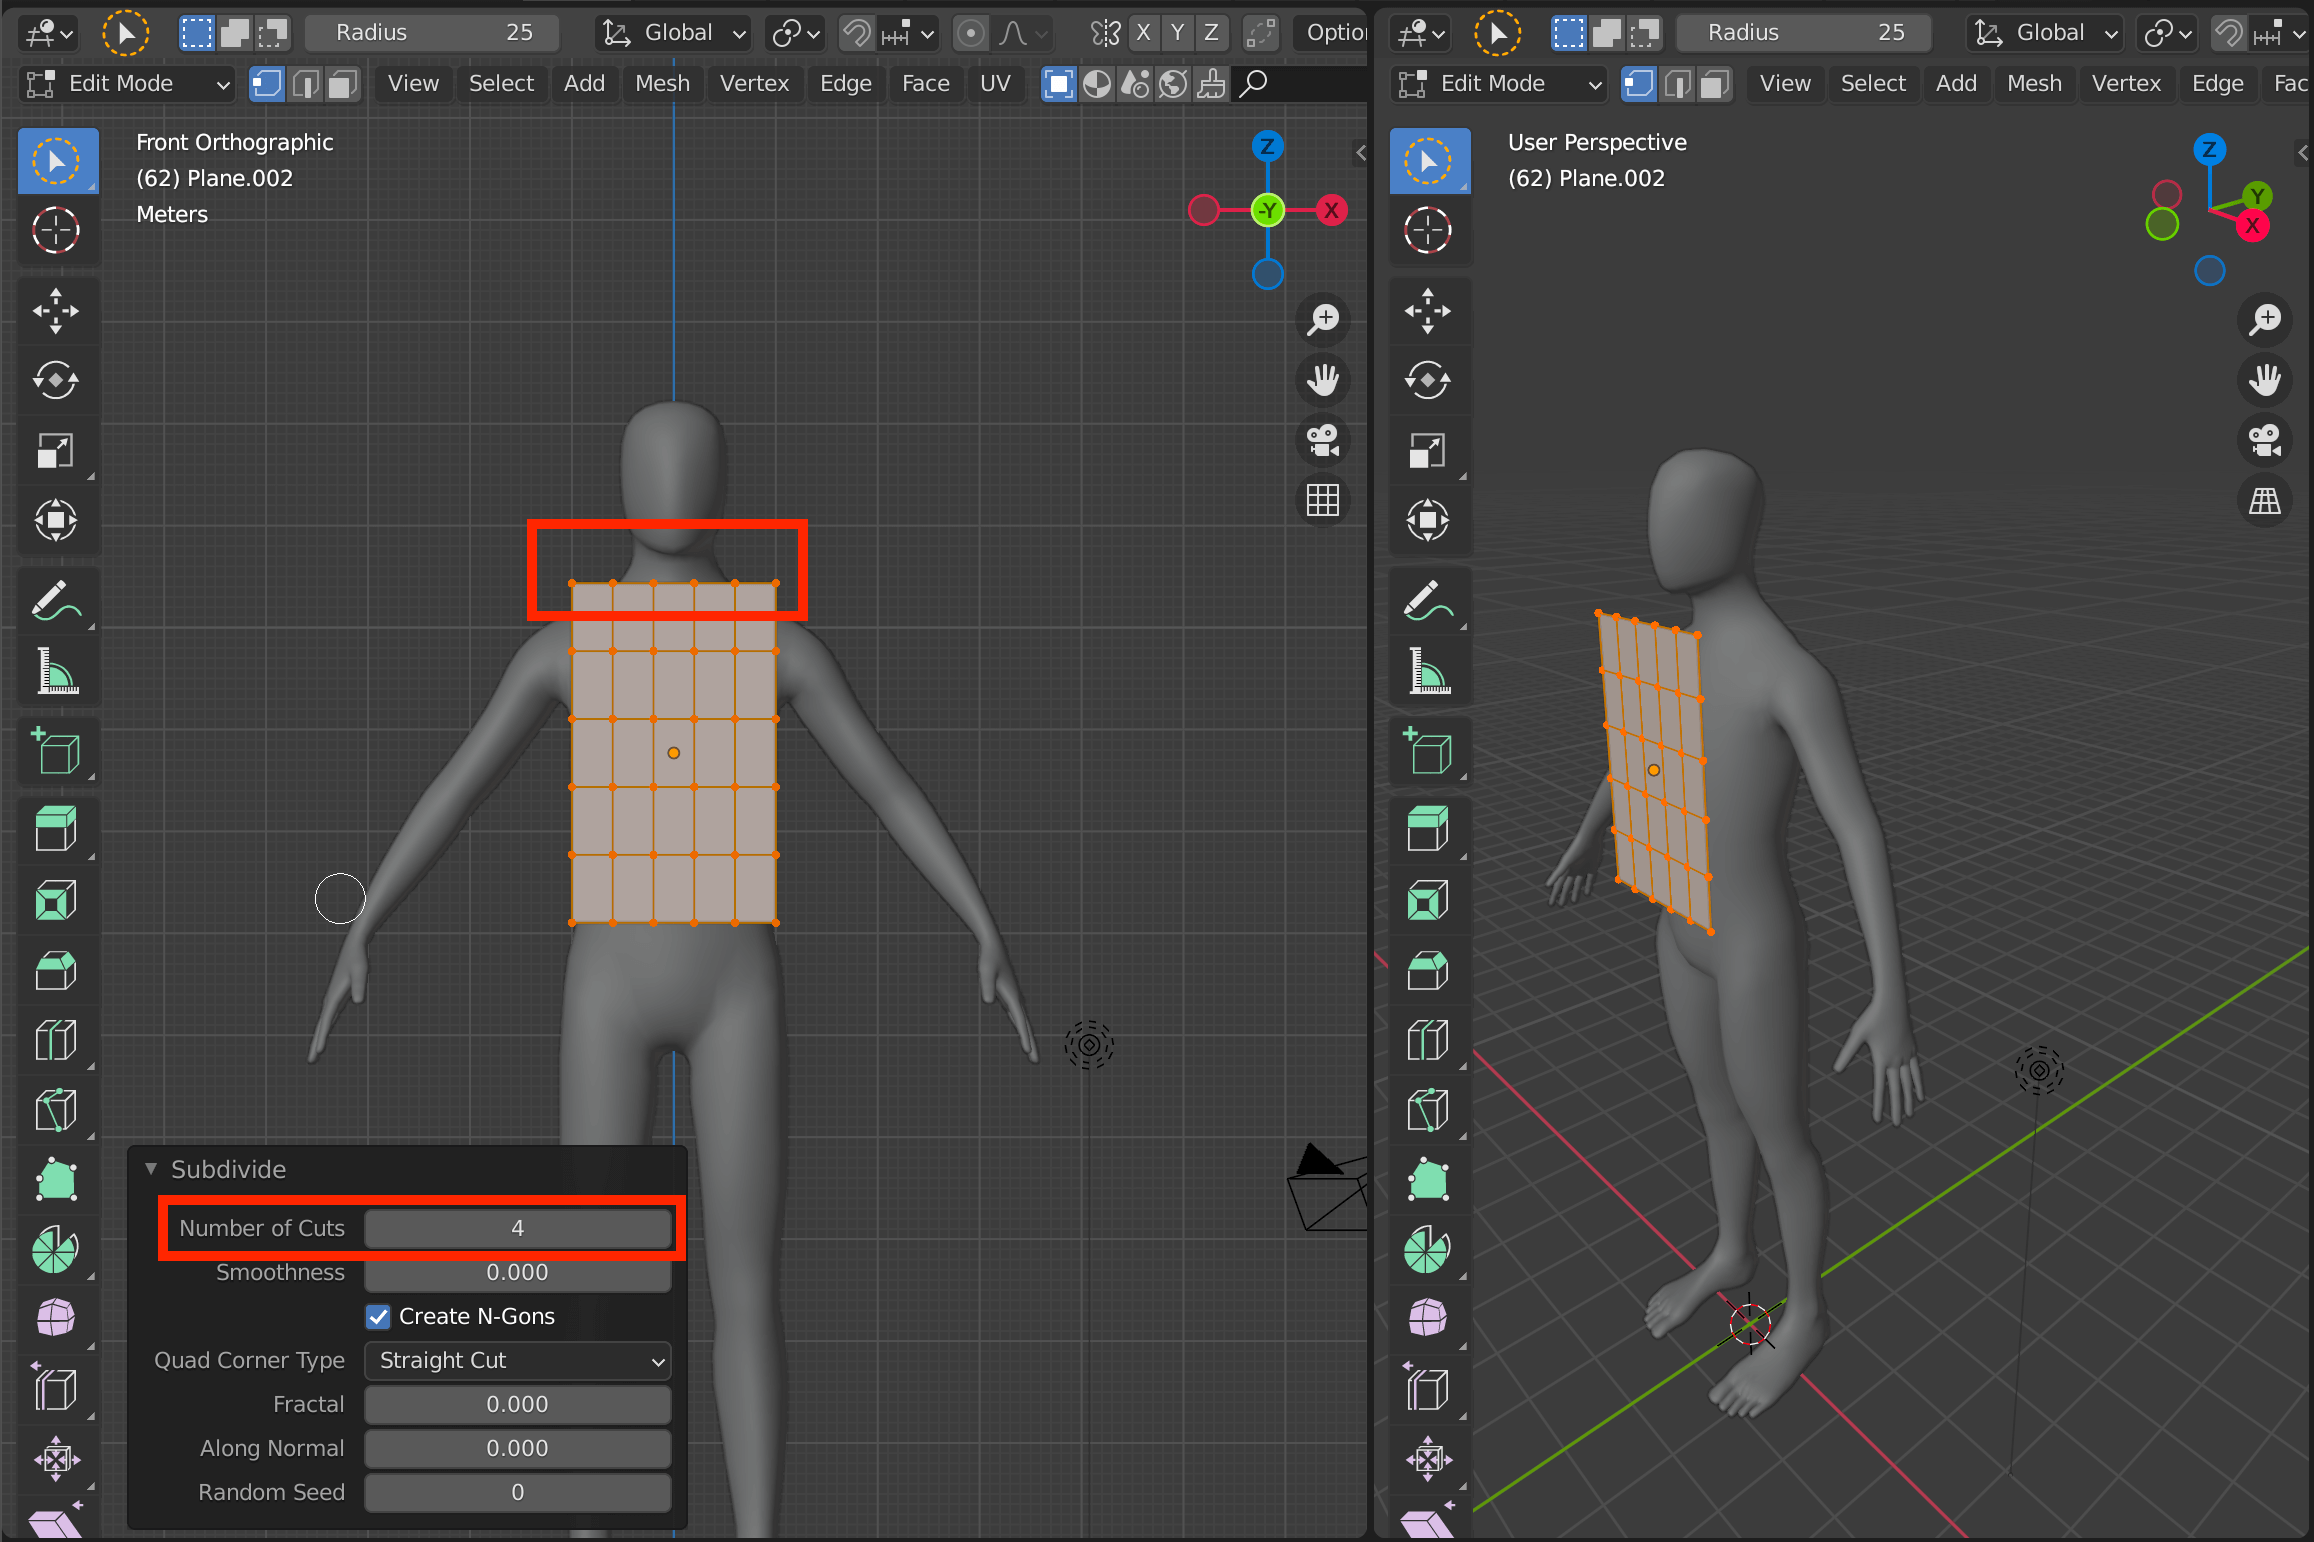
Subdivide
Then, select only the vertex at the neck, and press [G]→[Z] to lower the point.
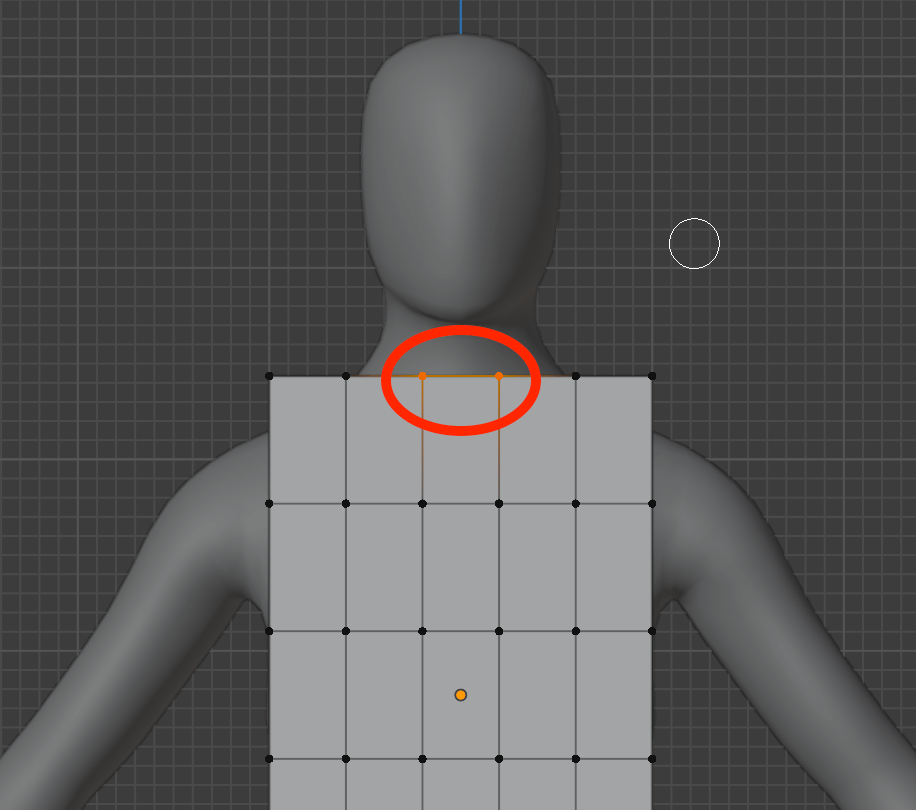
Click on a vertex to select it.
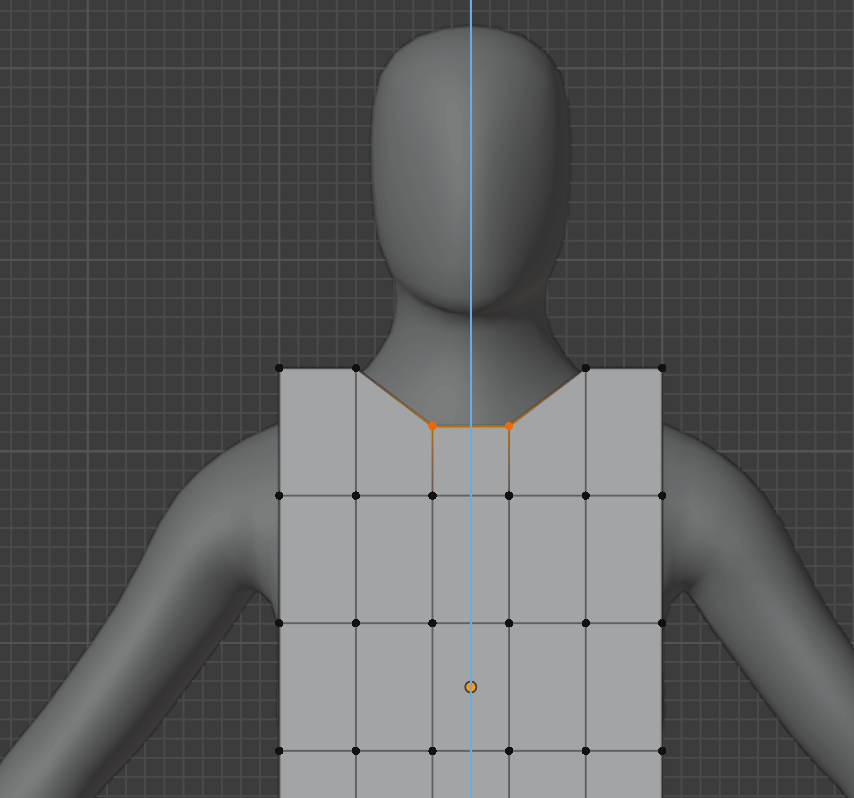
Move it down and press Enter to confirm.
After selecting the vertex that will be the shoulder part, use the [E] key (extrude) -> [Z] key (Z-axis) to extend it.
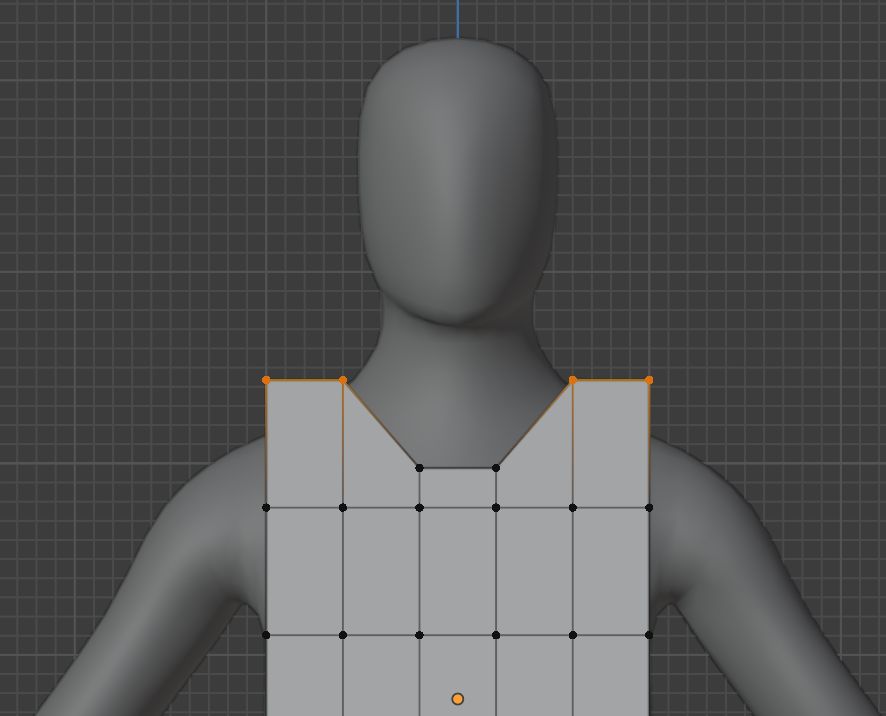
Select the vertex that will be the shoulder part
![Press [E]→[Z] key to push it out to the Z axis.](https://styly.cc/wp-content/uploads/2021/10/Screenshot-321.png)
Press [E]→[Z] key to push it out to the Z axis.
Creating a body
Create the fabric under the armpit.
After selecting the armpit vertices as shown in the screenshot below, press the E key (extrude), S key (expand), and X key (to X axis).
When the width of the body has been expanded by moving the cursor, press the Enter key to confirm.
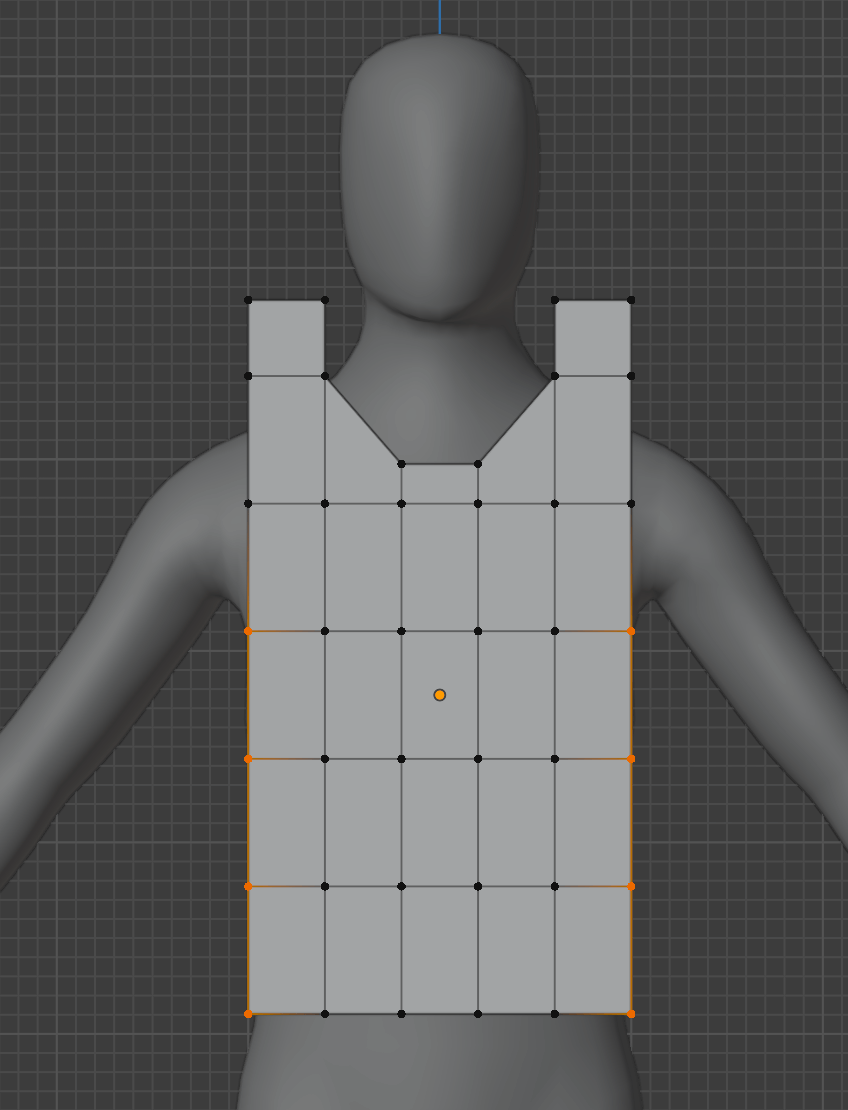
Select the vertex under the armpit.
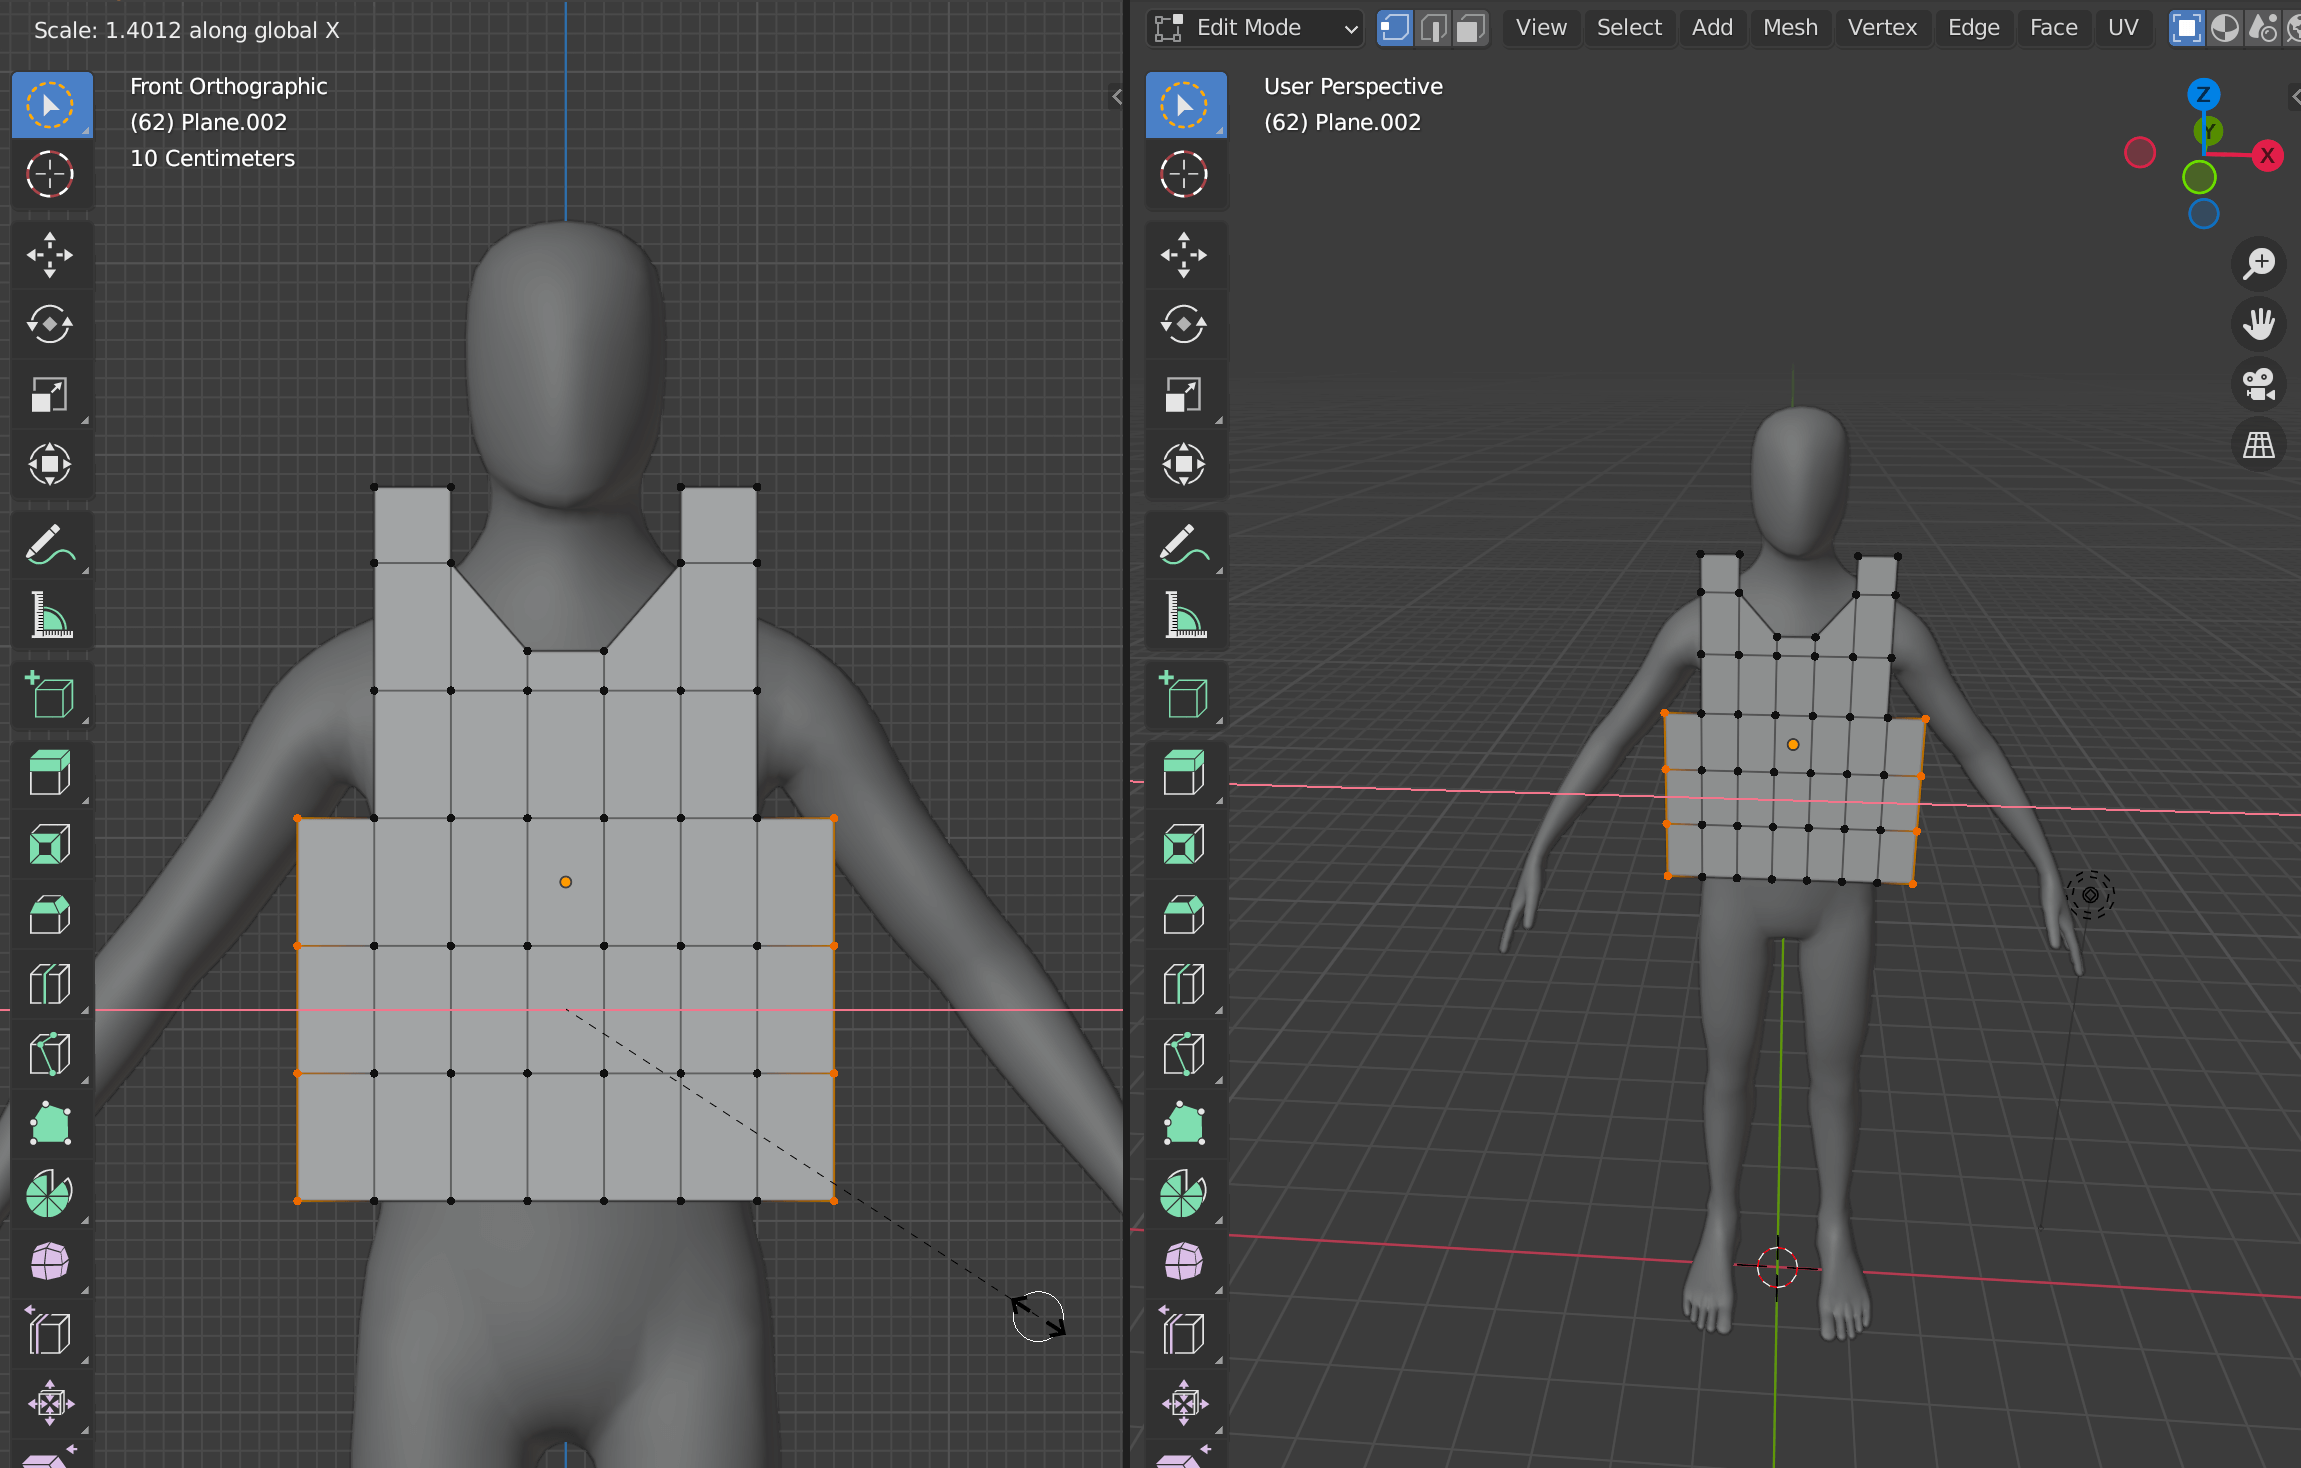
Move the cursor to widen the width, and press the Enter key to confirm.
Let’s make a smooth curve around the collar and armpits.
Add a modifier from the modifier properties (tool icon) on the right side of the screen.
After selecting the Subdivision Surface, open the Advanced tab and change the Boundary Smoooth to Keep Corners.
Subdivision Surface
Switch to object mode by pressing the [Tab] key (or the top left button).
Select Apply from the v next to the Subdivision Surface to apply it.
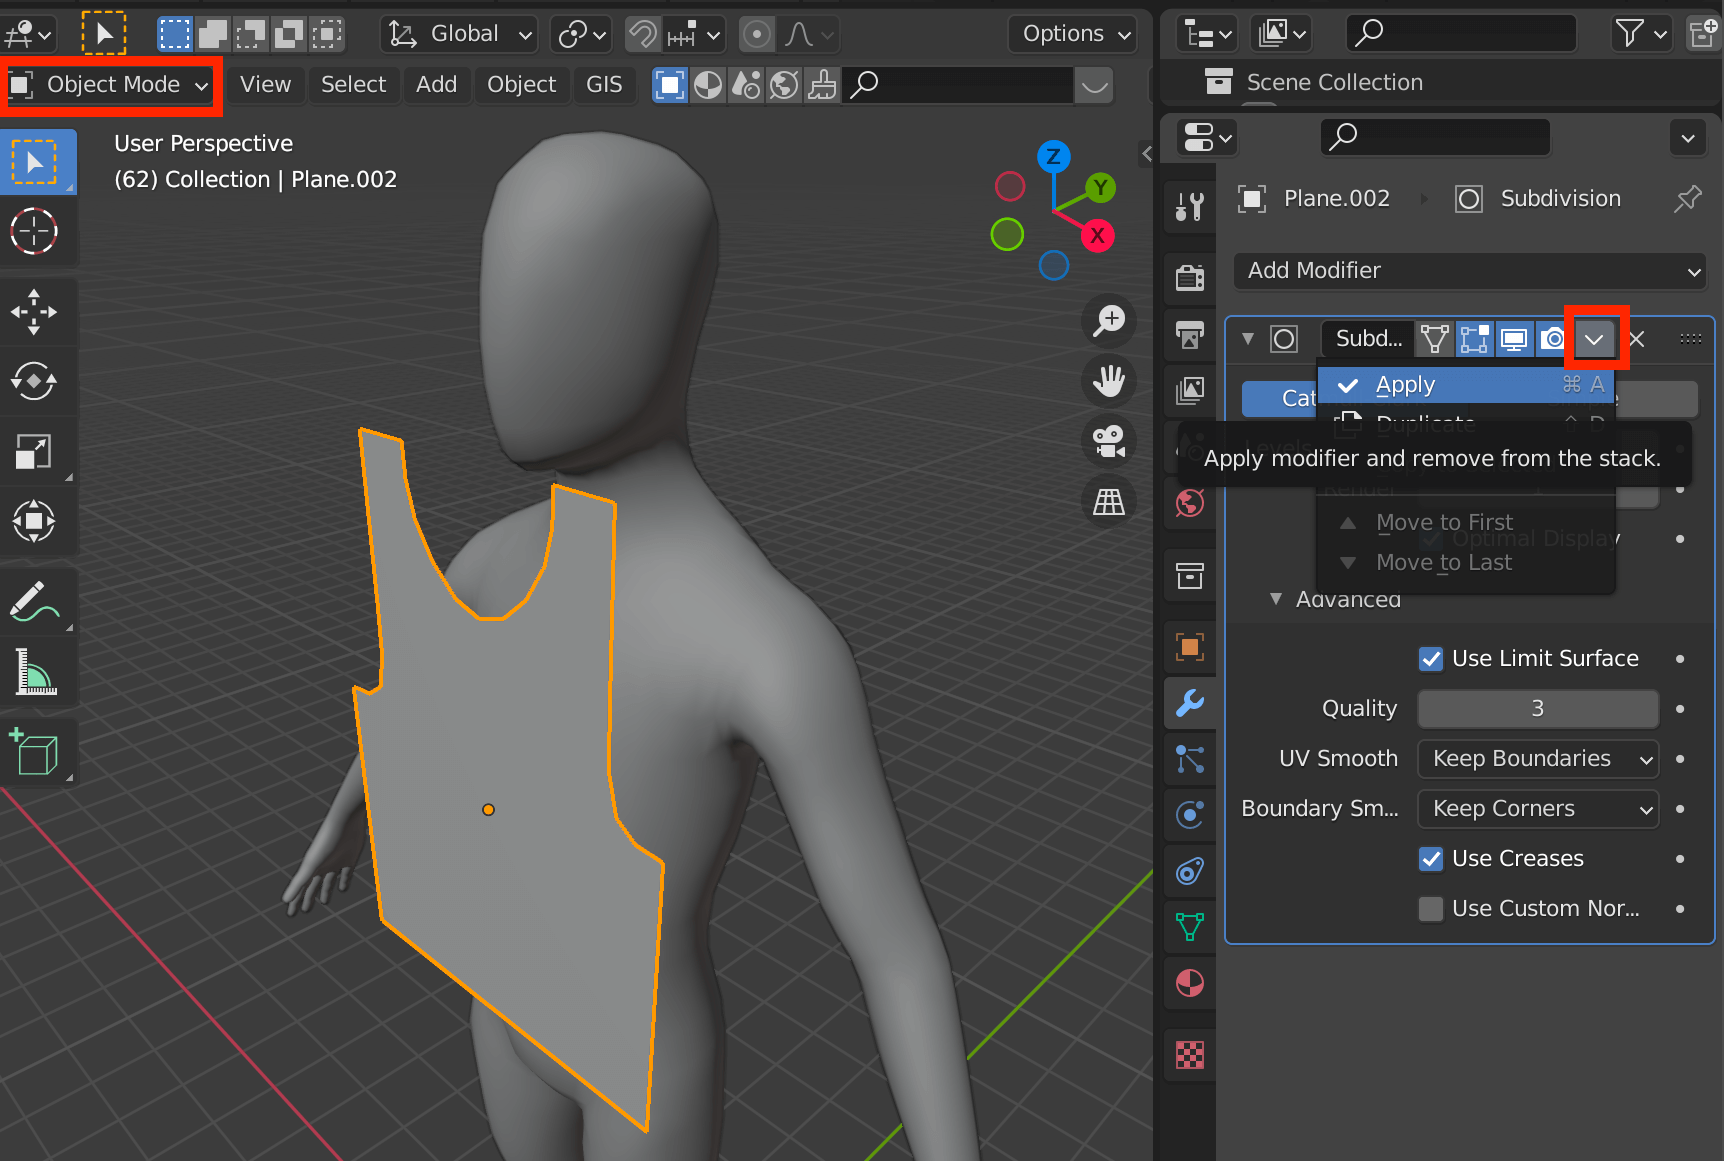
Switch to object mode and apply the Subdivision Surface
Switch to Edit mode again with the [Tab] key, make sure the Subdivision Surface is applied, then select all with the [A] key and push it out with the [E] key.
Then move the cursor to the back of the human model, adjusting its position, and place it between the human models.
The duplicate is the back of the body.
![Press [E] key to push it out, adjust it with the cursor, and press Enter to confirm.](https://styly.cc/wp-content/uploads/2021/10/back.gif)
Press [E] key to push it out, adjust it with the cursor, and press Enter to confirm.
After that, select the meshes where the neck, arms, and torso will be.
You can select each mesh of the model by clicking on Select Face in the upper left corner of the screen.
Face selection mode
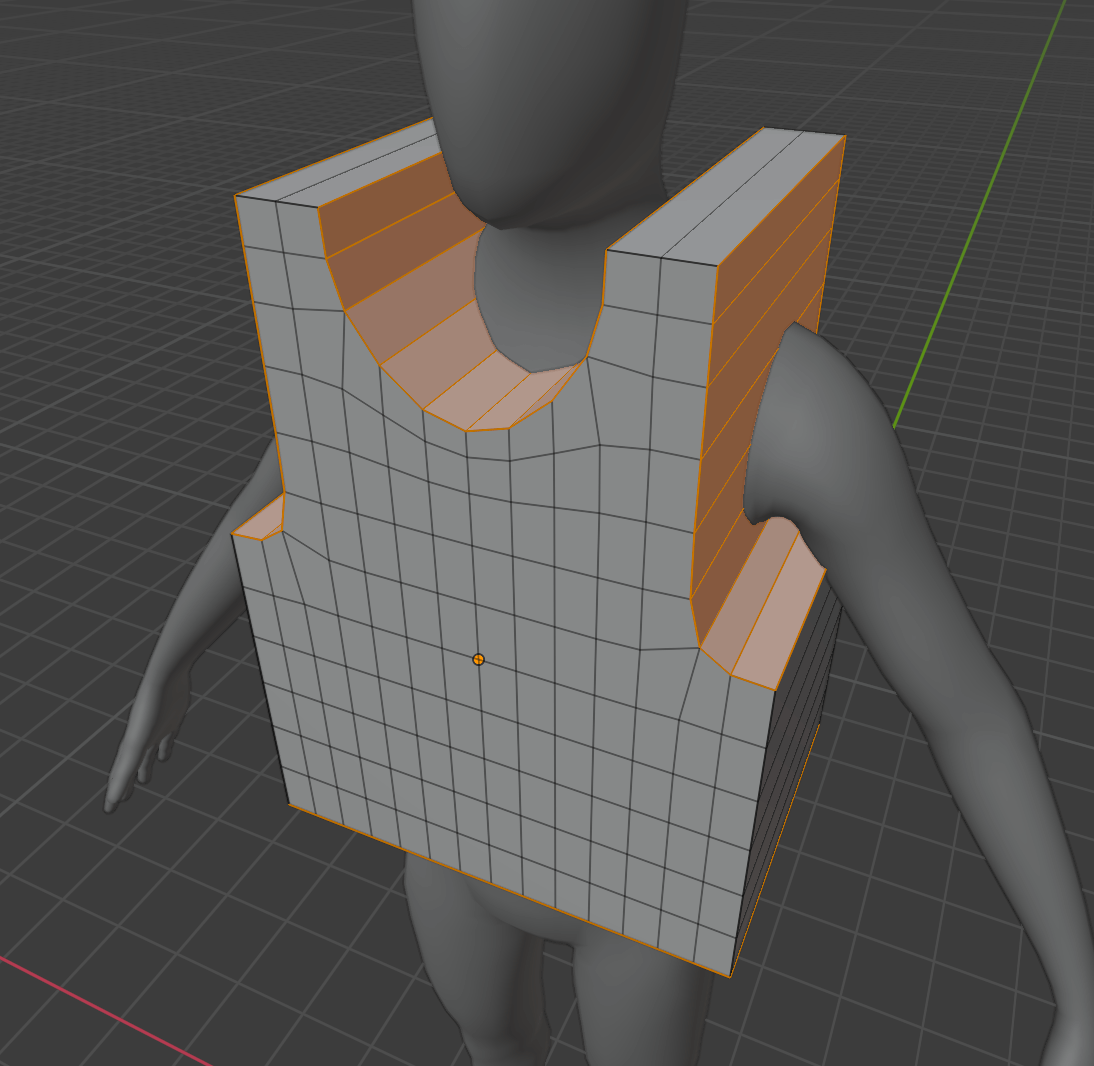
Select the area where the neck and arms will appear.
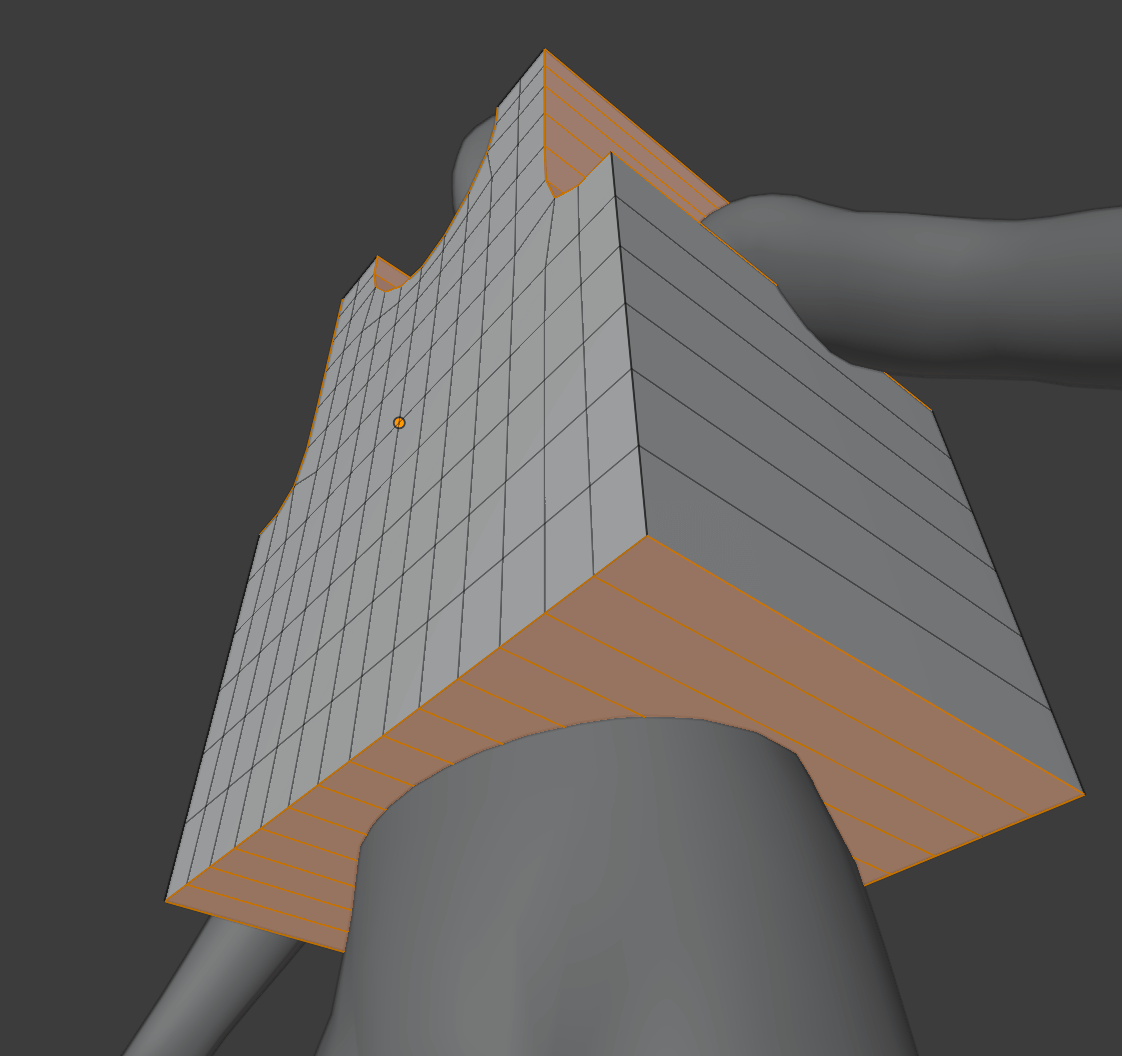
Don’t forget the bottom.
Delete them with the [X] key.
Select Faces and delete only the faces.
![Delete with [X] key](https://styly.cc/wp-content/uploads/2021/10/Screenshot-329.png)
Delete with [X] key
Then select the remaining Faces (i.e., the part of the shoulder and armpit that will be sewn together).
Click the [X] key (Delete) -> Only Faces to delete the faces only.
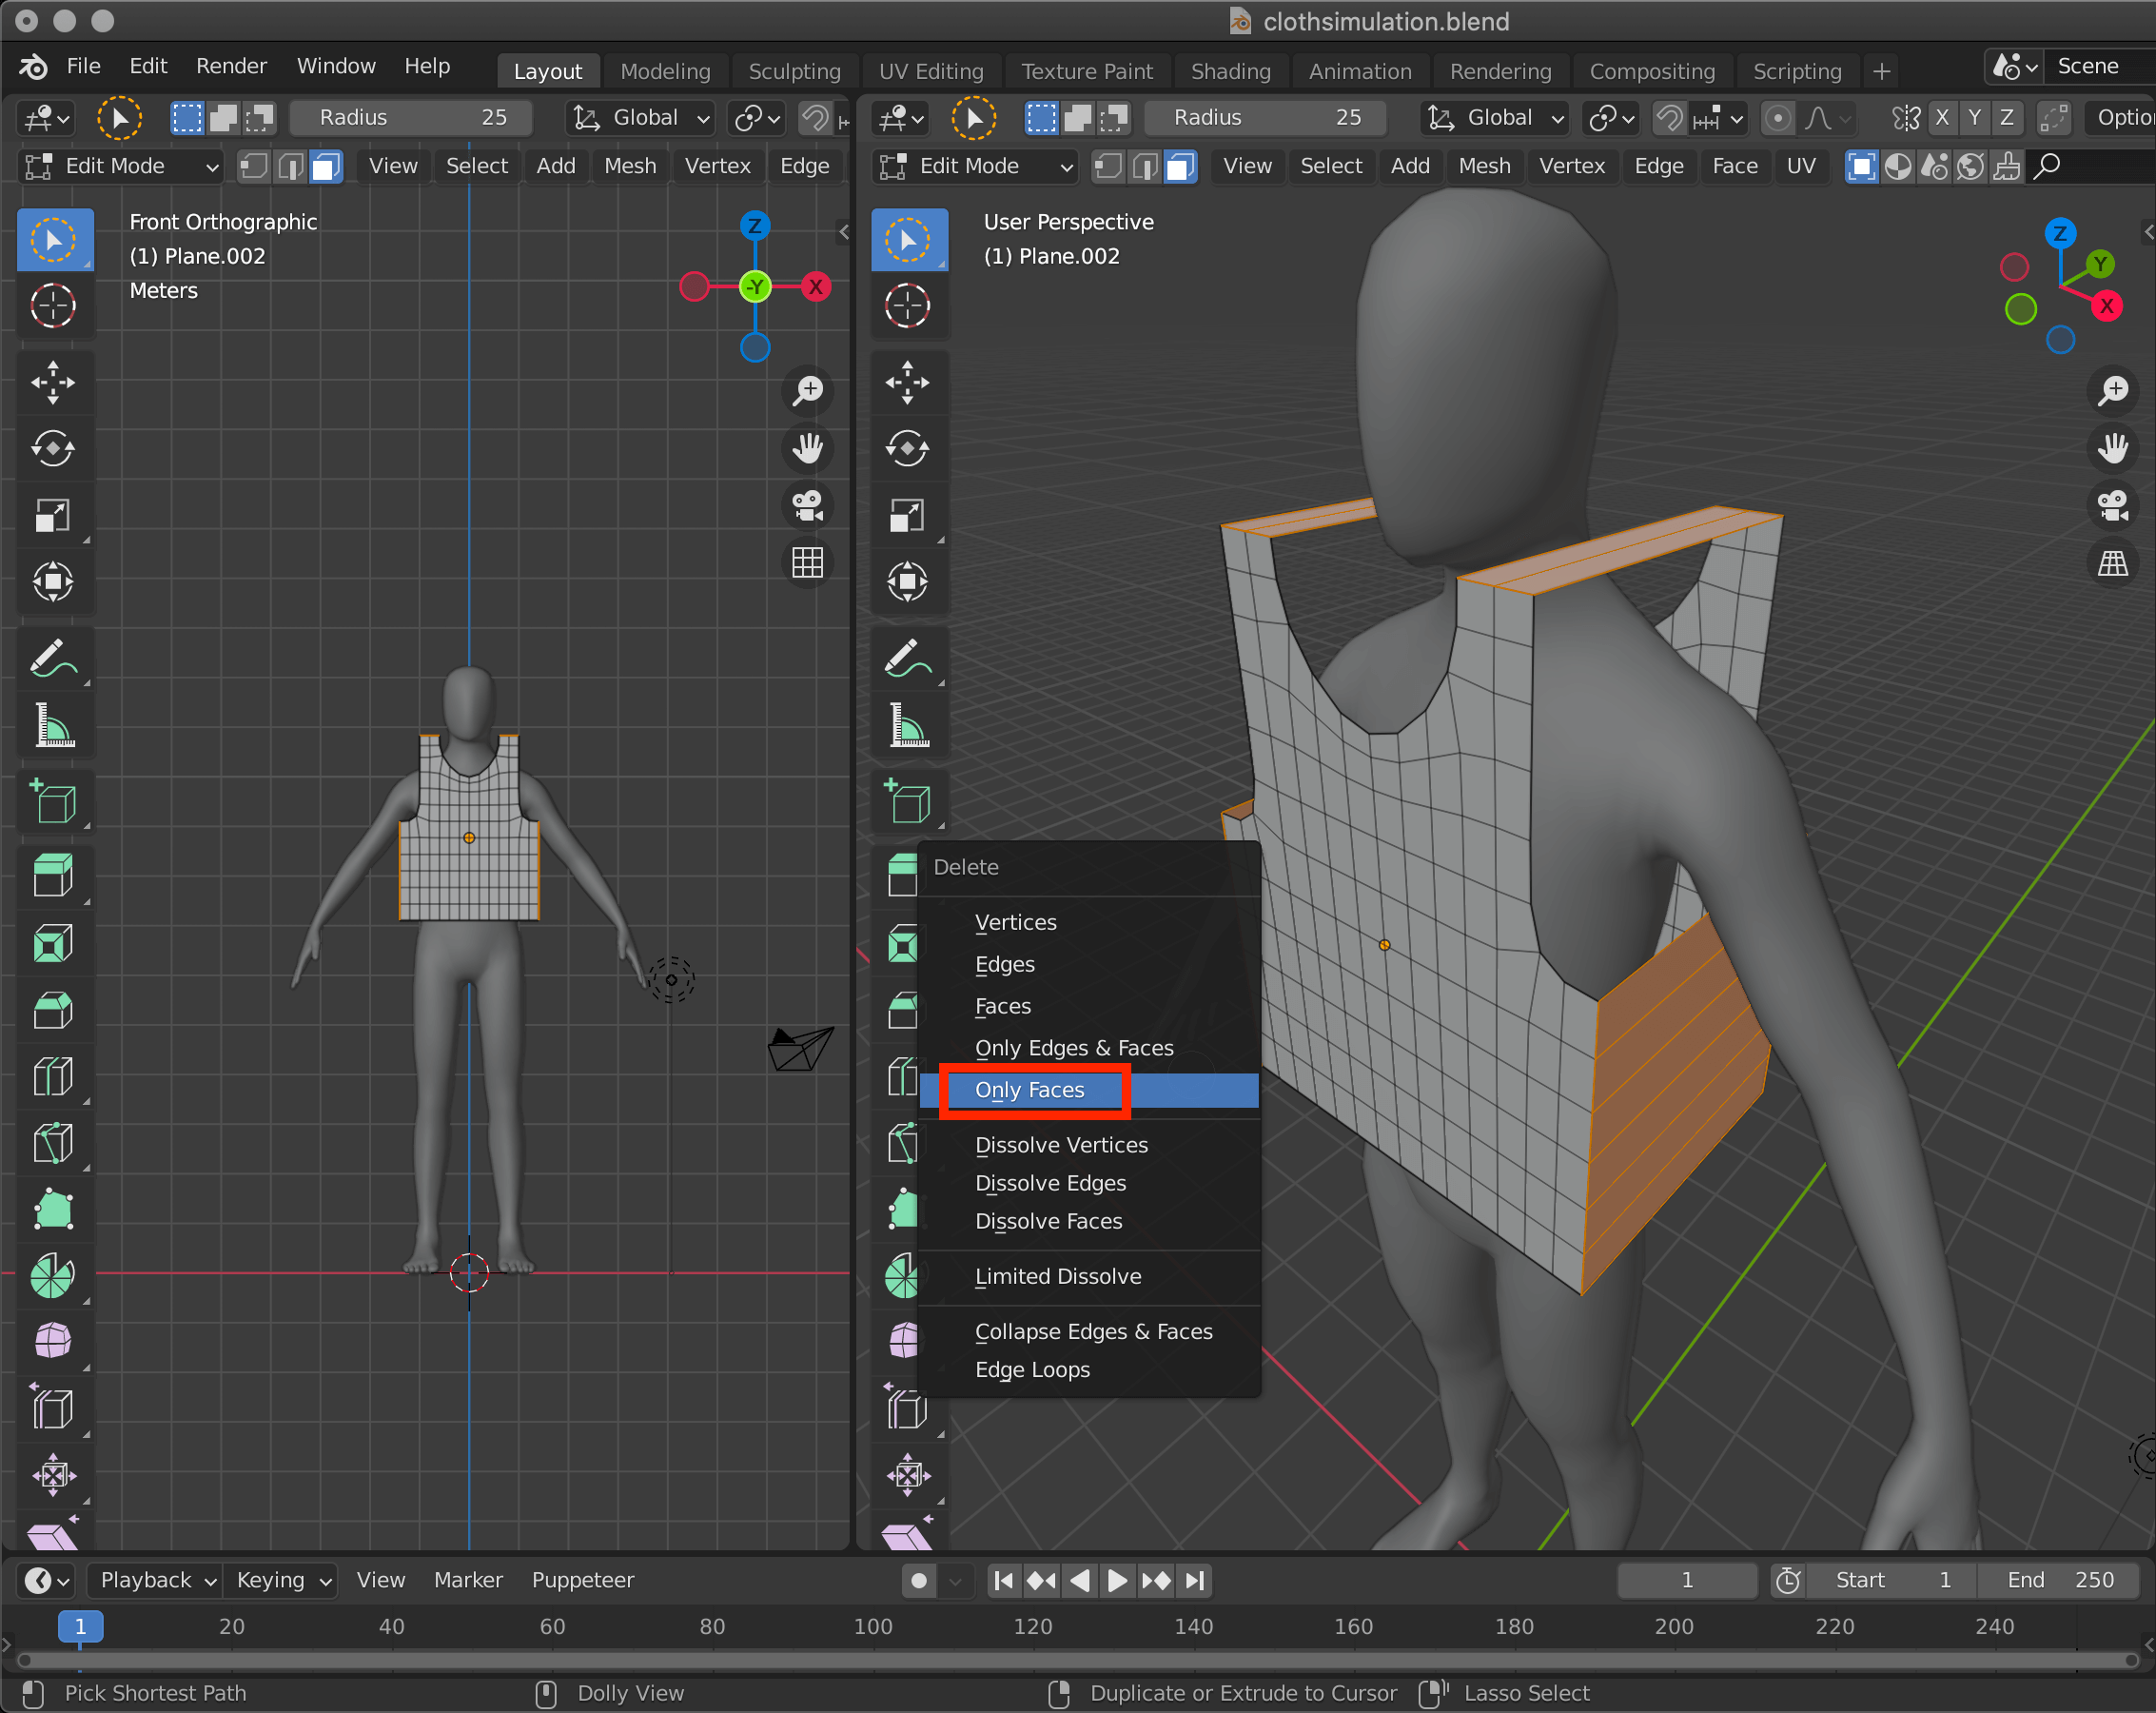
Select Only Faces
Cloth simulate.
Press [Tab] key to change to Object mode.
With the humanoid model selected, click Collision from the right side menu.
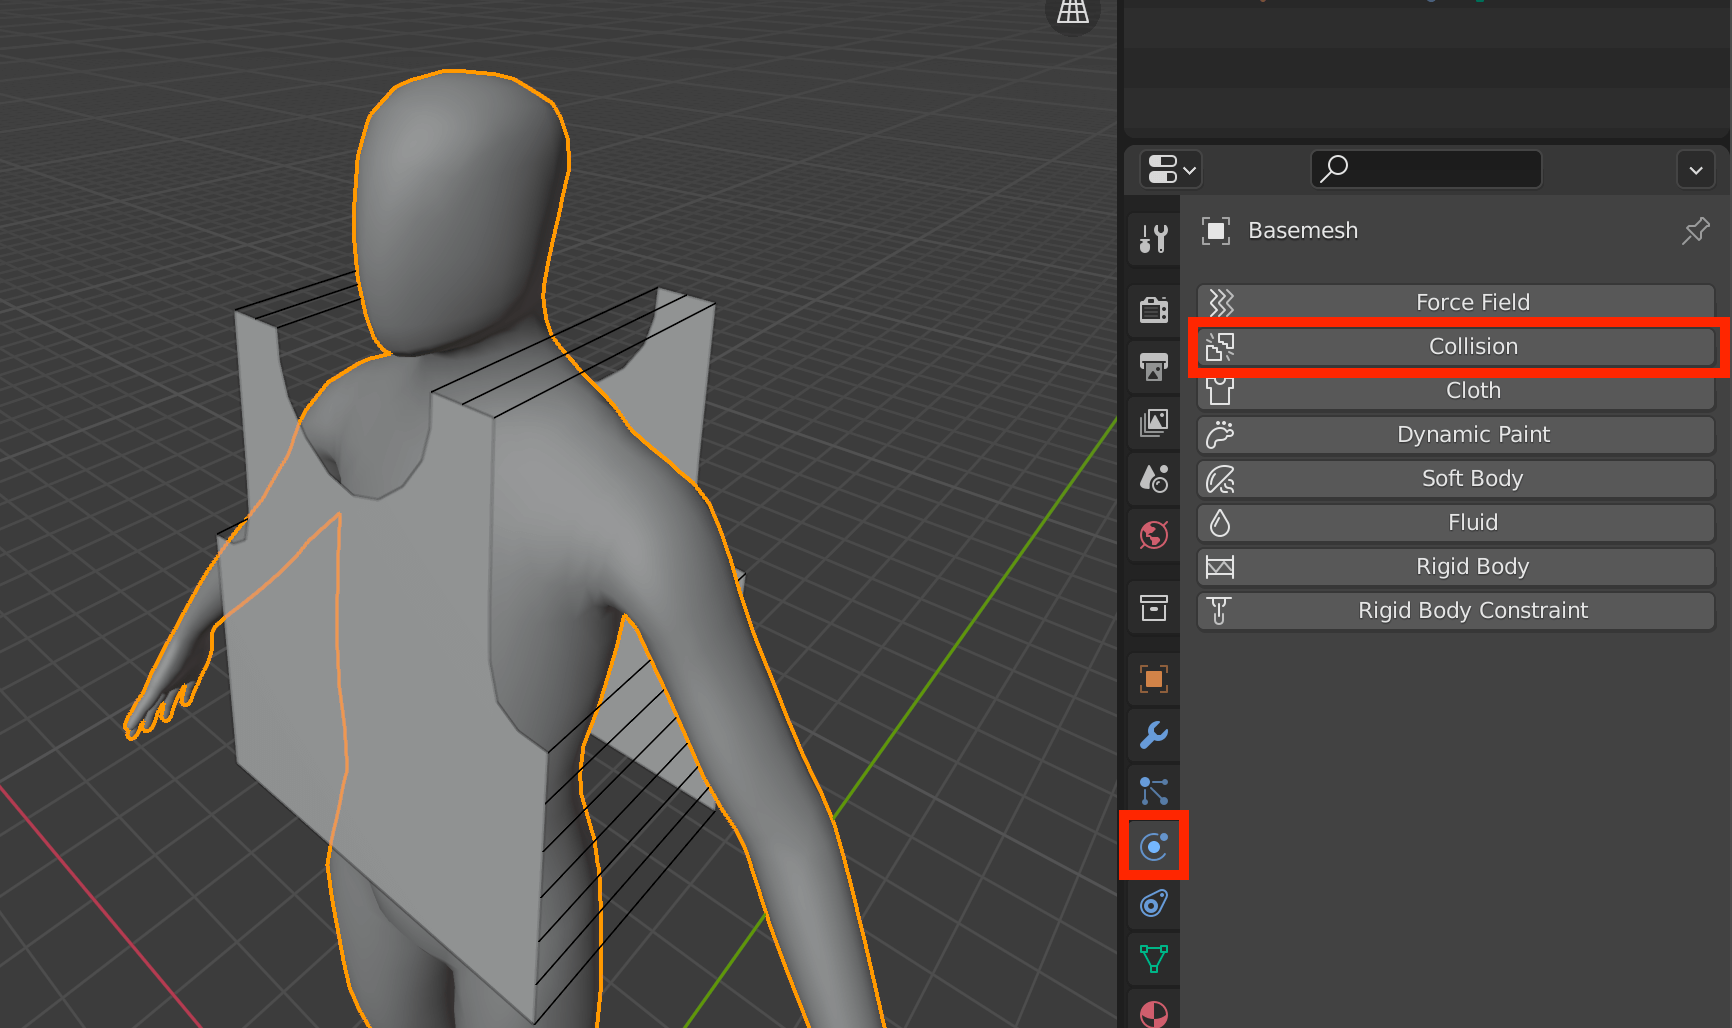
Select Collision from Physics Property
Next, select the clothing model and click on Cloth from the Physics Property menu as well.

Select Cloth from Physics Property
At the bottom of the Cloth menu, you will see a Shape item, and check Sewing.
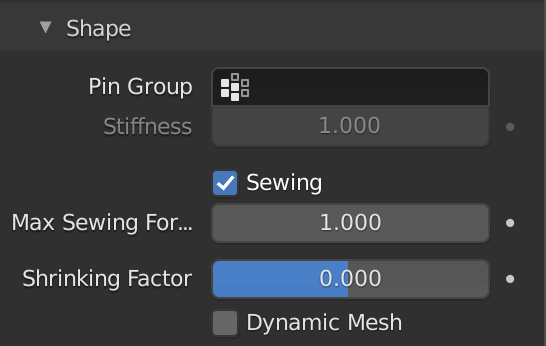
Check Sewing.
Click the Play button at the bottom of the screen to start the simulation.
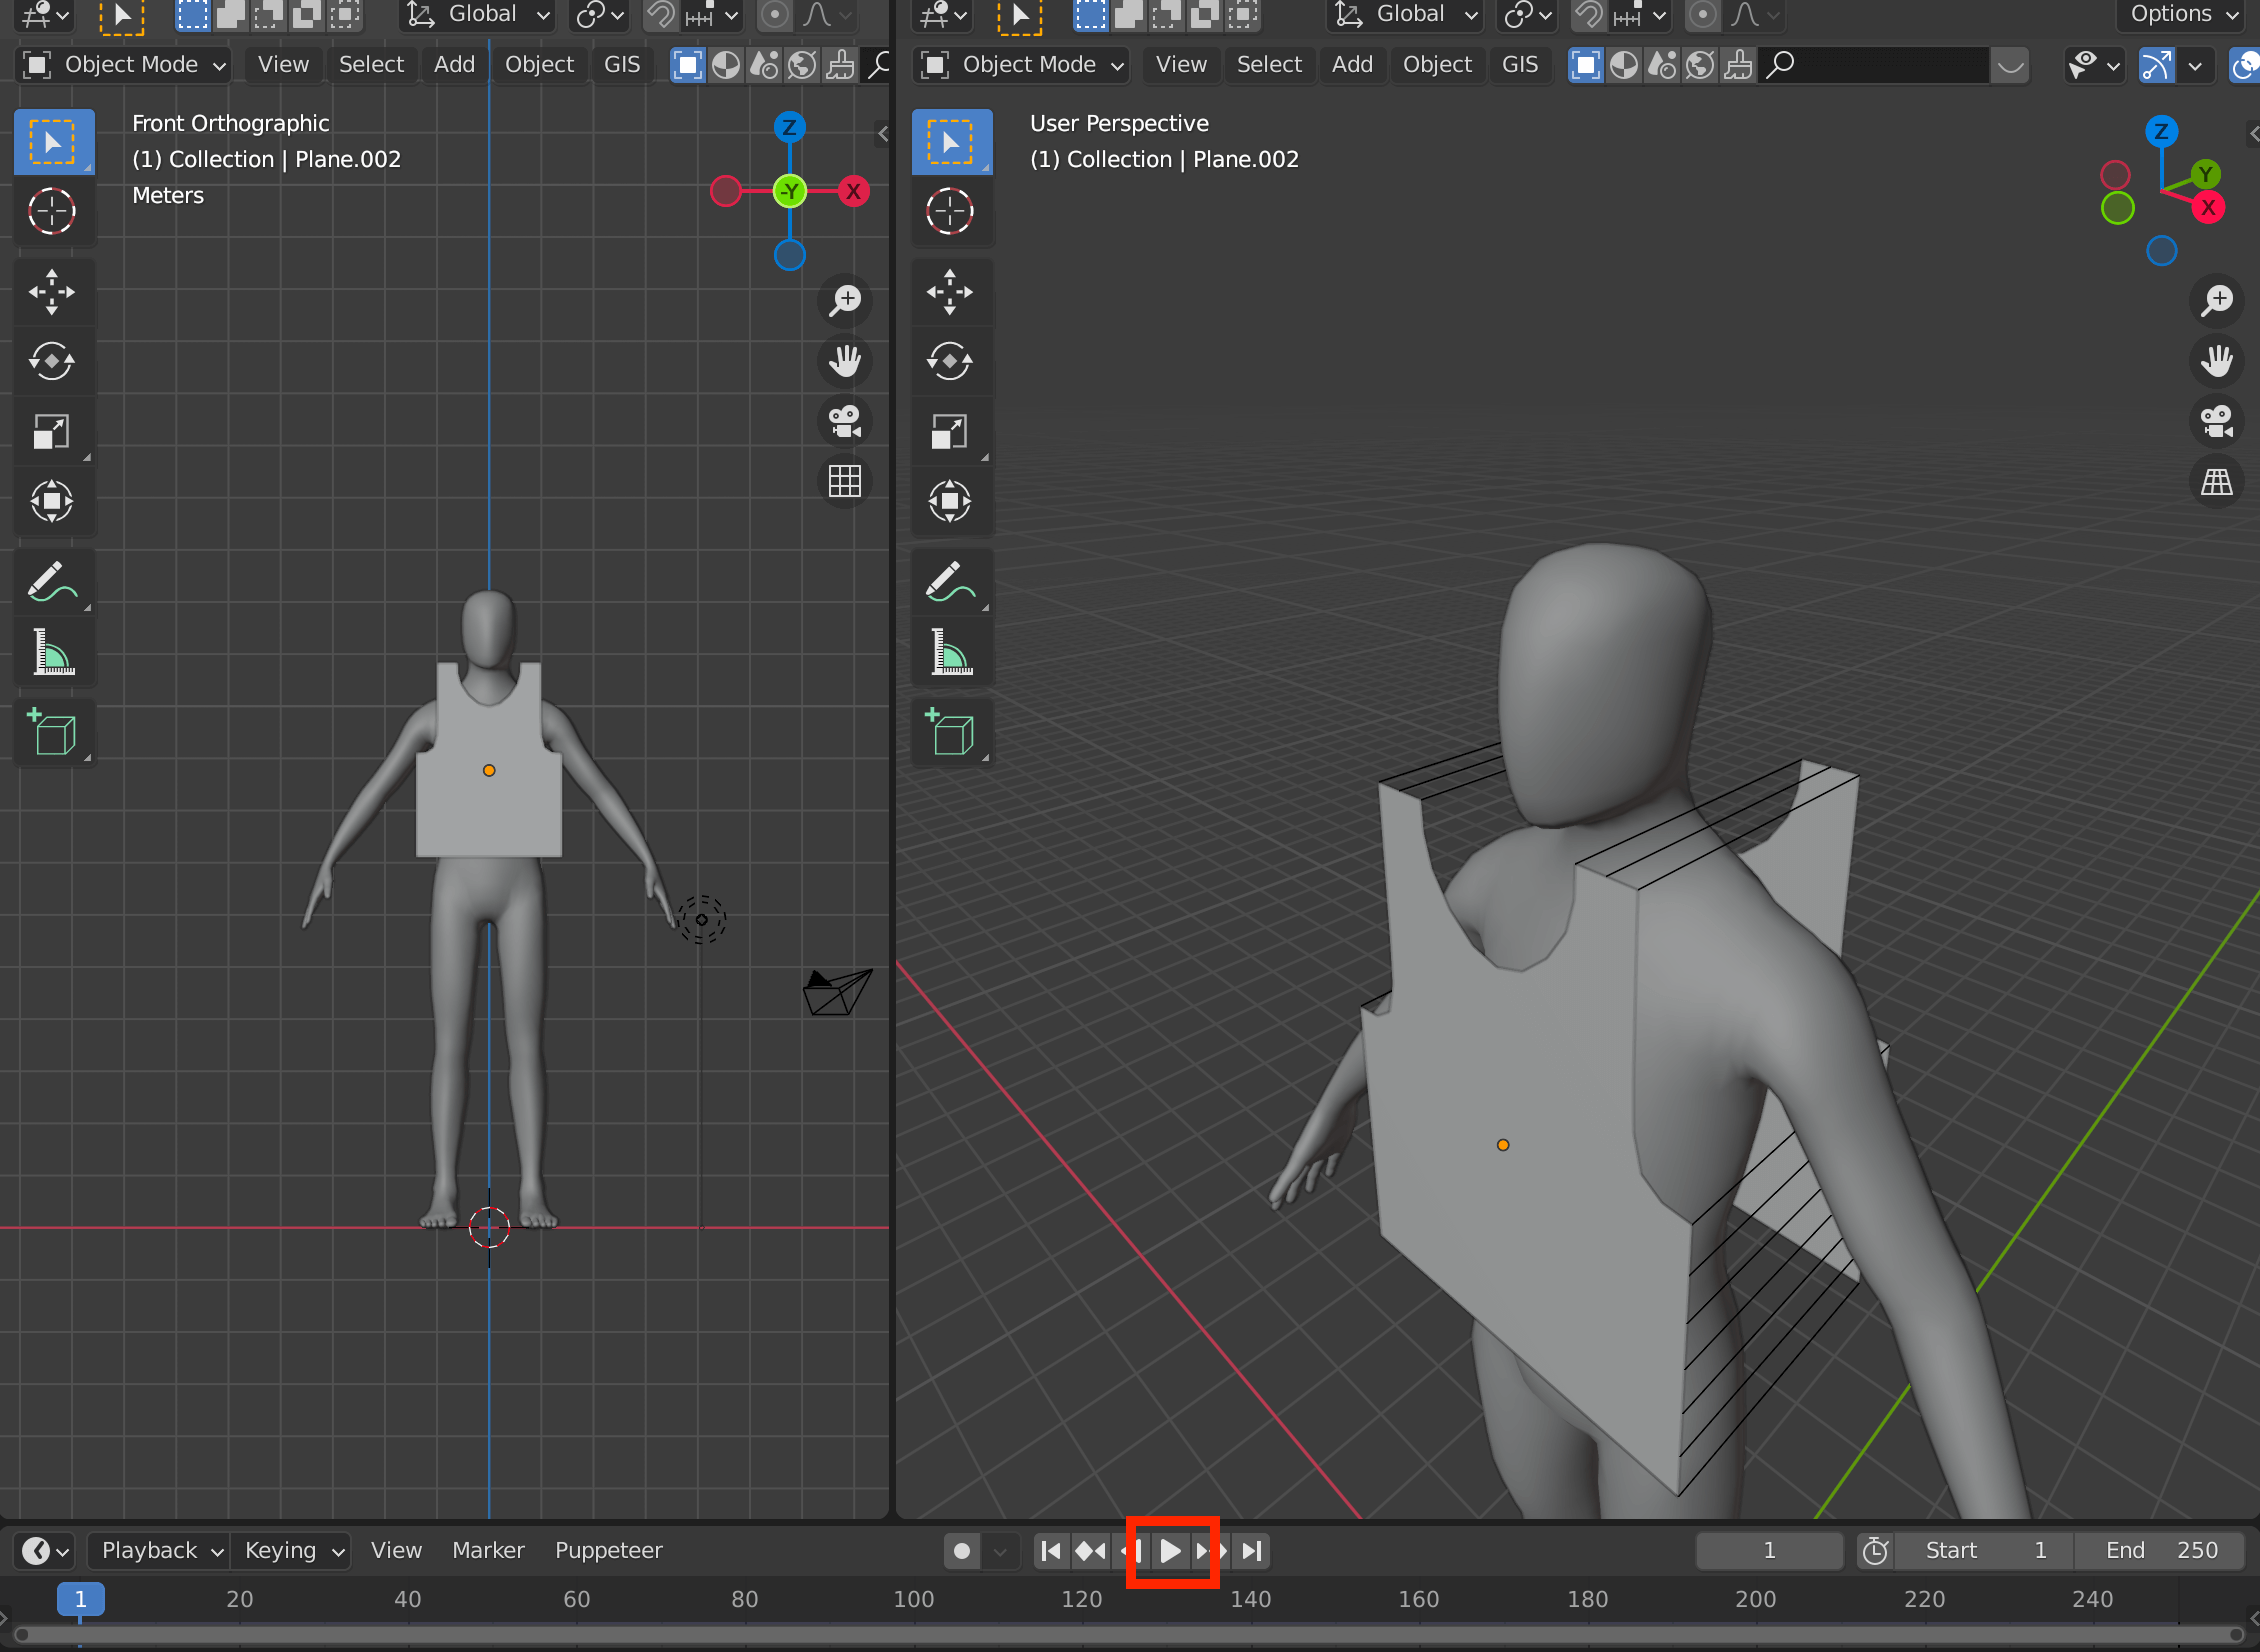
Click on the triangular play button.
If the simulation does not work
In some cases, the cloths are not sewn together and nothing happens after playback.
If the problem is caused by duplicate vertices, it is easy to solve, so try the following method.
First, switch to edit mode by pressing the [Tab] key, and then press the [Alt] key + [H] key to make sure there are no hidden ones.
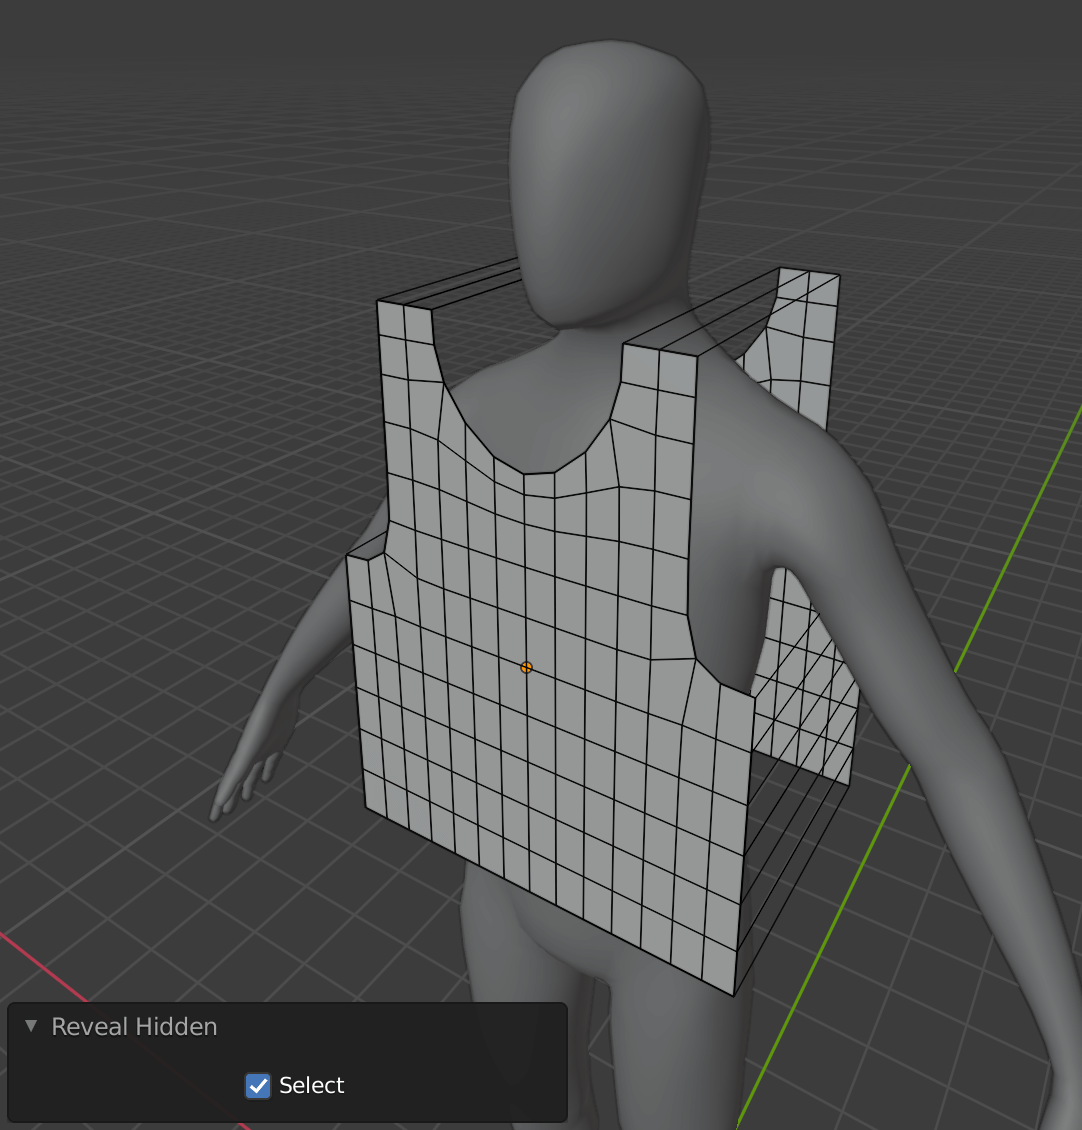
Alt key + H key
Then, select all with the [A] key.
![Select all with the [A] key](https://styly.cc/wp-content/uploads/2021/10/Screenshot-6.png)
Select all with the [A] key
Press [M] key to Merge and select By Distance.
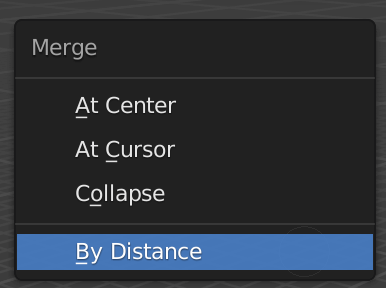
By Distance

The 56 extra vertices have been removed.
Switch to Object mode with the [Tab] key and click the Play button again, and this time the simulation will be performed correctly.

The simulation is now running.
To fix the angle of the shoulders and the width of the body, stop playback and go back to frame 1, and then edit the shape of the plane.
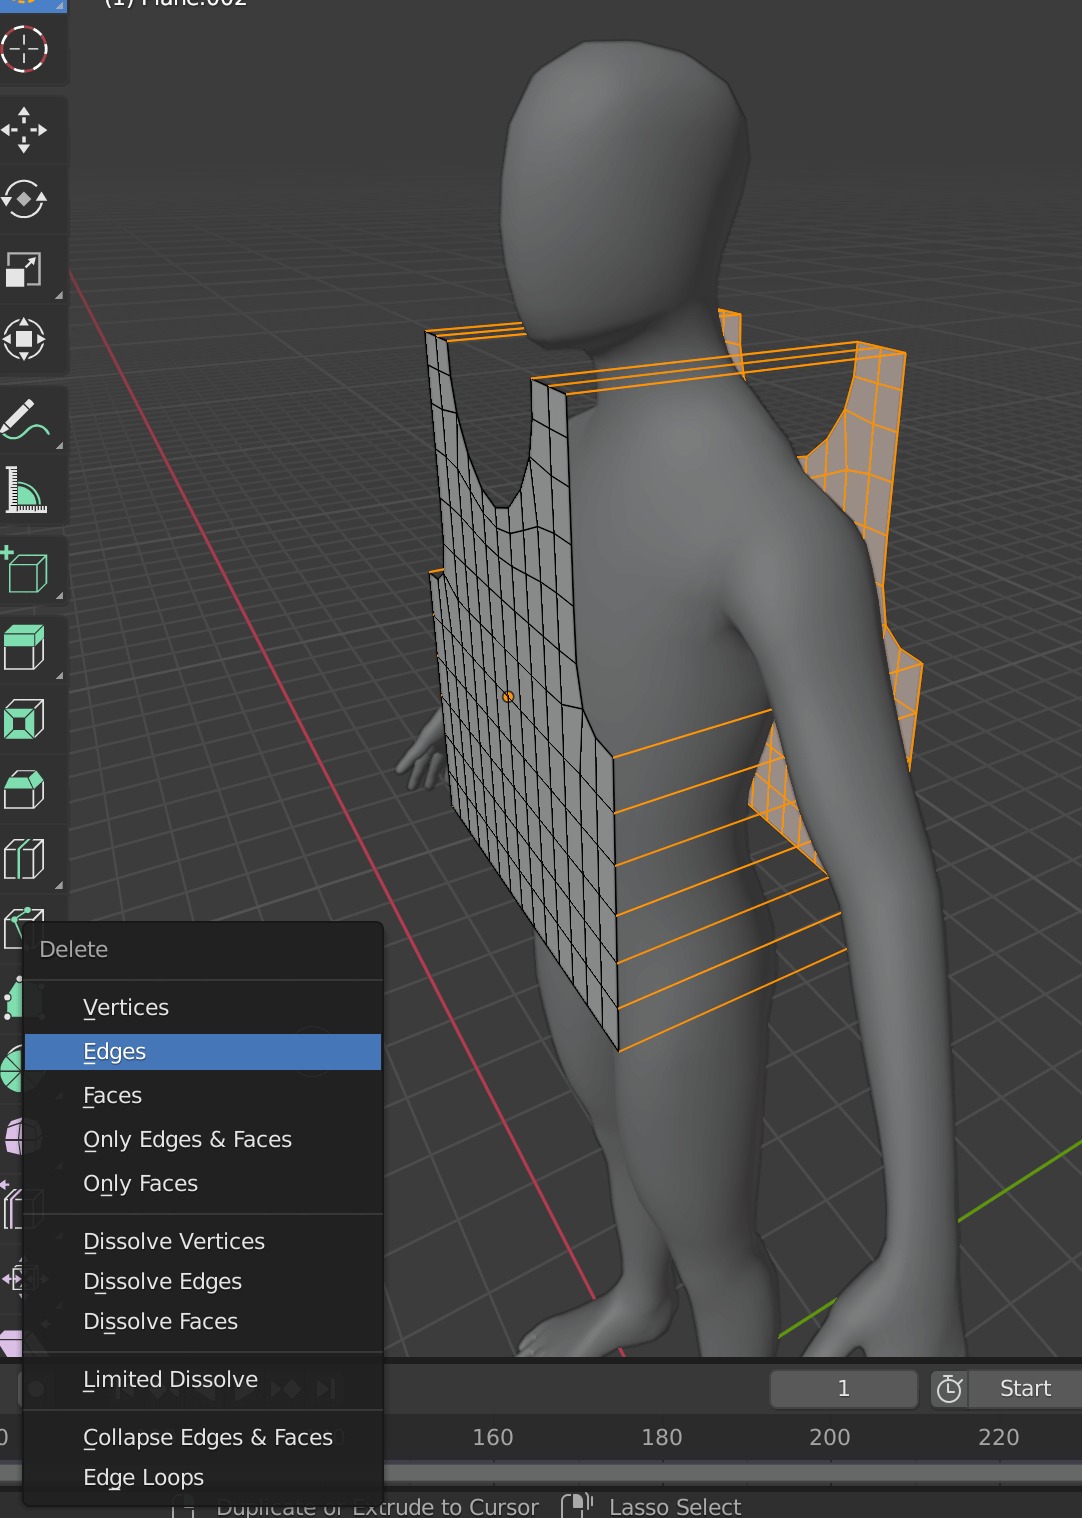
Select the edges and the back of the body and press X → Delete Edges.
Modeling a Cushion
In addition to clothes, you can easily create fabric products.
First, add a new Plane by pressing [Shift+A].
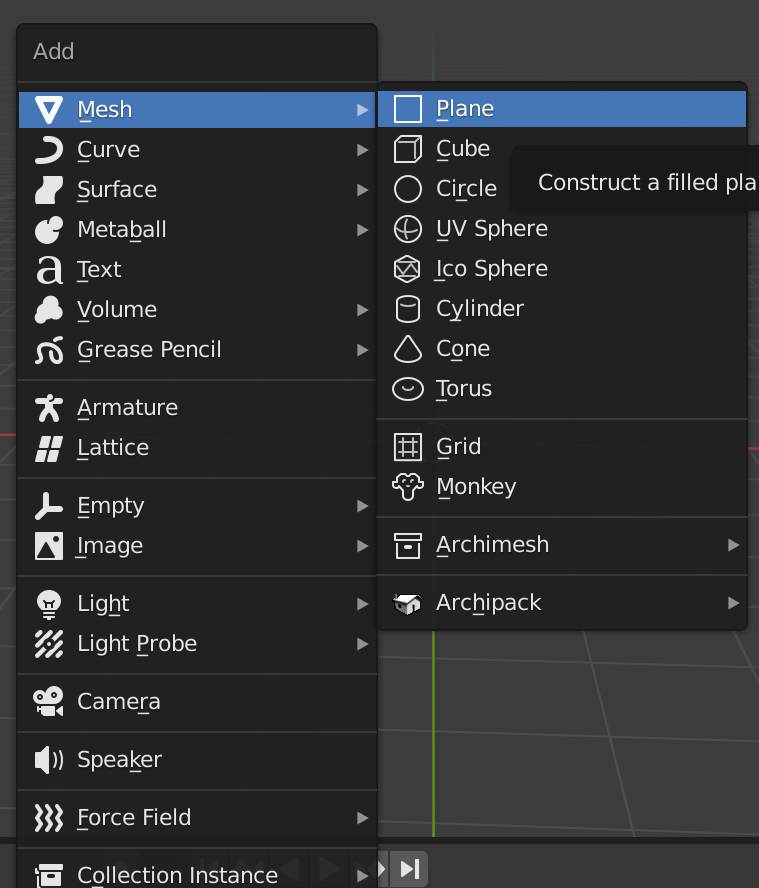
Add a new Plane
Switch to edit mode with the [Tab] key, then right-click and select Subdivide.
Subdividing a Plane with Subdivide
From the menu at the bottom left of the screen, set the Number of Cuts value to 10.
This is because 10 is the maximum number of values that can be processed simultaneously.

Set the Number of Cuts value to 10.
Then, click anywhere on the 3DView screen to confirm, and then press [A] to select all, and right-click to select Subdivide to further subdivide.
The finer the subdivision, the better the simulation will look, but be aware that it may take a long time to process and may force Blender to close itself.

Change the value again
Then press the [E] key to push it out.
A line will appear on the Z axis (i.e., the line will be pushed in the direction of the Z axis), so move the cursor and press the Enter key to confirm.
![Press the [E] key to push out and press the Enter key to confirm.](https://styly.cc/wp-content/uploads/2021/10/cushion.gif)
Press the [E] key to push out and press the Enter key to confirm.
After changing the angle of the screen so that the sides are visible, hold down the [Alt] key and click.
Make sure you can select the side or face from the top icon.
![Select while holding down the [Alt] key](https://styly.cc/wp-content/uploads/2021/10/select.gif)
Select while holding down the [Alt] key
Then select [X] key -> Only Faces and delete it.
![[X] key -> Only Faces](https://styly.cc/wp-content/uploads/2021/10/Screenshot-7.png)
[X] key -> Only Faces
Cloth simulate
Press [Tab] key to switch to object mode.
Select “Cloth” from the physical properties on the right side.
![Select cloth from the physical properties while in object mode with the [Tab] key.](https://styly.cc/wp-content/uploads/2021/10/Screenshot-355.png)
Select cloth from the physical properties while in object mode with the [Tab] key.
Then set the settings as shown below.
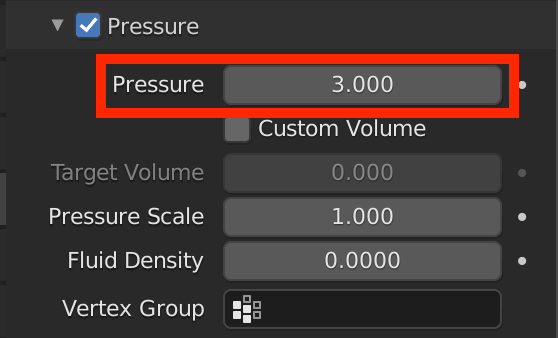
Check the Pressure checkbox and change the value to 3.
Pressure is a necessary setting when simulating objects filled with air, such as balloons, and the larger the value, the greater the air pressure.
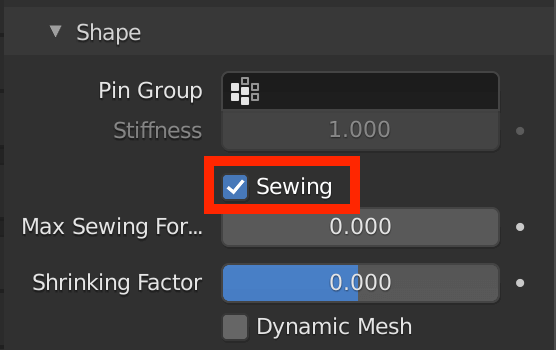
Check the Sewing checkbox under Shape.
Sewing is applied when sewing two pieces of cloth together.
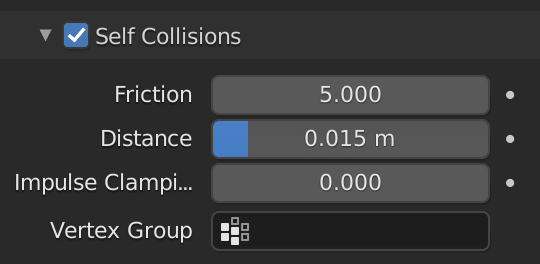
Check the Self Collisions checkbox.
If there is a non-fabric model, collisions will be applied to it, but if there is only a fabric model, as in this case, Self Collisions can be applied to prevent the model itself from being penetrated.
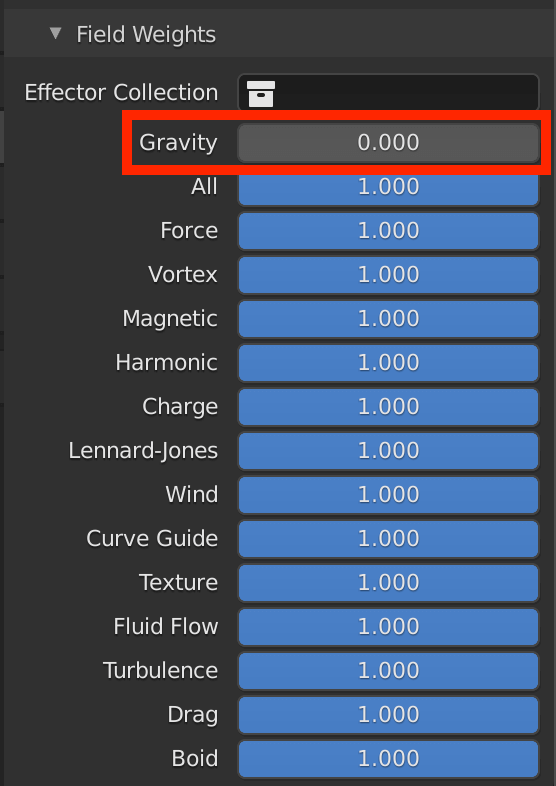
Set Gravity to 0
Gravity is the force of gravity.
If you set this to 0 to make the model weightless, there is no need to worry about it falling or flying away.
When you have completed all the settings, click the Play button.

Playback will simulate the model.
When you are done, stop playback and apply cloth simulation.
With the keyframe of the desired shape selected, click on the “v mark” from the modifier property Cloth and select Apply.
You can make the keyframe keep its shape even if you move it.

Select Apply from v and apply.
How to upload to STYLY
Let’s upload your 3D model to STYLY.
Create a STYLY account
How to create a STYLY account

How to upload 3D models to STYLY

How to upload from Unity to STYLY

You can use STYLY FORUM to solve the problem. STYLY FORUM is a place where people can discuss a service or technical issue on STYLY, or provide bug reports on STYLY.
https://en.forum.styly.cc/support/discussions