Introduction
This series is created for beginners with little to no experience in modeling. We will go over the basics of Blender, create a simple 3D model, and upload it to STYLY.
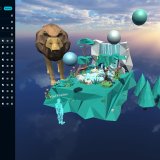
In this article, we will teach you how to use Blender by creating the models below. This is a simple model that can be created by just moving and scaling objects.
There are many shortcut keys to learn in Blender, but once you have them in your head, modeling will become much easier. We highly recommend memorizing these shortcuts. Good luck!
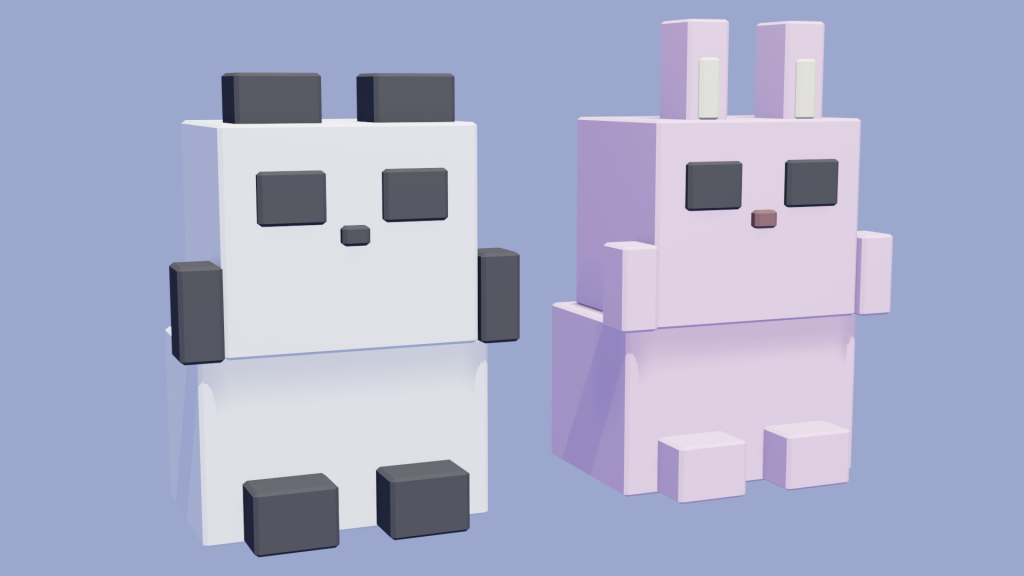
Completed Render
Installation and Language Settings
How to Download Blender
- Go to the Blender download page.
- Download the zip file. From the black pulldown menu, select the version suited for your environment.
- Extract the zip file and open the installation package.
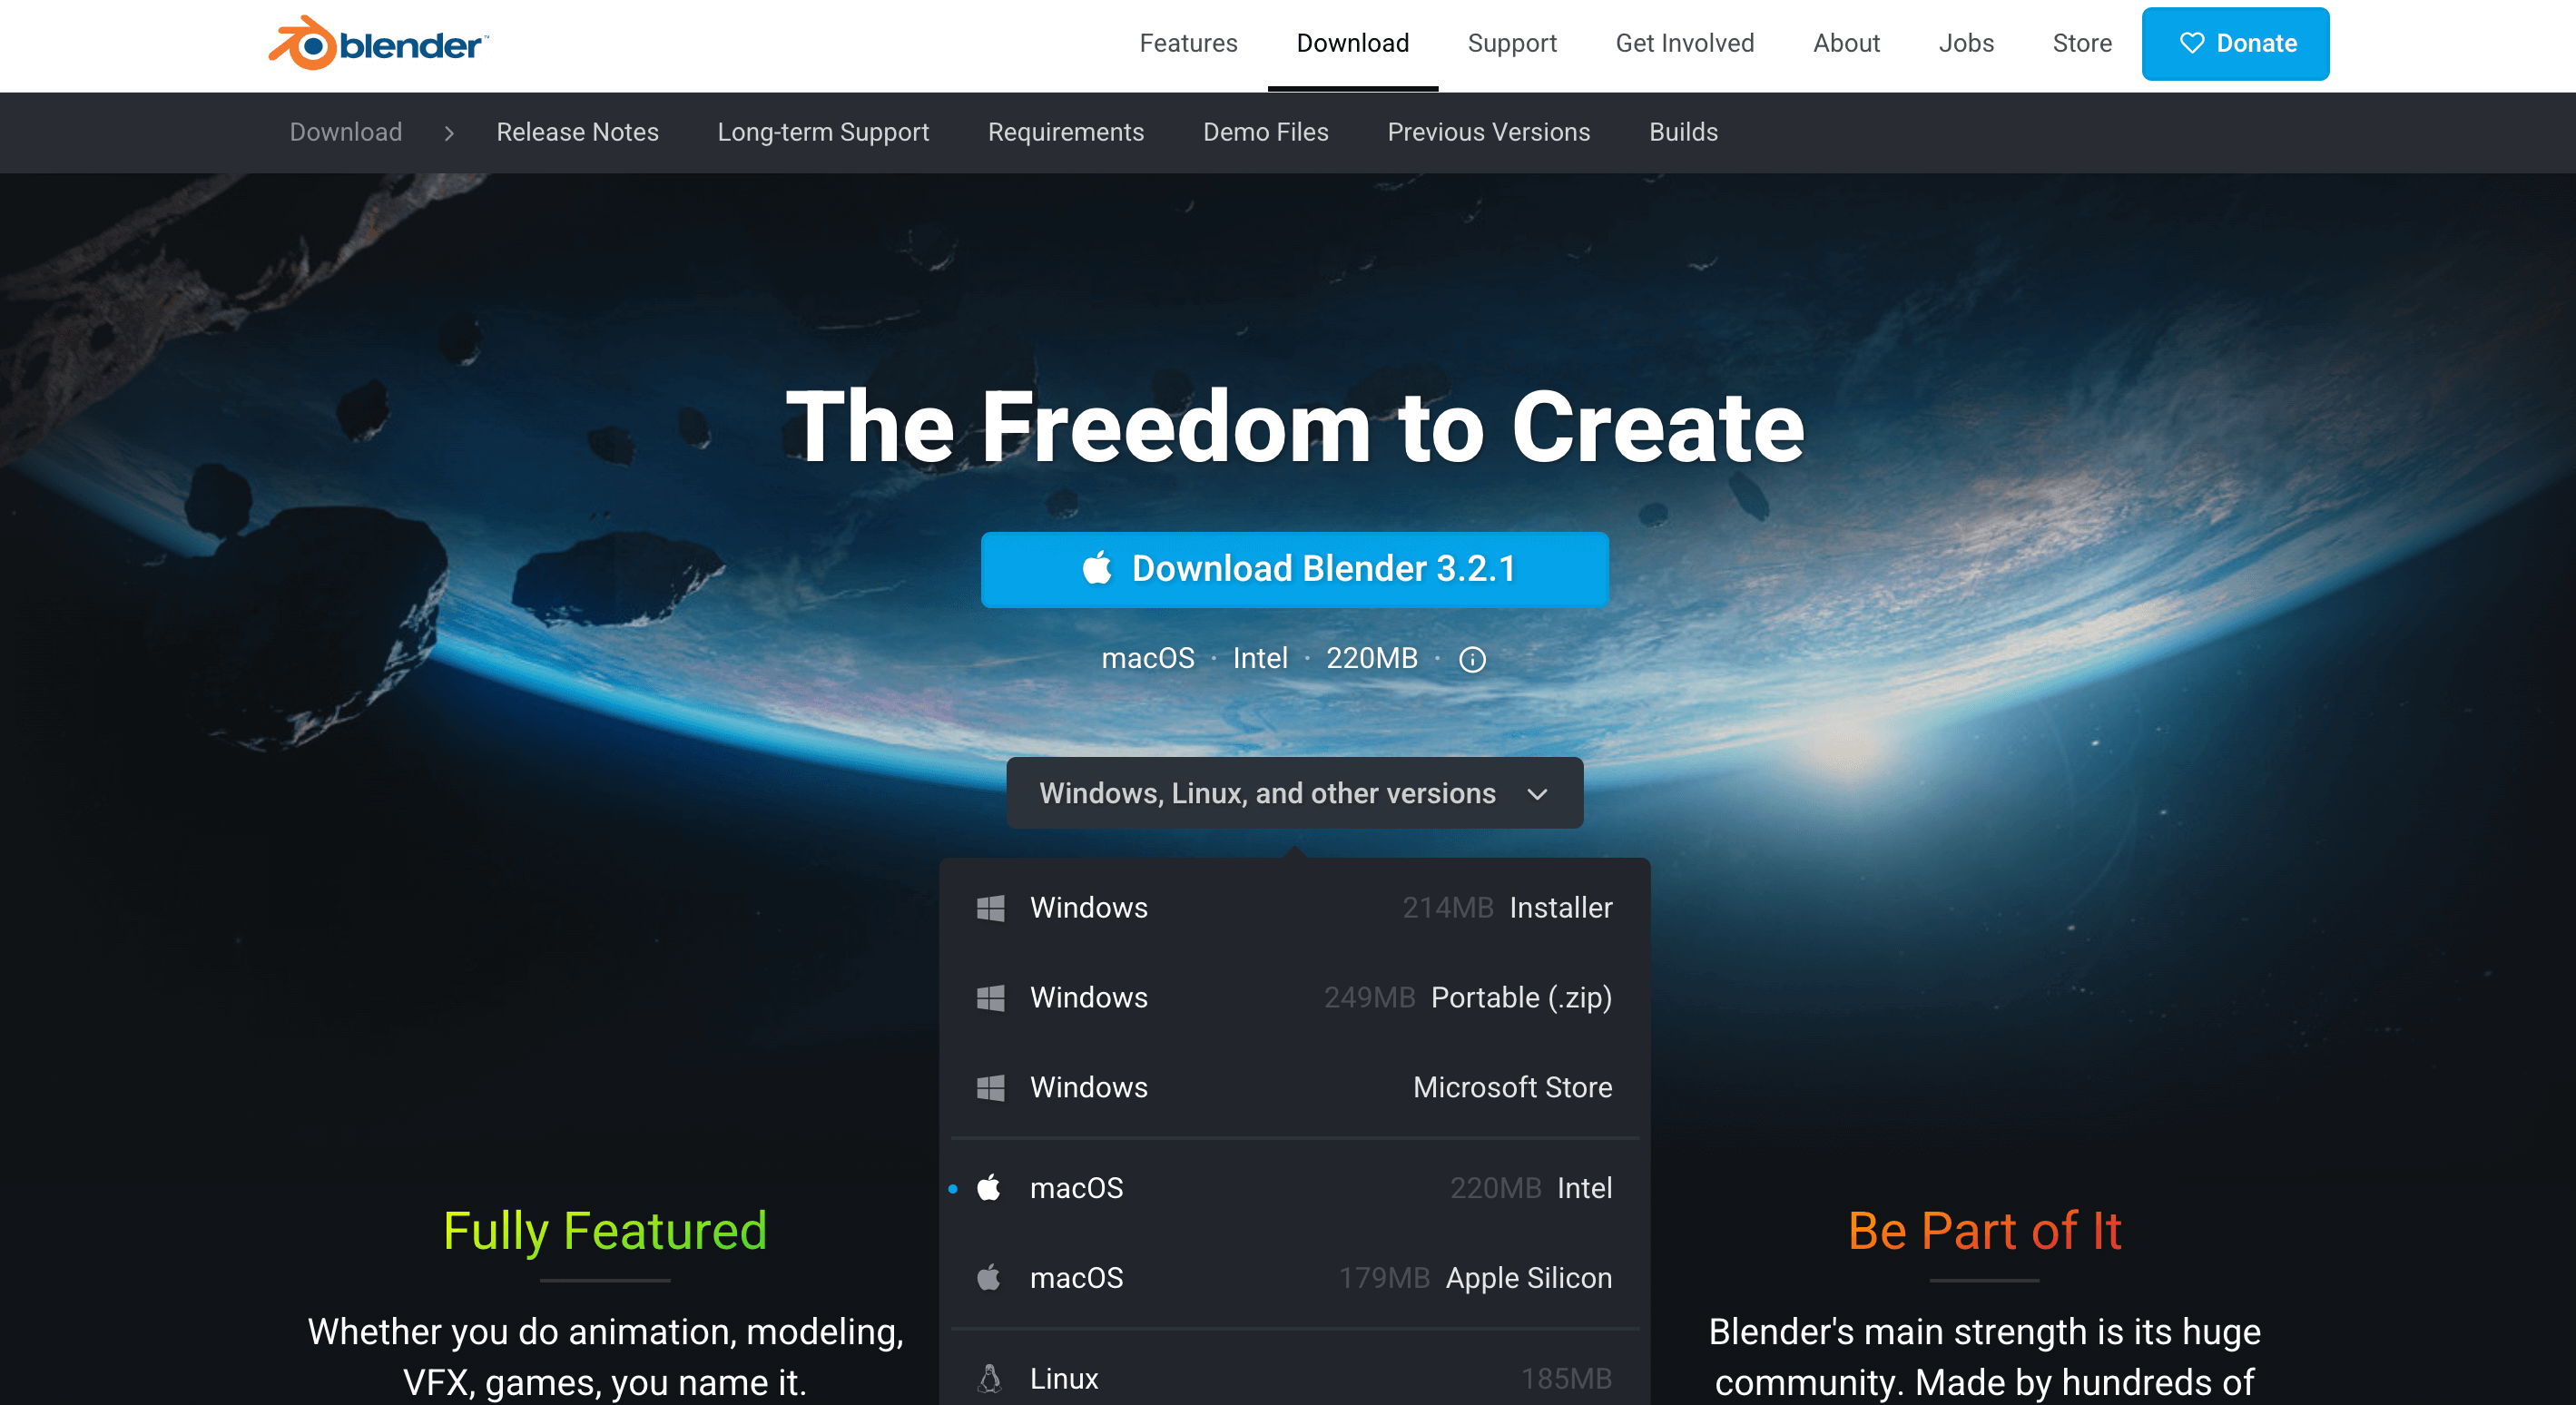
Blender Website
Japanese Language Settings
If you want to use Blender in Japanese, click the icon at the top left and select Preferences.
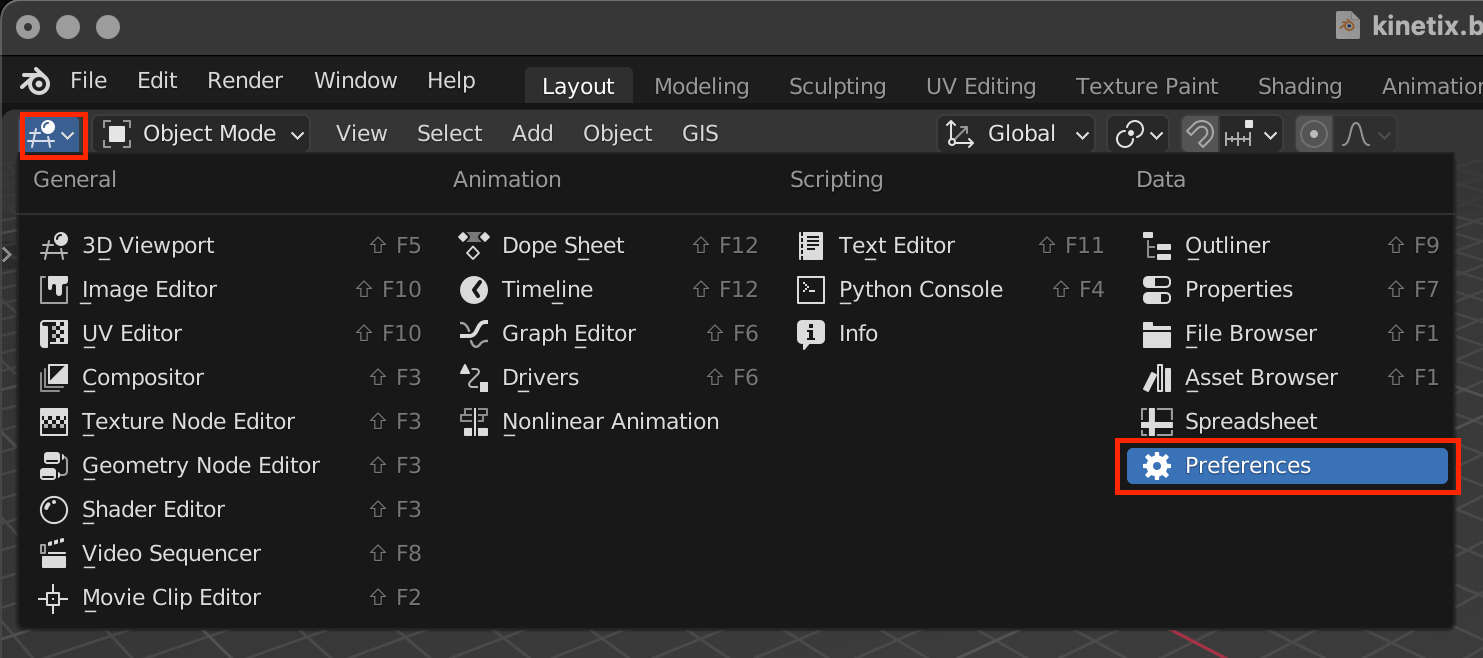
Preferences
Select Interface at the top of the menu on the left, then select Japanese from the Language menu at the center of the screen.
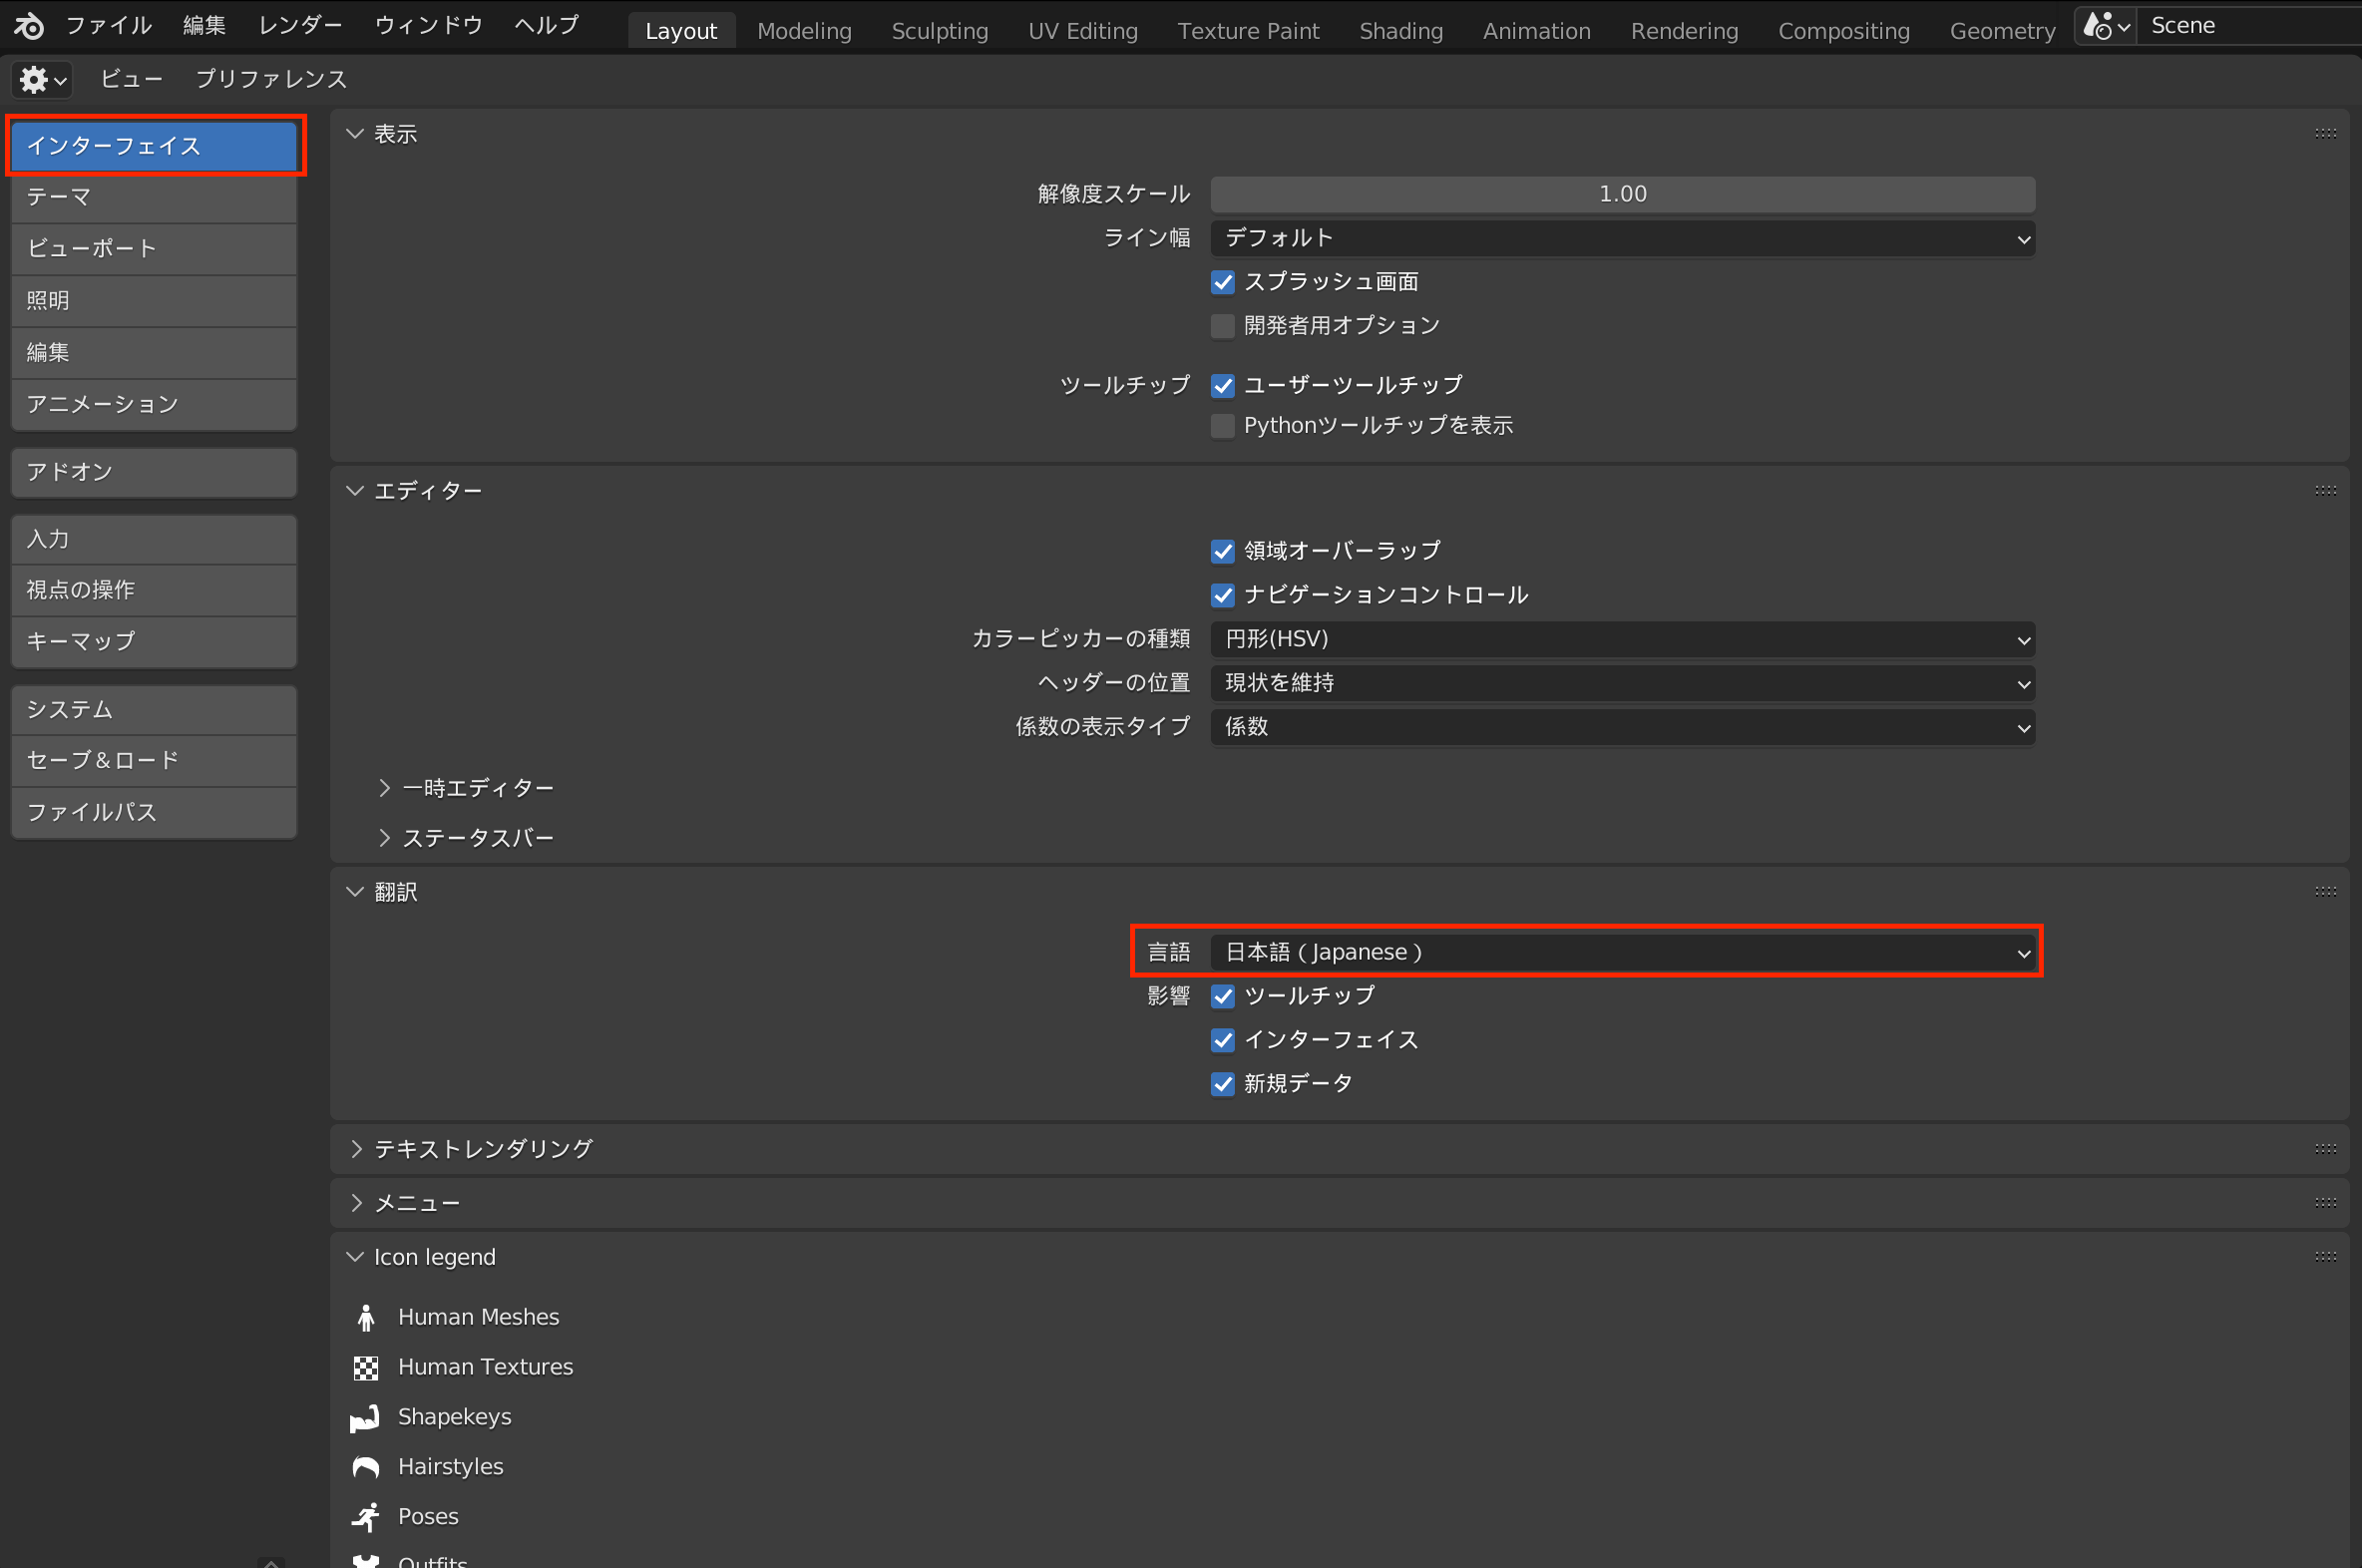
Language Settings
* This article will be written using the English interface.
Practice Using Blender: Shifting Your Viewpoint
When you open Blender, you will see the following screen:
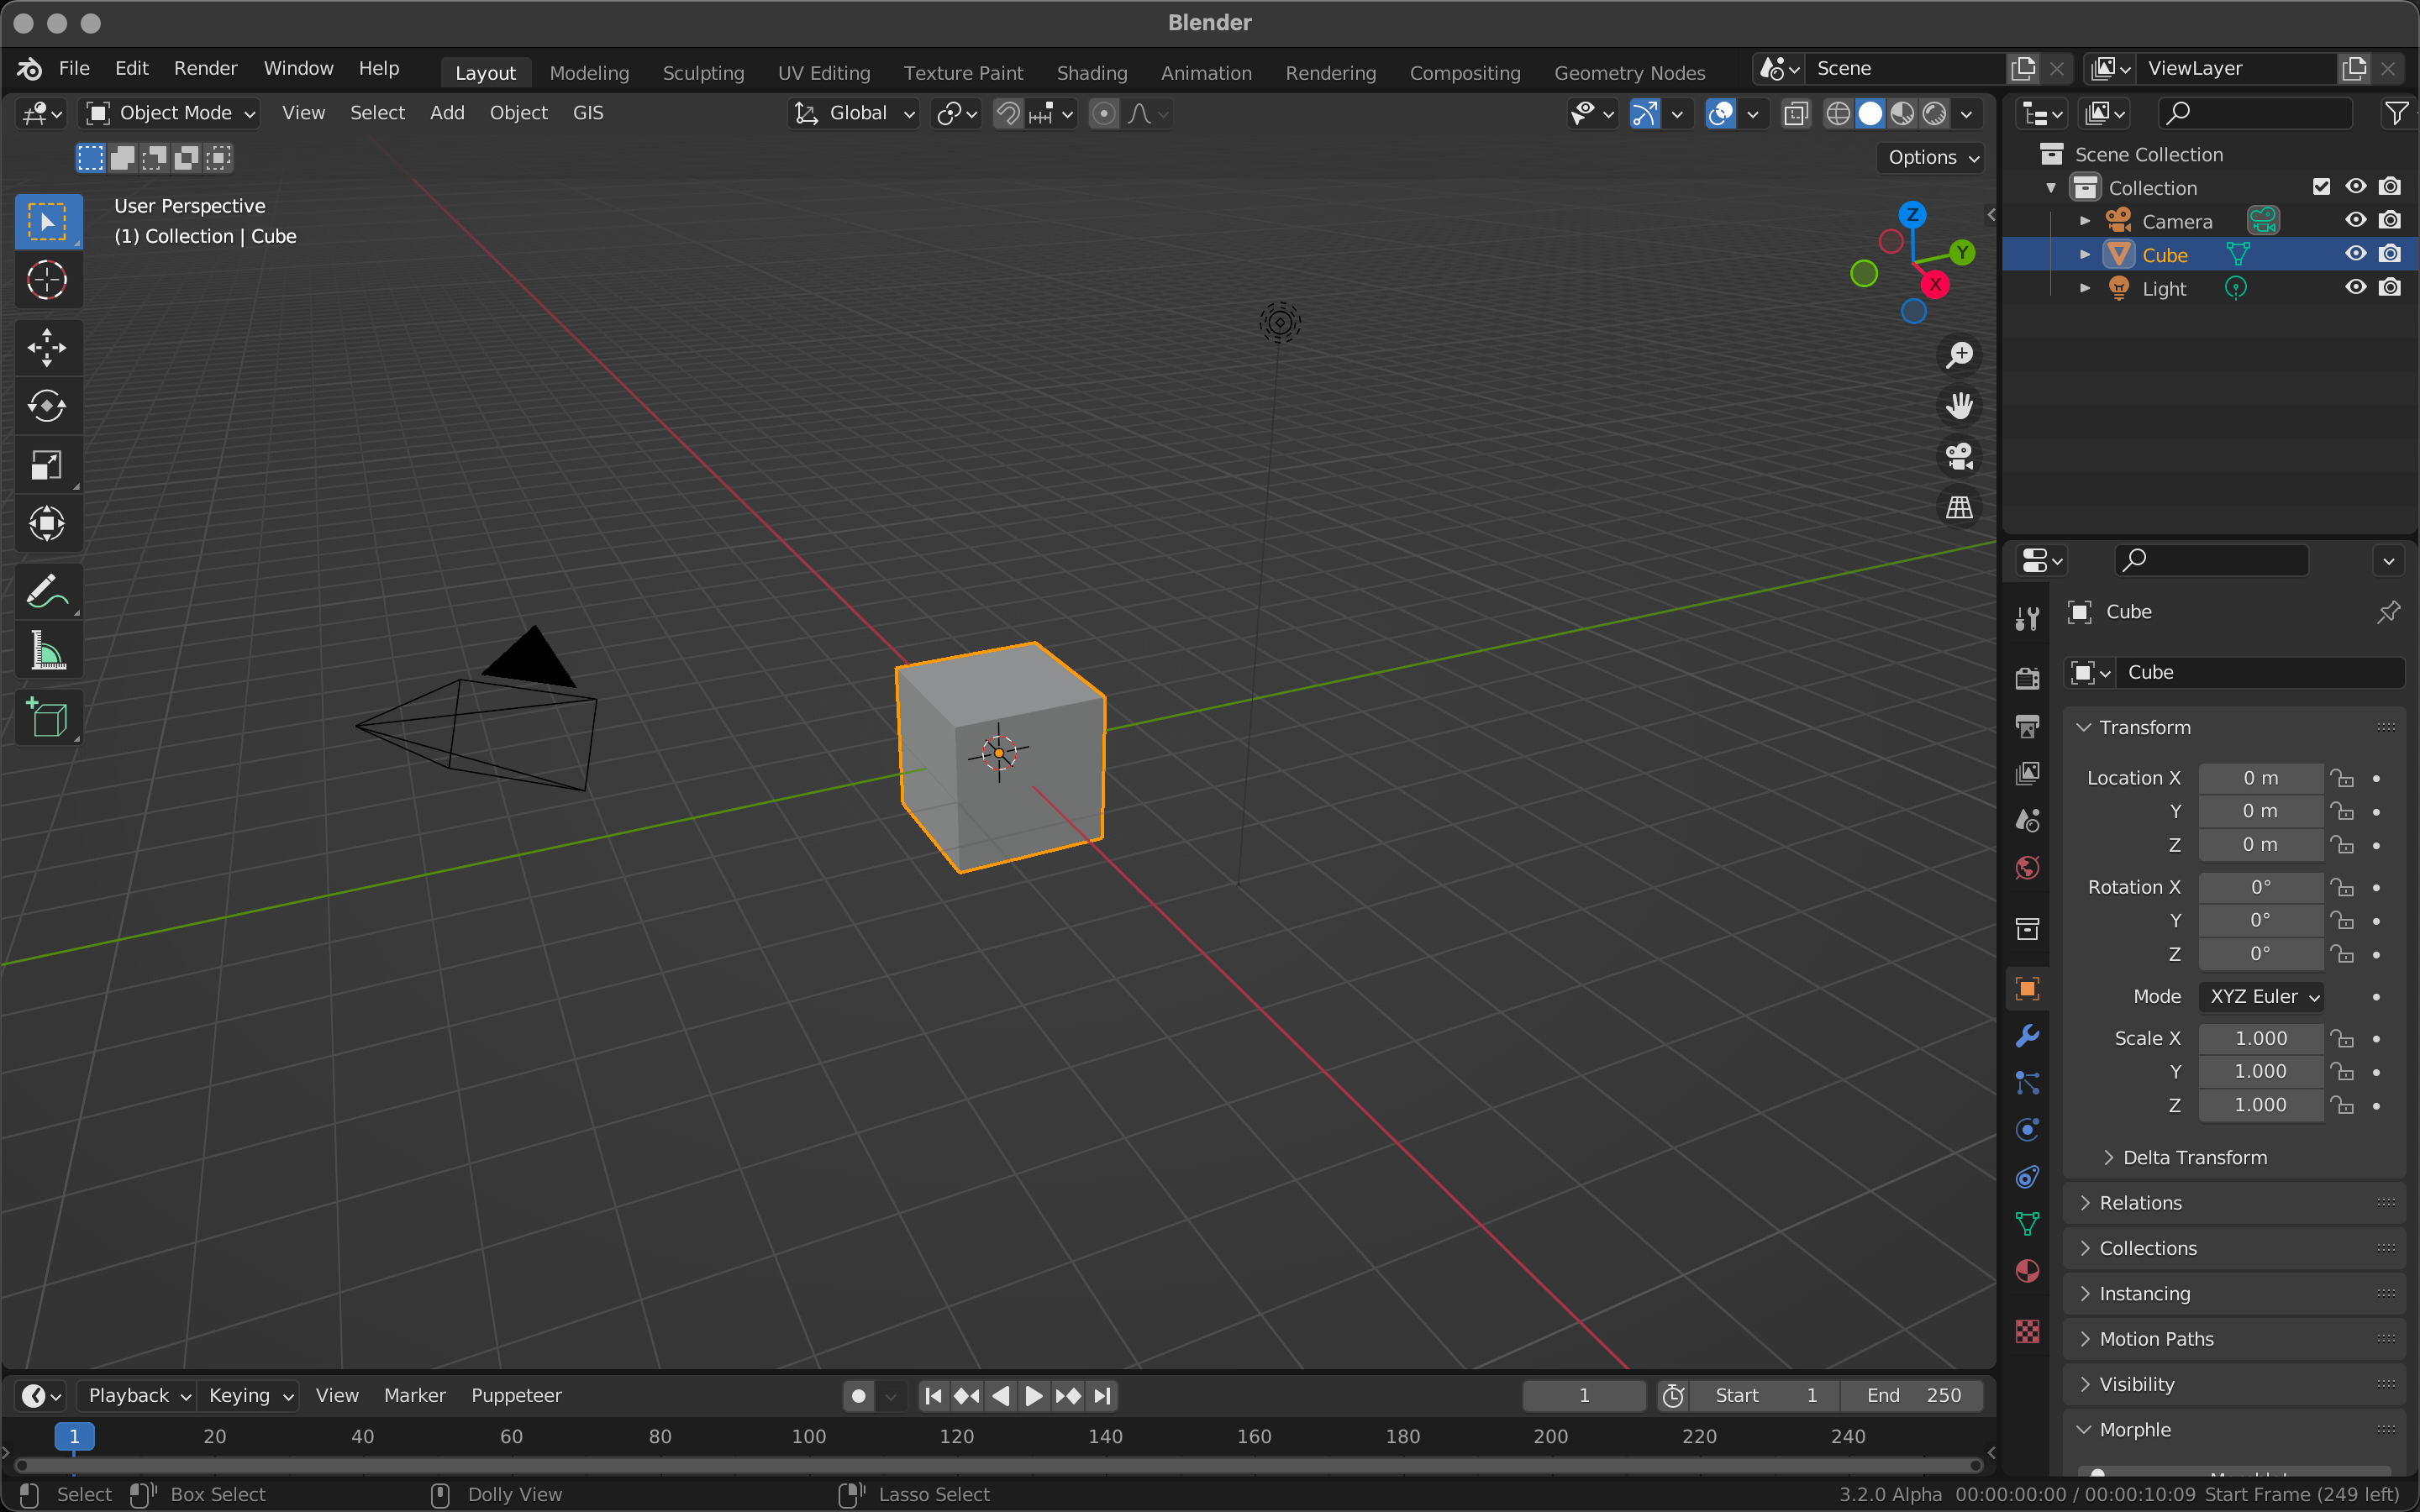
Blender Viewport
First, we will learn how to navigate Blender by shifting your viewpoint. We recommend having a mouse ready for this project, as Blender is easier to use with a mouse.
There are three ways to change your viewpoint.
- Move the mouse while holding down the wheel to rotate the viewpoint around the selected object.
- Scroll the wheel up and down to zoom in and out.
- Move the mouse while holding down [Shift] and the mouse wheel to shift the viewport to a parallel position.
Practice Using Blender: Selecting an Object
Next, we will explain how to select an object.
Blender versions 2.8 and onwards now allow users to select an object by left-clicking.
When you select an object, the outline of the selected object will become orange.
Practice Using Blender: Moving an Object
After selecting an object, click the Move tool in the Toolbar menu on the left to bring up three arrows.
The shortcut to toggle this menu is [T].
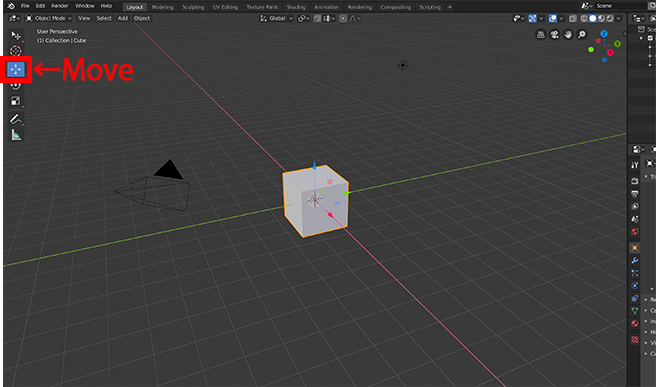
Move Tool Icon
The arrows are red=x-axis→, green=y-axis, and blue=z-axis. You can move the objects on each axis by selecting and dragging the arrows.
You can also move the object by pressing [G] (G for Grab). To move only on the X axis, press [G] followed by [X]. Similarly, if you want to move only on the Y axis, press [G] [Y]. If you want to move only on the Z axis, press [G] [Z].
To stop moving the object, left-click at the desired position.
Practice Using Blender: Rotating an Object
Use the Rotate tool located below the Move tool to rotate your object.
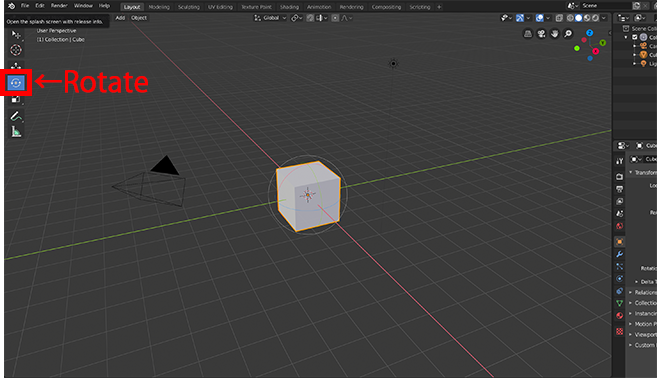
Rotate Tool Icon
The shortcut key for rotation is [R] (R for Rotate – these abbreviations should be obvious by now!).
To rotate the object around the X axis, press [R] followed by [X]. Similarly, to rotate around the Y axis, press [R] [Y]. For the Z axis, press [R] [Z]. To stop rotating the object, left-click at the desired position.
Practice Using Blender: Scaling an Object
Next is scaling. The icon below Rotate is Scale.
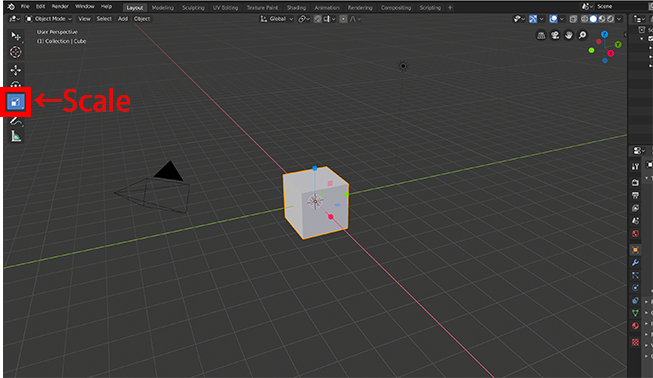
Scale Tool Icon
The shortcut key for scaling is [S] (S for Scale).
To scale on only the X axis, press [S] followed by [X]. Similarly, to scale on the Y axis, press [S] [Y], and for the Z axis, press [S] [Z]. To stop scaling the object, left-click at the desired size.
Workspaces
You can switch between workspaces from the tabs shown below:
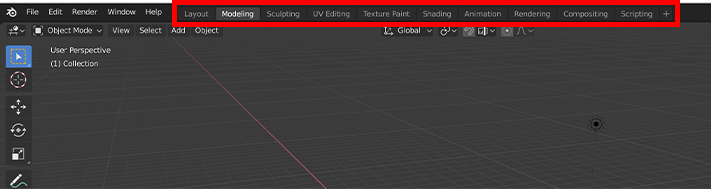
Workspaces Tab
Each workspace looks like this:

The Default Workspaces
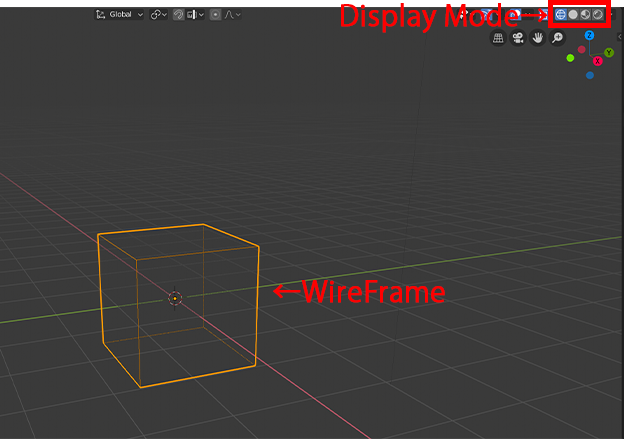
Display Modes
The display modes are the four spheres in the upper right corner. They are, from left to right: Wireframe view, Solid view, Material Preview view, and Rendered view.
In Solid view, materials and lighting are not shown in the viewport, whereas in Material Preview, you can preview the lights and materials.
We recommend modeling in Wireframe or Solid view, and then adjusting lights and materials in the other display modes.
Changing Display Modes
The shortcut key [Z] will open a pie menu to switch between display modes.
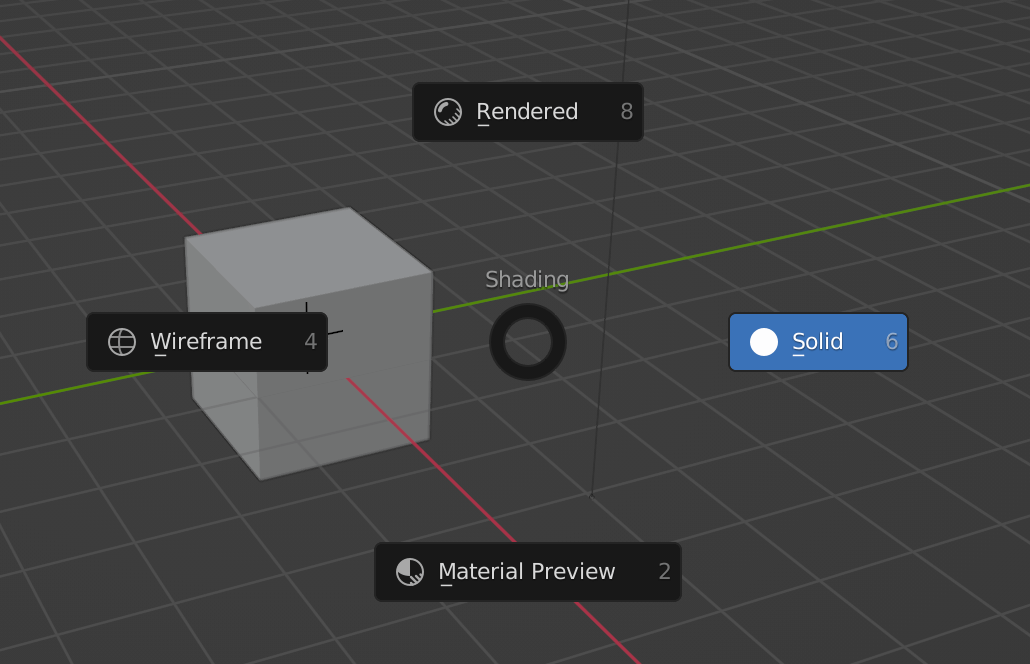
Press [Z] to switch between Display Modes.
Changing Viewpoints
If you want to view an object from the side or front, you can change the viewpoint from the Orbit gizmo at the top right of the editor.
Clicking the X,Y, and Z axis labels will align the view to that axis.
Changing Viewpoints
Alternatively, you can change viewports by selecting View > Viewpoint in the top menu.
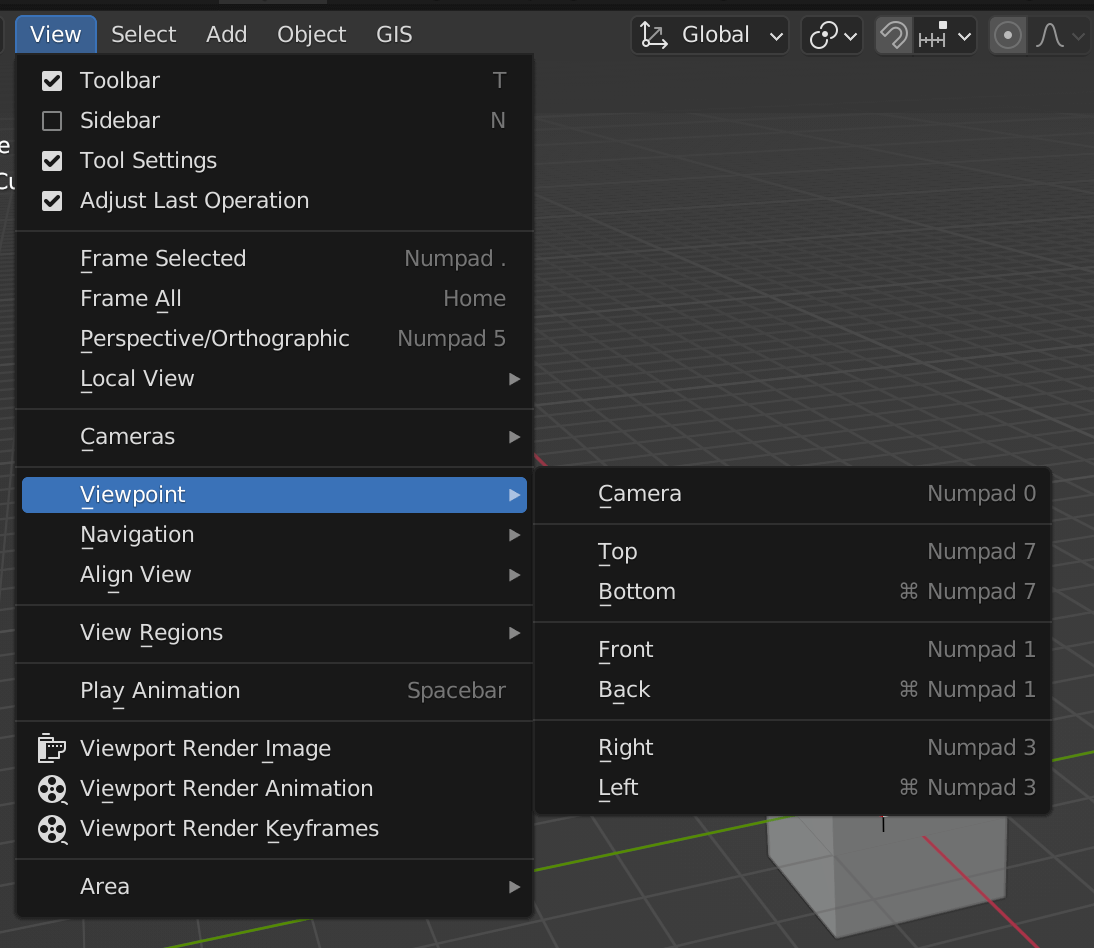
Viewpoint
Let’s Try Modeling
Now that we’ve gone over the basics of Blender, we can start creating a simple panda model.
Blender has a lot of shortcut keys. They’re hard to master, but we’ll give you a simple breakdown so you can get used to them one by one.
To create a panda model, we will follow these three steps:
- Modeling the panda
- Adding color
- Refining the panda model
パンダのモデリングModeling the Panda
For this example, we will use the default cube for our base model.
Default Cube
If you don’t want to use the default cube, select the cube and delete it by pressing [X] and clicking Delete.
To add other objects, select Add > Mesh in the upper left menu. You can also press [Shift]+[A] to bring up the same menu.
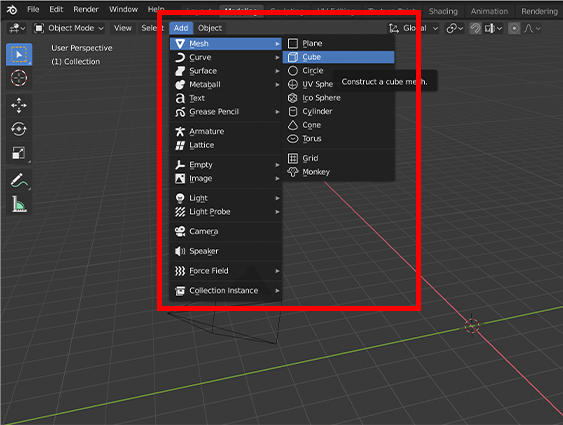
Add Mesh > Cube (from the top menu)
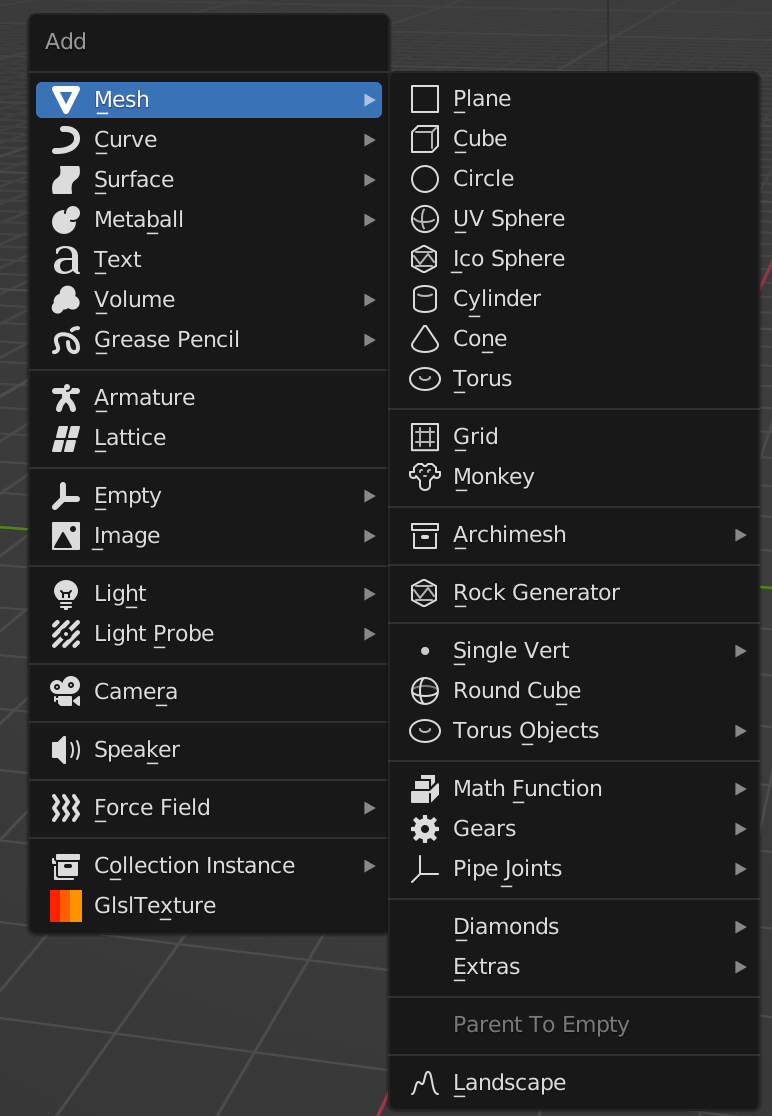
Add Mesh > Cube (from shortcut keys [Shift] + [A])
We will use this cube to make the panda’s head.
Scale it up or down to get the head shape you want. Make sure to check the shape from all directions.
When you are finished adjusting, select the cube and press [Shift]+[D] to duplicate it.
After pressing [Shift]+[D], press [X] to move the duplicated object in the X axis direction, [Y] for the Y axis direction, or [Z] for the Z axis. Move and scale the duplicated cube so that it’s in the position and shape of the panda’s body.
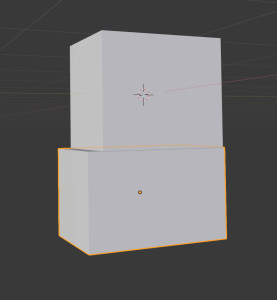
The Panda’s Body
Repeating the process above, make a panda with ears, limbs, eyes, and a nose by duplicating the cube and moving/scaling it to the desired position. We won’t limit your creativity—you could also make a bunny-panda or a cat-panda. Create your own original “panda” any way you like.
Right now, everything is still a separate object. But you can leave them as is for now because we will combine them into a single object later on.
You can also use the Sidebar menu at the top right to enter values for location, rotation, and scale of the panda. If the menu isn’t shown, click on the [<] arrow or press the shortcut key [N] to toggle the Sidebar.
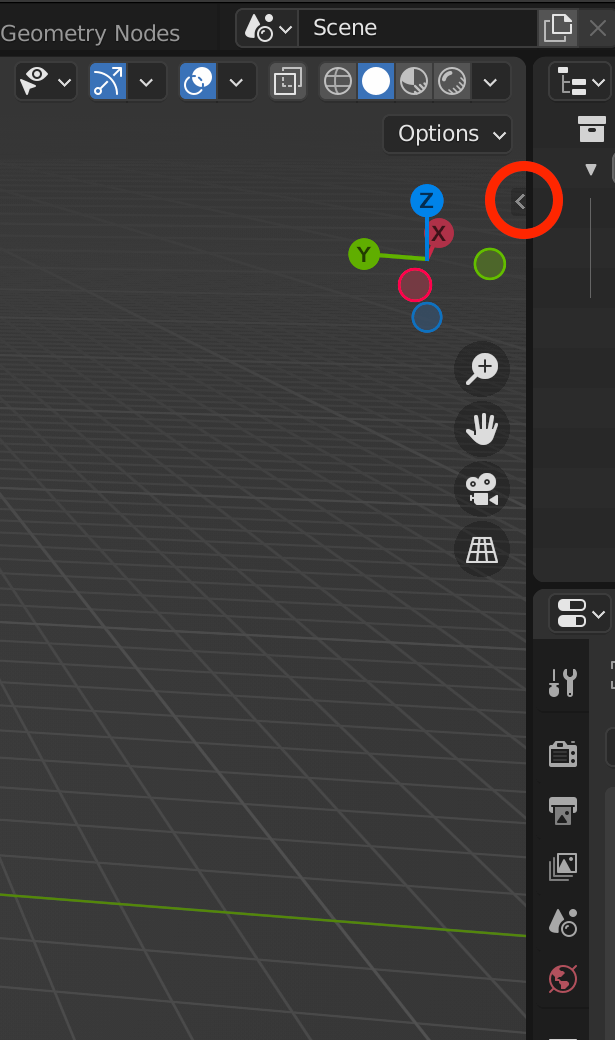
Clicking the < arrow will display the Sidebar menu.
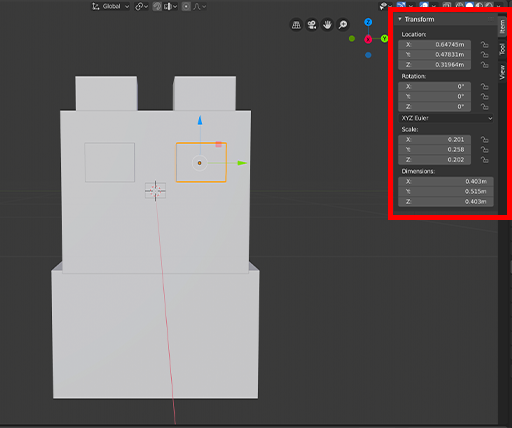
Adjust the location and scale by tweaking the values.
Adding Color
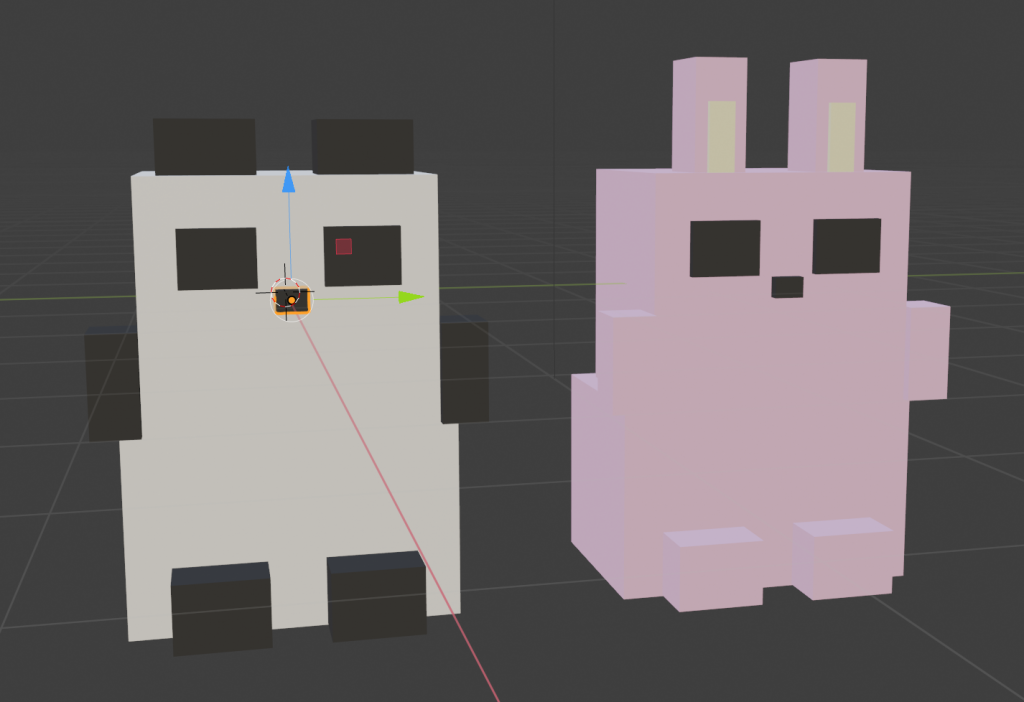
Were you able to create your original “pandas”? I made two pandas.
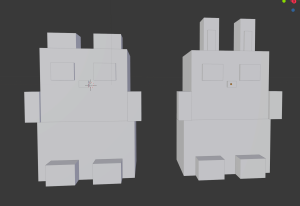
Two “Pandas”
Right now, they look like they’ve been cursed by a witch and turned to stone.
So, let’s add some color. The first thing to do when adding color to the model is to set the display mode to LookDev (Material Preview) in the upper right corner. Otherwise, you will not be able to see the applied material. This is the magic that breaks the witch’s curse (wink wink).
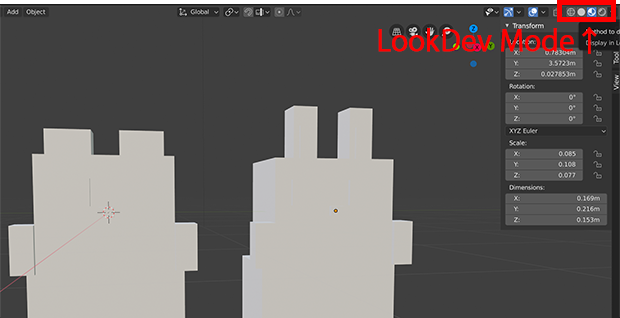
Switch to LookDev (Material Preview) Mode
First, let’s select the object you want to add color to.
We will add color to one part at a time. So select any object you want to start with, such as the head.
Once you select the object, create a new material by opening the Materials tab from the menu on the right (See 1 in the image below). Select the default material (2), and click the – button to erase the default material (3).
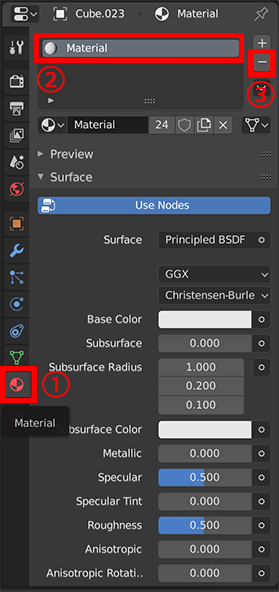
Adding a New Material: Image 1
Click + to add the required number of materials (4), and click New to create a new material for the slots (5).
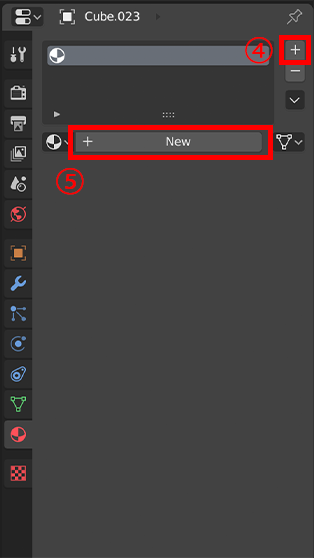
Adding a New Material: Image 2
You will have a new material named “Material.001.” You can change the name by double-clicking on the material name.
As you can see from the images, there are many material settings. In our case, we only need to adjust the Base Color and the Specular settings (Specular is how reflective a surface is when hit by light). Adjust these to your liking.
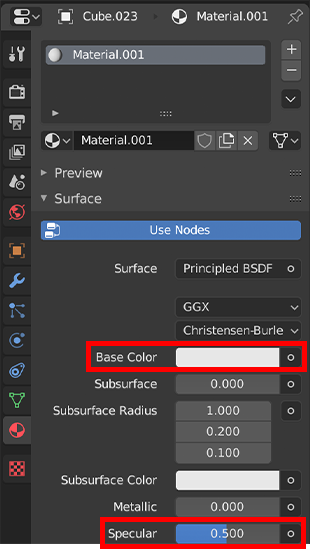
Material Settings
Clicking on the Base Color area brings up a hue ring where you can adjust the color.
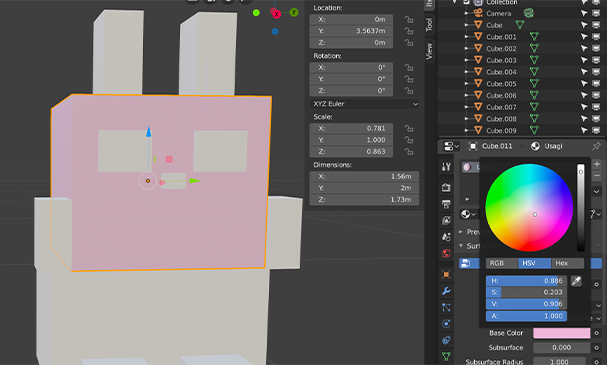
The selected area has changed color.
Next, select an object you want to make the same color, such as the body.
As before, press – to delete the default material, and click on the material icon (1) instead of the New button. This will open a list of created materials, and the material you just created should appear in the list (2).
Select your material and the object should become the same color. If you want to apply the same material to another object, you can do so from here.
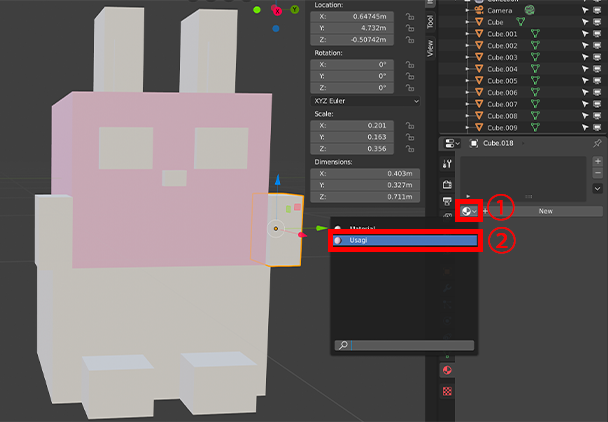
Applying the Same Material to Another Object
As you can see, there are two ways to add more color to your model. If you want to create a new material click New. And if you want to apply a material you have already made, select it from the material list.
With this, the pandas that were turned to stone have now regained their color.
Our panda-panda and bunny-panda that look like Minecraft characters are nearly ready. Let’s give them the final touches and refine their appearances.
Pandas regain color after the witch’s curse.
Refining the Panda Model
We’ve come so far in the modeling process, let’s finish our pandas with the final touches!
Right now, the ears, face, and body are all separate objects, so we will combine them into one single object.
To do this, hold down [Shift] and select all the objects you want to combine.
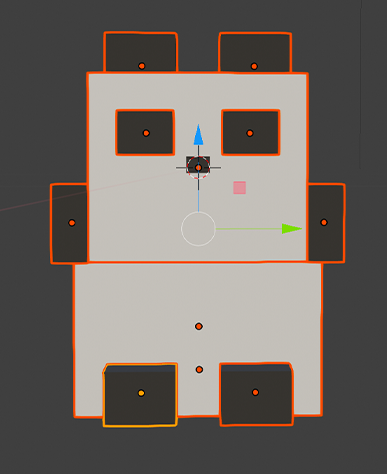
Select all the objects you want to combine.
Once you have selected everything, press [Ctrl]+[J] ([Command]+[J] for Mac).
With this, the panda should have become one whole object! However, on closer inspection, something is wrong with the pivot-point of the object…
The pivot-point (or origin) is the point on which the object is centered.
This becomes the reference point for the positioning and application of various modifiers.
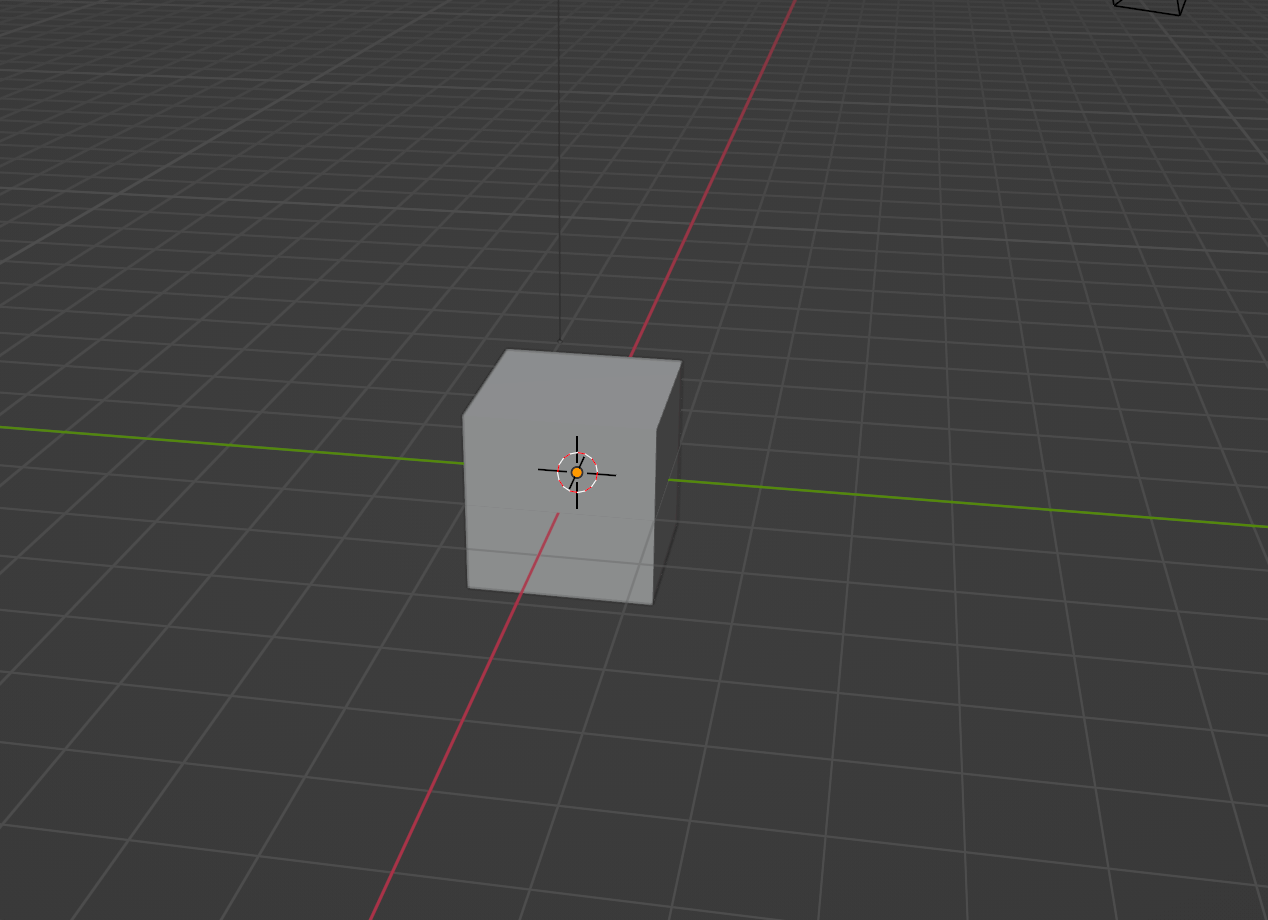
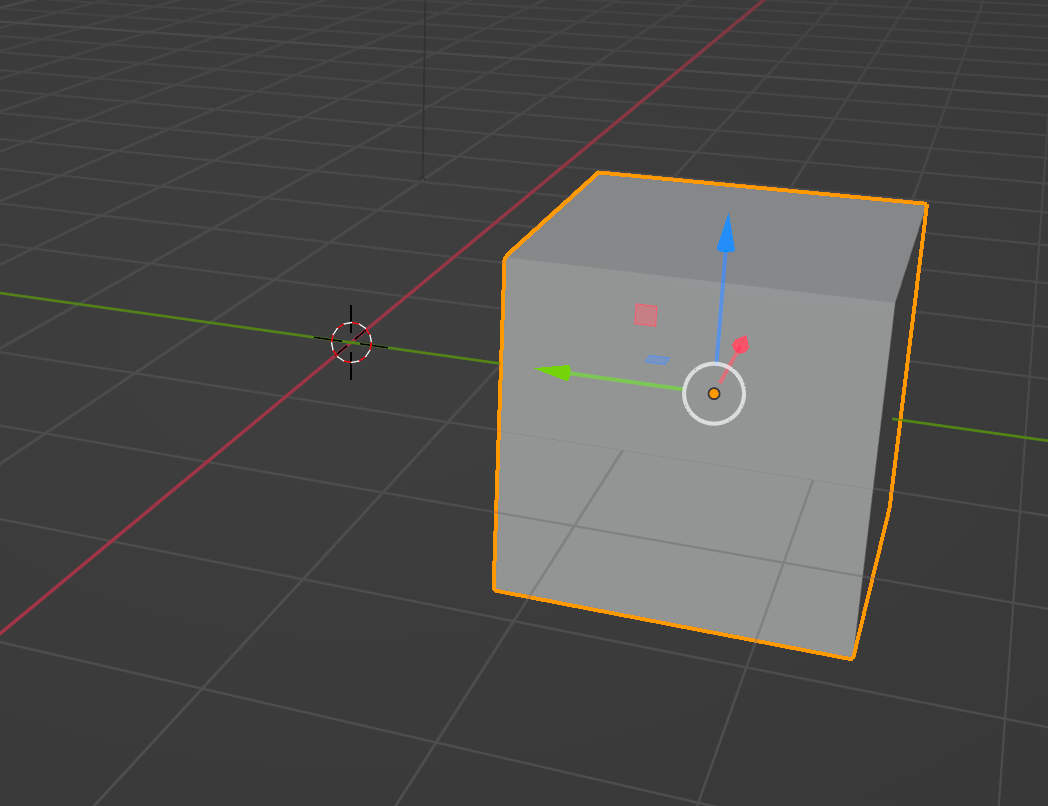
In the image below, the cube’s origin is at the center. So even if the cube itself is moved on the Y axis, the cube’s pivot-point has not shifted.The Cube’s Origin Point
The panda’s origin was set to the origin of the object selected last. (Note that the origin is not the dashed red and white circle, but the mark with the arrows at the panda’s foot.)

The origin of the panda is not at the center of the object.
From the menu above, select Object > Set Origin > Origin to Geometry.
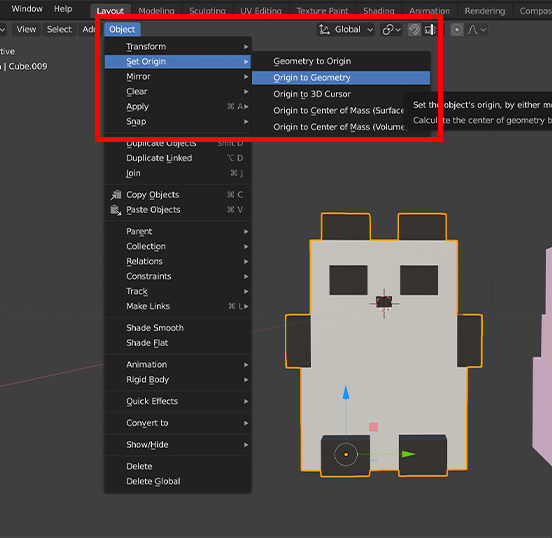
Change Origin to Geometry
Now, the origin is centered on the object!
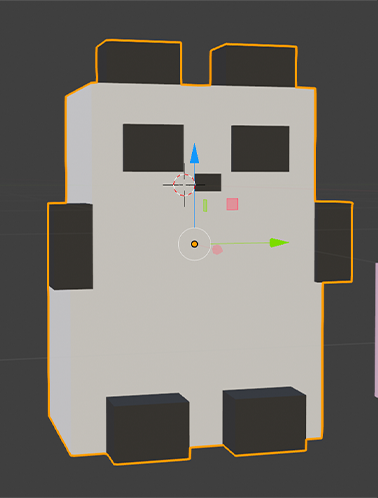
The origin has been moved to the center of the object.
Finally, we need to smooth the corners of our panda, as they are too sharp and might hurt the panda if it bumps into something.
Select one of the pandas. In the Properties tab, click the Wrench icon to open the Modifier settings.
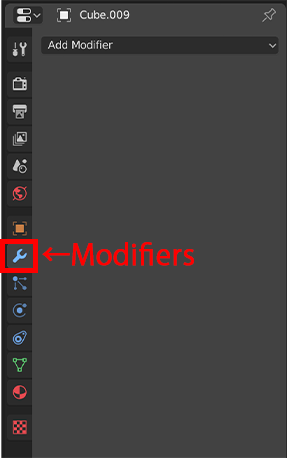
Modifiers Tab
Then, click Add Modifier and select Bevel.
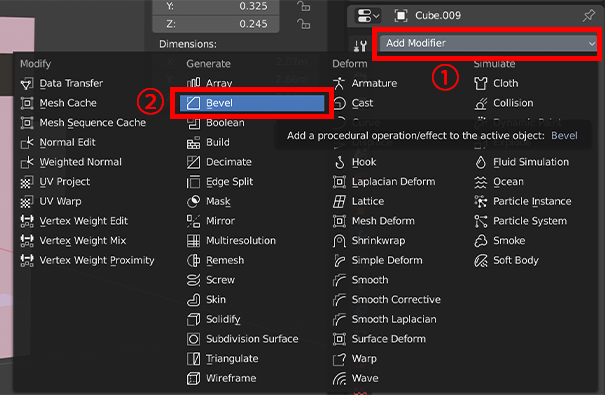
Select “Bevel”
The Bevel modifier is a function for sloping the corners of your object. In Blender, these editing functions are called Modifiers.
When you select “Bevel,” the selected panda will become slightly beveled and the corners will be smoothed out.
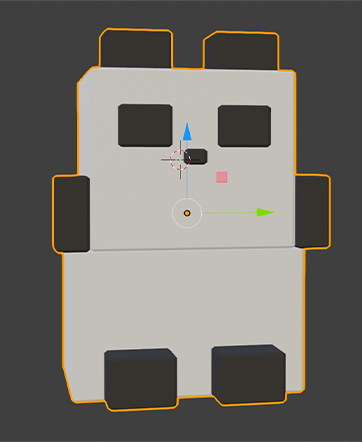
Panda with its sharp edges removed.
You can adjust the value of the bevel width in the modifier settings. Feel free to adjust it to your liking. I left mine at the default value of 0.1.
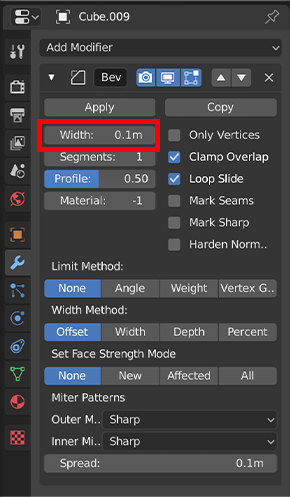
Adjusting the Bevel Values
Once you have adjusted the values, click Apply to apply your settings!
Note that if you do not Apply, it will not be applied when exporting the model.
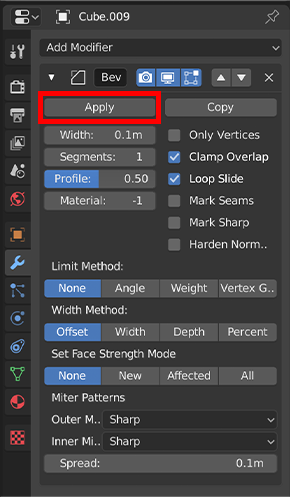
Make sure to apply the Bevel modifier.
With this, your model is complete!
Yay!
Importing the Model to STYLY
- Export the model from Blender
- Upload to STYLY
Export the Model
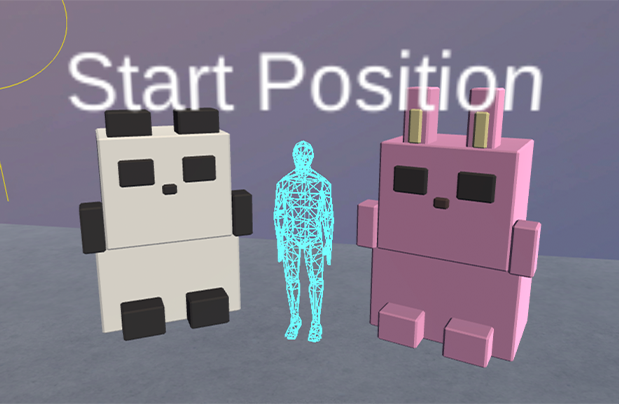
We have created two pandas, but we will export them out one at a time. Sadly, our pandas will be separated while this happens, but don’t worry, we’ll meet again soon.
First, if the origin of the object is not at the origin of the scene (the World Origin), the origin of the scene will become the origin of the object when it is exported. Therefore, we must move the object to the World Origin (there may be other ways to do this, but in this tutorial I will introduce one).
Select the object you want to move to the World Origin and press [Shift]+[S]. The pie menu below will appear, so select Selection to Cursor, and the object will be moved to the origin.
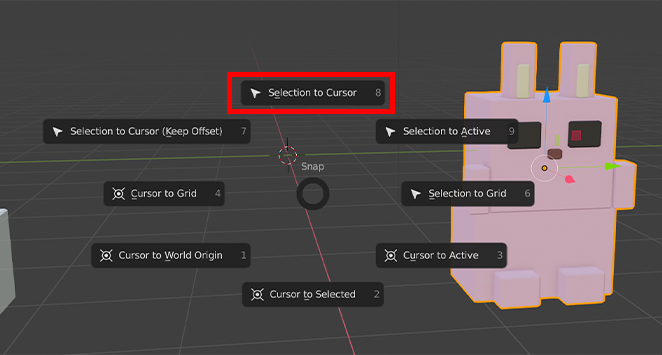
Move the Object to the World Origin
The “Cursor” refers to the dashed red and white circle, so Selection to Cursor will move the selected object to the red and white circle. By default, the Cursor should be at the origin of this scene. However, if the the red and white circle has been moved to a different location, select Cursor to World Origin from the same menu, move the cursor to the World Origin, and then select your object. Press [Shift]+[S] and click Selection to Cursor to move it to the center of the scene.
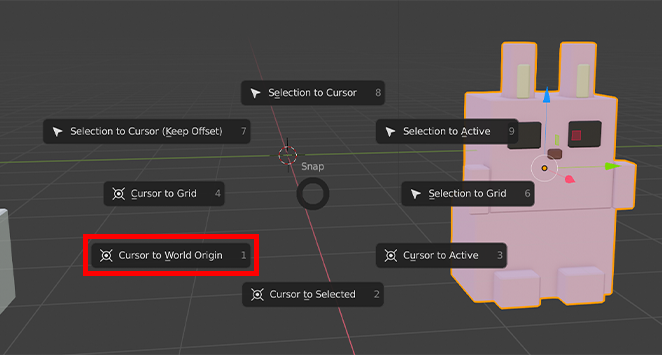
Cursor to World Origin
Once you have moved your model to the World Origin, make sure it is selected and choose File > Export > FBX (.fbx) from the top menu.
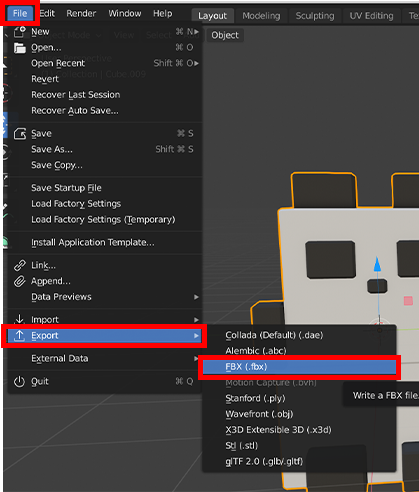
Export > FBX (.fbx)
After the export settings appear, make sure to check “Limited to Selected Objects” and select Mesh in the Object Types on the lower left.
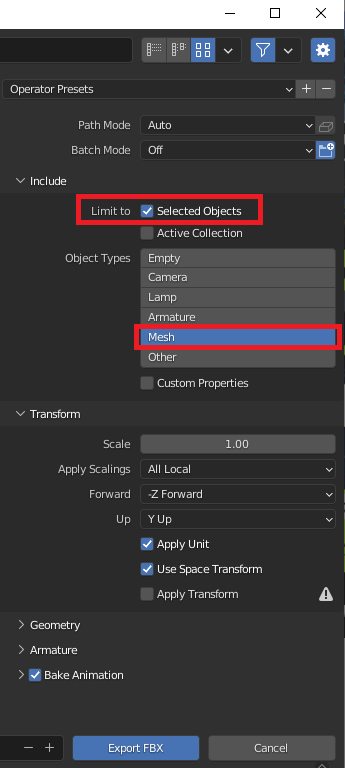
Export Settings
Finally, enter a file name for your FBX and export.

Decide on a name and export your FBX!
Upload to STYLY
Now, let’s upload your model to STYLY.
First, access STYLY and launch STYLY Studio.
Click the link below to see how to create an account.

Once STYLY Studio is up and running, upload the exported FBX model by selecting Assets > 3D Model > Upload.
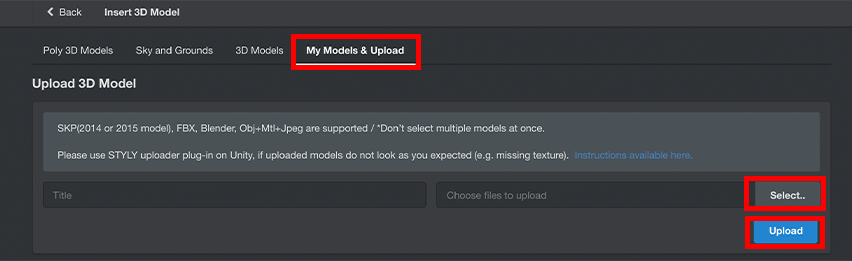
Uploading Your Model
The upload is complete when the status of your model changes to Completed.
Your uploaded 3D models can be found in My Models and can be placed in your scene by clicking on it.
Learn how to publish your scene to STYLY here:
We meet again!
Although we took different paths, we were able to reunite with bunny-panda and panda-panda in STYLY. Hooray!
In our next article, we will be modeling something with more detail.
For questions about STYLY, bug reports, and improvement requests, please contact the STYLY FORUM
https://en.forum.styly.cc/support/discussions
Certified (QA) by Shota Shawn Yoshizawa
Edited by SASAnishiki
Translated by cpnnn