This article describes how to control viewpoints in STYLY: using PlayMaker, you can learn the functions of 2D images always facing forward to the viewpoint, viewpoint movement, viewpoint warping, and executing events in response to the viewpoint position.
- 1 About STYLY Viewpoints
- 2 What PlayMaker’s camera control allows STYLY to achieve
- 3 Create an FSM Template to get the viewpoint (Main Camera) of STYLY with PlayMaker
- 4 Creating a function that “keeps the 2D image facing forward in relation to the viewpoint
- 5 Creating the “Viewpoint Movement” Function
- 6 Creating the “warp” function
- 7 Reacting to the position of the viewpoint and executing events
About STYLY Viewpoints
First, let’s take a look at the viewpoints in STYLY, which can be divided into two main types.
Studio Perspective
The STYLY Studio viewpoint is the viewpoint from which you create your STYLY scene.
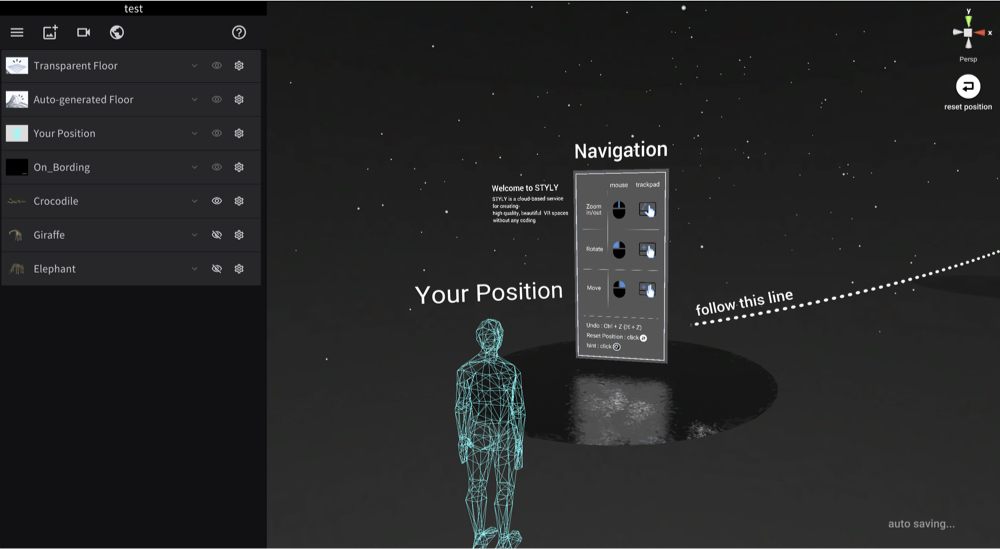
Working perspective of the STYLY Studio screen
Perspective of the Web Player / STYLY VR application
The STYLY Web Player / STYLY VR APP viewpoint is the perspective you see from Your Postiion in STYLY Studio; it is the perspective from which you experience the STYLY scene.
Perspective seen from the STYLY VR APP with the HMD on
.
What PlayMaker’s camera control allows STYLY to achieve
2D images continue to face forward with respect to the viewpoint

This expression can be used to create a space with a sense of depth in a 3D space even with only images.
Viewpoint Shift
By learning how to use viewpoint shifting, it is possible to guide the viewer to only the areas you want to show without moving the controller.
Warp

The viewpoint will warp to a specified location; if you learn how to use warp, you can instantly move the user to the desired location within the space or to another space.
Reacting to the viewpoint position and executing events
By using this event, you can execute an event when the user arrives at a specific position.
The following four functions are STYLY available
- Keep the 2D image facing forward in relation to the viewpoint
- Viewpoint shift
- Warp
- Execute events in response to the viewpoint position
Create an FSM Template to get the viewpoint (Main Camera) of STYLY with PlayMaker
Before creating the function, we will give a lecture on how to get the viewpoint (Main Camera) of STYLY with PlayMaker.
The FSM for acquiring the STYLY viewpoint (Main Camera) will come up many times in the future when creating functions, so let’s create an FSM Template so that you can use it many times in this lecture.
Create a new scene.
Create a GameObject by right-clicking on the Hierarchy window (hereafter referred to as Hierarchy) and selecting Create Empty.

Add PlayMakerFSM to the GameObject.
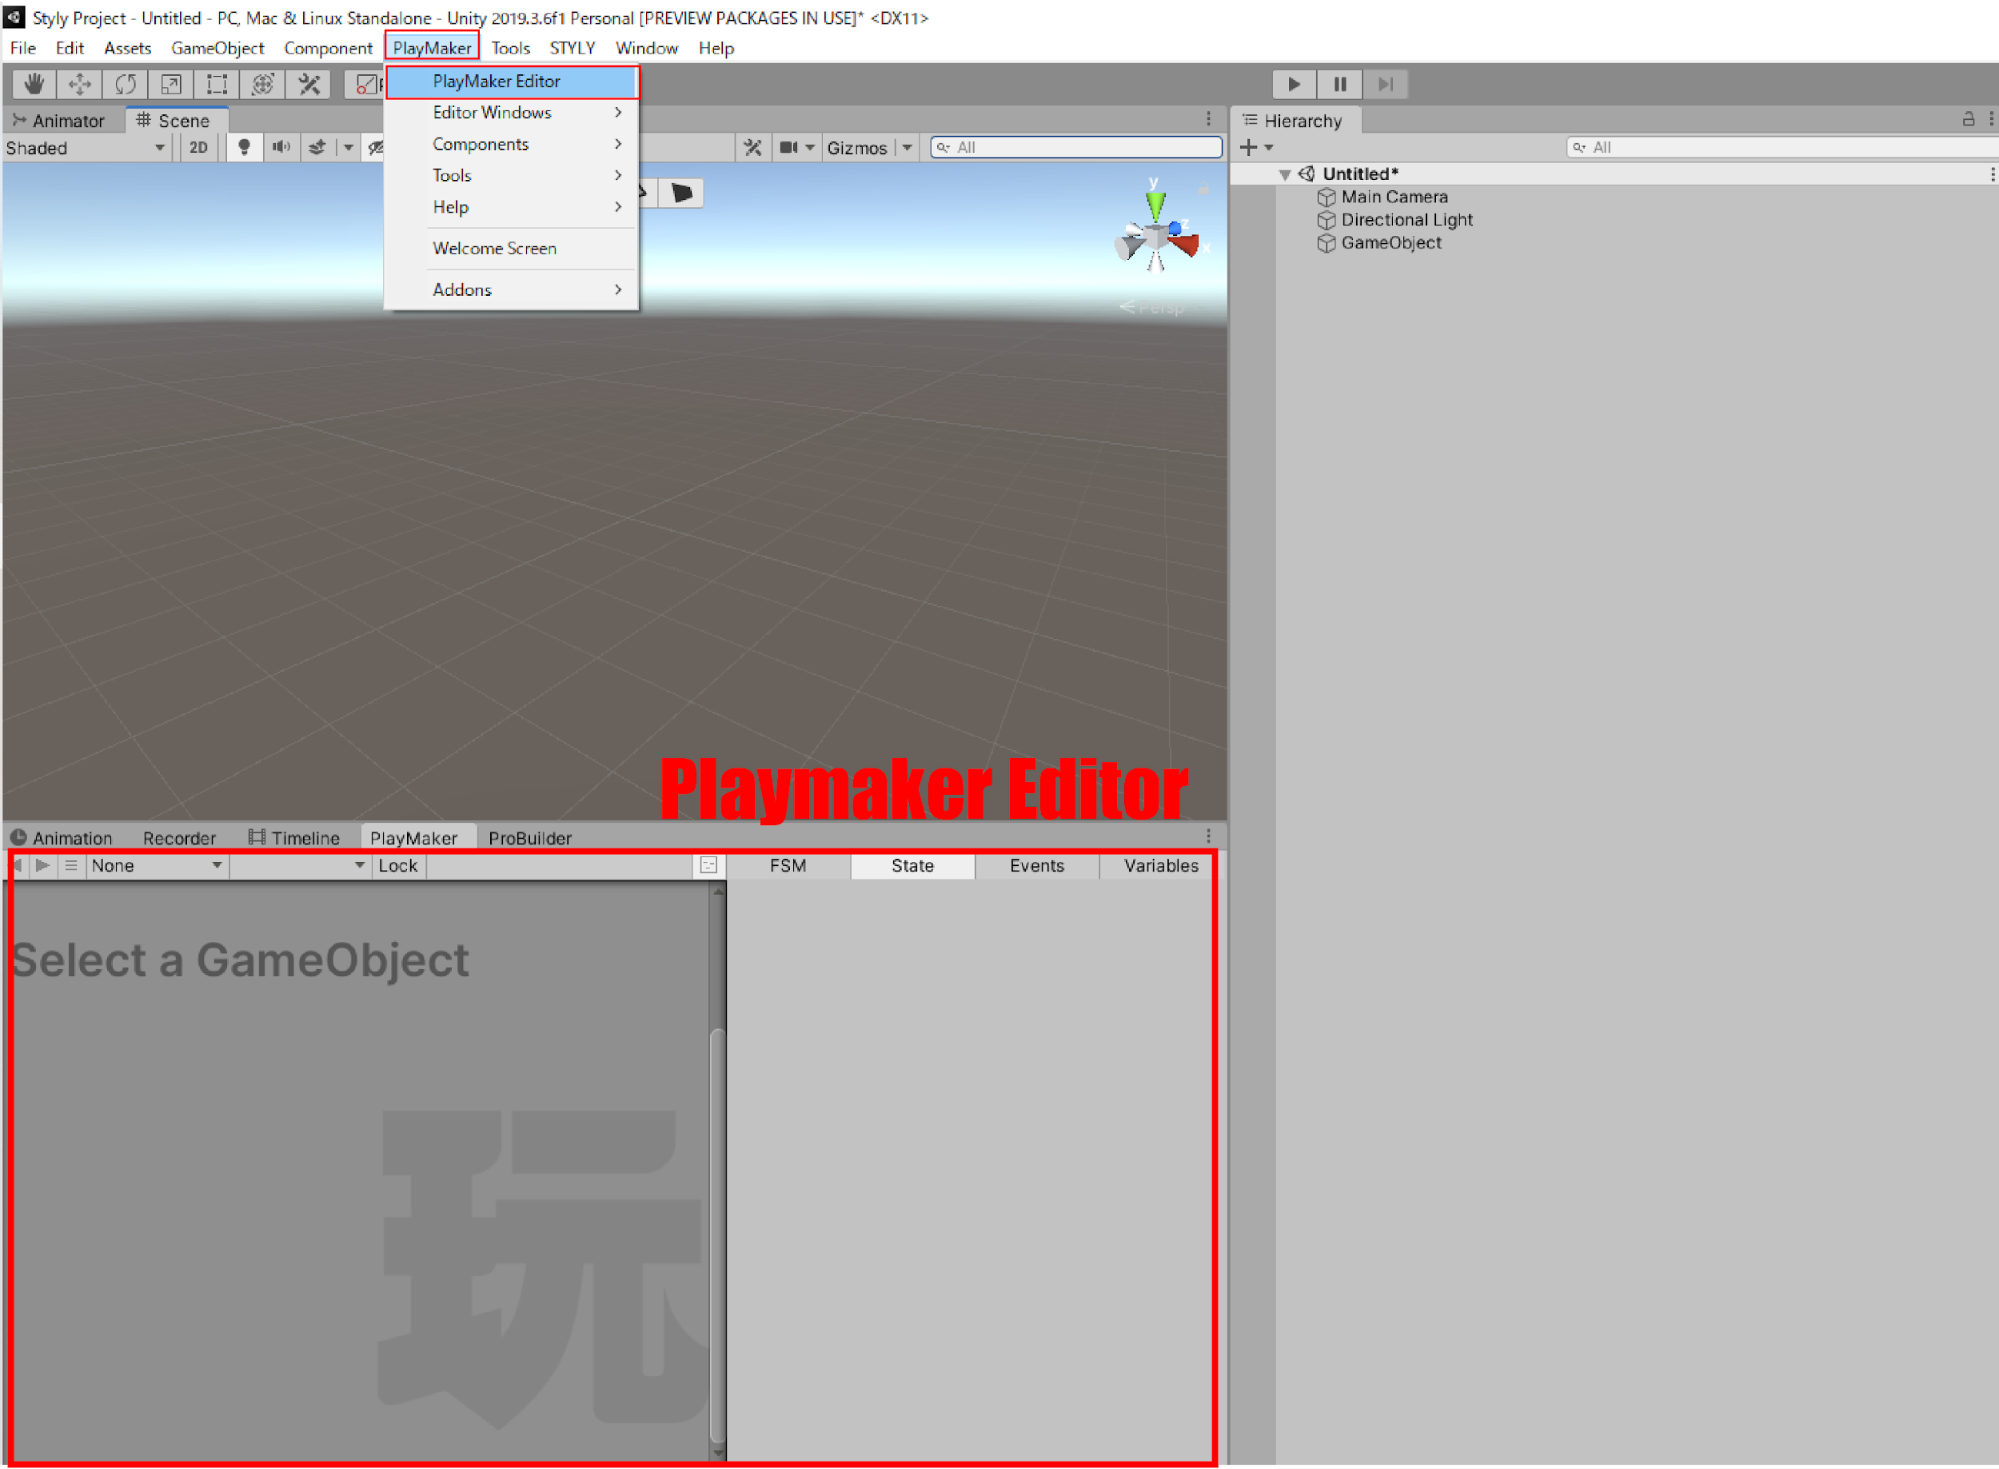
Display the PlayMaker Editor.
Install PlayMaker beforehand and select PlayMaker > PlayMaker Editor from the menu bar above.
When the window appears, place it in the desired location.
With the GameObject selected, right-click on the PlayMaker Editor and select “Add FSM.
Next, add an Action.
Display the Action Browser and add a Find Game Object to State1.
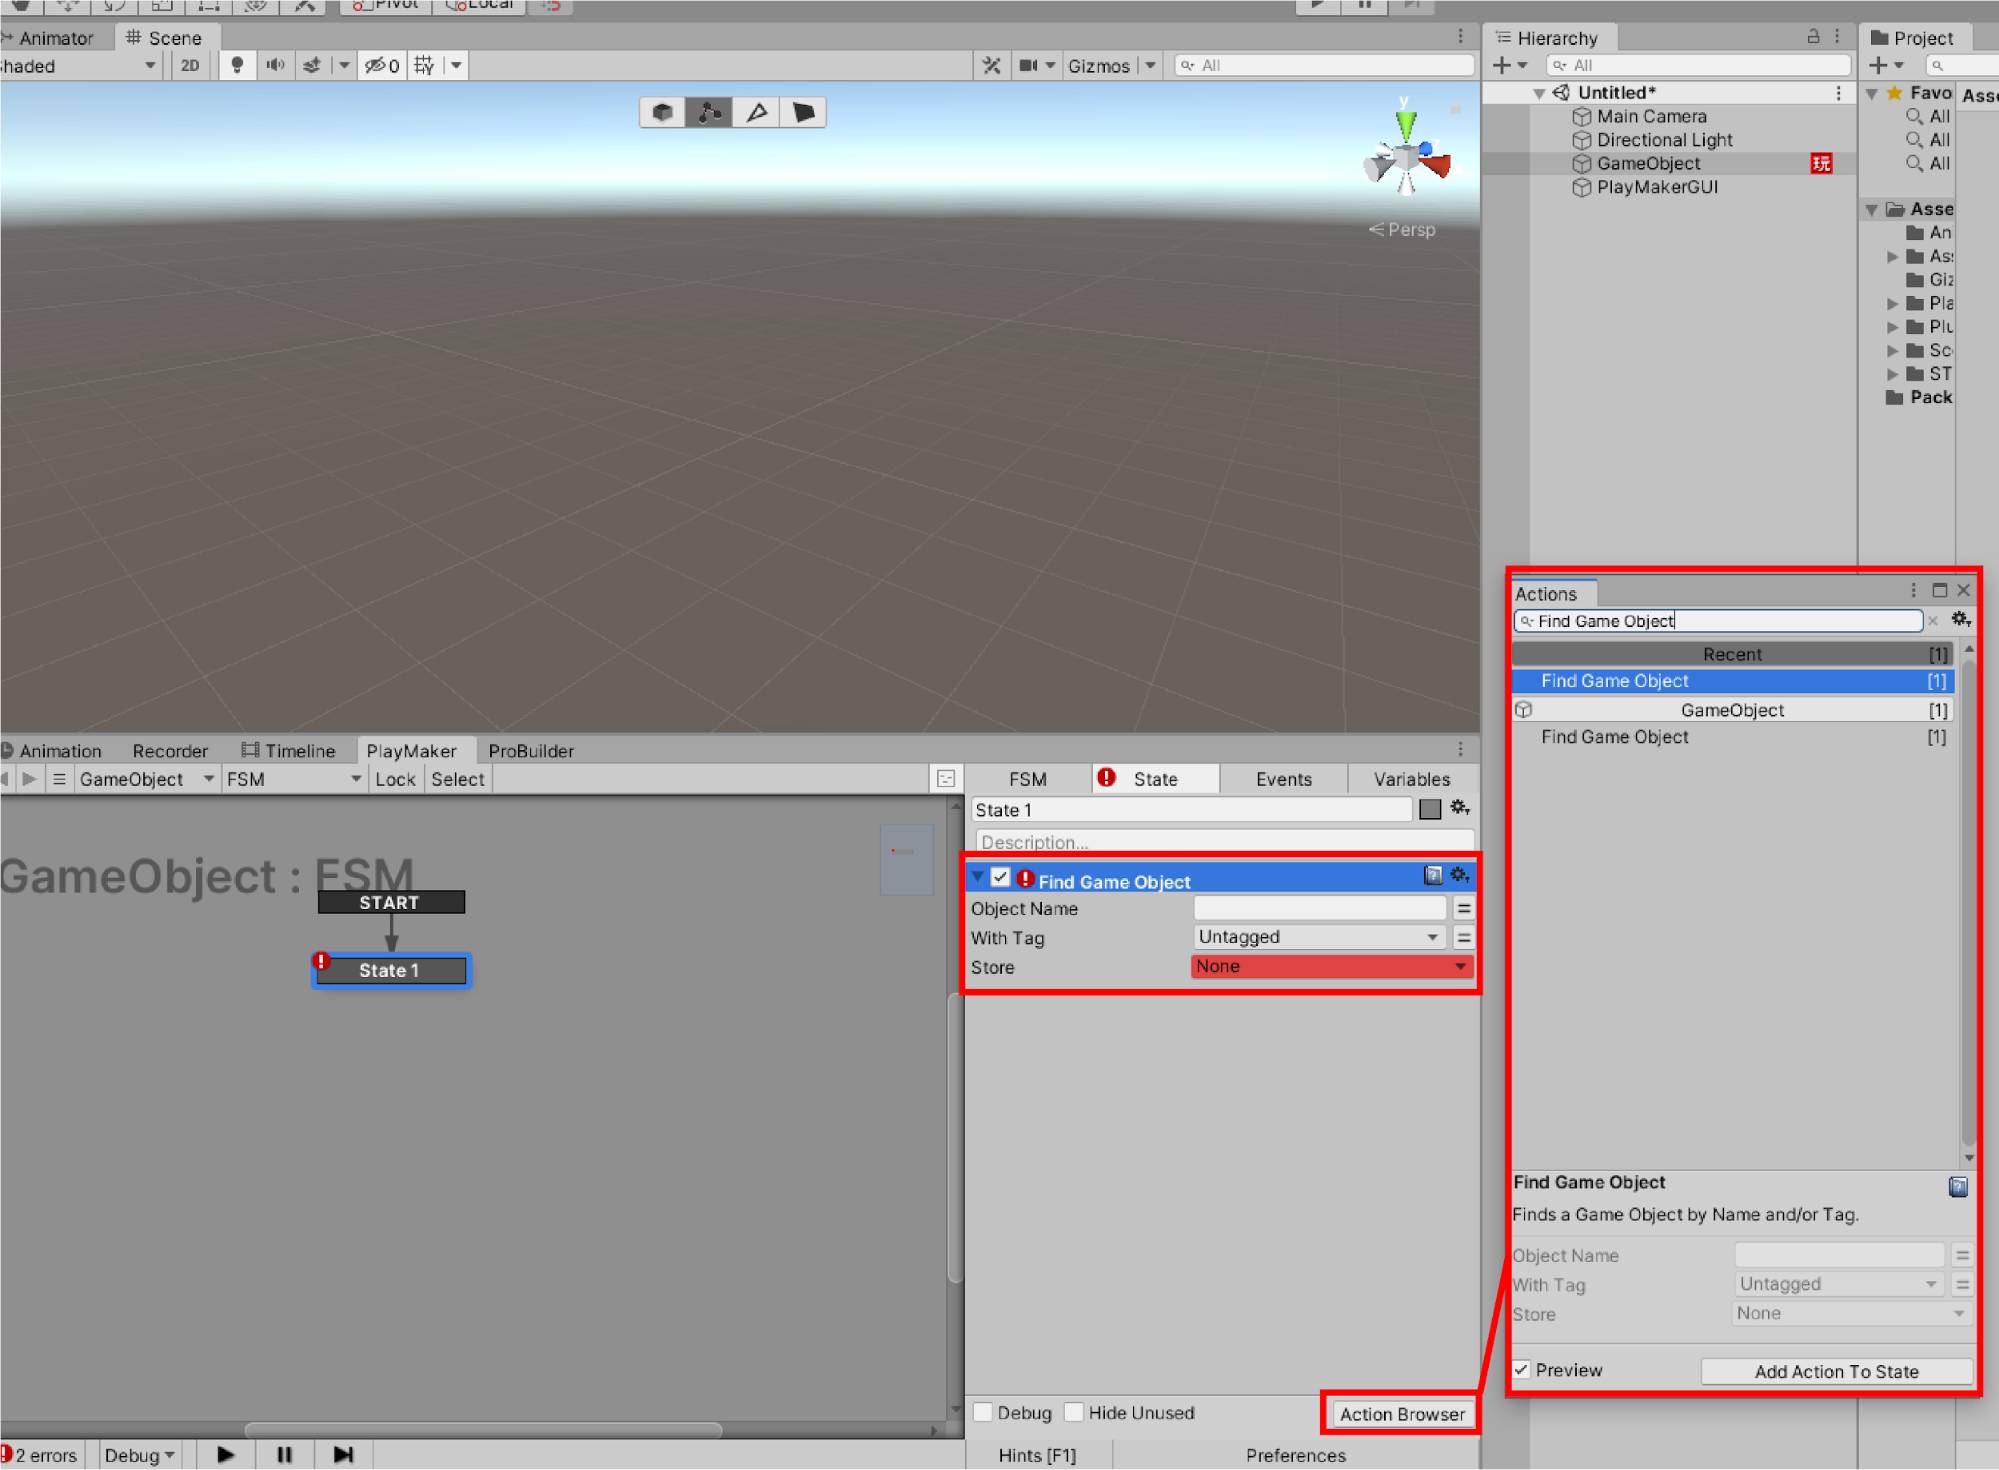
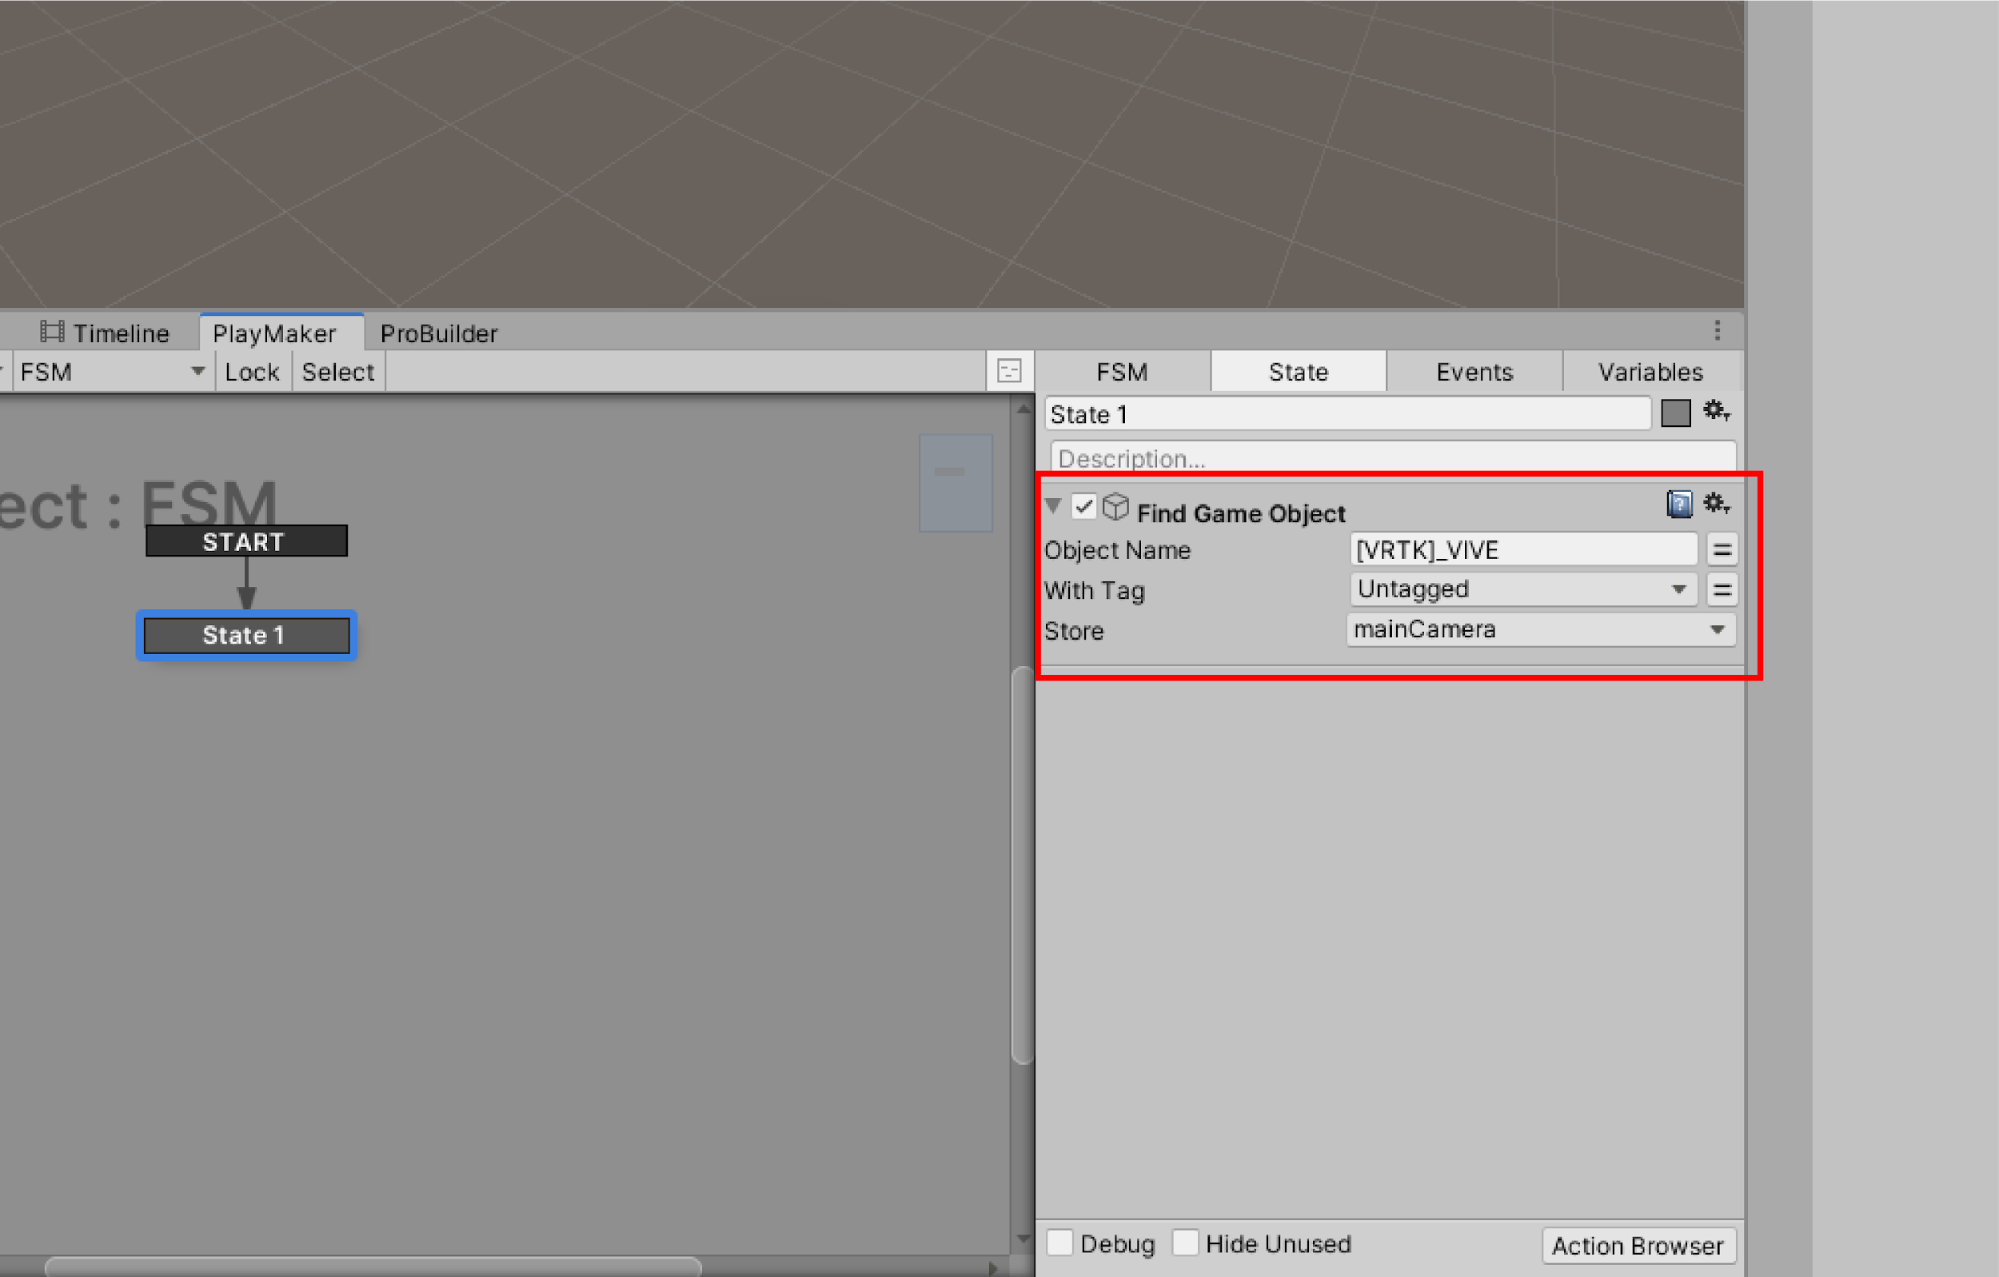
Enter [VRTK]_VIVE in the Object Name of Find Game Object.
Be careful, because if you enter the wrong name, you will not be able to get the viewpoint (Main Camera) of STYLY.
Find Game Object
Finds a game object by name, tag or both and stores it in a variable to be used later.
|
Parameter Name |
Parameter Description |
Parameter Value |
|
Object Name |
Finds the name of a game object in the hierarchy. |
[VRTK]_VIVE |
|
With Tag |
Tag, if used STYLY, must be set to Untagged. |
Untagged |
|
Store |
Stores the game object found in a variable. |
Variable mainCamera |
Select Store: New Variable… and enter mainCamera to define the variable mainCamera.
Add Game Object Is Null.
Select Game Object: Variable mainCamera.
Select Is Null: New Event and enter NextCheckCamera to define the Event variable NextCheckCamera.
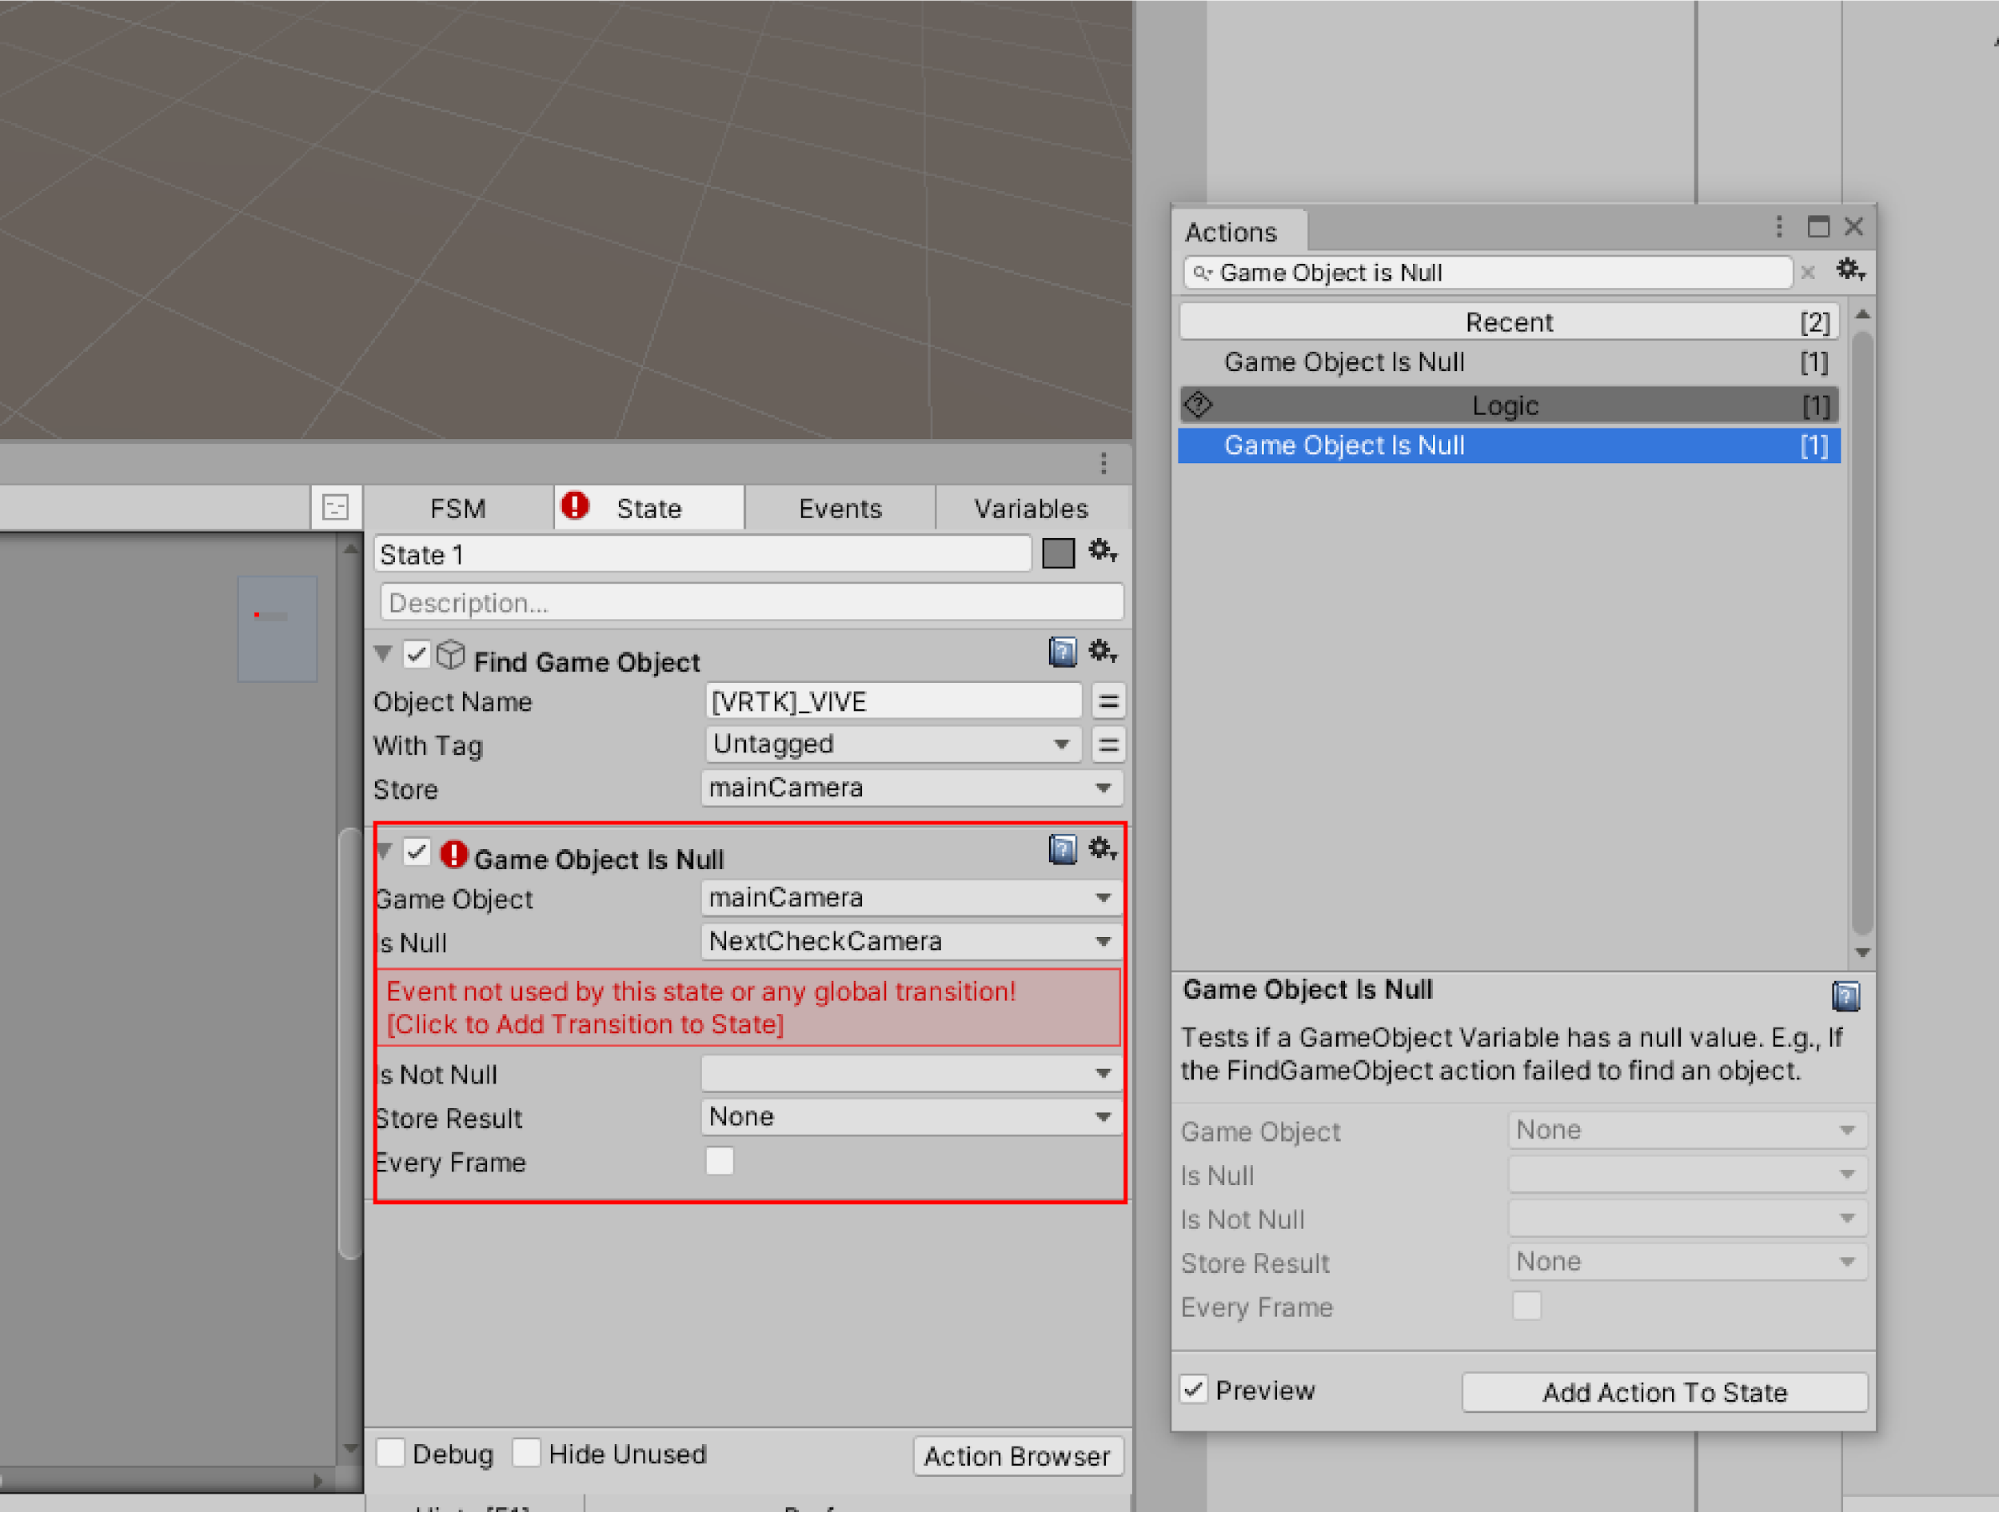
Game Object is Null: Tests if the game object variable has a null value (a value that contains no information is called a null value).
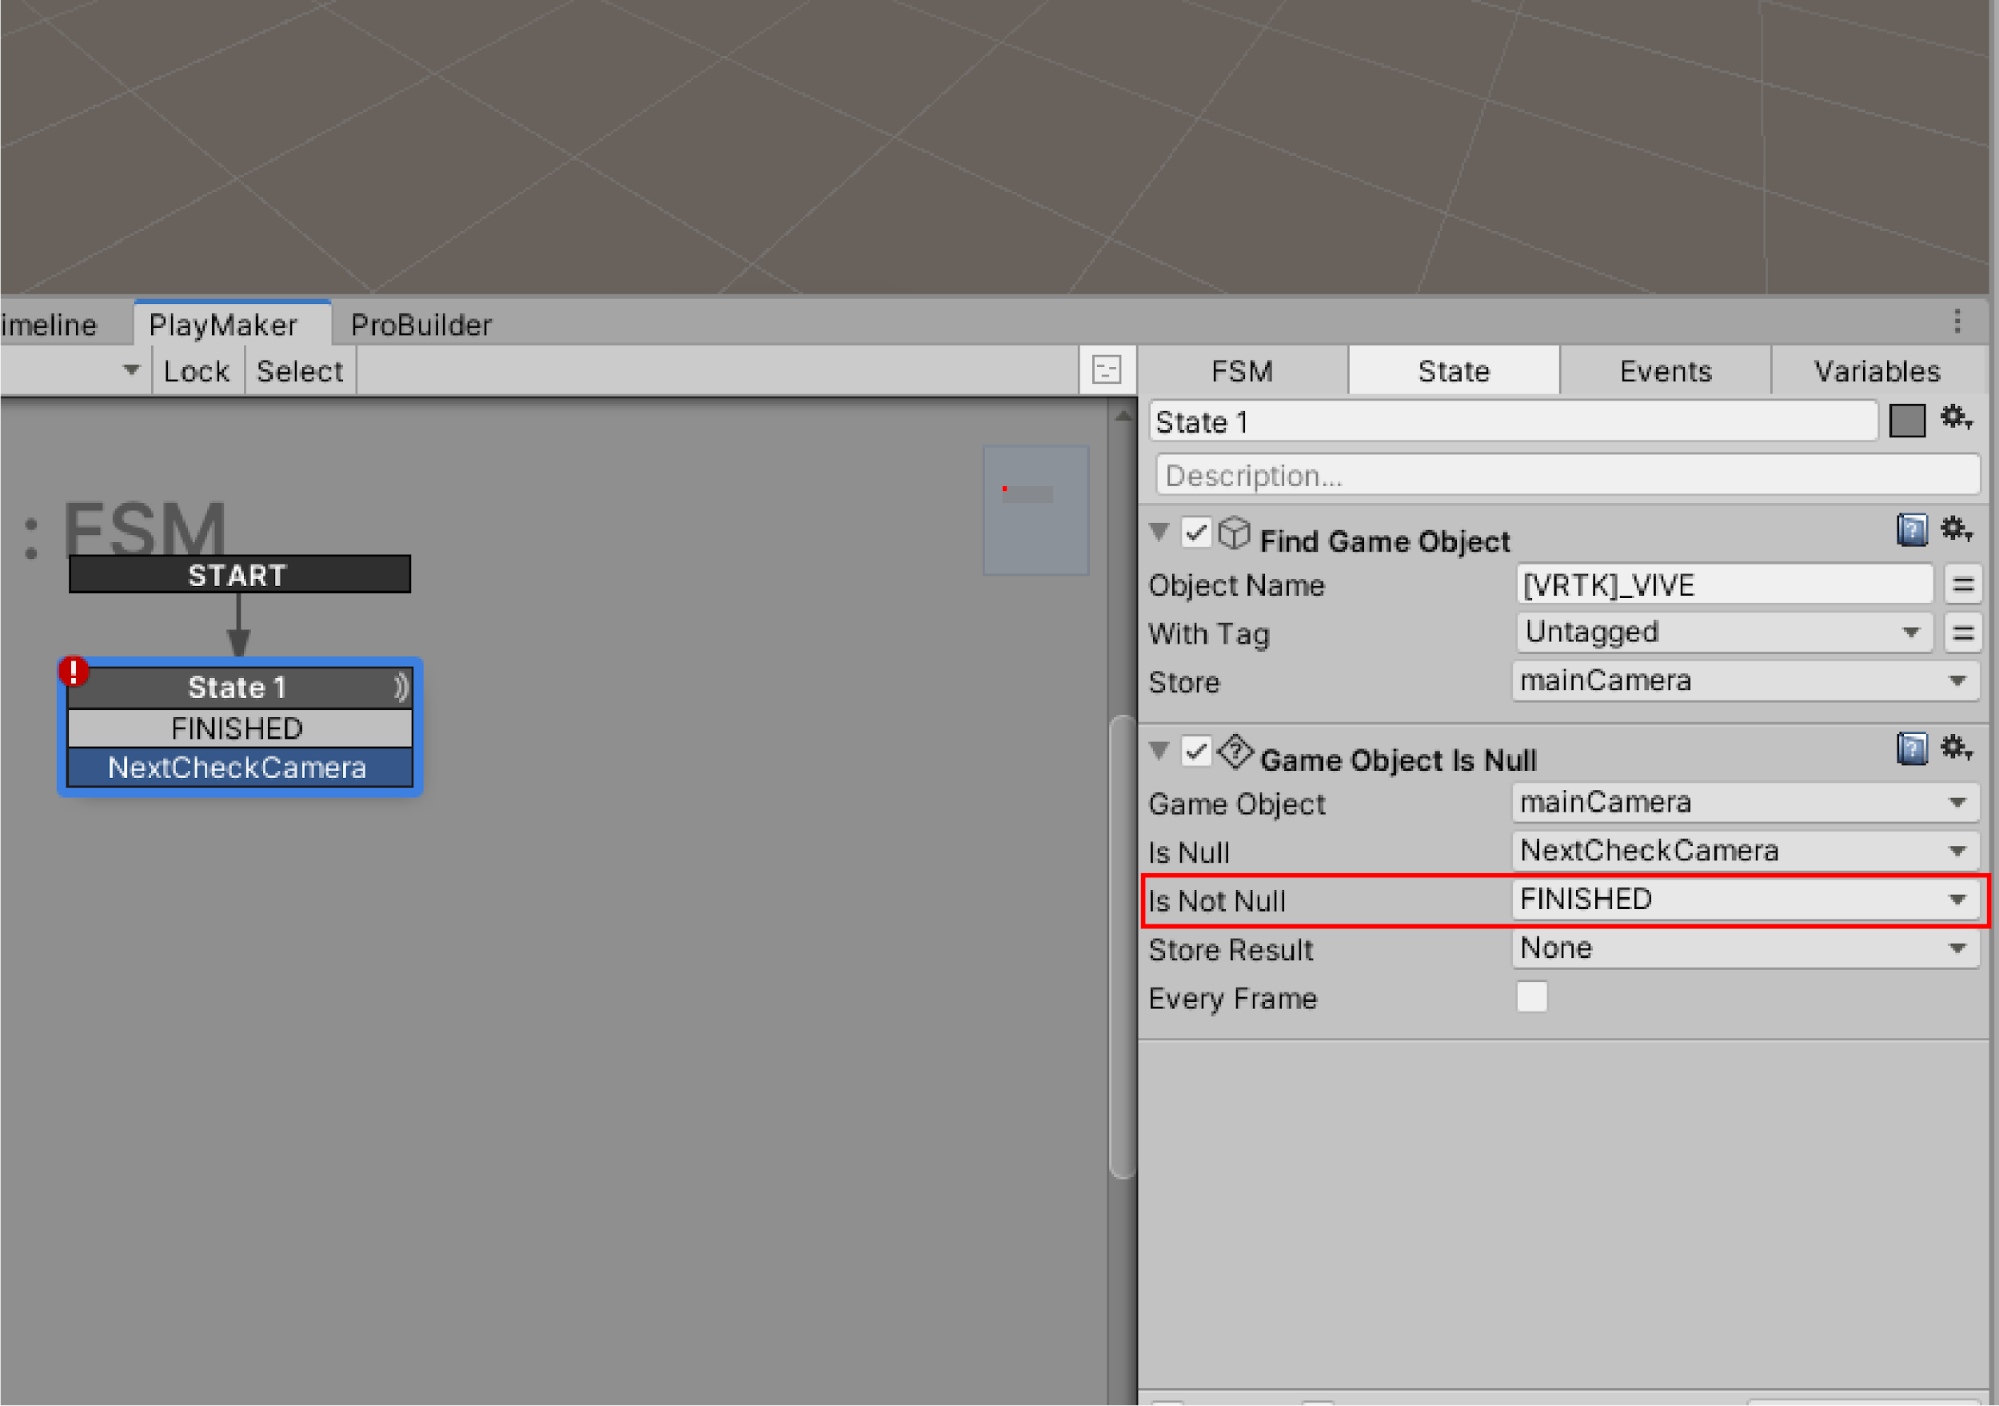
Next, set an Event for State1.
Right click on State1 and select Add Transition > FINISHED and NextCheckCamera.

Set the Action “Game Object is Null” item “Is Not Null” to “FINISHED” in the State.
Game Object Is Null
Tests if a game object variable has a null value (a value that contains no information is called a null value).
|
Parameter Name |
Parameter Description |
Parameter Value |
|
Game Object |
Object to which the Action will be applied. |
mainCamera |
|
Is Null |
If a game object is stored in Game Obejct (variable mainCamera), |
NextCheckCamera |
|
Is Not NUll |
If the game object is not stored in the Game Obejct (variable mainCamera), |
FINISHED |
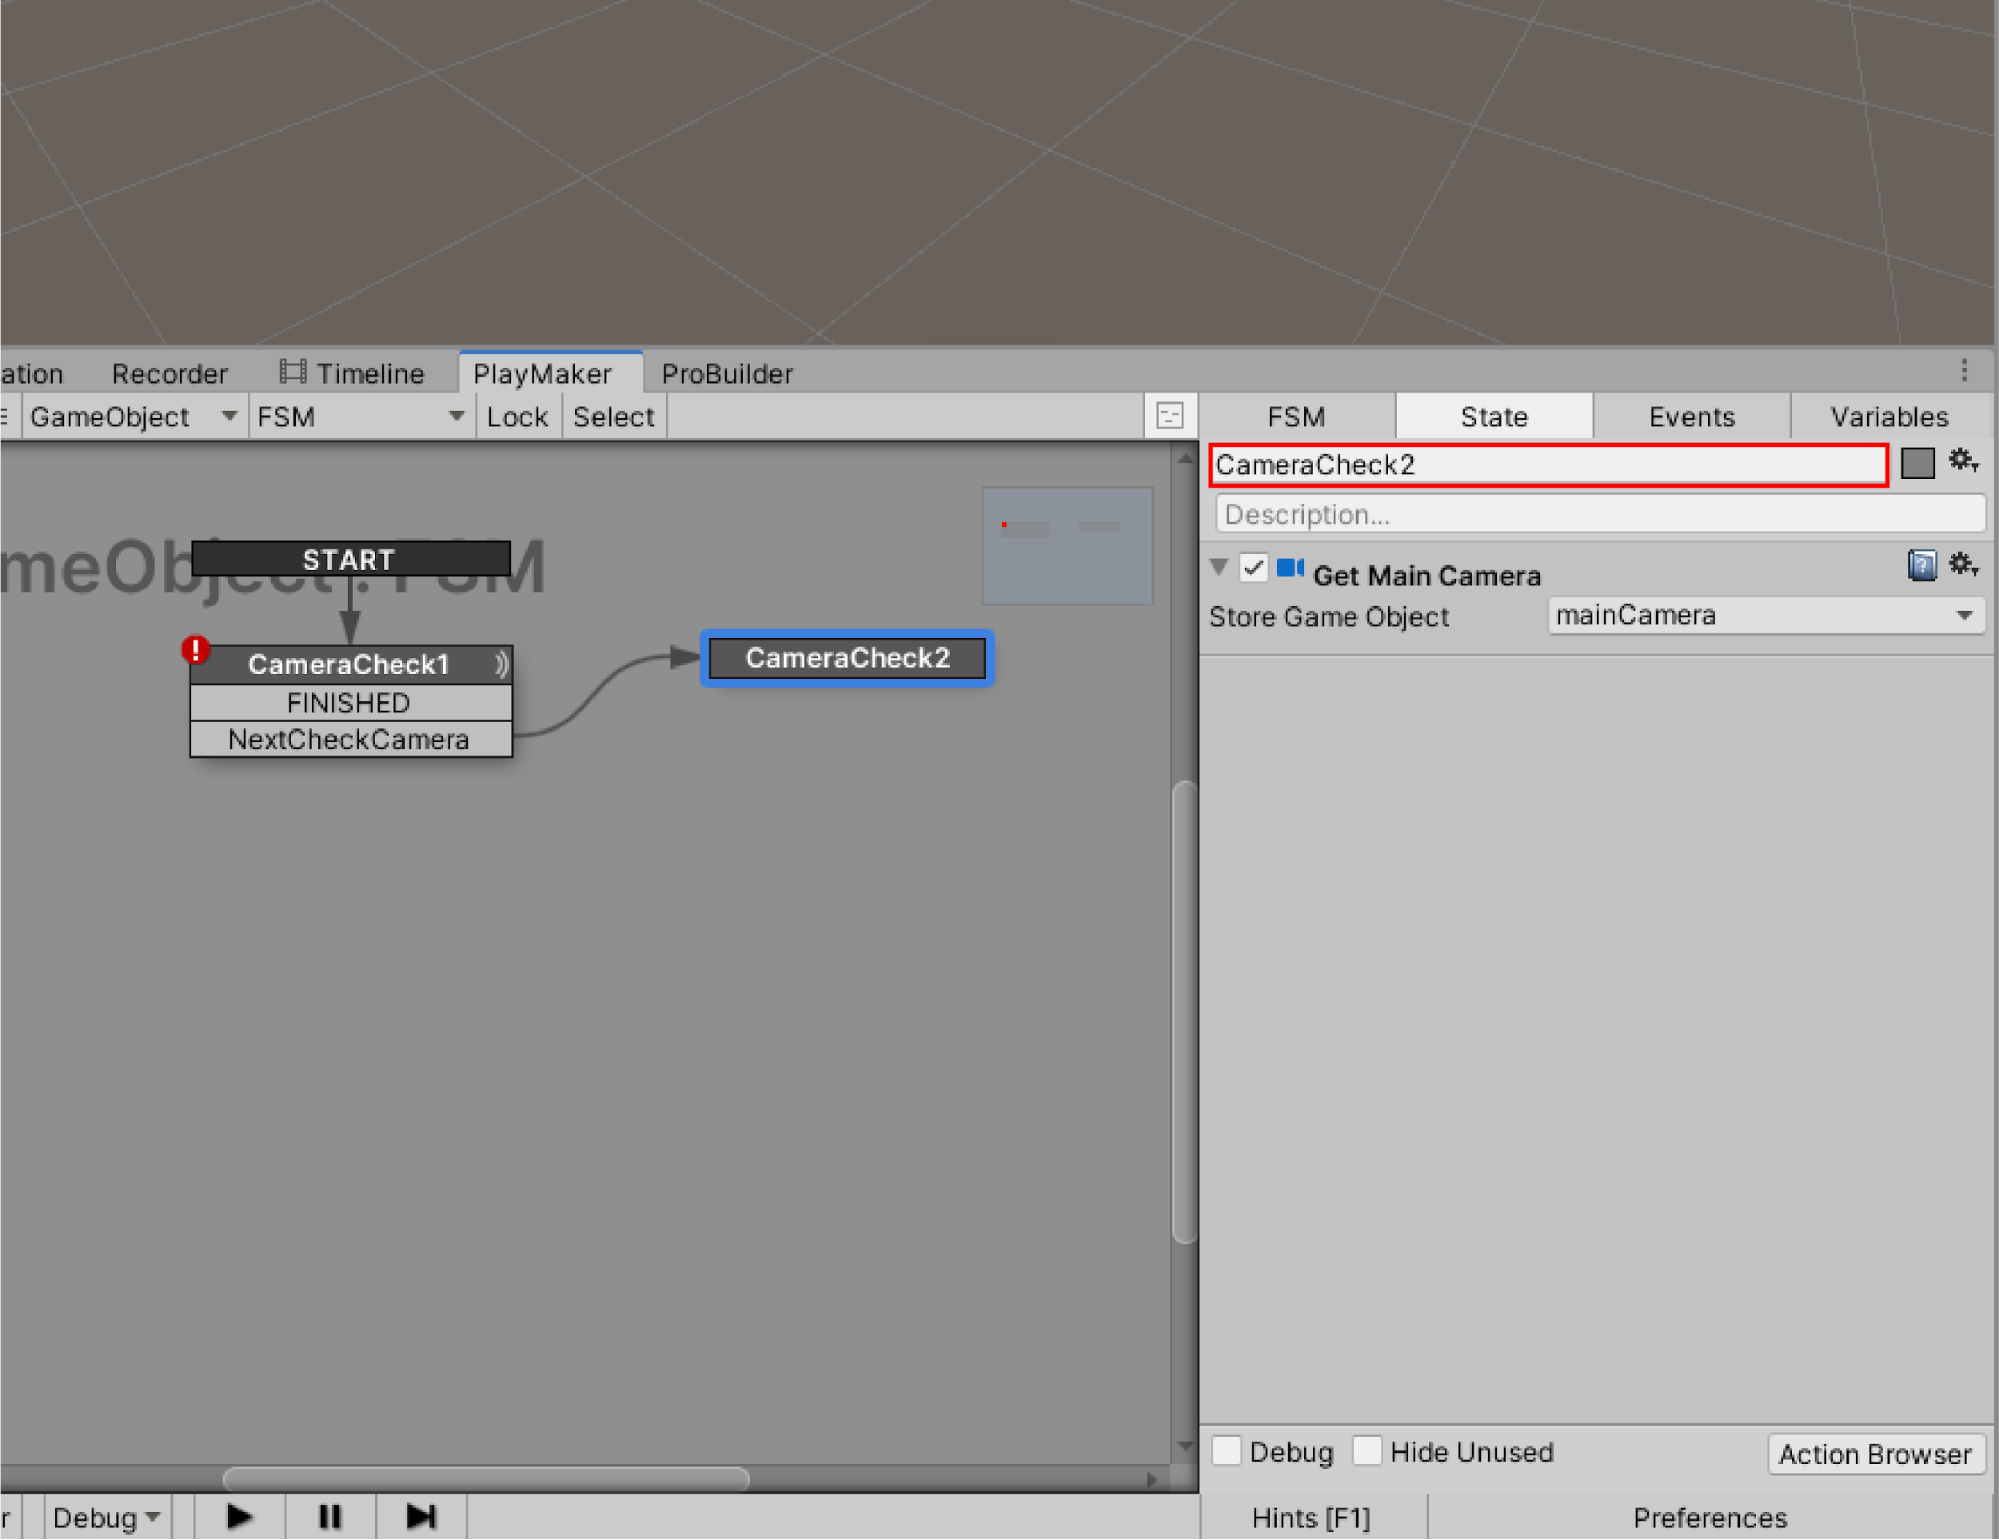
Right click on PlayMakerEditor and select “Add State” to create State2.
Connect the Transition from the State1 event “NextCheckCamera” to State2.
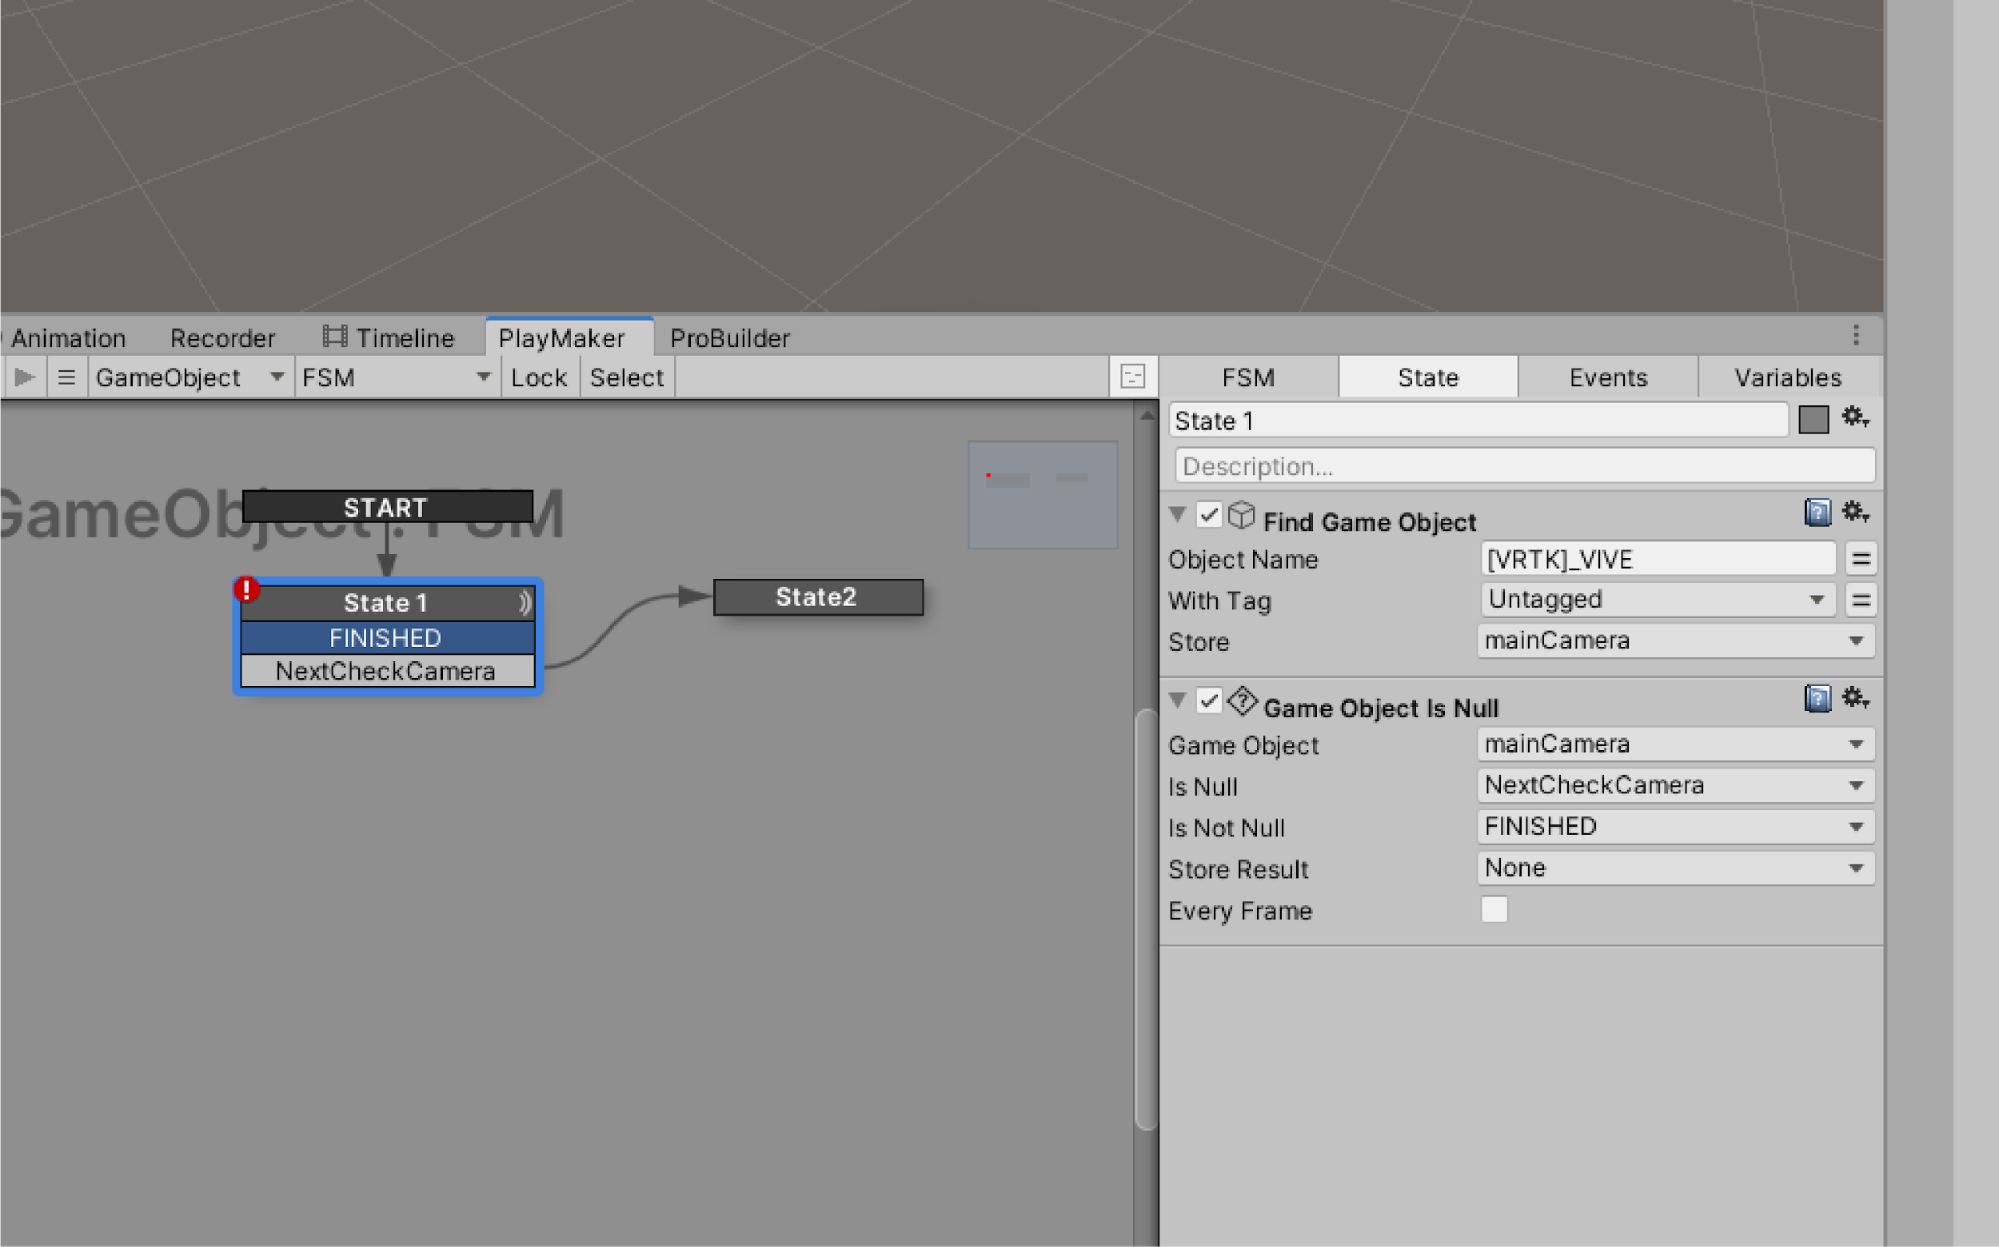
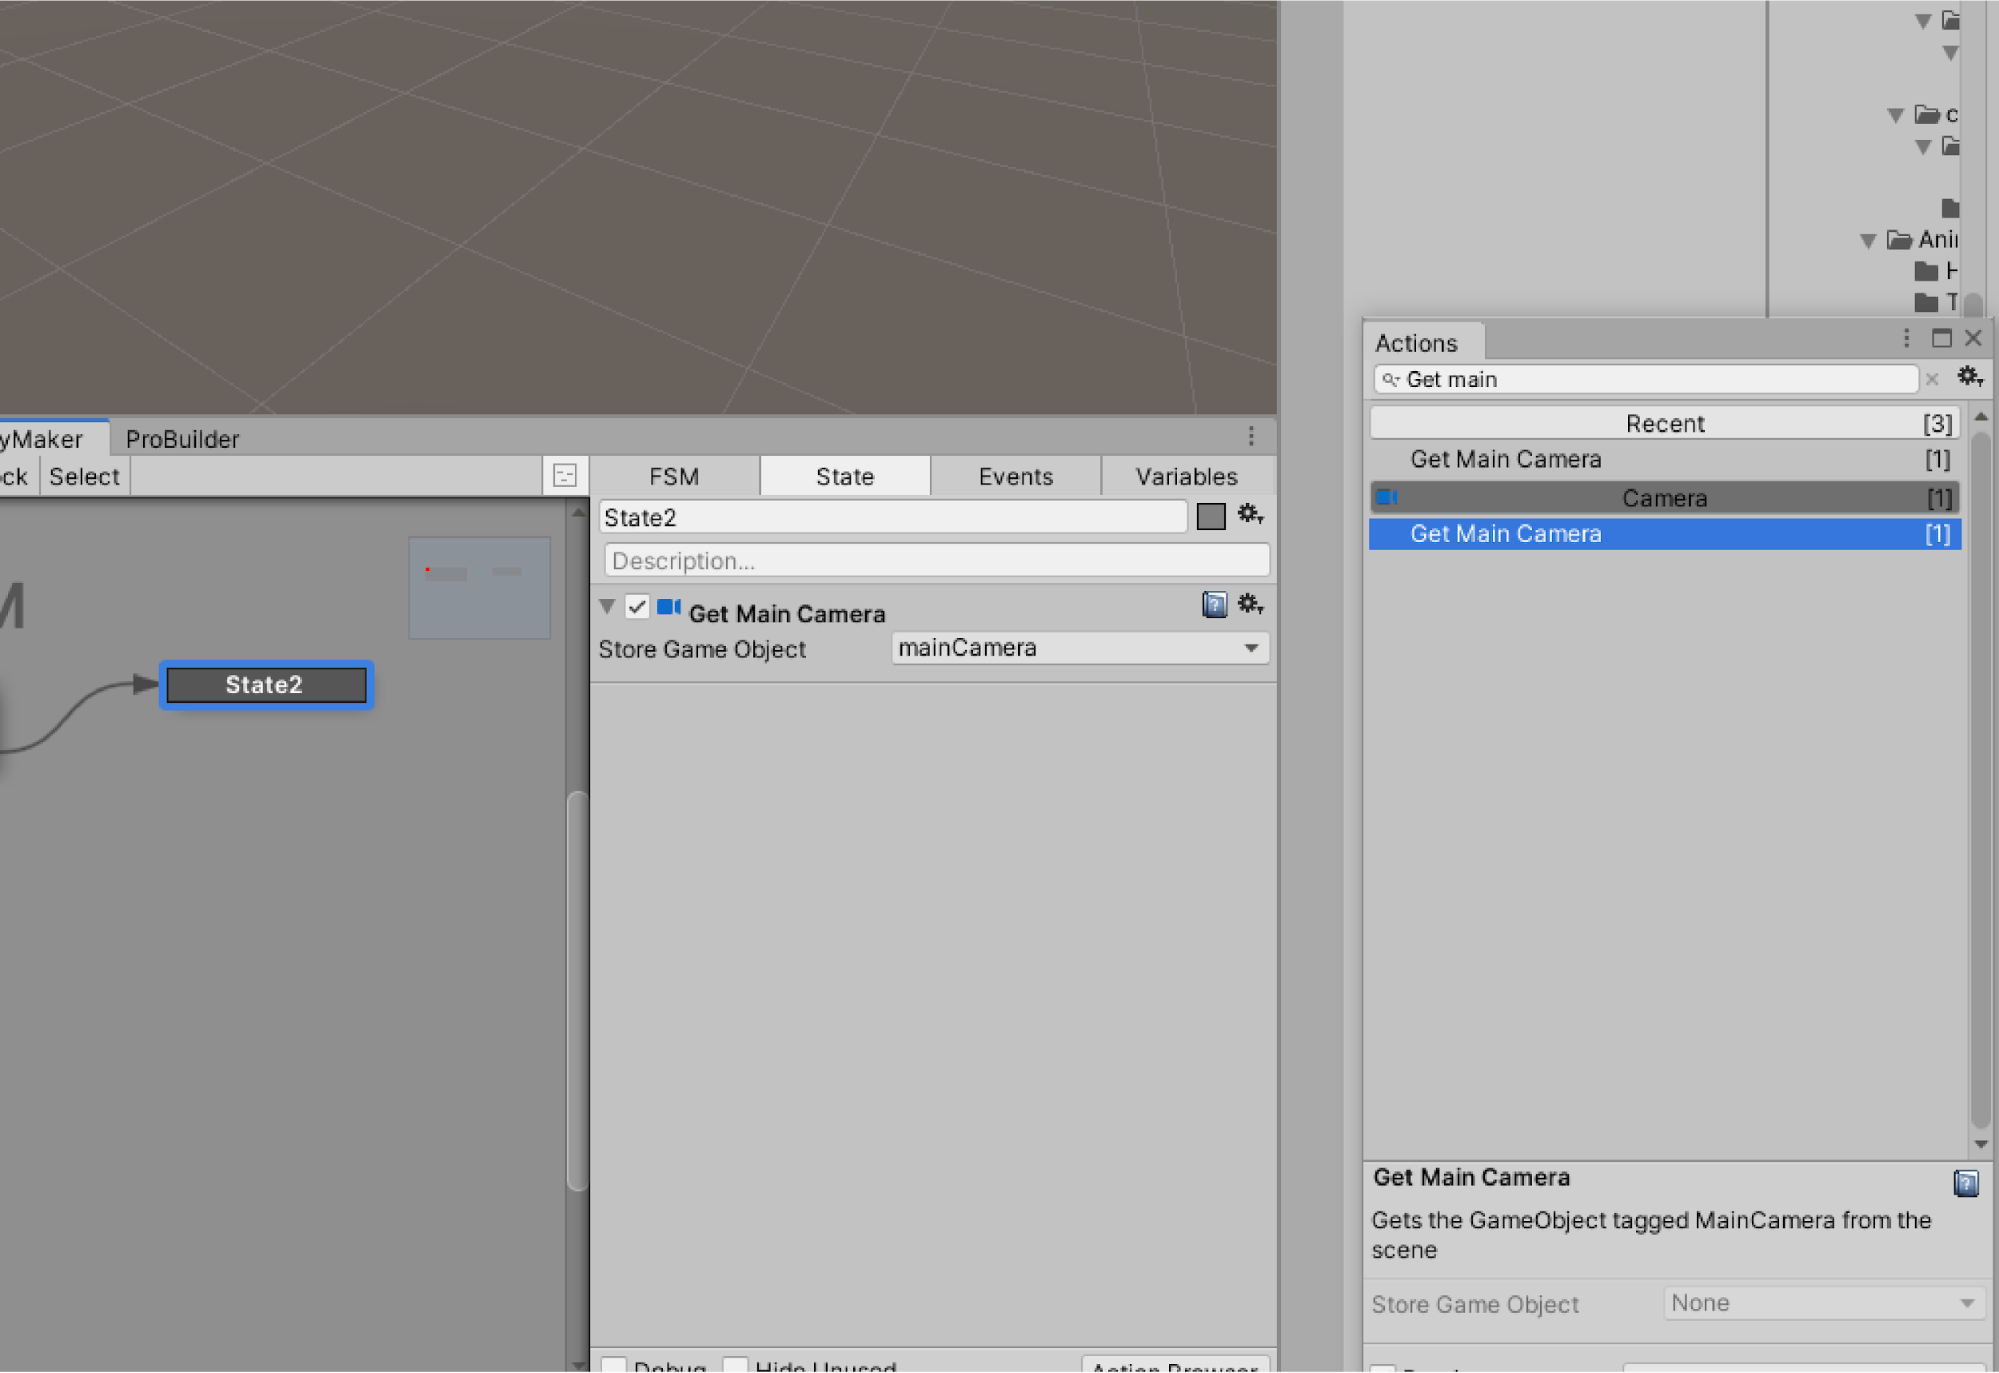
Add Get Main Camera to State2 and select the variable mainCamera for Store Game Object.
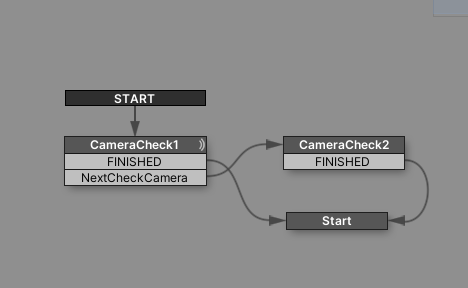
On the State tab, select Name and rename State1 to CameraCheck1 and State2 to CameraCheck2.
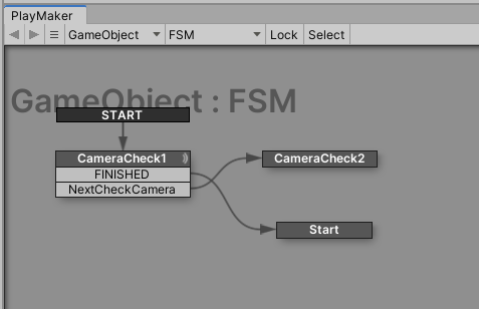
Create State1.
Connect a Transition from FINISHED in CameraCheck1 to State1.
Rename State1 to Start.
Right click on CameraCheck2 and select Add Transition > FINISHED.
You can also add FINISHED by Ctrl + left mouse click on the State.
Connect the Transition from CameraCheck2 FINISHED to Get Goal Pos.
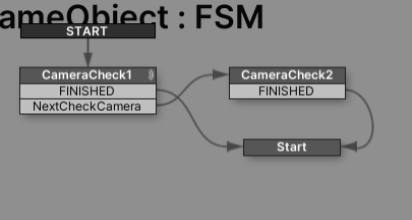
This completes the FSM to get the STYLY viewpoint (Main Camera).
Save the created FSM as an FSM Template so that it can be used over and over again.
Right click on PlayMakerEditor and select “Save Template”.
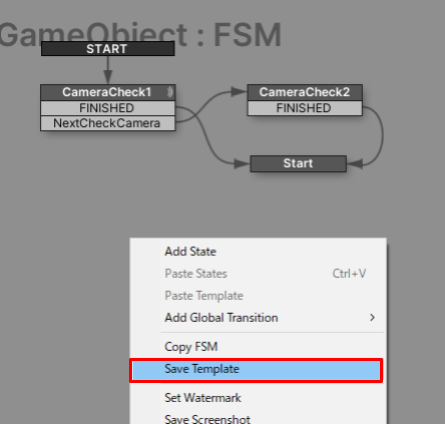
A file save dialog will appear,
Save the file as CameraCheck.asset in the desired location.
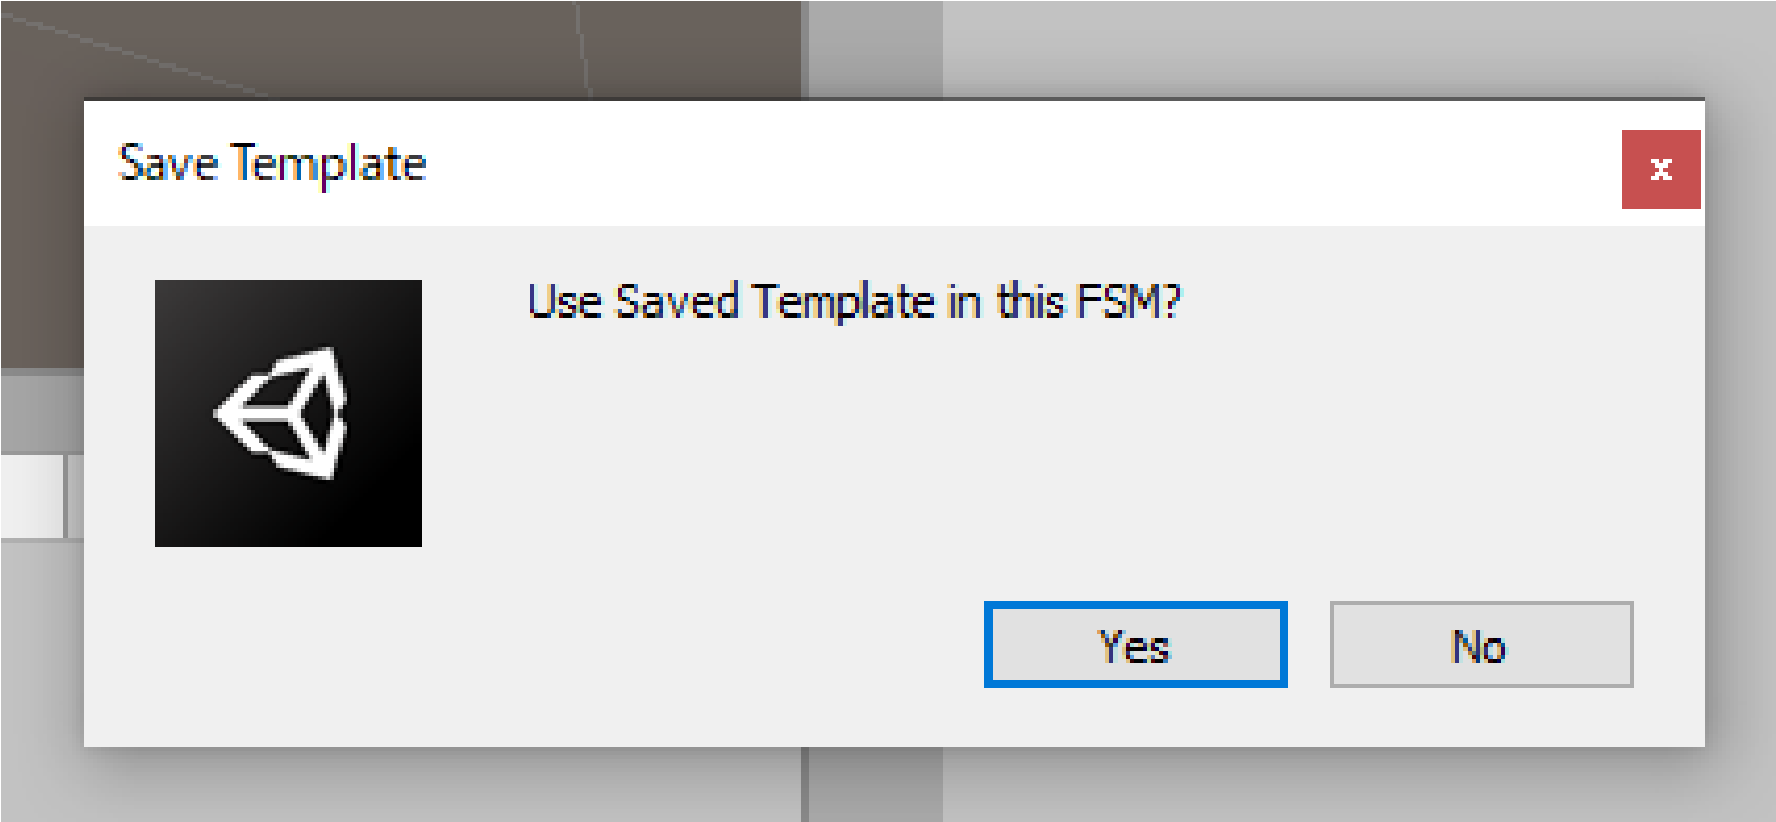
Select Yes.
If the following message is displayed, the creation of the FSM Template to acquire the STYLY viewpoint (Main Camera) is complete.
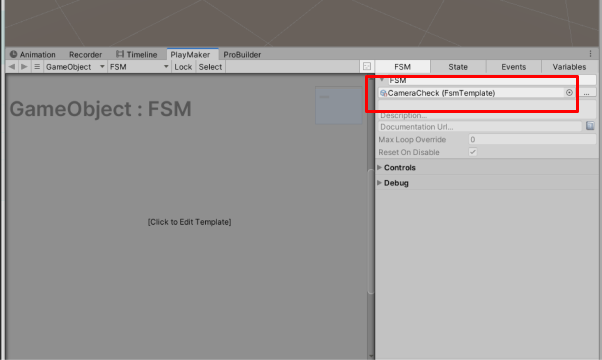
Let’s create a function using the created Template.
Creating a function that “keeps the 2D image facing forward in relation to the viewpoint
Let’s create a function that keeps the 2D image facing forward even if the viewpoint (Main Camera) is moved.

Right-click the Asset folder in the project window and select Create > Folder to create a folder.
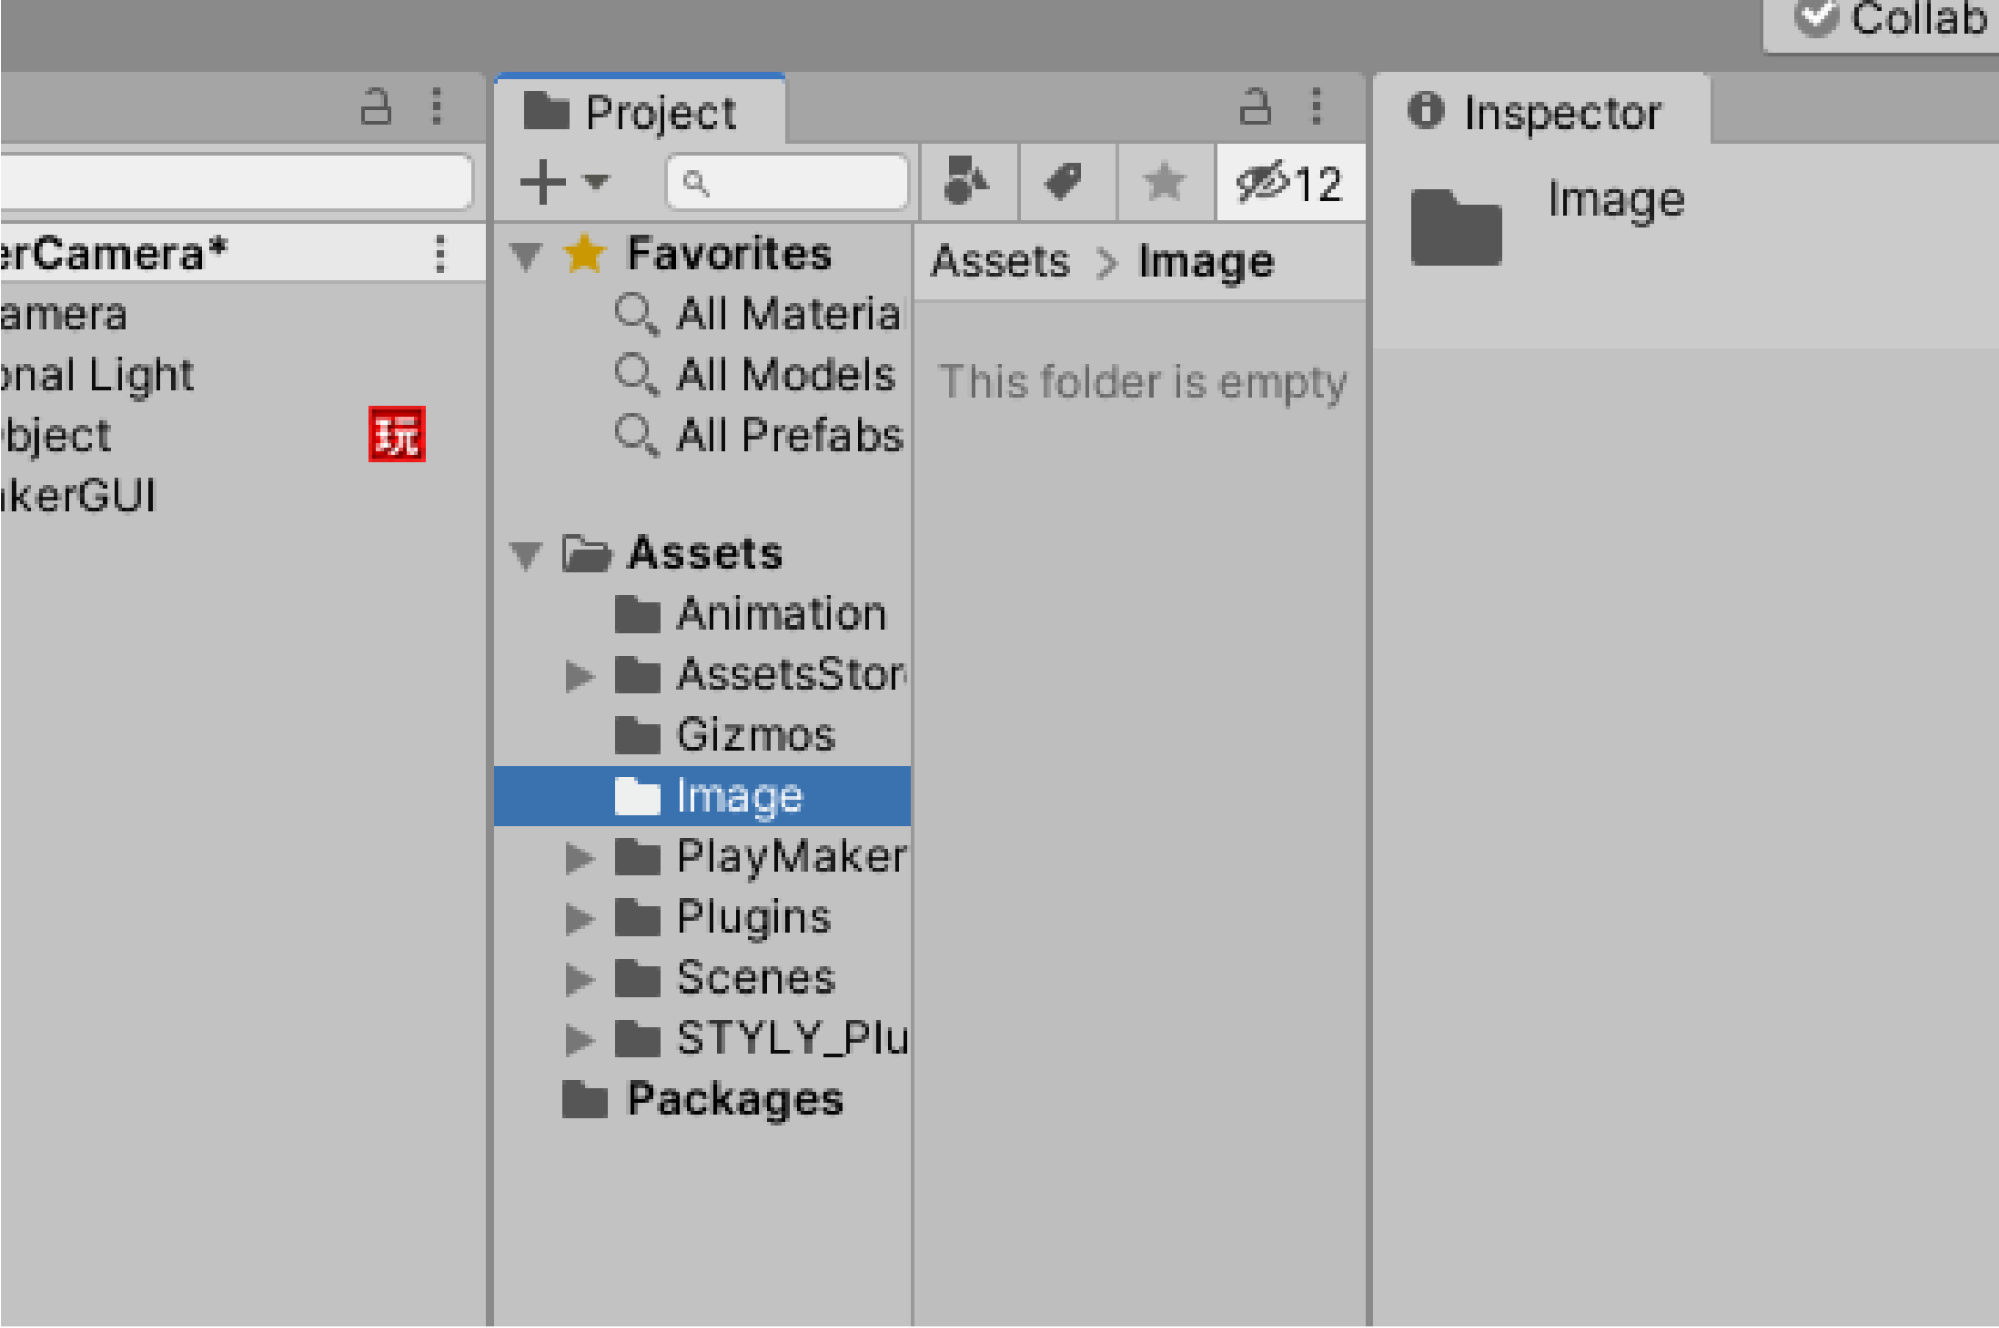
Prepare any image data you like.
Drag and drop the prepared image files into the Image folder.
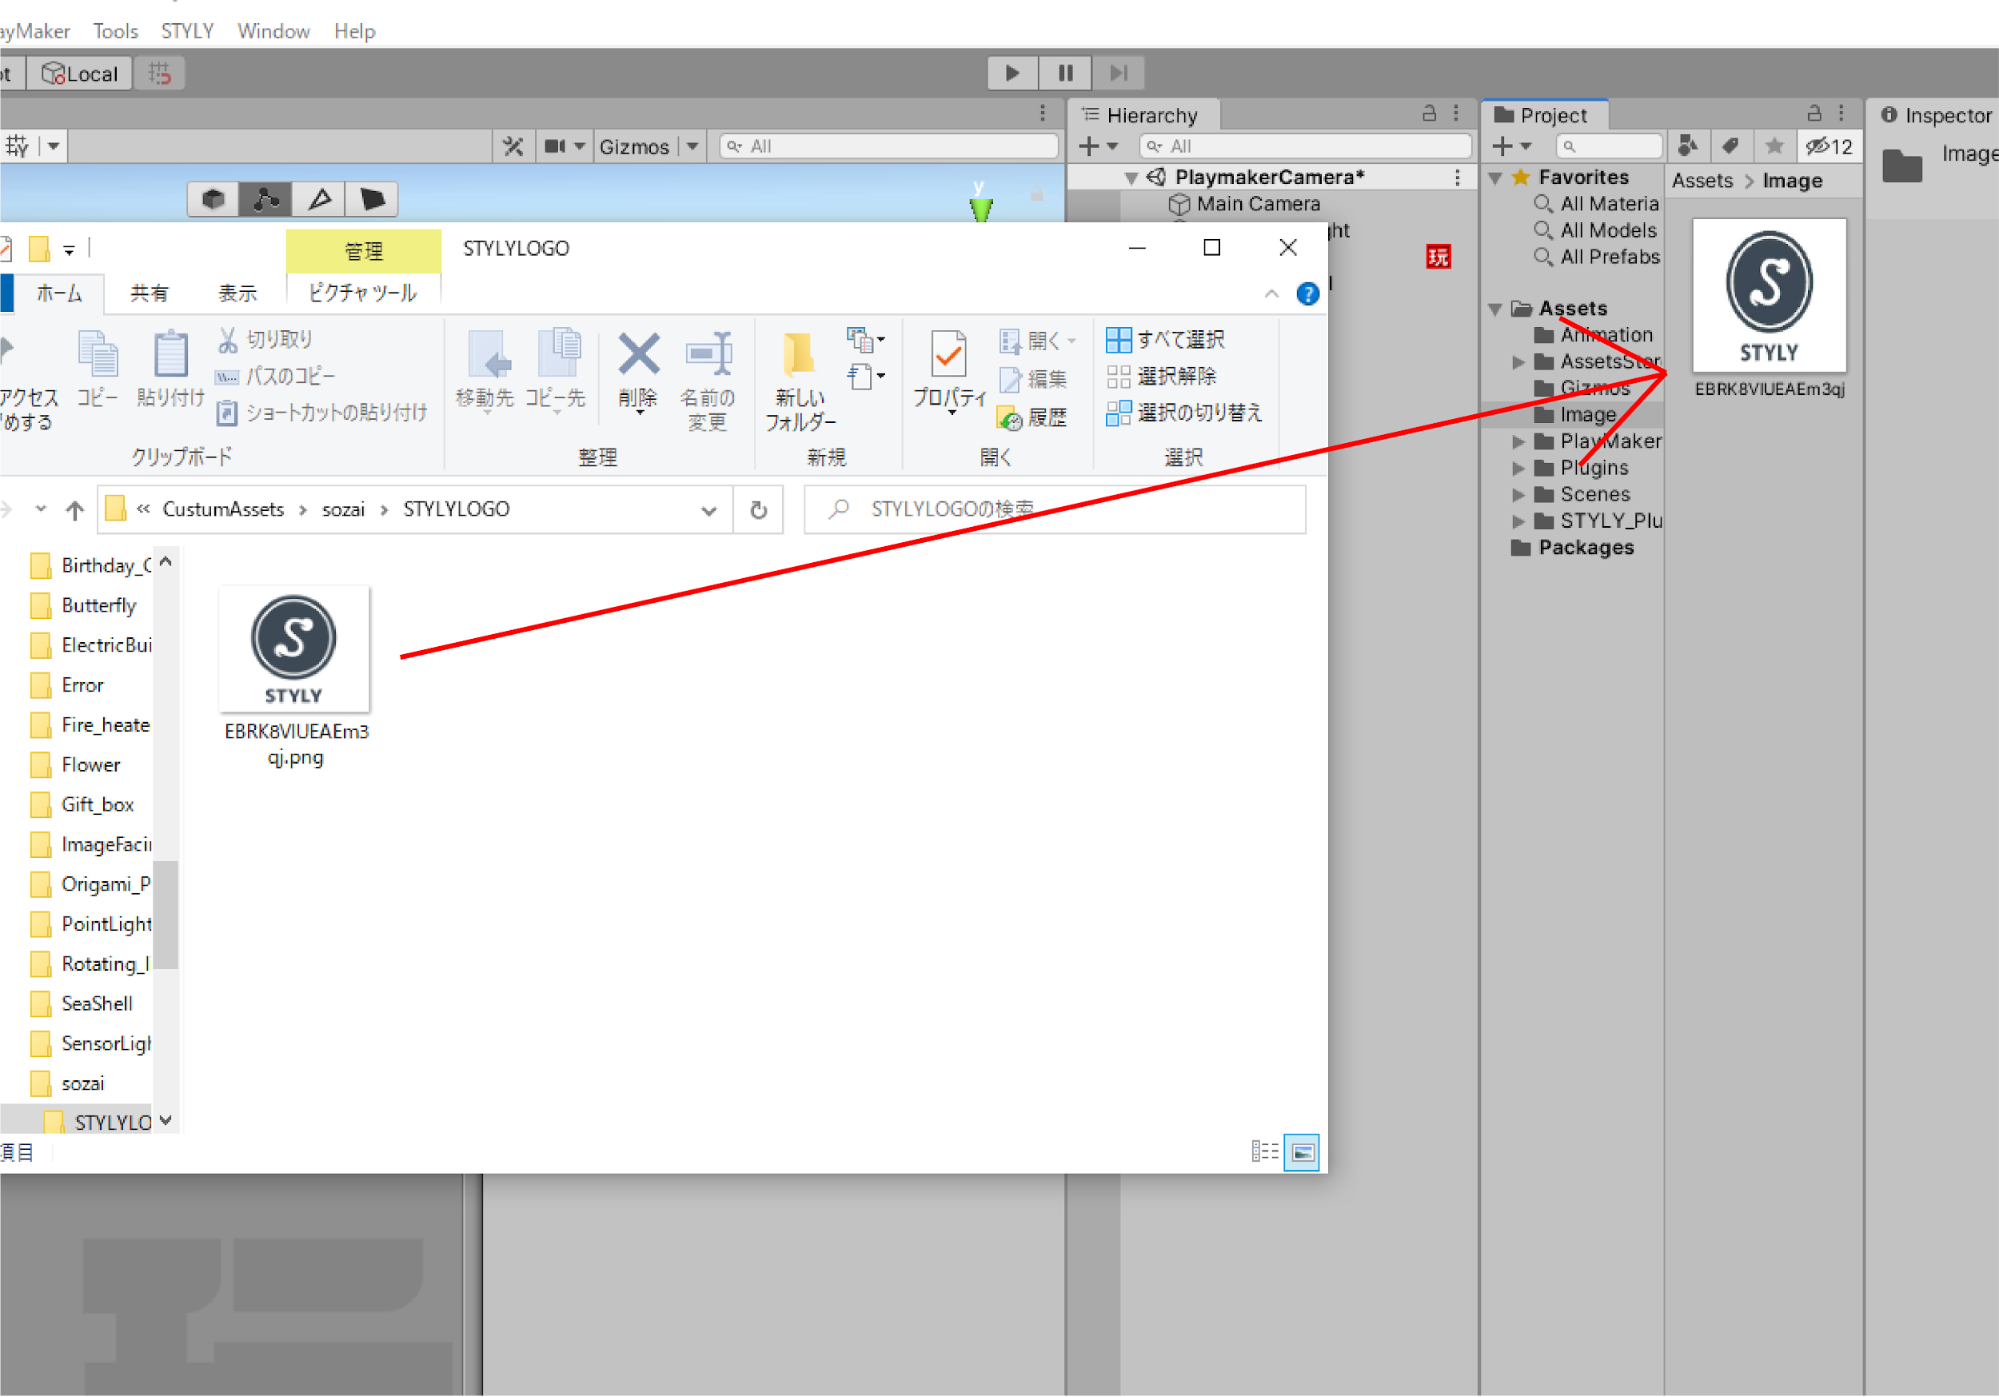
Select the image data under the image folder in the project window.
Inspector will display information about the image data.
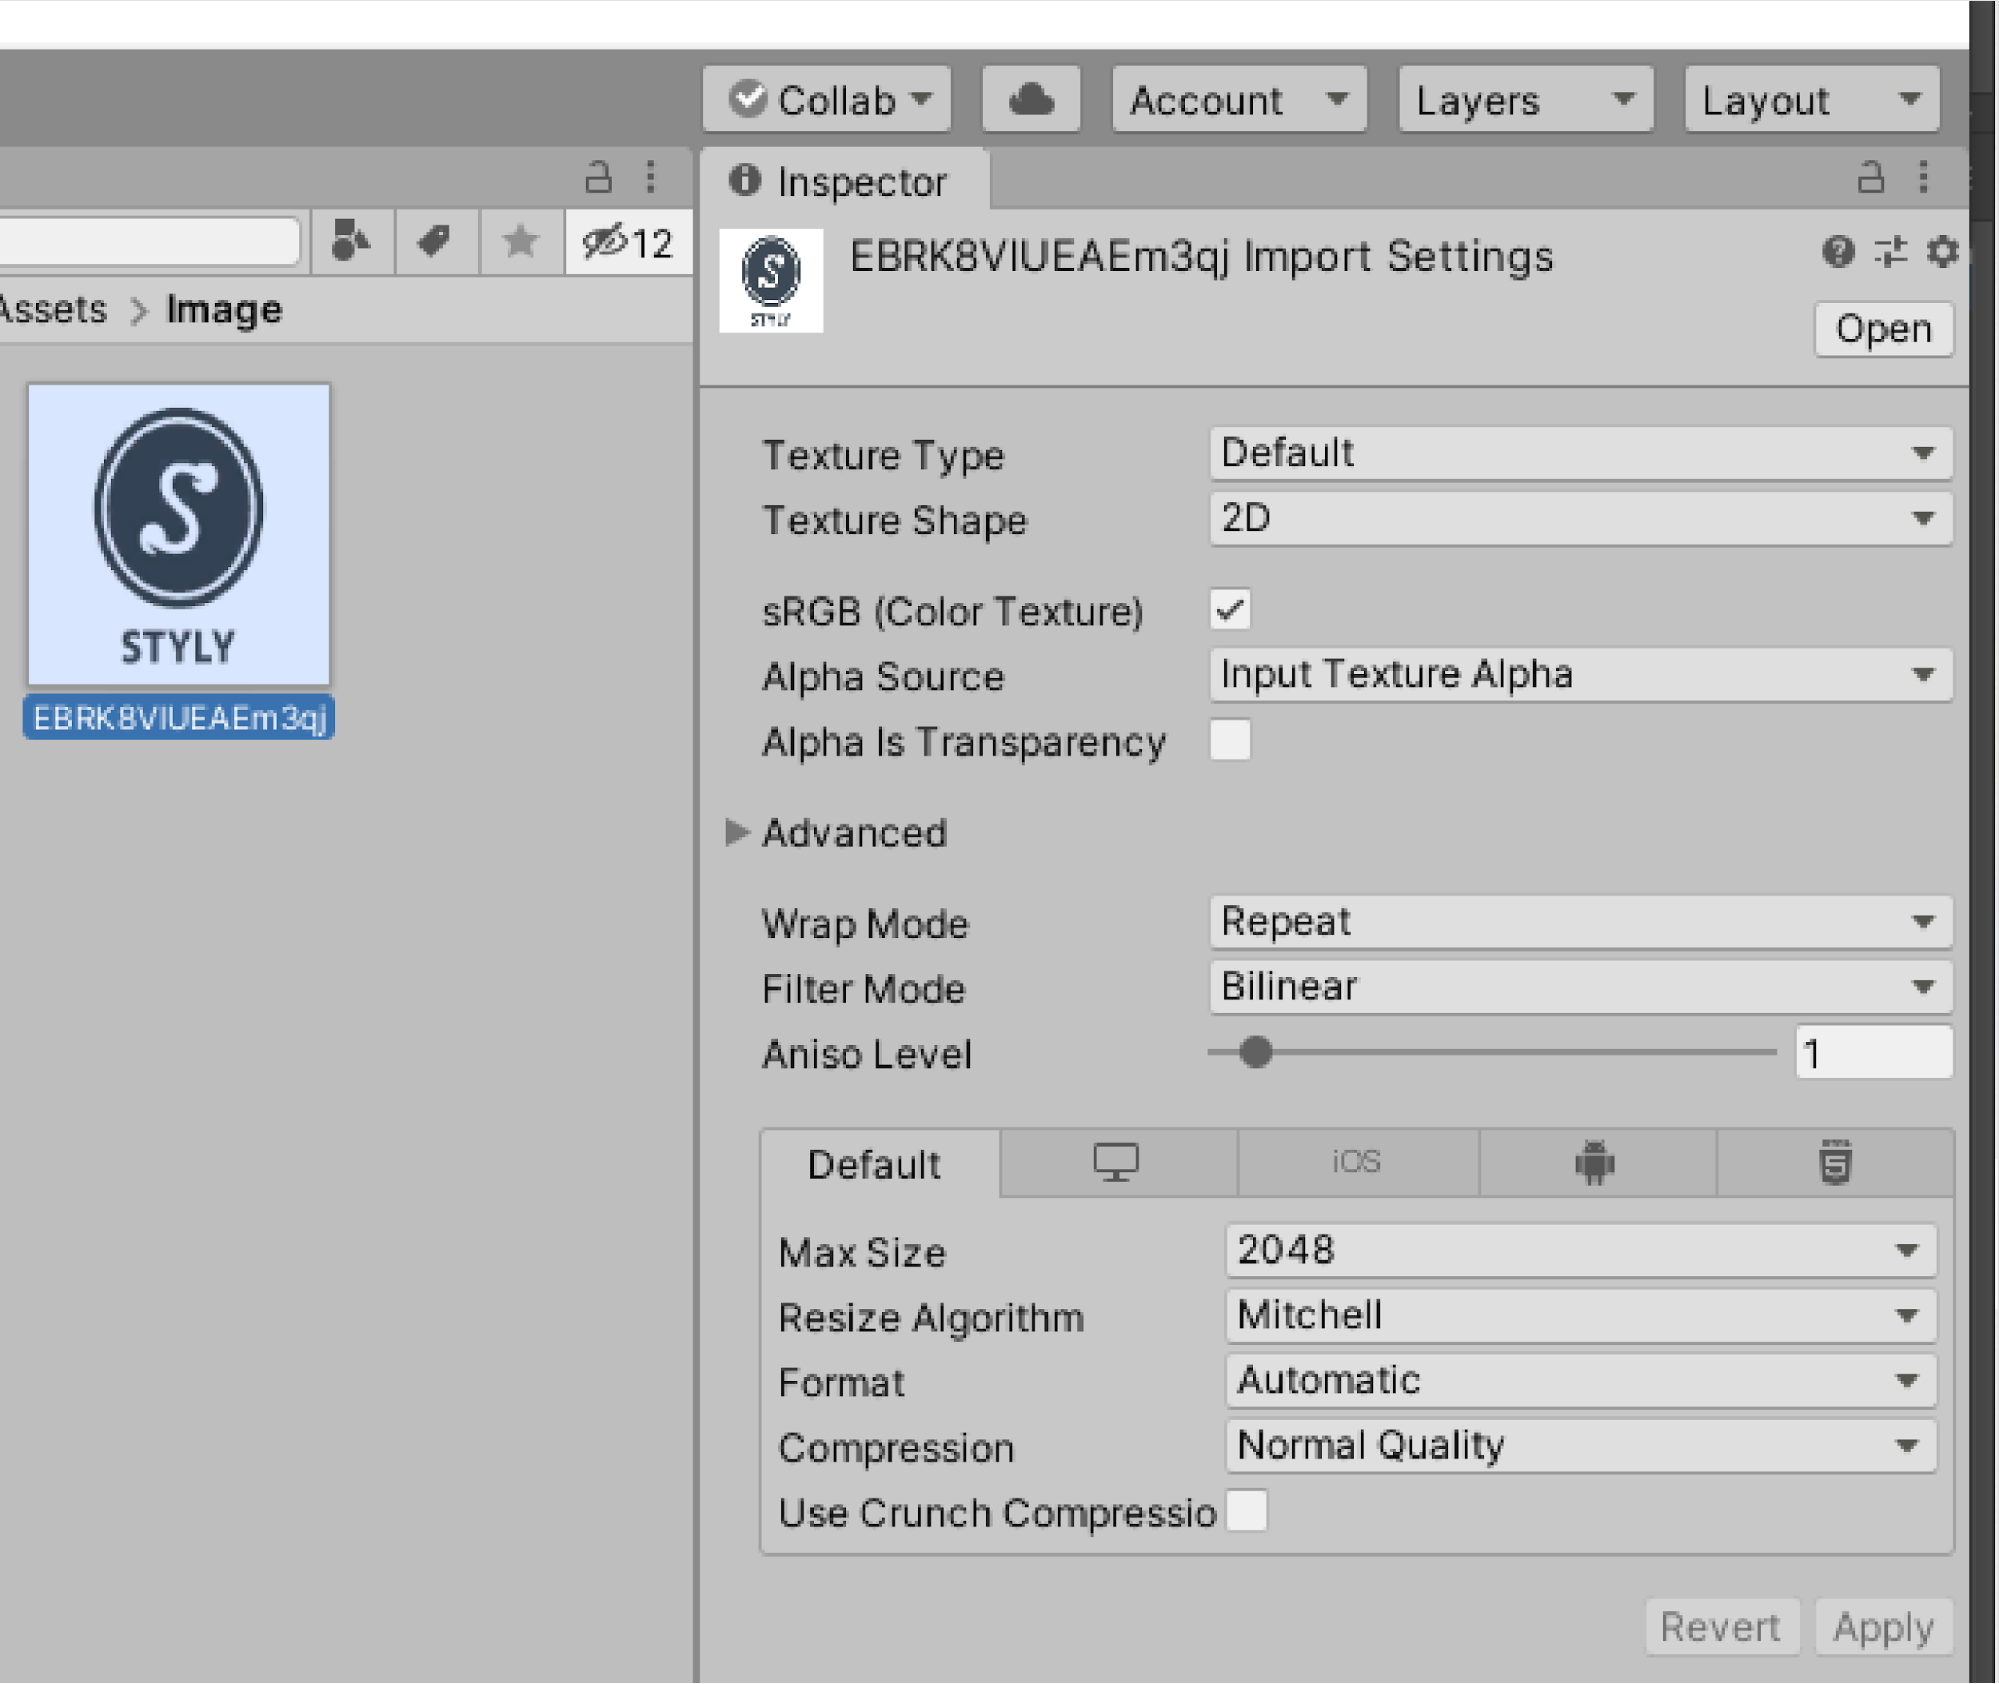
Change Inspector’s Texture Type to “Sprite (2D and UI)”.
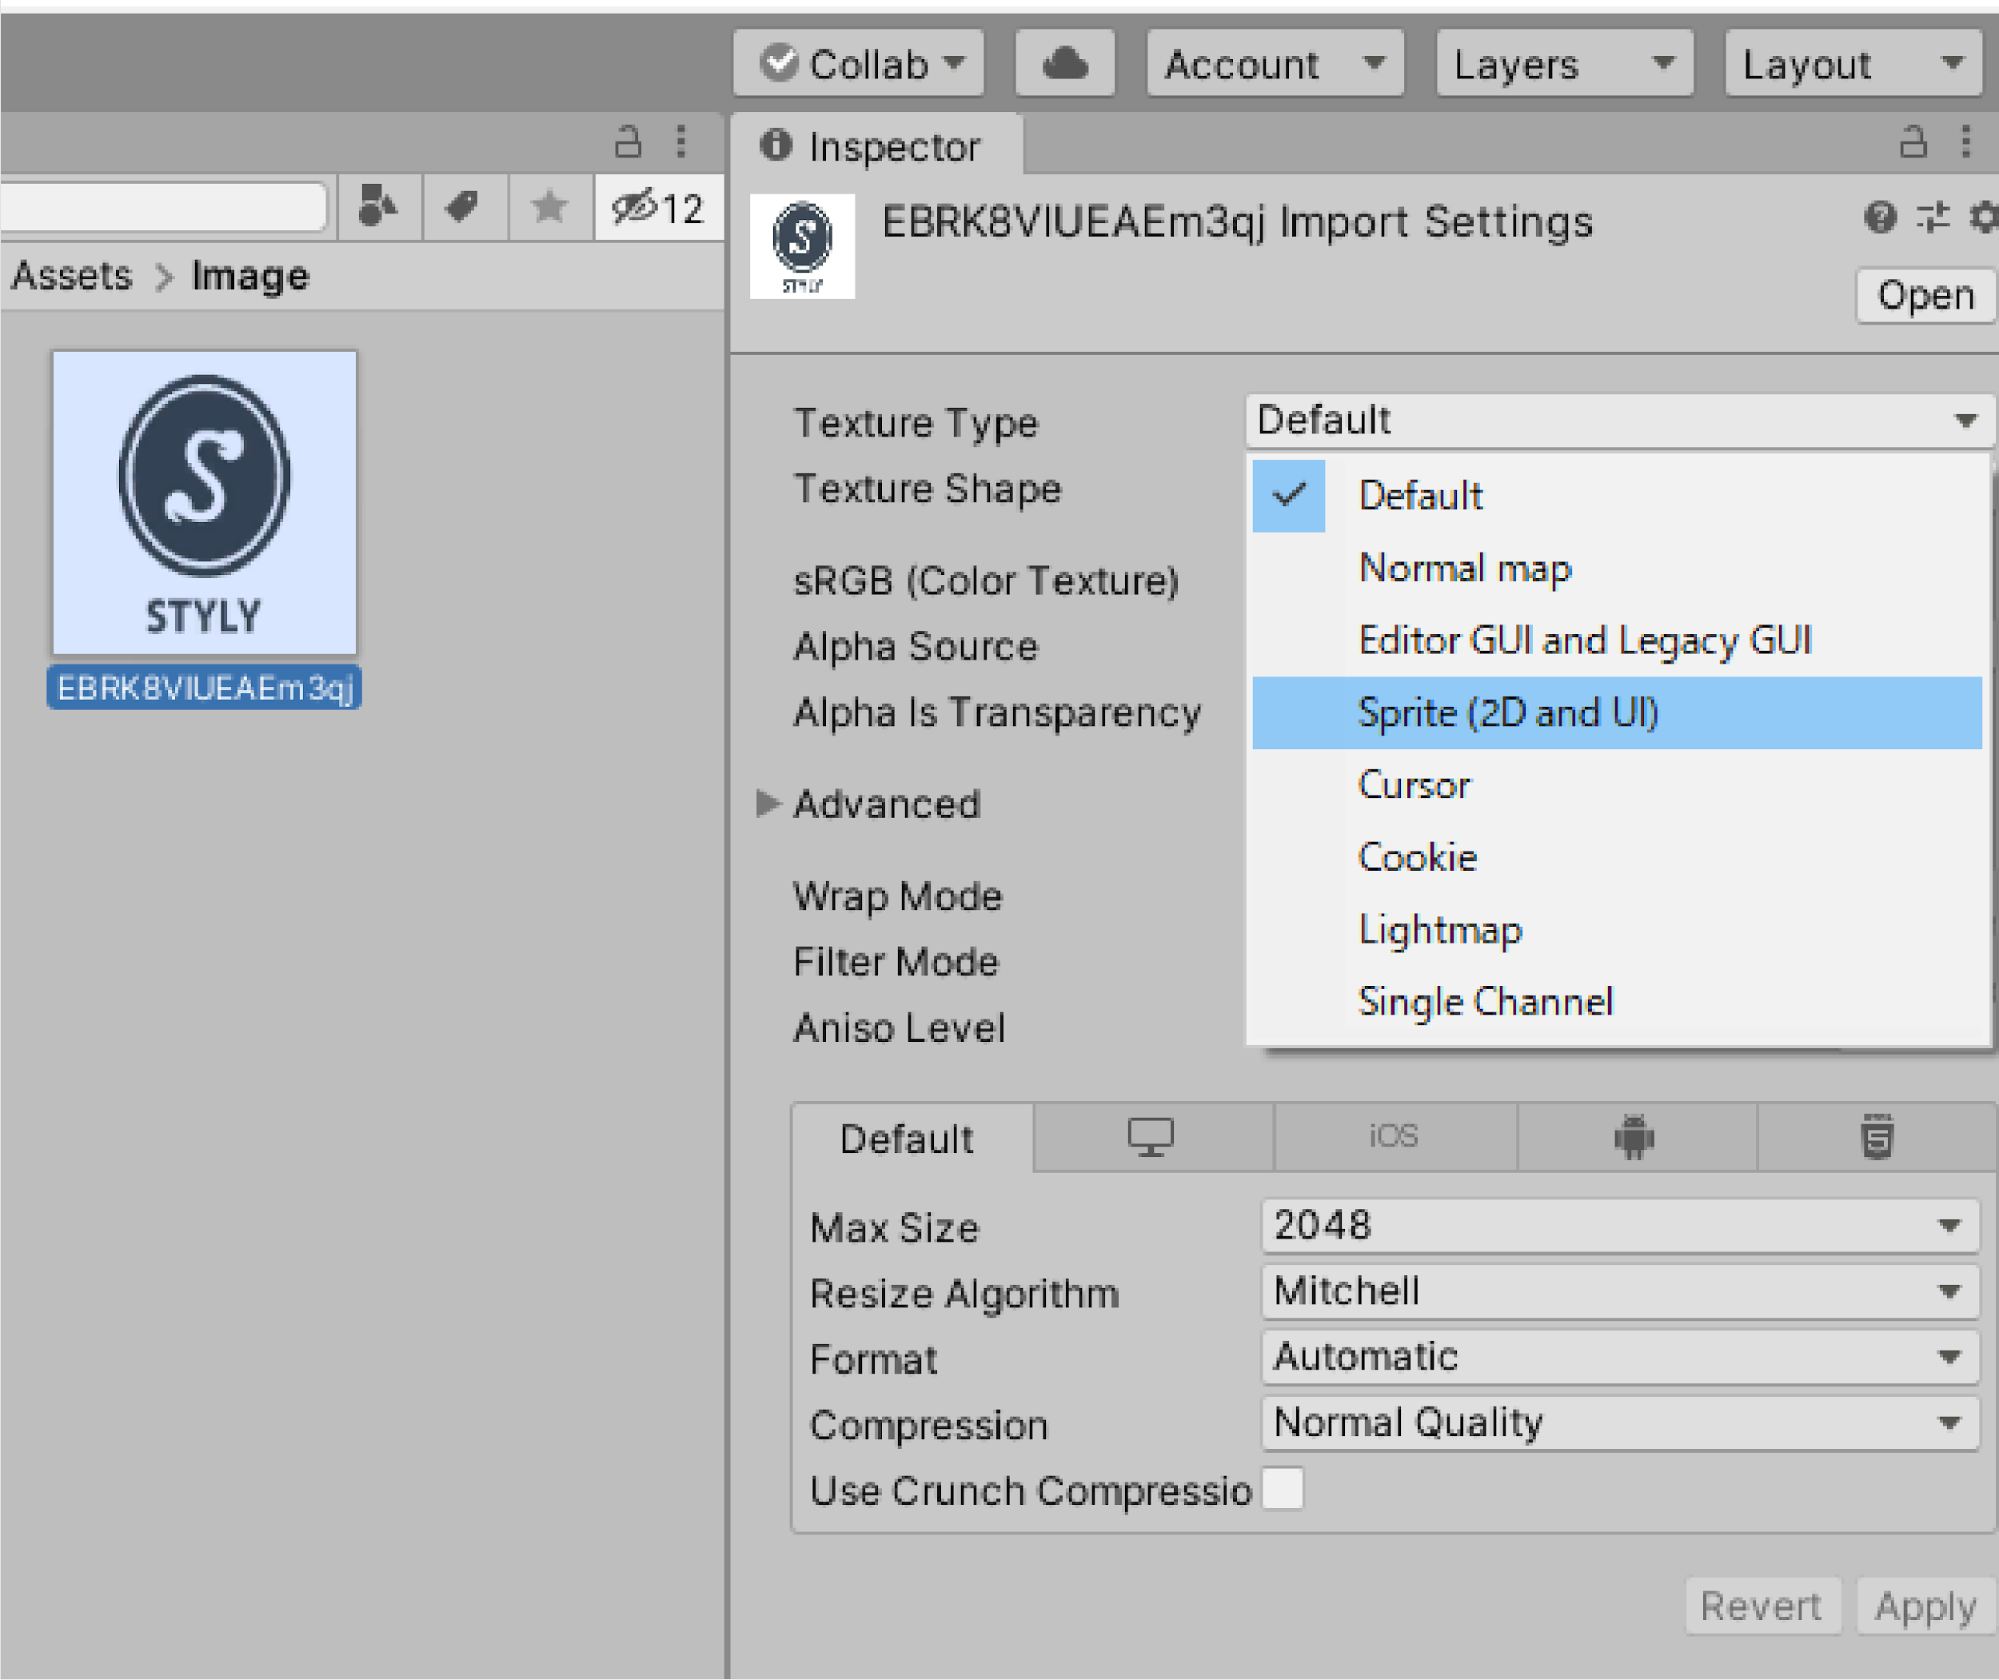
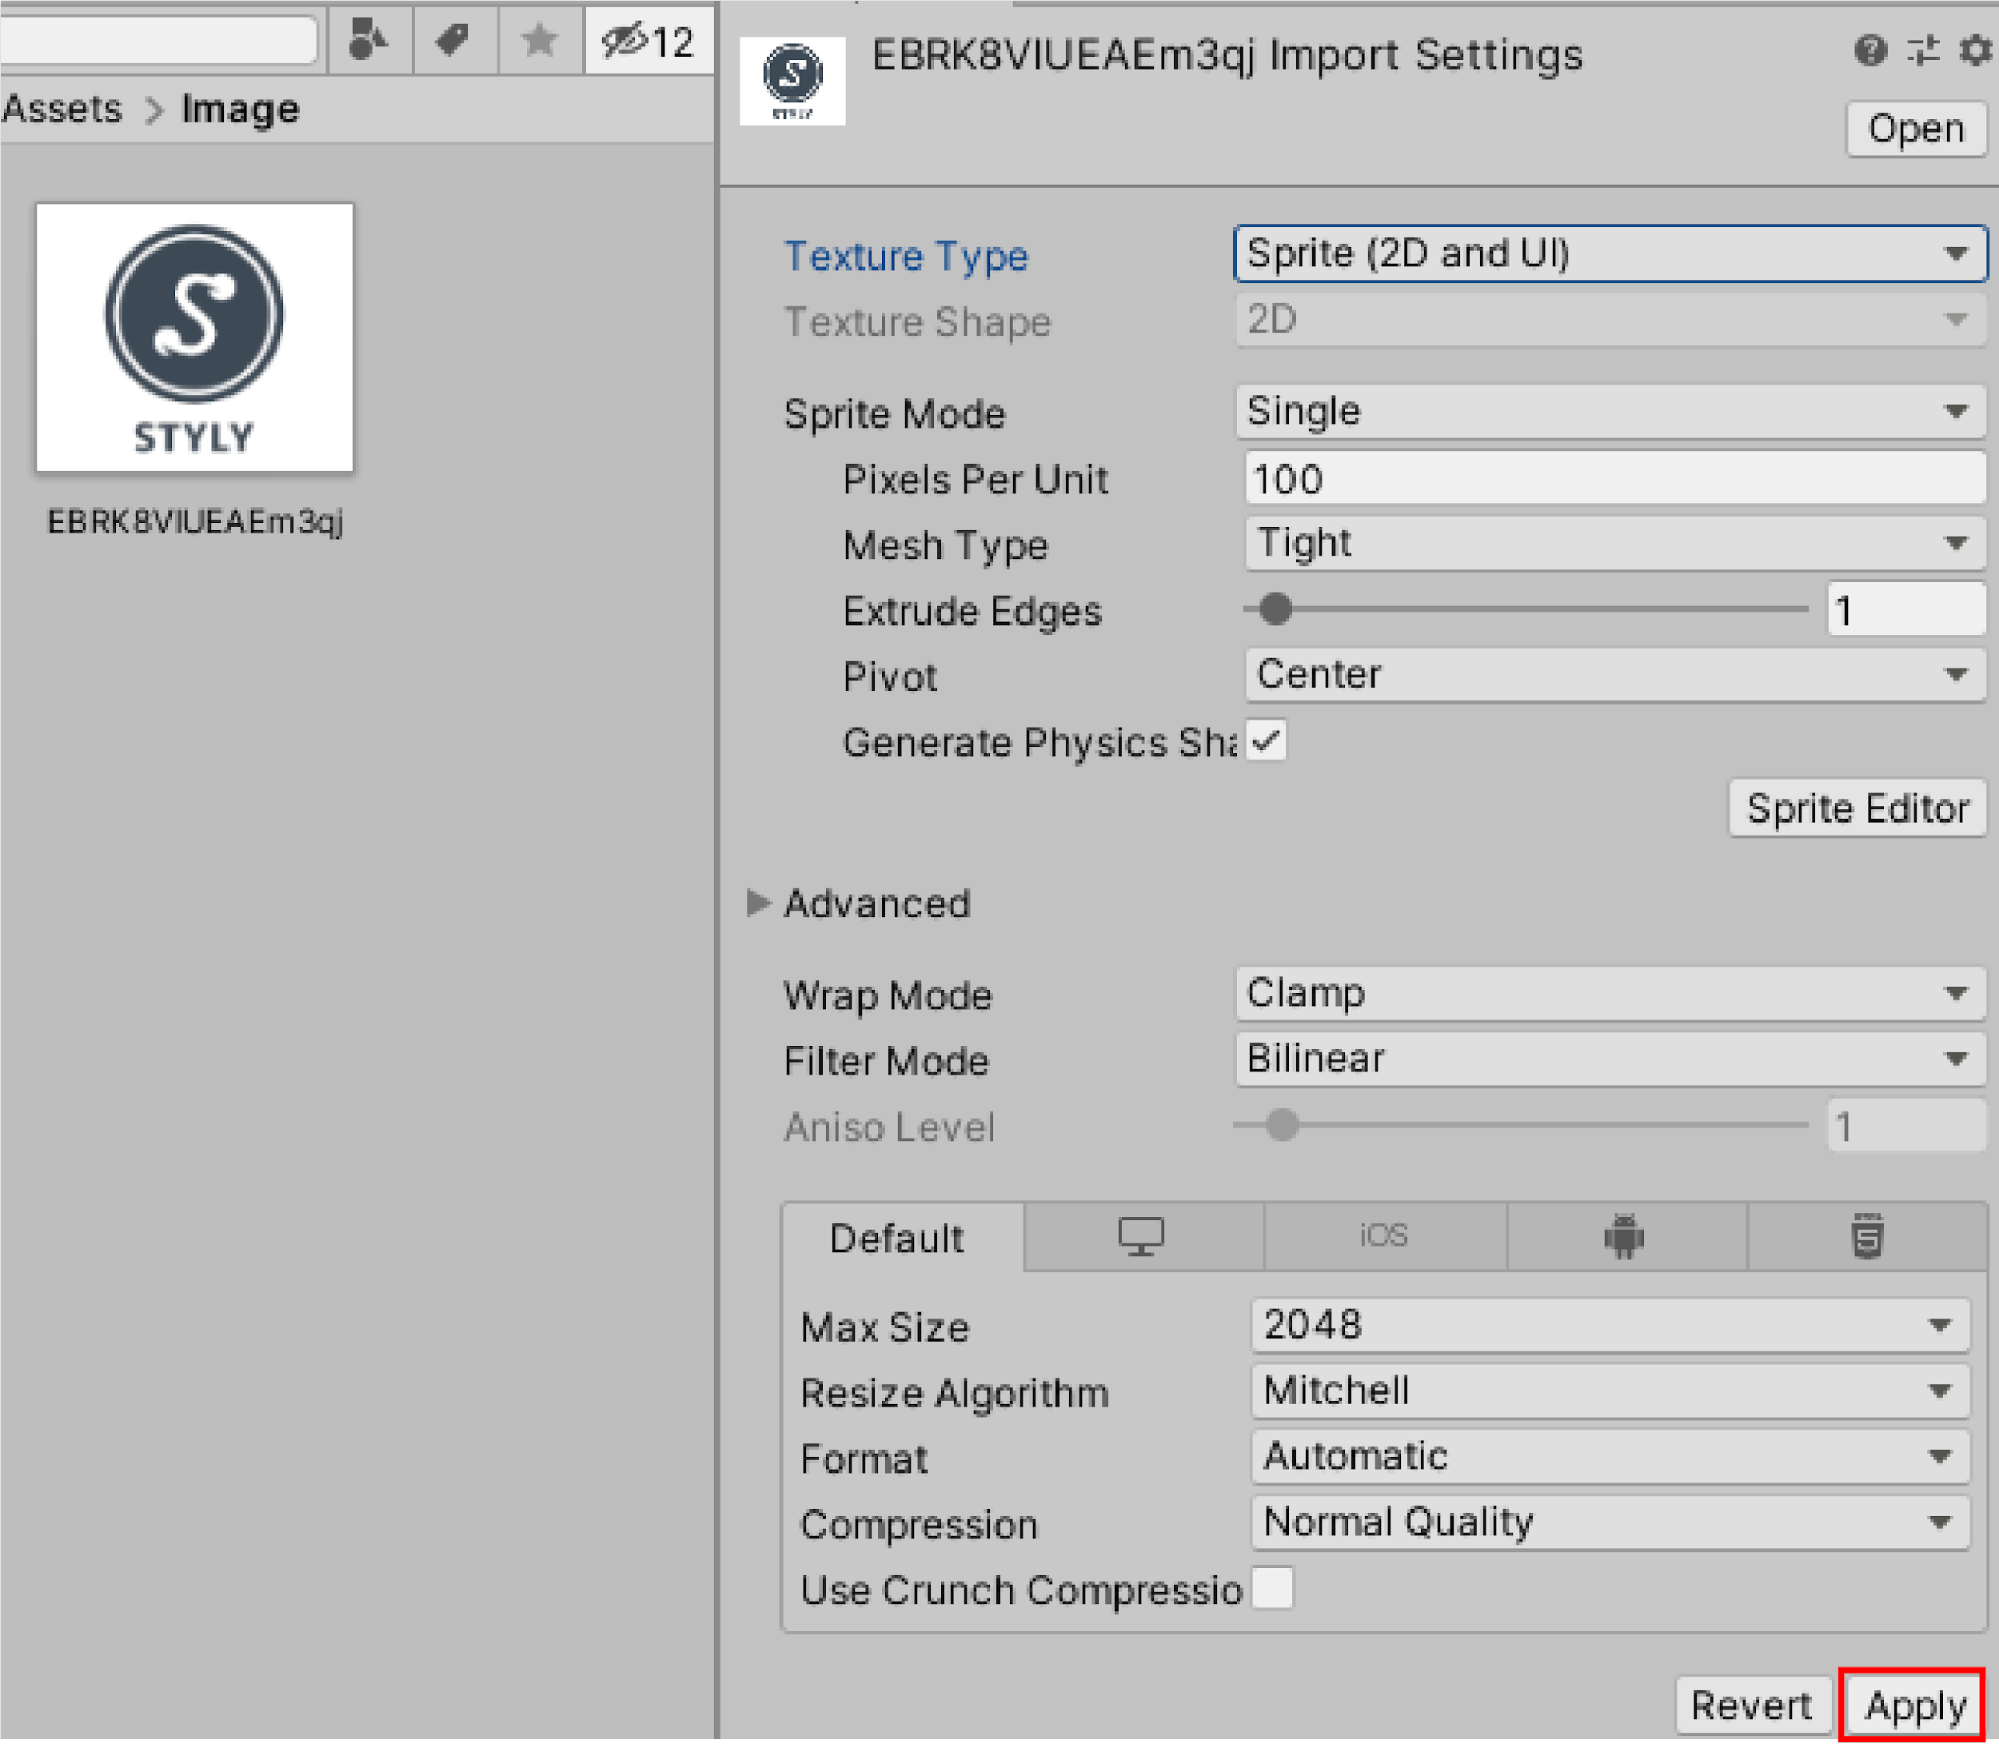
Once you have selected Sprite (2D and UI), select Apply in the lower right corner.
Note that if you do not select Apply, the Texture Type change will not take effect.
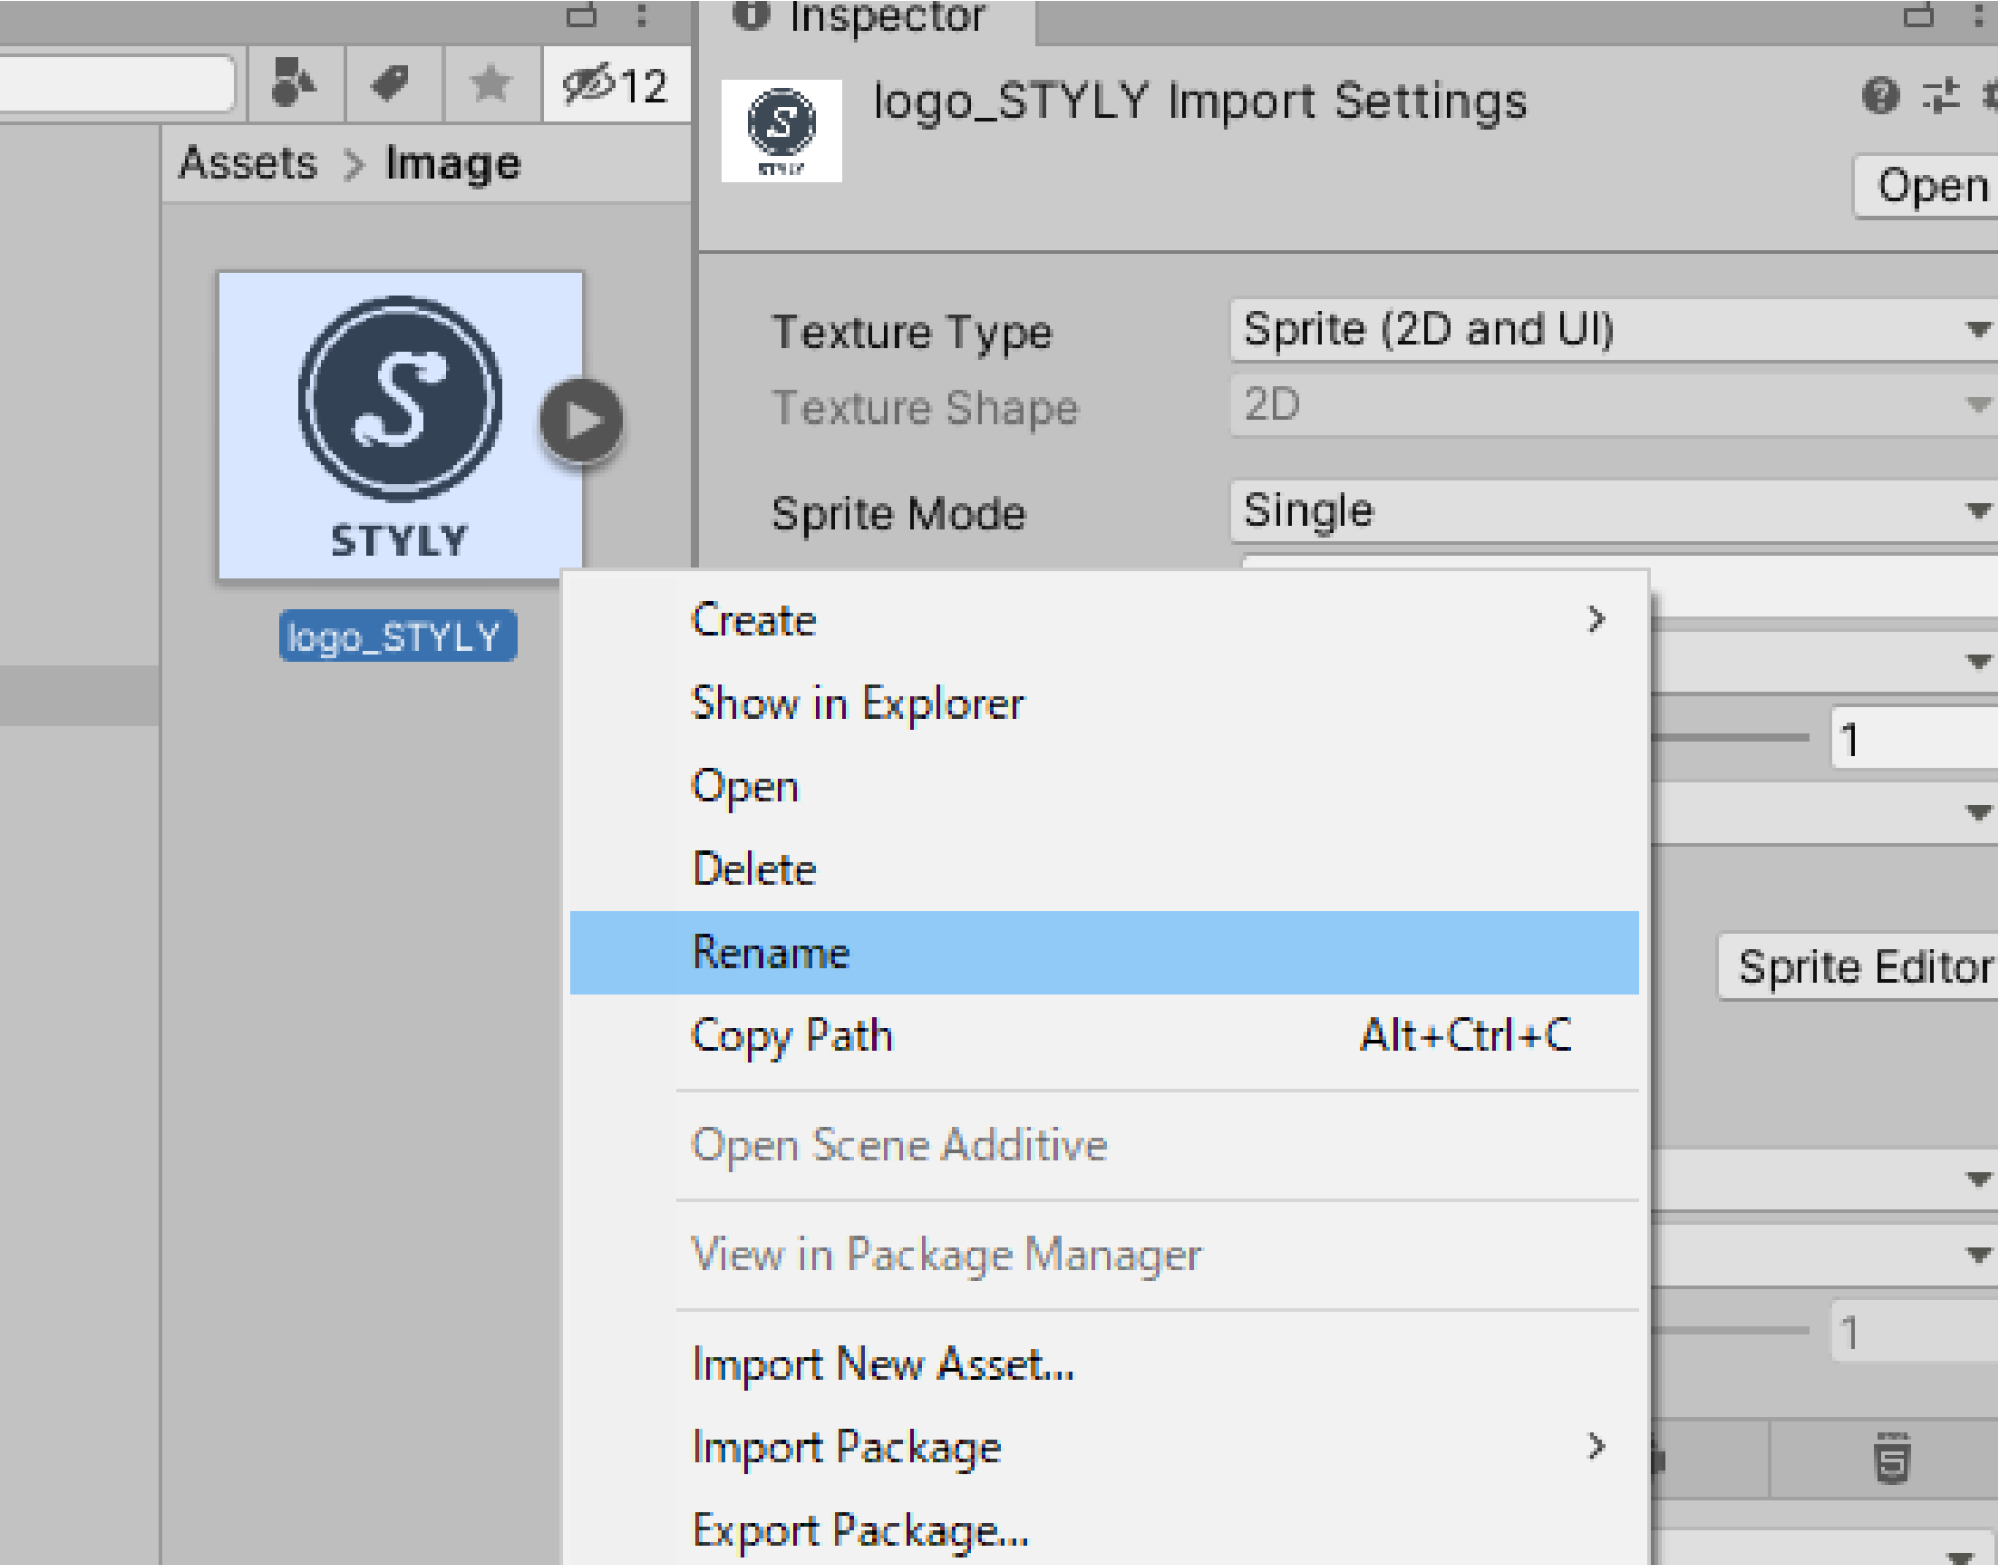
After changing the Texture Type, rename the image data.
Right-click on the image data in the project window and select “Rename.
Rename it to “logo_STYLY”.
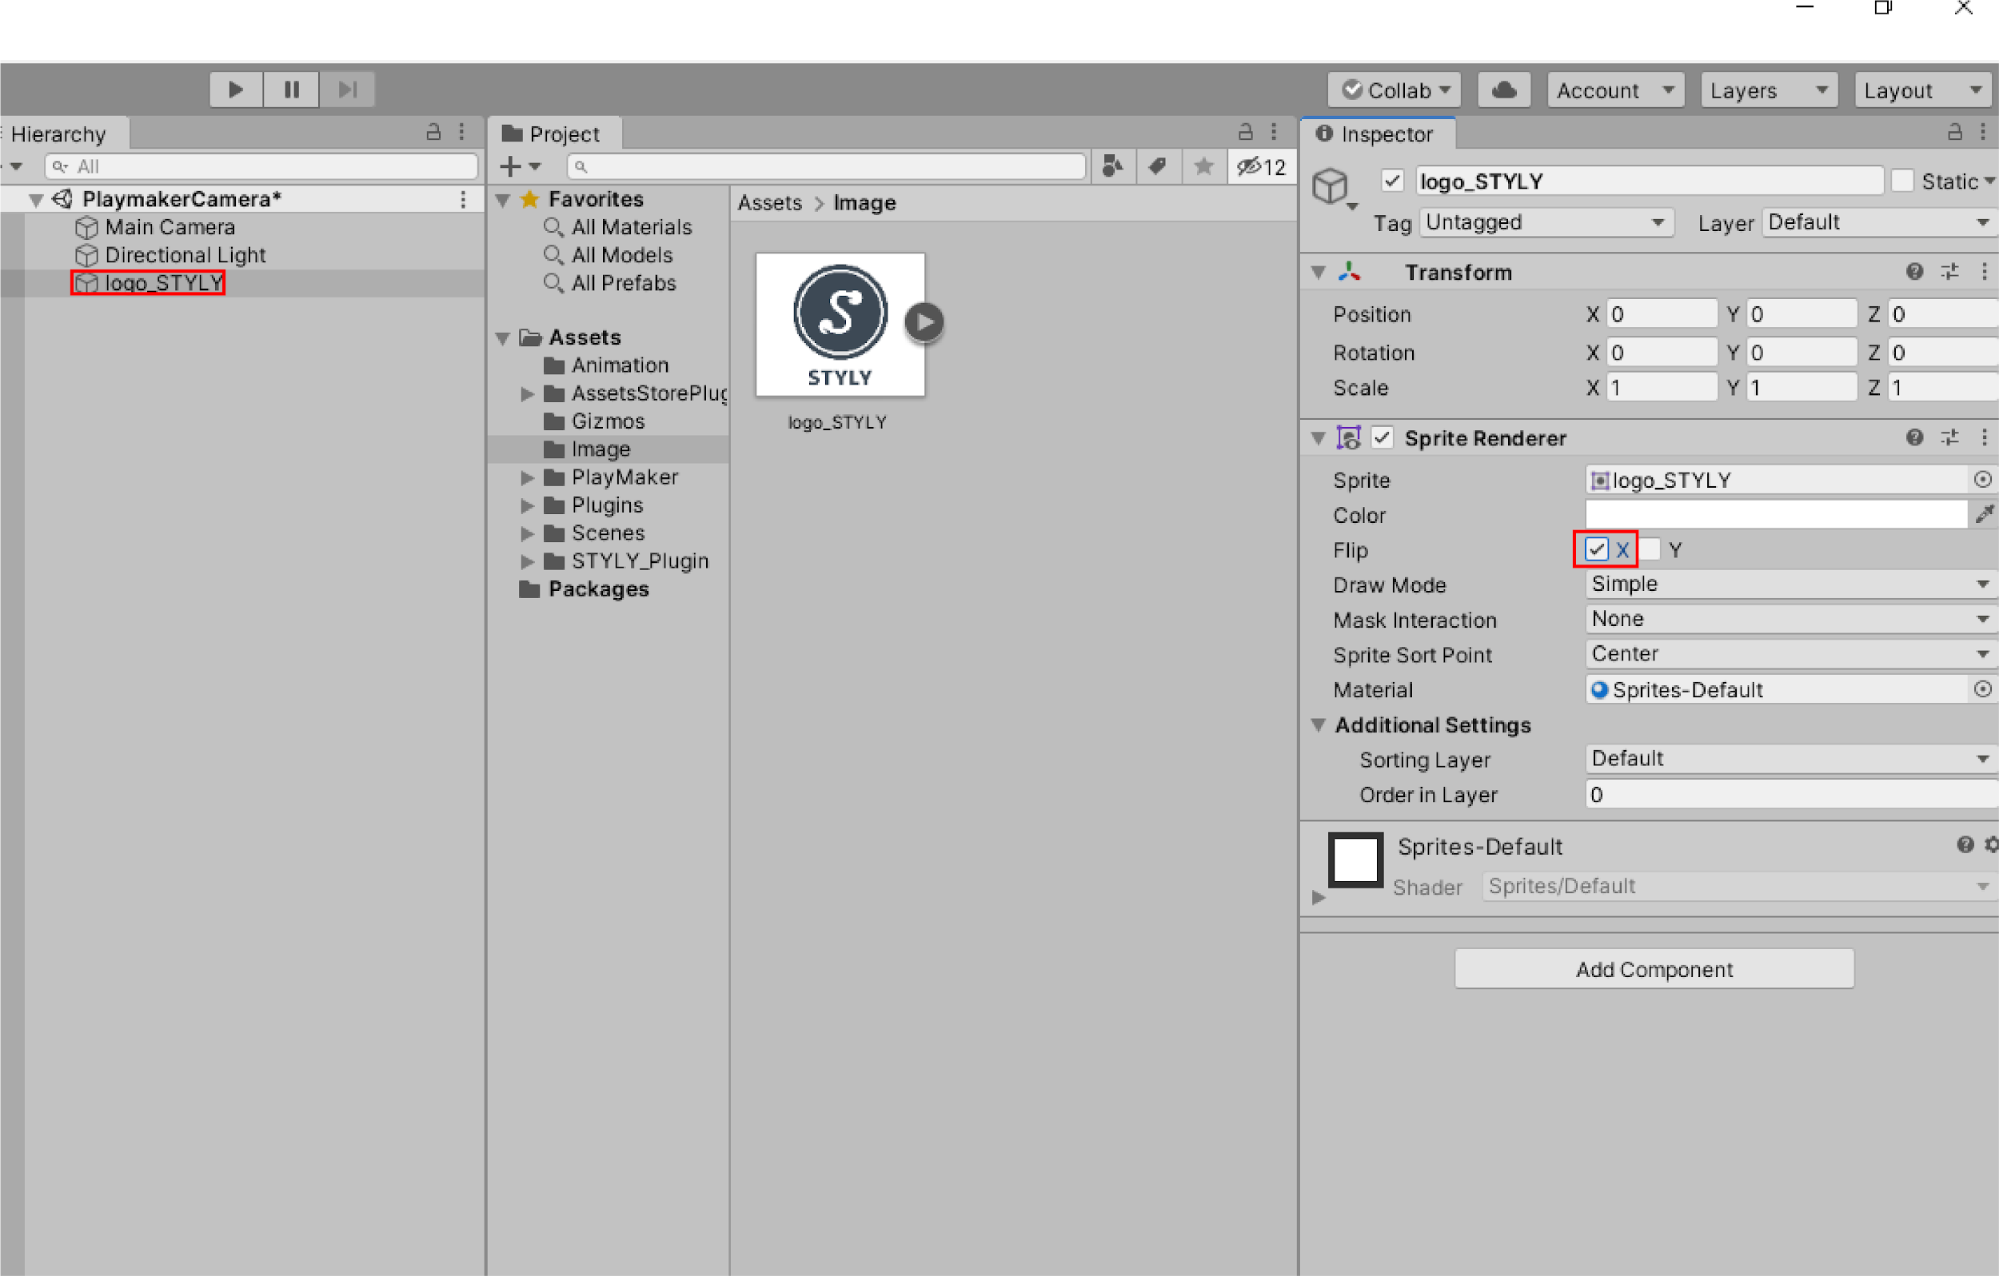
Drag and drop the image data from the project window to the hierarchy.
Manipulate the scene view so that the image is in front of the Main Camera.
Select “logo_STYLY” on the Hierarchy and check Sprite Renderer > Flip > X in Inspector.
Set PlayMaker to this “logo_STYLY”.
Select logo_STYLY and right click on PlayMakerEditor,
Select “Paste Template” > “General” > “CameraCheck”.
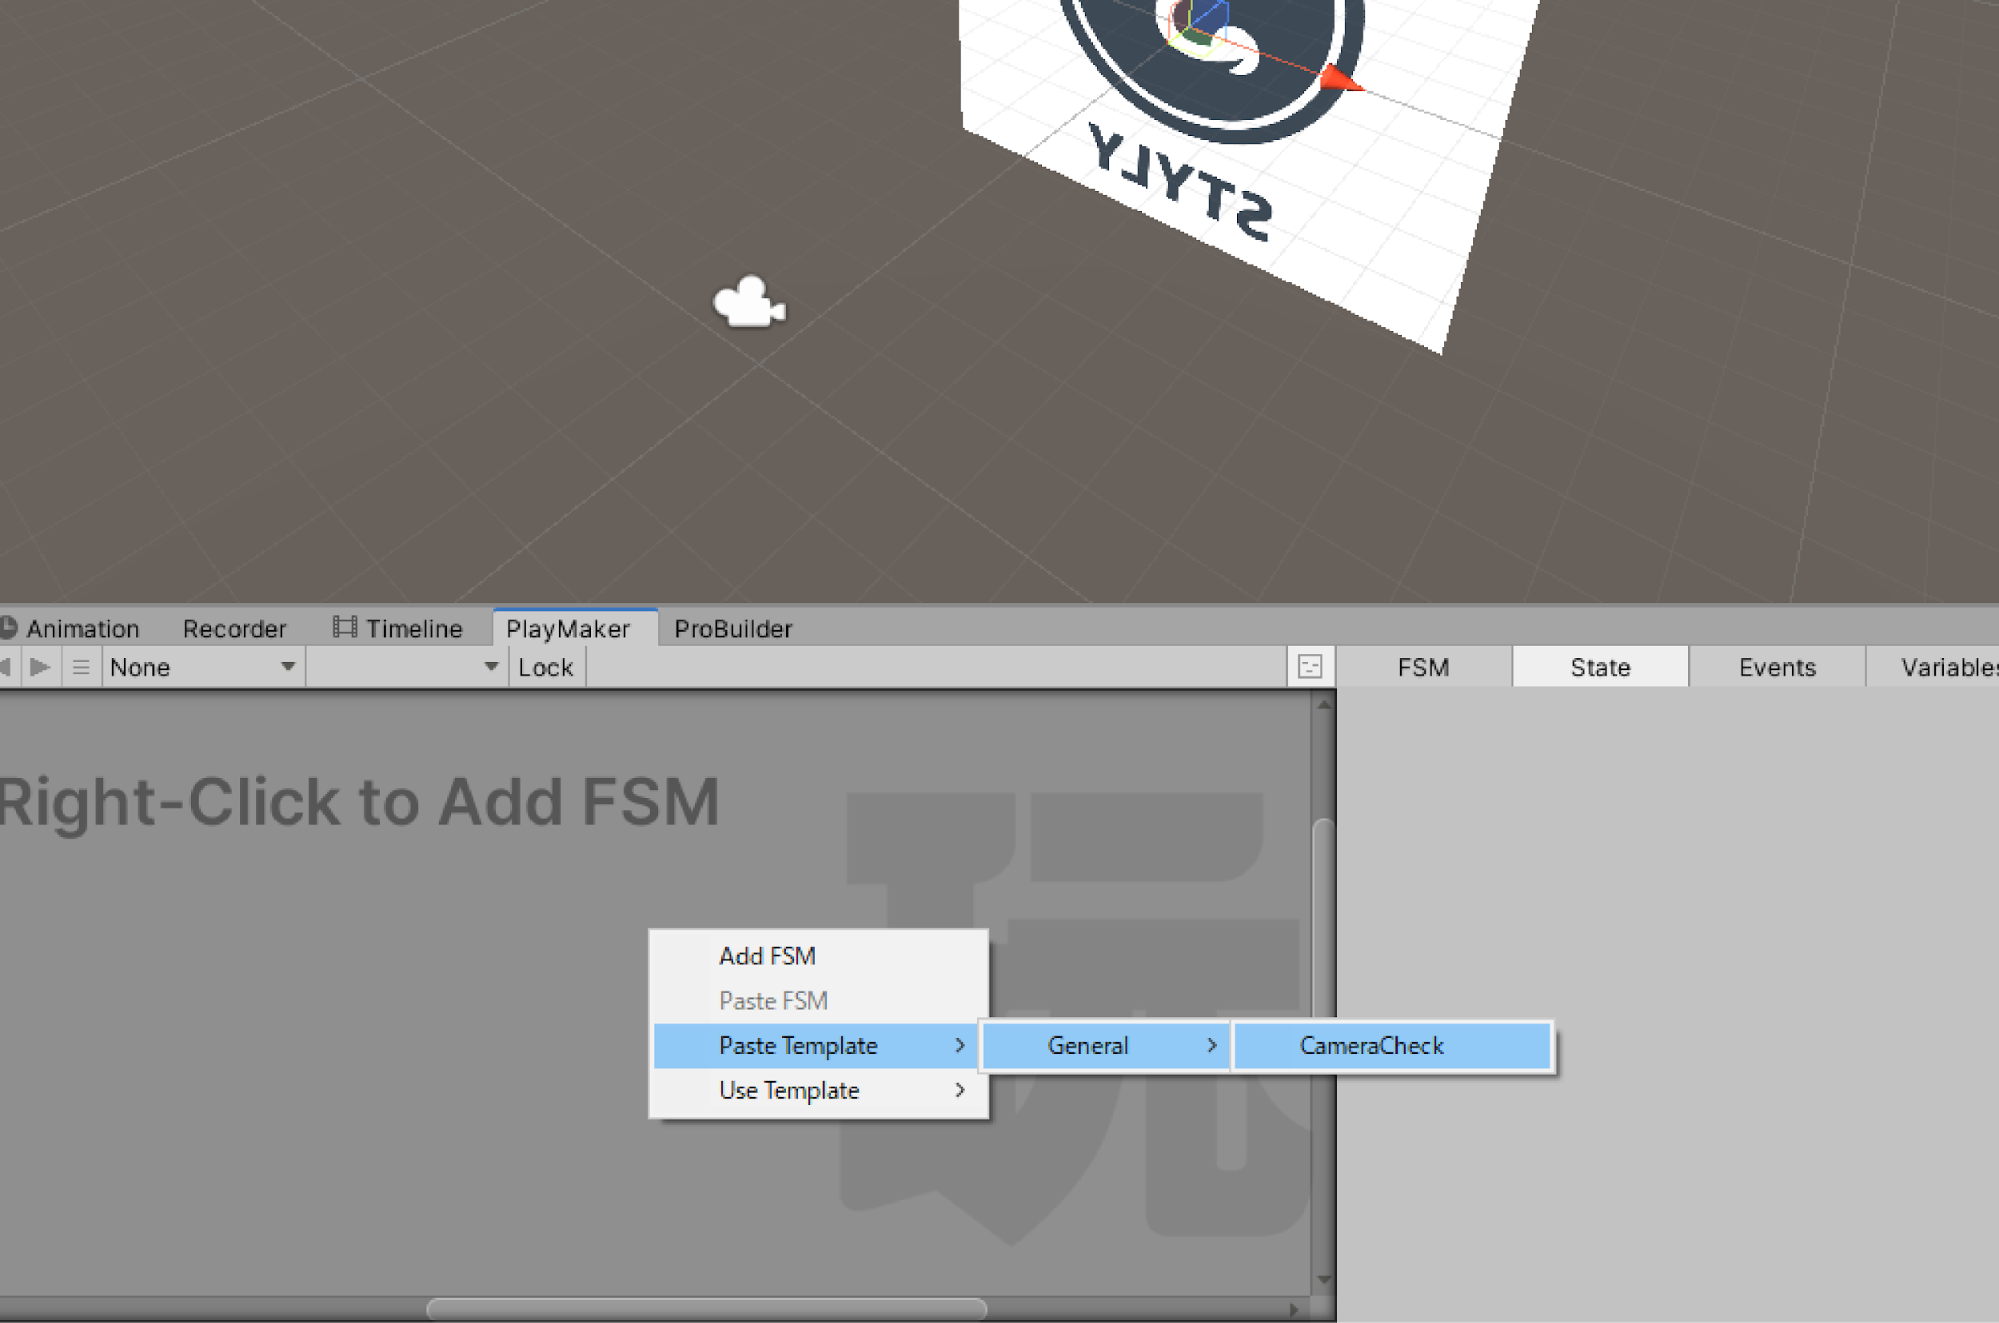
The template will be displayed.
Add Look At to the “Start” State

Look At: Rotate the Game Object so that it faces the Target Object in front of it.
Set mainCamera to Target Object.
Select the two lines to the left of the item to display the menu bar, open the menu bar and select “mainCamera”.
Look At
Rotates the Game Object so that it faces the Target Object in front of it.
|
Parameter Name |
Parameter Description |
Parameter Value |
|
Game Object |
Target object for the Action |
Use Owner (set by default) |
|
Target Object |
The object to which the Game Object will face forward. |
Variable mainCamera |
Let’s check the operation by pressing the play button.
If the image keeps facing forward to the Main Camera, it is a success.
Press Ctrl + S (Windows) / Command + S (macOS) to set the scene name to LookAt and save the scene.
This completes the “2D image keeps facing forward to the viewpoint” function.
Let’s upload it to STYLY.
When uploading a prefab, prefab the image data “logo_STYLY” with PlayMaker set and upload it.
When uploading a scene, the camera is automatically disabled by the STYLY Plugin for Unity, so you can upload the scene with the Main Camera in place.
Let’s actually experience this in STYLY!
Creating the “Viewpoint Movement” Function
Let’s create a function that moves the viewpoint (Main Camera) toward a specified object.
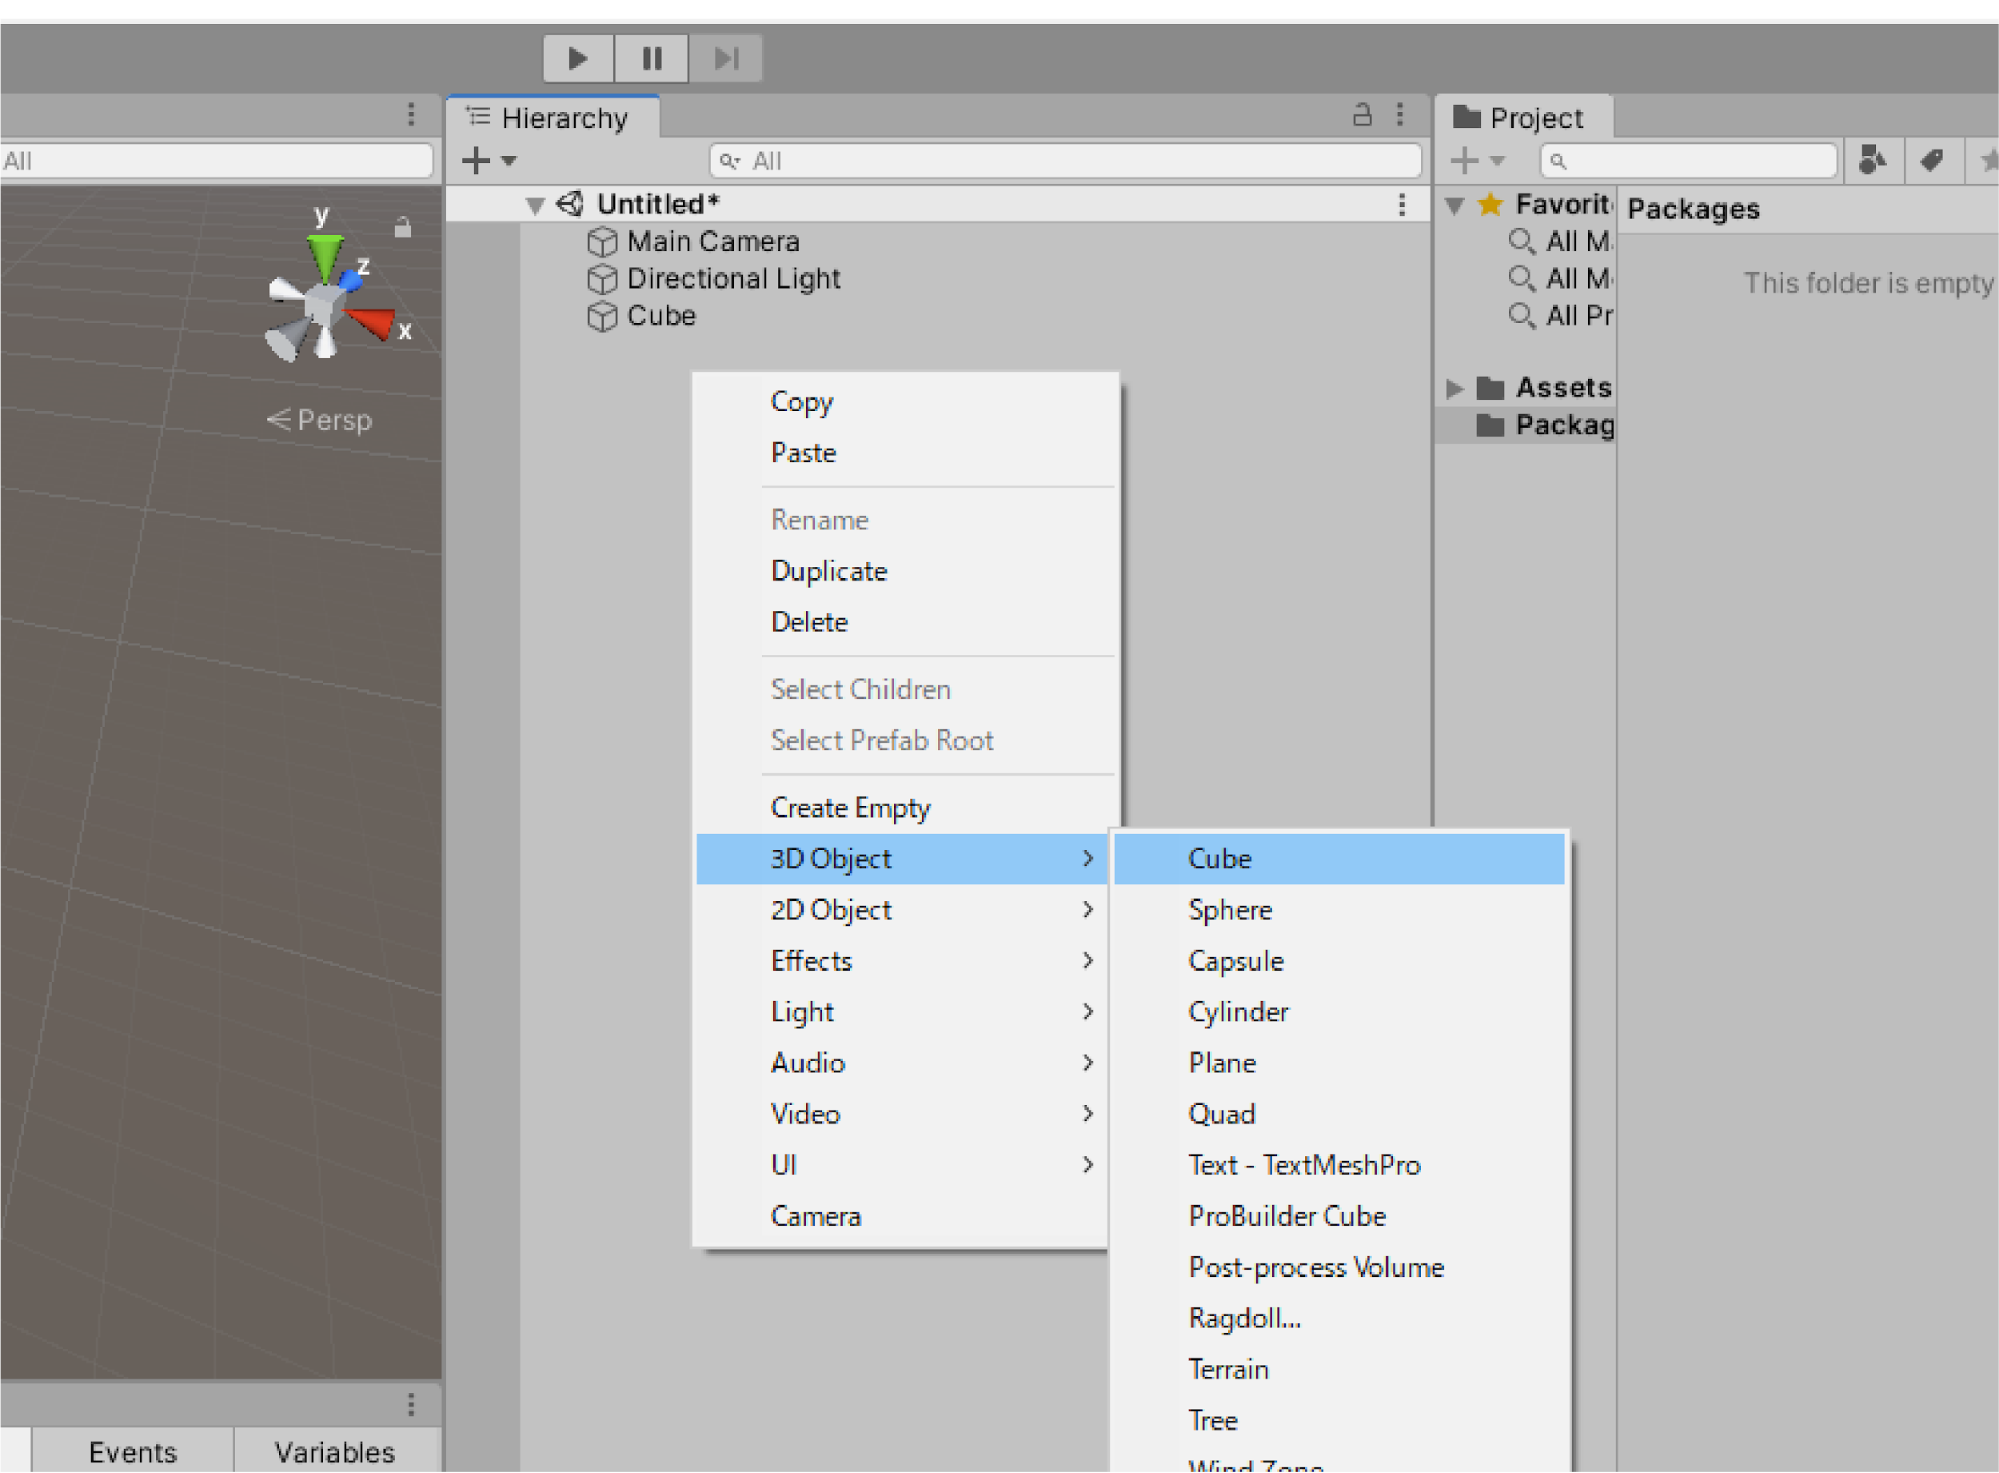
Right-click on the hierarchy and select 3D Object > Cube to create a Cube.
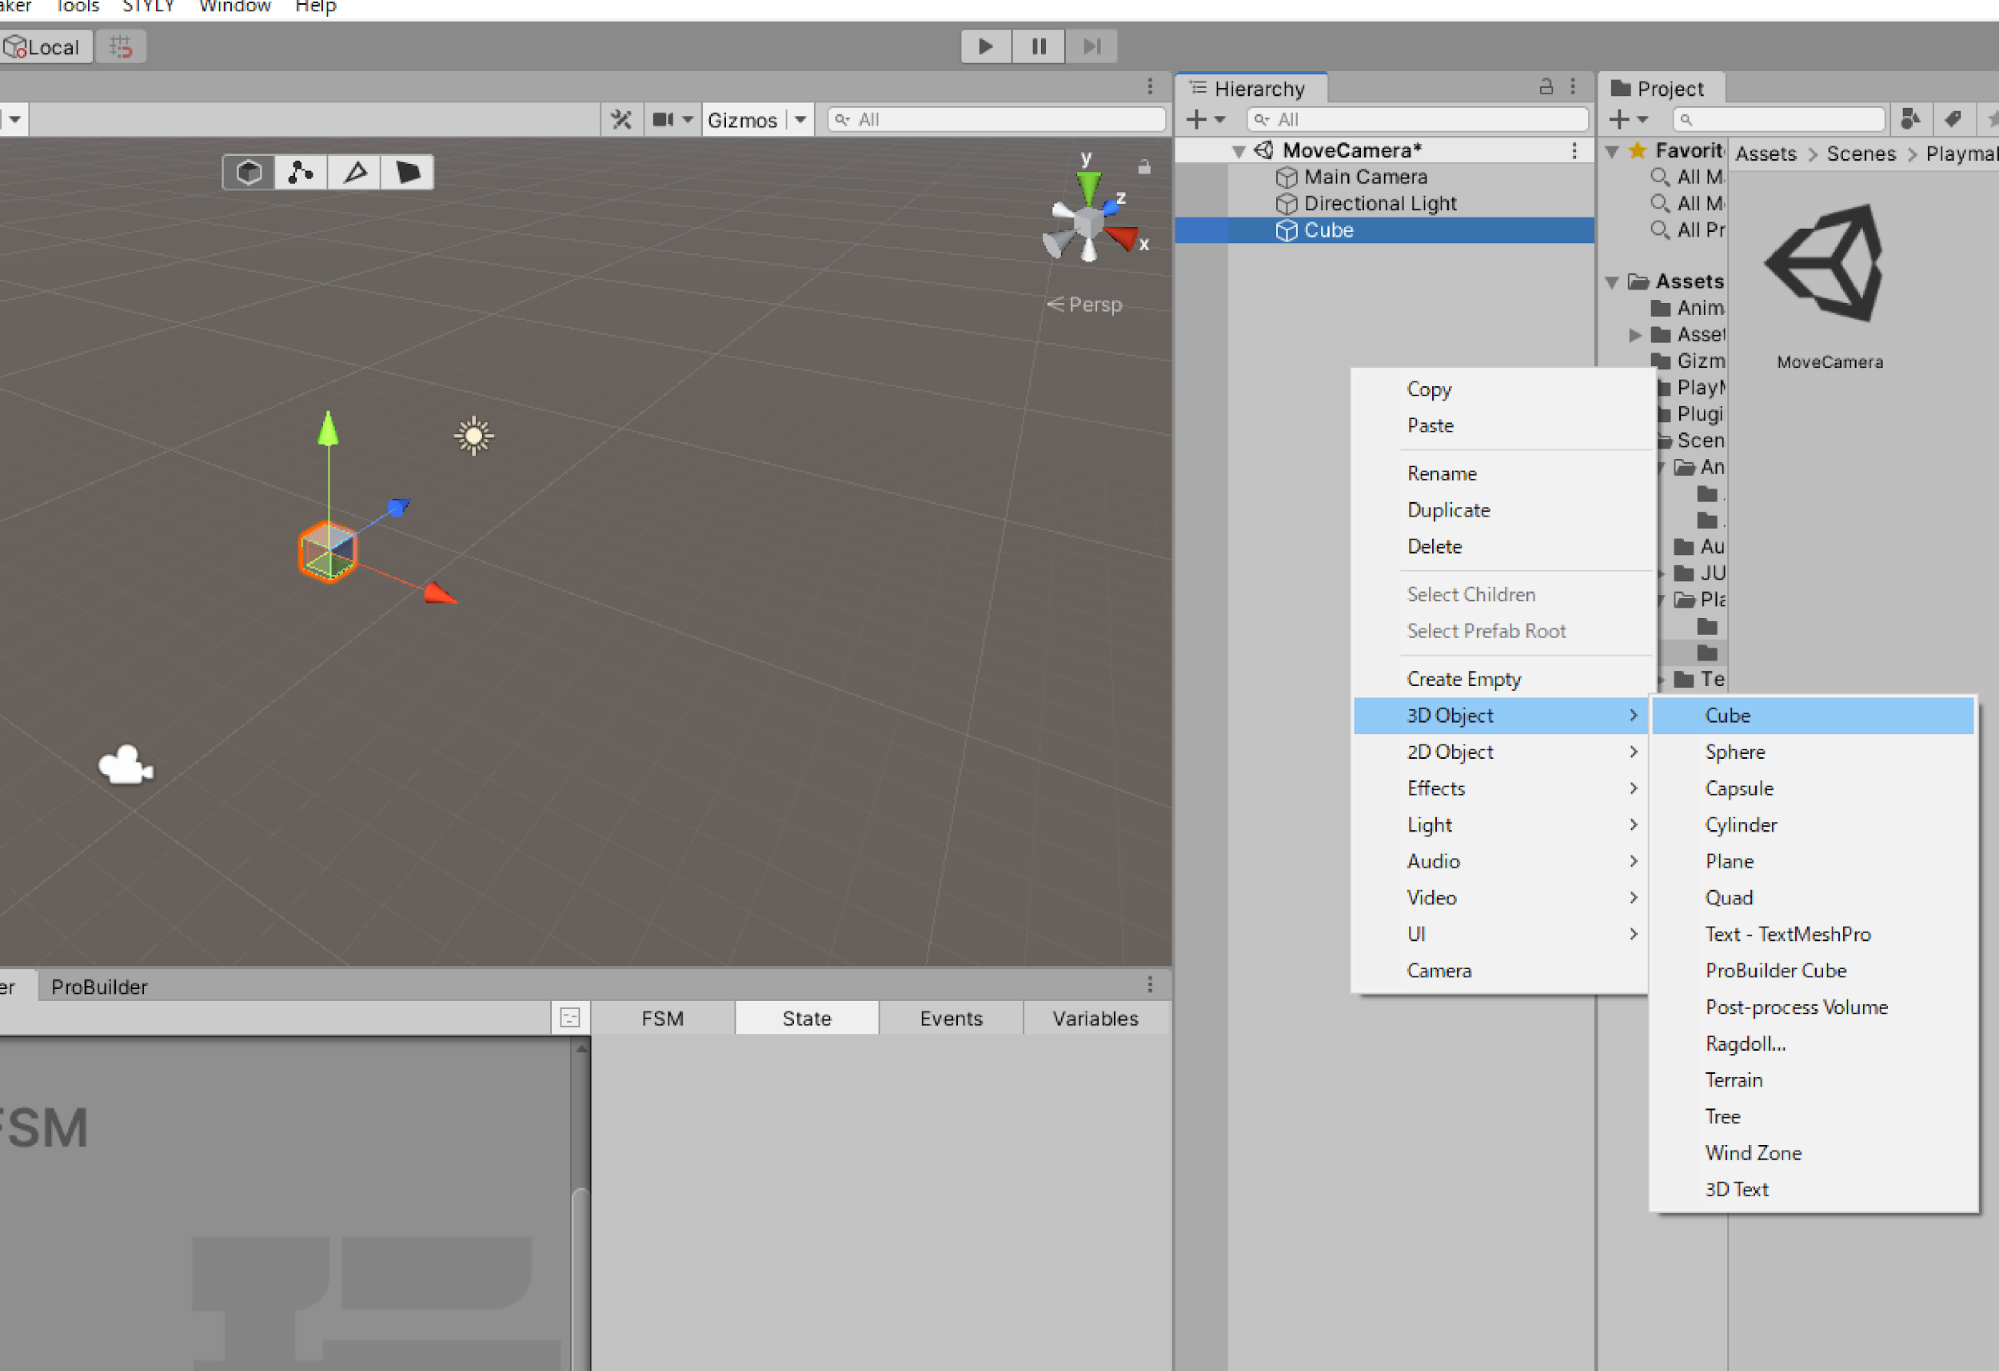
Rename the Cube to MoveCameraEndPoint.
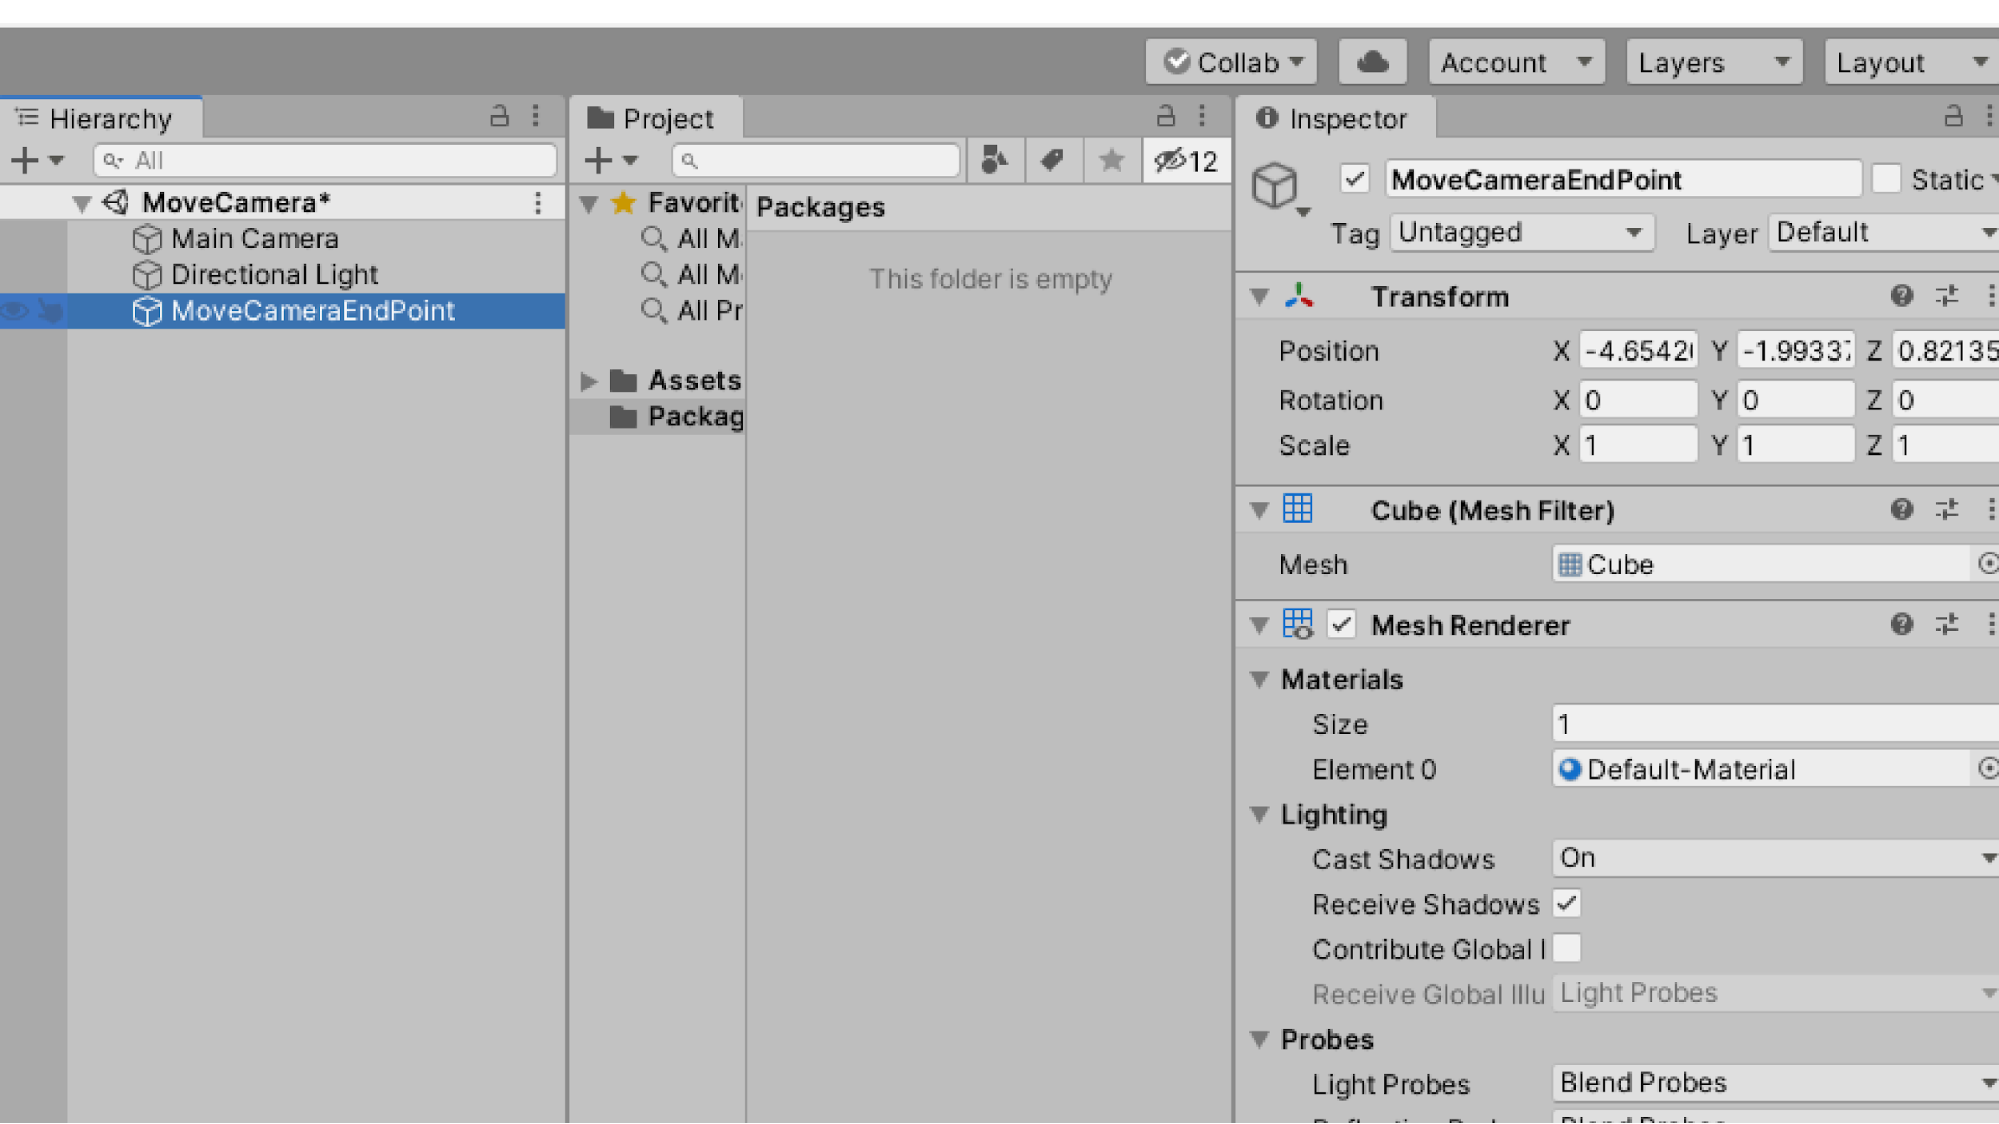
Select MoveCameraEndPoint on the hierarchy.
Open PlayMakerEditor,
Right-click on PlayMakerEditor and select Paste Template>General>CameraCheck.
Display the template.
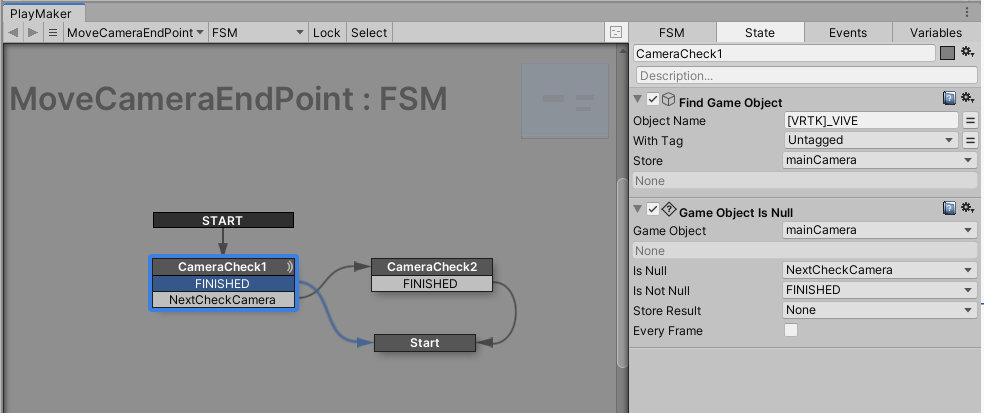
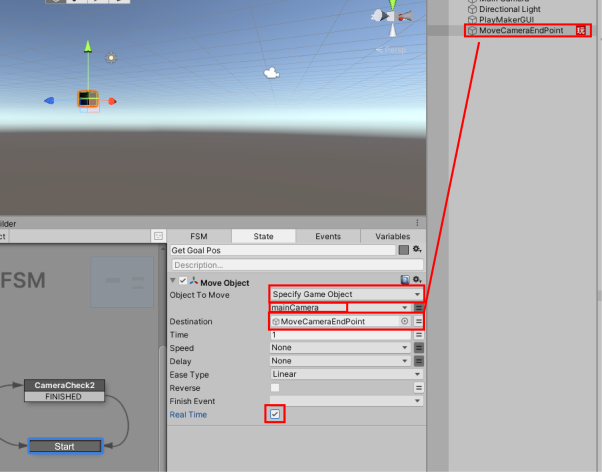
Add a Move Object to Start.
Move Object: Move the game object to the destination.
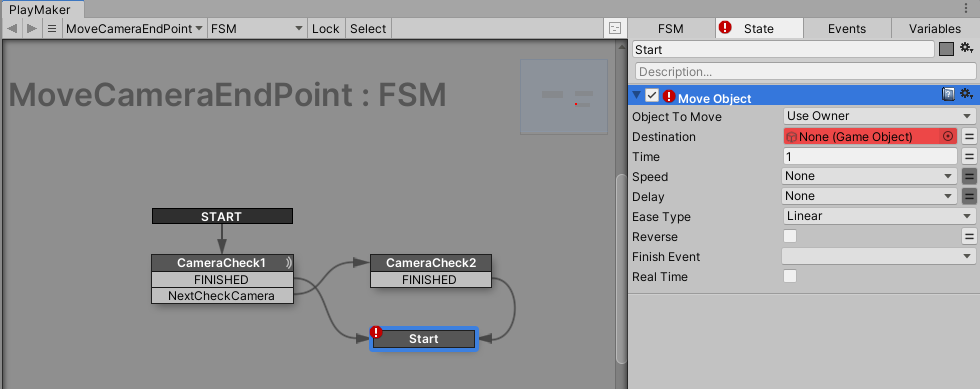
Change Object To Move: Specify Game Object and select the variable mainCamera.
Destination: Drag and drop MoveCameraEndPoint from the hierarchy.
Time: 20
Real Time: Check the box.
Move Object
Moves the game object to the destination.
|
Parameter Name |
Parameter Description |
Parameter Value |
|
Object To Move |
Object to move |
Specify Game Object Variable mainCamera |
|
Destination |
Destination |
MoveCameraEndPoint |
|
Time |
Time to move |
20 (optional) |
With these settings, we have created a PlayMaker system in which the camera moves to the Cube’s position in 20 seconds.
Let’s play the video.
You can see that the camera moves slowly.
To make it move faster, let’s set Time to 5.
If you play it back, you will see the following.
The movement speed has increased.
In this way, you can change the PlayMaker value and set it as you like!
Change the scene name to MoveObject using Ctrl + S (Windows) / Command + S (macOS) and save the scene.
Upload your scene STYLY.
When uploading a prefab, prefab the object with PlayMaker set up and upload it.
When uploading with a scene, the camera is automatically disabled by the STYLY Plugin for Unity, so you can upload with the Main Camera in place.
Let’s actually experience this in STYLY!
Creating the “warp” function
Let’s create a function that warps the viewpoint (Main Camera) to the position of a specific object.
There are several conditions for warping, for example
- When approaching an object
- When you pull the trigger of the controller
- When the controller hits the object
- After a few seconds have elapsed.
In this case, we will create a function that warps after a few seconds have elapsed.
Right-click on the hierarchy and select 3D Object > Cube to create a Cube.
Rename the Cube to WarpPoint.
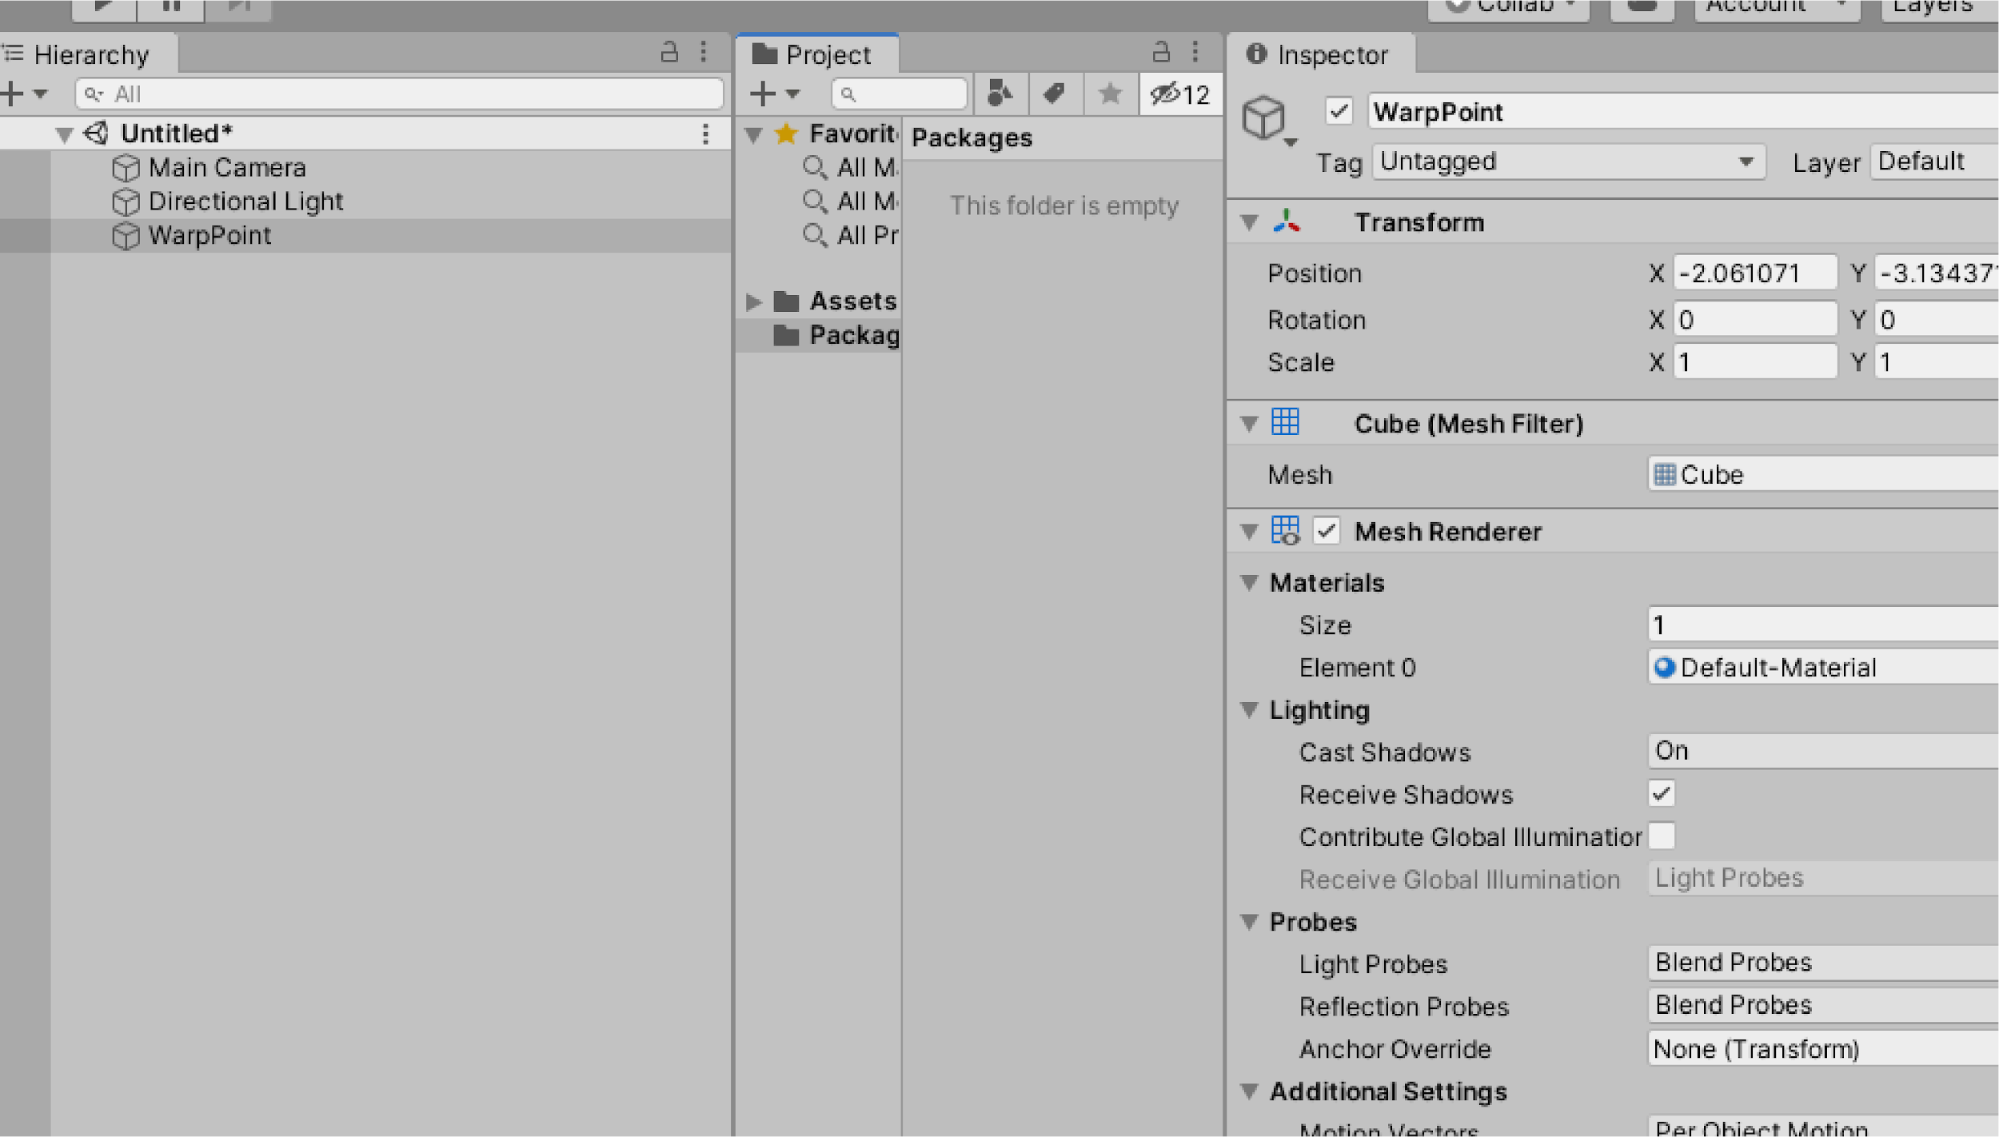
Select WarpPoint on the hierarchy.
Open PlayMakerEditor,
Right-click on PlayMakerEditor and select Paste Template>General>CameraCheck.
Display the template.
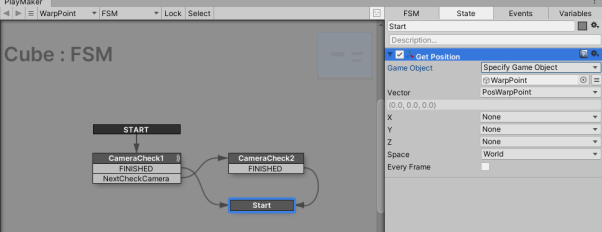
Add Get Position to Start.
Game Object: Change to Specify Game Object and drag & drop a WarpPoint from the hierarchy under Specify Game Obejct.
Vector: Select New Veriable… and enter PosWarpPoint to define the variable PosWarpPoint.
Space: Set to World.
Get Position
Gets the position of the game object and stores each axis in a float variable.
|
Parameter Name |
Parameter Description |
Parameter Value |
|
Game Object |
Game object whose position is to be retrieved. |
Specify Game Object WarpPoint |
|
Vector |
(X,Y,Z) coordinates can be stored. |
MoveCameraEndPoint |
|
Space |
World: World coordinates Local: Local coordinates |
Wolrd |
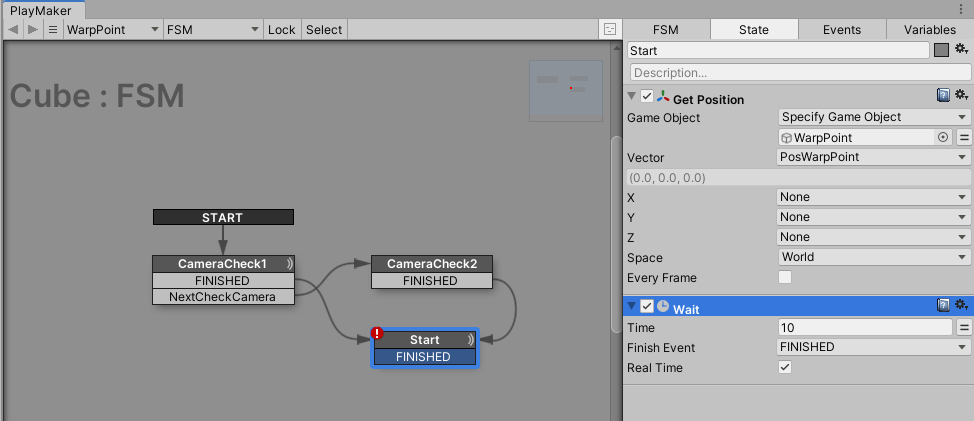
Add Wait
Time: 10 seconds
Finish Event: Select FINISHED.
Real Time: Check
Time: Delay the end of the state until the specified time.
Add a FINISHED event to Start.
Right click on PlayMakerEditor and select “Add State” to
Change the name to Move Camera.
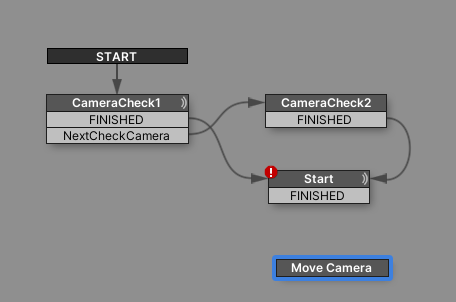
Connect a Transition from FINISHED to Move Camera in Start.
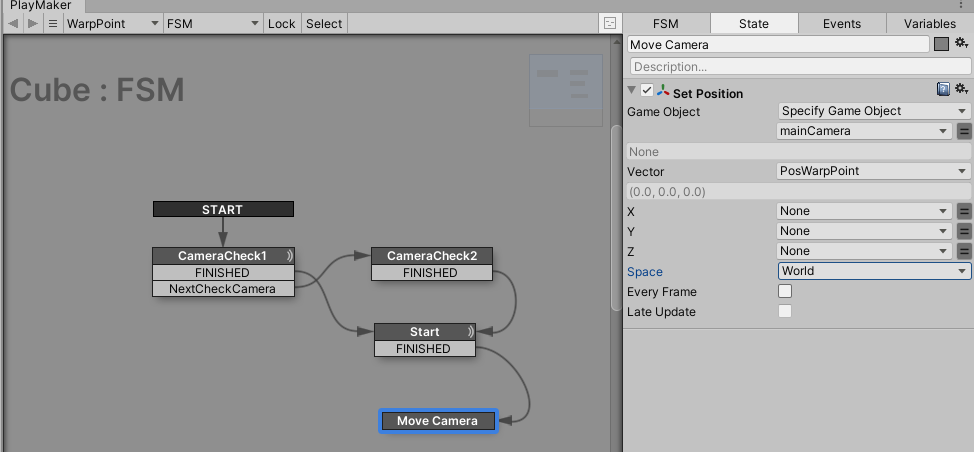
Add Set Position to Move Camera.
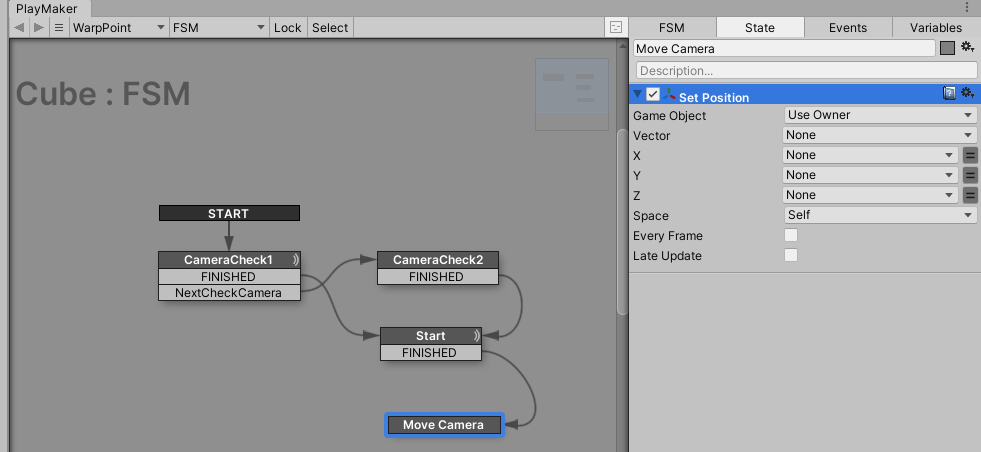
Game Object: Select Specify Game Object and select the variable mainCamera.
Vector: Select the variable PosWarpPoint.
Space should be World.
Set Position
|
Parameter Name |
Parameter Description |
Parameter Value |
|
Game Object |
Game object to which you want to set the Position. |
Specify Game Object WarpPoint |
|
Vector |
(X,Y,Z) coordinates can be stored. |
MoveCameraEndPoint |
|
Space |
World: World coordinates Local: Local coordinates |
Wolrd |
Let’s play it back!
After 10 seconds, the camera will warp the Cube to the WarpPoint, and you are done.
Upload your prefab to STYLY.
When uploading a prefab, prefab the object with PlayMaker set up and upload it.
When uploading a scene, the camera is automatically disabled by the STYLY Plugin for Unity, so you can upload the scene with the Main Camera in place.
Let’s actually experience it in STYLY!
Reacting to the position of the viewpoint and executing events
Let’s create a function that measures the distance between the Main Camera and the Cube, rotates the Cube when the distance is less than a certain distance, and stops the rotation of the Cube when the distance is greater than a certain distance!
Create a new scene.
Right-click on the hierarchy and select 3D Object > Cube to create a Cube.
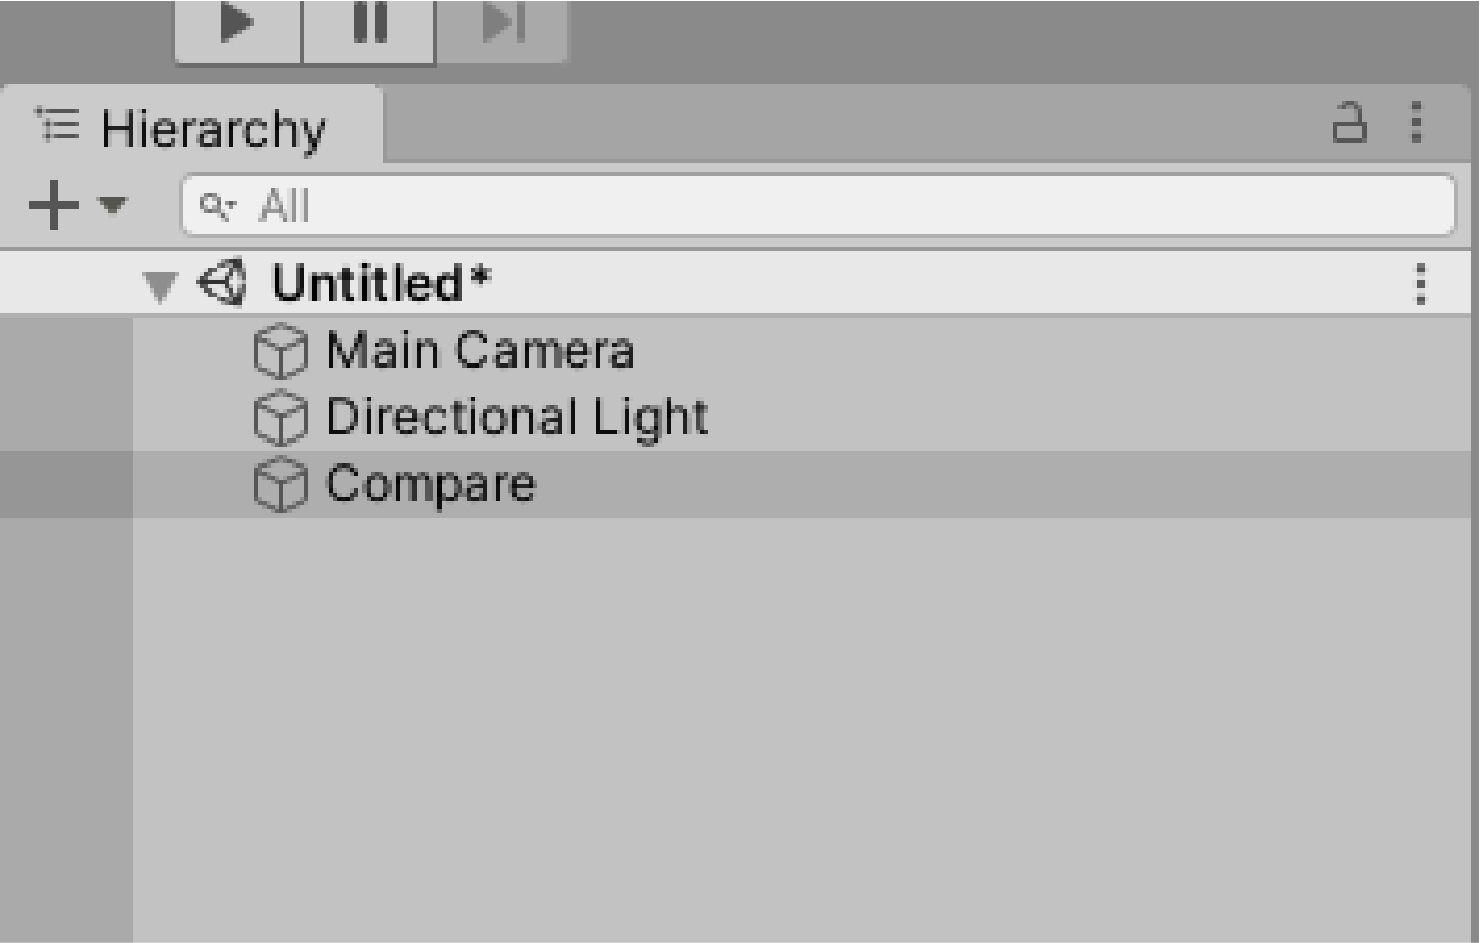
Select Compare on the hierarchy.
Open PlayMakerEditor,
Right-click on PlayMakerEditor and select Paste Template>General>CameraCheck.
Display the template.
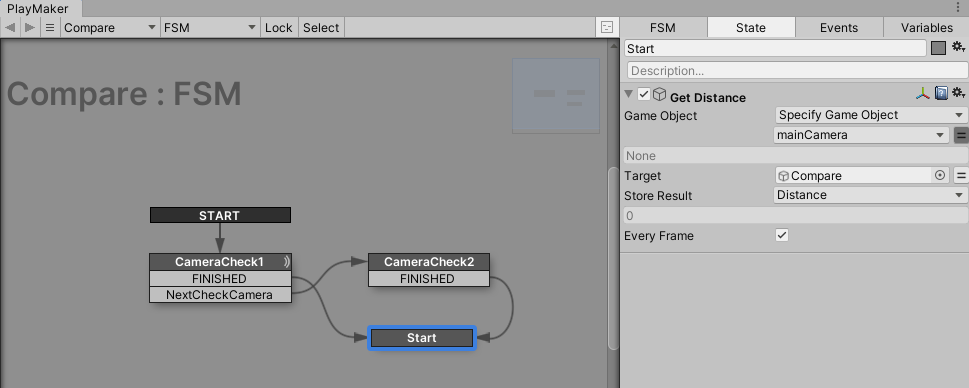
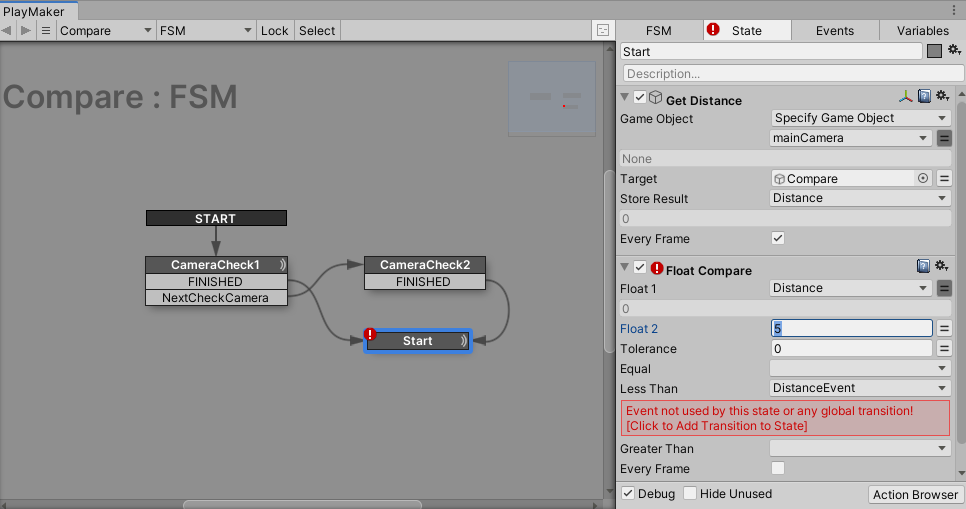
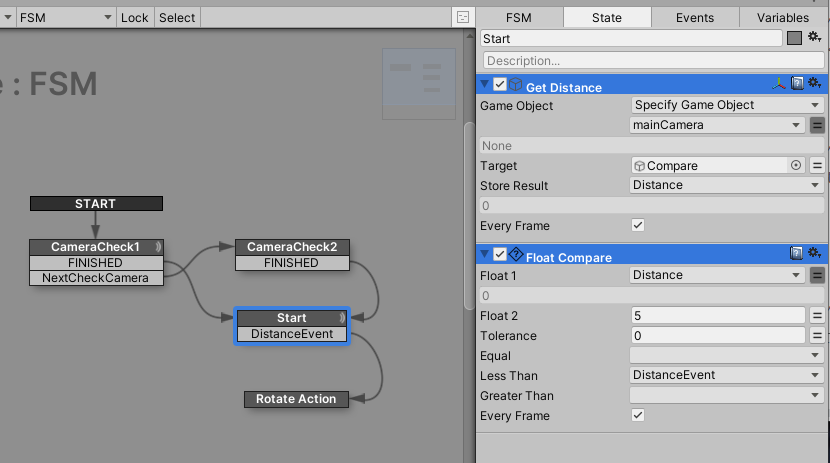
Add Get Distance to Start.
Game Object: Select Specify Game Object and select the variable mainCamera.
Target: Drag and drop Compare from the hierarchy.
Store Result: Select New Variable… and enter Distance to define the variable Distance.
Get Distance
Measures the distance between two game objects and stores the result in a float function.
|
Parameter Name |
Parameter Description |
Parameter Value |
|
Game Object |
The object from which to measure the distance. |
Specify Game Object Variable mainCamera |
|
Target |
The object to measure the distance to. |
Compare |
|
Store Result |
Stores the distance between the Game Object and Target in a variable. |
Variable Distance |
|
Every Frame |
Repeat this operation every frame. |
Check |
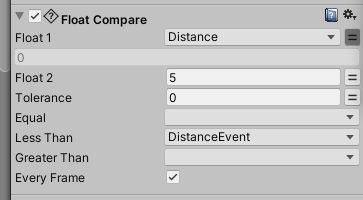
Add Float Compare to Start.
Float1: Select the variable Distance.
Float2: Enter 5.
Less Than: Select New Event and enter DistanceEvent to define the Event variable DistanceEvent.
Check Every Frame.
Float Compare
Allows comparing two values and sending an Event based on the comparison result.
|
Parameter Name |
Parameter Description |
Parameter Value |
|
Float1 |
Value to be compared1 |
Variable Distance |
|
Float2 |
Value to be compared2 |
5 |
|
Equal |
Event sent when Float1 and Float2 are equal Float1 = Float2 |
|
|
Less Than |
Event sent when Float1 is less than Float2 Float1 < Float2 |
DistanceEvent |
|
Greater Than |
Event sent when Float1 is greater than Float2 |
|
|
Every Frame |
Repeat this action for every frame. |
Check the box |
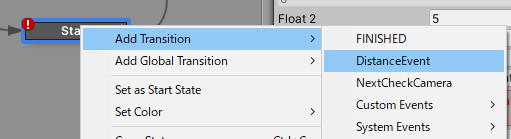
Once the action is set, set a Transition Event in Start.
Right-click on Start and select Add Transition > DistanceEvent.
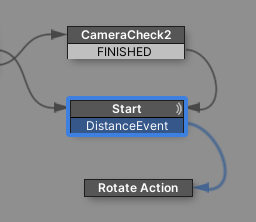
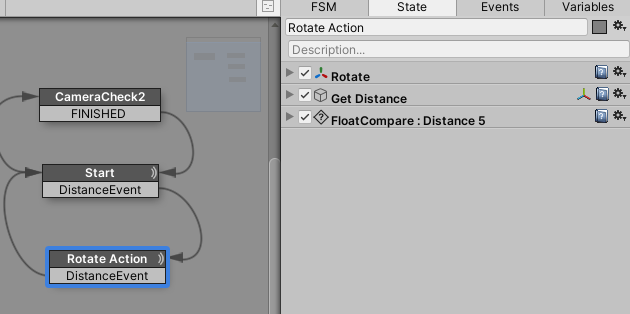
Right-click on the Editor and create a State from Add State, name it Rotate Action.
Connect the Transition from the Start DistanceEvent to the Rotate Action.
Add Rotate to Rotate Action.
Enter a number in X Angle: press the double line to the left of the item and enter 45.
Check Per Second.
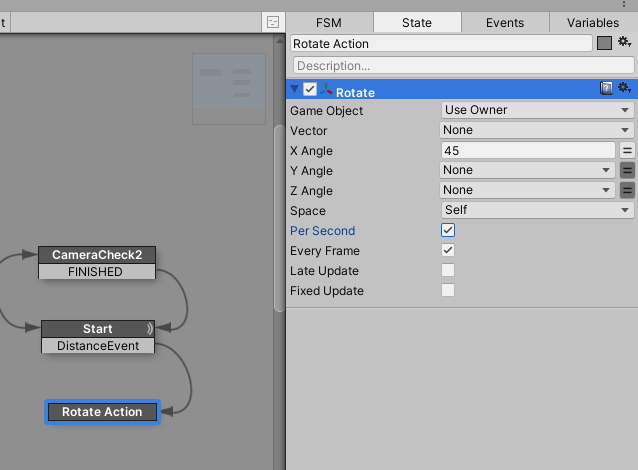
Rotate
Rotates the object
|
Parameter Name |
Parameter Description |
Parameter Value |
|
Game Obejct |
Object to which the Action will be applied. |
Use Owner (set by default) |
|
Vector |
Rotation vector specifying rotation around the X, Y, and Z axes Note: Individual axes can be overridden below |
|
|
X Angle |
Degrees of rotation about the X axis |
45 |
|
Y Angle |
Degrees of rotation about the Y axis |
|
|
Z Angle |
Degrees of rotation about the Z axis |
|
|
Space |
World rotates based on the world coordinates. Self rotates with respect to the object specified in Game Obejct. |
Either one is acceptable. |
|
Per Second |
Rotation is specified in degrees per second. It is the amount of rotation per second. (If you want the object to keep rotating, check the box.) |
Check the box |
|
Every Frame |
Repeat every frame. |
Check the box. |
Now press the play button once.
If the Cube rotates when the distance between the Main Camera and the Cube becomes less than 5, it is a success.
We have created an event when the distance between the Main Camera and the Cube becomes less than 5.
Next, let’s create an event when the distance between the Main Camera and the Cube is greater than 5.
Copy and paste Get Distance and Float Compare from Start into the Rotate Action.
To copy, hold down the Ctrl key, select Get Distance and Float Compare, and press Ctrl + C.
To paste, press Ctrl + V.
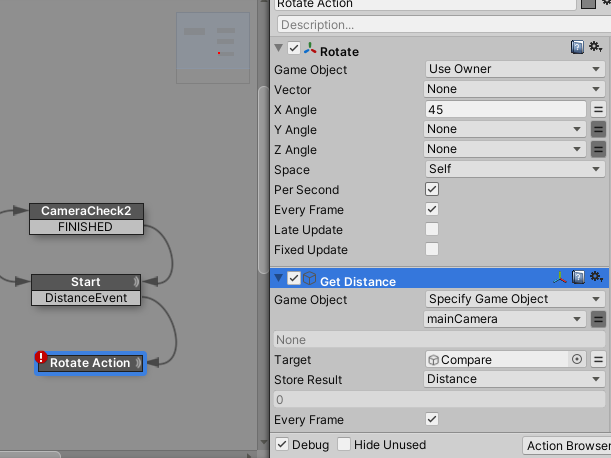
The order of the actions in the “Rotate Action” state is as follows
- Rotate
- Get Distance
- Float Compare
Set “None” to “Less Than” for Float Compare in Rotate Action.
Select DistanceEvent as Greater Than.
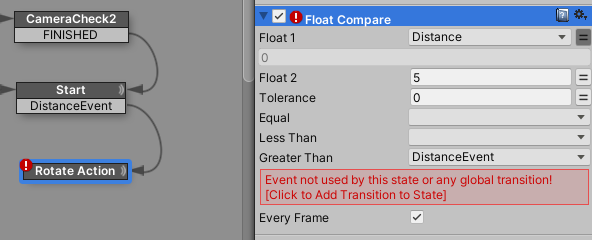
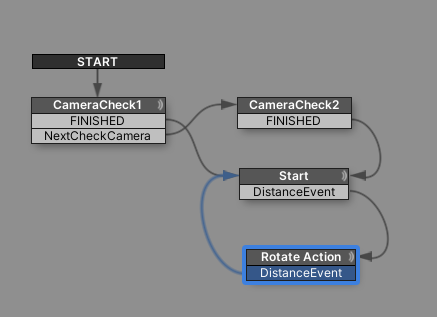
Right-click on the Rotate Action and select Add Transition > DistanceEvent.
Connect the Transition from Rotate Action to Start.
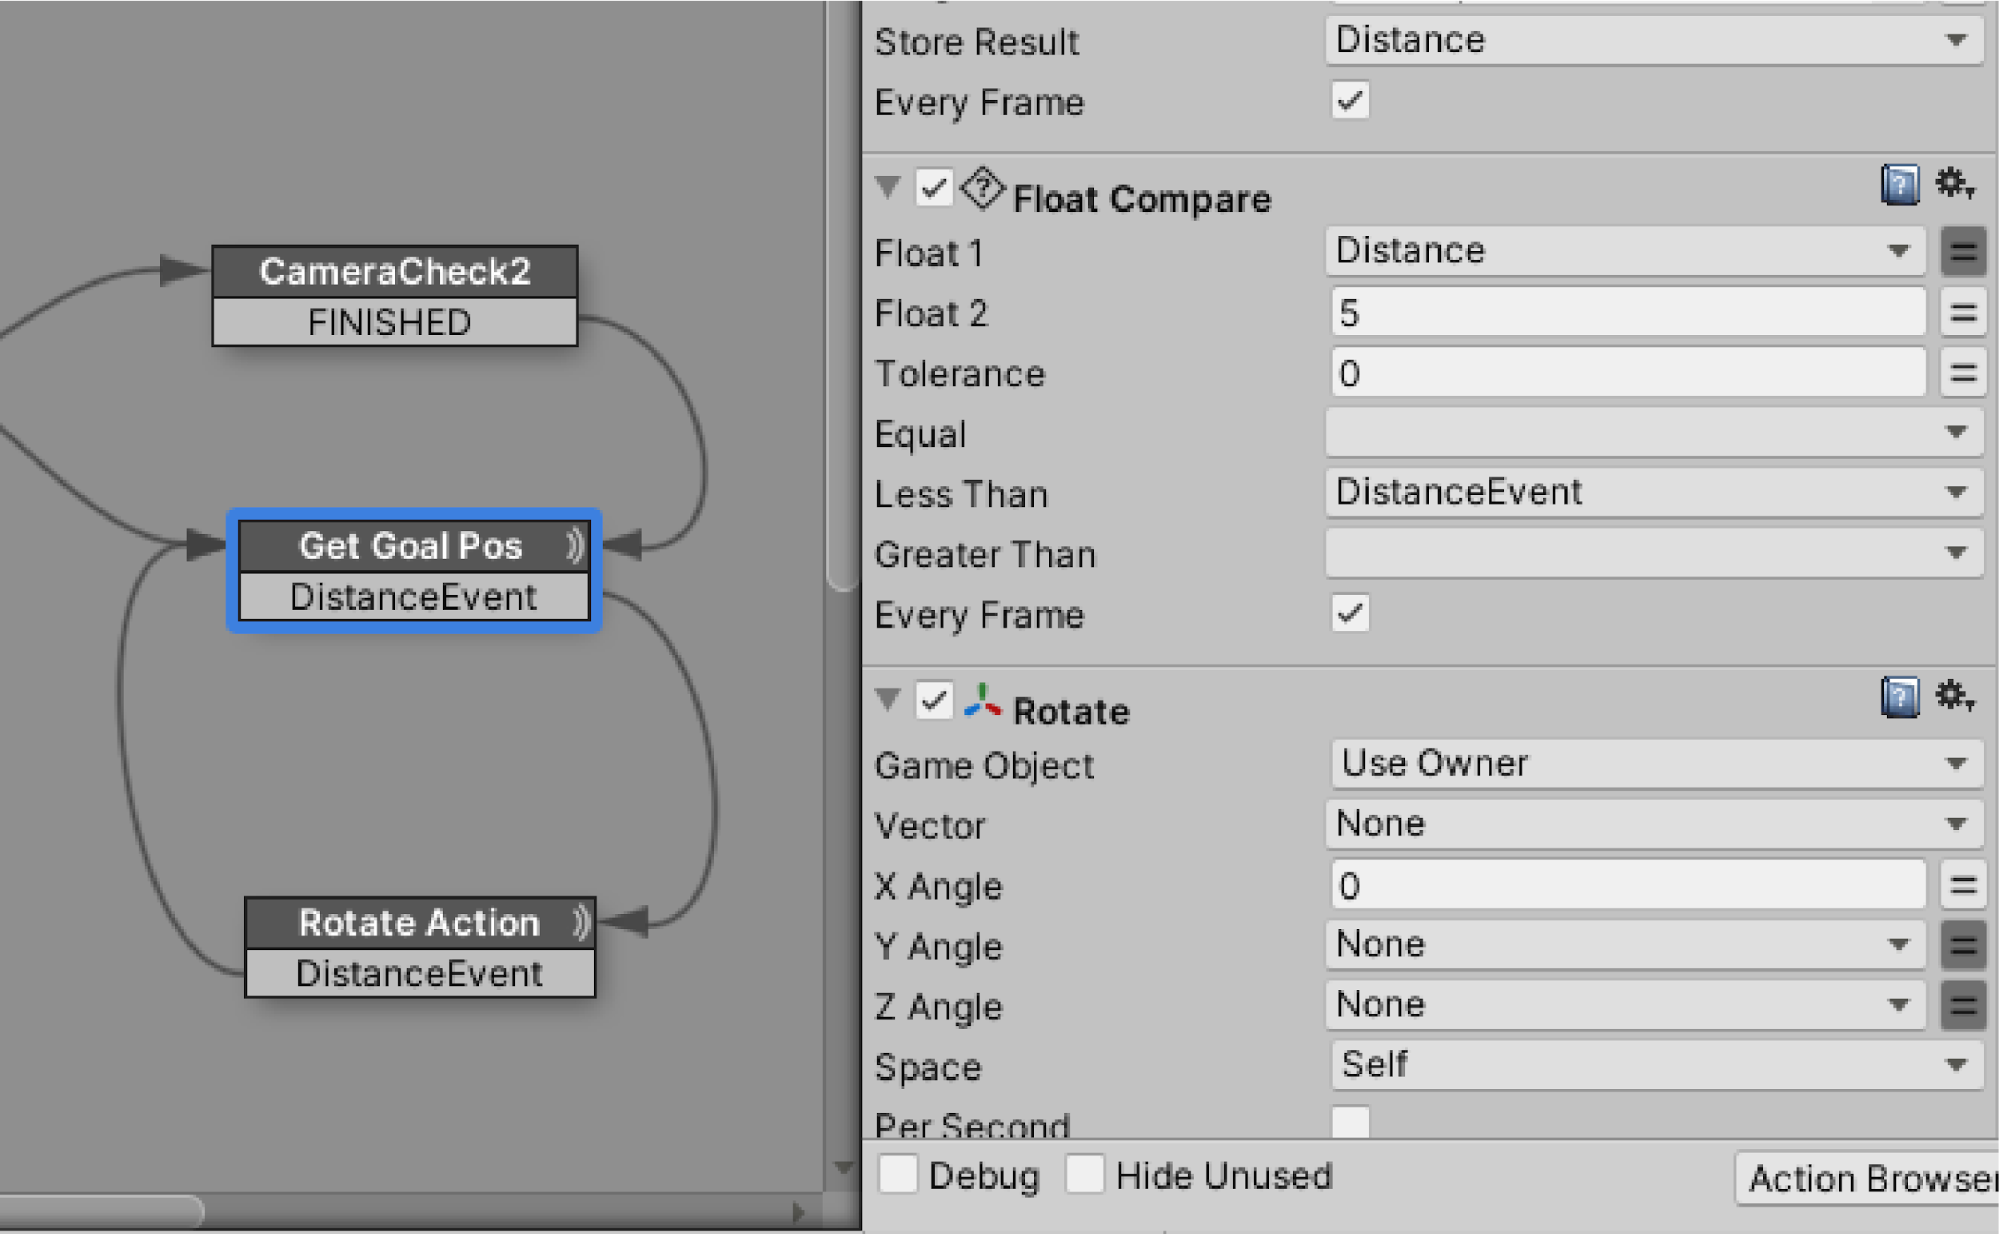
Add Rotate to State.
Set the X Angle of Rotate to 0.
Now you have created a function that measures the distance between the Main Camera and the Cube, and if the distance is less than 5, the Cube will rotate 45 degrees in 1 second, and if the distance is more than 5, the Cube will stop rotating.
Let’s play it back: move the Cube or the Main Camera, and when the Distance is less than 5, the Cube will rotate, and when the Distance is greater than 5, the Cube will stop rotating.
Upload your prefab to STYLY.
When uploading a prefab, prefab the object with PlayMaker set up and upload it.
When uploading a scene, the camera is automatically disabled by the STYLY Plugin for Unity, so you can upload the scene with the Main Camera in place.
Let’s actually experience it in STYLY!