This article describes how Unity’s UI can be used to create a UI that counts points.
The UI elements can enhance your gameplay. The score-counting UI that we will be creating forms a guideline for the development of an entire game scene.
Clarity of purpose can enhance immersion into the scene and can help make your work more enjoyable.
Sources
This article was written with the help of the following articles:
If you want to create a simple game in STYLY, you can also refer to the following articles for a better understanding:
Sample Scene
A sample of the counting UI we will create has been prepared. Let’s experience it.
Creating a Counting UI
Overview
This will be a combination of the UI of Unity’s system and that of PlayMaker.
We will create a system that counts by generating events in a target 3D model and increasing the numbers in the UI as it transitions.
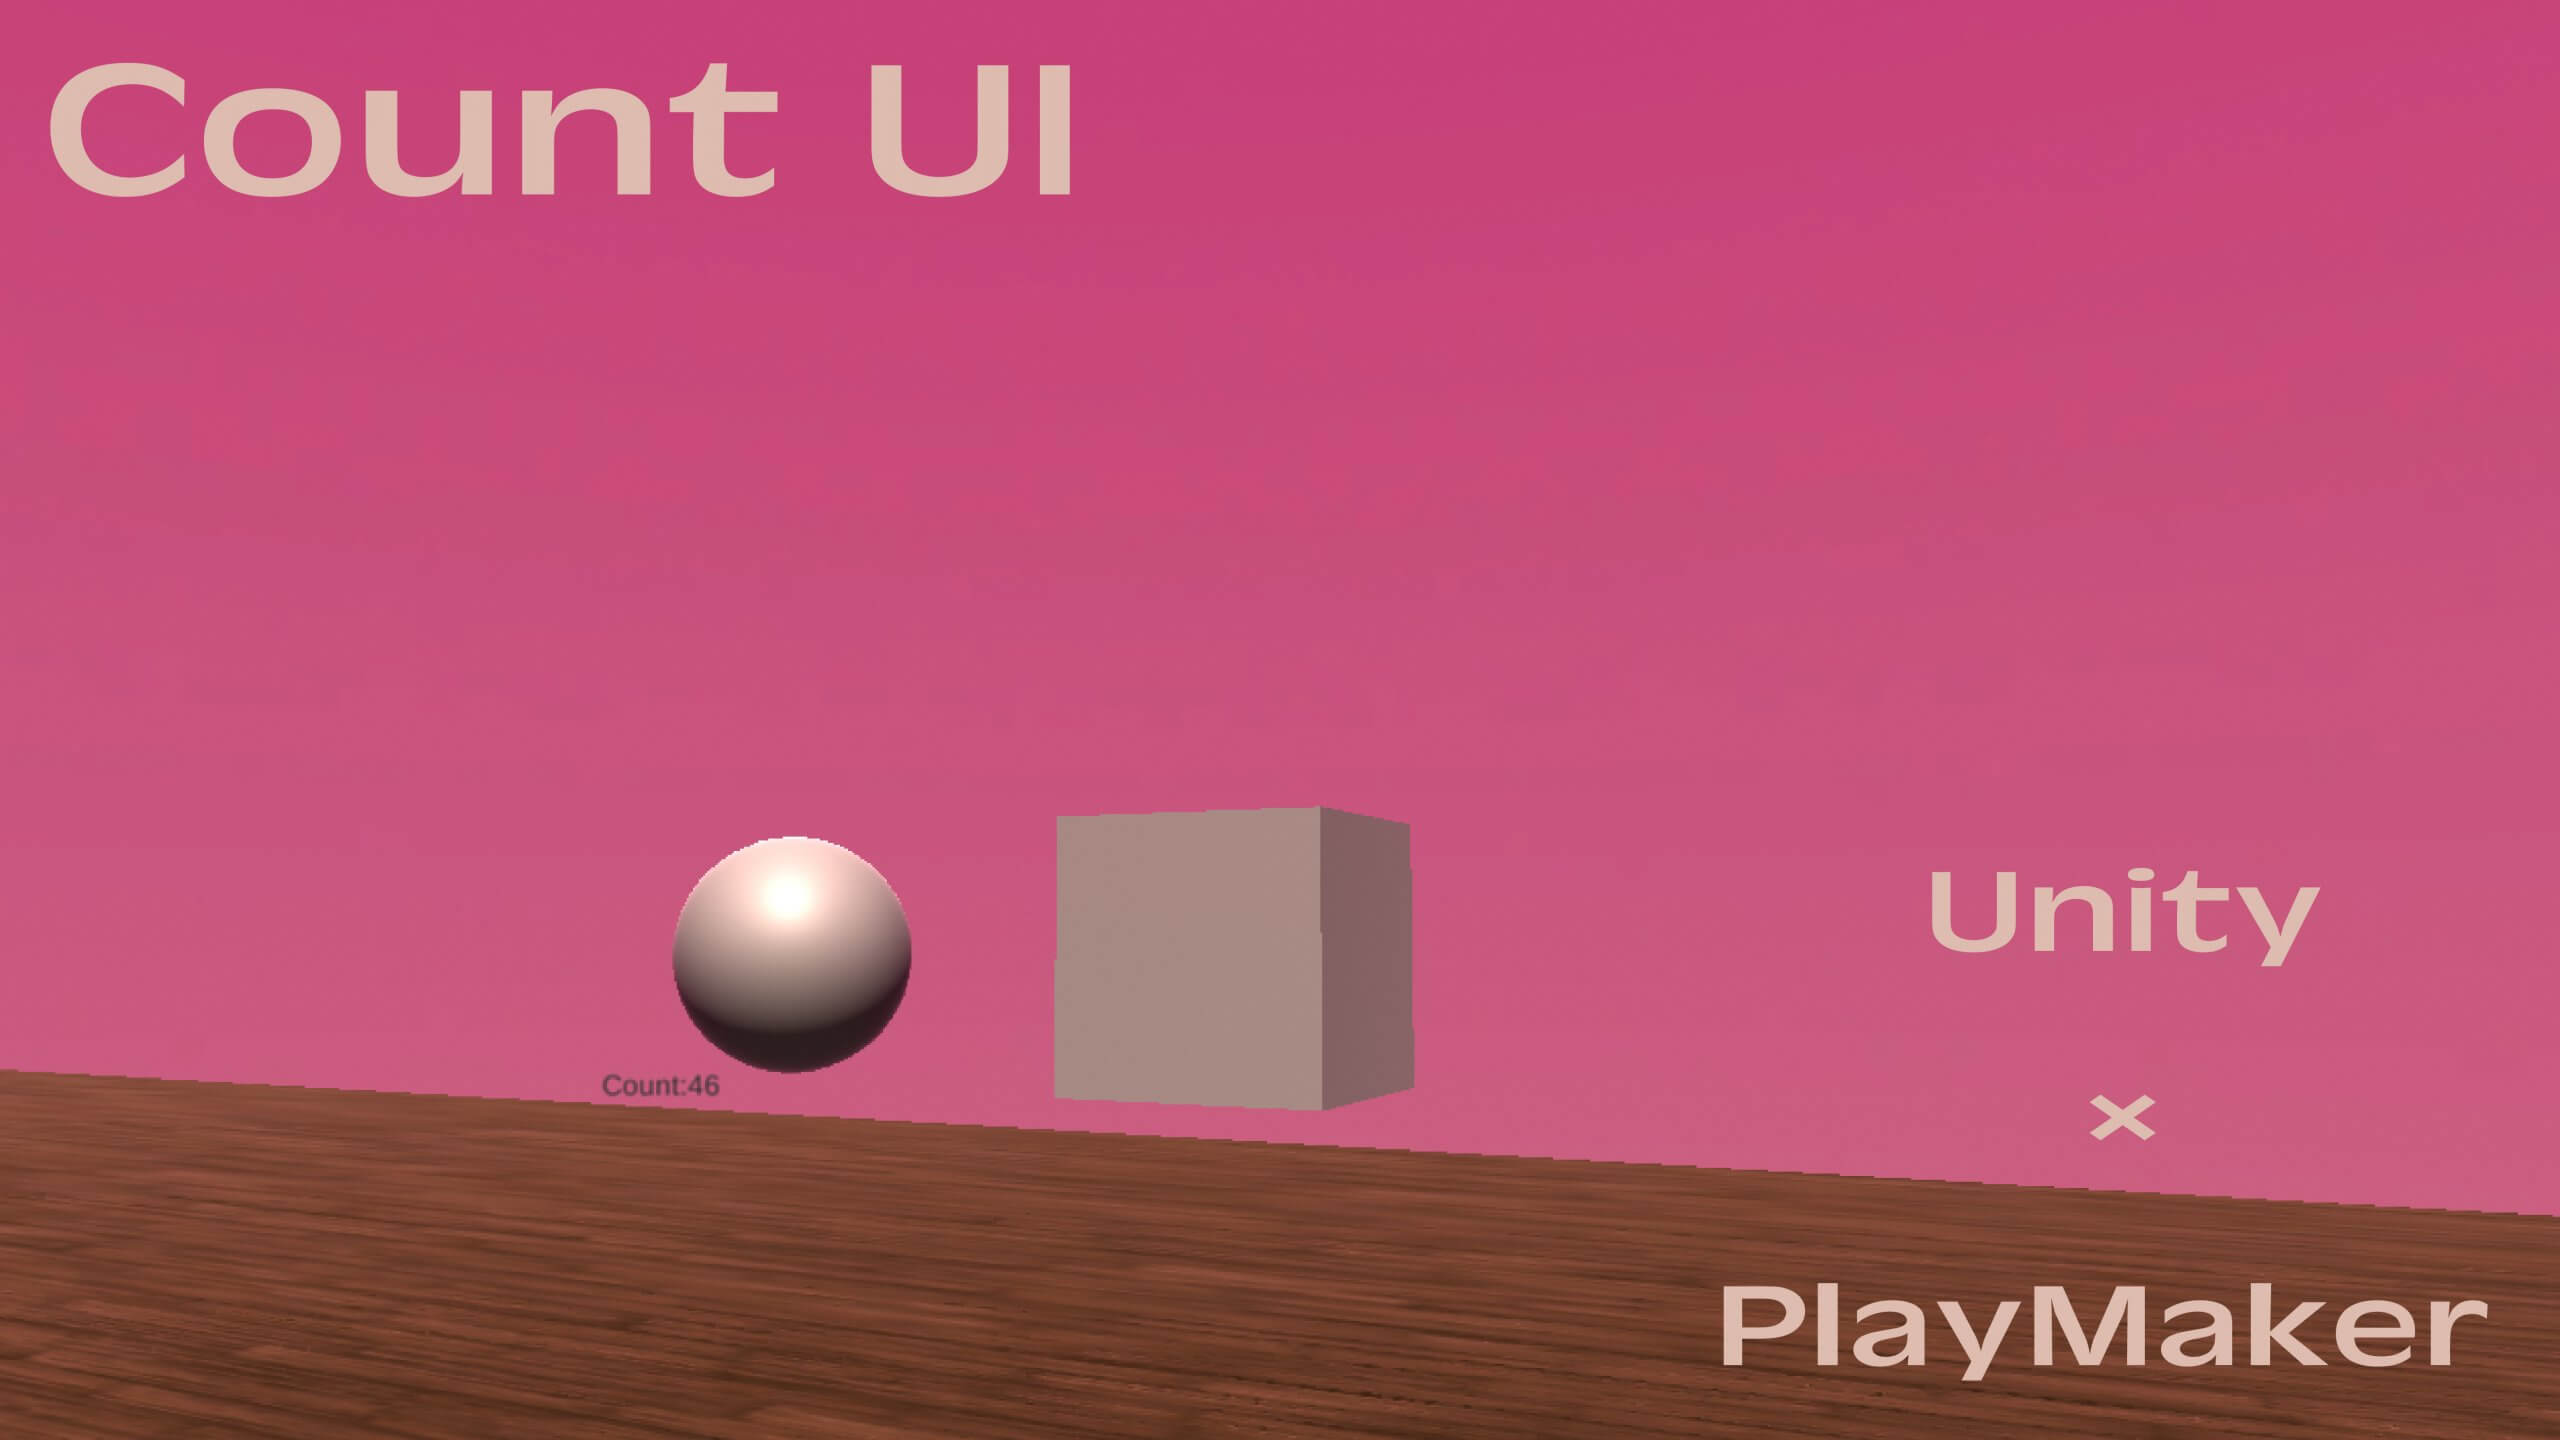
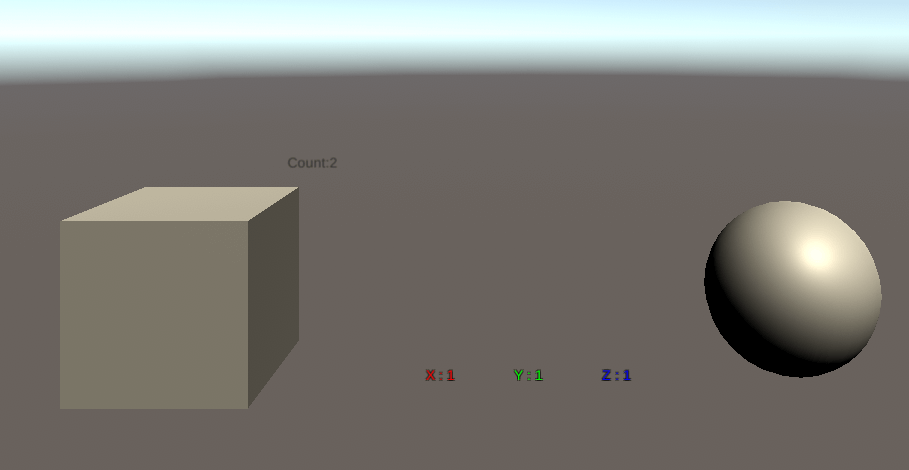
In this example, we create a simple UI where the numbers are increased when the TRIGGER EVENT occurs. The final result resembles the following.
The main flow is as follows:
- Creating a 3D model to count
- Creating the UI
- Setting up the 3D model and UI in PlayMaker
Preparation
Let’s get Unity up and running. We will also be using PlayMaker, so be sure to set it up beforehand.
![[Unity Tutorial] Creating a Game Using Playmaker ① From Basic Introduction to Installing](https://styly.cc/wp-content/uploads/2019/06/1200px-160x160.jpg)
When PlayMaker is ready, open a new scene and do the following:
Prepare the object
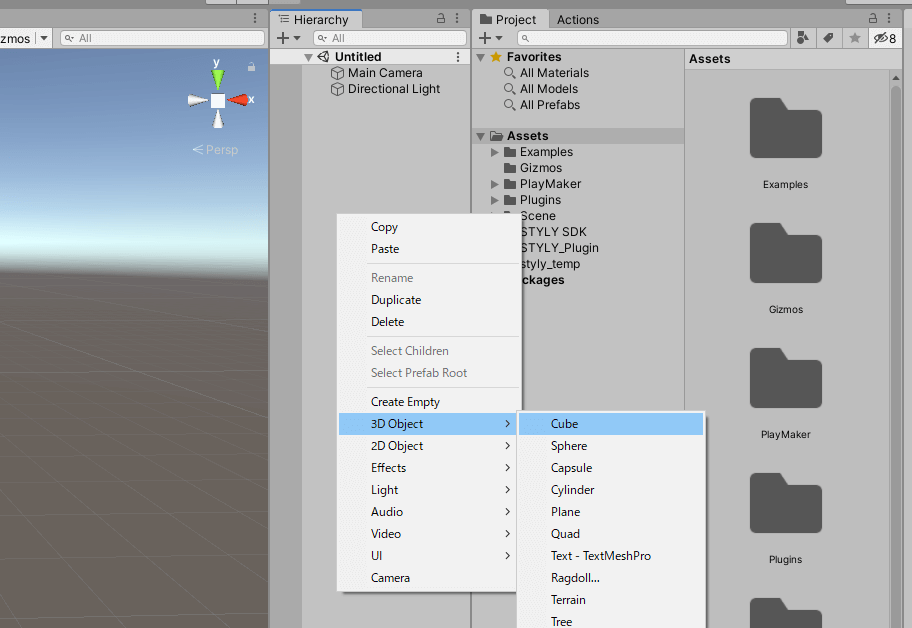
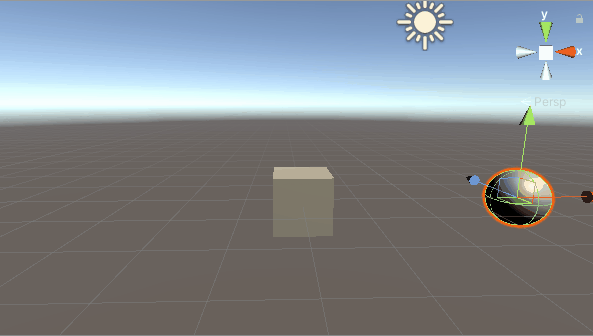
Create a 3D model for this count.
Create a cube and a sphere in Unity.
For this, you can right-click in the hierarchy window and choose 3D Object > Cube / Sphere.
Set up a TRIGGER EVENT, this time using a TRIGGER EVENT.
![[Unity/Playmaker] How to Trigger an Event when the Controller Touches an Object (TRIGGER EVENT)](https://styly.cc/wp-content/uploads/2020/02/Controller-69-160x160.jpg)
Cube Settings
Transform the cube as follows:
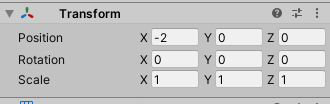
Put a check mark on Is Trigger in the cube’s Box Collider.
Add rigidbody from the Add Component menu and uncheck Use Gravity.
The cube is now prepared.
Sphere Configuration
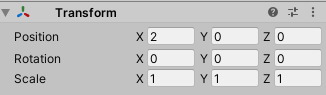
Transform the sphere as follows:
Set the TRIGGER EVENT for sphere as well.
Check Is Trigger in the sphere’s Sphere Collider.
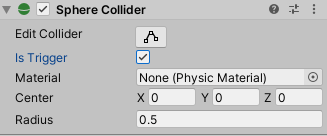
Add rigidbody from the Add Component menu and uncheck Use Gravity.
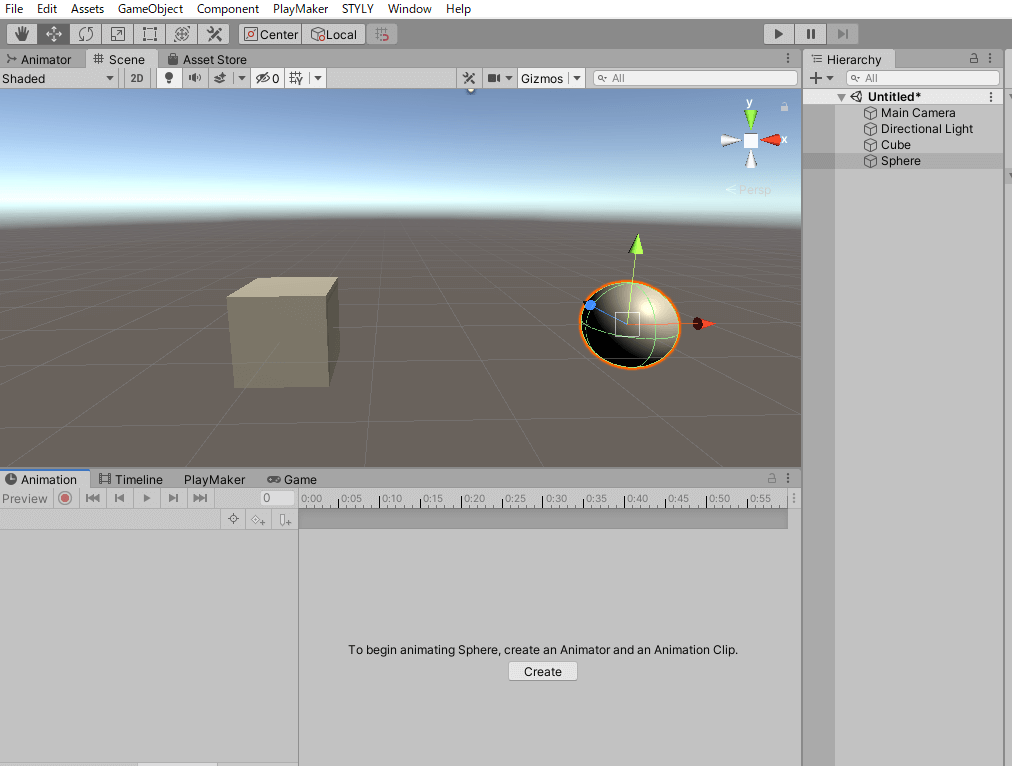
Finally, set up an animation to make the sphere touch the cube.
Display the animation window.
Select Window > Animation > Animation in the top menu bar.

Display the animation window.
Place it in the desired location.
Select Create for the animation window.
Save the animation file to a location of your choice.
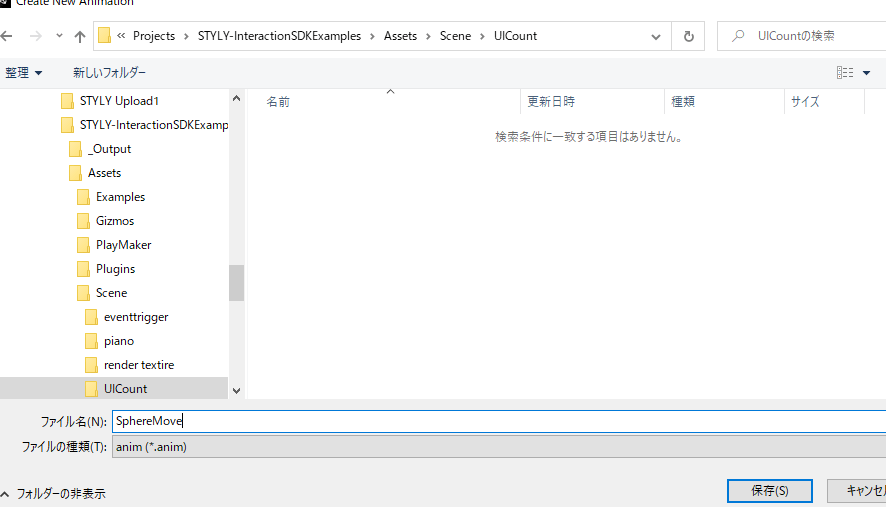
Here, we named the file SphereMove. Save your file to the desired location.
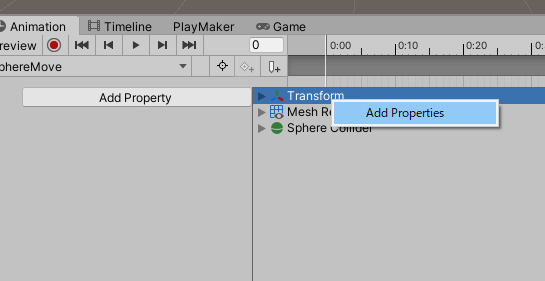
Select Transform from the Add Property menu.
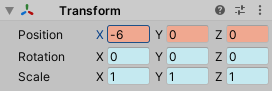
Align the sequence bar to the 0:30 position and set Position X on the Transform to -4.

Let’s hit the keyframes.
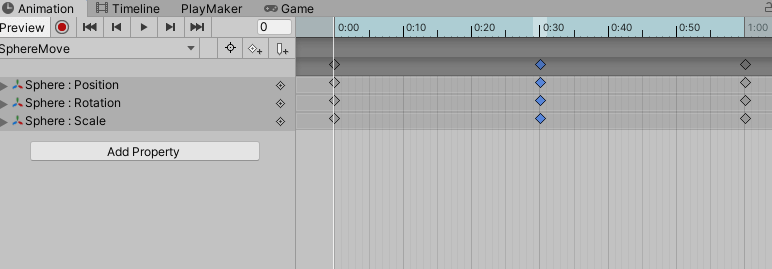
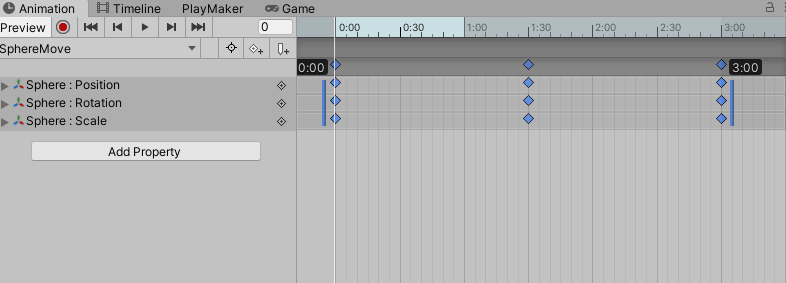
One second is too fast, so we can adjust it: select three keyframes and zoom in. Make sure that final last keyframe is at the 3 second mark.
Now the sphere will move back and forth, touching the cube as it plays.
This slippage will cause a TRIGGER EVENT to occur.
Our 3D model is now ready.
Preparing the UI
Let’s prepare the UI.
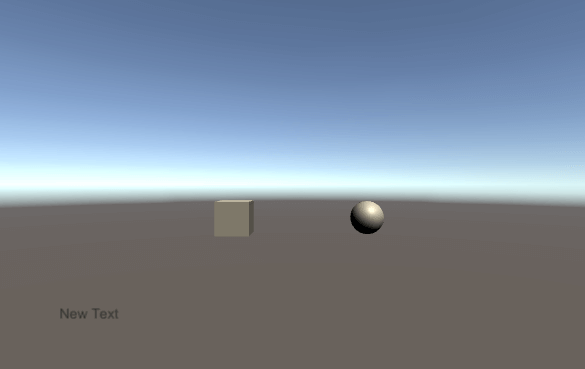
Choose UI > Text in the hierarchy window.
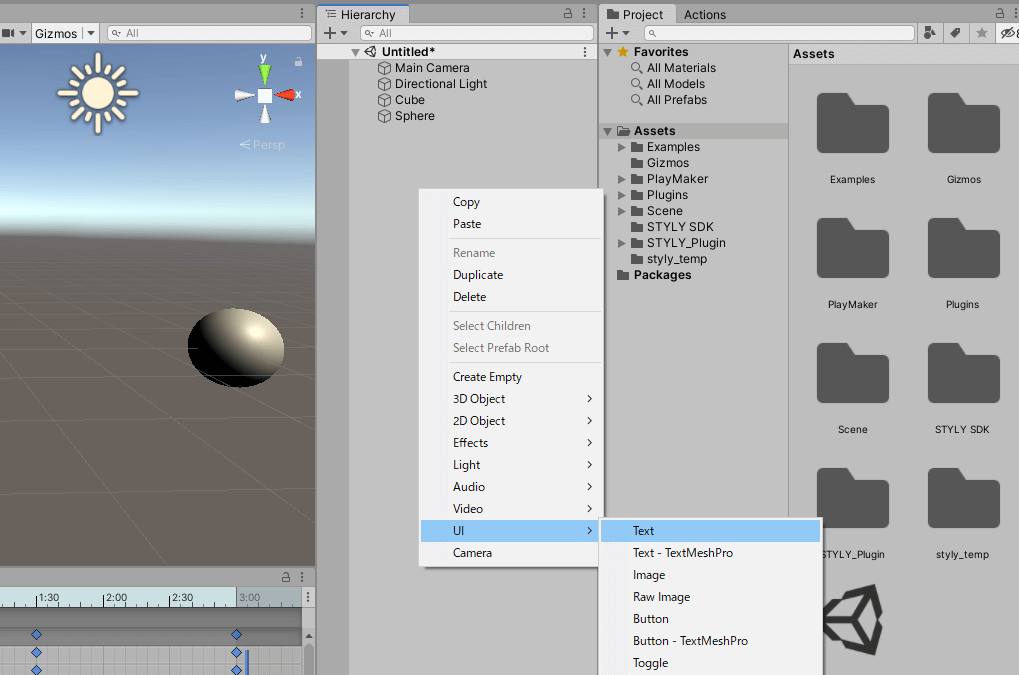
The UI text “New Text” is now displayed in the game window.
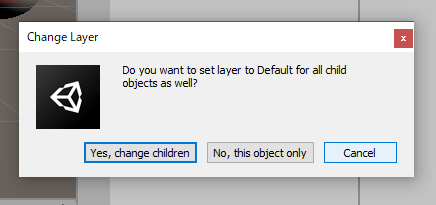
For STYLY, you need to set the UI layer to Default. Usually, it is set to the UI layer, so be sure to change this.
Select the Canvas object, and in the Inspector window, go to “Layer” and change it to Default.

When the Change Layer window appears, select Yes.
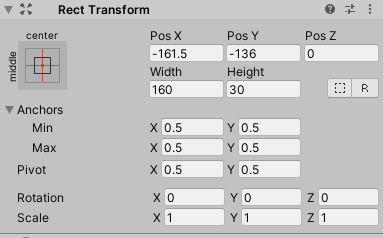
The settings are now complete, but you can also change the position and size of the text.
To change the text position, you can do so from the inspector of the Text object in Canvas in the Hierarchy window.
Select Text and change it with Pos X / Pos Y from the “Rect Transform” action in the inspector window.
PlayMaker settings
Using PlayMaker, we will create a mechanism for the UI to change depending on the TRIGGER events in the 3D model.
Setting up the Sphere
Add the FSM to the sphere: Right-click on the PlayMaker window and select “Add FSM”.
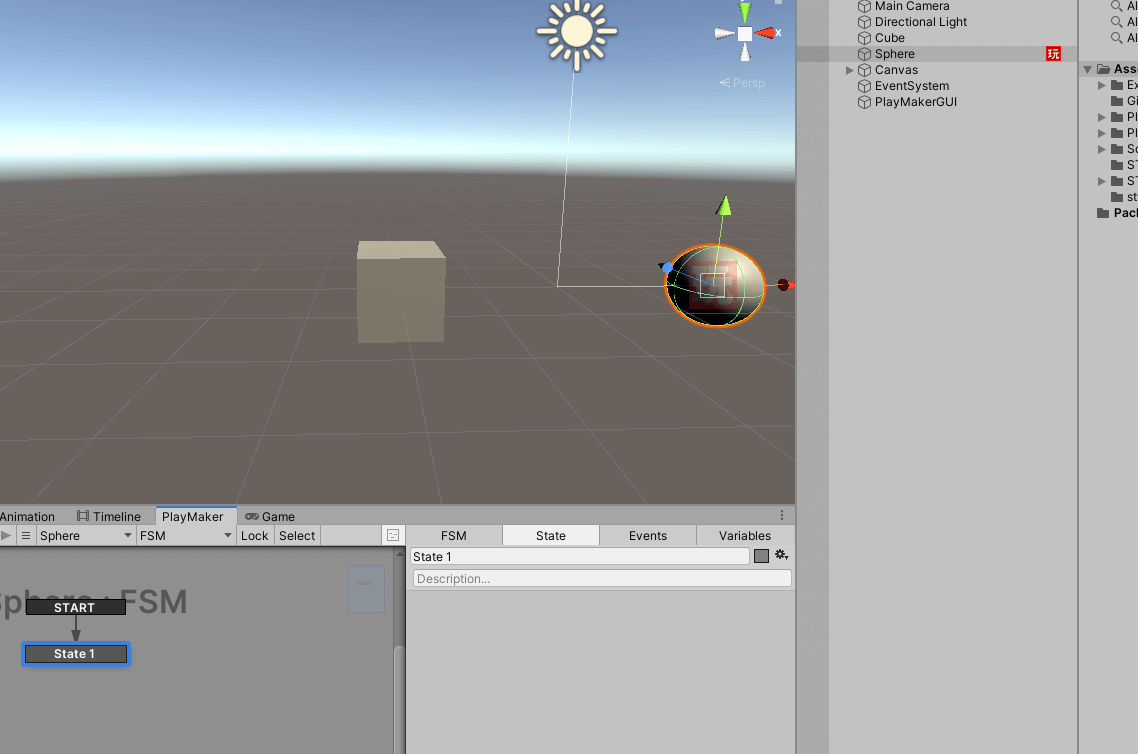
Set the action for State 1.
Add “UI Text Set Text” from the Action Browser.
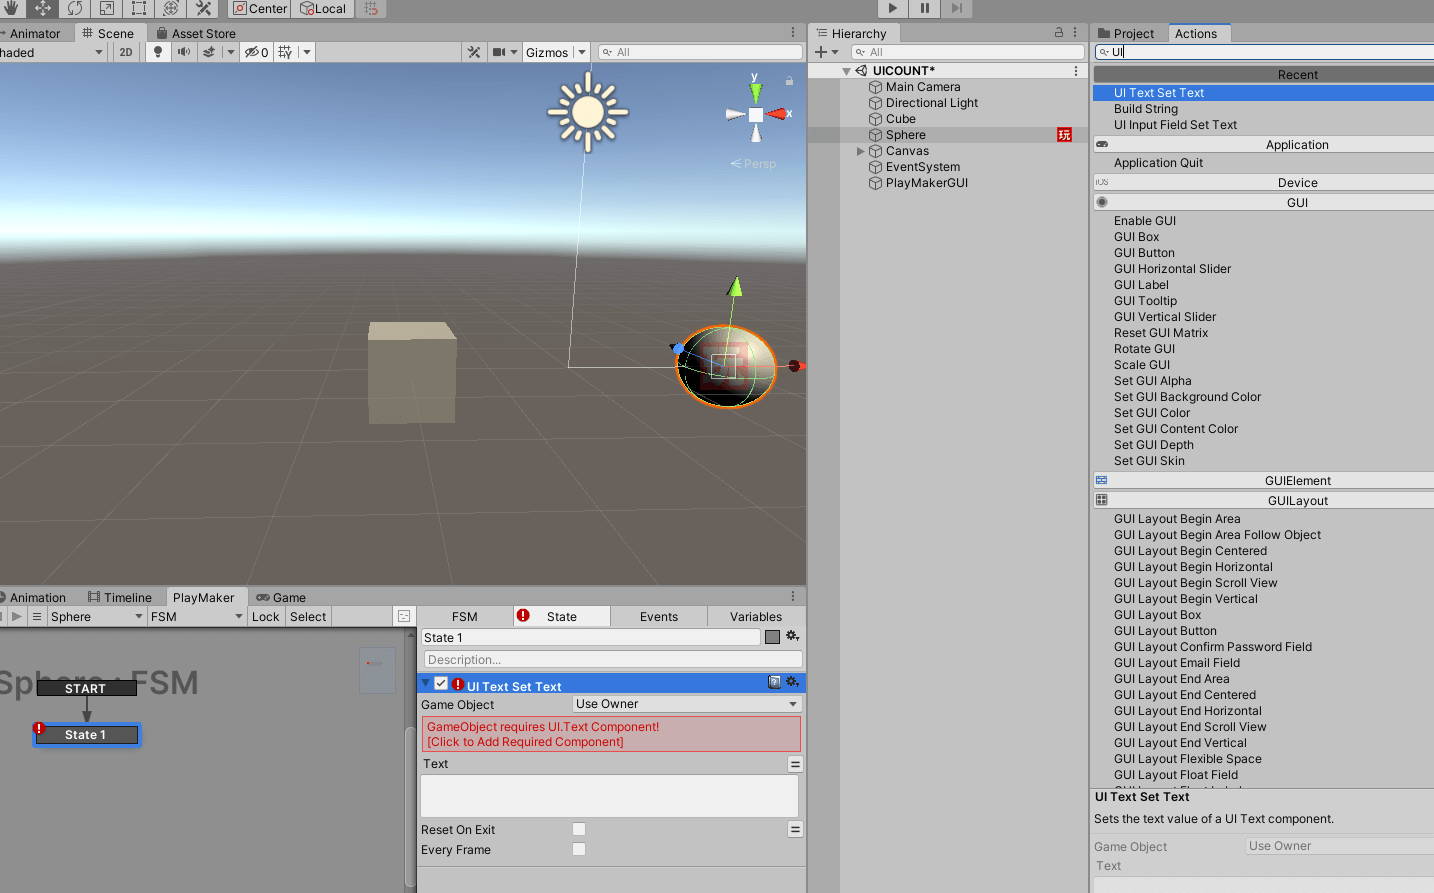
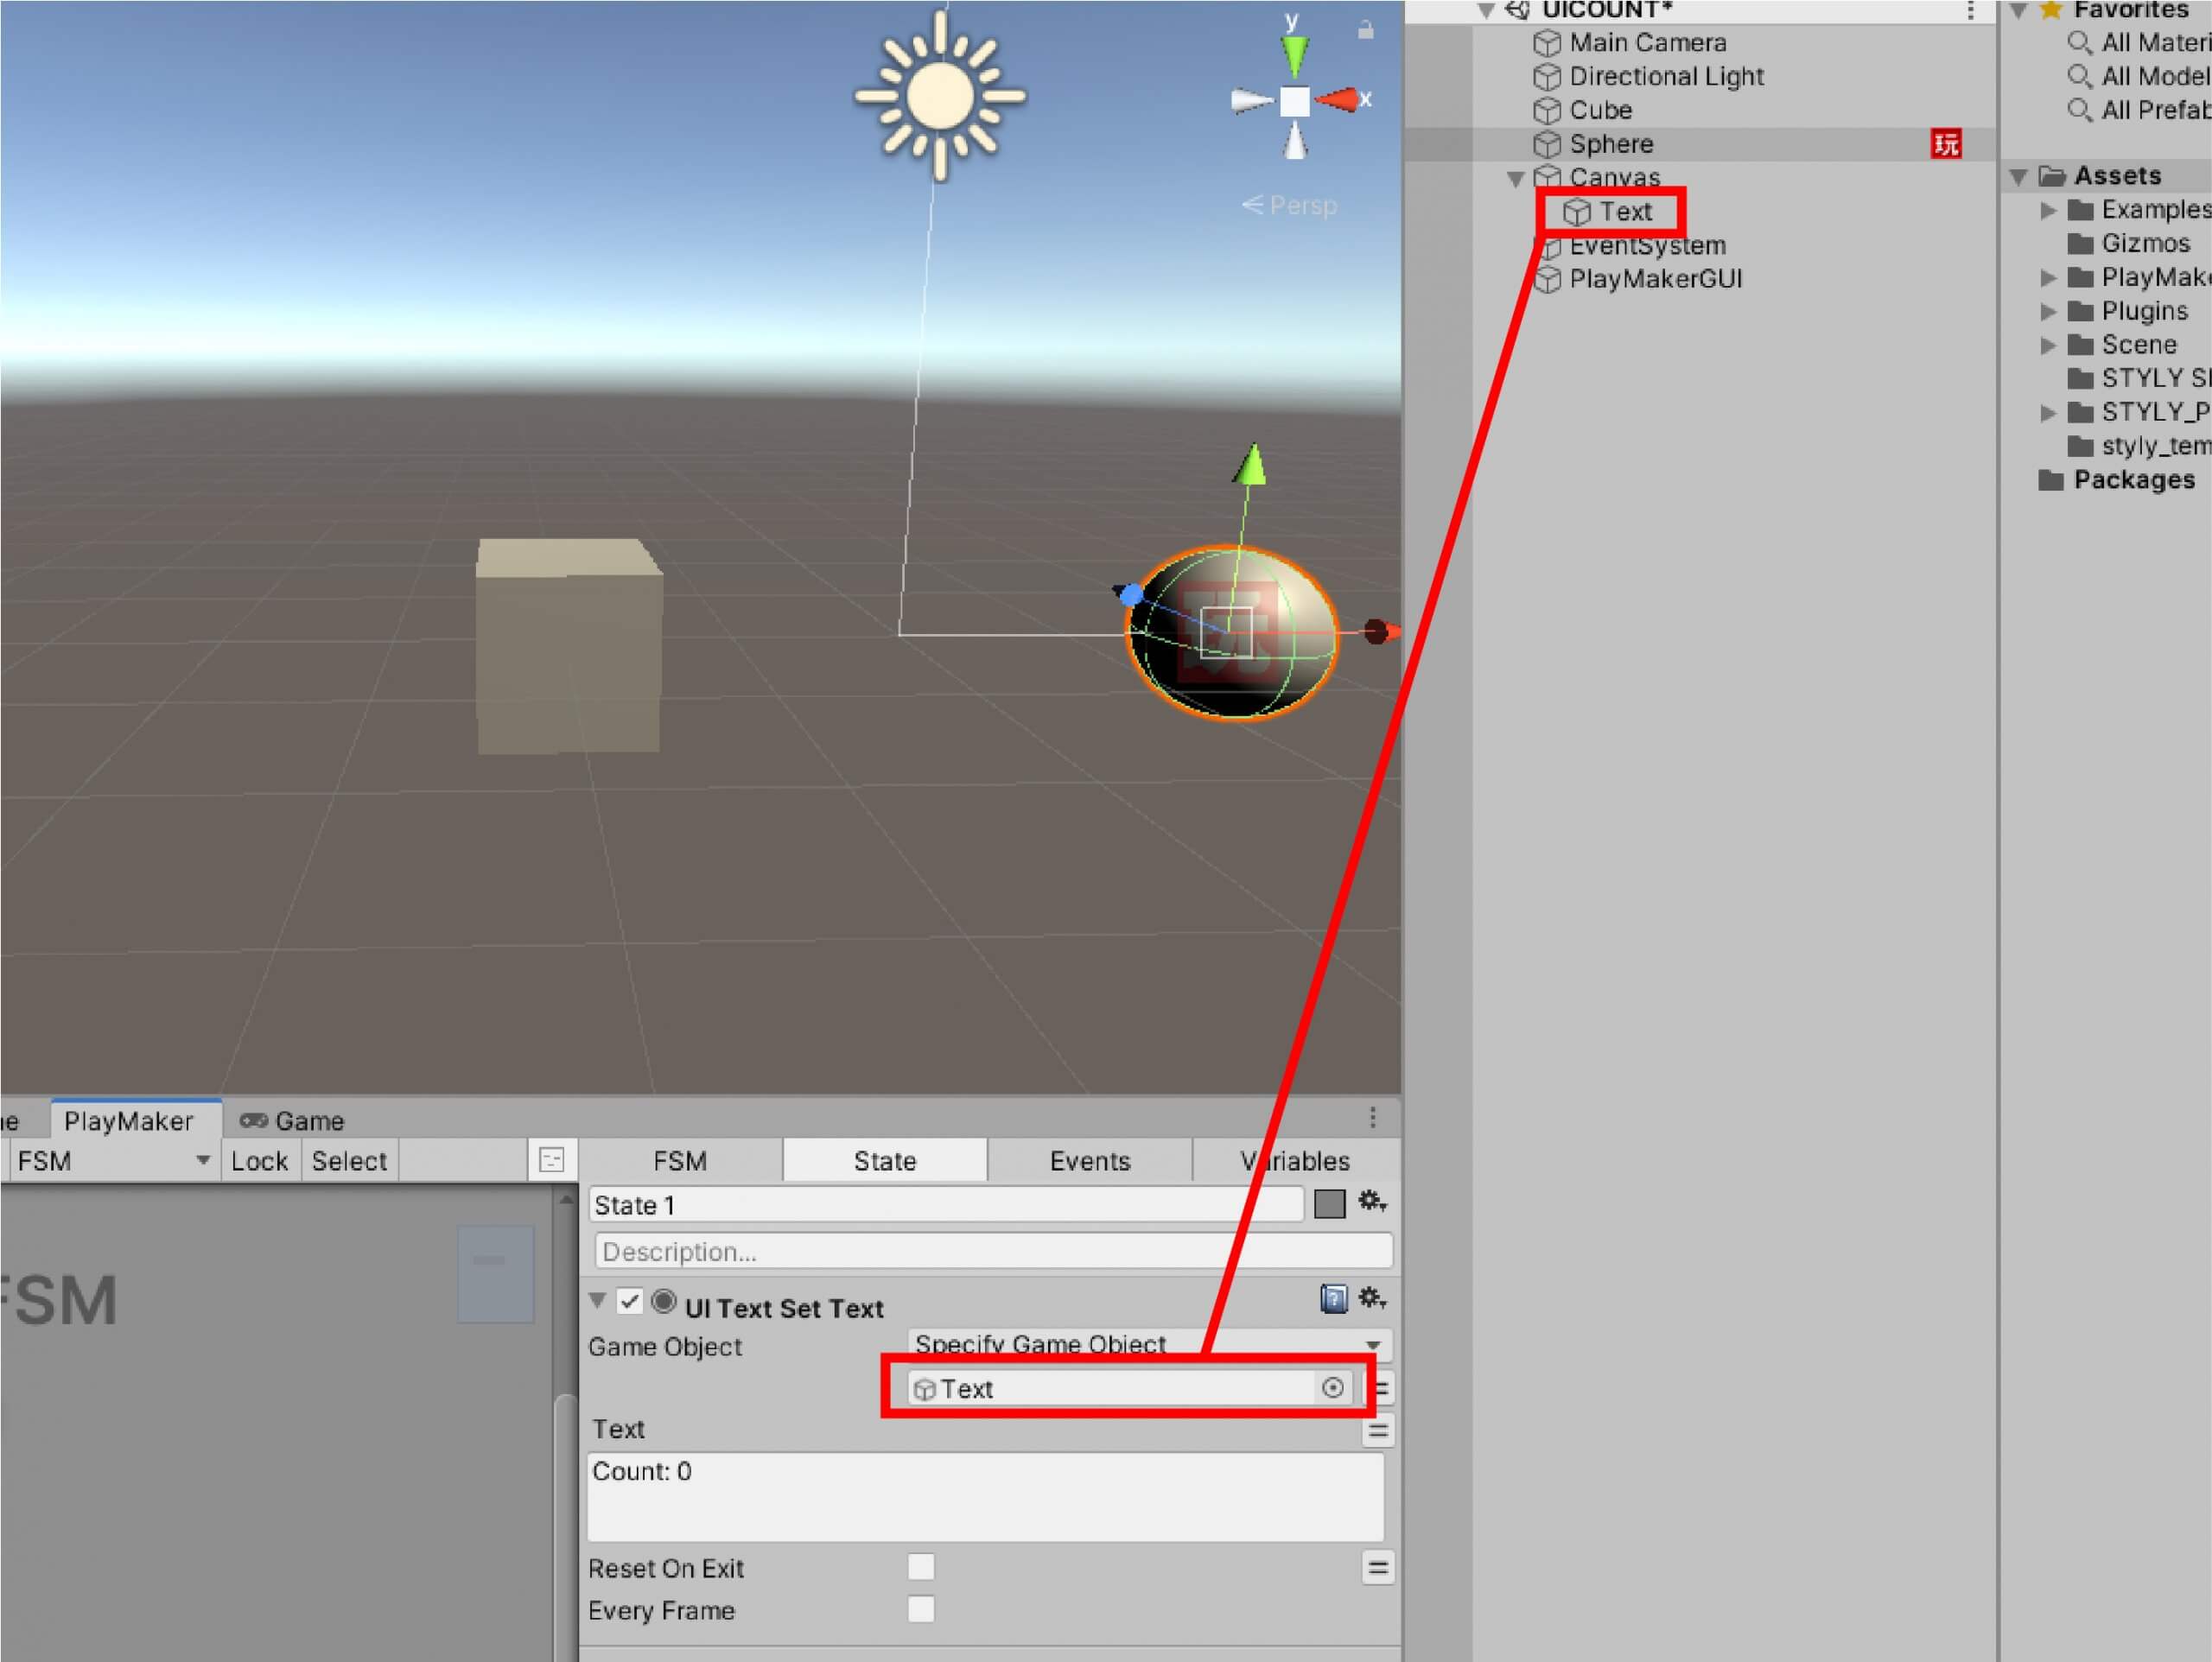
Change the Game Object field to “Specify Game Object” and drag and drop a Text object to the Game Object field.
Let’s change the text content to “Count: 0” (leave a space between the : and 0).

Let’s play it back in this state.

“Count: 0” will be displayed. This action allows you to set the text content of the specified UI object to the specified content.
Next, let’s add “Set Int Value” to State1.
Add a new count variable to the “Int Variable” column and select it. This variable can be added from the “New Variable…” option.
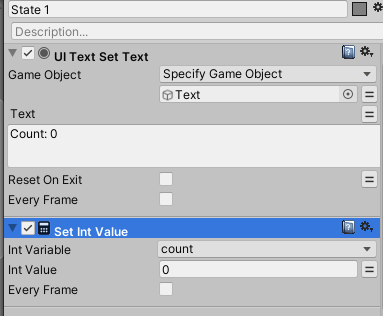
We have now set up State 1.
Next, let’s add another State.
Select Add State.
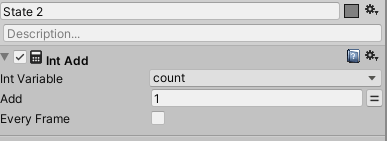
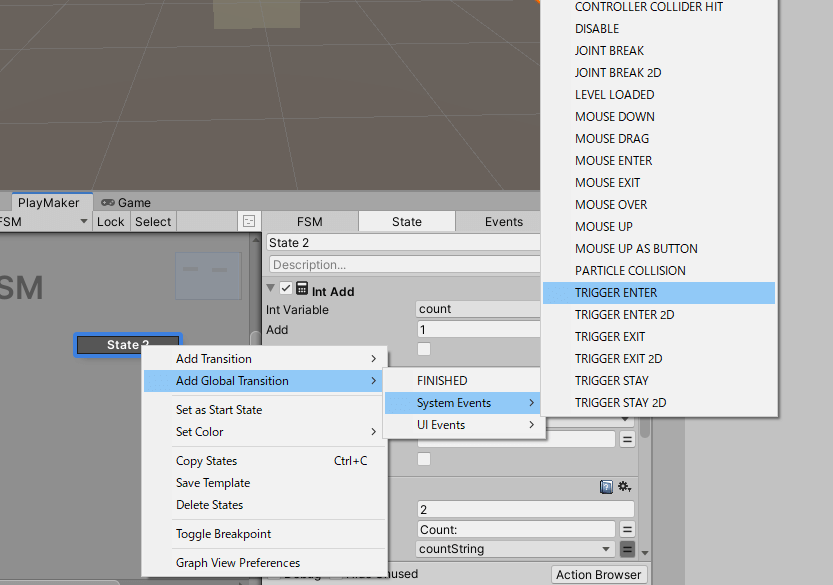
Let’s add the “Int Add” action to State 2.
In the Int Variable column, select the “count” variable that we just created.
Let’s set the number for Add to 1.
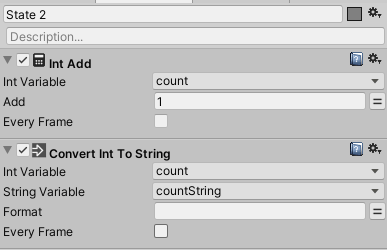
Next, let’s add the “Convert Int To String” action.
Select “count” in the Int Variable column.
In the String Variable column, select “New Variable…” and add the new variable “countString”.
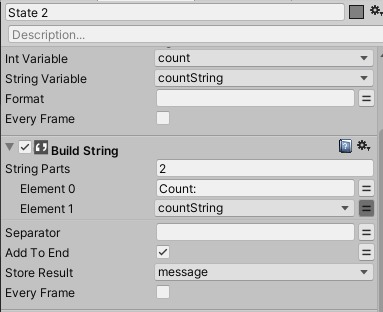
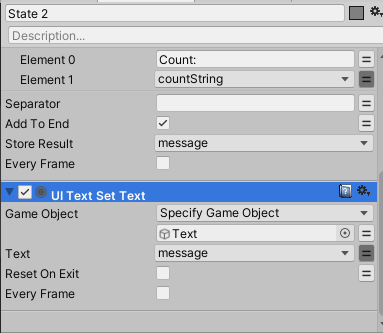
Next, add the “Build String” action.
Set the number of String Parts to 2.
Enter “Count:” in the Element 0 field and press
In the Element 1 column, add the variable “countString”.
Finally, in the Store Result column, add a new variable “message” from “New Variable…” in the Store Result column.
Next, we add UI Text Set Text.
In the Game Object field, we set “Specify Game Object” and drag and drop a text object.
In the text field, select the “message” that we have set up earlier.
Now, we have set up the State.
Finally, select State 2, right-click and select Add Global Transition > System Events > TRIGGER ENTER.
PlayMaker now looks like this. Let’s check it.


Let’s play it back.
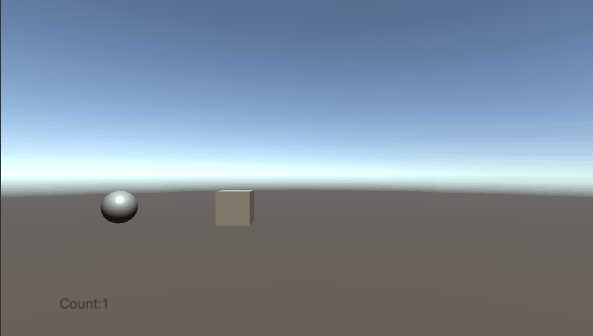
If the number in the UI below counts up, you’ve succeeded.
Upload to STYLY
Upload to STYLY. This time, we’ll upload it by scene upload.
If your scene is too large to upload to STYLY, please refer to this article:
Upload your scene from your timeline to STYLY.
How to create an account

How to upload a prefab from Unity to STYLY

If the UI appears on STYLY, you have succeeded.
If you want to adjust the position of the UI, etc., fix it in Unity.
Introduction to NEWVIEW SCHOOl ONLINE
NEWVIEW SCHOOl ONLINE, where you can learn the basics of Unity and PlayMaker necessary for creating VR/AR content, from the basics to the application of PlayMaker, and learn the process of creating the fascinating content available on STYLY (we’ll also expose the production techniques).
