This article explains how to create and apply a normal map in Blender to express the unevenness in appearance.
What is Normal Mapping?
Normal mapping is a way to create pseudo-shadows and highlights by specifying a normal map that has height, and height information, separate from the normal texture of an object, and to express an uneven appearance even if the mesh is not uneven.
For more details, please refer to the following article.
![[Blender] Understanding Bump Maps and Normal Maps](https://styly.cc/wp-content/uploads/2021/03/スクリーンショット-2021-03-20-15.28.08-160x160.png)
In this article, we will explain “Creating a Normal Map in Blender” in the “Creating a Normal Map” section of the following article.
Baking a Normal Map
Baking is often used to bake shadows into the texture of a model in advance to reduce the burden of computation. This time, instead of shading, we will bake the height and height information as a normal map.
For more information about baking, please refer to the following article.
![[Blender 2.81] Baking textures into retopology models](https://styly.cc/wp-content/uploads/2020/03/キャプチャ6-160x160.png)
There are two ways to bake: by adding meshes and by sculpting, but the basic idea is the same for both.
Adding Meshes and Baking
When the number of polygons increases due to the modelling of detailed parts, you can reduce the number of polygons by baking to a normal map.
Let’s try this with a simple model.
First, prepare a plane with subdivided polygons by applying “Edge” -> “Subdivide” to the plane several times as shown below.
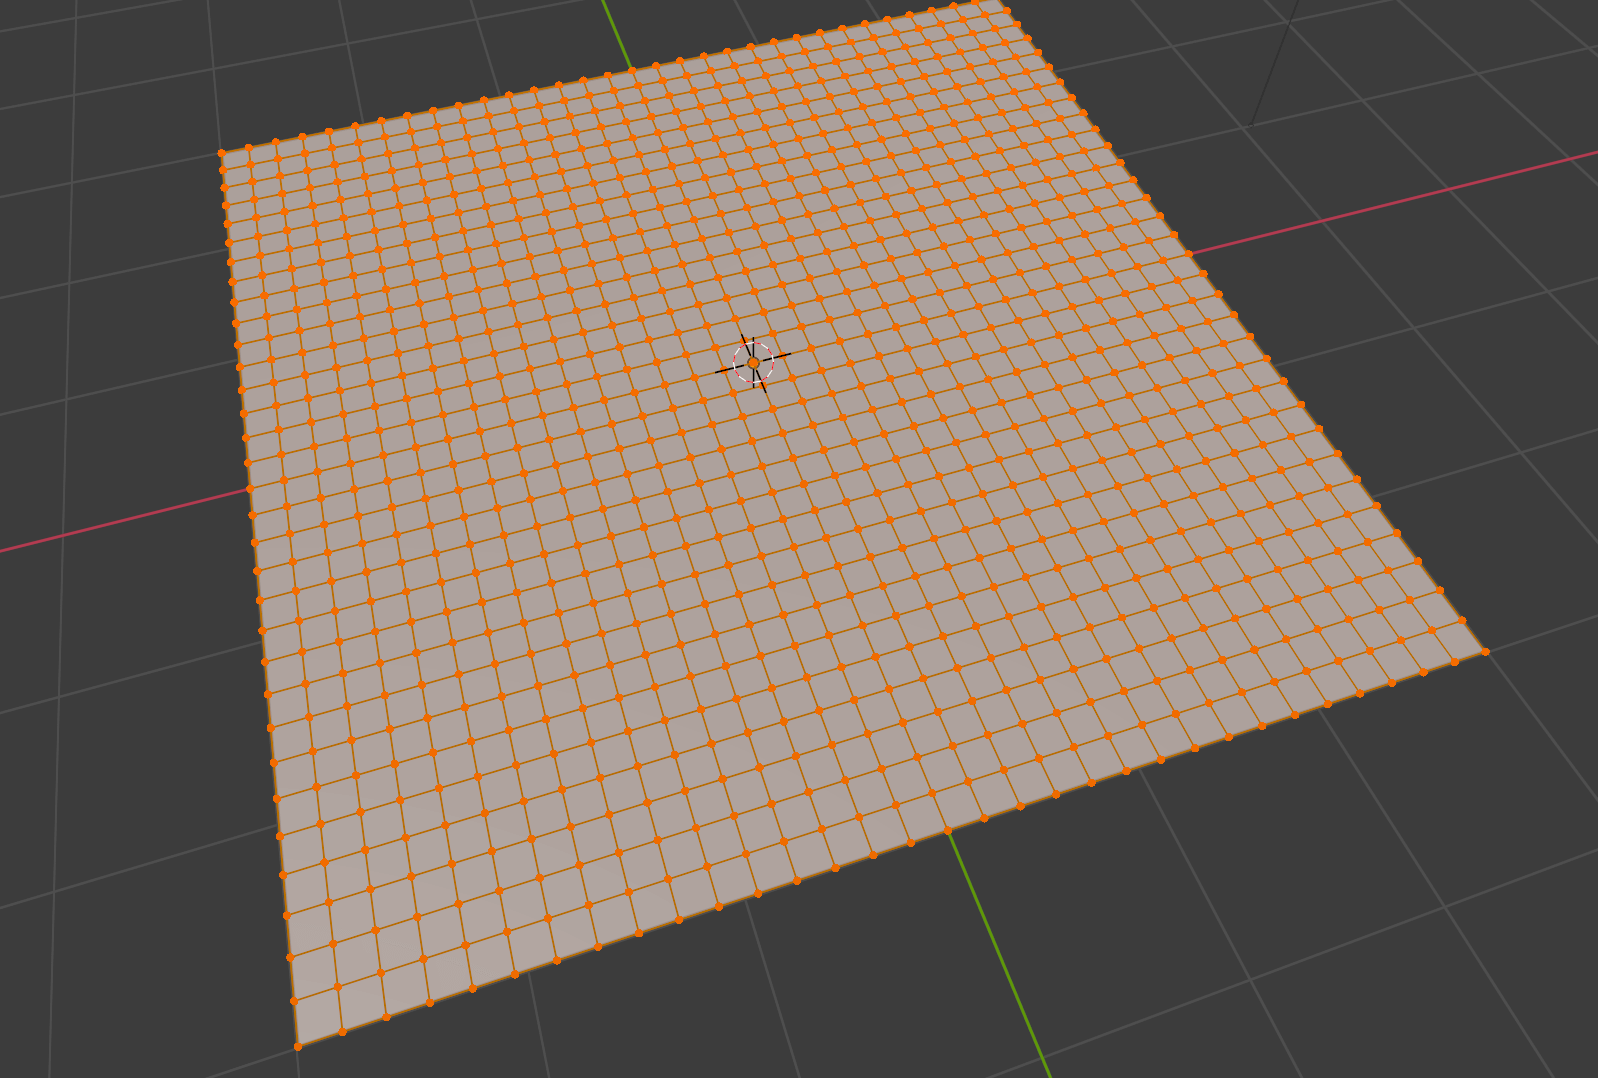
Subdivide the plane.
Duplicate this plane in place by pressing [Shift]+[D], and use the proportional editing function by pressing [O]→[G] to add appropriate indentations.
For more information about proportional editing, please refer to the following article.
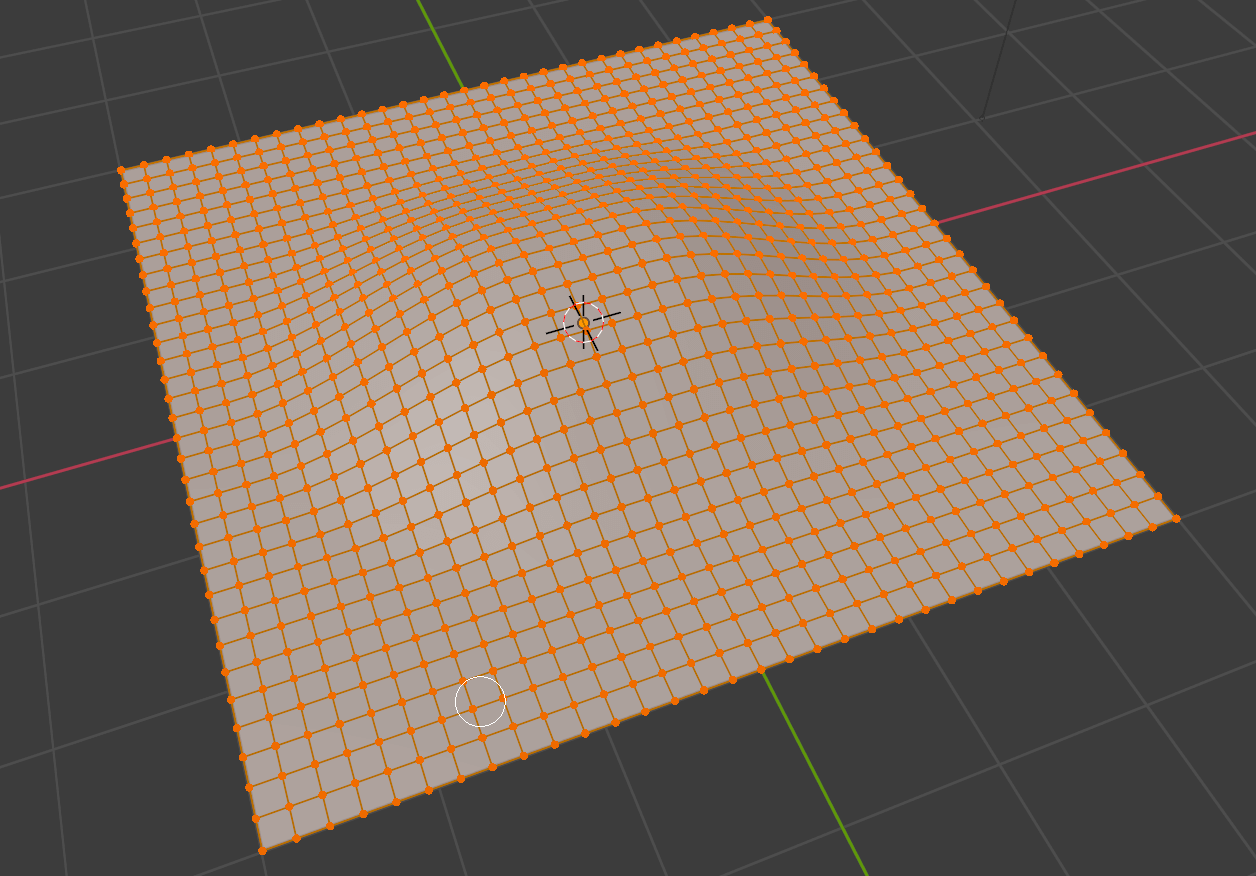
Duplicated and dimpled plane.
In the material properties, add a new material by clicking on the “+” button.
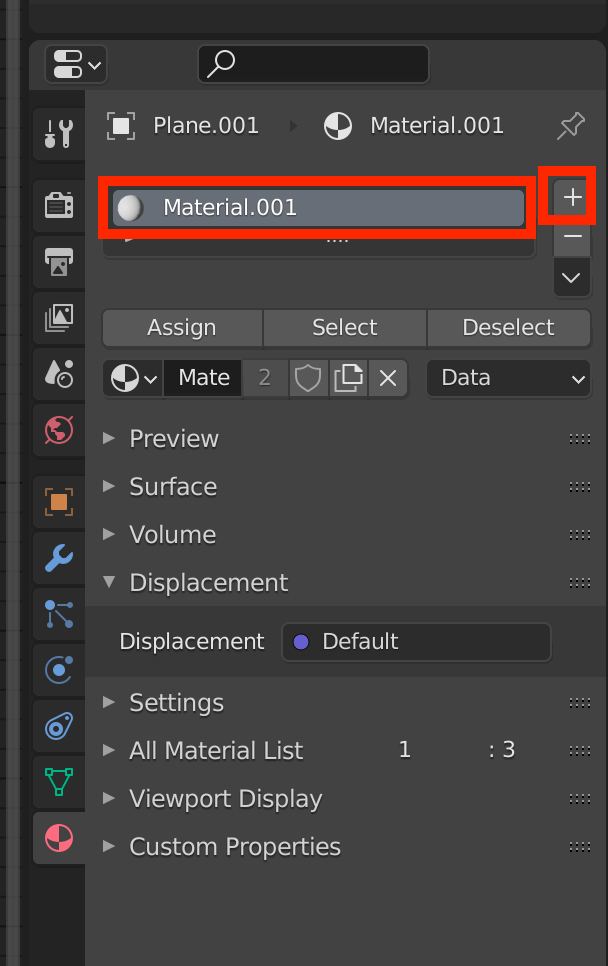
Adding a new material.
Open the Shader Editor and use [Shift]+[A] to add an Image Texture node.
Click on “+ New” to create a new texture. We’ll leave the name as “Untitled”.
The Image Texture does not need to be connected to any other nodes.
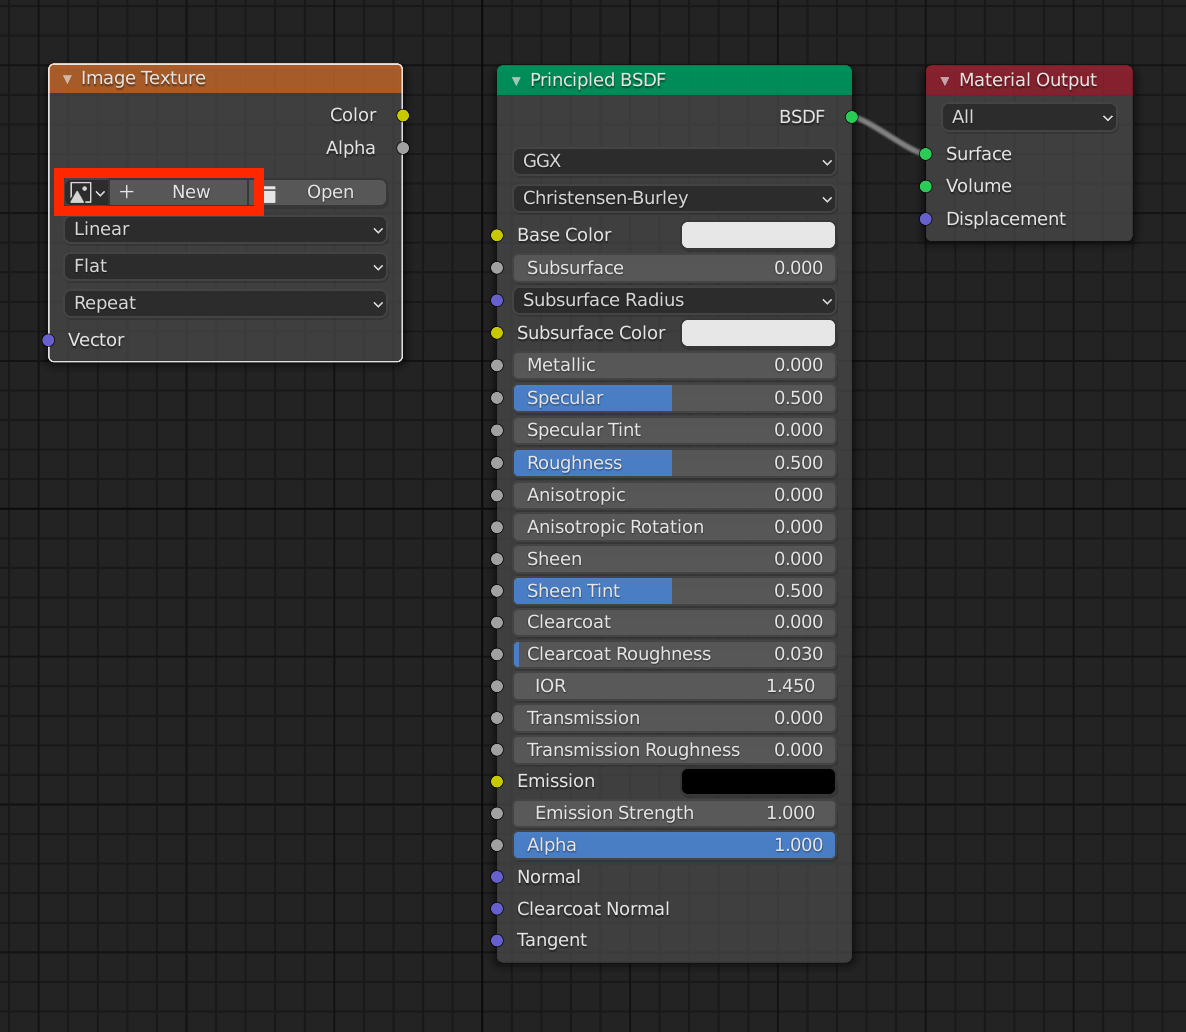
Adding a new Image Texture.
Assign the same material to the duplicated and deformed plane.
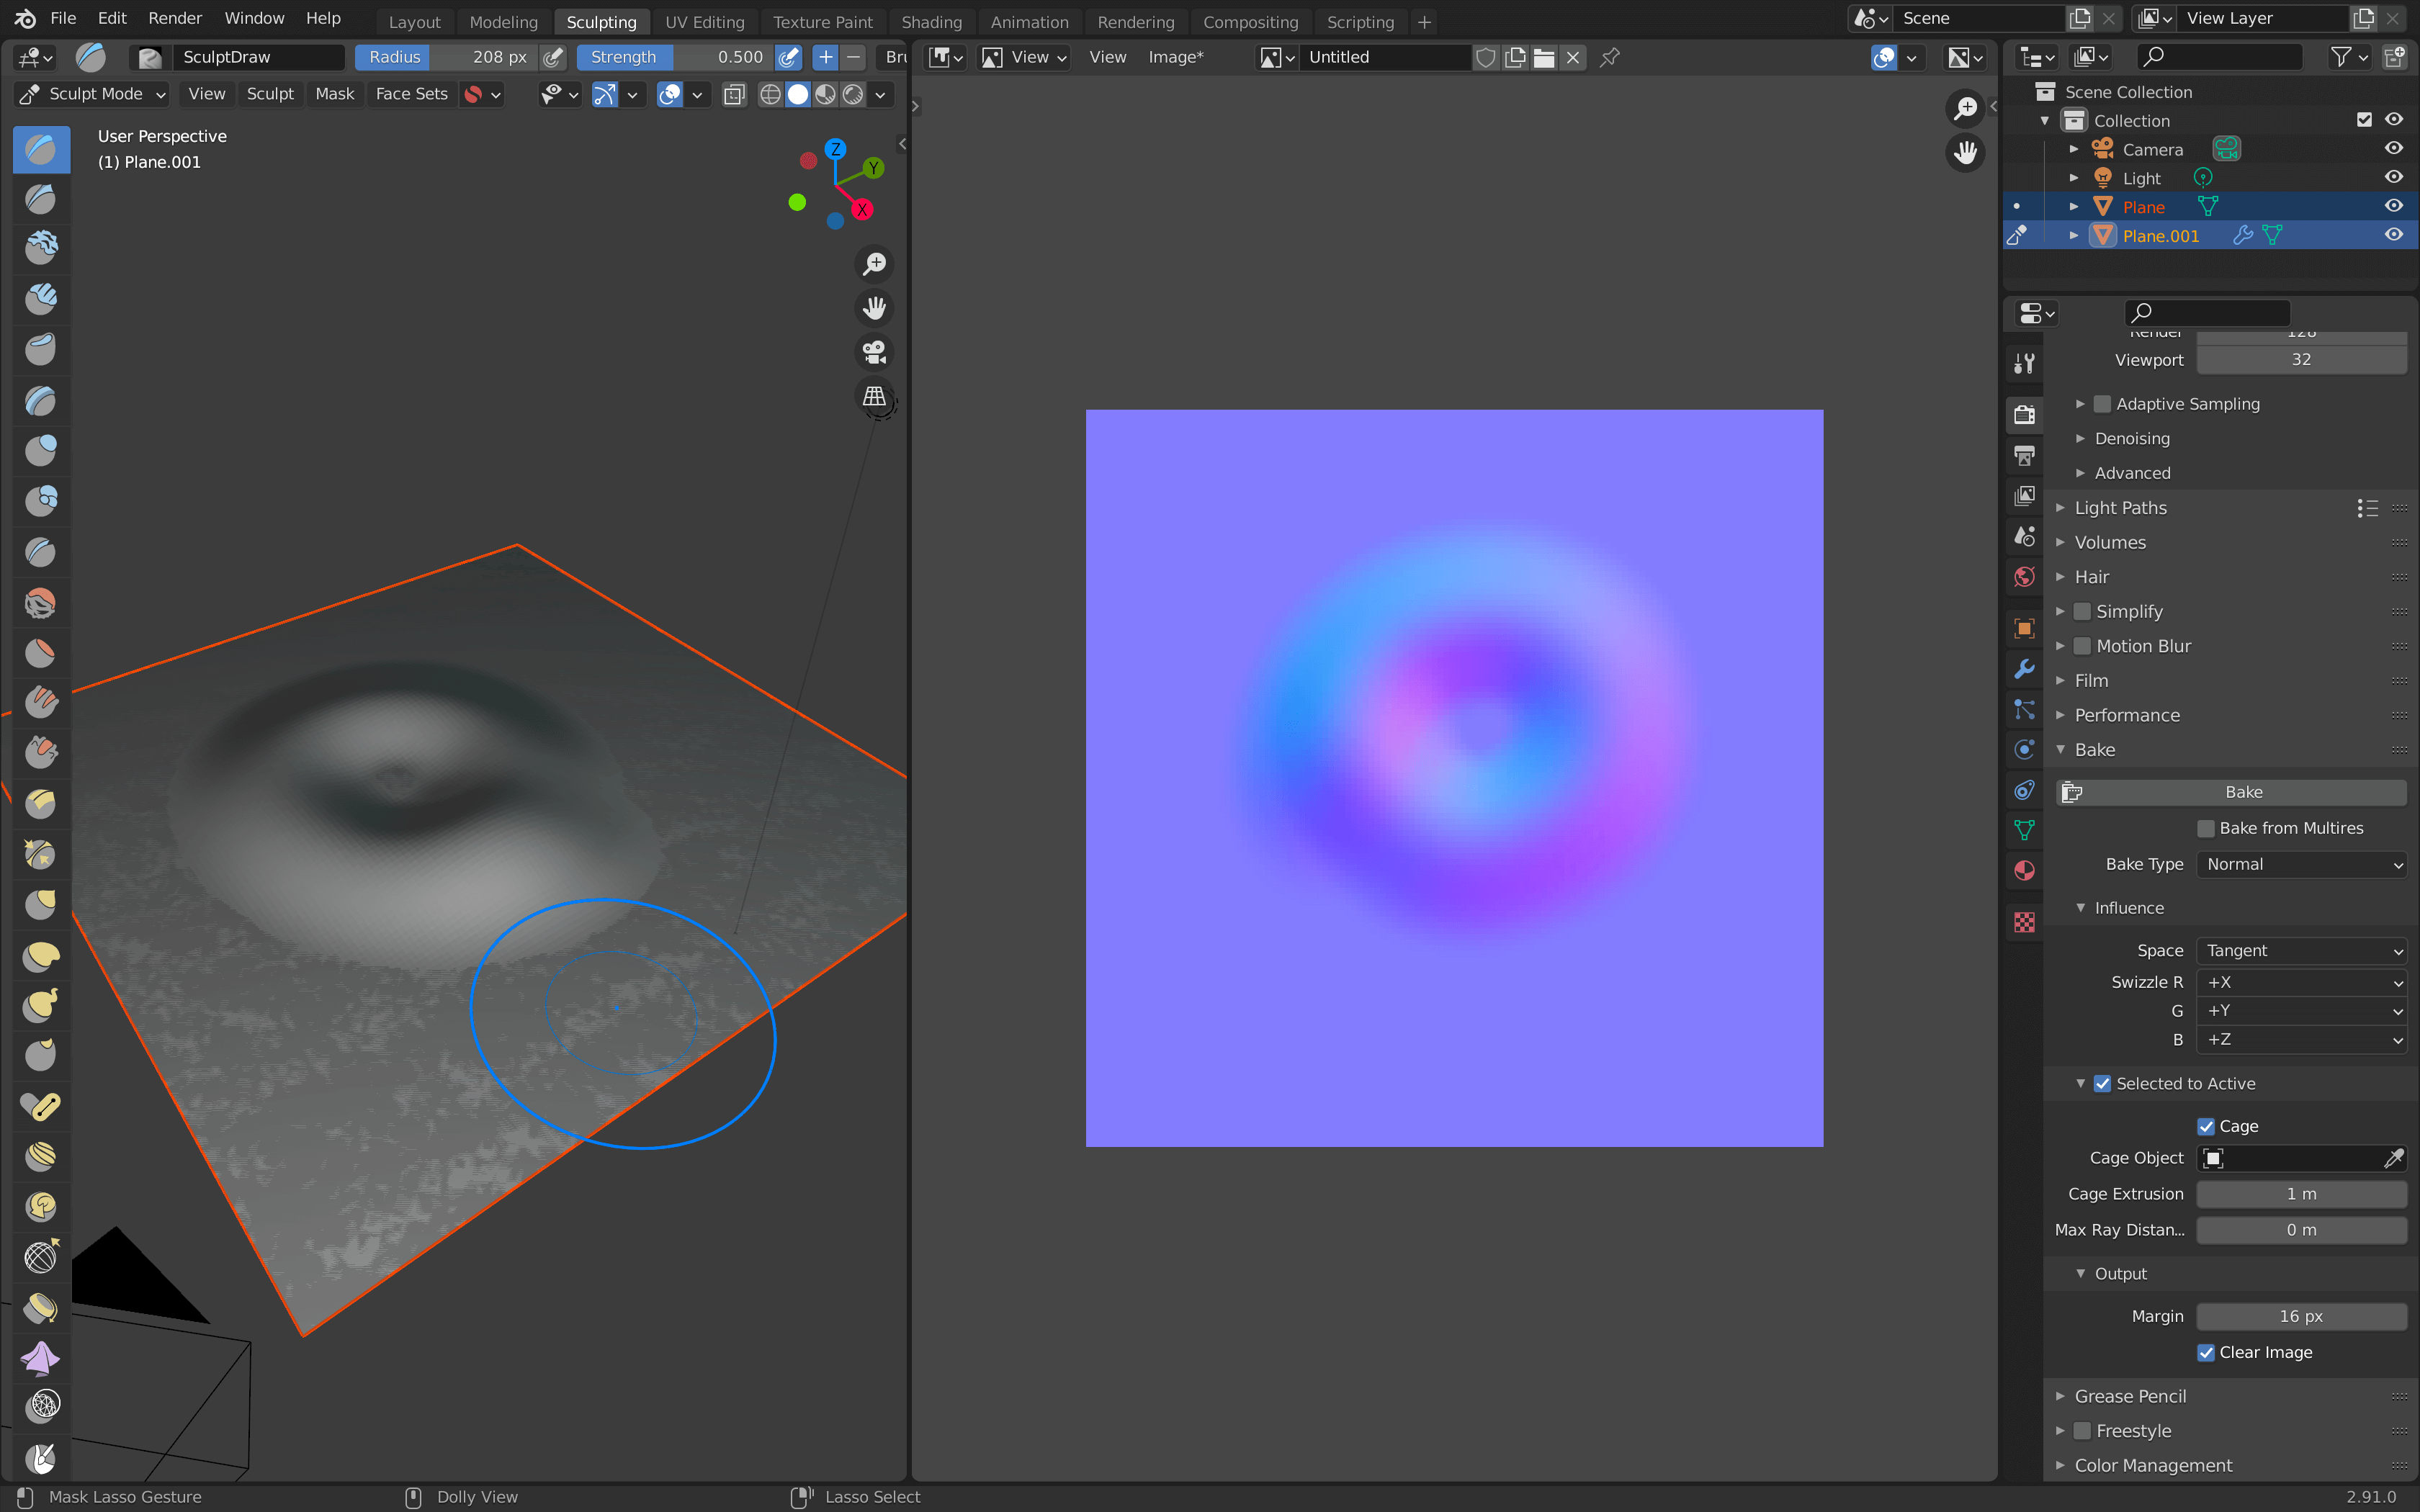
Select the cloned and deformed plane, then the original plane, while holding down the [Shift] key, and from the Render Properties, change Render Engine to Cycles. (Eevee does not have a bake function.)
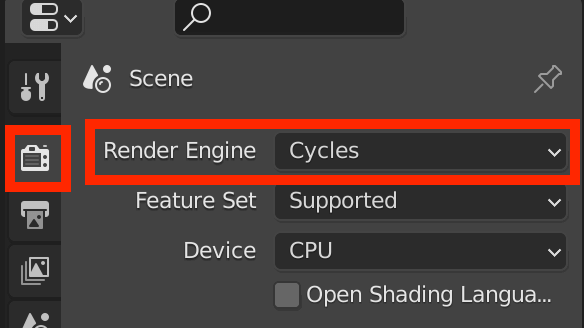
Change to Cycles.
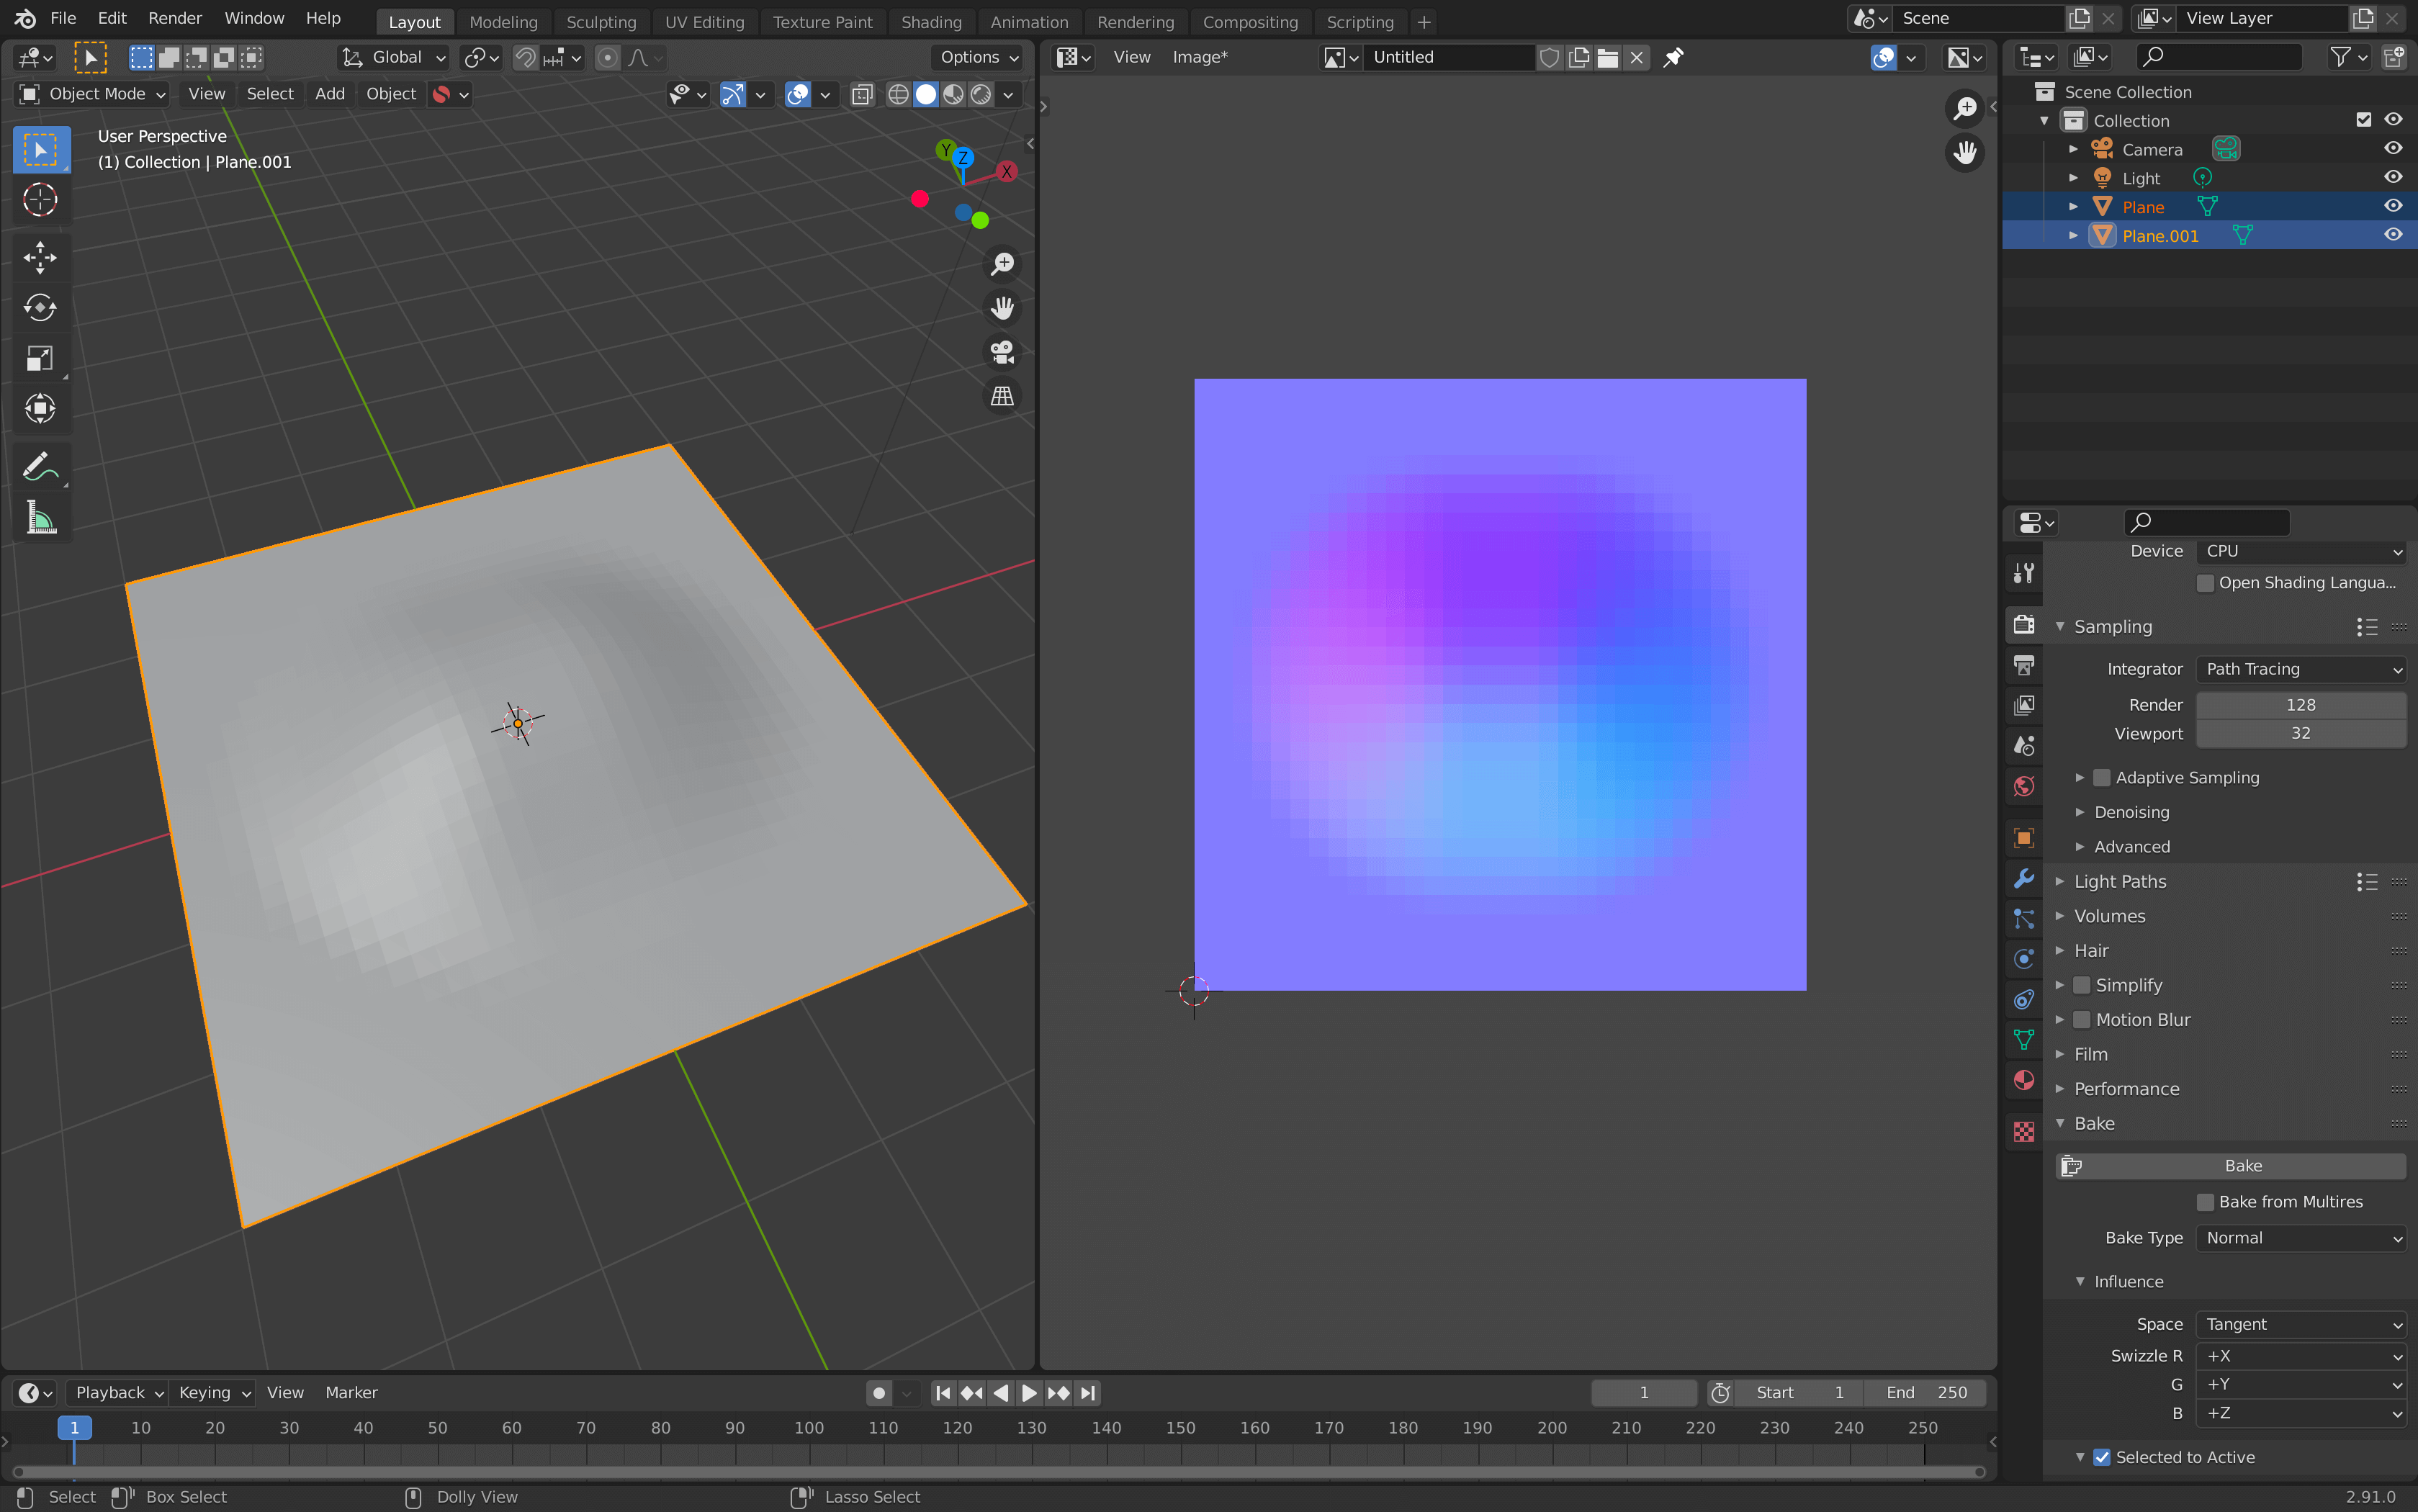
Scroll down and set the items as shown below, then click Bake.
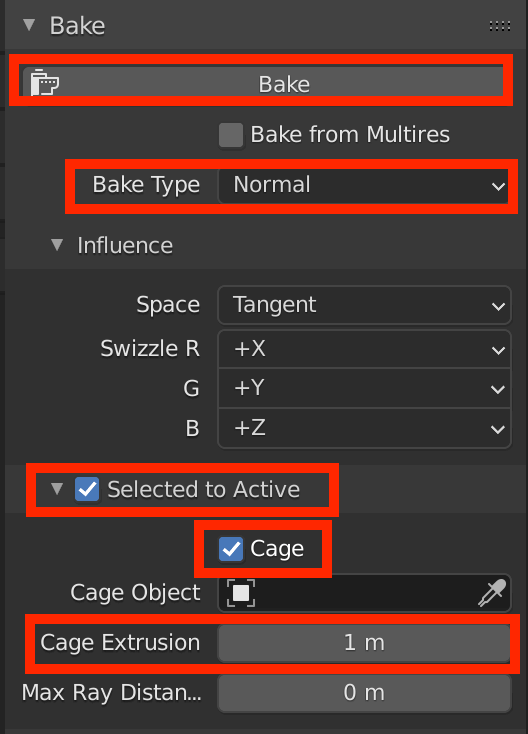
Bake Settings.
- Selected to Active: Bake a texture from another model.
- Cage: Specify the range of influence of the bake when baking a texture from another model.
- Cage Extrusion: Bake’s area of influence.
The baking process will take place. When it is finished, check the “Image Editor” screen to see that a normal map has been created.
Don’t forget to select the name of the texture you just created from the top of the screen.
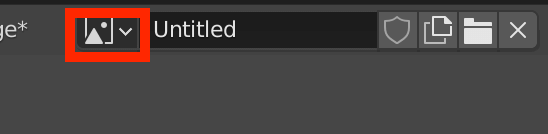
Select the texture you just created.
After baking.
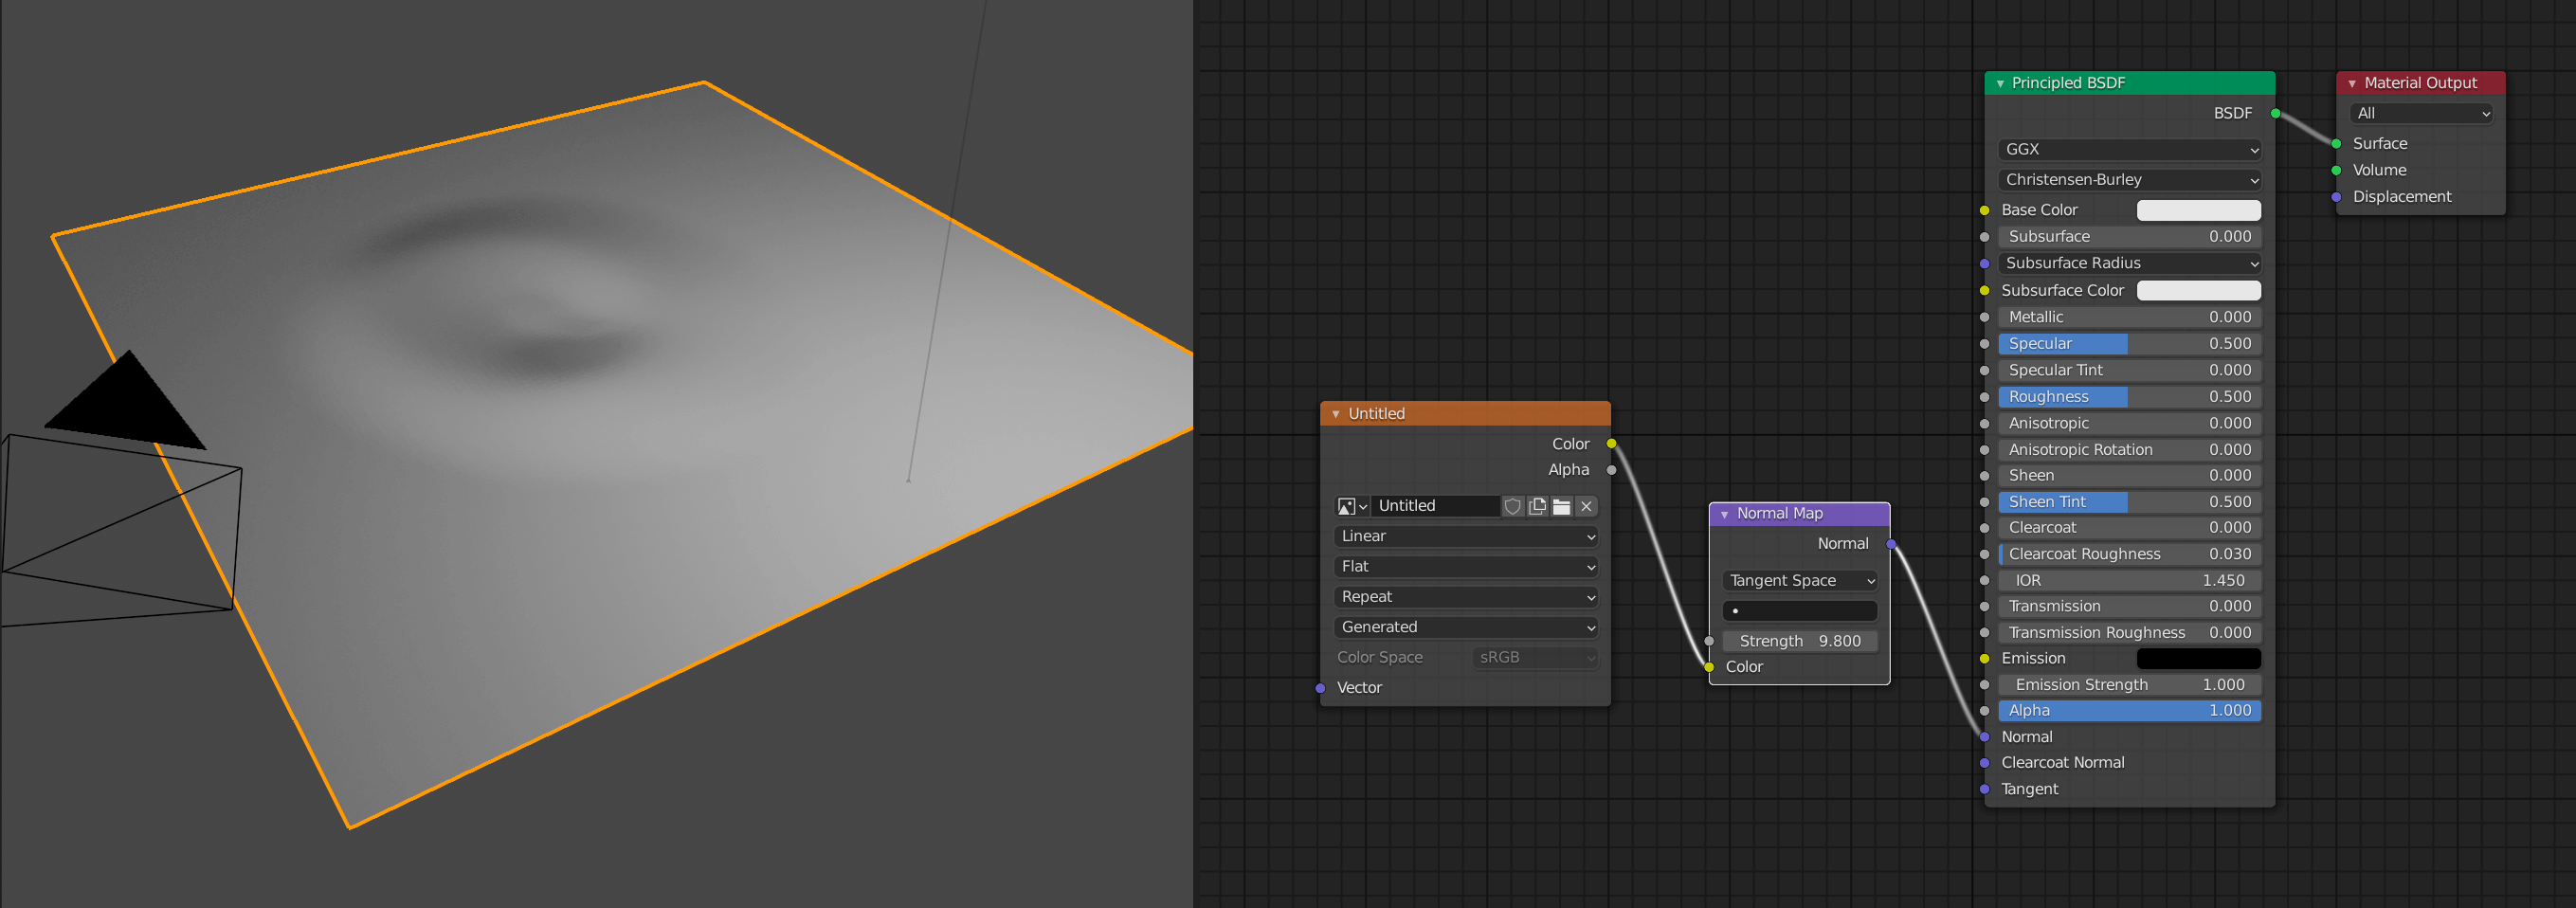
Once the normal map has been created hide the deformed plane, add a Normal Map node, and connect it as shown below.
You can see that the plane is now uneven.
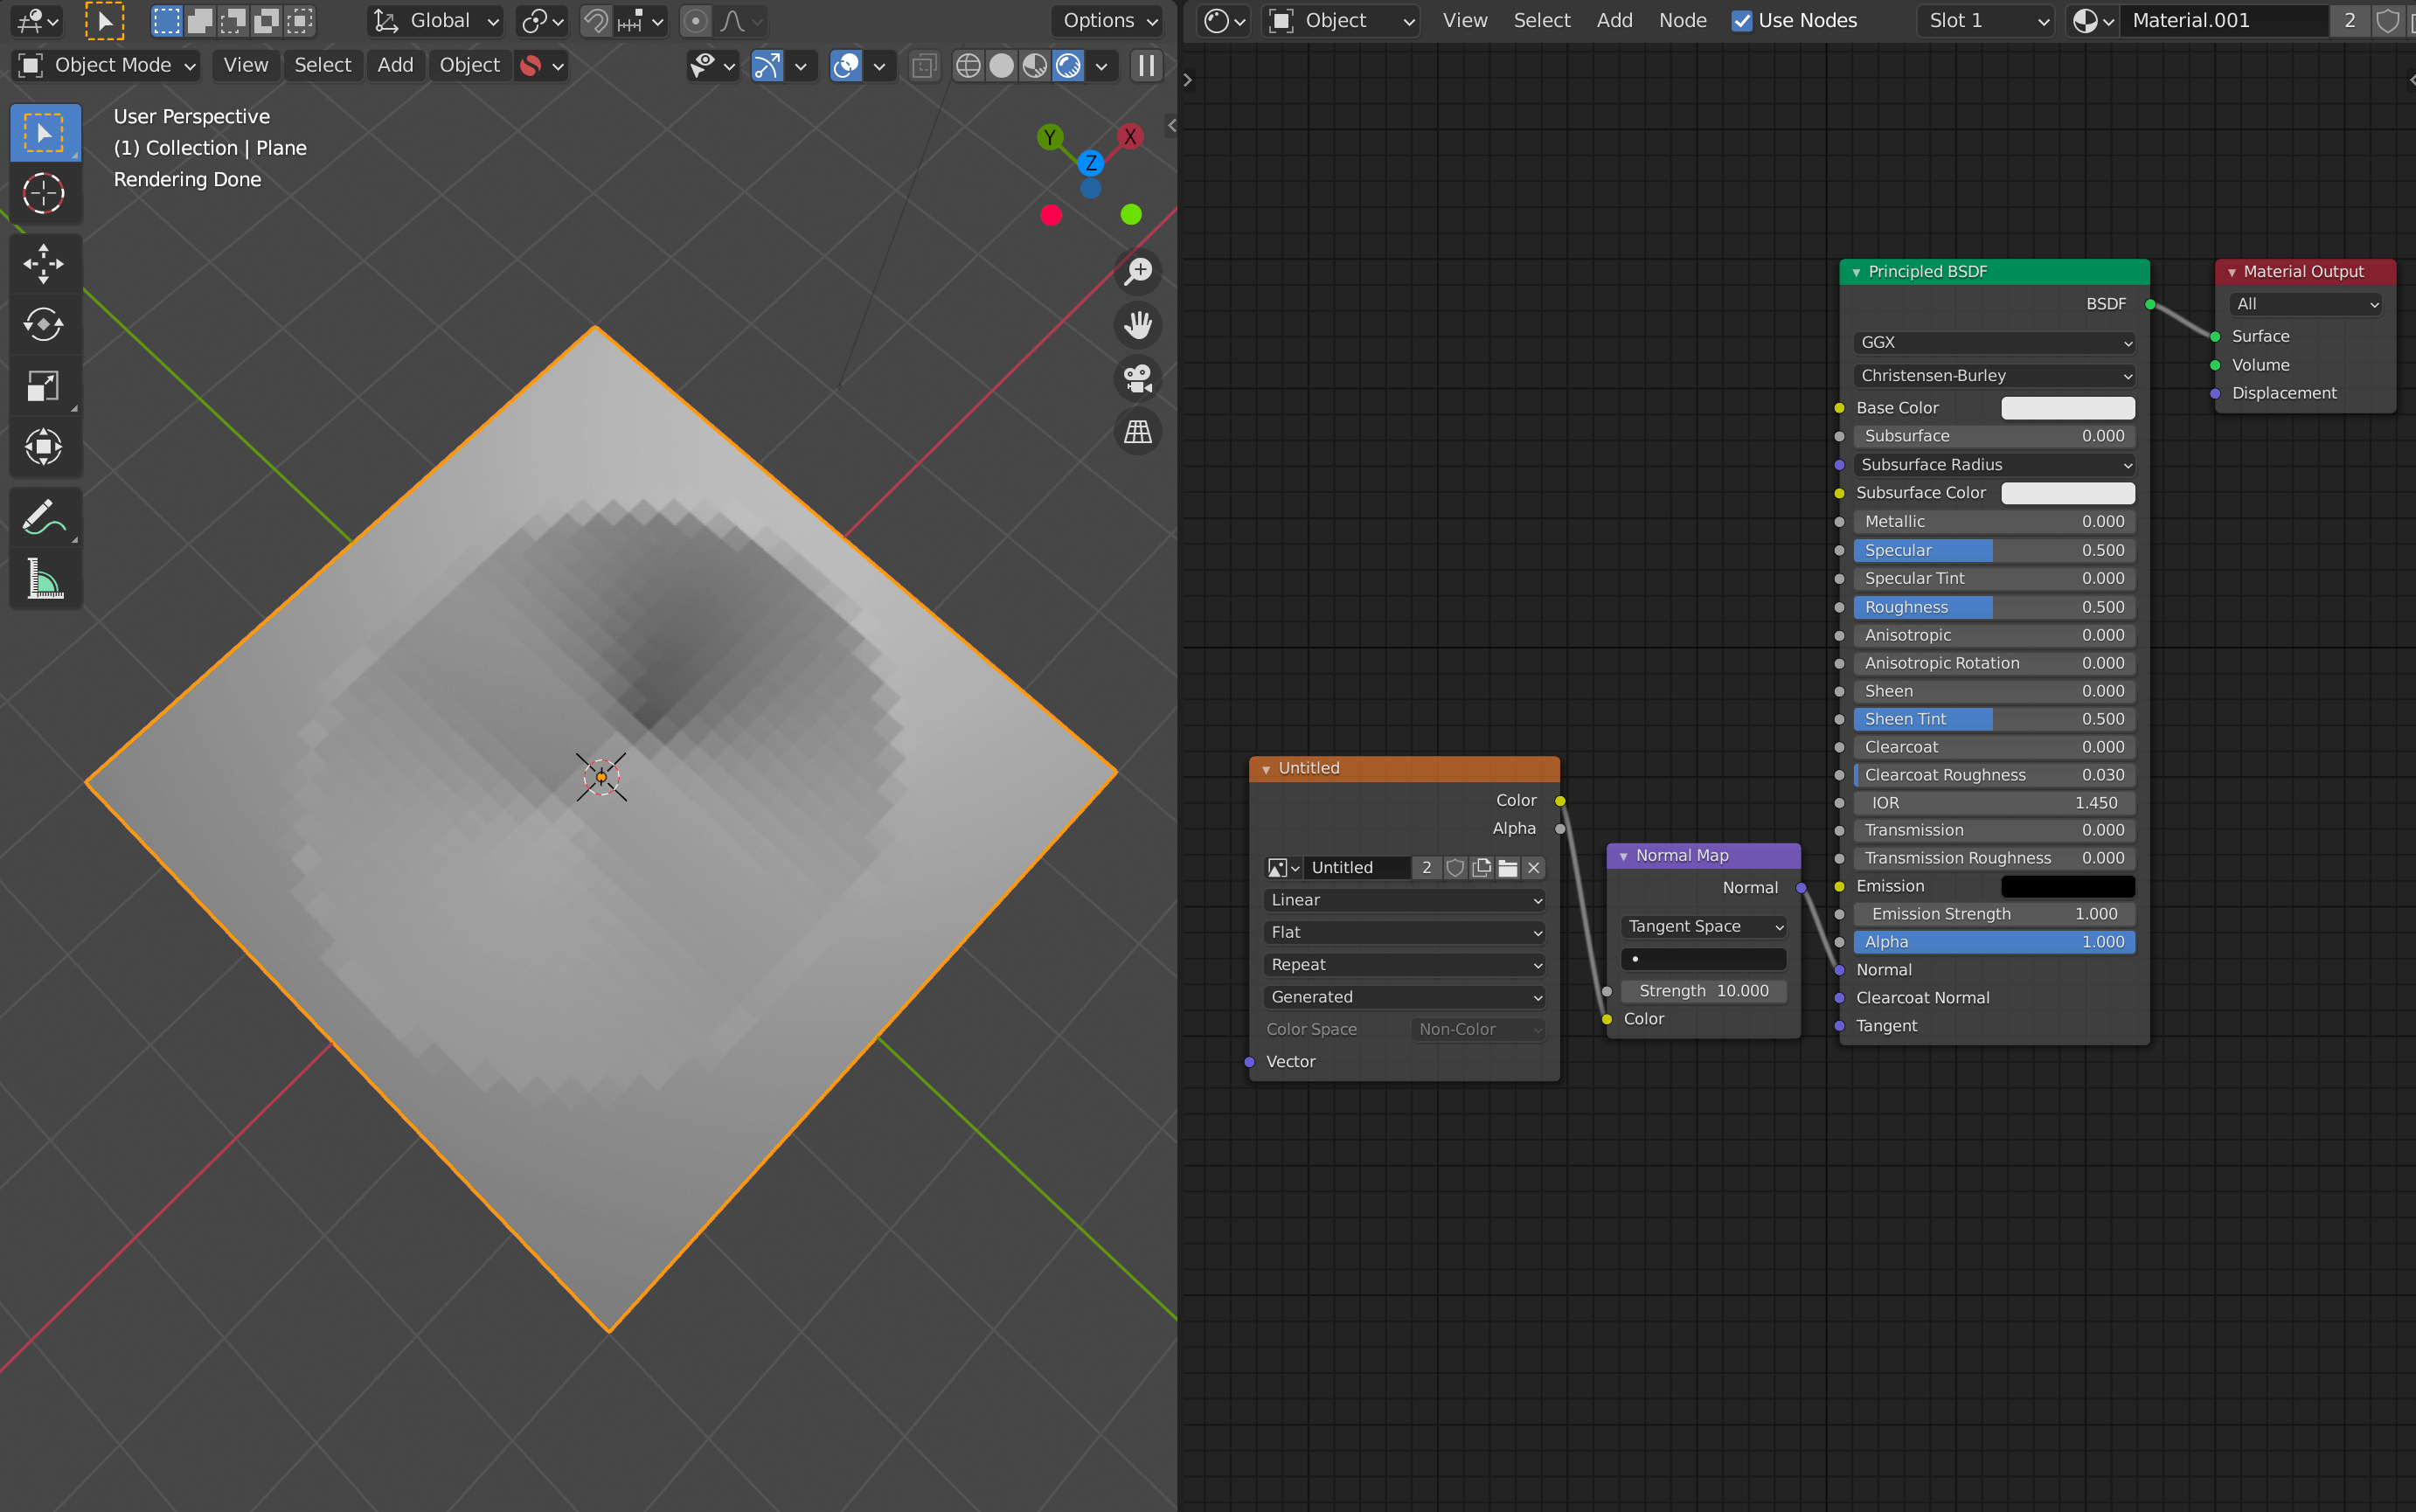
After applying the Normal Map, the plane is now uneven.
Baking with Sculpting
Baking with a normal map can reduce the number of polygons needed to create wrinkles in clothes that cannot be sculpted without a fine mesh.
Add a plane and duplicate it in the same way as in “Adding mesh and baking” above.
To the duplicated plane, add the “Multiresolution” modifier from the “Add Modifier” menu. This modifier is used when you want to make a simply modelled object look like a complex object, and is often used when sculpting.
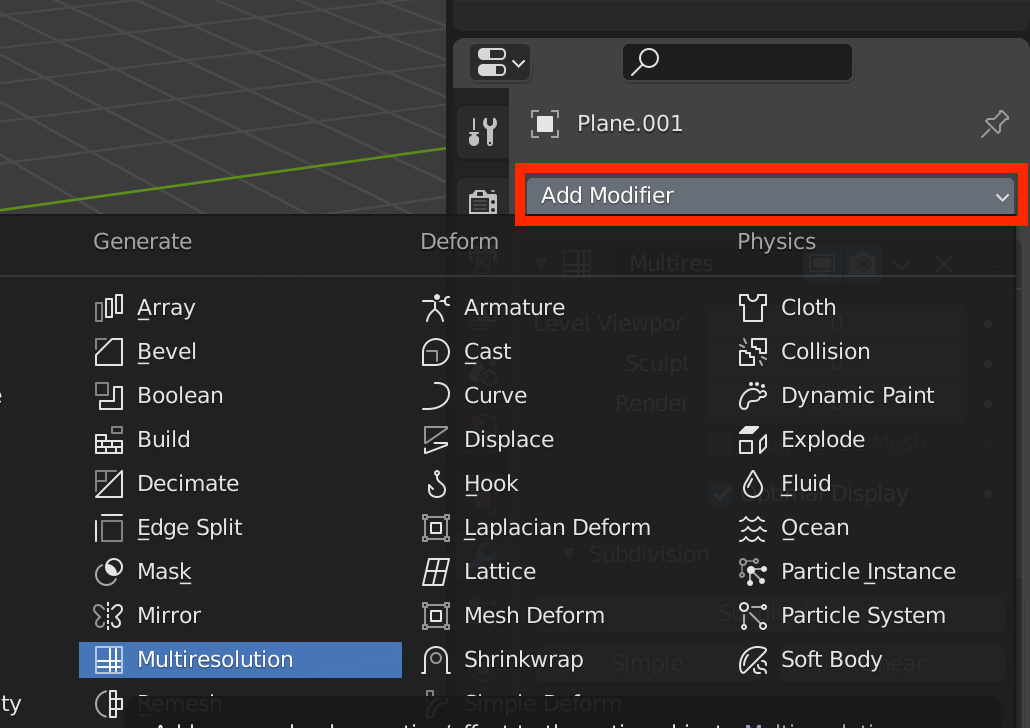
Adding a modifier.
Once you have added them, click on the “Subdivide” button and adjust the Level Viewport, Sculpt, and Render items so that they are between 1 and 3.
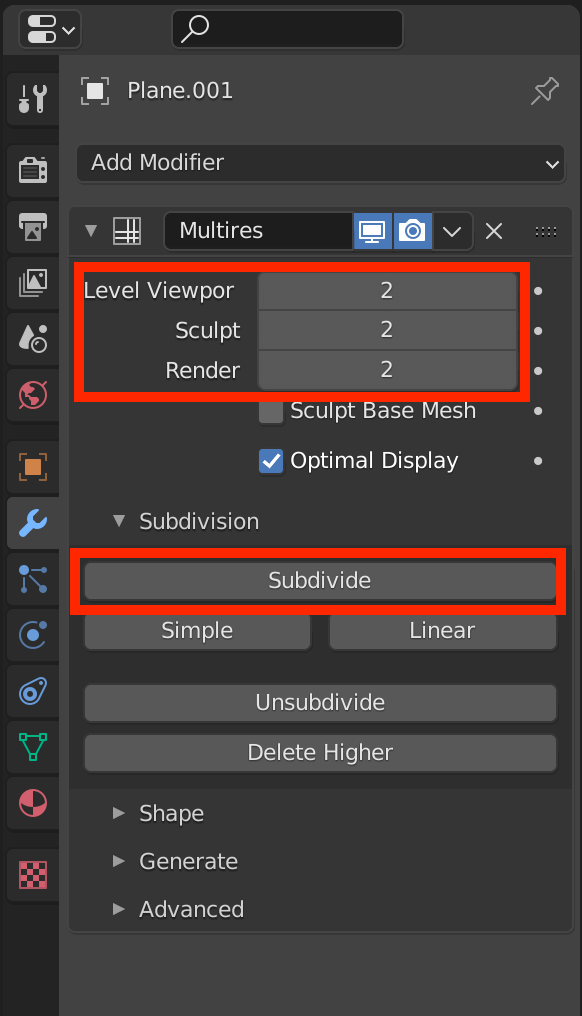
Multiresolution Modifier.
Switch to the Sculpting window and use the brush to add irregularities to the plane we just duplicated.
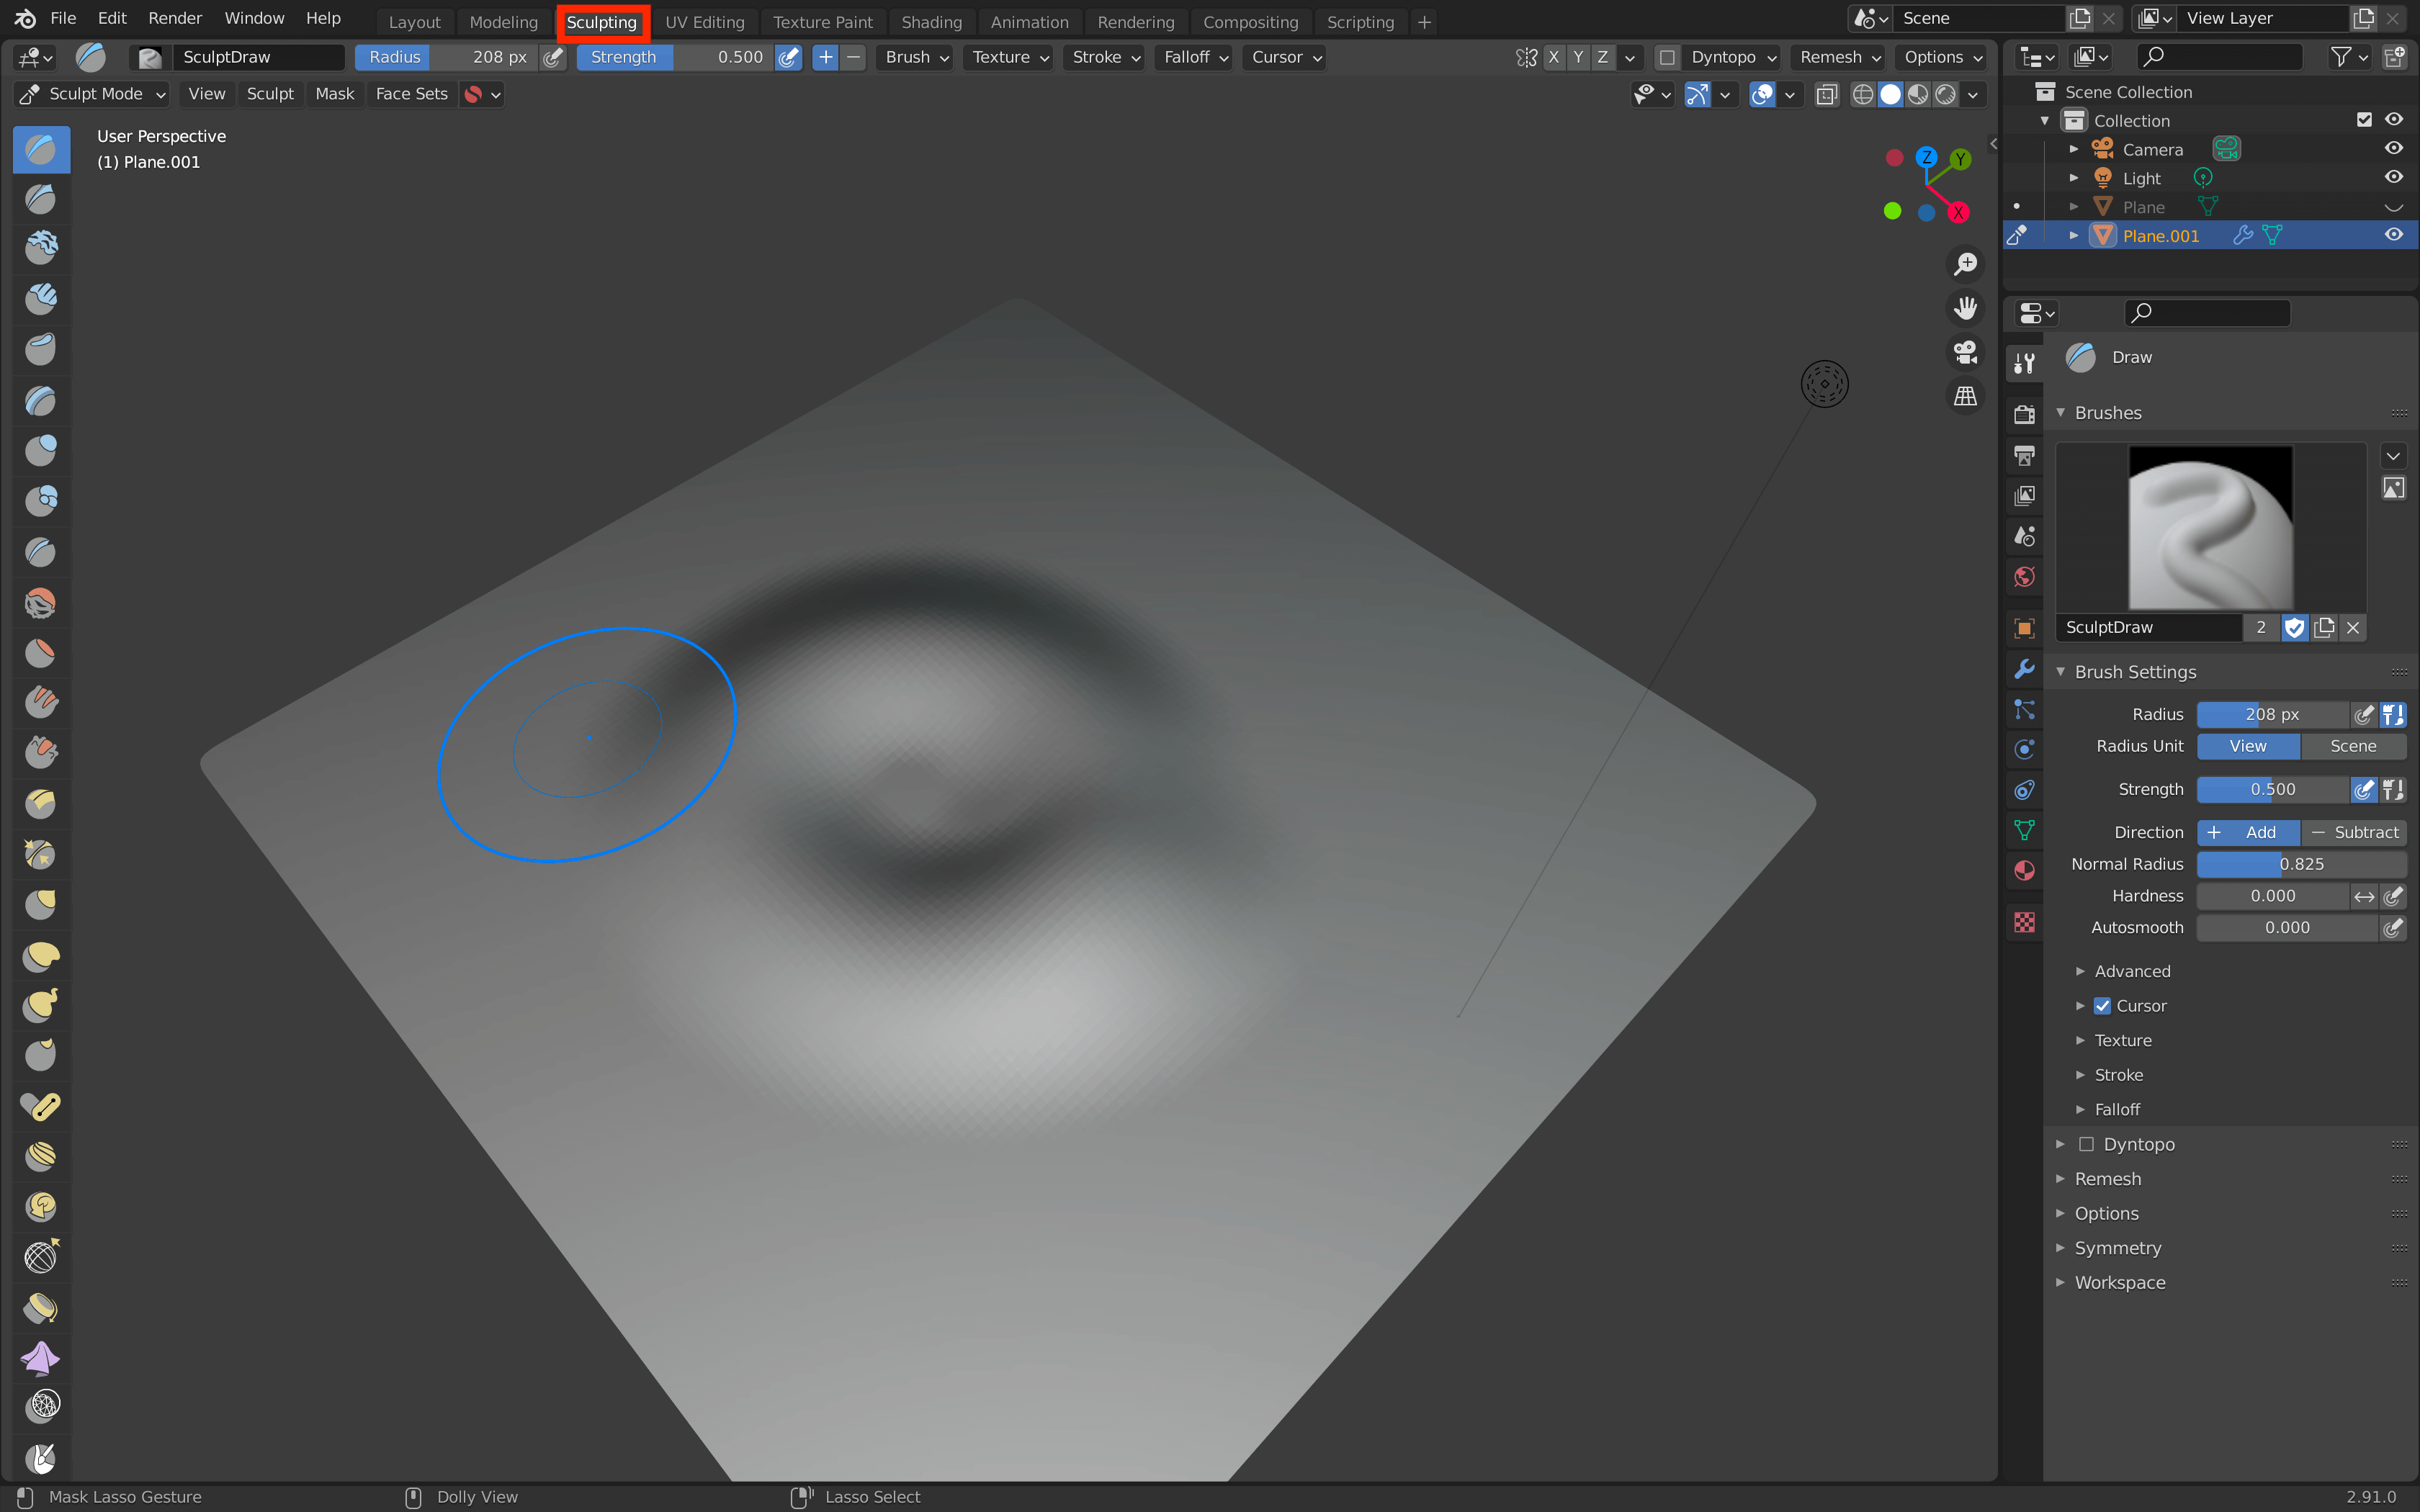
Sculpting.
The next step is the same as adding a new material as described in “Adding a mesh and baking” above.
After baking.
Similarly, we added a Normal Map node and applied it to the original plane to reflect the unevenness.
The unevenness is now reflected.
How to Upload to STYLY
Let’s upload your 3D model to STYLY.
Create a STYLY account.
How to create STYLY account

How to upload 3D model to STYLY
