Modifier tool is very useful when working with Blender.
It doesn’t directly change the shape of the object, so you can redo and tweak it many times without destroying it until you apply the settings.
Combine a number of functions and change the order of processing to create the ideal object.
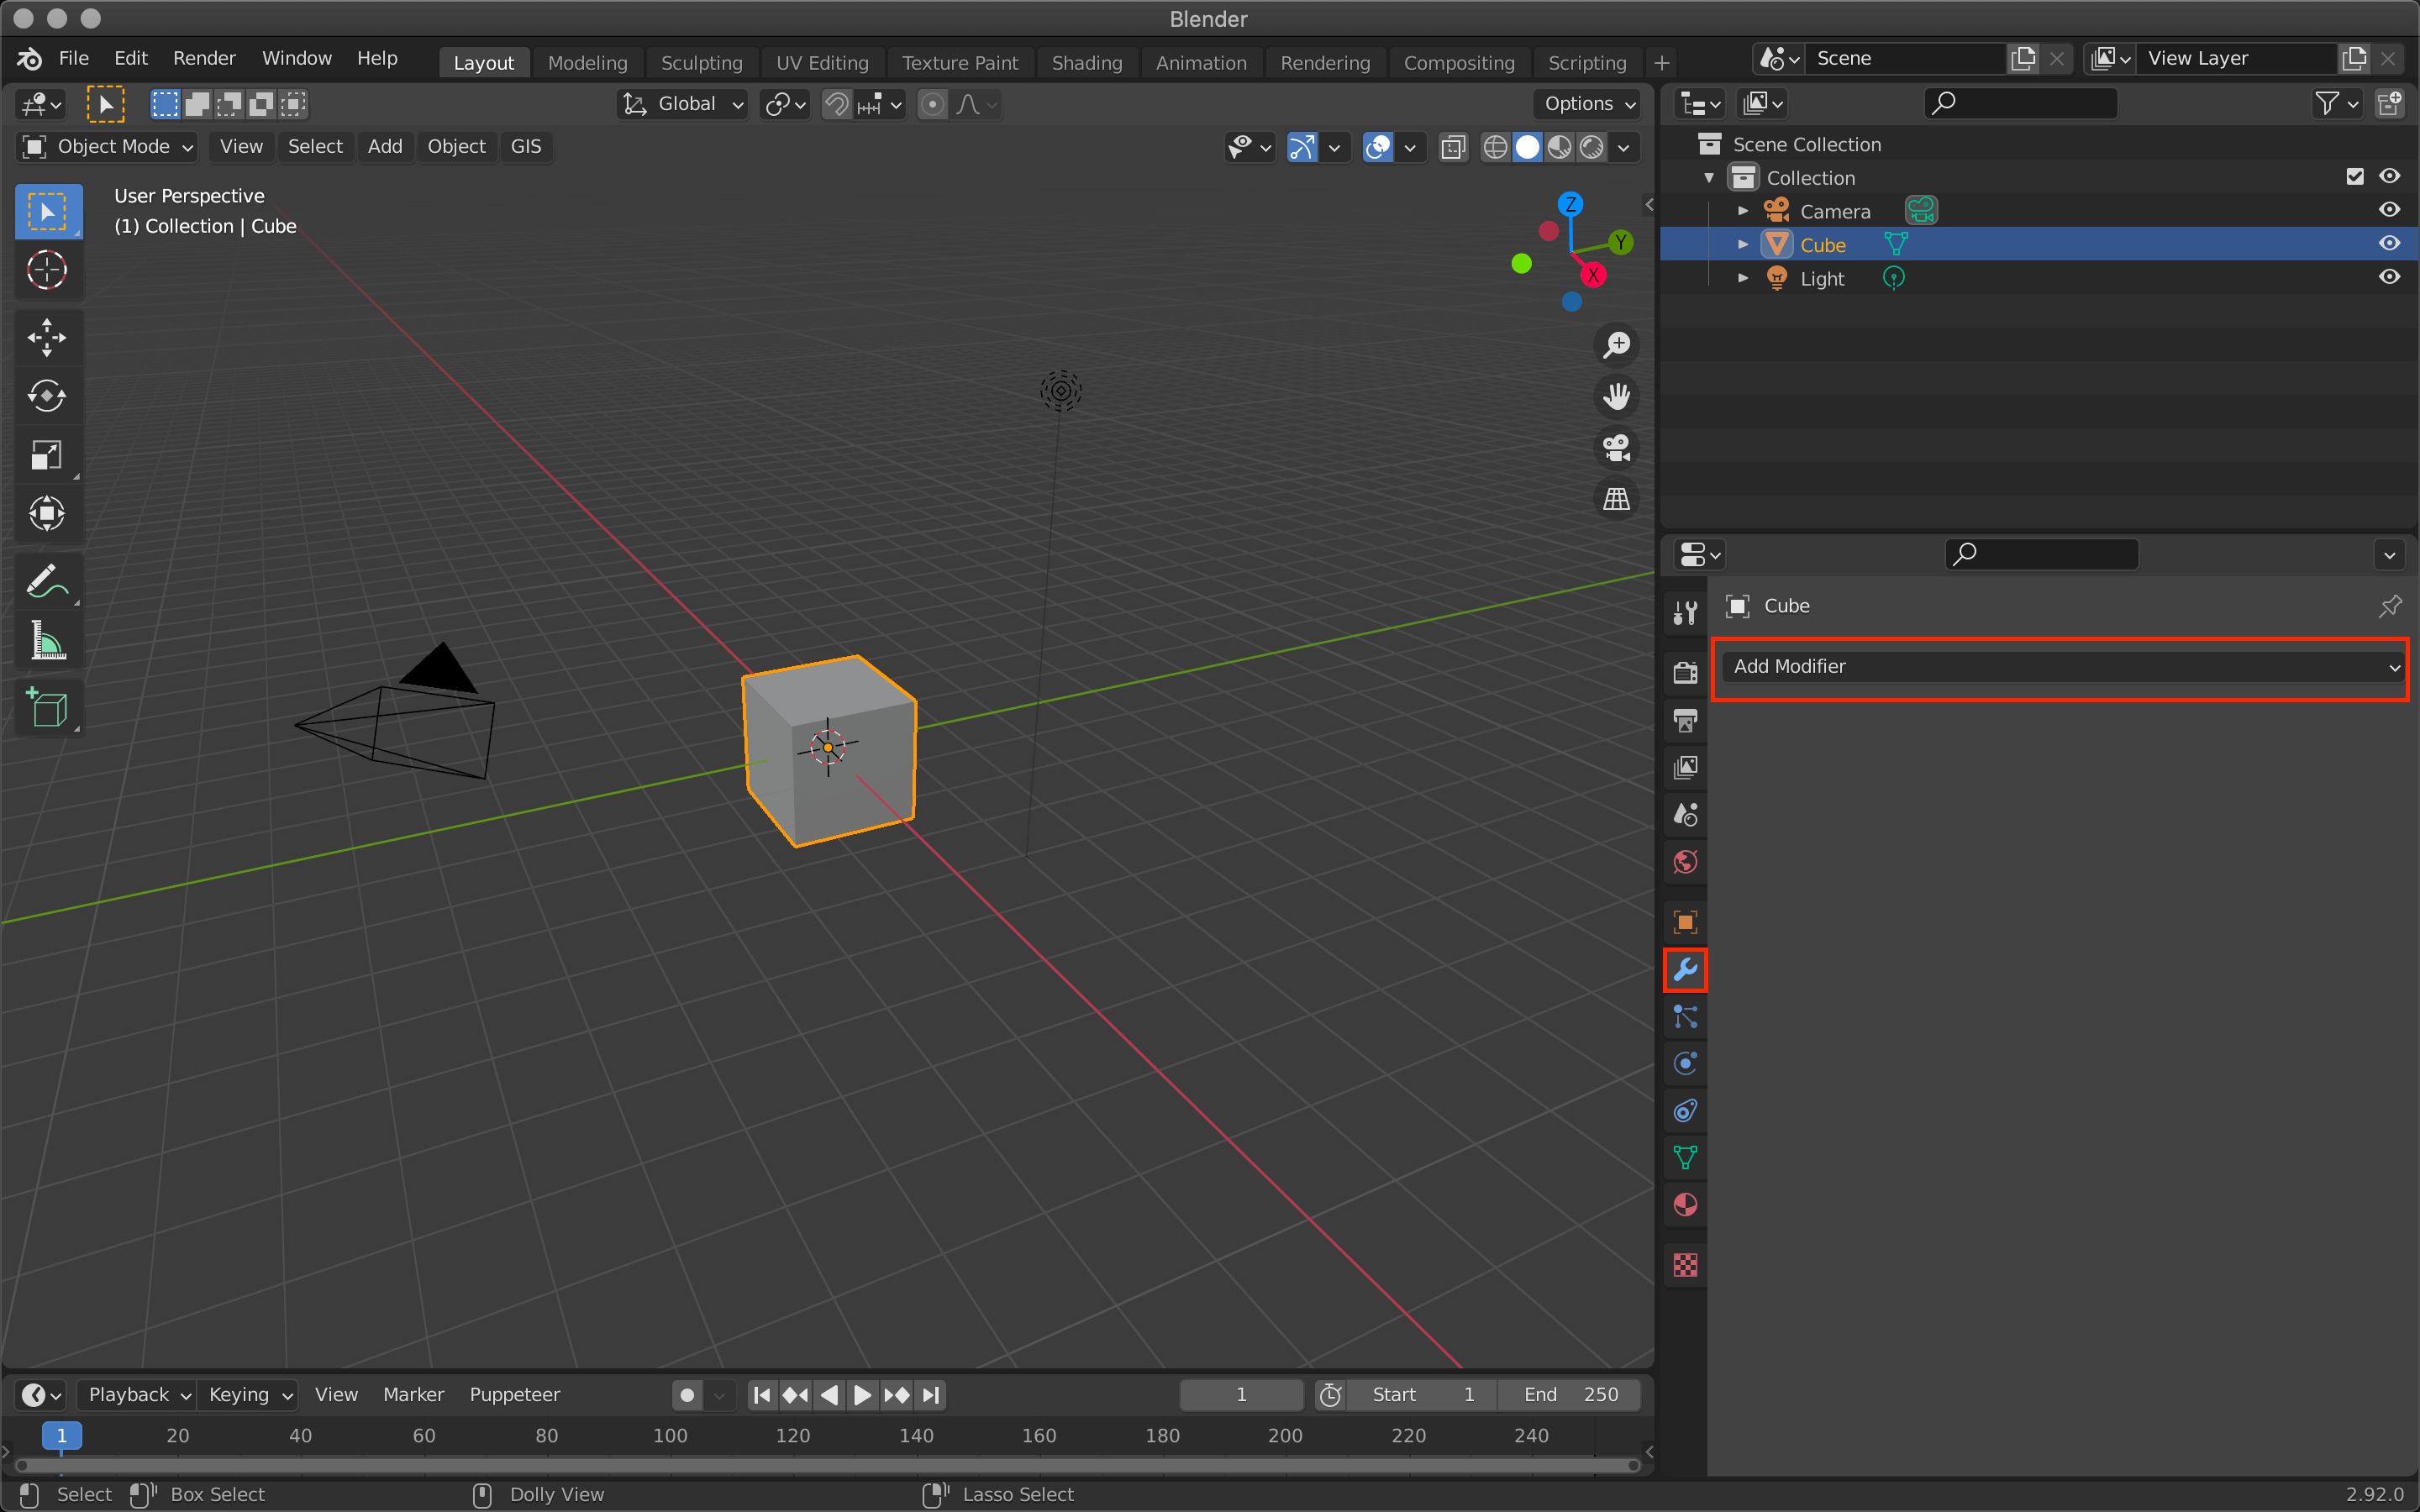
Select from the menu on the right of the screen
Modifiers
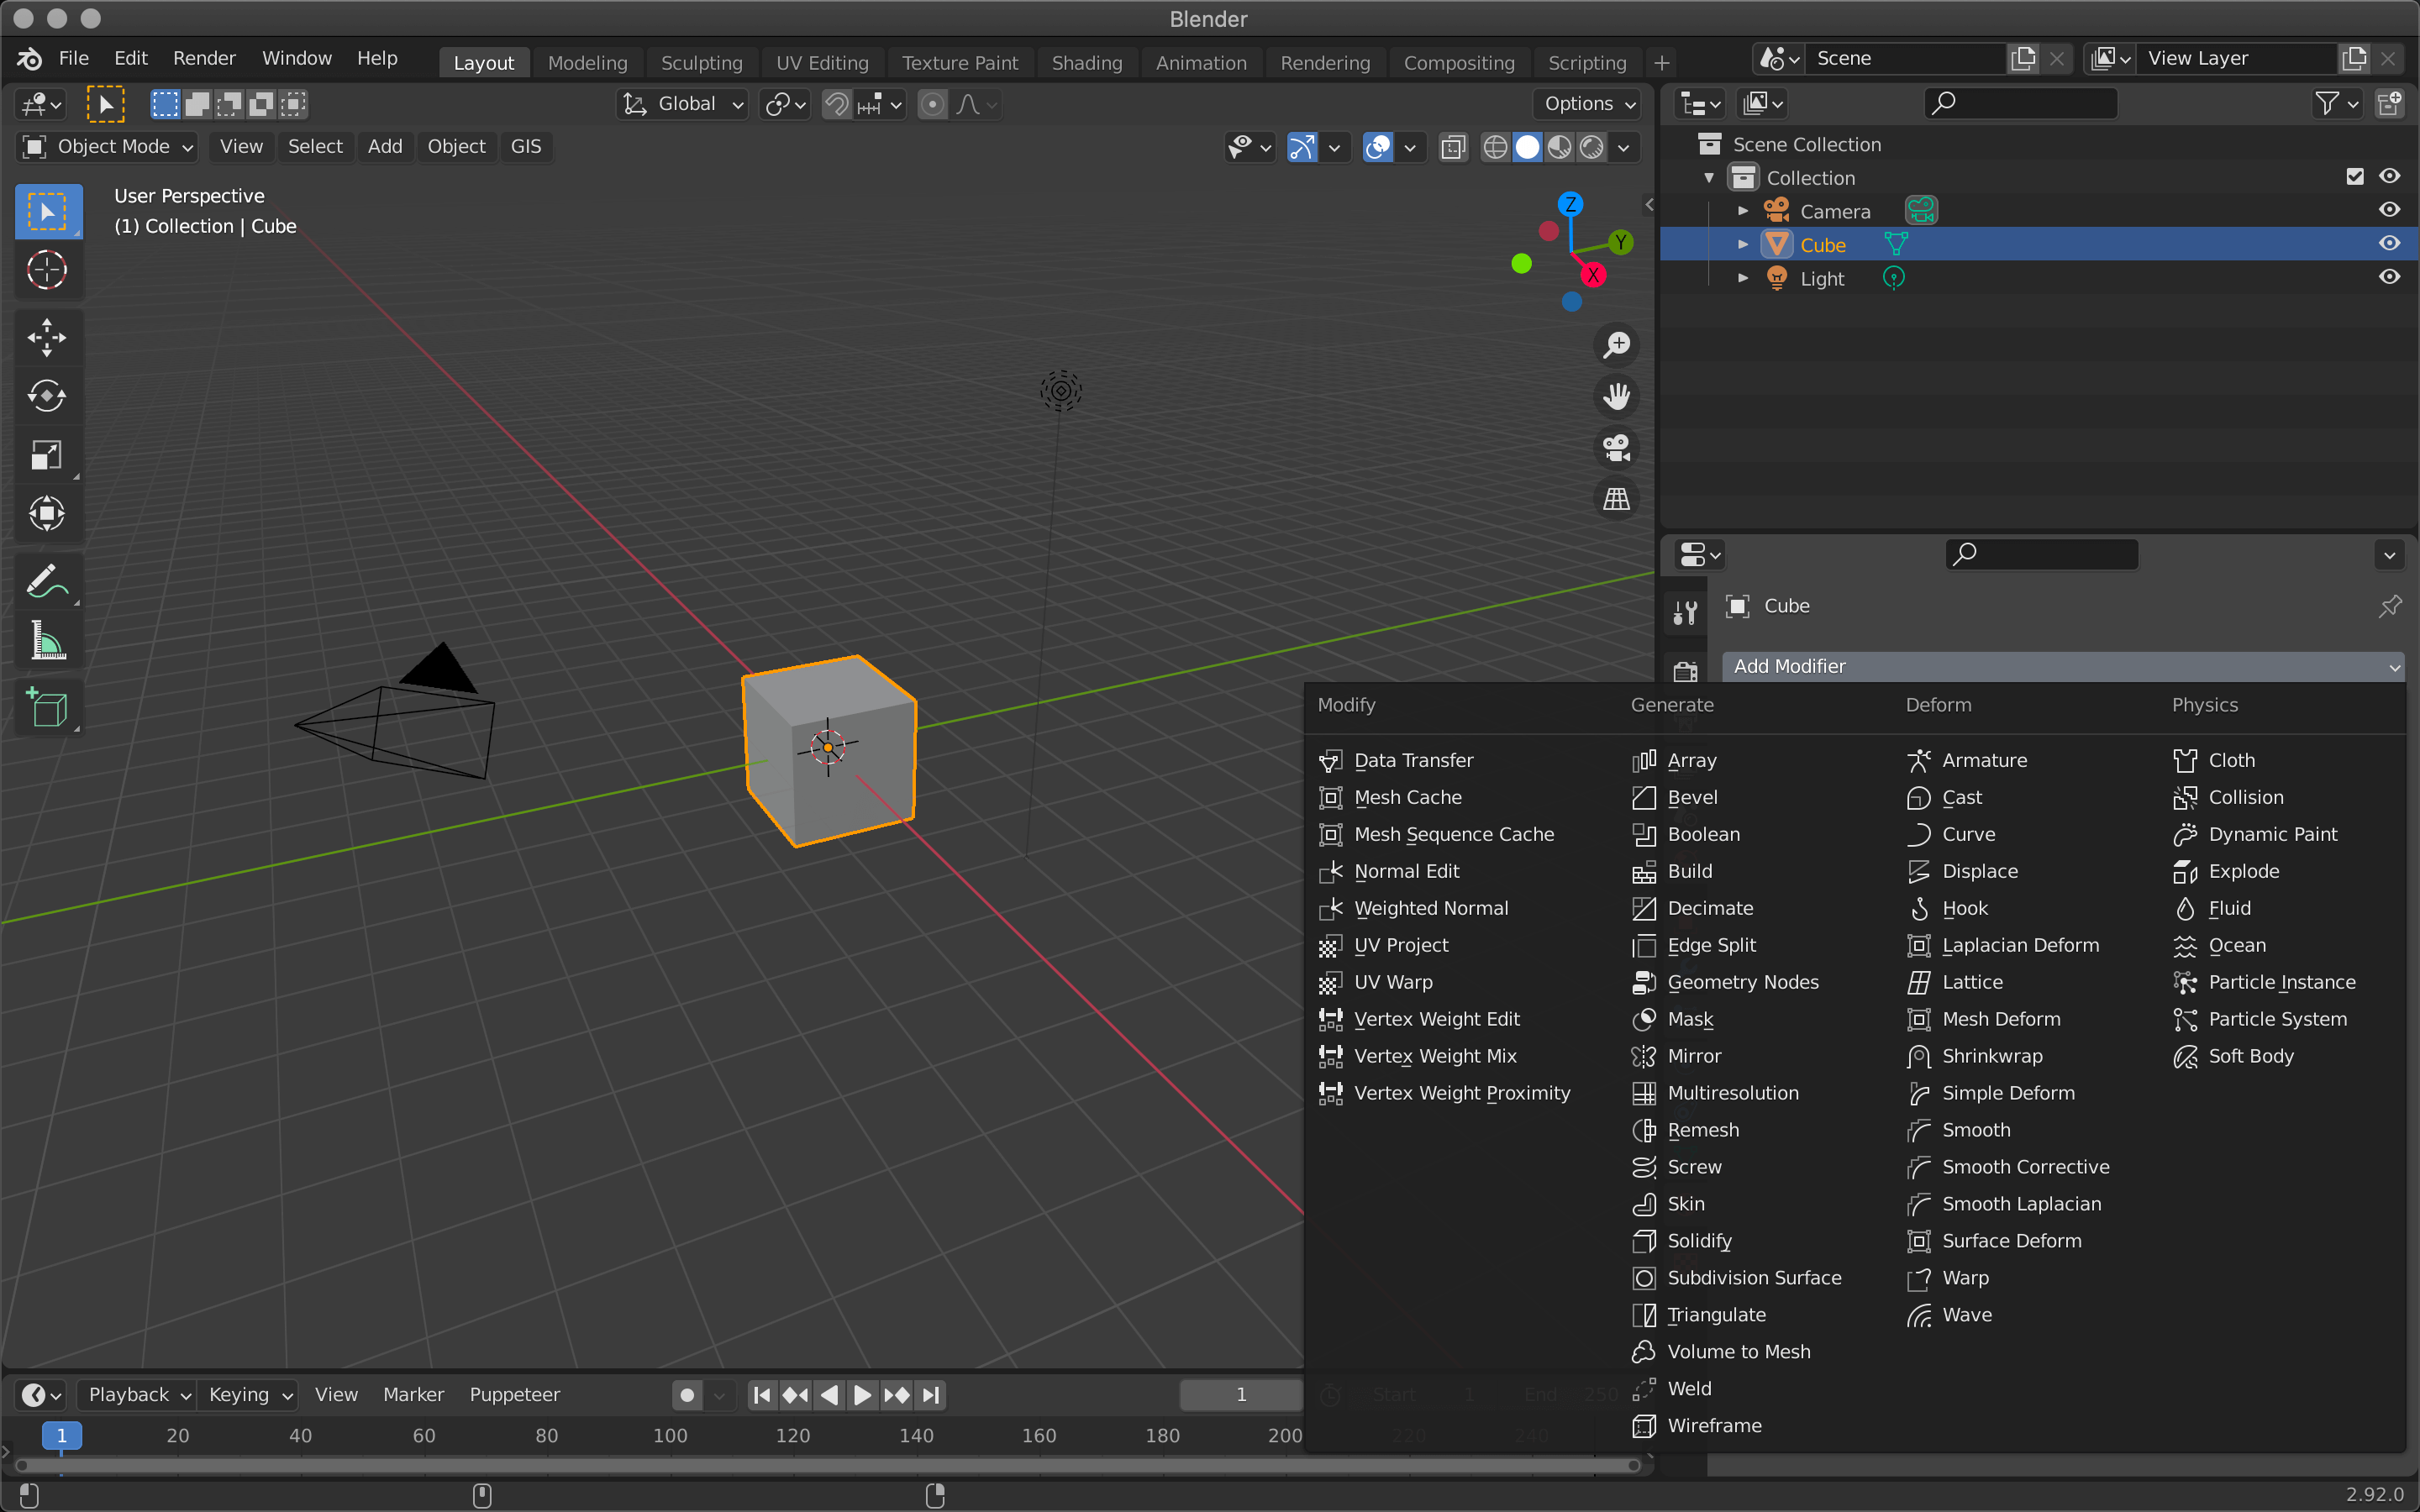
Modifier List
There are four main categories of modifiers, each with more detailed functions.
The modifiers introduced here are those of version 2.92.0.
Modify
This function can be used to modify an object, such as projecting UVs onto another object or changing its shape.
- Data Transfer
- Mesh Cache
- Mesh Sequence Cache
- Normal Edit
- Weighted Normal
- UV Project
- UV Warp
- Vertex Weight Edit
- Vertex Edit Mix
- Vertex Edit Proximity
Generate
Generate is used to twist, increase the number of objects, or change the shape of objects.
- Array
- Bevel
- Boolean
- Build
- Decimate
- Edge Split
- Geometry Nodes
- Mask
- Mirror
- Multiresolution
- Remesh
- Screw
- Skin
- Solidify
- Subdivision Surface
- Triangulate
- Volume to Mesh
- Weld
- Wireframe
Deform
Deform an object by smoothing its surface or following its shape to another object.
- Armature
- Cast
- Curve
- Displace
- Hook
- Laplacian Deform
- Lattice
- Mesh Deform
- Shrinkwrap
- Simple Deform
- Smooth
- Smooth Corrective
- Smooth Laplacian
- Surface Deform
- Warp
- Wave
Physics
This function controls the physical movement of real-world objects that require the calculation of gravity and time, such as cloth flapping in the wind or water poured into a glass.
- Cloth
- Collision
- Dynamic Paint
- Explode
- Fluid
- Ocean
- Particle Instance
- Particle System
- Soft Body
When exporting objects that use modifier functions in animation to external services or software such as STYLY, you will need to follow some steps and the data size will be large.
Also, some functions can only be used in Blender, so you need to be careful.
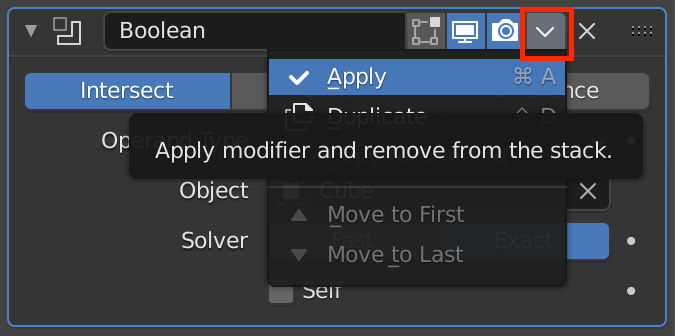
To apply a modifier, click Apply from v.
In this article, I will introduce three functions from the Generate modifier that I often use in Blender.
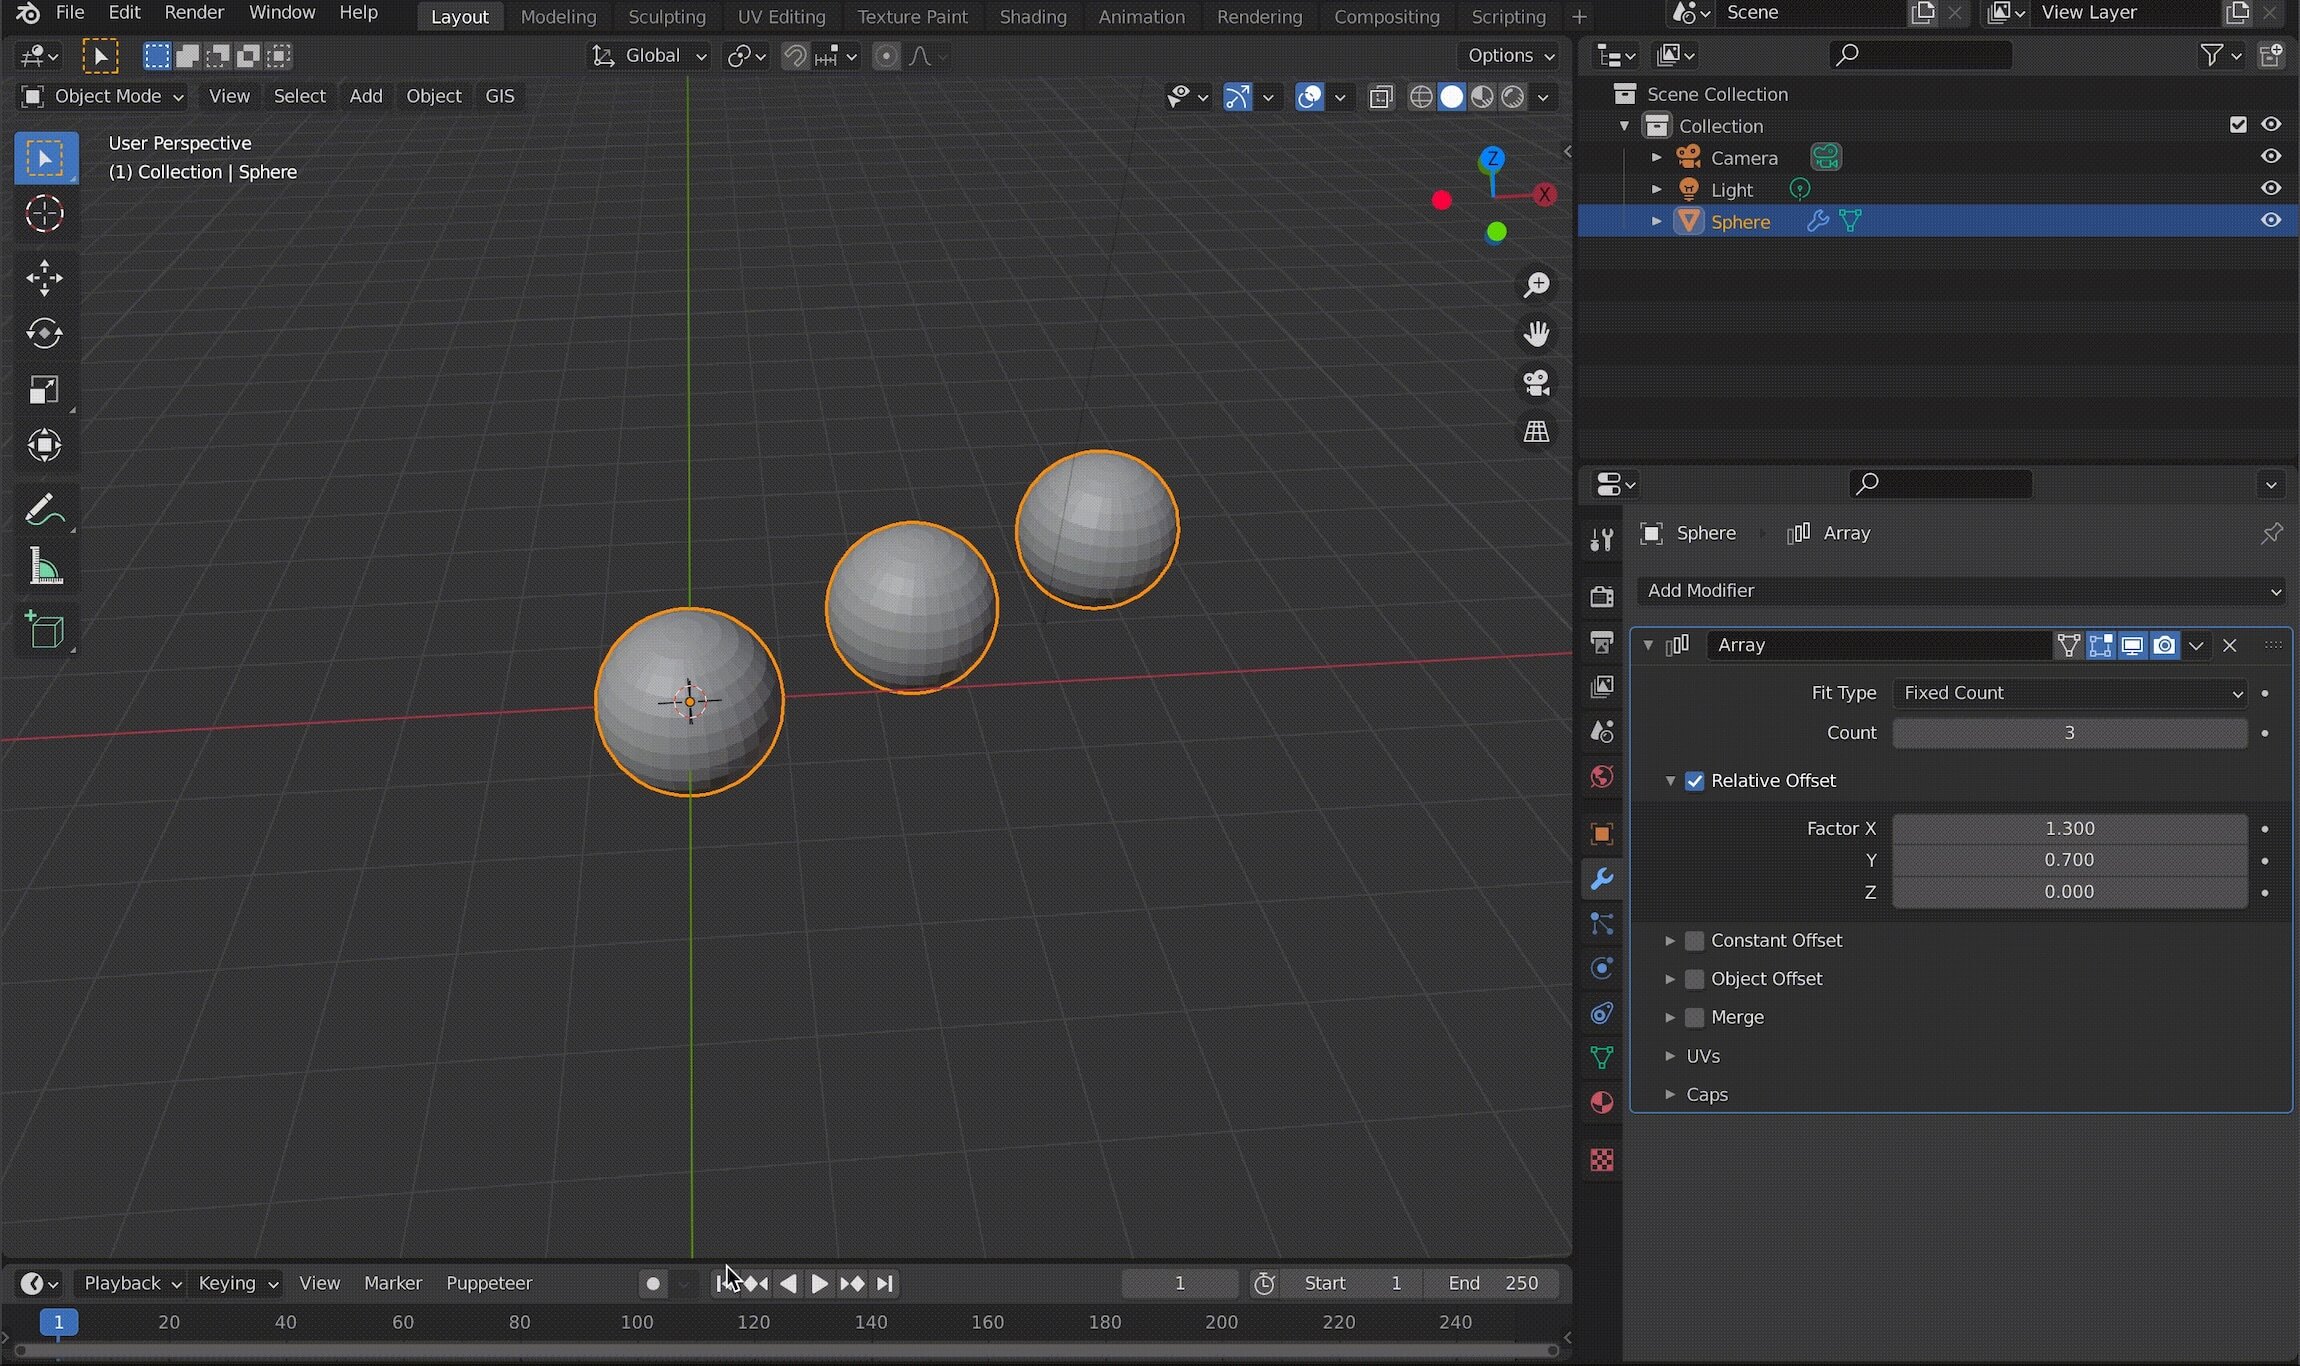
Generate Array
This is used to place multiple identical objects at equal intervals.

Array
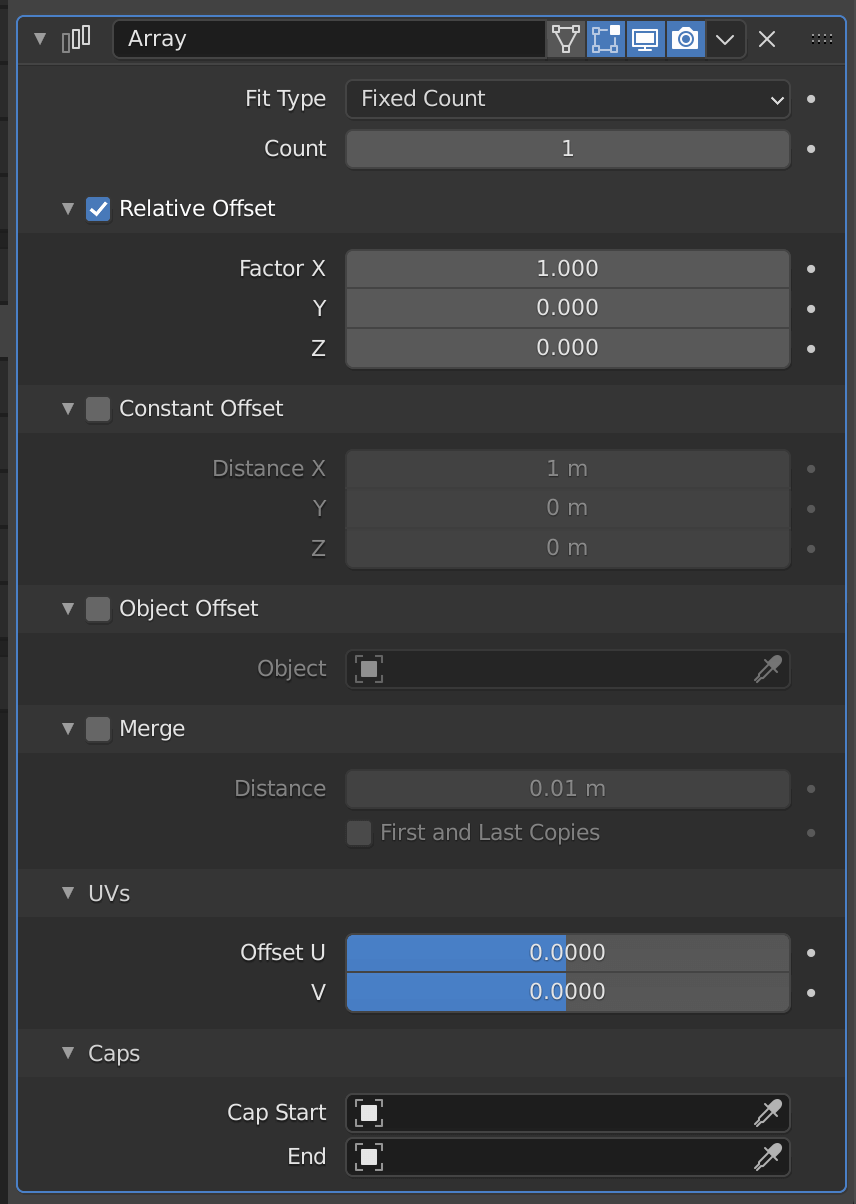
Array
| Fit Type(Fixed Count) | Increases the number of objects by the number of counts. |
| Fit Type(Fit Length) | Increase the number of objects that fit into the length of Length. |
| Fit Type(Fixed Curve) | Increase the number of objects that fit into the specified curve length. |
| Relative Offset | Sets the distance between objects. |
| Constant Offset | Sets the distance between the origins of objects |
| Object Offset | Reflects the angle and size of another specified object |
| Merge | Merge the increased objects together |
| UVs | Sets the UV offset of the duplicated object |
| Caps | Place another object at each Start/End |
Relative Offset and Constant Offset allow you to specify the X, Y, and Z of each axis direction simultaneously.
Example of using an Array in a diagonal direction
With Object Offset, you can change the angle or size of the specified object, and the changes will be reflected in the object using the Array.
For example, if you specify a cube that is rotated 45 degrees on the Z axis, the connected spheres will also be rotated 45 degrees.
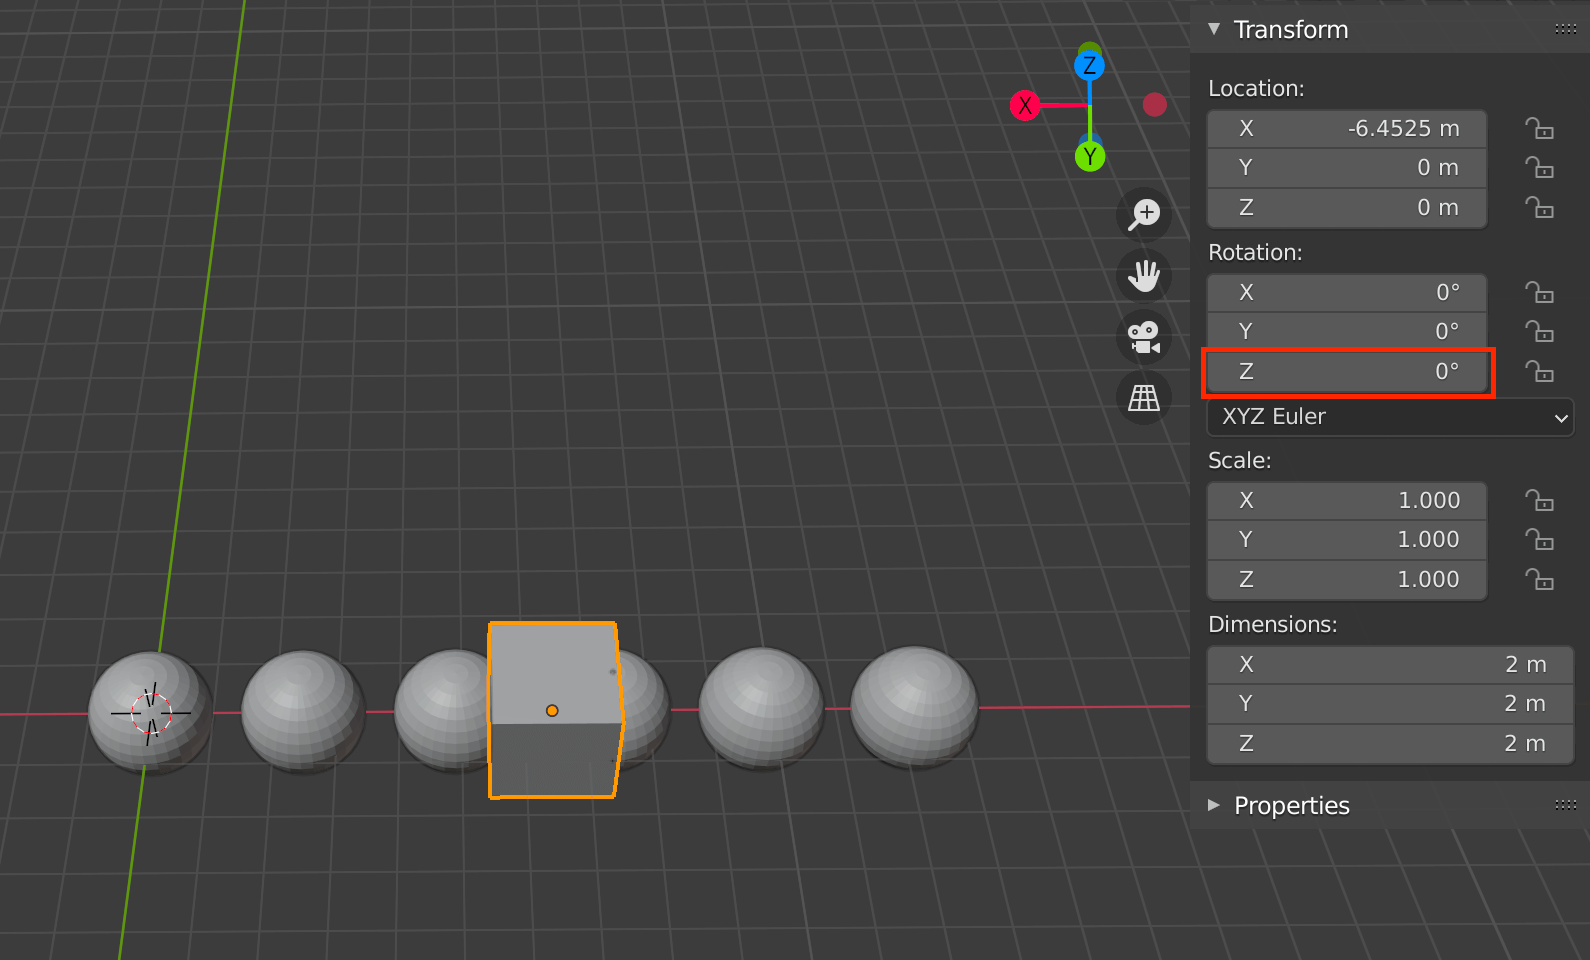
Assigned cube with an angle of 0 degrees on the Z axis
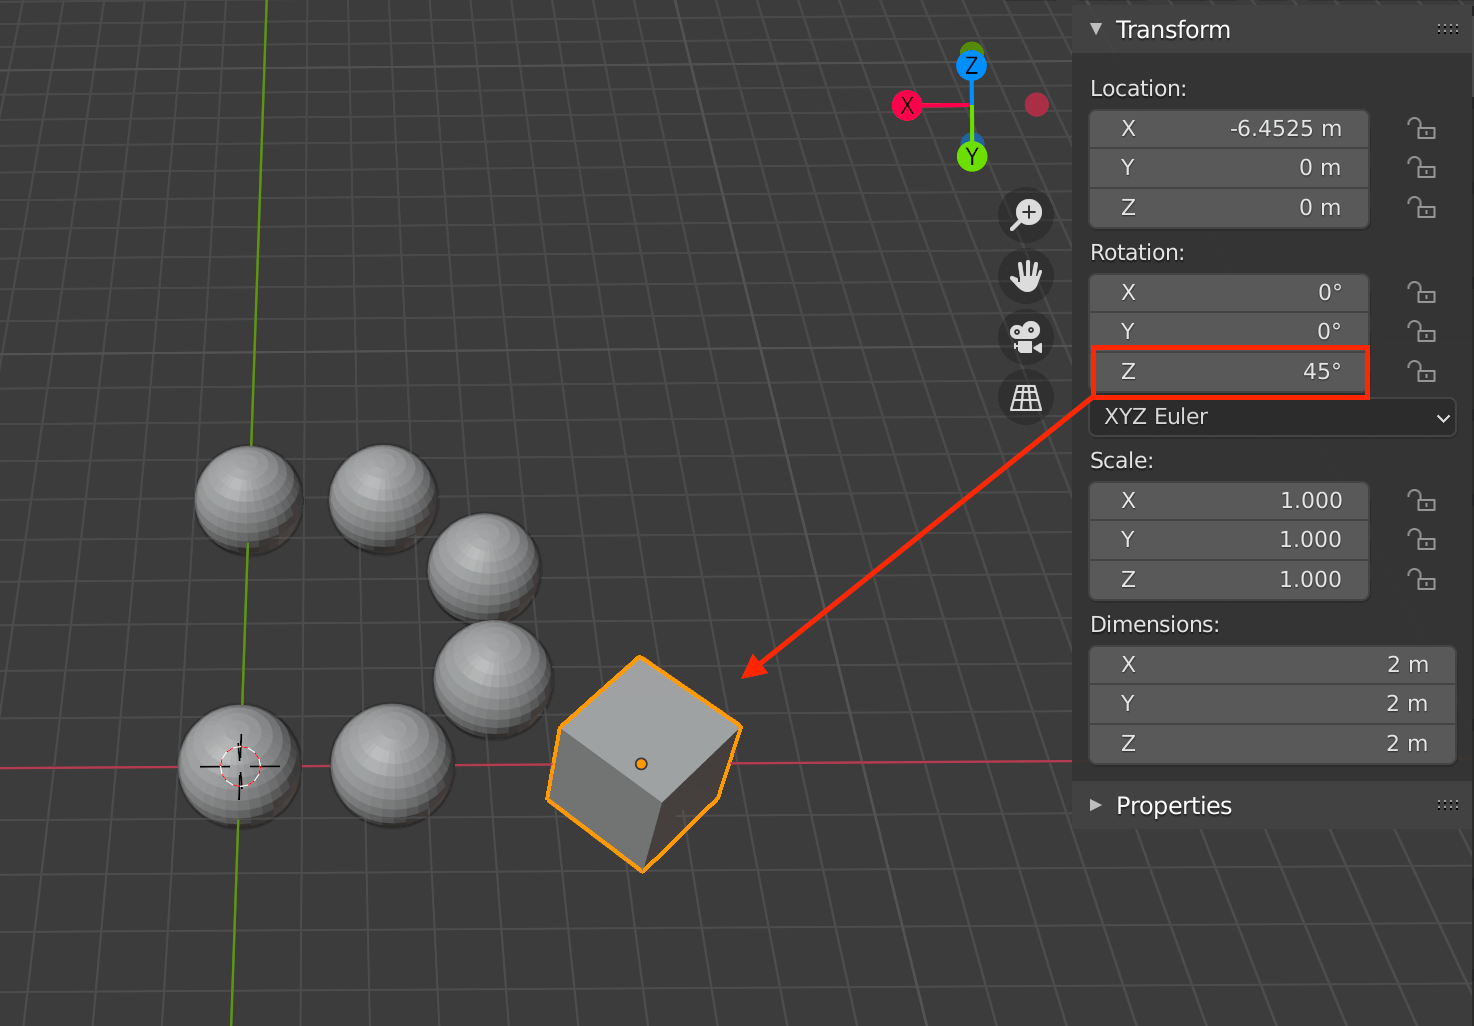
Assigned cube angle is 45 degrees on the Z axis
Changing the angle of the assigned cube also changes the angle of the entire sphere.
Generate Bevel
Generate Bevel is a function that smoothes out the angular edges of an object, also called “beveling.
Also known as “beveling,” it is often used in mechanical and product modeling.
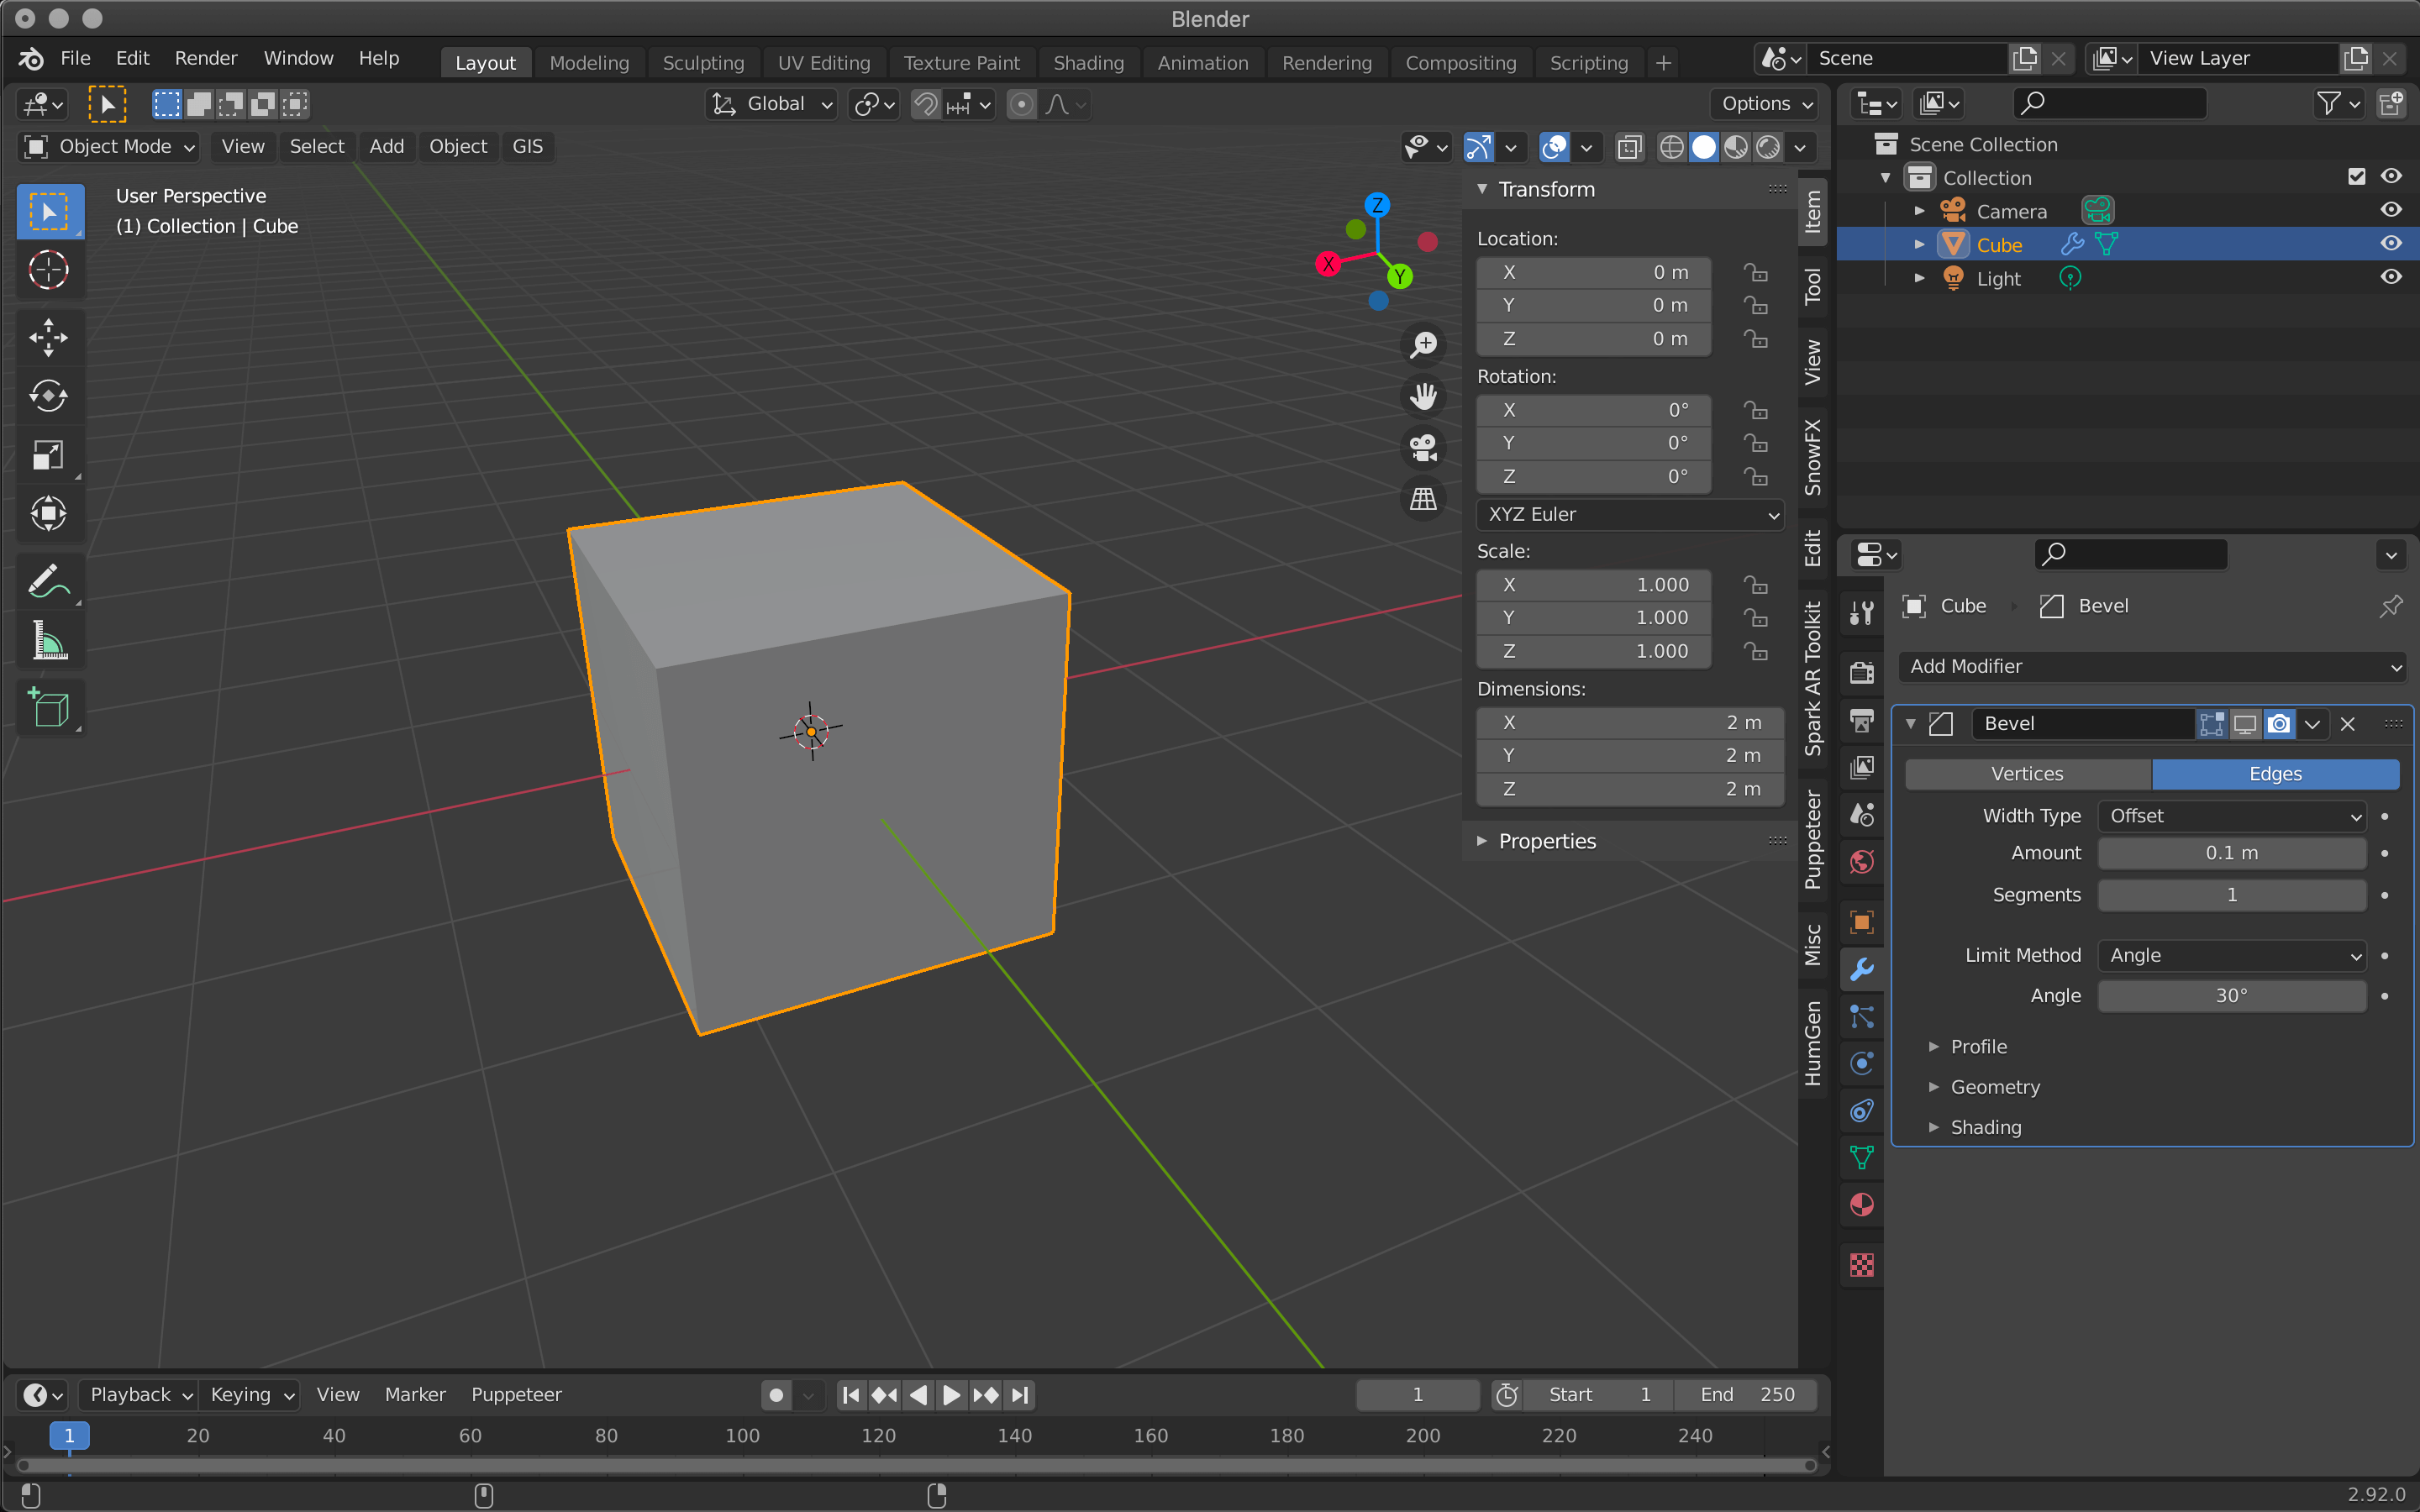
Hide Bevel
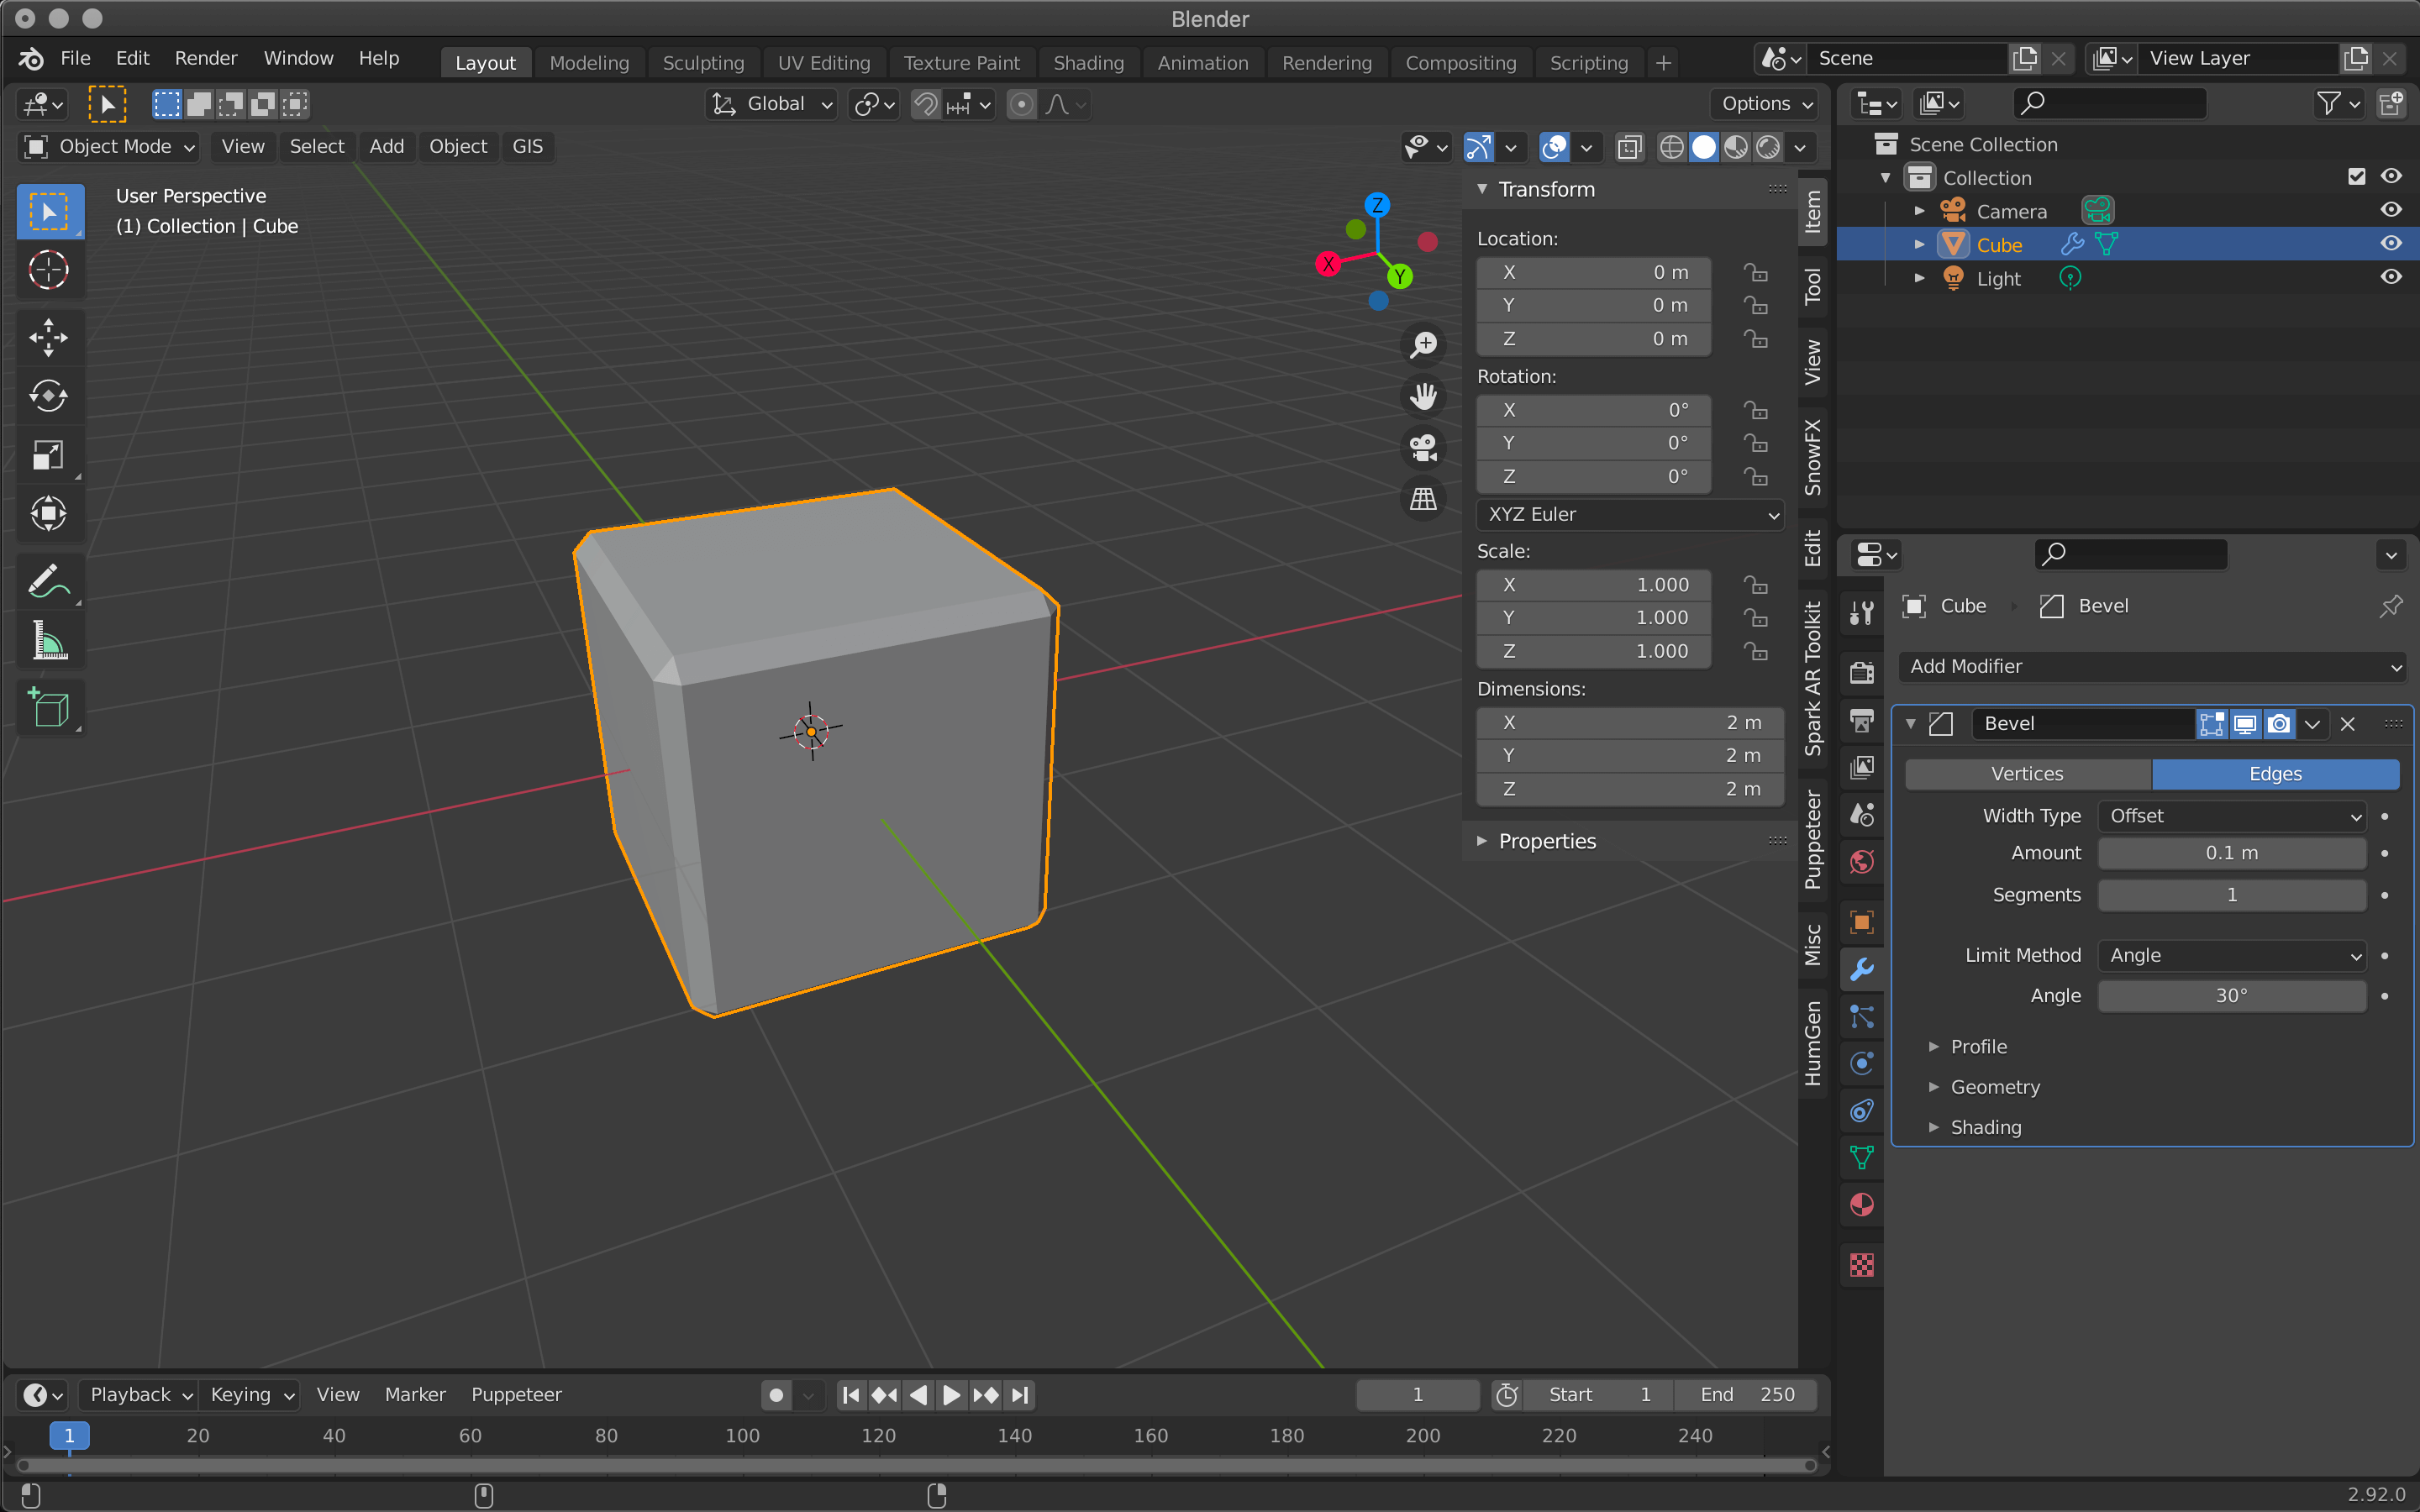
Show Bevel
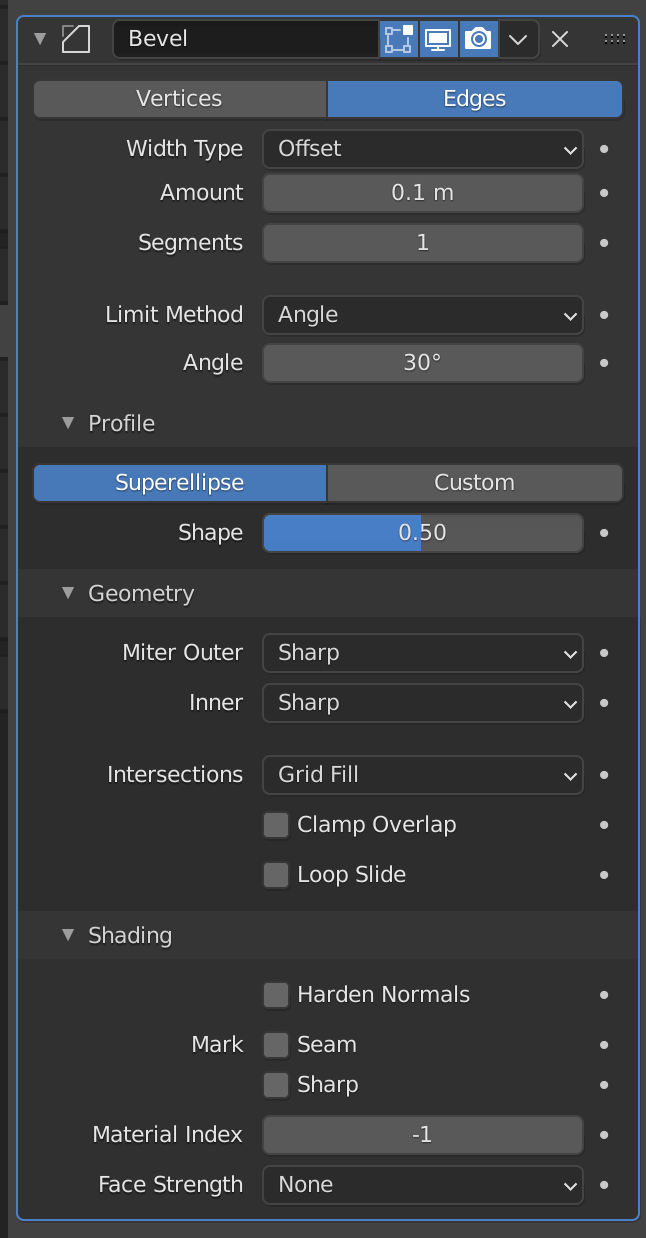
Bevel
| Vertices/Edges | Vertex only/Vertex and Edge |
| Width Type | Wide to define the amount of bevel |
| Amount | Width to apply bevel |
| Segments | Number of segments in the bevel area |
| Limit Method | Controls where the bevel is applied to the mesh |
| Angle | Bevels only edges that are less than or equal to 180 degrees (angle of adjacent faces + value) |
| Profile(Superellipse) | Sets the value of the unevenness of the beveled area |
| Profile(Custom) | Allows you to set more detailed values for bevels |
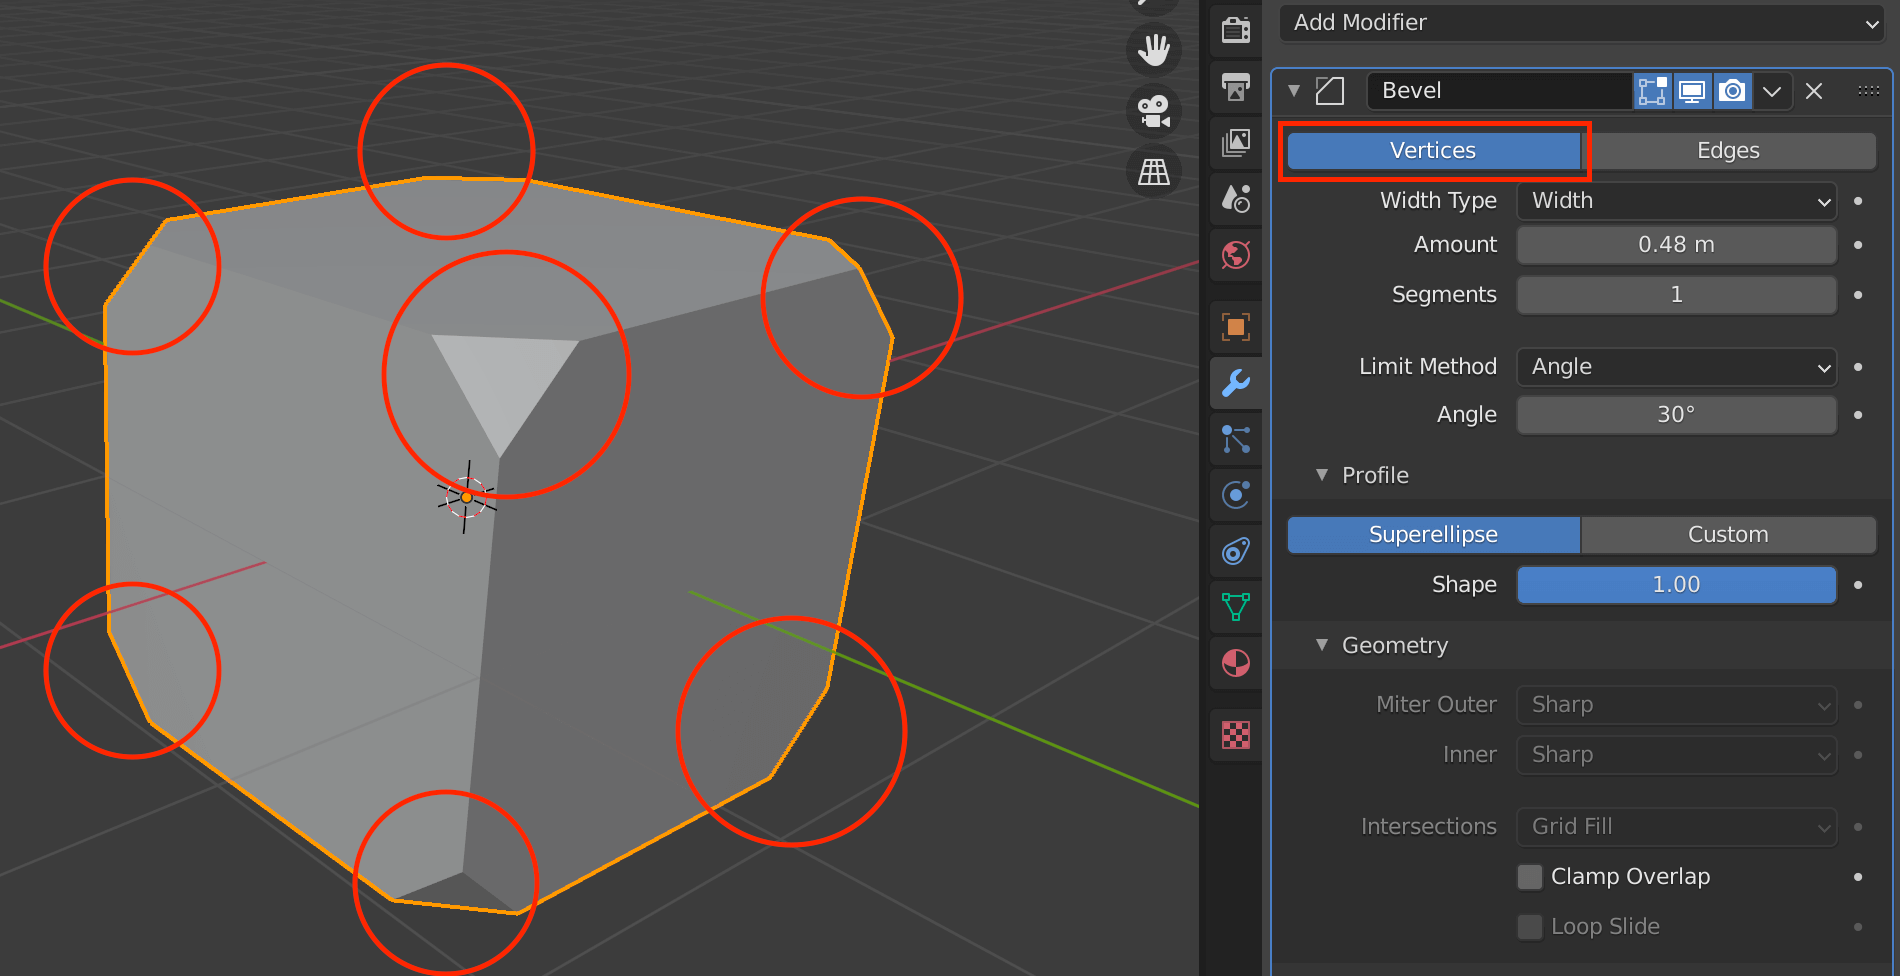
Vertices are reflected only on vertices.
Bevel is mainly set by Amount and Segments.
The larger the value of Amount, the wider the bevel will be applied, and Segments sets how finely the width will be divided.
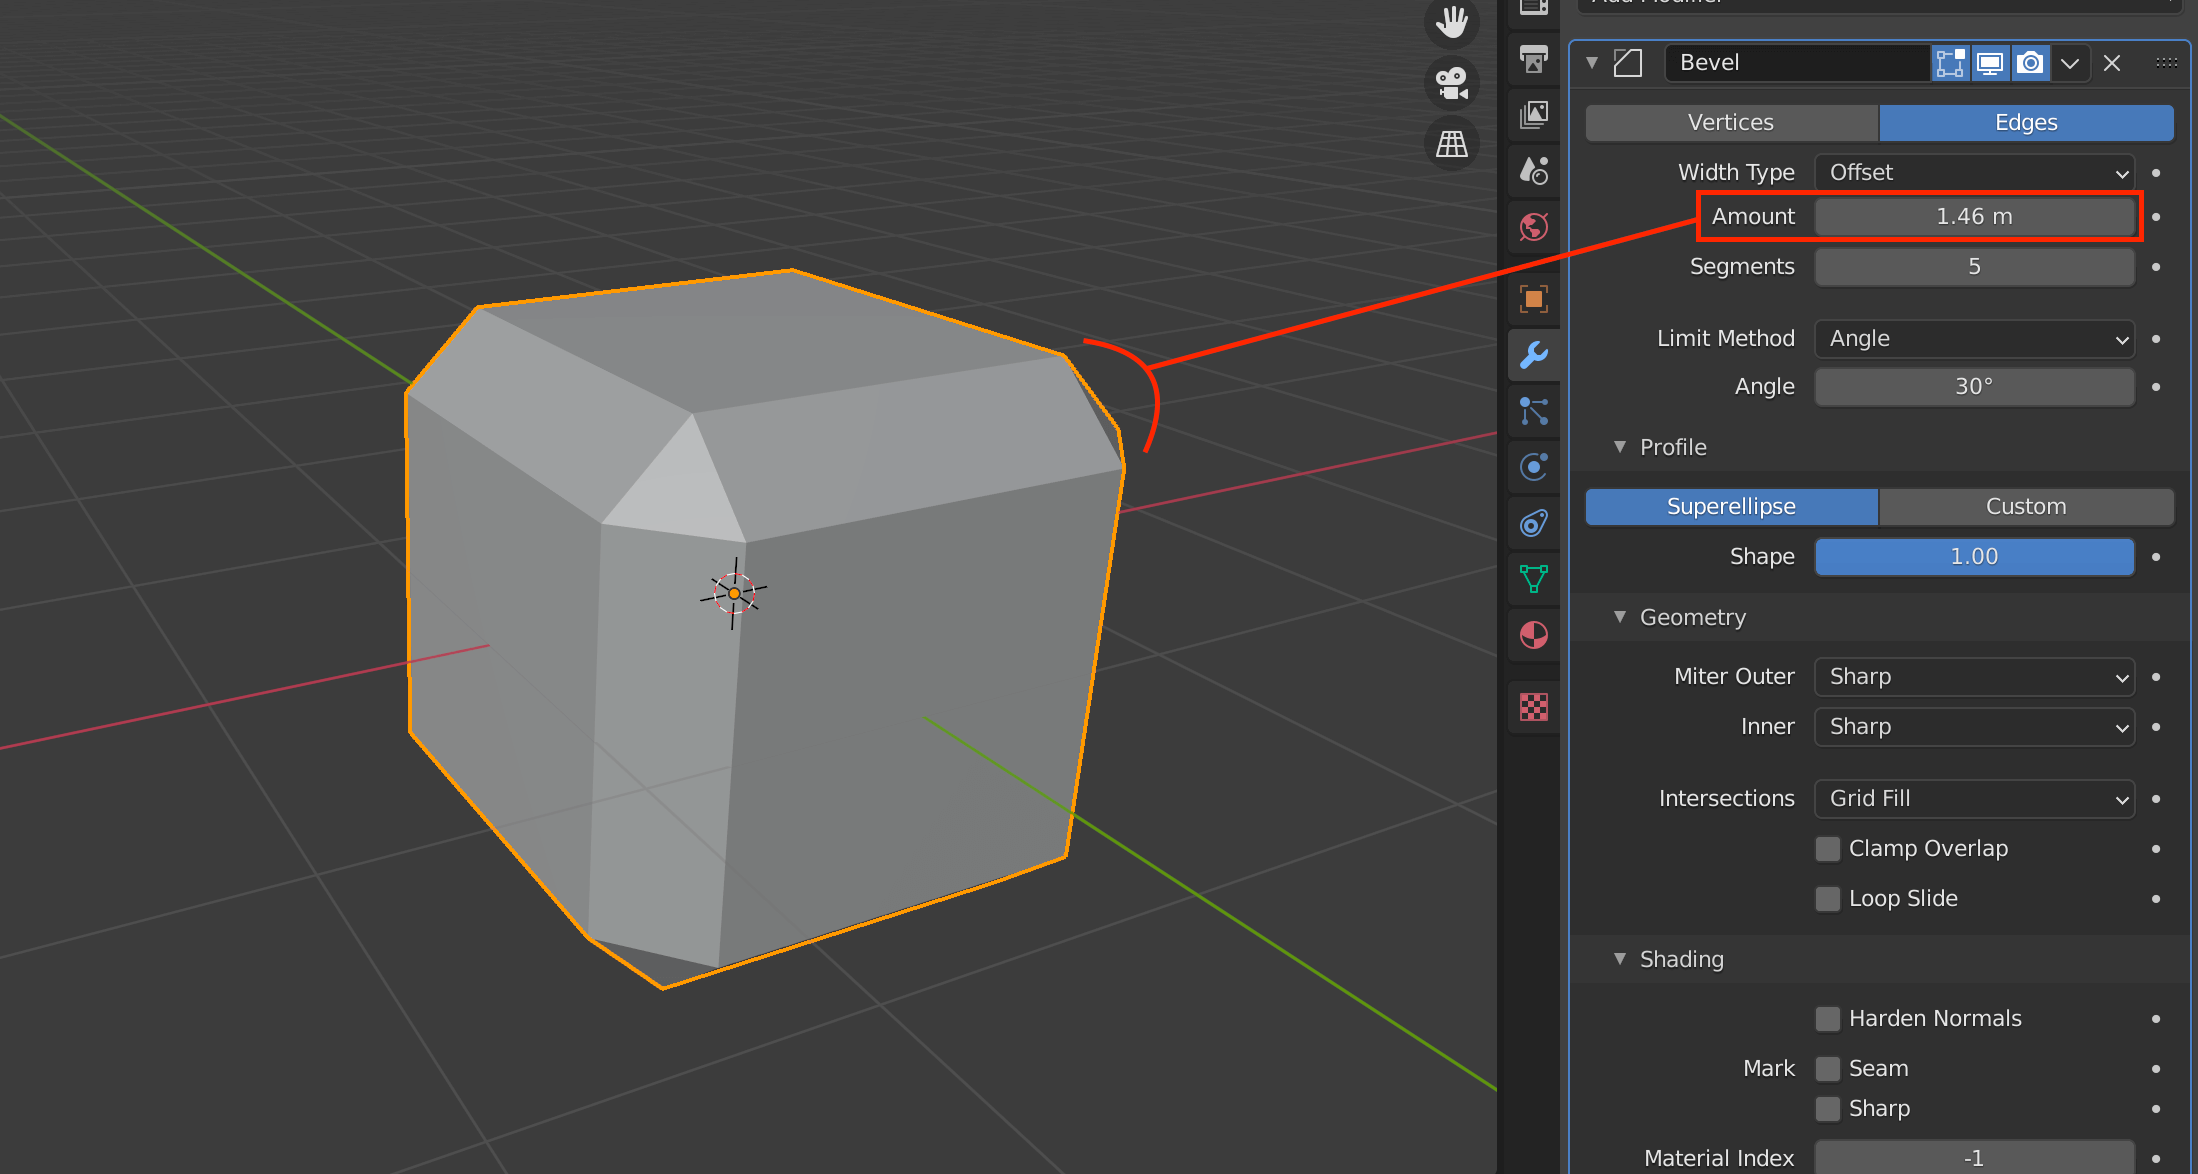
The larger the value of Amount, the larger the width of the bevel.
Select Superellipse to set a value between 0.0 and 1.0, and Custom to set a more detailed value.
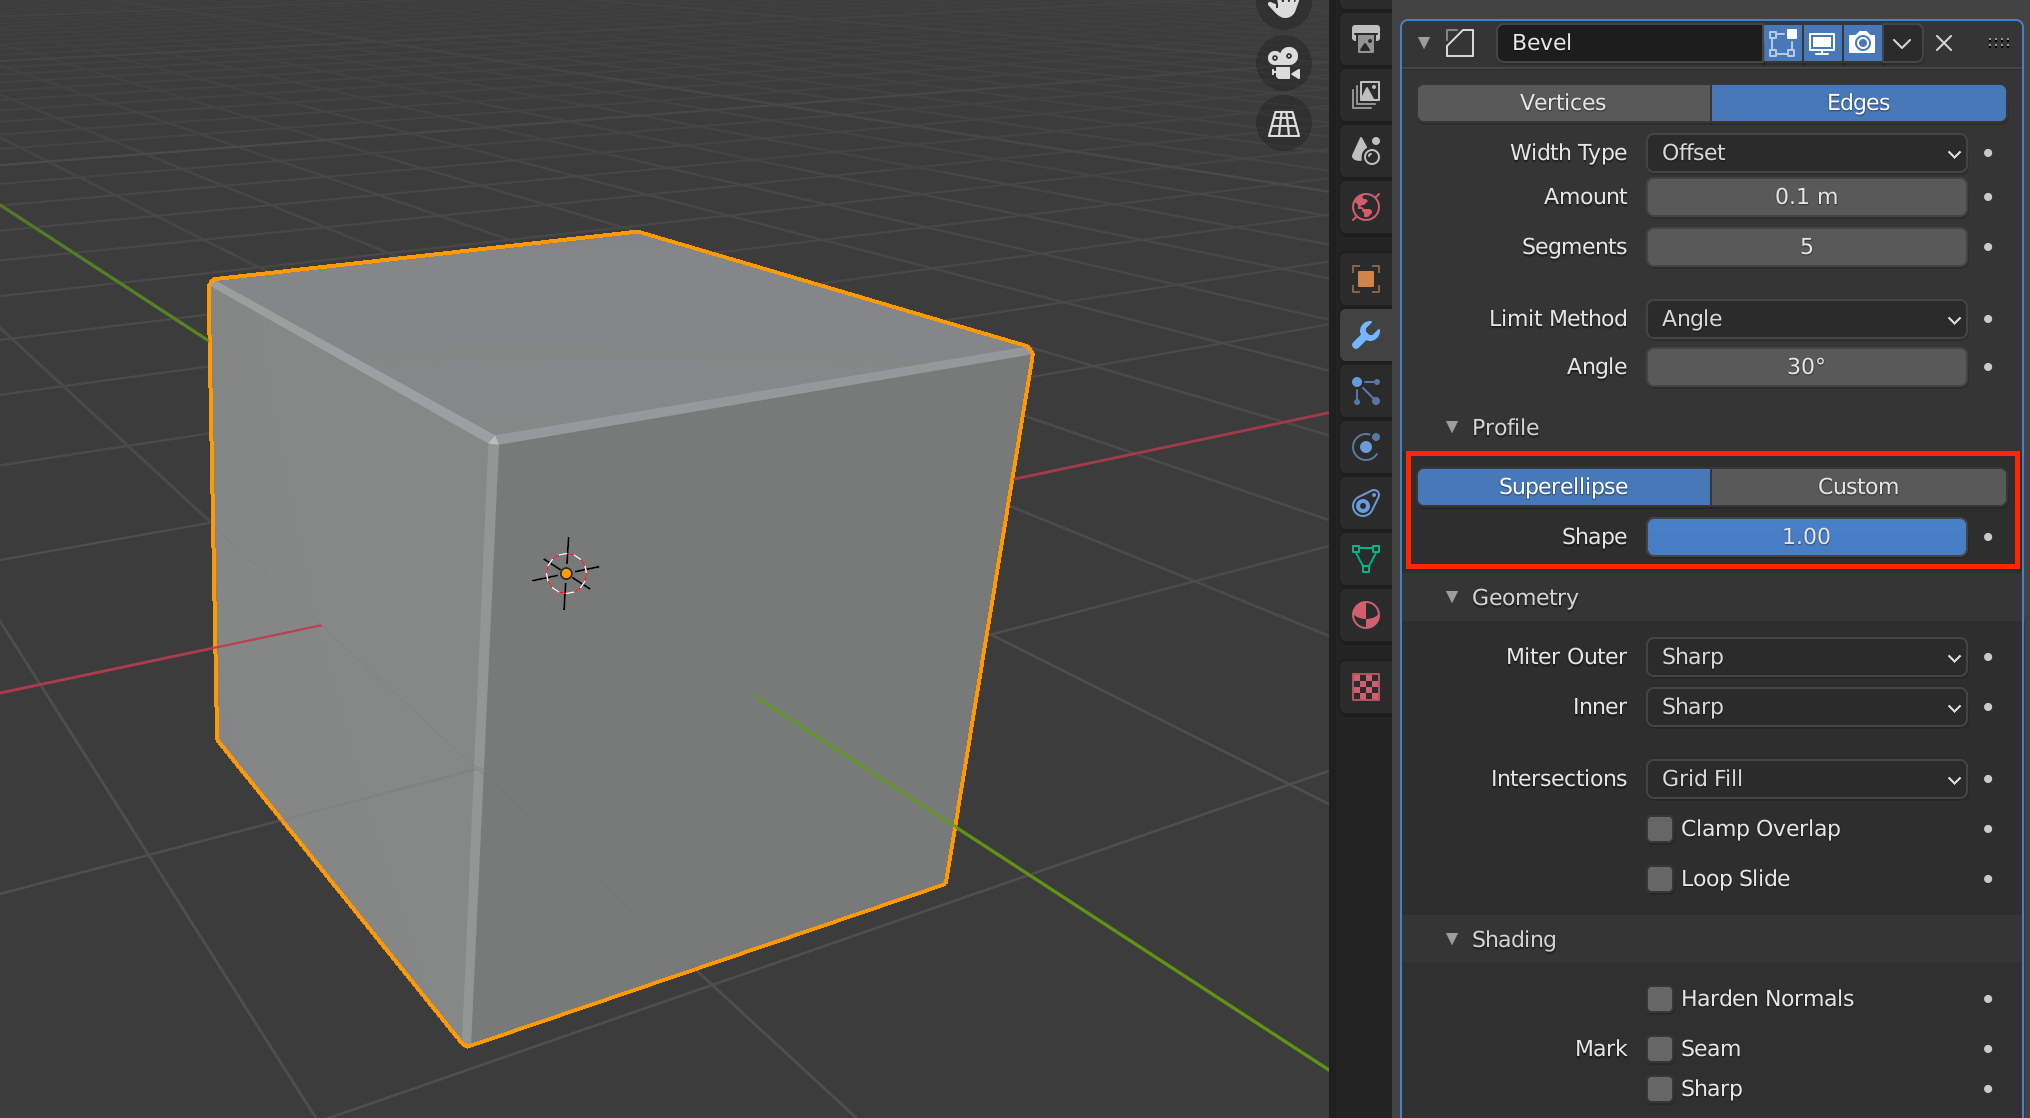
Profile(Superellipse) Shape is 1.00
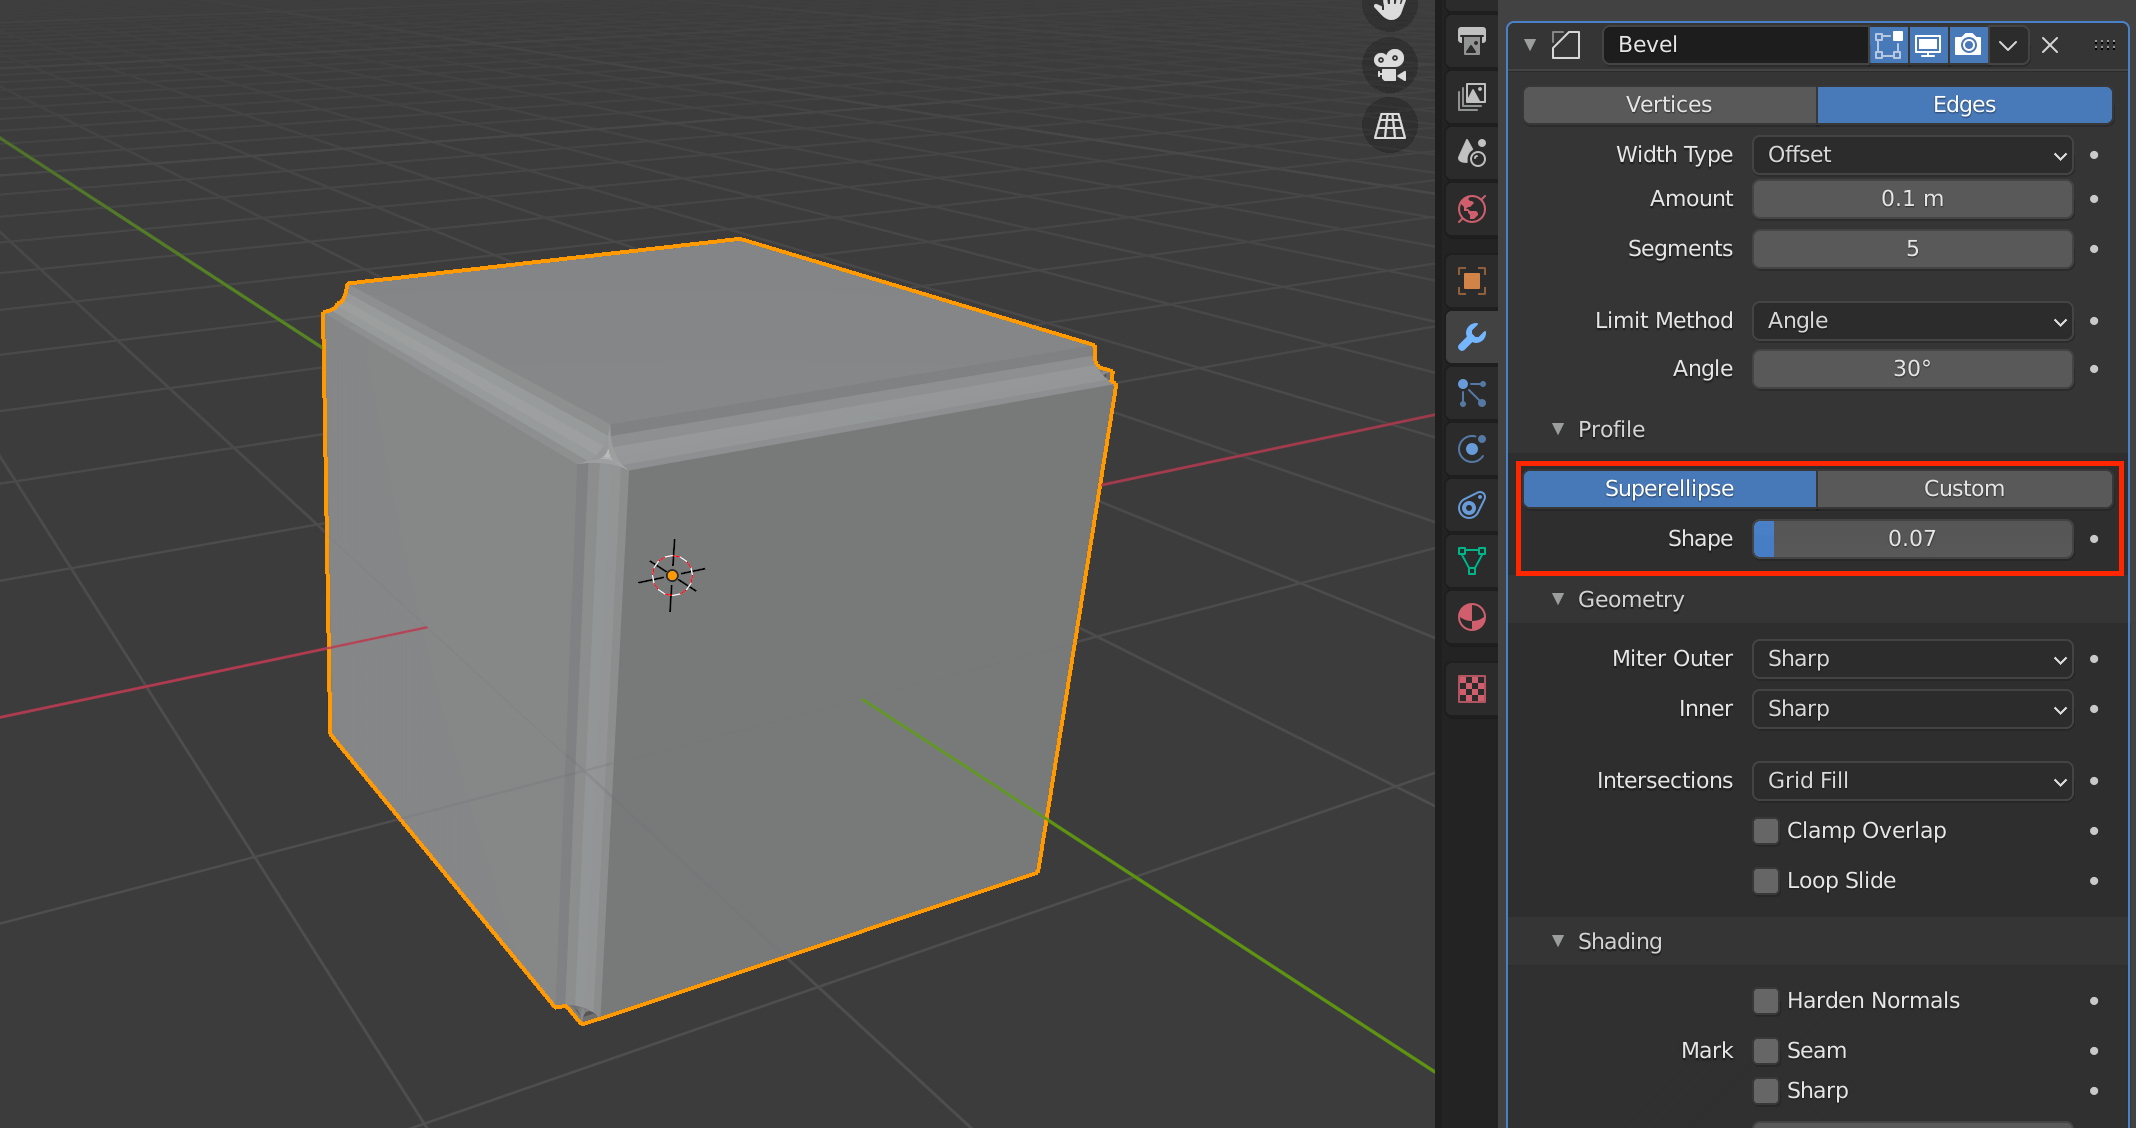
Shape of Profile(Superellipse) is 0.07
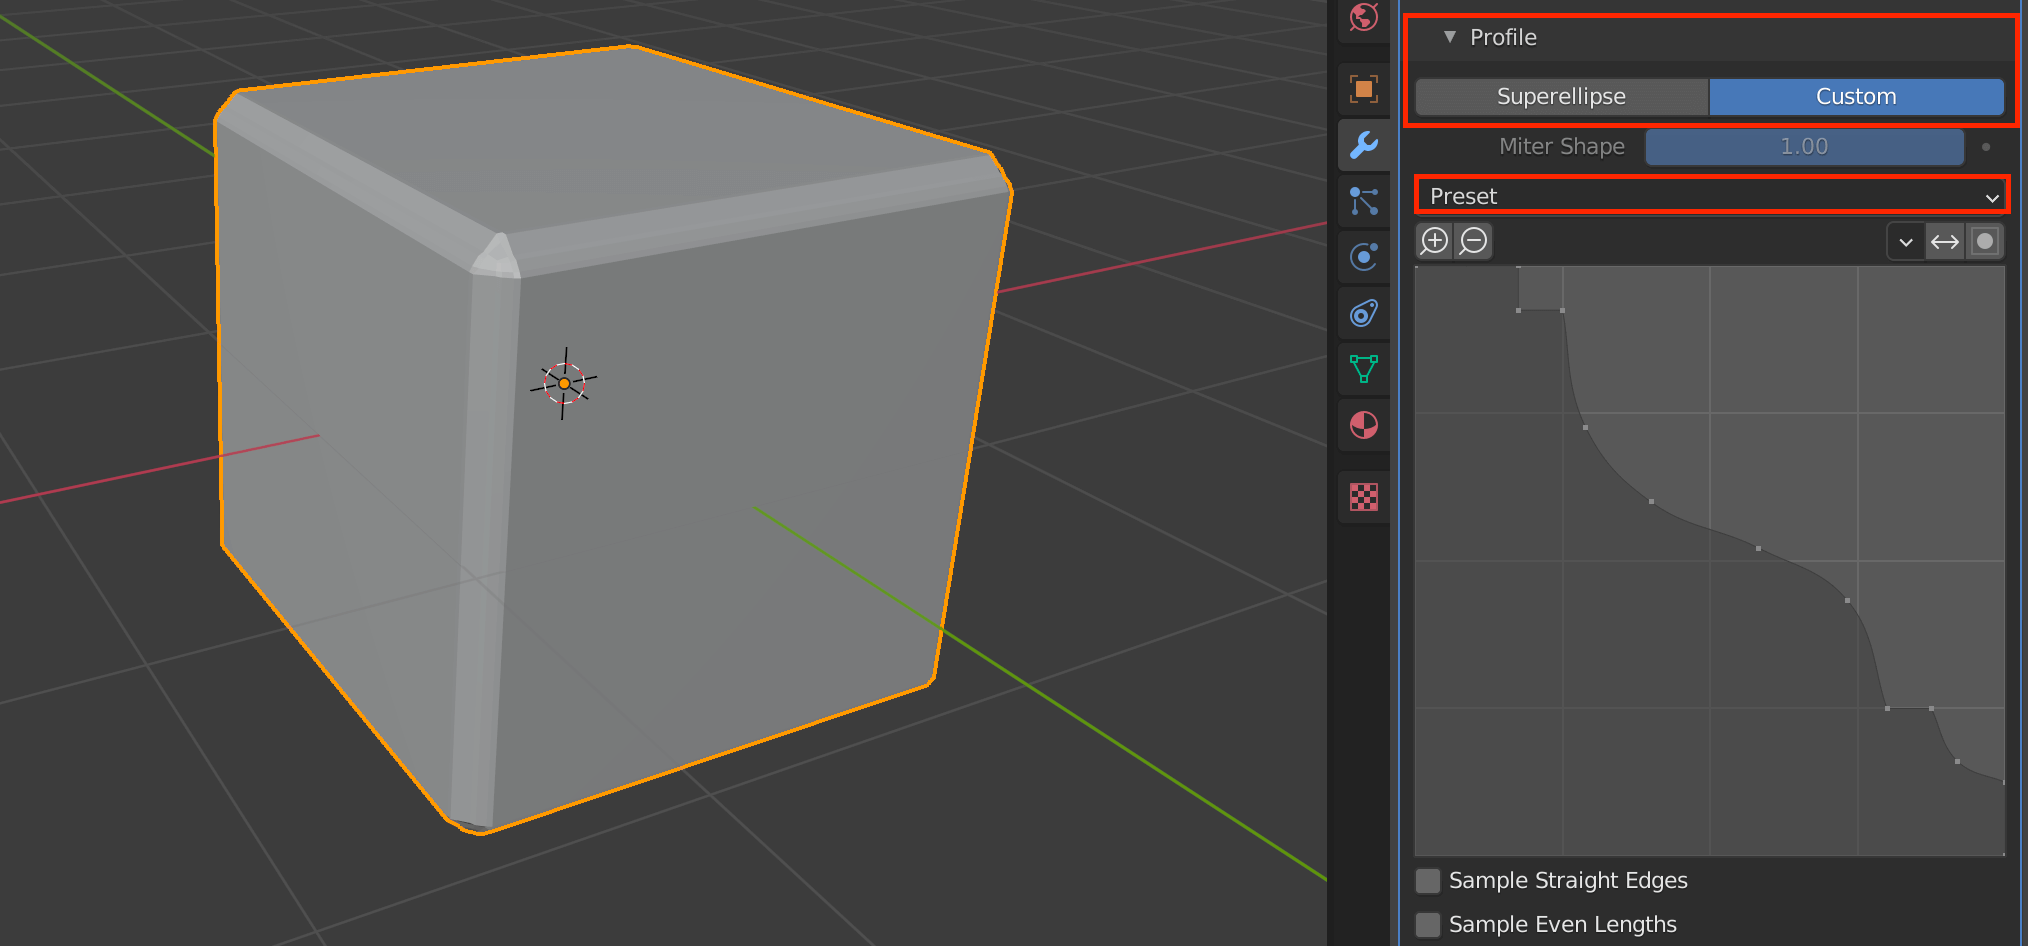
Profile Custom
When multiple vertices are overlapping, the bevel cannot be used.
In such a case, select all vertices with A, and then select M→By Distance.
The overlapping of the vertices will be removed.
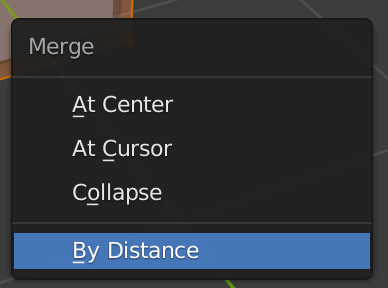
By Distance
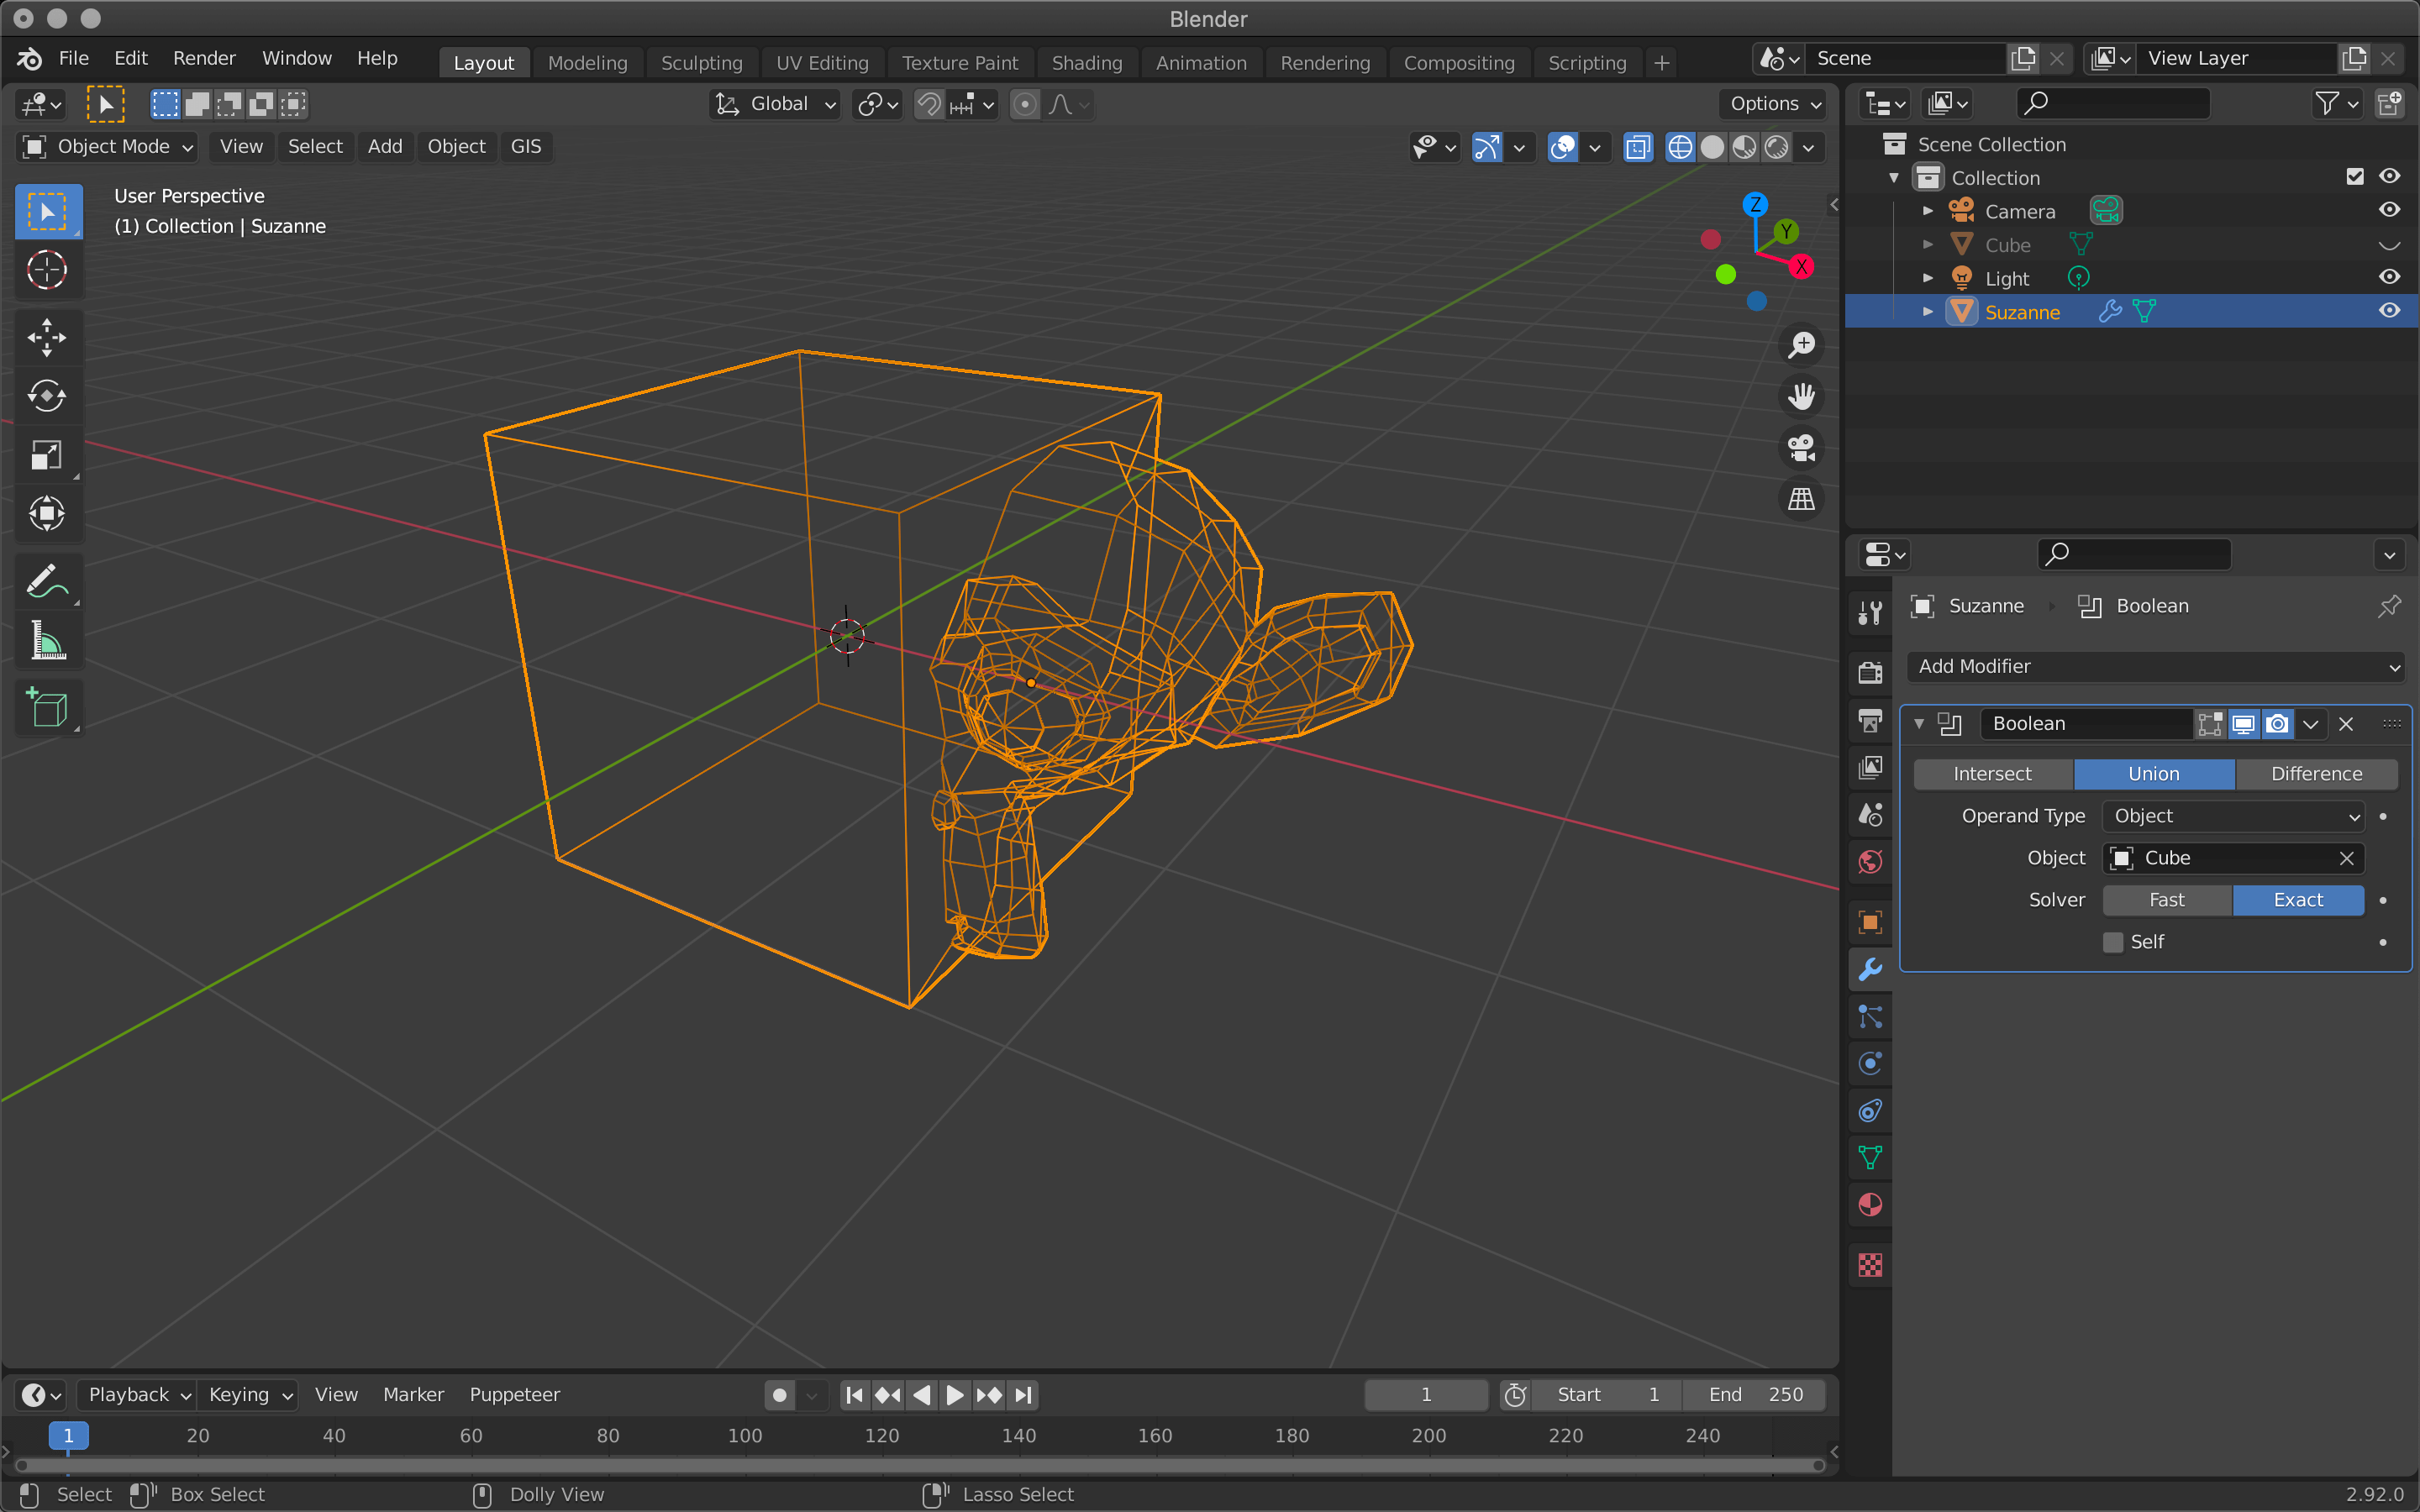
Generate Boolean
This function allows you to hollow out or merge two overlapping objects.
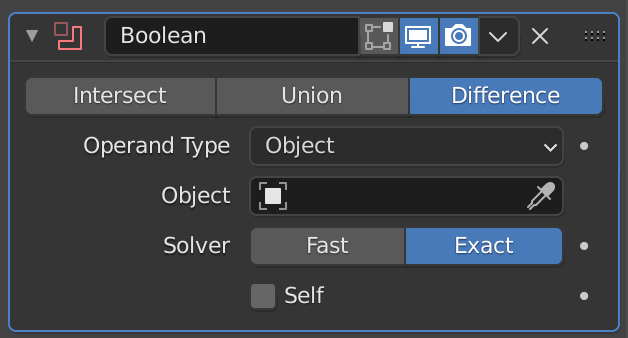
Boolean
| Intersect | Intersect |
| Union | Merge |
| Difference | Difference |
| Operand Type | Selects either a single object or a collection |
| Object | Add the affected object |
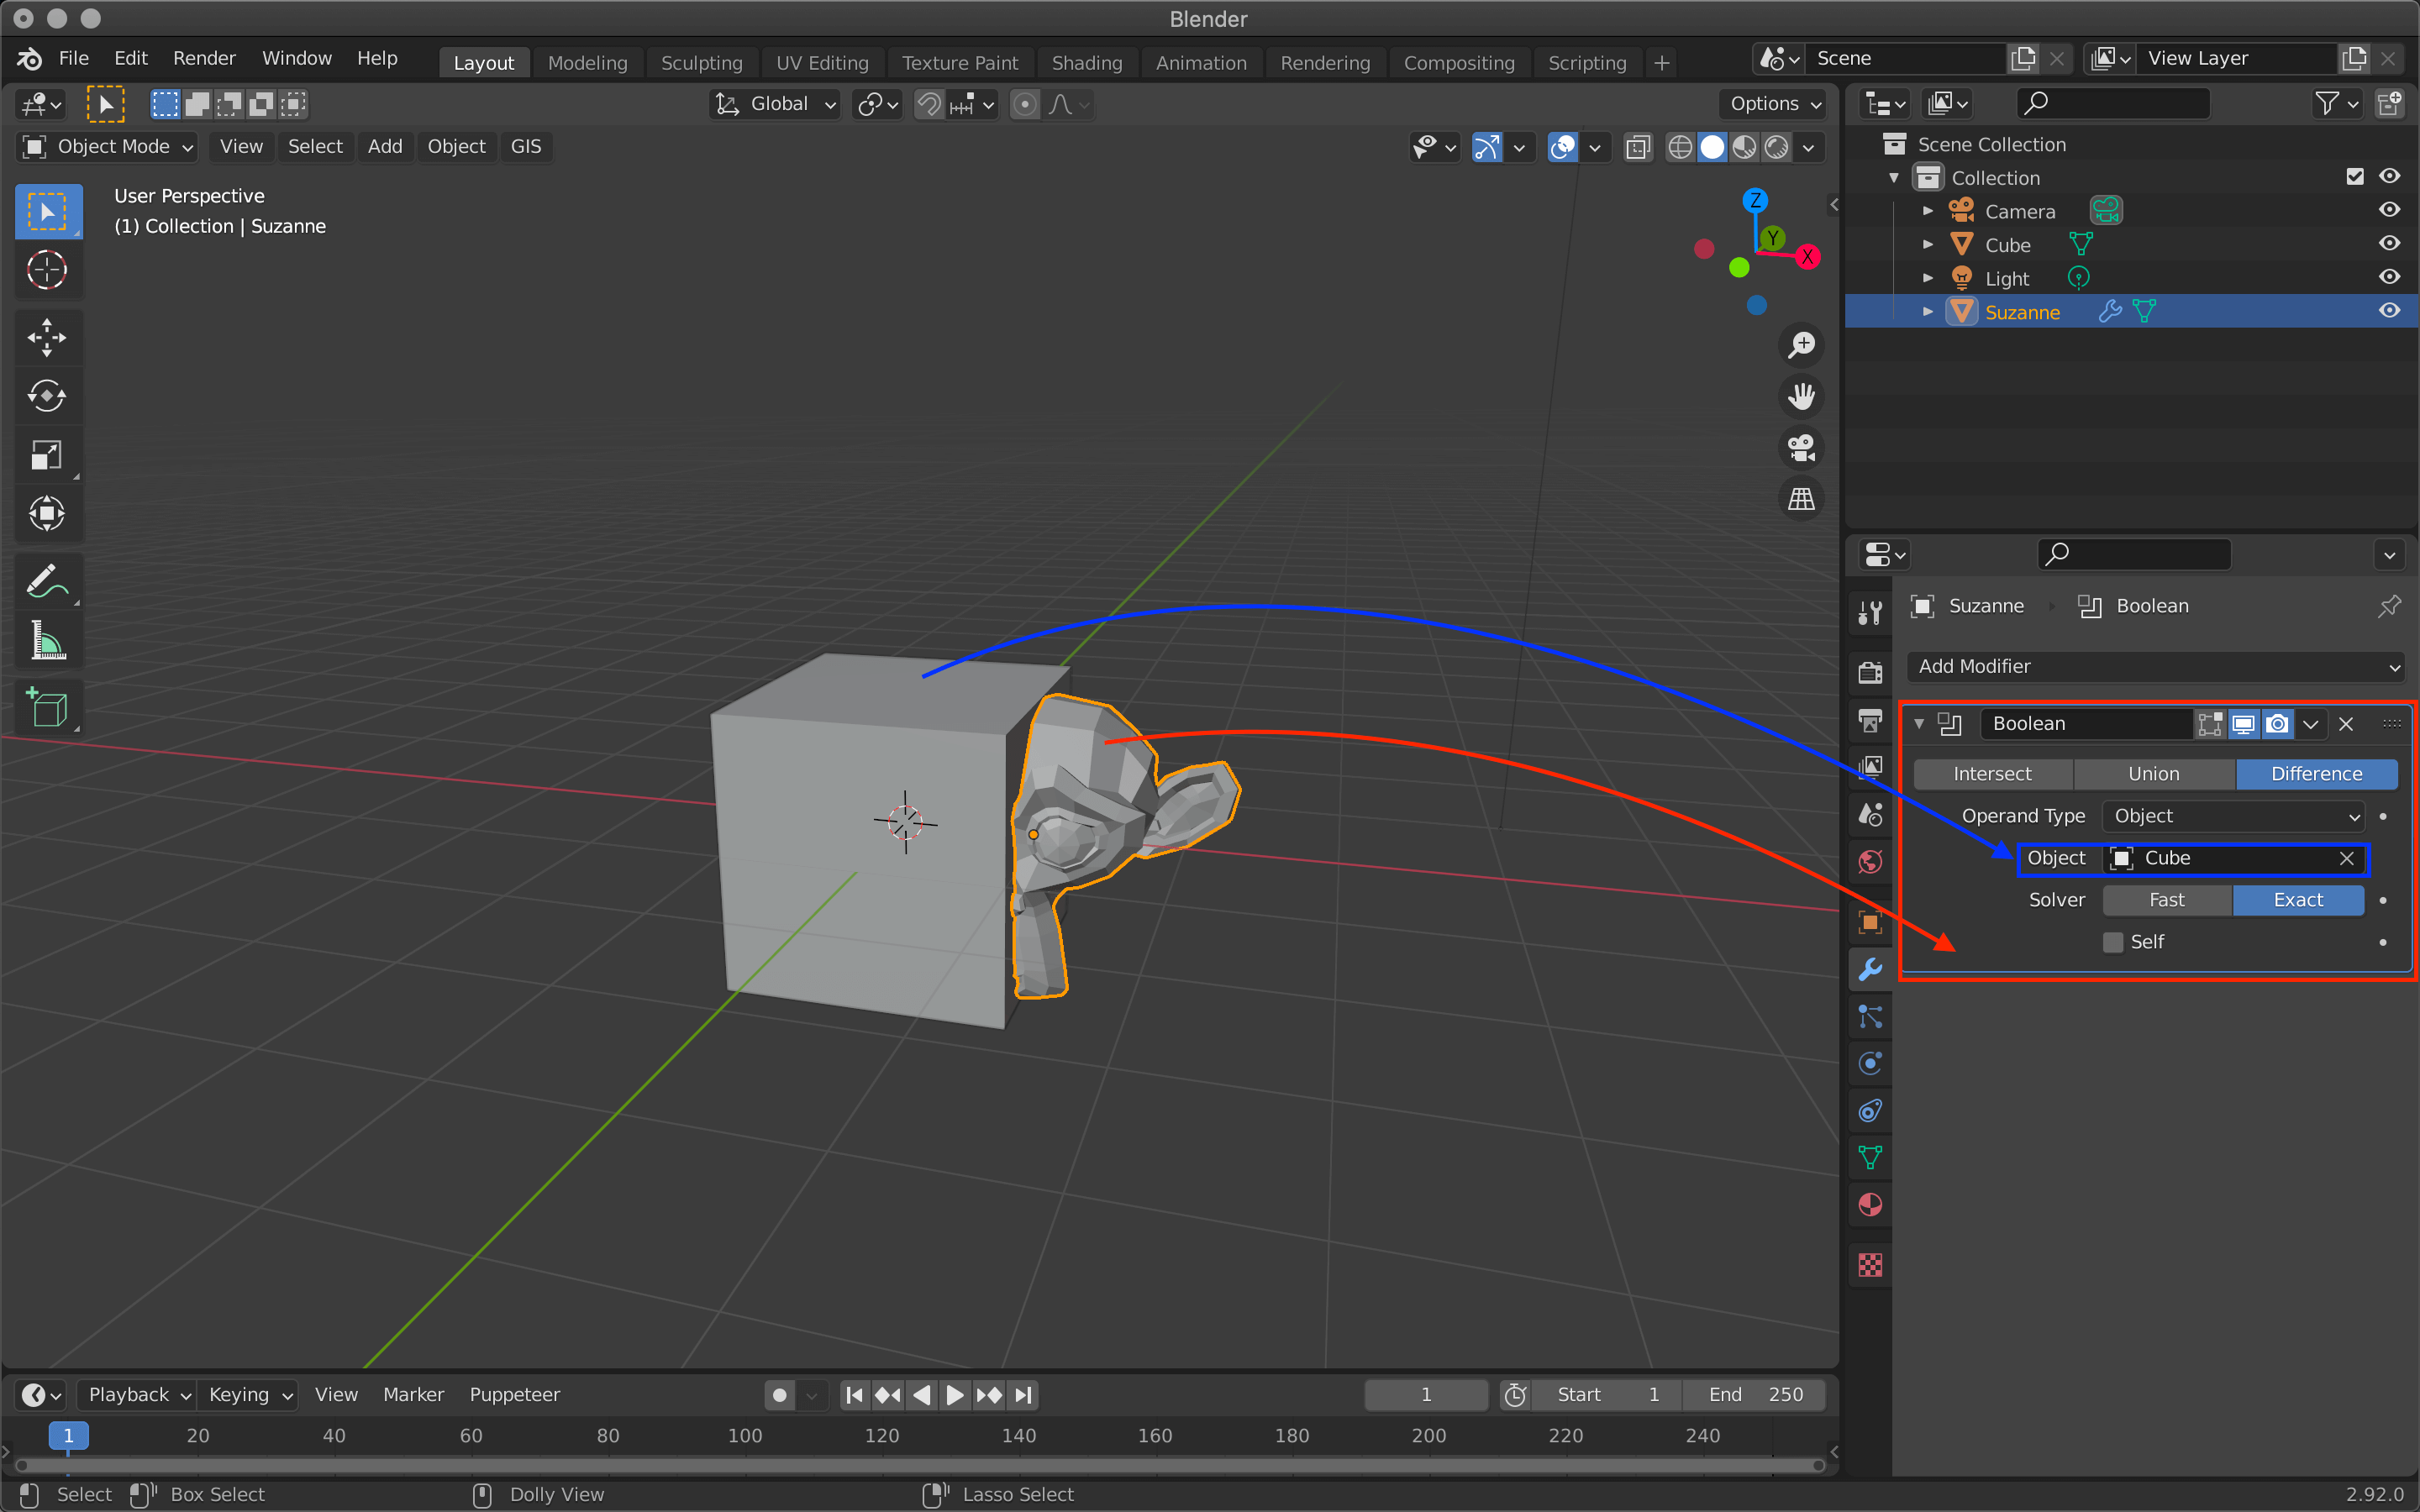
Added a Boolean modifier to Suzanne (the monkey object) and assigned her a cube
Intersect will subtract Suzanne except where she overlaps the cube.
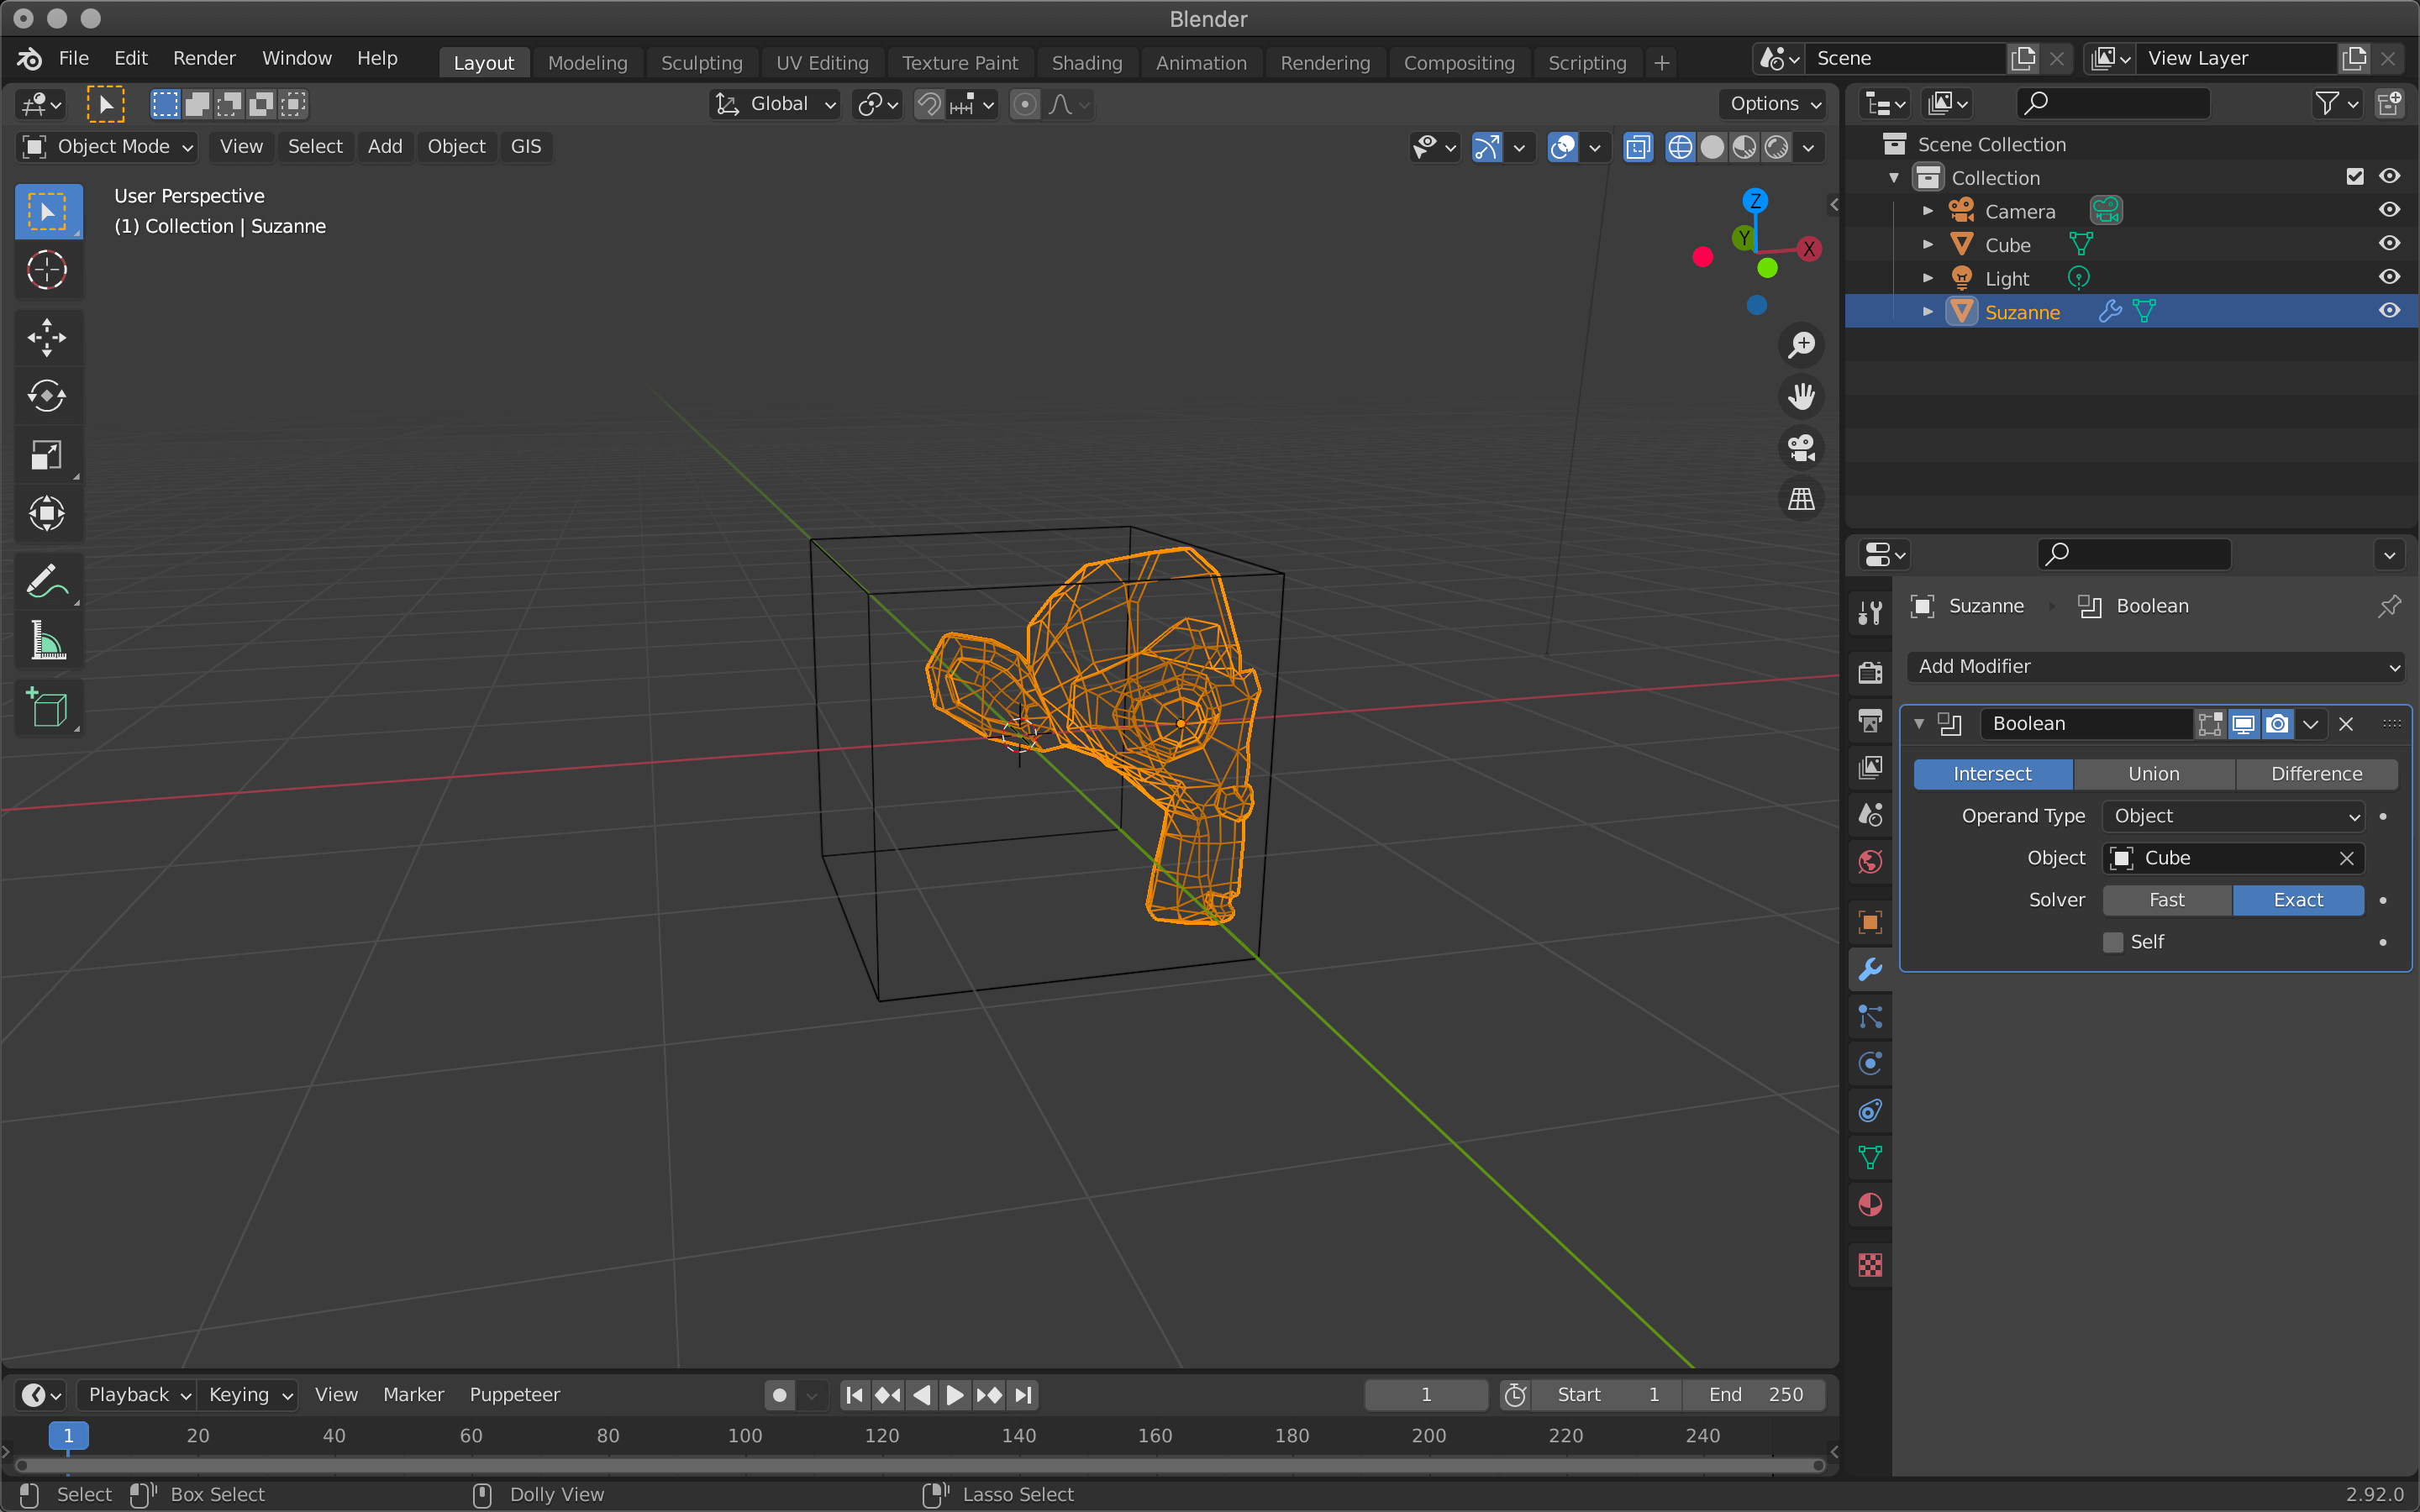
Intersect
Union combines the two objects into one where they meet.
Only the inside of the Suzanne appears to be hollowed out.
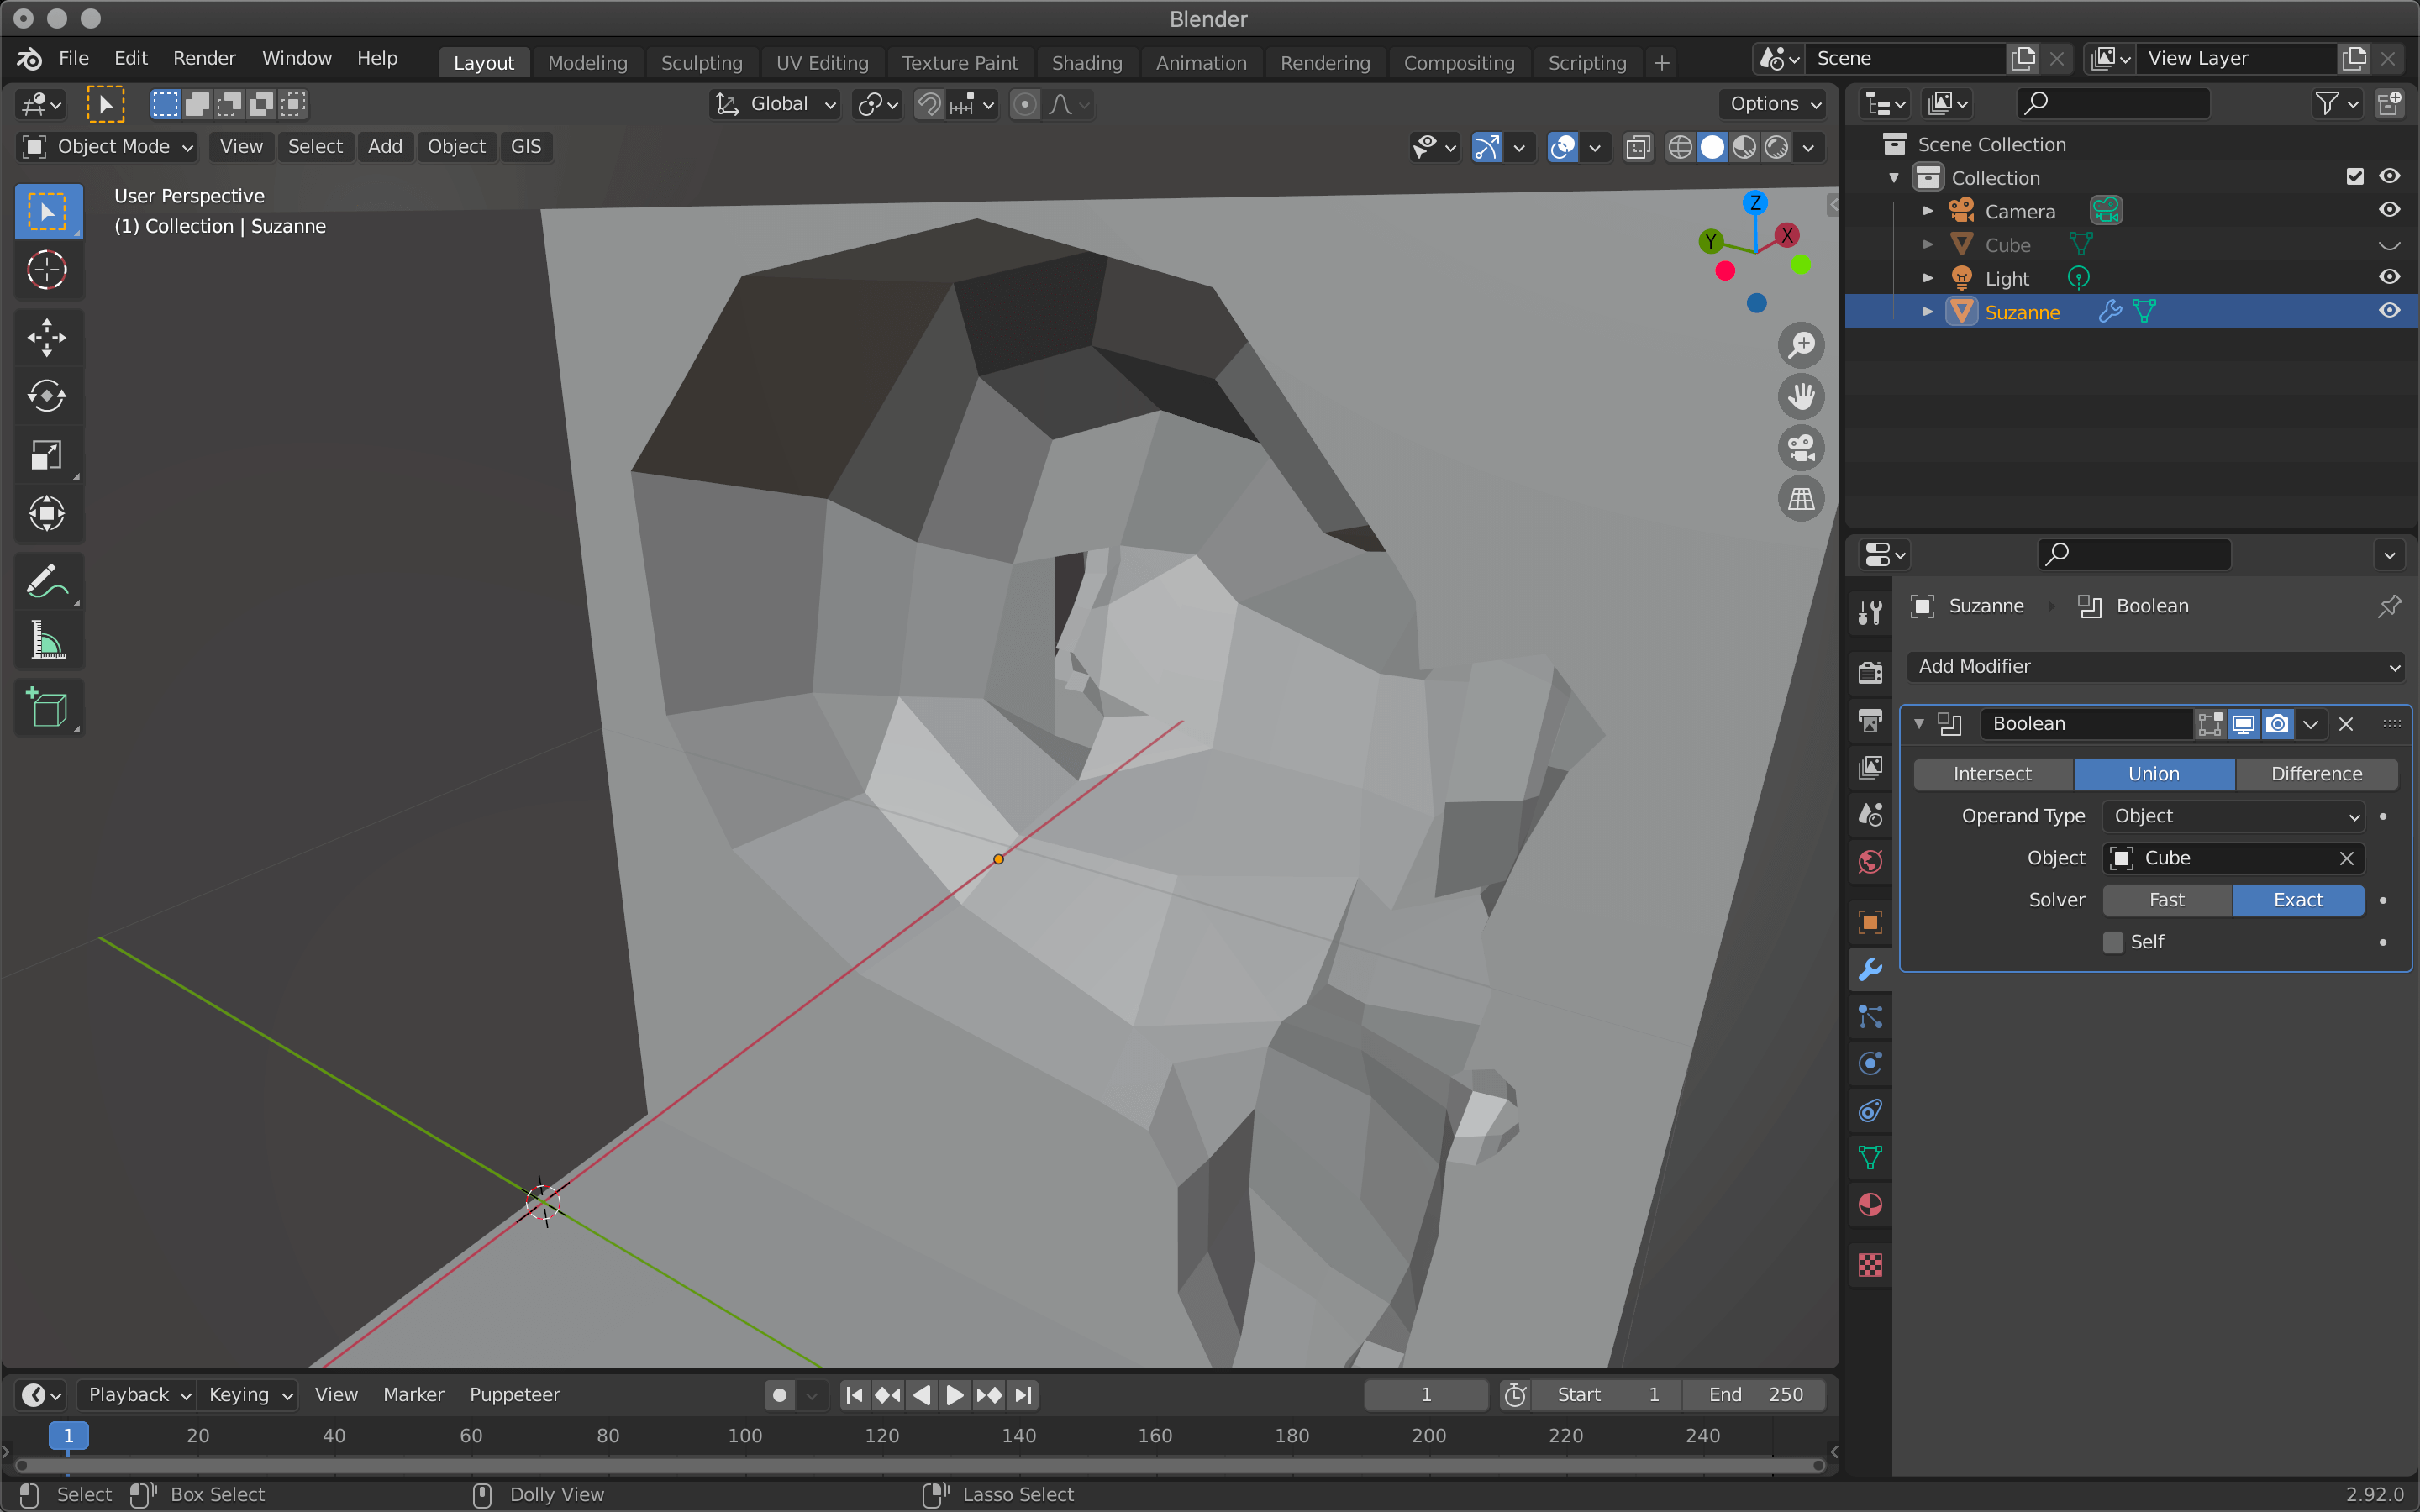
Looking at the cube from the inside, it is joined to Suzanne
Difference hollows out the shape of the cube.
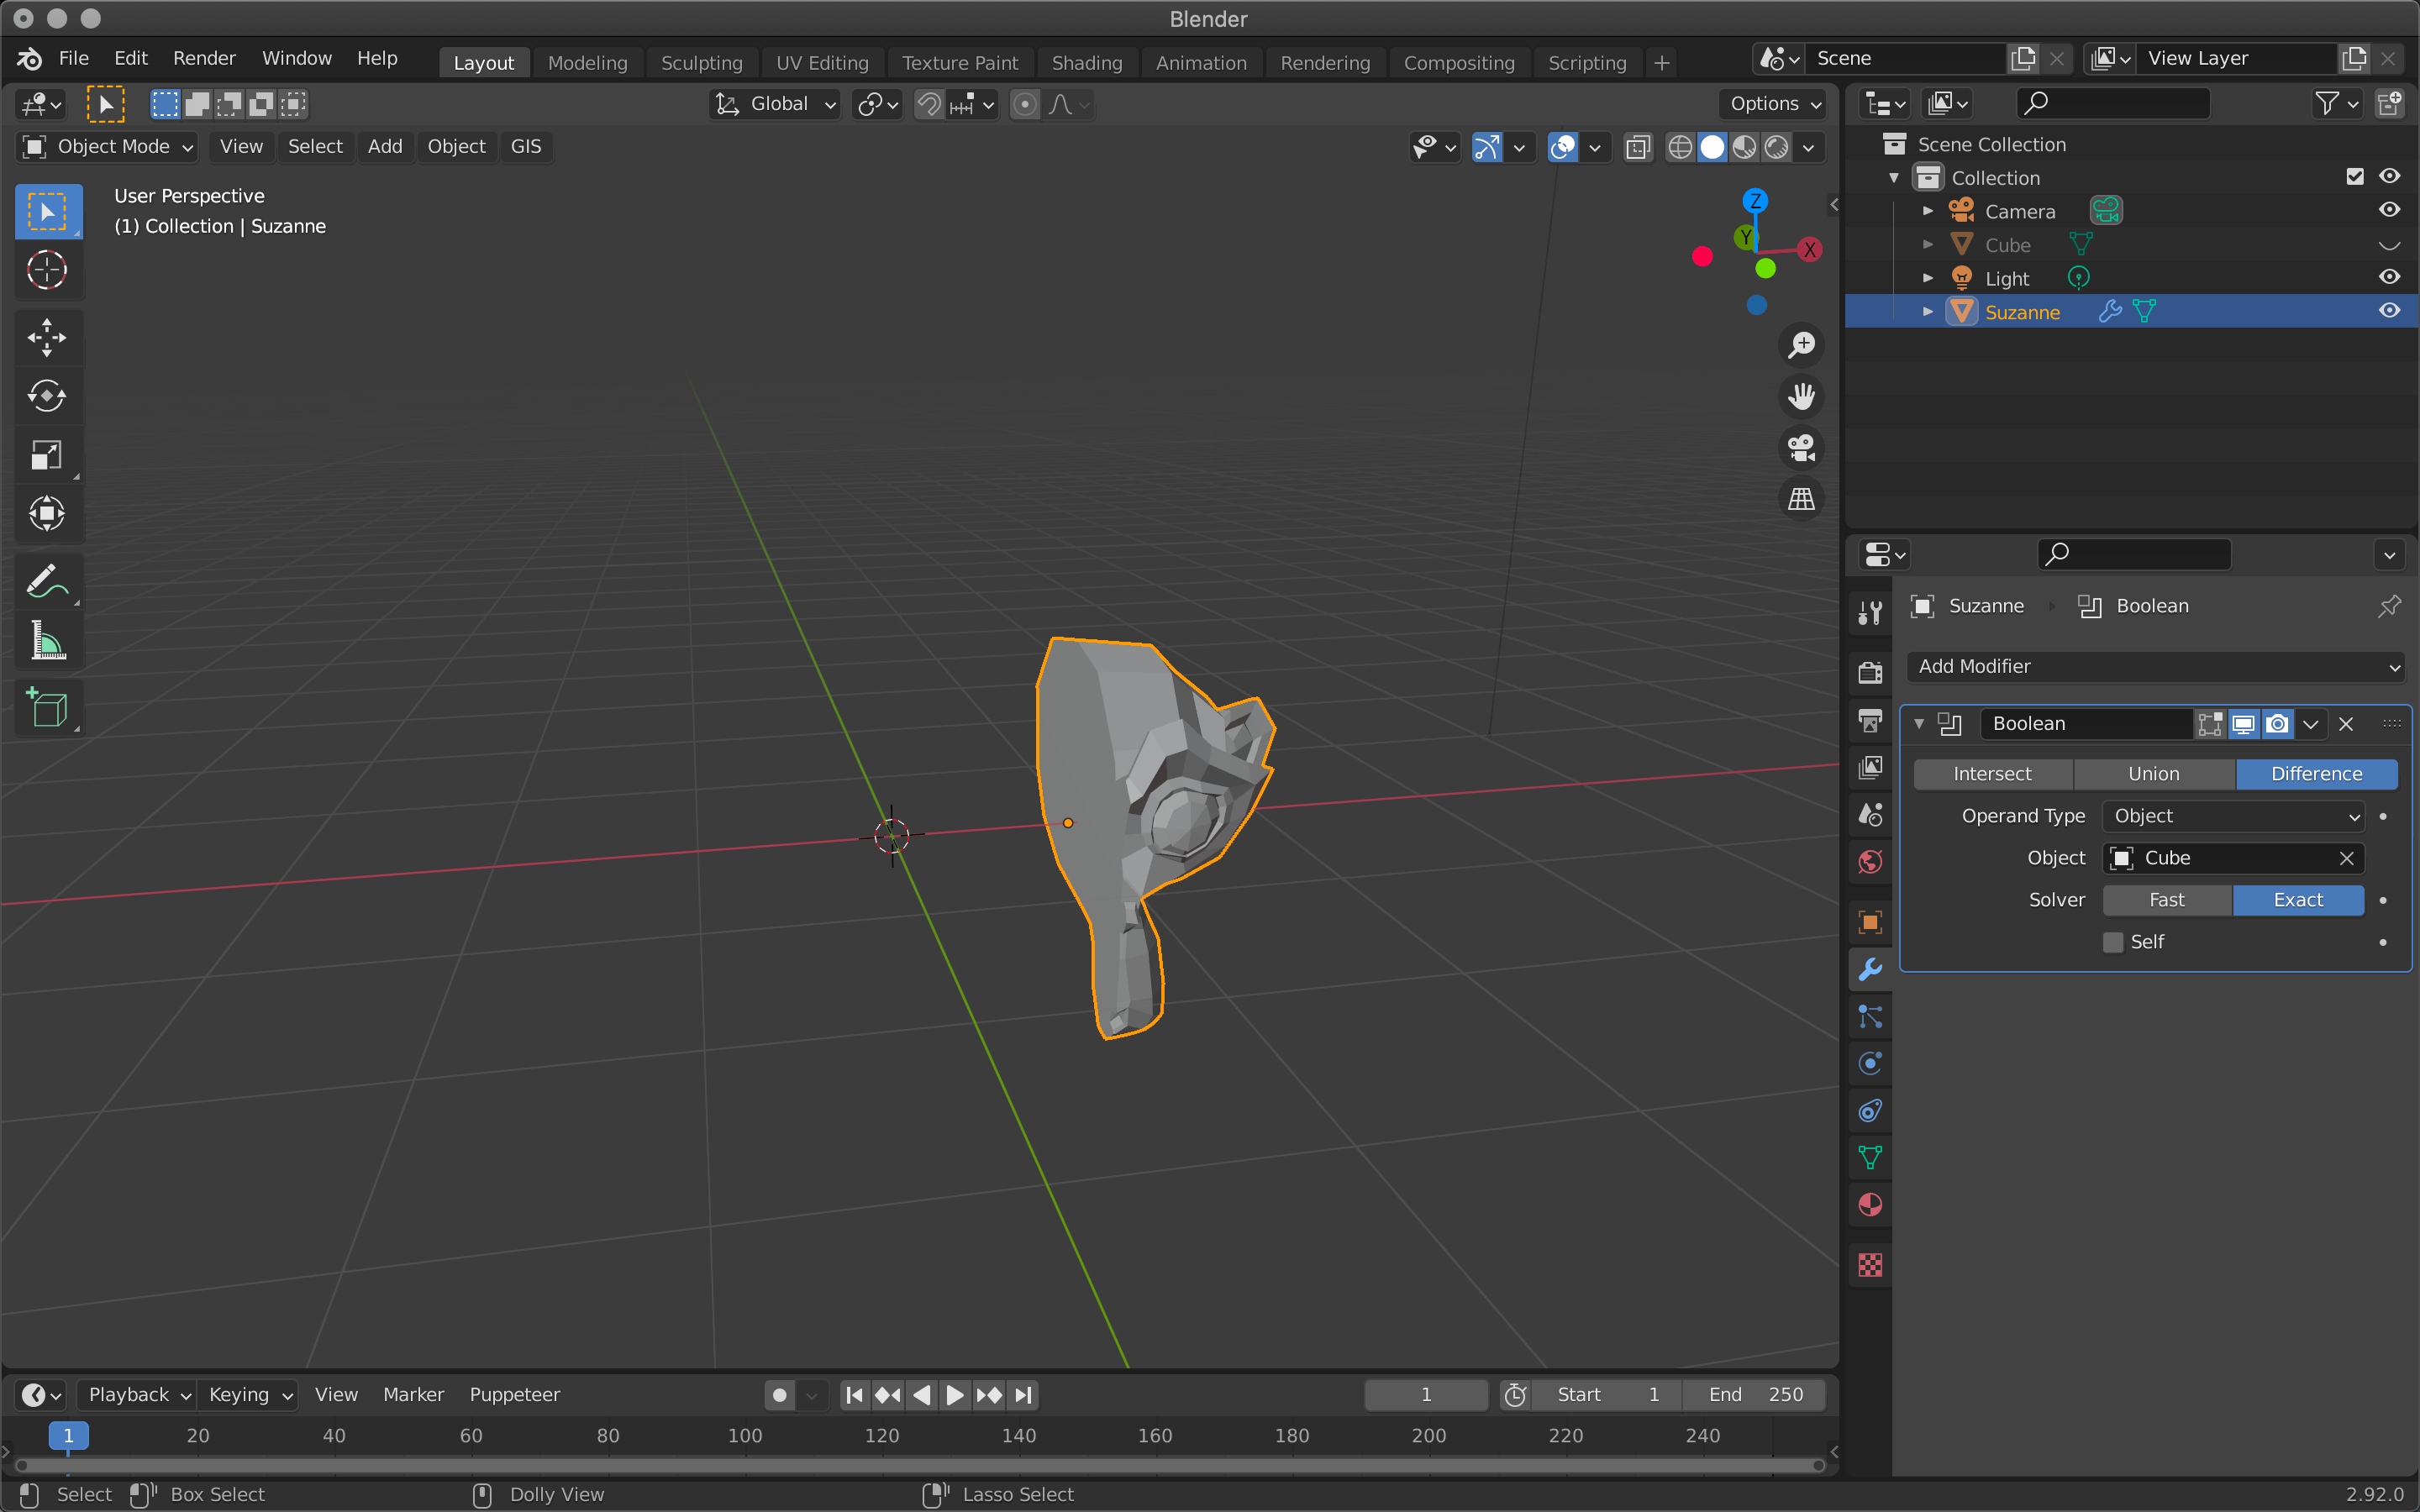
Difference
In the next article, I will introduce Build/Decimate/Edge Split from Generate.
![[Introduction to Blender] Using modifier tools (2) Generate (Build/Decimate/Edge Split)](https://styly.cc/wp-content/uploads/2021/06/IMG_9201-160x160.png)