This article shows you how to use PlayMaker to generate events by tapping your smartphone screen.
I think you’ll find it very useful for creating augmented reality (AR) creations in STYLY!
To learn more about STYLY Mobile’s AR scene, click here.
This tutorial uses a cube rotating or stopping when tapped.
The rotating cube example is applicable in many different expressions!
Sample
Here is a sample of the AR we will create.
You can rotate or stop the cube by tapping your smartphone (or clicking on the cube on your PC).
Experience AR With Your Smartphone

Advance Preparation
To experience AR, start by installing PlayMaker, a plugin for Unity.
![[Unity Tutorial] Creating a Game Using Playmaker ① From Basic Introduction to Installing](https://styly.cc/wp-content/uploads/2019/06/1200px-160x160.jpg)
If this is your first time using PlayMaker, read the following articles to get a better understanding.
![[Unity] Starting Playmaker from Scratch](https://styly.cc/wp-content/uploads/2019/09/PlaymaerCoreConcept-160x160.png)
For PlayMaker basic operations, go here.
Creating a Cube
Select 3D Object. Right-click on the hierarchy window.
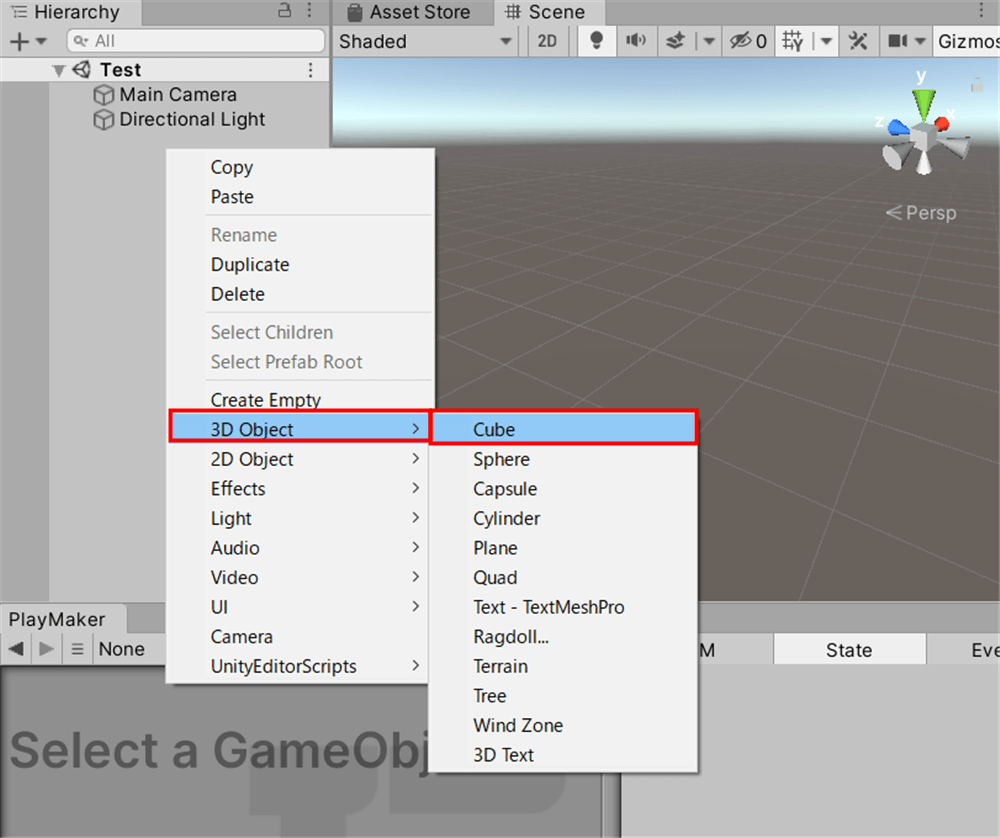
Creating Cube
Set the cube’s Transform to the origin and set Size to (0.2,0.2,0.2).
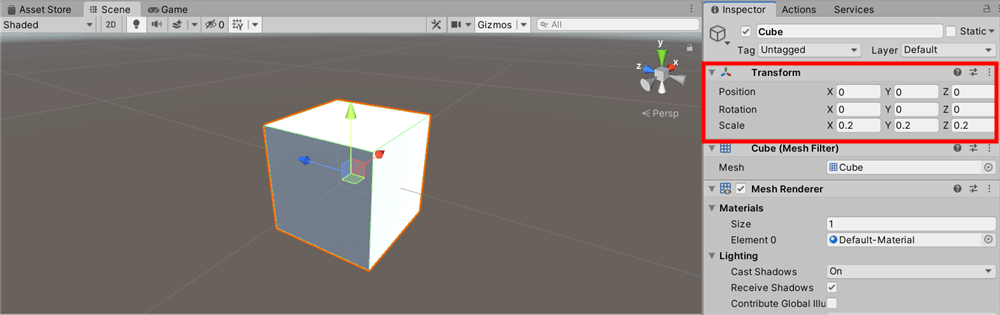
Change Cube’s Transform
Try changing the cube’s Transform. The Transform makes it easier to see the cube’s STYLY AR, as each side displays as a 20 cm cube.
Adding Materials
The default material is lonely, so change it to your favorite color.
Create a material and drag and drop it into the cube.
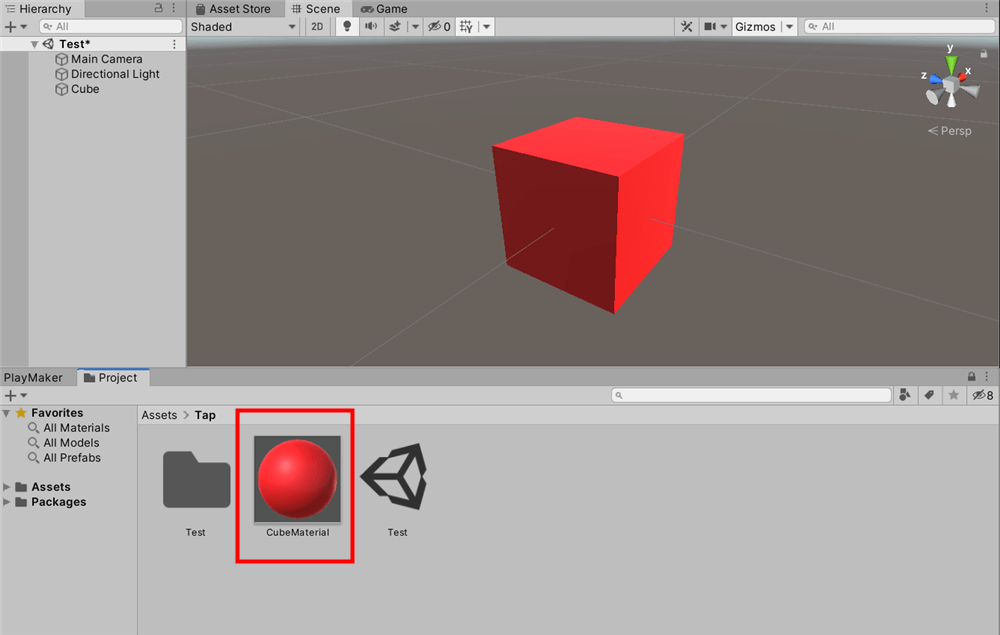
Attaching a Material
Create a Tap Operation Gimmick
Create an Empty GameObject
To create an empty GameObject:
1. Right-click on the hierarchy window in Create Empty.
2. Add the FSM to the GameObject to manage the gimmick.

Create the GameObject
Drag and drop the Cube to GameObject to make it a parent-child relationship.
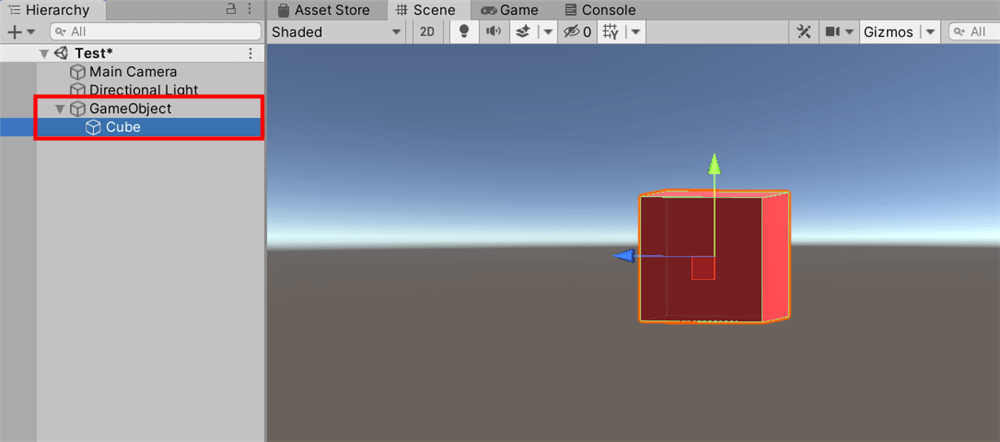
Make it a Parent-Child Relationship
Tap State settings
Select the GameObject. In GameObject, right-click on the PlayMaker window, and add FSM.
Change the name of State1 to Tap.
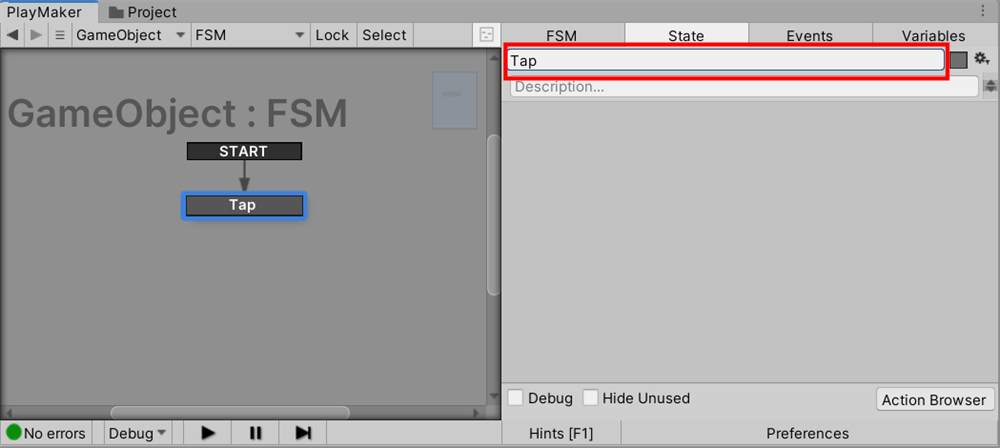
Change the name of State1 to Tap
Add Mouse Pick Event Action
In the Tap state, add the Mouse Pick Event action.
This action fires an event when tapping the specified object.
(Mouse Pick Event activates a “click on the PC,” but if you use this action on a smartphone, it will be the same process as a “tap.”)
1. Click on the GameObject item and select Specify Game Object.
2. Drag and drop the Cube into the displayed form.
3. Set a new START event for Mouse Down.
4. The new START will advance to the next state when you tap the cube.

Setting the Mouse Pick Event Action
Rotate State Settings
Create a new state and rename it Rotate.
Let’s connect the transition from the START event to the Rotate state.
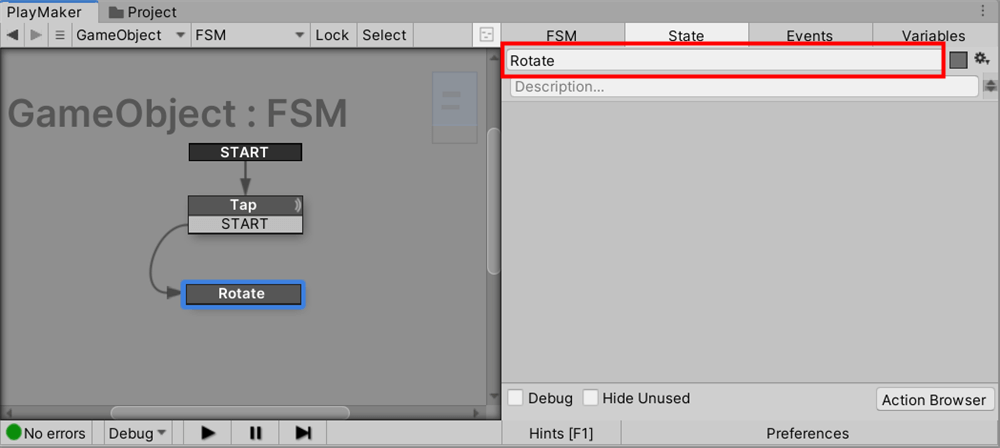
Create the Rotate State
Rotate Action Settings
By adding the Rotate action to the Rotate state, you can rotate the object
To rotate the object, follow these steps
1. Click on the GameObject item and select Specify Game Object.
2. Drag and drop the Cube into the form that appears below.
3. Check Per Second and enter 90 for X, 60 for Y, and 30 for Z.
4. You can enter any value for X, Y, and Z. (The higher the number, the faster the rotation.)
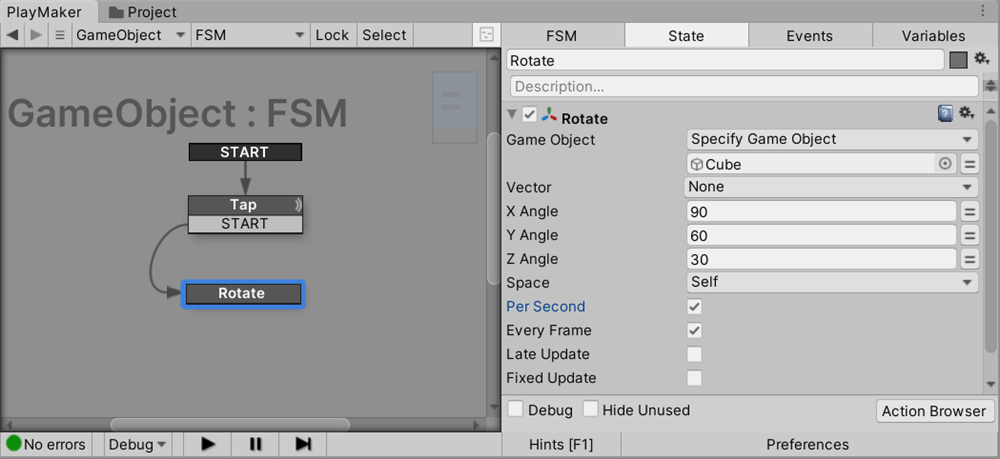
Rotate Action Settings
Get Mouse Button Down action settings
Add the Get Mouse Button Down action.
Set the new STOP event to Send Event.
These steps will advance STYLY AR to the next state when tapped on the smartphone screen.
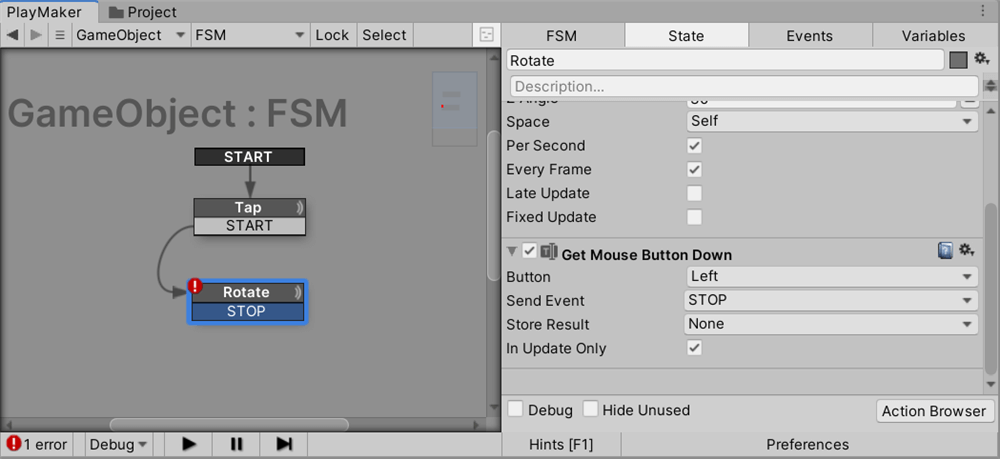
Set the Get Mouse Button Down Action
- Tip: The difference between the Mouse Pick Event and Get Mouse Button Down actions are:
The Get Mouse Button Down action fires an event when you tap anywhere on the smartphone screen.
The Mouse Pick Event action allows you to cause an event by tapping a specific object.
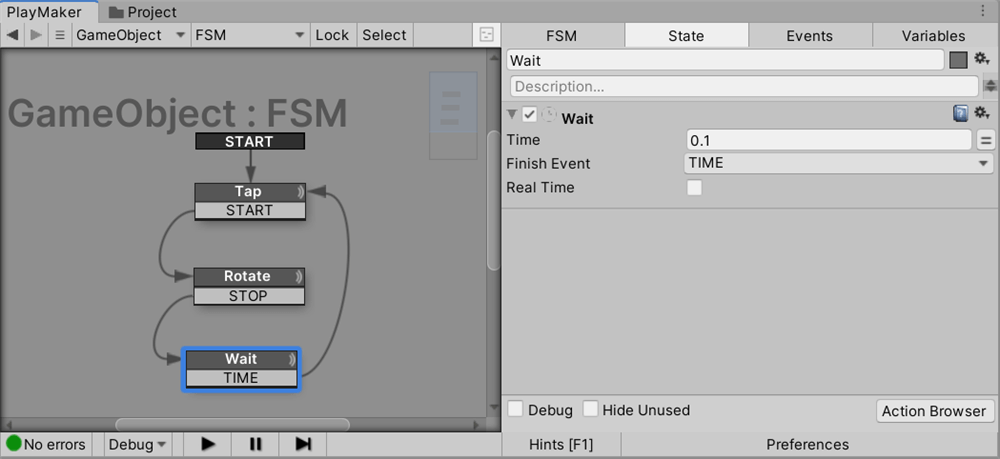
Setting the Wait State
Create a new state and rename it Wait.
Connect the transition from the STOP event to the Wait state.
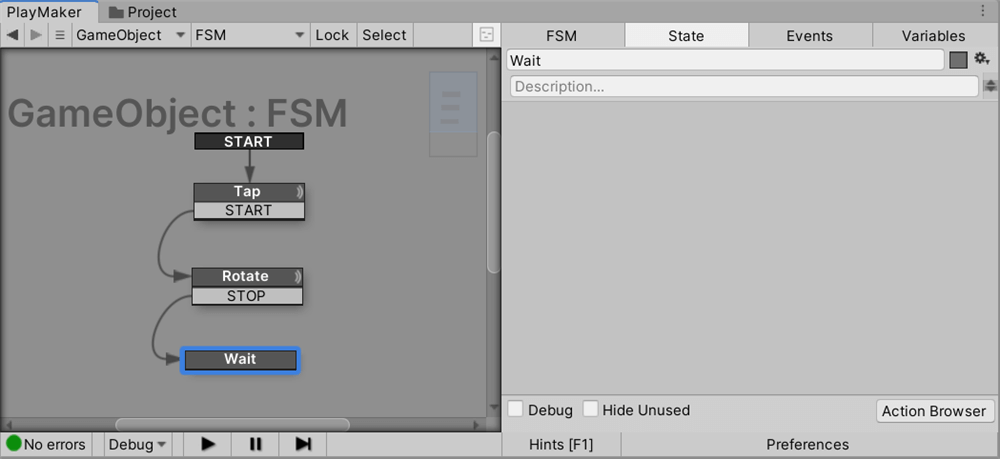
Creating the Wait State
Add the Wait action
1. To avoid an infinite loop in the program, add the Wait action.
2. The Wait action will pause the process for a specified number of seconds.
3. Enter 0.1 in Time and set the Finish Event to a new TIME event.
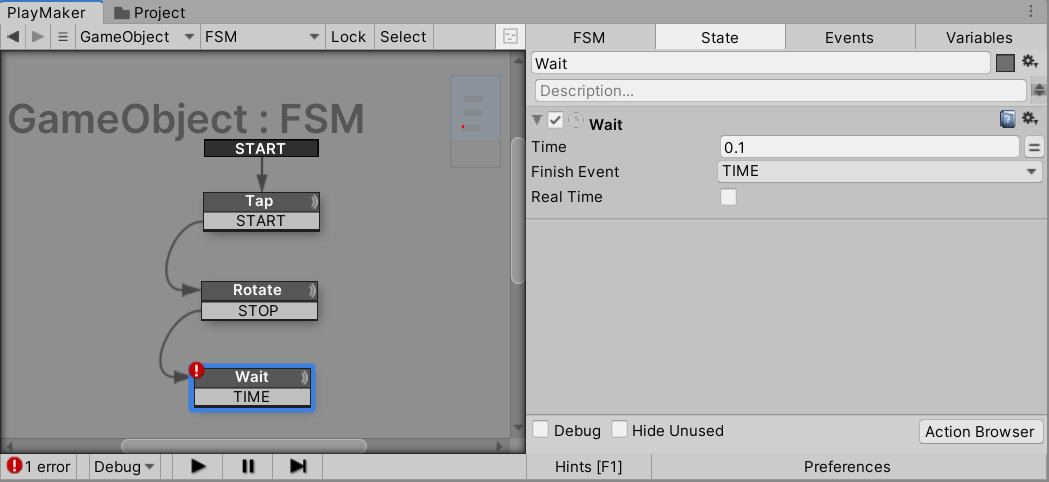
Setting the Wait Action
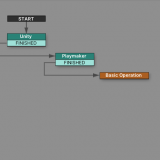
Finally, connect the transition from the FINISHED event to the Tap State, and the gimmick is complete!
Finished View
Play the scene and check it out. (In Unity, click instead of tap.)
Click the cube to rotate and click the Game View to stop the rotation.
By default, the camera is far away, so let’s change the coordinates of the Main Camera to (0,0,-1).
Playing the scene
How to upload to STYLY
Prefabricate the created GameObjects.
Right-click the prefab and select Upload prefab or scene to upload
You can learn how to upload your prefab from Unity to STYLY in the following article.

How to create an account

How to upload to STYLY

Conclusion
This article introduced the Mouse Pick Event and Get Mouse Button Down actions to generate an event with a smartphone tap action.
The tap action allows you to change an object’s appearance, display an image, play music, and many other exciting applications.
Introduction to NEWVIEW SCHOOl ONLINE
NEWVIEW SCHOOl ONLINE, where you can learn the basics of Unity and PlayMaker necessary for creating VR/AR content, from the basics to the application of PlayMaker, and learn the process of creating the fascinating content available on STYLY (we’ll also expose the production techniques).
