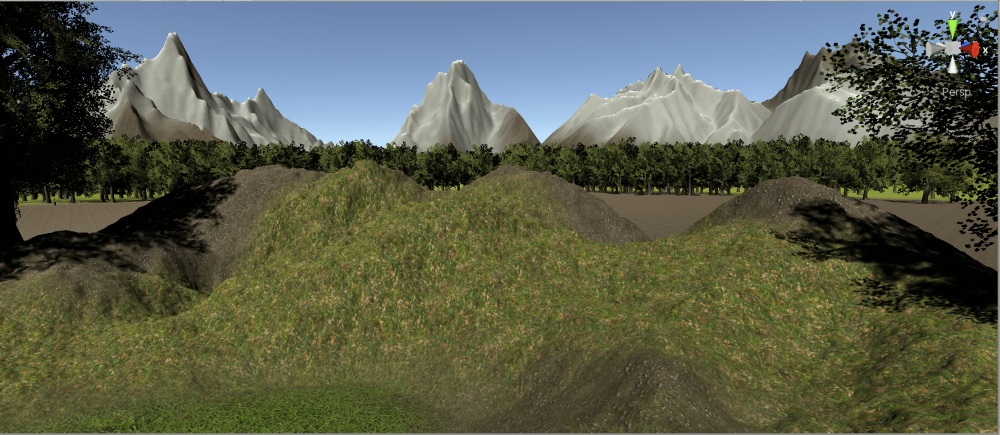
In this article, I will show you how to use Unity’s “Terrain Tool” to create the following scenery on a STYLY scene.
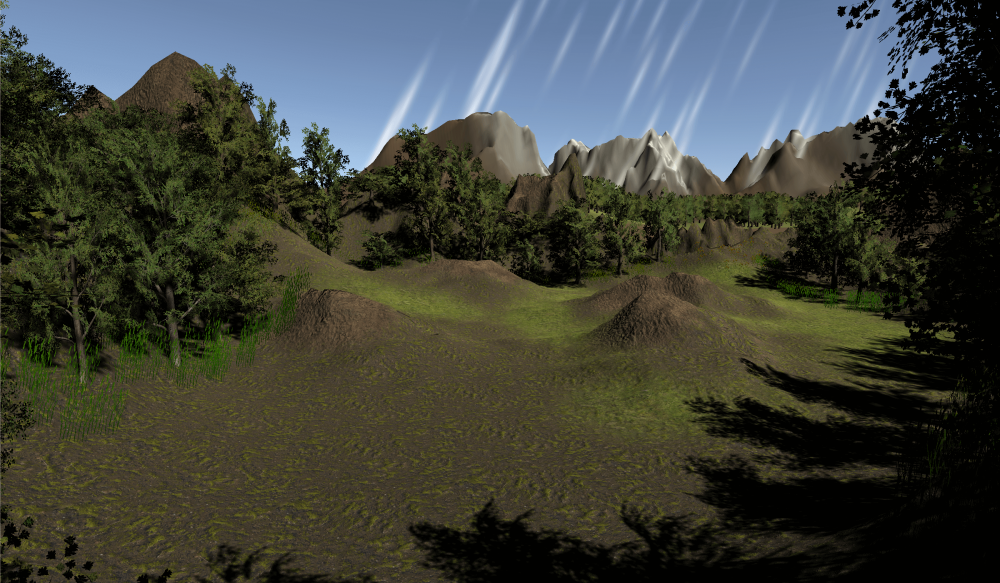
Scenery we will create
When creating a scene, it takes a lot of time and effort to attach materials to each terrain you create.
It is also inefficient to place objects such as trees, plants, and flowers one by one.
With the Terrain Tool, you can create terrain, set textures, and add objects sensitively with a brush.
It also helps you adjust the quality of your scene by allowing you to set the details freely.

You can create landscapes with ease!
Let’s try to master it.
*The recommended scene size when uploading a whole scene to STYLY is 20MB or less, but Terrain tends to grow in size, so please be careful.
Sample
Before we move on to creating a scene, let’s take a look at a scene created using the Terrain Tool to get an idea of what we’re talking about.
In this case, we will create a scene in the mountains as shown below.
Preliminary preparations
First, import the Terrain Tool into Unity as a preliminary preparation.
Open the Package Manager by going to Window > Package Manager and check Show preview packages from Advanced at the top of the window.
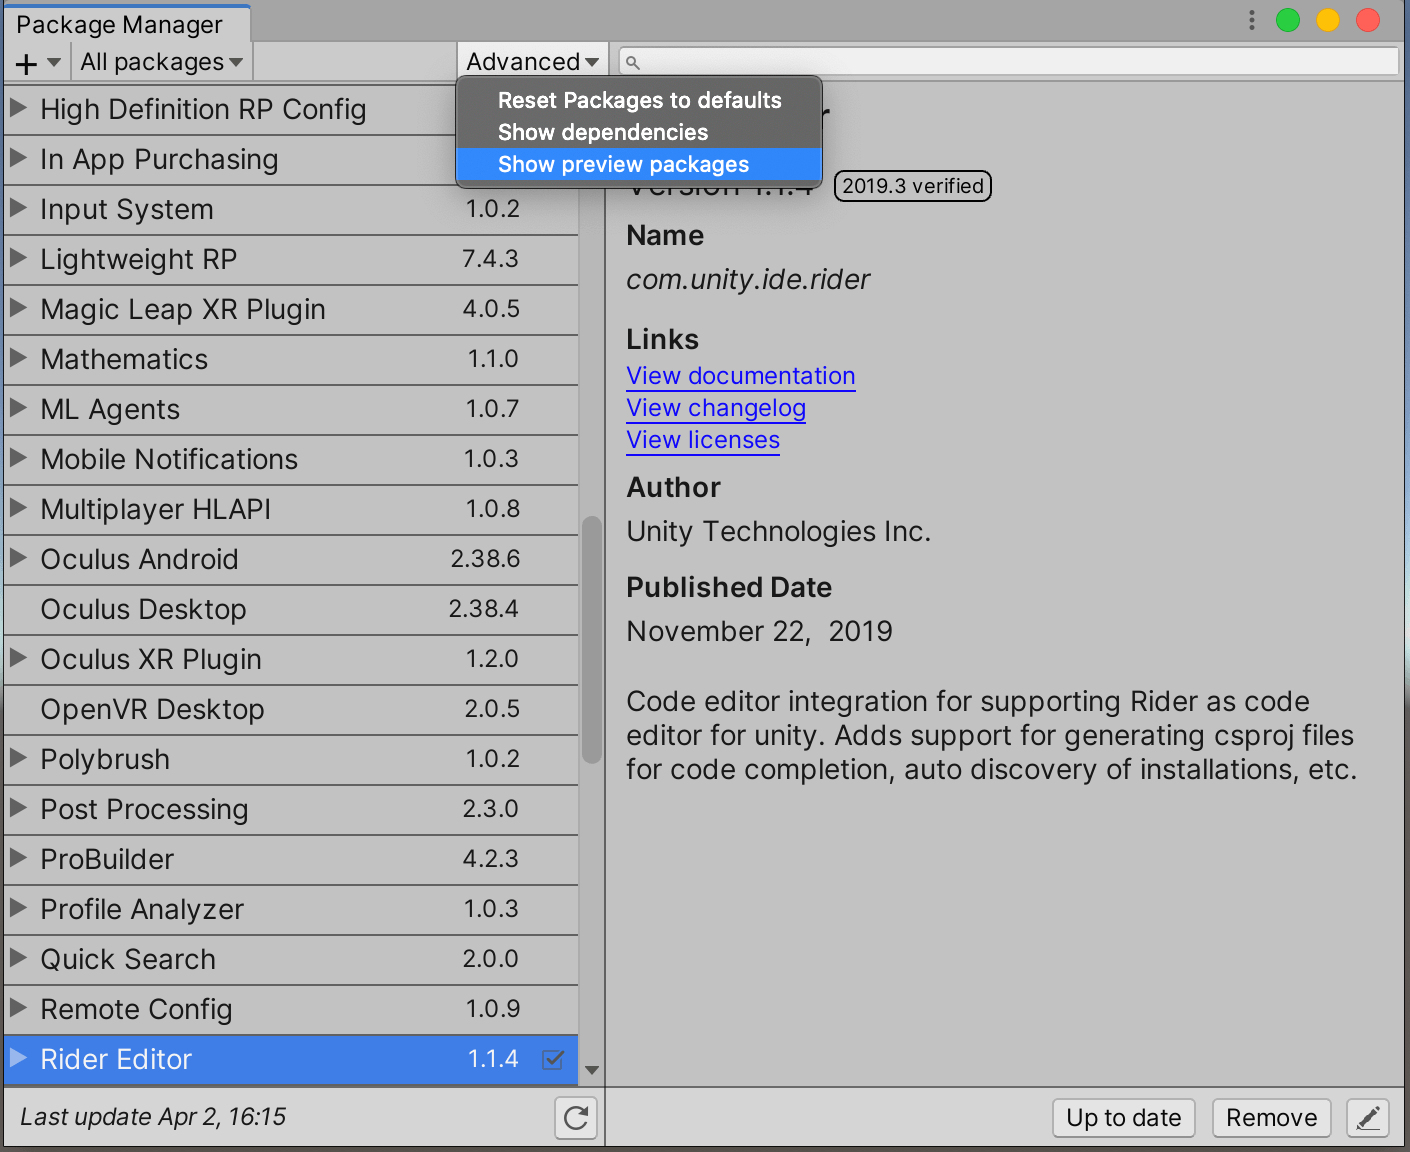
Enable the preview version of the package to be shown.
Then search for “Terrain Tool” in the search field at the top right and install it from “Install” at the bottom right!
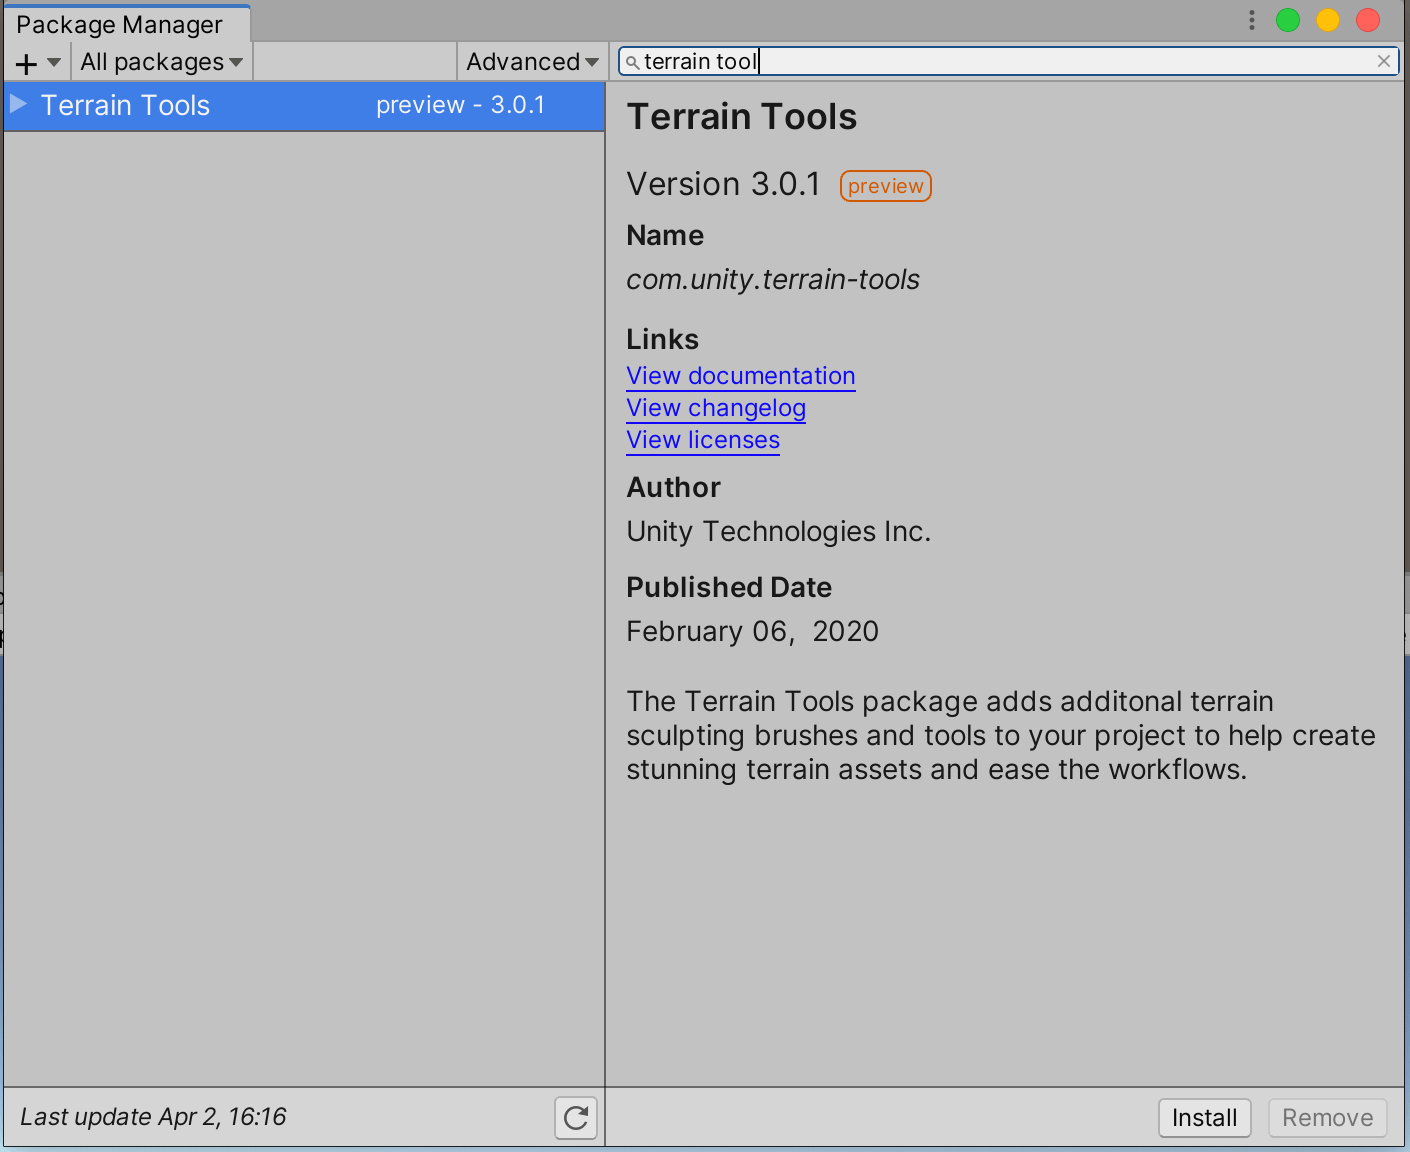
Install Terrain Tools
Next, prepare the materials.
This time, we will use the following four free assets, which you can import from the links below.
Placing the Terrain
Once you are ready, let’s create a terrain.
Right click on the Hierarchy and select 3D Object > Terrain to place the terrain in your scene.
The default size is too large, so select Terrain and change the Terrain Width and Terrain Length to 50 in the Inspector’s Terrain Setting > Mesh Resolution.
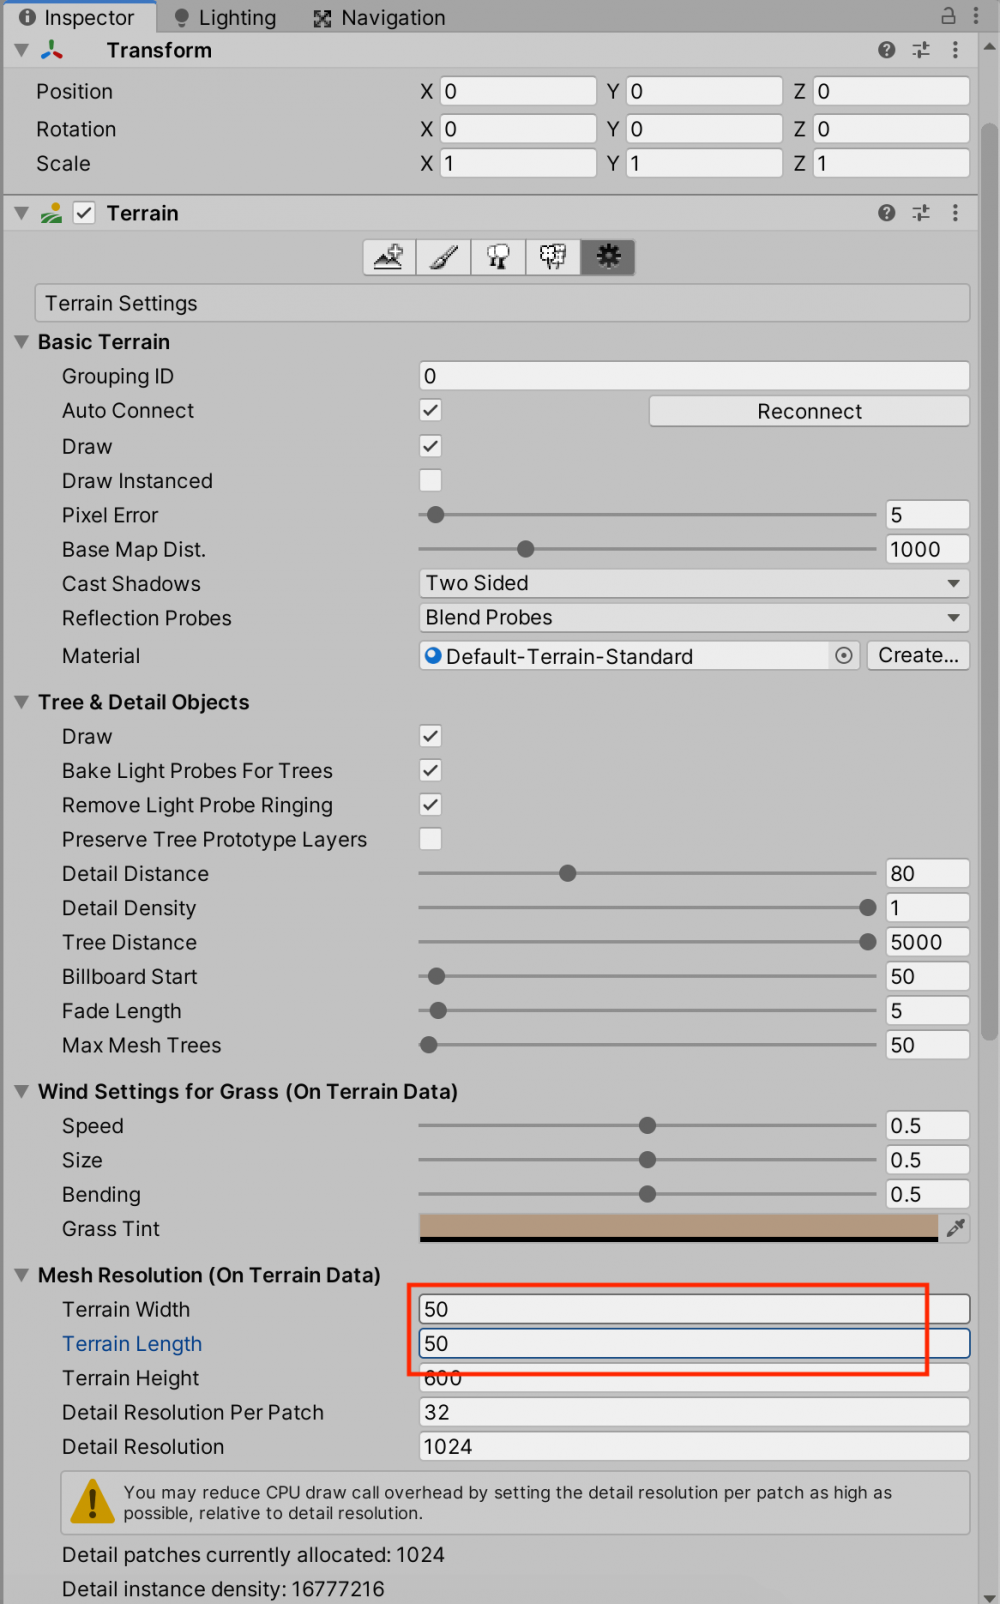
Adjusting the size of the Terrain
Adjust the size of the Terrain by changing the Width and Length, not the Scale in Transform.
Creating a Topography
Next, let’s create a topography for the terrain.
Open the Paint Terrain in the Inspector and select Raise or Lower Terrain.
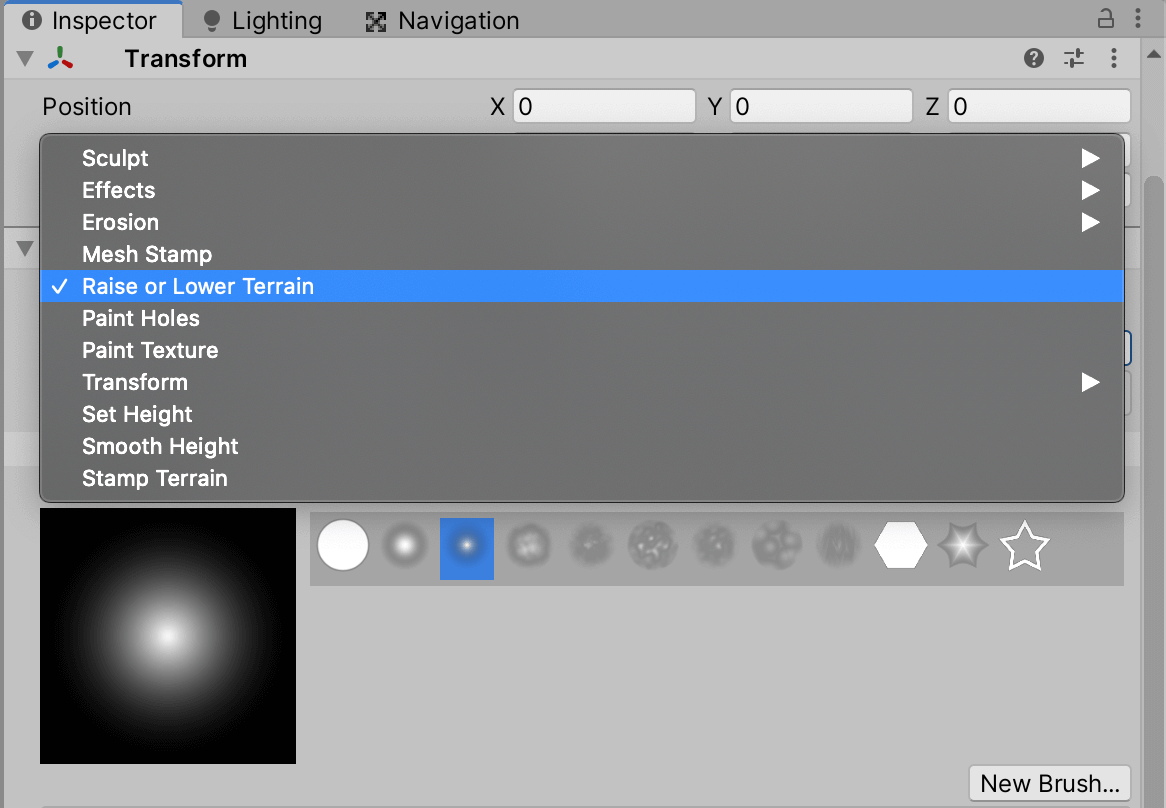
Click on the Terrain in the Scene to raise the ground.
Holding down the control key while clicking will push the ground down.
The topography is created by combining these two.

You can create topography like a brush.
However, when creating complex topography such as a large number of mountains, it is very troublesome to just raise and lower the ground.
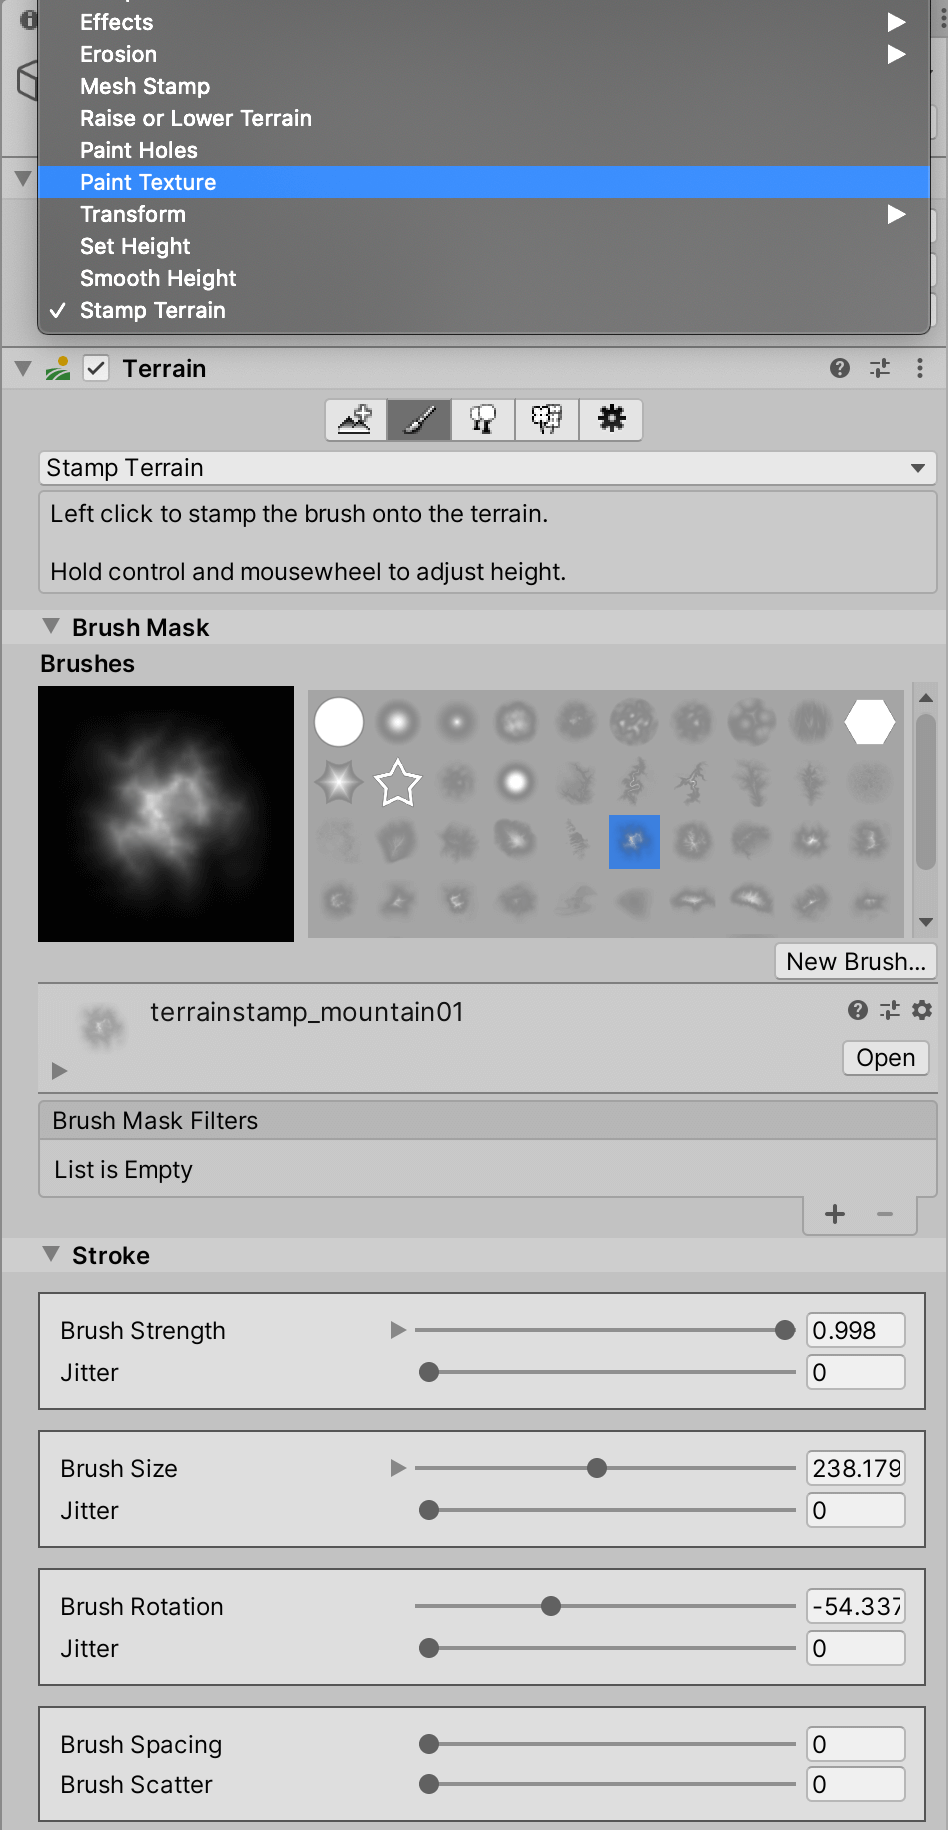
When creating such complex topography, “Stamp Terrain” is useful.
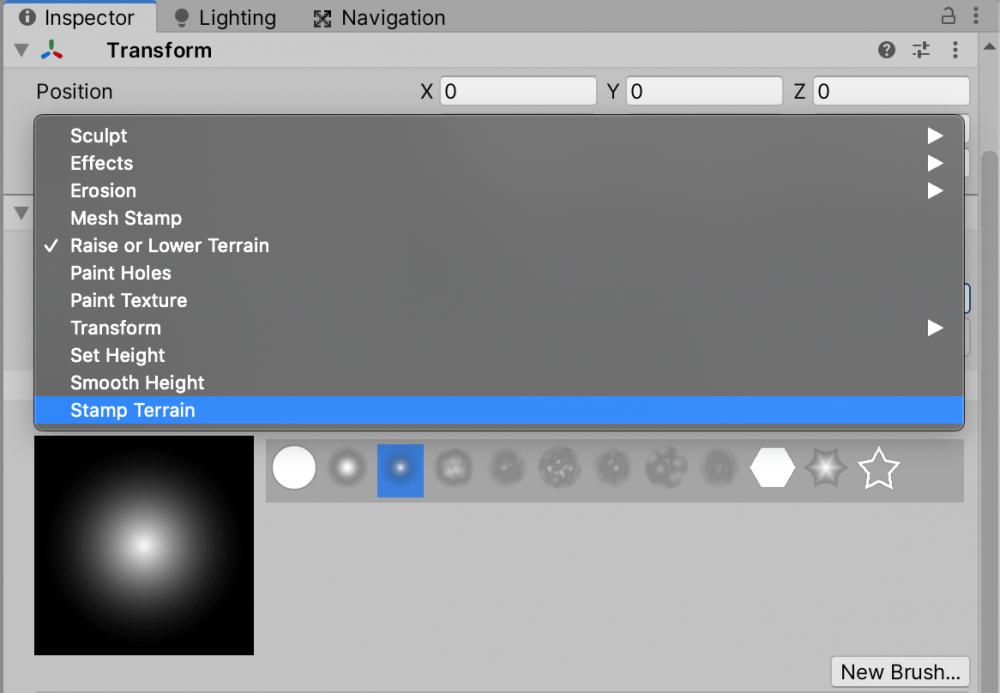
Select Stamp Terrain
You can easily create a complex topography by selecting Stamp Terrain, choosing your favorite brush, and clicking Terrain.

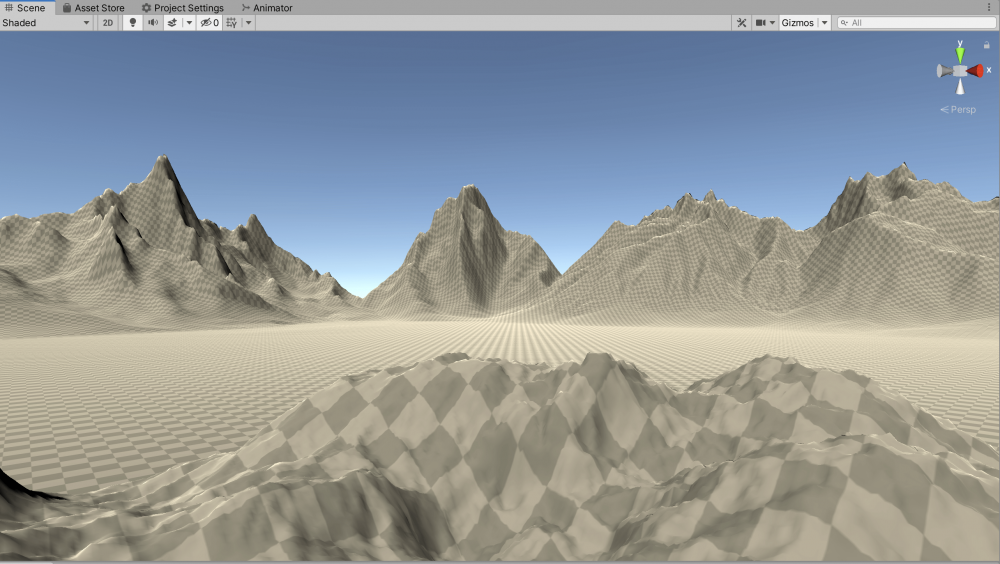
Creating a topography with Stamp Terrain
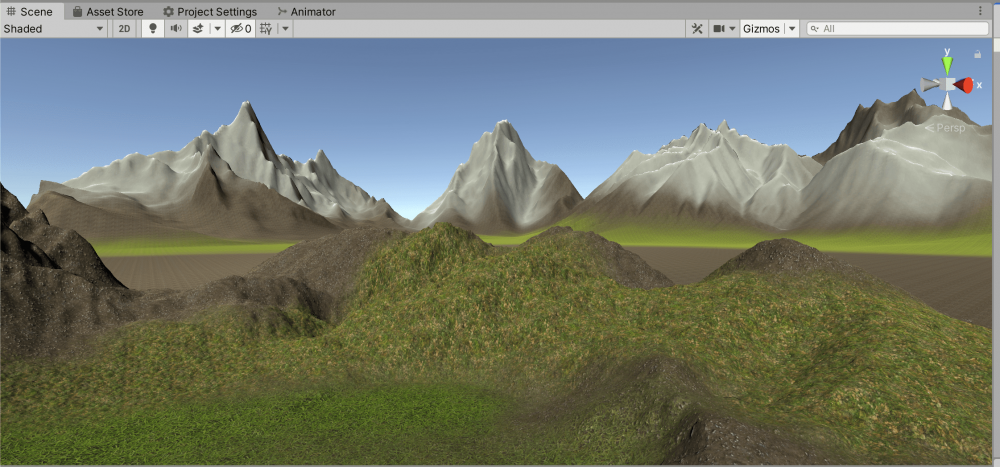
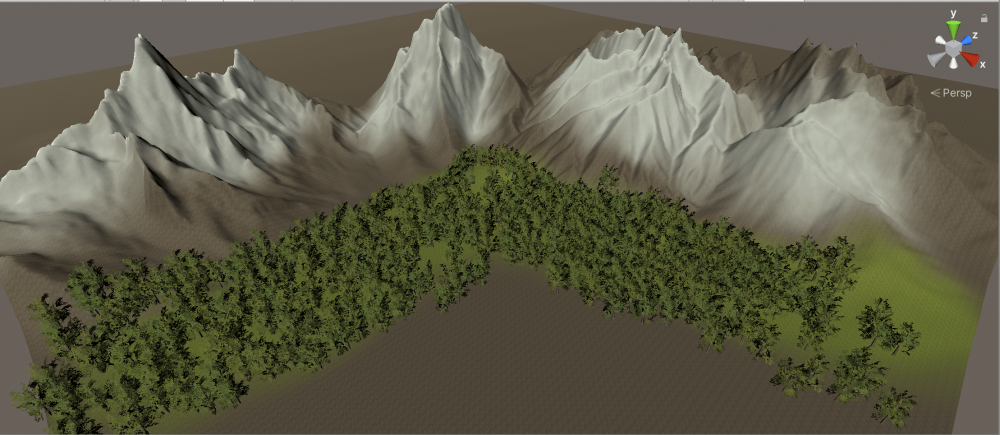
In this example, I created the following topography.
The three directions of the stage are surrounded by stamped mountains to make the border between worlds less noticeable, and another Terrain is used to create a distant view.

Terrain created in this project_1

Terrain I made this time_2
Terrain created this time_3
Setting up the textures
Let’s set up a texture for the terrain we have created, since the same color will not look good.
Setting a texture for the terrain
Select Paint Texture.
The Terrain Tool manages the terrain by creating layers in the terrain and setting a texture for each layer.
To do this, let’s create a Terrain Layer.
Let’s change each texture of the Ground Texture asset we imported to a Terrain Layer.
Open the folder containing the textures and create a Terrain Layer from Create.
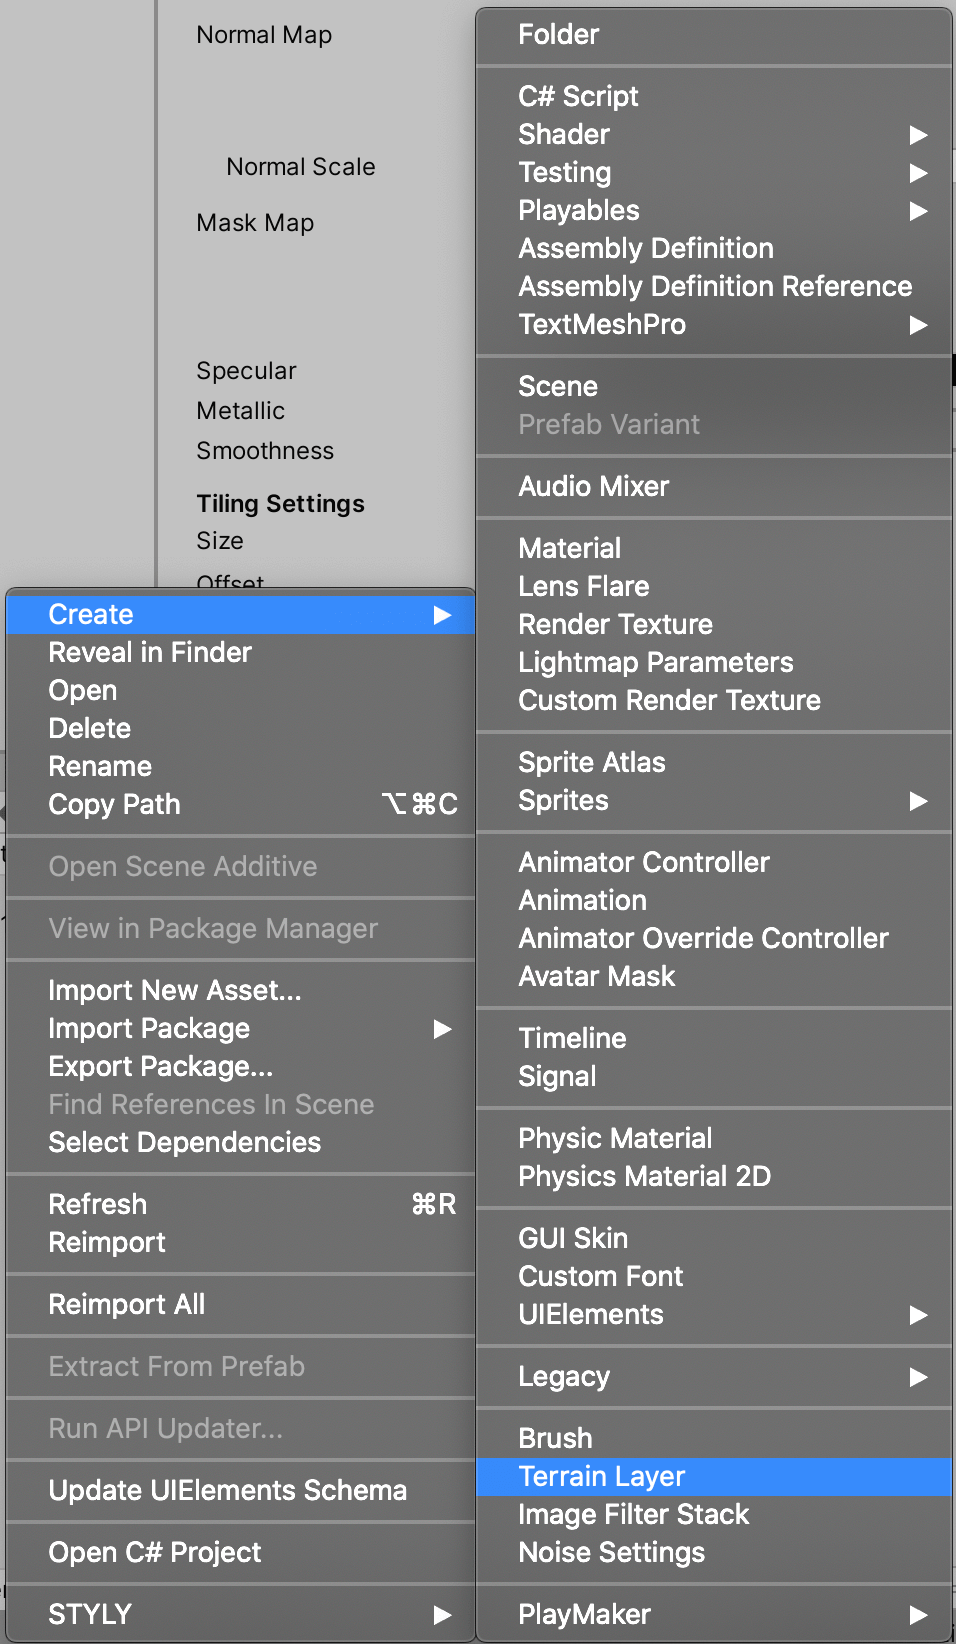
Create > Terrain Layer
Attach a diffuse texture to “Diffuse” and a normal texture to “Normal Map”.

Applying a texture to a layer
That’s all for creating a Terrain Layer.
Return to Terrain and select Add Layer from Paint Texture > Layer Palette to add the layer you just created.

Adding a Terrain Layer
Let’s add another layer.
You can color the terrain with a specified texture by clicking on the Scene while the layer is selected.

Try painting the terrain with Paint Texture.
まYou can also switch the applied texture by changing the order of the layers.
Changing layers also changes the texture.
Note that the default texture in Terrain is the one on the top layer.
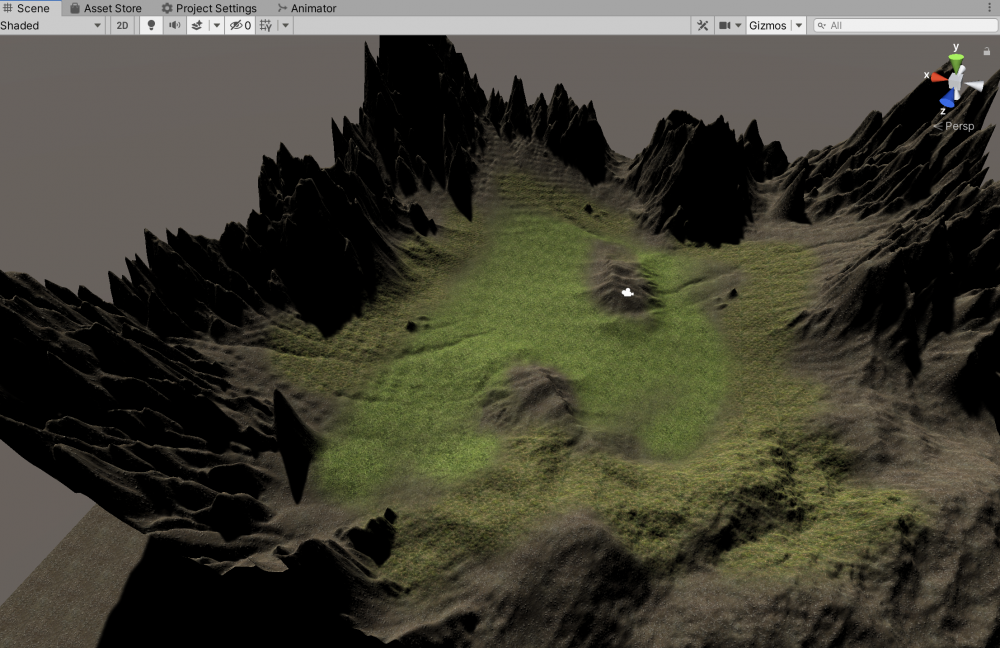
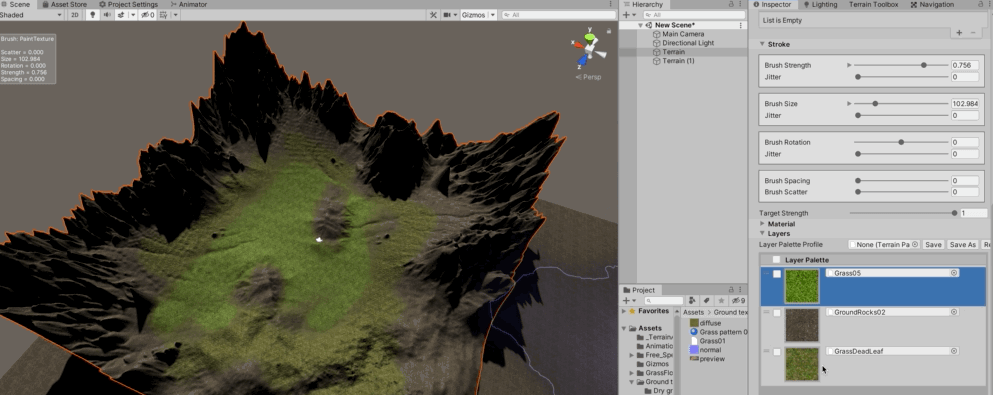
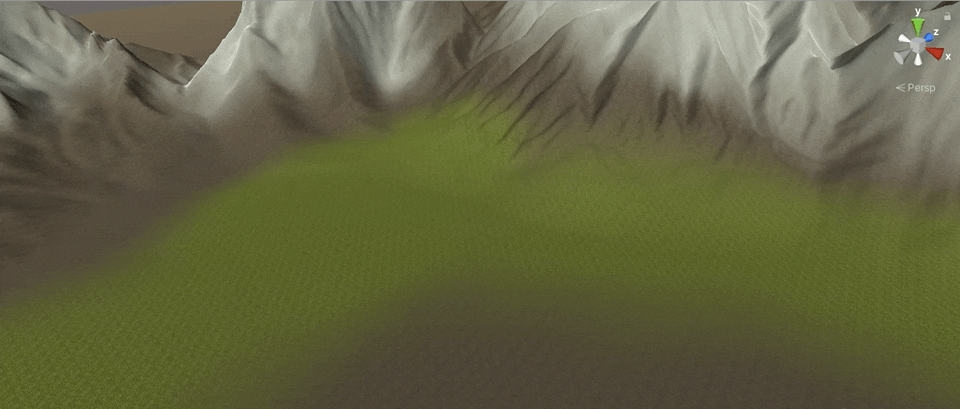
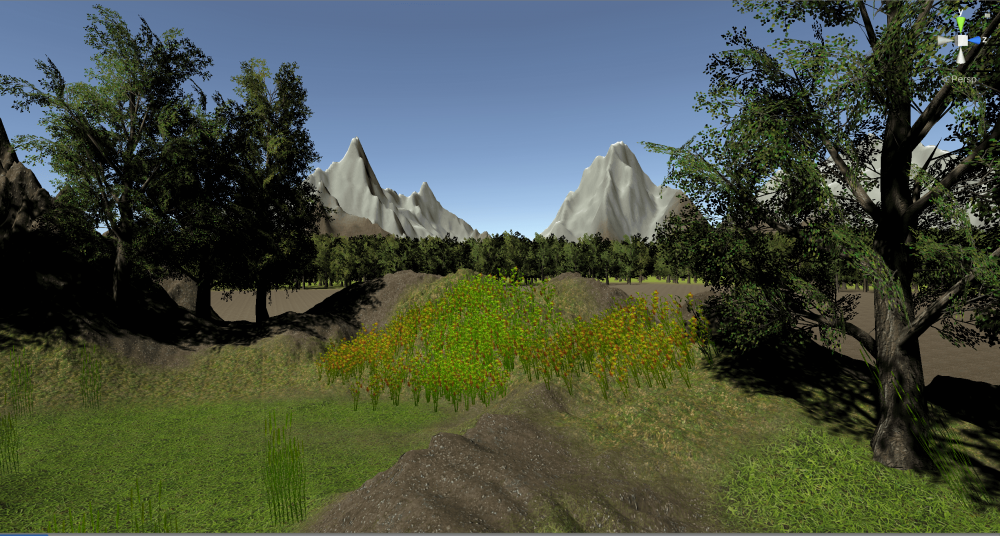
In this case, I painted the terrain as shown below.
The texture layers we used are as follows.
- Grass 05
- Ground & rocks 02
- Grass & dead leafs 02
- snow(Terrain Layer)

This texture painting_1

This Time Texture Painting_2
This Time’s Texture Painting_3
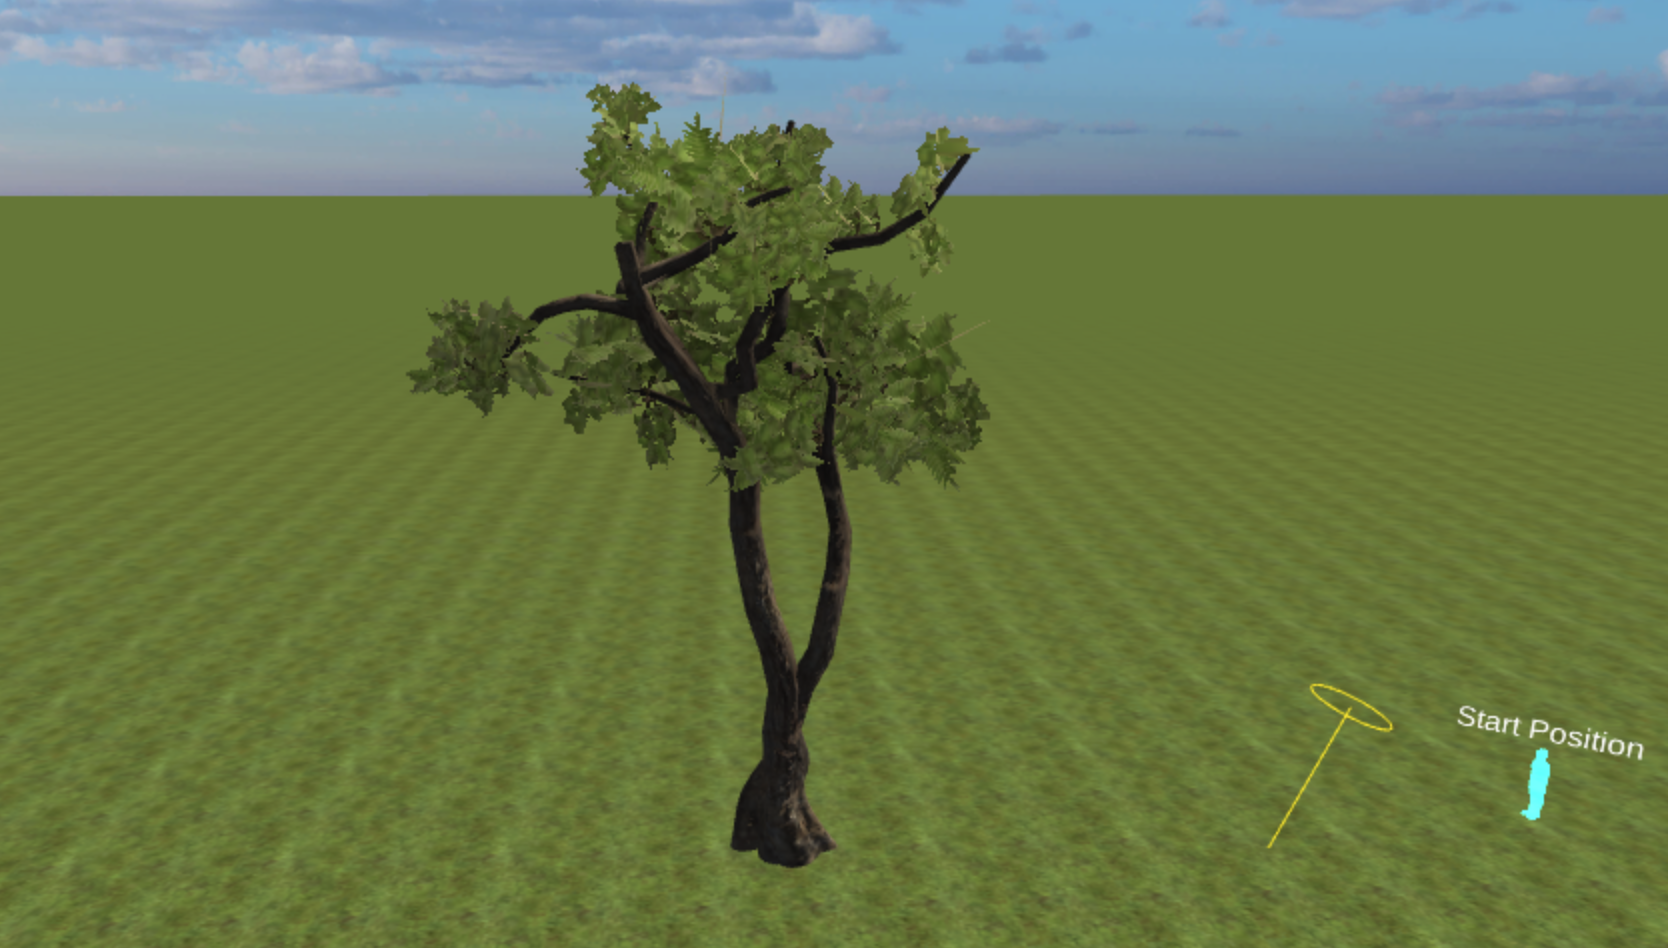
Placing the trees in the scene
The scene is now more colorful and complete, but it still looks a bit bleak.
So, let’s add a tree to the scene.
Select “Paint Tree”.
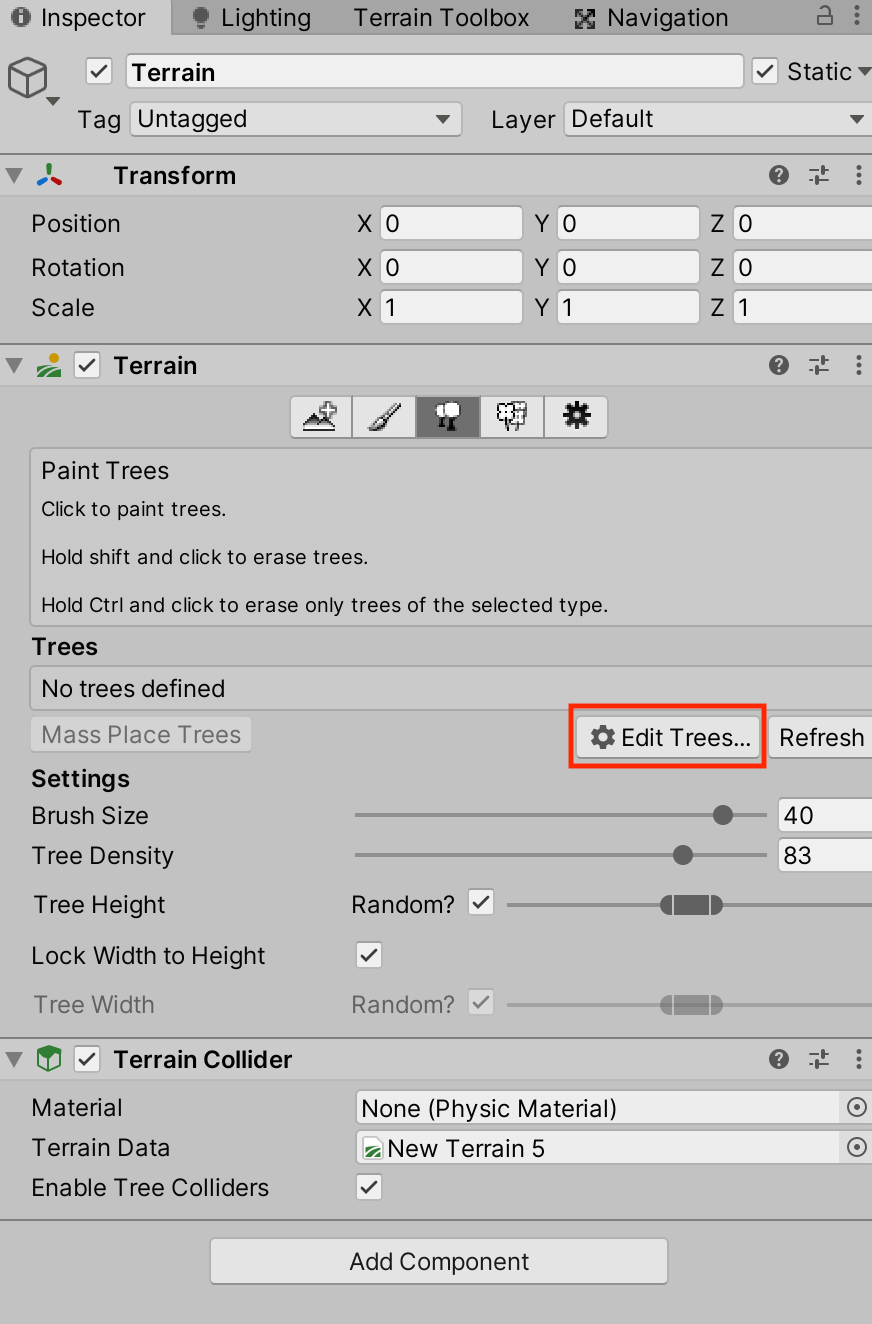
Paint Trees > Edit Trees
Open the Edit Tree > Add Tree window and set the imported tree assets.
You will now be able to add trees freely.
If you want to delete a tree, hold down the control key and click on it.
Placing a tree in Paint Trees
The details of each item in Settings are as follows
- Brush Size → Size of the generated area
- Tree Density → Density to be generated
- Tree Height → Height of the generated tree
- Lock Width to Height → Whether or not to lock the width of the tree to the height
- Tree Width → Width of the generated tree
Let’s place the trees in the scene as you like.
In this case, I placed them as follows.
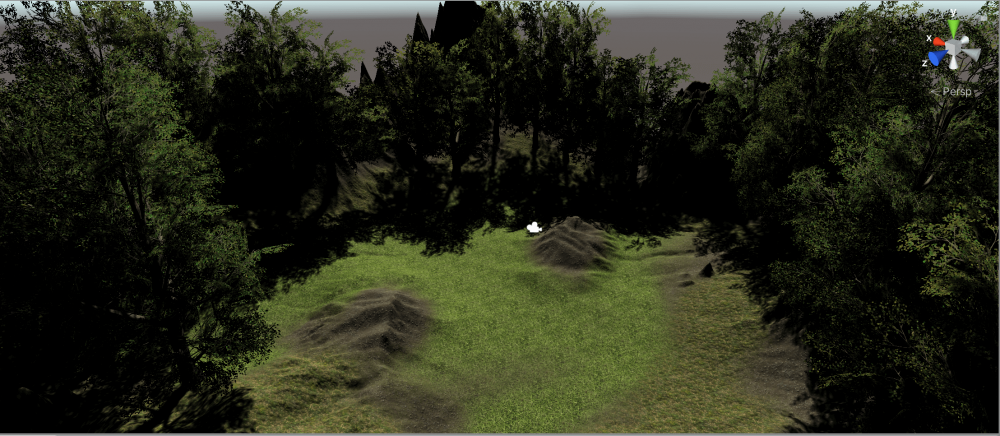
Tree placement_1
Tree placement_2
Tree placement_3
Placing flowers and plants in the scene
This is much better than the first.
Next, let’s add some flowers and plants to the scene.

Paint Details > Edit Details
Open a window from Edit Details > Add Grass Texture and set the texture of the imported grass.
Within this window, you can set the height and width of the grass.

Setting the height and width of the grass
Once the settings have been made, select the grass from the Details section and click on the scene to place it.
Let’s set the texture of the flower in the same way and add it to the scene.
Adding flowers and grass to the scene
Placing the wind in the scene
Now it’s time for the final touches.
To add movement to the scene, we will add swaying trees caused by wind.

Adding wind to the scene
Add a new “Wind Zone” to the scene.
This Wind Zone has the ability to simulate the force of the wind.

3D object > Wind Zone
By default, the wind is quite strong, so let’s change it to the following values.

Setting up the Wind Zone
A detailed explanation of Wind Zone can be found in the following article.
Please refer to it if you are interested.
This concludes the creation of the sample scene.
How was it? We were able to create a natural scene with relatively little effort.
You can add effects in STYLY Studio to make the scene more moody.
Please give it a try.

Try adding accents in Studio
By the way, the God Ray in the sample scene above can be made from the following article.
![[Unity] Using the particle system to express a God Ray](https://styly.cc/wp-content/uploads/2021/02/thumb-160x160.png)
Information referred to
This article was created based on the following materials.
Unity: How to build beautiful landscapes in Unity using Terrain Tools
Let’s make a game with Unity! Unity: How to build open world terrain
How to upload to STYLY
Let’s upload your 3D model to STYLY.
Create a STYLY account
How to create an account

How to upload to STYLY

How to upload from Unity to STYLY

In this article, I showed you how to use the Terrain Tool to create scenery.
With this tool, you can create beautiful scenes efficiently.
Creating a scene efficiently means that you can afford to pay more attention to the fine details.
I hope this article will be useful for your creation.