With the recent update, the Light Probe feature is now available on STYLY.
Light Probe feature reduces the load of real-time calculations and lightens the scene size by calculating lighting simulations in advance for VR and other applications.
I introduce “Magic Light Probes,” assets that take advantage of this feature to enrich lighting.
Here is the article from the release about Light Probe
Understanding of a scene using Light Probe
If you actually use Light Probe, you can express the following lighting.
The following video shows a scene with the Light Probe settings described in this article.
The right side is before setting and the left side is after setting.
In the scene on the left, the Light Probe is set using Magic Light Probe after the lights are set to appear beautifully with Light Probe.
You can see that the lighting has become more natural.
The following image is a scene without Light Probe.
Objects do not blend well with the background in areas that are not directly illuminated by the directional light.
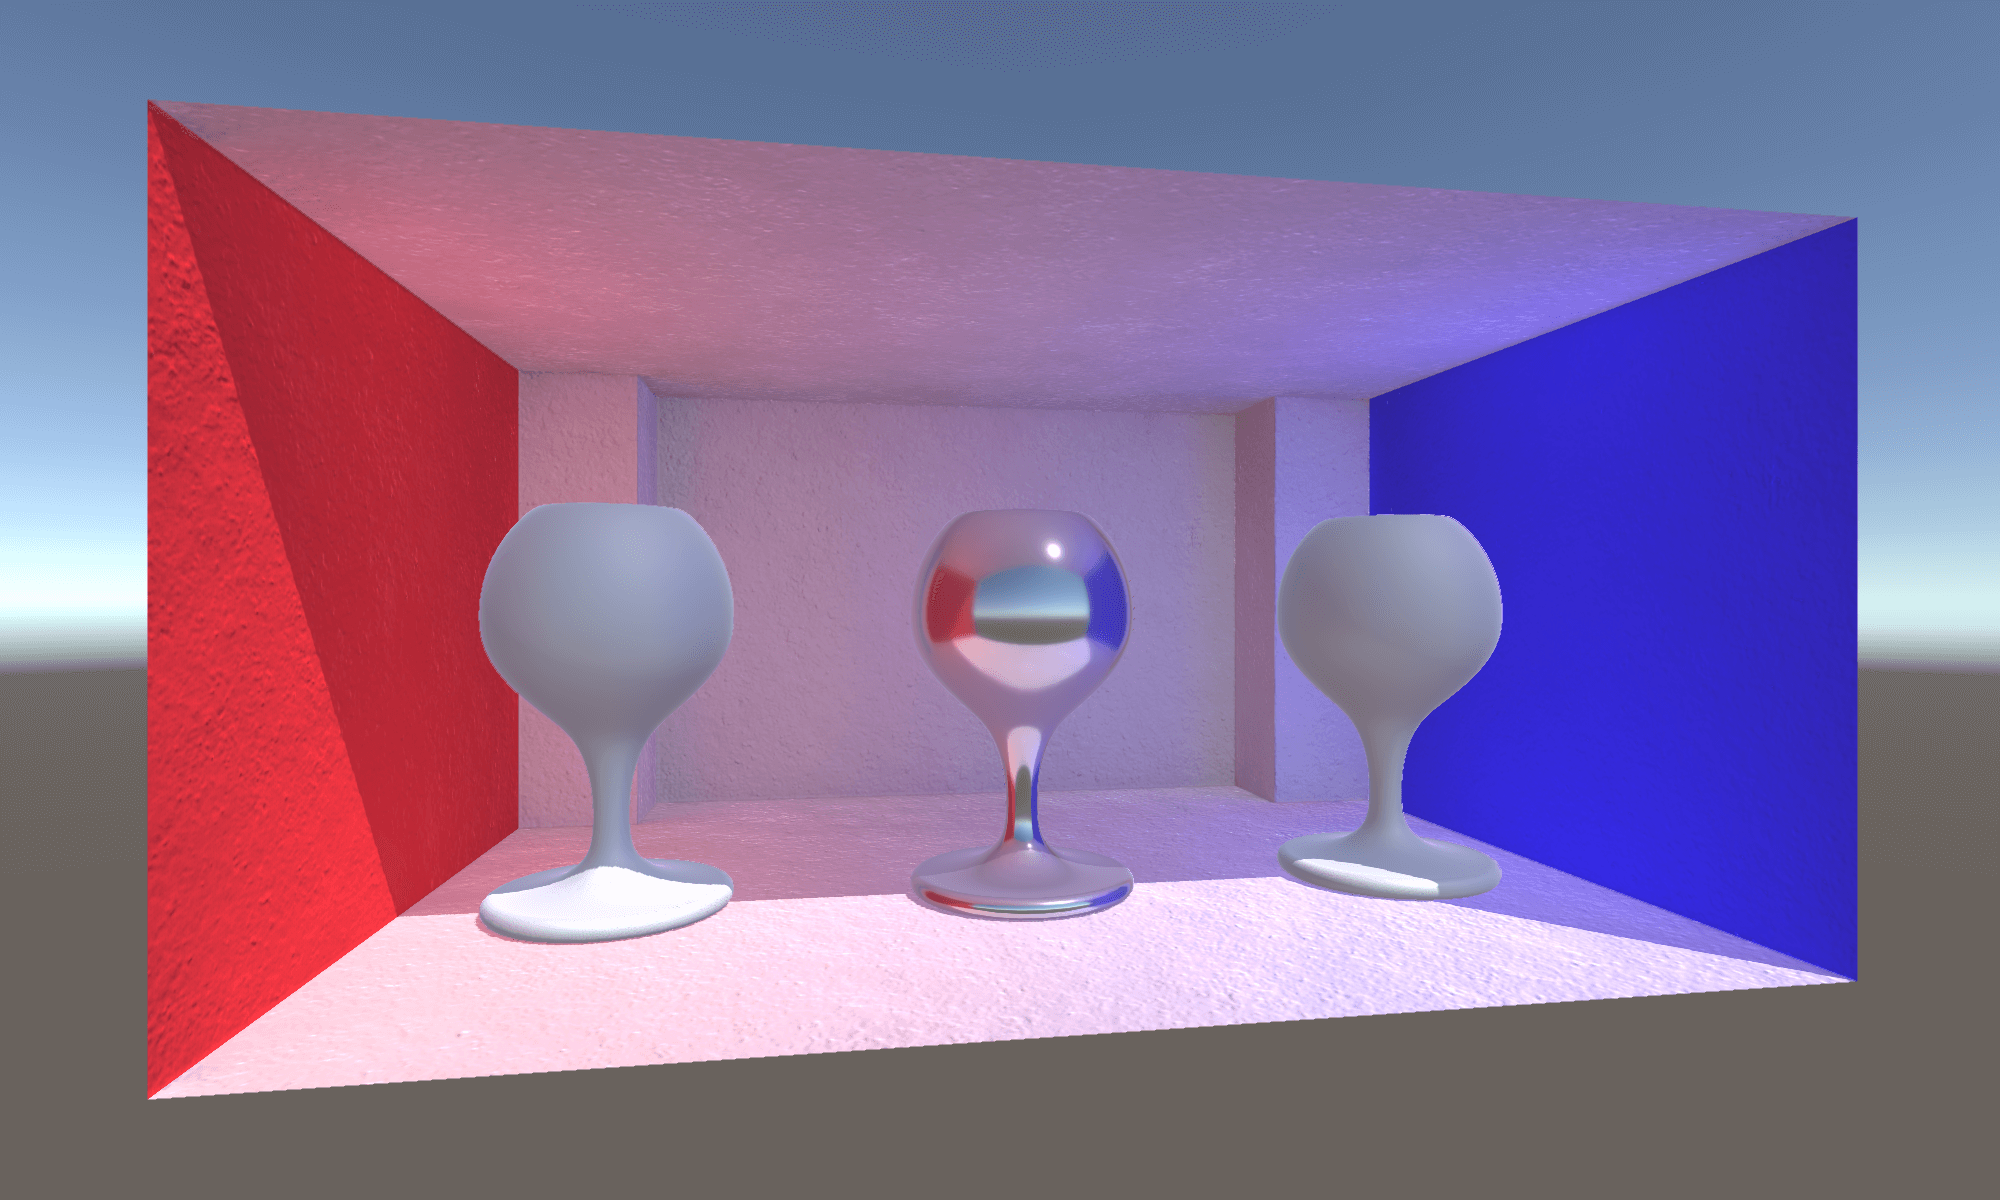
Scene without Light Probe
The following image is a scene with Light Probe.
Even in shaded areas, the objects and the background, such as the joint light, match each other naturally.
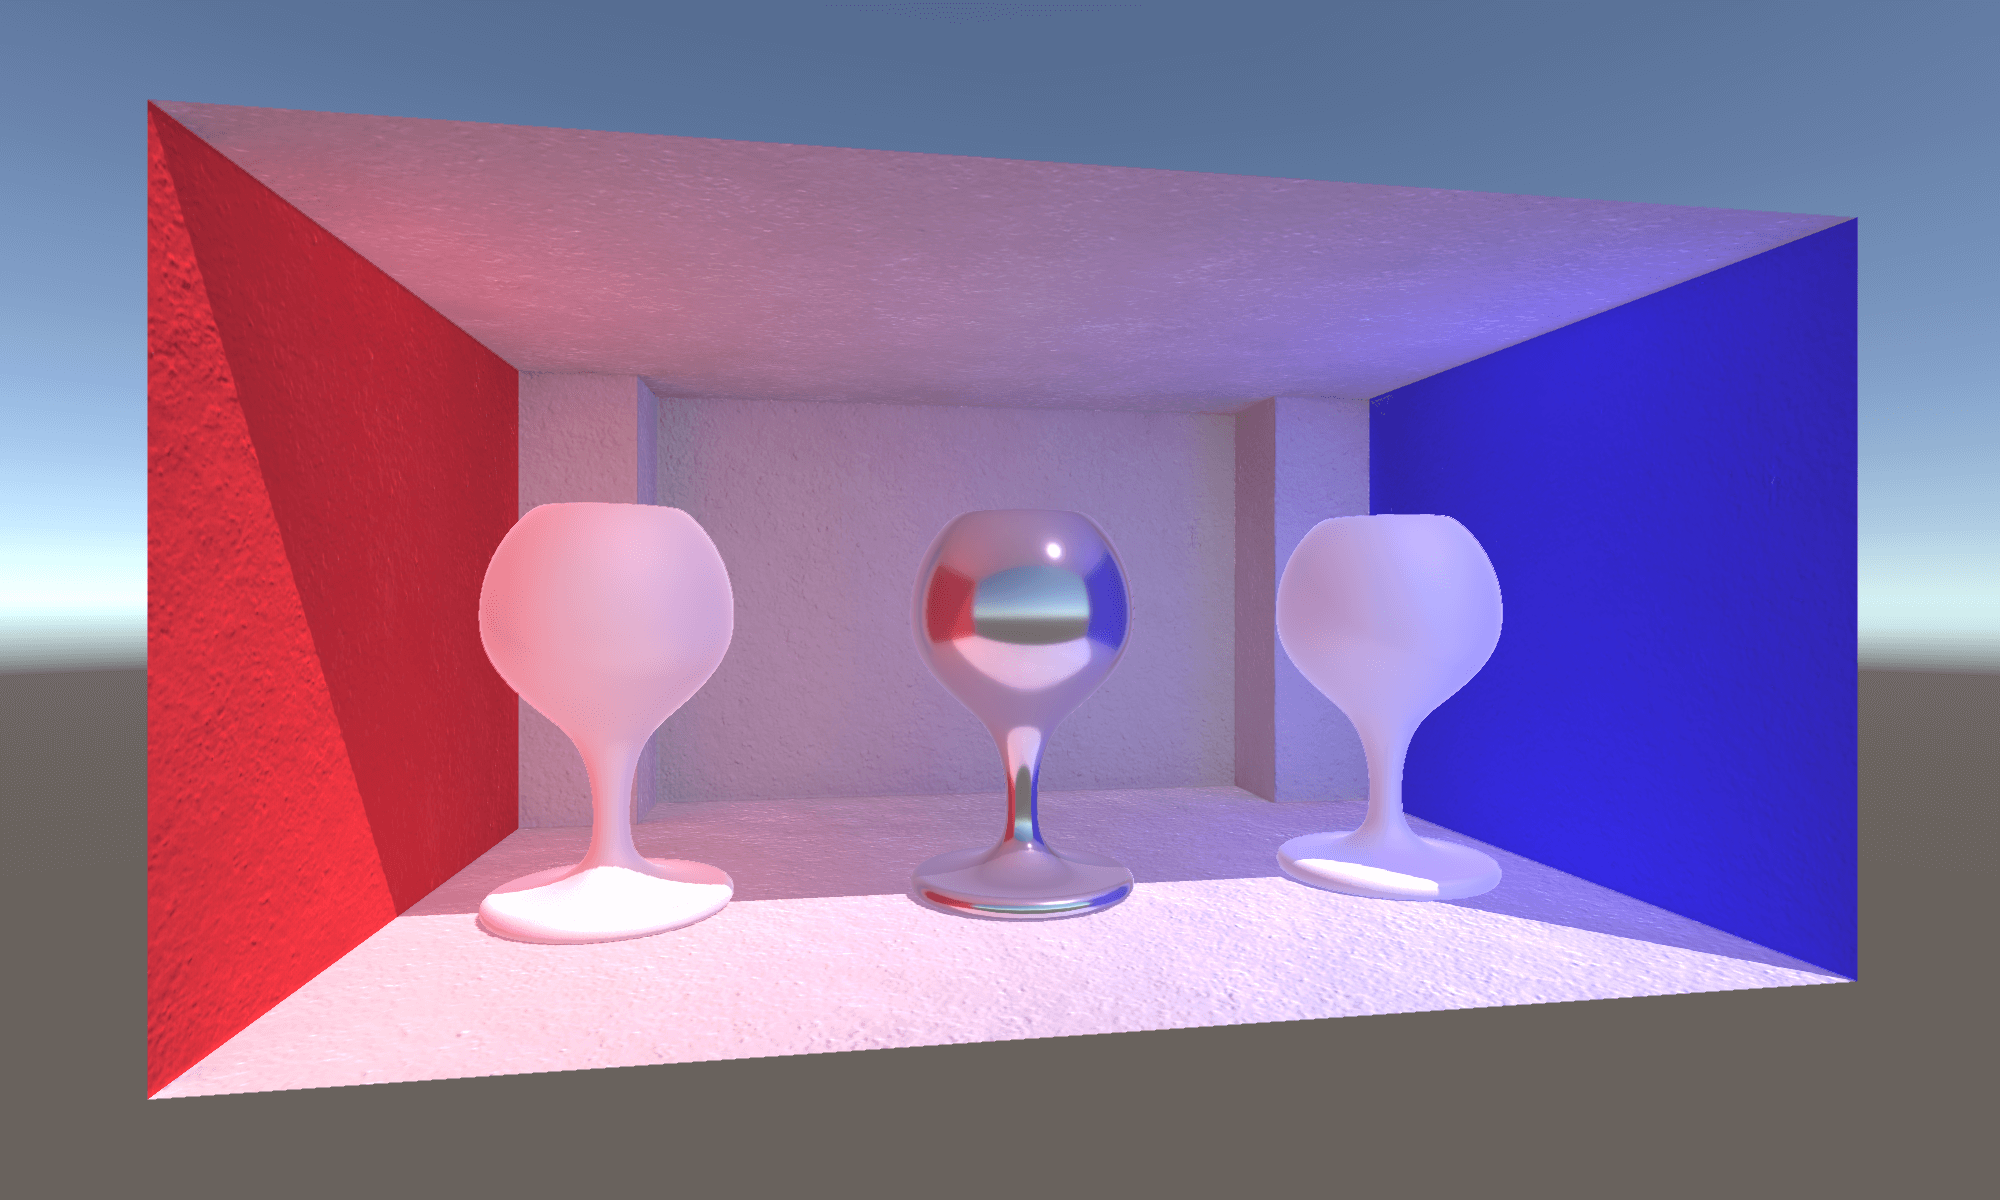
Scene with Light Probe
Specifically, the following characteristics are reflected.
- More accurate and natural looking lighting, including indirect light.
- Lightening of the scene due to the simulation of lights in advance.
- When using Unity, the level of shadow detail and rendering range can be adjusted.
This is especially useful in the following two situations.
- High quality lighting (including indirect reflected light) for moving objects in the scene.
- Provide static scene lighting information when using Unity’s LOD system for landscapes.
The following article explains the LOD system and how to install it
Let’s use Magic Light Probes!
“Magic Light Probes” is an asset that automatically configures Light Probe settings.
Light Probe is a useful feature, but setting up a Light Probe can be time-consuming.
This is because you need to set up the locations where lighting simulations are stored by yourself.
Setting up simulations for complex scenes one by one, or setting up the intensity and precision of lighting can be time-consuming.Magic Light Probes is an asset that automatically performs these simulations for you.
The following video clearly shows the difference in appearance when the asset is used.
![[Introduction to Unity] How to lighten/optimize your scene with LOD (Level of Detail)](https://styly.cc/wp-content/uploads/2021/11/スクリーンショット-0003-11-30-19.59.55-160x160.png)
How to install Magic Light Probes
Magic Light Probes can be downloaded from the Unity Asset Store at the following link.
After opening the Unity scene you wish to set up, go to the Unity Asset Store and select Add to My Assets to download and import it.
When importing Magic Light Probes into Unity, the following error message may appear.
Assets/Magic Light Probes/Extensions/RaycastCommandMultihit.cs(157,13 : error CS0227: Unsafe code may only appear if compiling with /unsafe. Enable “Allow ‘unsafe’ code” in Player Settings to fix this error.
In this case, open the Project Settings of Unity, open the Other Settings of the Player, and check the “Allow `unsafe ` Code” checkbox in the blue text of the image below.

Check the Allow `unsafe ` Code in blue
How to set up Magic Light Probes
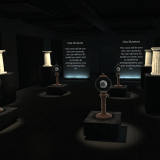
In this case, I will apply Light Probe to a scene with the following objects.
This room is downloaded from Sketchfab.
For an easy way to download assets from Sketchfab to Unity, please see the following article.
![[Unity Asset] How to download 3DCG stably from Sketchfab using Sketchfab for Unity.](https://styly.cc/wp-content/uploads/2021/08/cdb9484b-be9a-4f66-995f-ef2afb6566b9-160x160.png)
.png)
Scene with Objects
After downloading Magic Light Probes, Tools will be added to the top menu.
From there, select Magic Tools > Magic Light Probes > MLP Manager to open the MLP Manager window.
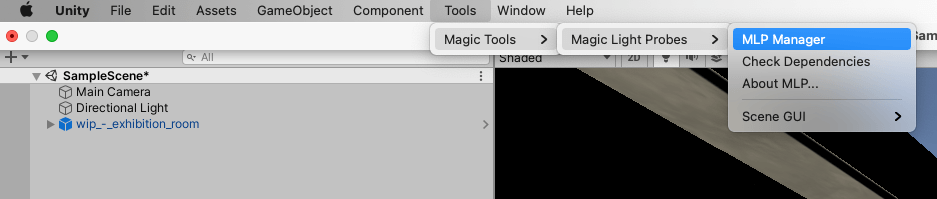
MLP Manager
Once this window is open, press the “Add Volume…” button in the image below.
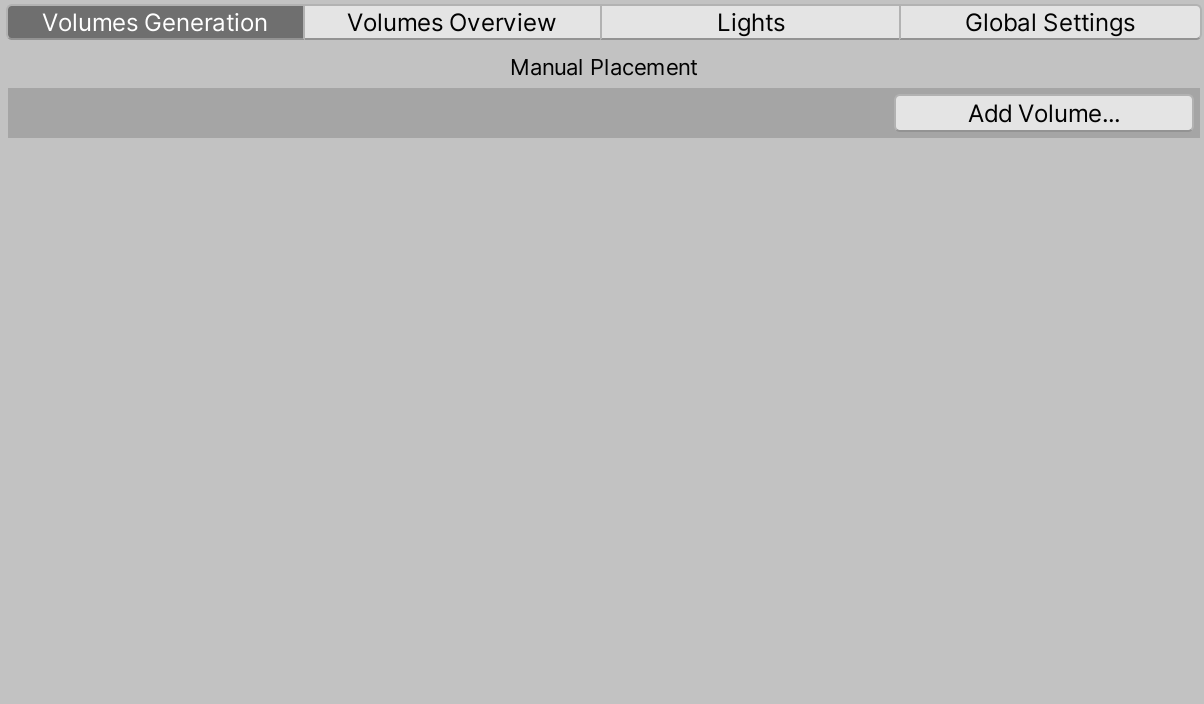
Add Volume…
An object called “Magic Tools” will then be added to the hierarchy, as shown in the image below.
In this case, the object will be added to the center of the scene view, so it is recommended to open the center of the place where you want to add the Light Probe in the scene view to make the next setting easier.
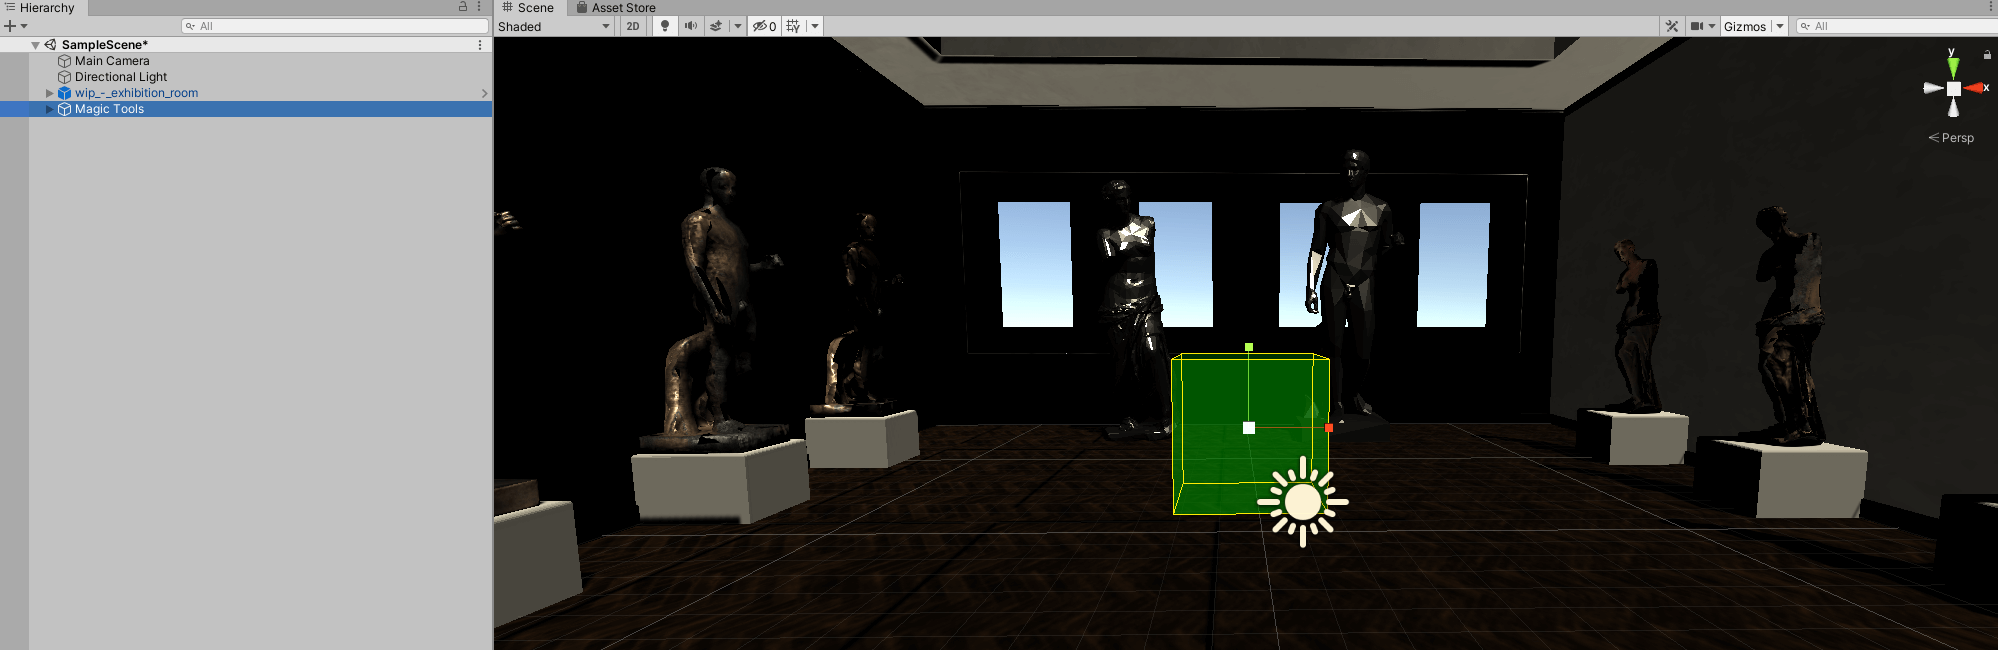
Magic Tools
The child object of the added Magic Tools is an object called “MLP Group 0 Volume,” which can be selected to set the area where the Light Probe will be placed.
MLP Group 0 Volume
LIght Probes can be scattered over the entire area or concentrated in areas that you want to illuminate in particular to balance the lighting.
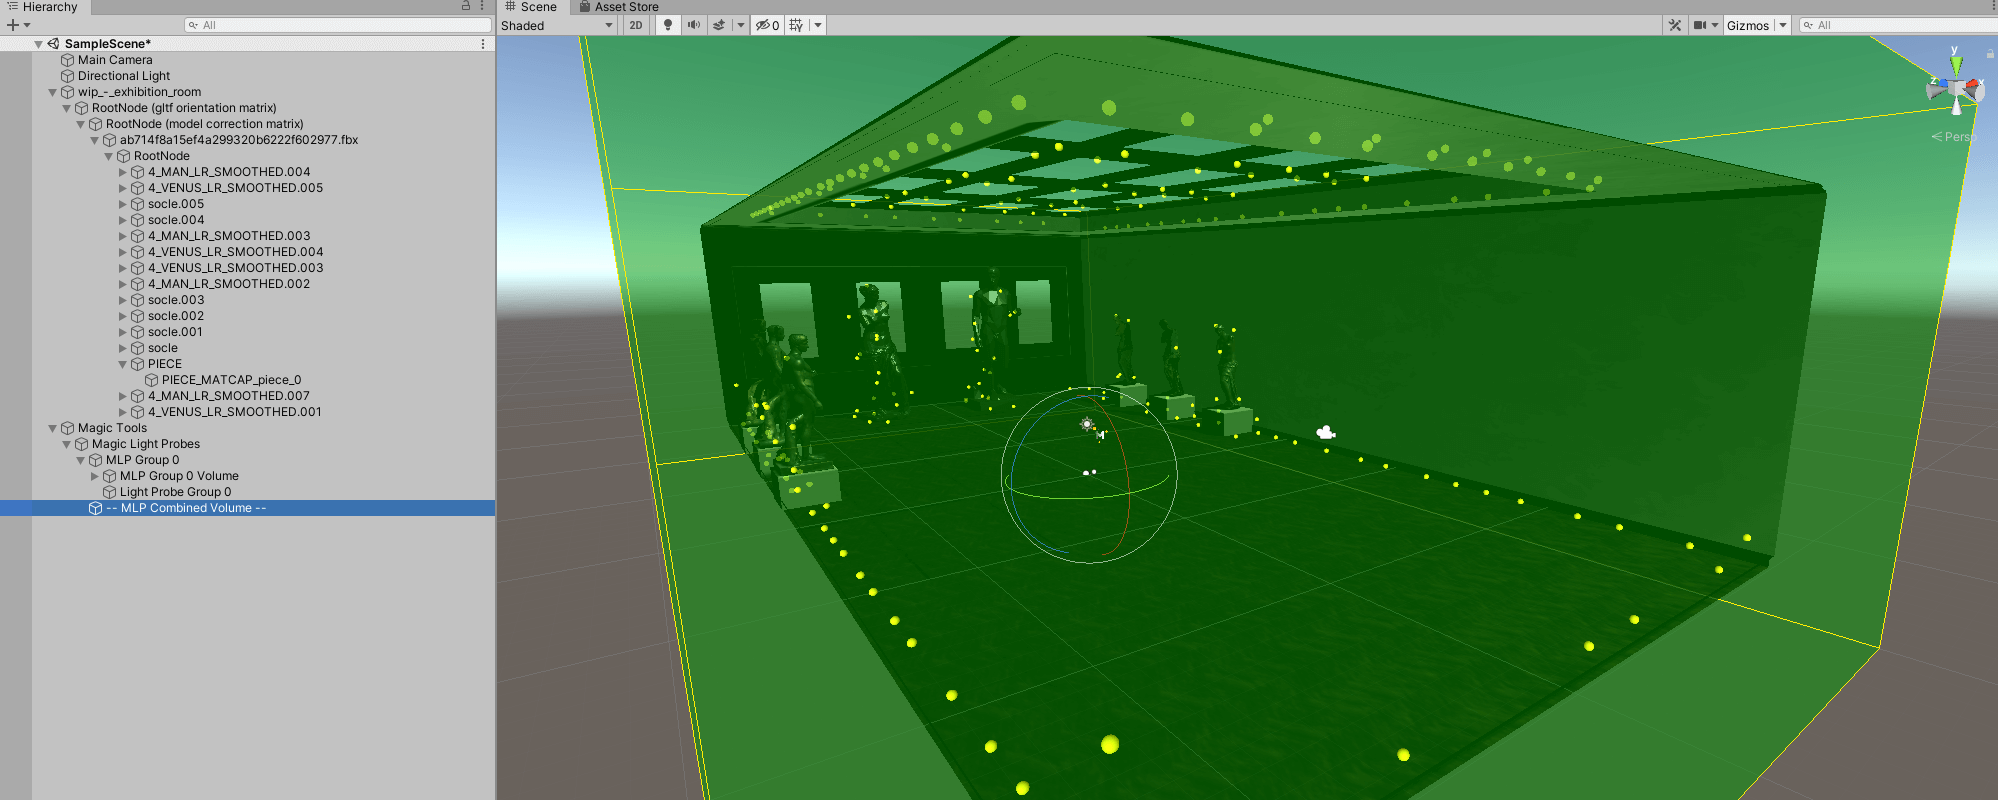
Let’s start by placing Light Probes throughout the room.
Set MLP Group 0 Volume to the size of the entire room.
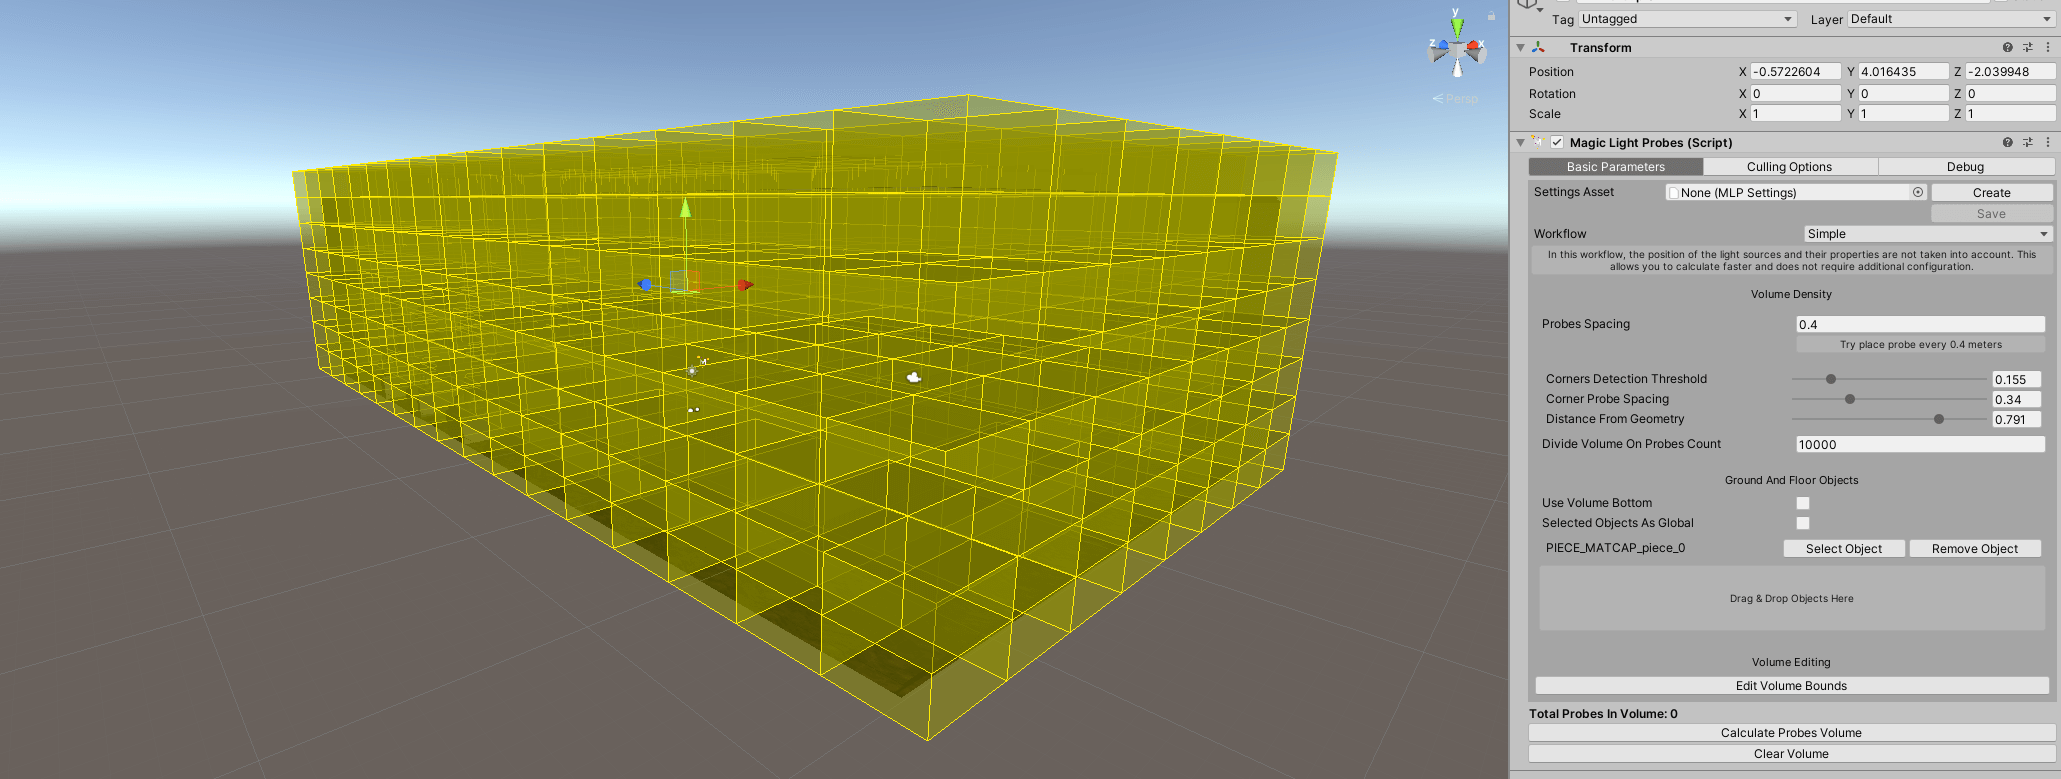
MLP Group 0 Volume is set to the size of the entire room
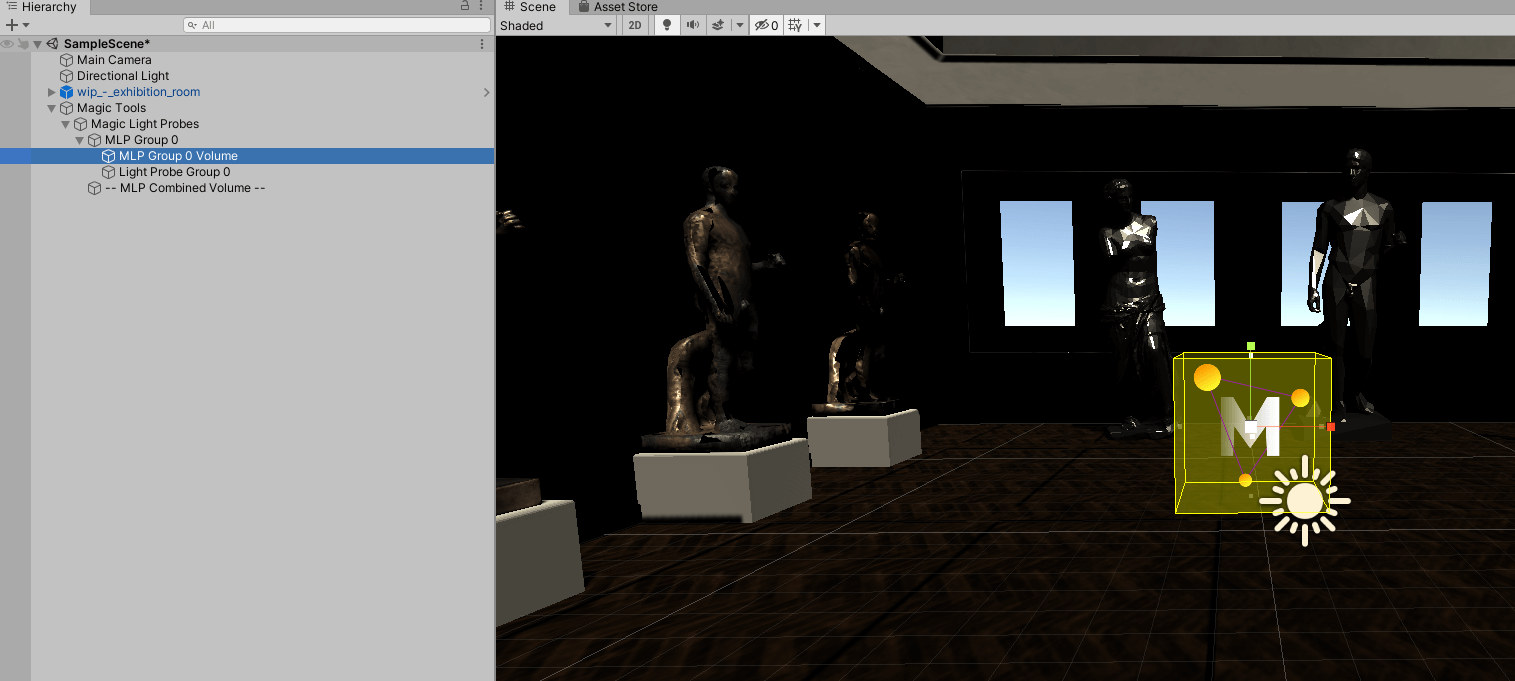
Next, select MLP Group 0 in the hierarchy and check the inspector.
In the inspector, the “Magic Light Probes (Script)” field allows you to set up the Light Probe to calculate the Light Probe.
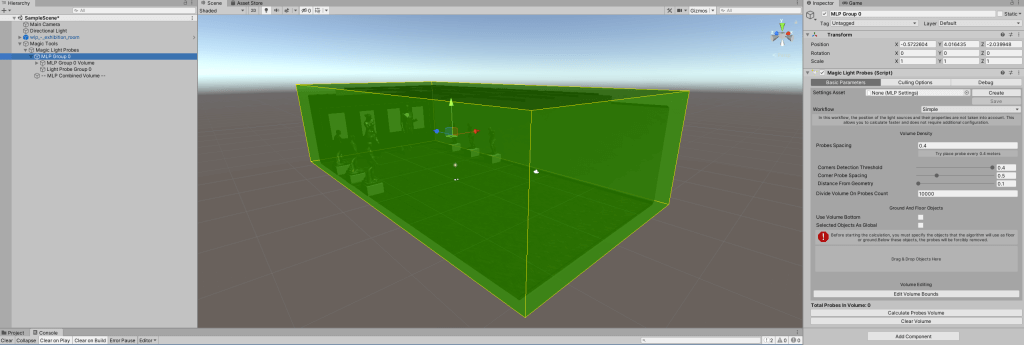
Select MLP Group 0
First, set the floor of the area where the Light Probe will be placed.
Drag and drop the objects that will become the floor in the “Drag & Drop Objects Here” field.
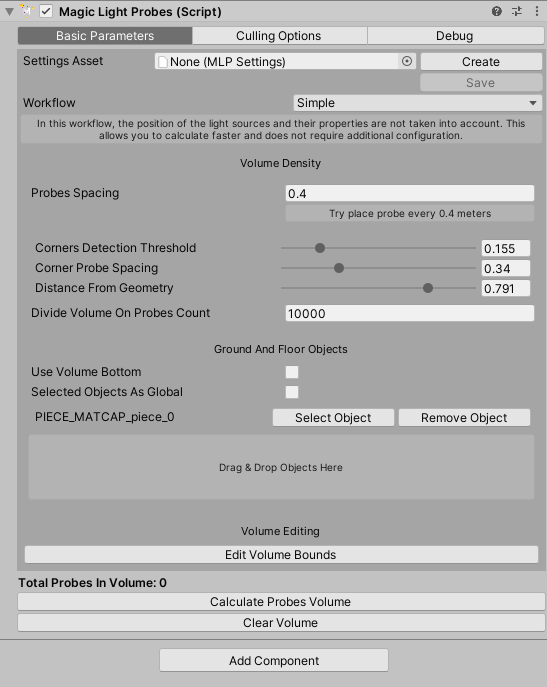
Drag & Drop Objects Here
If there is no object that corresponds to the floor, check the “Use Volume Bottom” checkbox.
If this is set, the bottom of MLP Group 0 Volume will be treated as the floor.
The object to be set as the floor must have Collider or Mesh Renderer assigned.
If neither is present, the following window will appear, so please add a Mesh Collider or Mesh Renderer from the inspector.
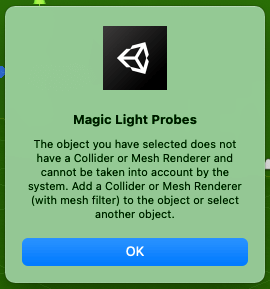
Object must have Collider or Mesh Renderer.
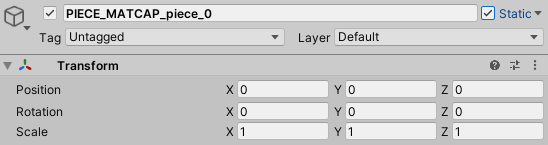
Also, the object for which the Light Probe is calculated in Magic Light Probes must be “Static”.
If you have not selected a Static object, you will get a window like the one below.
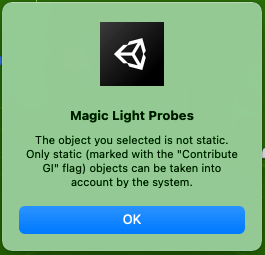
It must be set to Static.
Static indicates that the object is static, and setting it to Static allows pre-calculations to be performed separately from real-time processing.
To make an object “Static,” select the appropriate object in the hierarchy and check the Static checkbox in the upper right corner of the inspector as shown in the picture below.
Note that even if only the child object is set to Static, the Light Probe will not be reflected if the parent object is not Static.
Static
When Staticing an object with multiple child objects, it is convenient to Static the parent object at the most root position, so that the child objects can be selected to be Staticed together as shown in the window below.
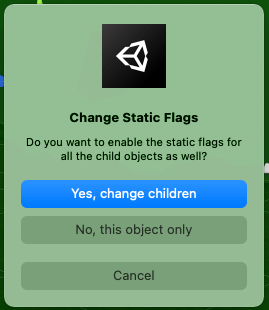
Change to Static all together
In this case, an error message “The main volume contains too many sub-volumes.” may appear in the “Magic Light Probes(Script)” field of the inspector.
This indicates that the map is too large or the amount or density of Light Probes to be calculated in the map is too high.
In this case, adjust the values in the inspector to set them to values that allow the calculation.
The main parameters used are listed in the following table.
Rather than understanding each parameter, it is easier to first try to place the Light Probe at a value that can handle the calculation in a short time, and then adjust the parameters to increase the accuracy.
Also, as described below, Magic Light Probes’ Assets includes a demo scene, so you can refer to the values of the settings in the demo scene.
| Parameter Name | Description |
| Probes Spacing | Sets the interval at which the Light Probe is placed. Normally, a density of 0.4 or higher is sufficient. |
| Corners Detection Threshold | This value determines the geometry intersections of the objects to be calculated. |
| Corner Probe Spacing | Sets the distance between Light Probes placed at geometry intersections. |
| Distance From Geometry | Sets how far away from the geometry the Light Probe will be. |
| Probes Count Limit | Sets the maximum number of Light Probes to be placed so that the calculation does not become too heavy. |
You can also check the details of the other parameters and Gifs of the effects of changing the above parameters here.
In the default state, only the model in the Default layer is taken into account. If you want to take other layers into account, change the Collision Detection Layers from the Culling Option in Magic Light Probes (Script).
However, when using STYLY, basically only Default objects can be used, so here I will set the objects in the Default layer.
After completing the settings up to this point, select “Calculate Proves Volume” in Magic Light Probes (Script) to start the calculation for placing the Light Probe.
You should save the scene before the calculation as shown below.
If you select “OK” when this window appears, you will be asked to confirm the save each time the calculation is performed, but if you select “Don’t save and don’t ask again,” you will have to save the scene yourself each time.
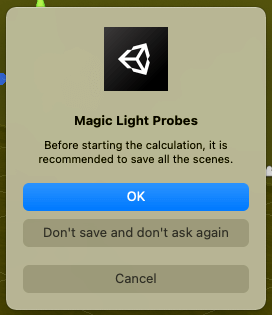
Confirmation of Saves
The calculation shows the progress on the inspector as follows.
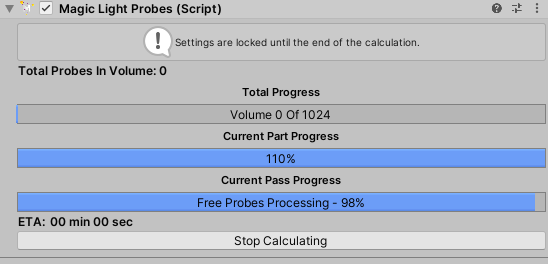
Progress display on the inspector
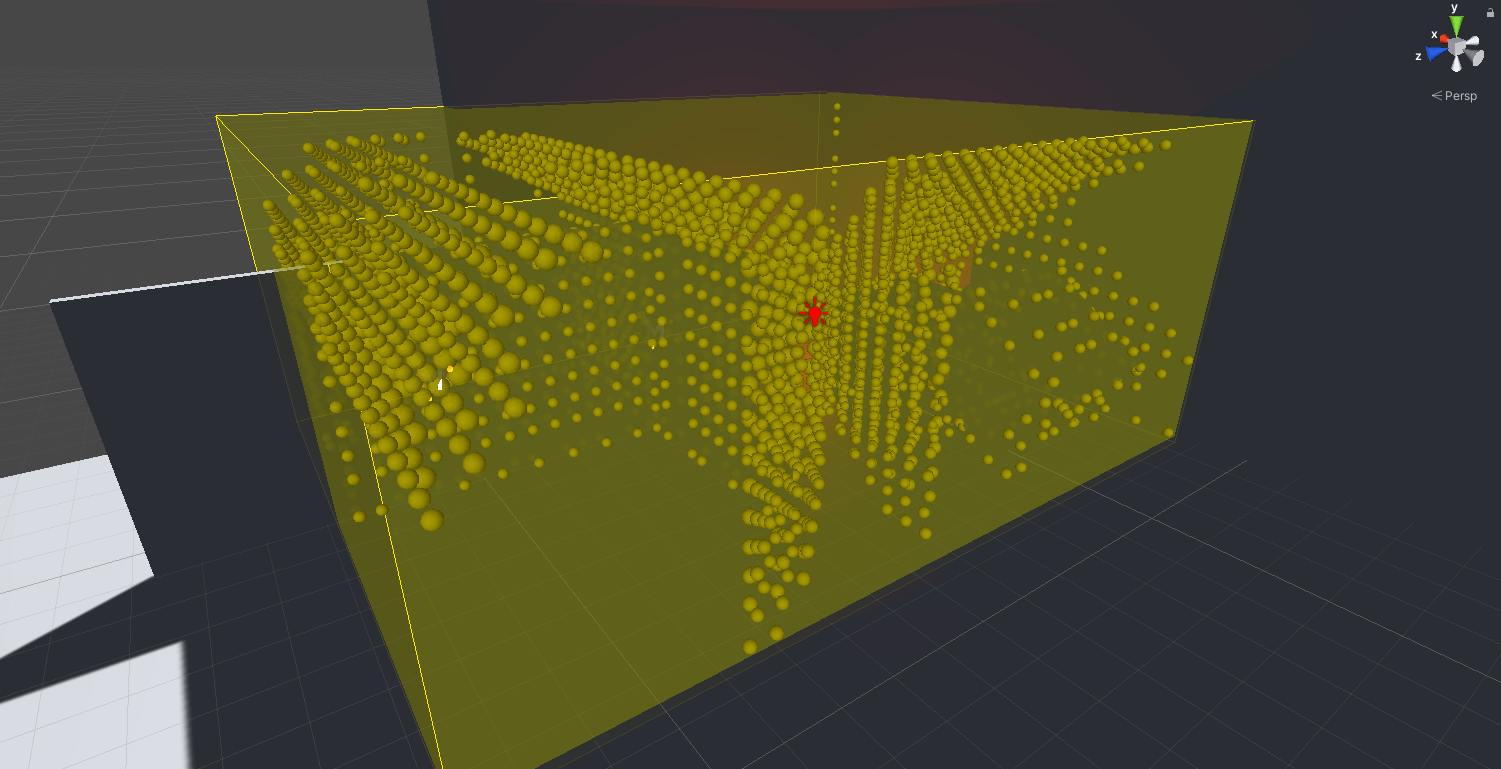
When the calculation is complete, the Light Probe has been placed in the scene as shown below.
The Light Probe has been placed in the scene.
Next, I will add Light Probes to the areas where I want the lighting to look particularly nice.
As before, select “Add Volume…” from the MLP Manager window and place MLP Groups where I want to concentrate the Light Probe.

Add Light Probe
Similarly, the above procedure can be used to concentrate Light Probe on objects that you want to show nicely.
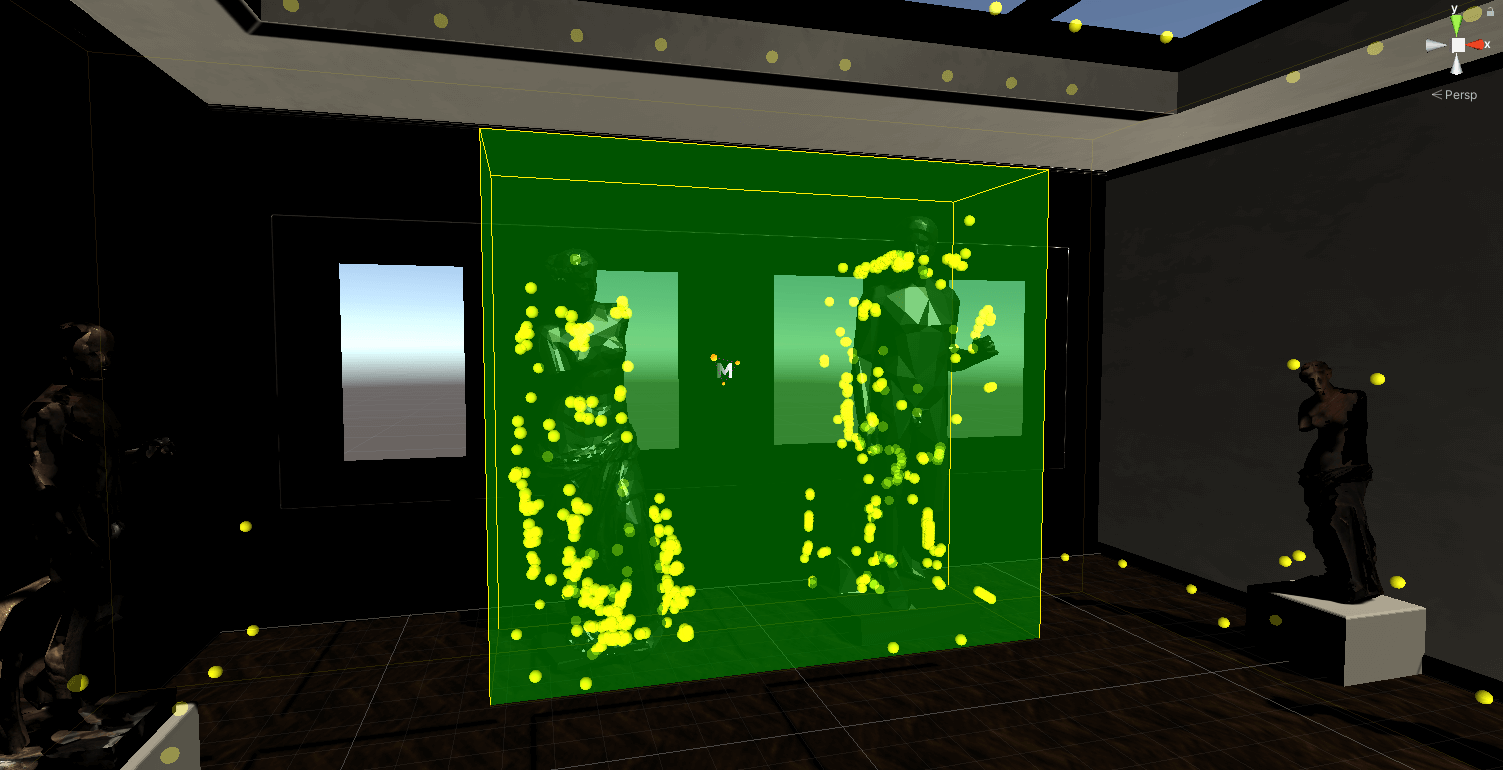
More concentrated Light Probe placement
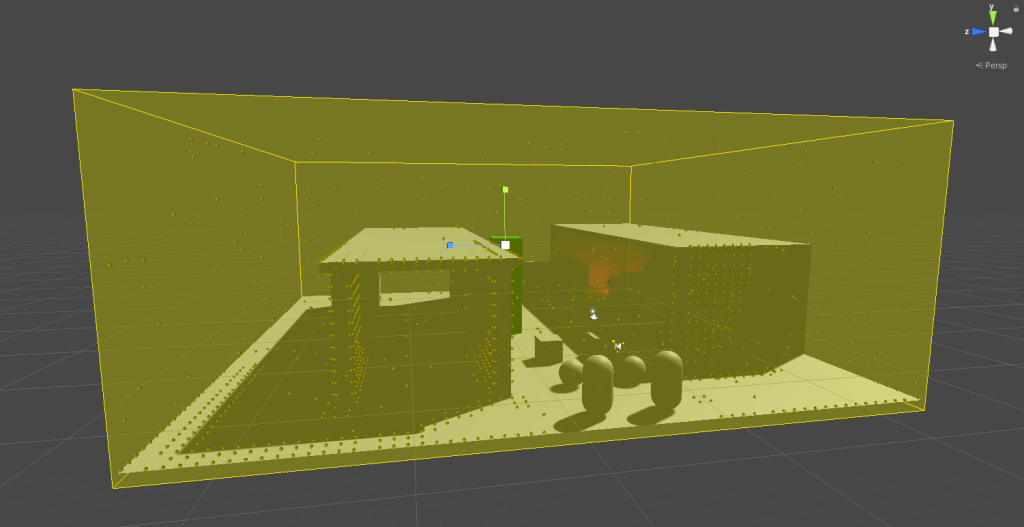
Reference to these settings can be found in the Magic Light Probes asset’s Example.
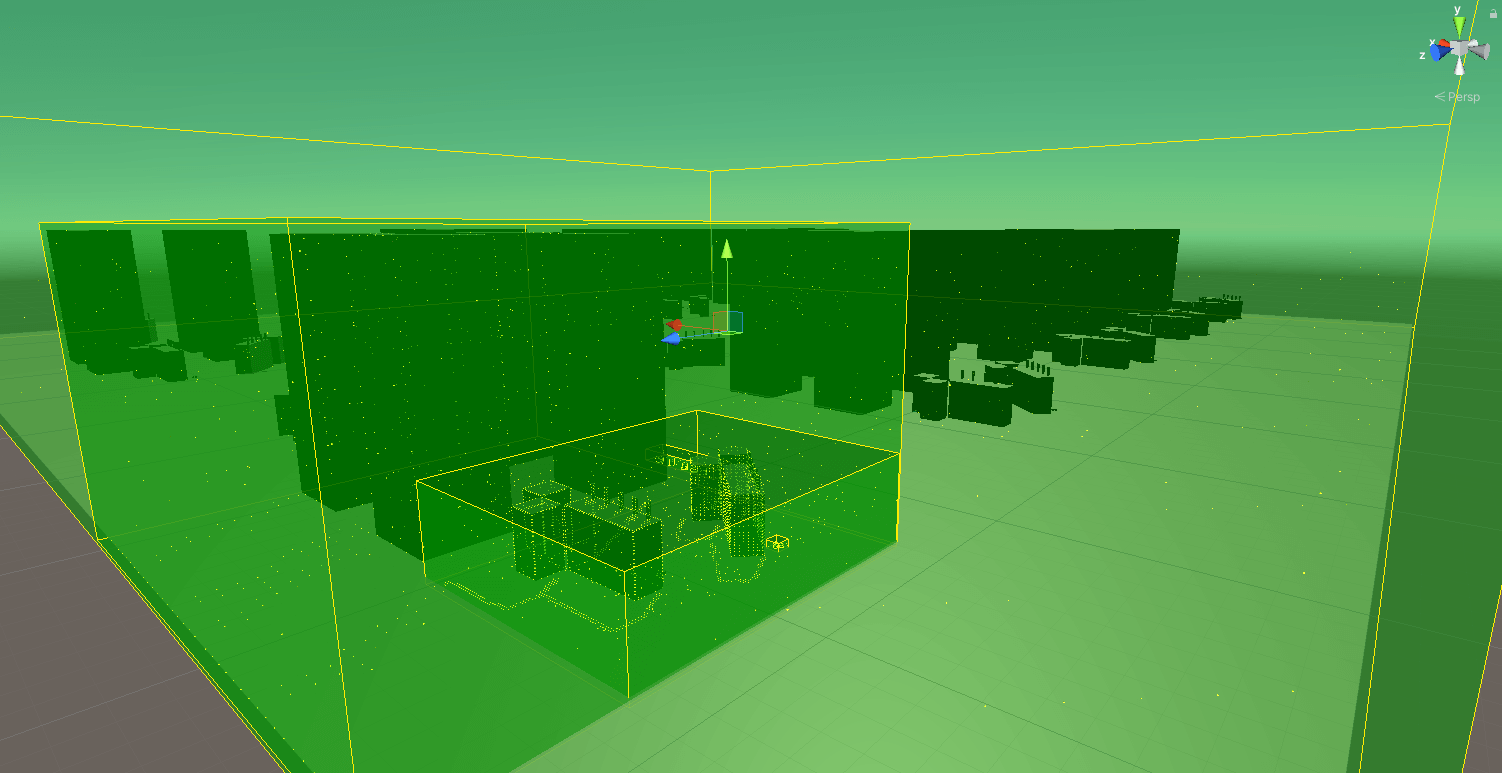
You can see what values are set in the inspector by looking at the following examples of placement: a demo scene, an indoor scene, using Terrain, and a large outdoor scene.
Demo scene
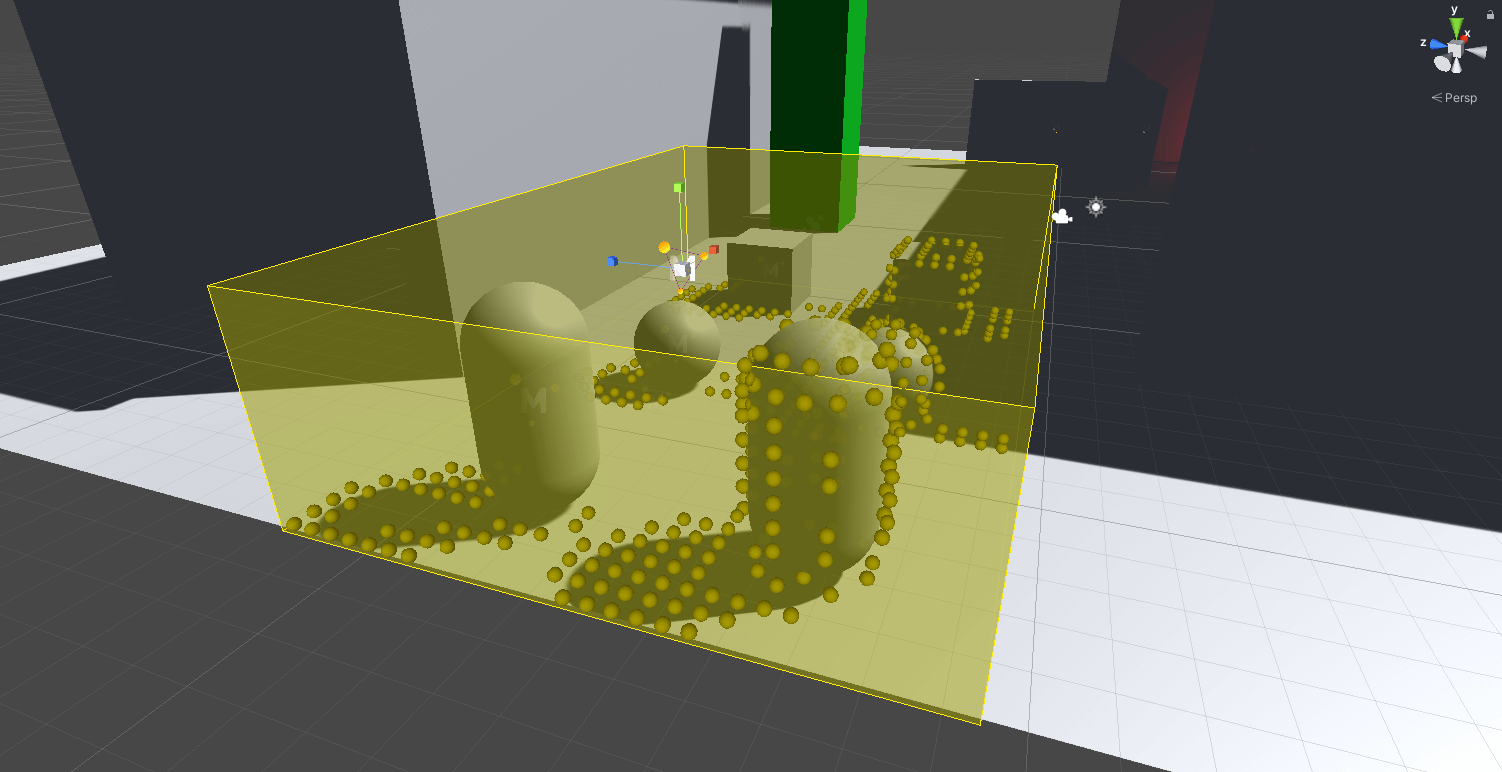
Near objects in demo scene
Around the lights in the demo scene
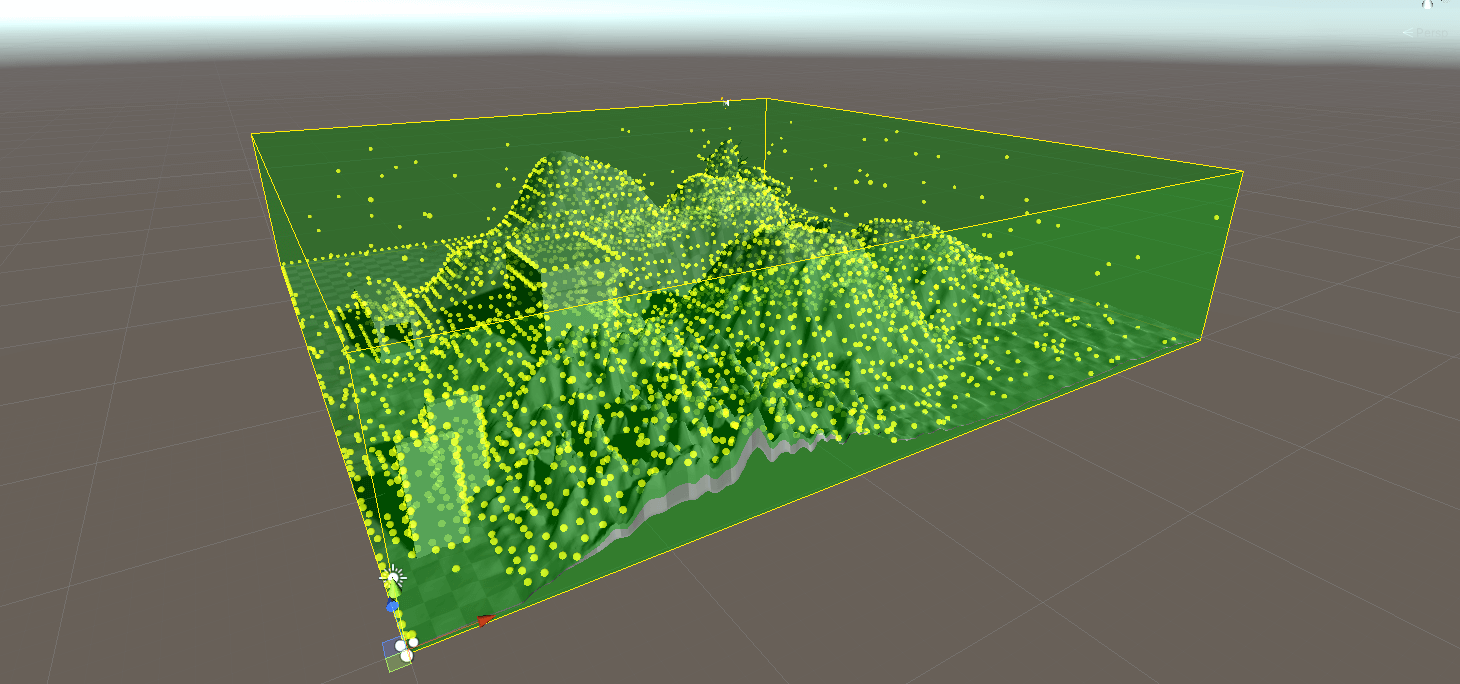
Outdoor demo scenes such as terrain

Demo scenes to be set up inside and outside a building
Extensive demo scene
Upload to STYLY!
To upload to STYLY, you must upload a prefab or scene that includes Magic Tools.
Please note that if you upload without Magic Tools included, the Light Probe will not be reflected on STYLY.
That’s all for the explanation of how to use Magic Light Probes.
Especially, lighting on dynamic objects will be light and clean, so please try using them in such scenes to create crisp and realistic scenes!
How to upload to STYLY
Upload your 3D model to STYLY.
Create a STYLY accountCreate a STYLY account
How to create a STYLY account

How to upload 3D models to STYLY

How to upload from Unity to STYLY

You can use STYLY FORUM to solve the problem. STYLY FORUM is a place where people can discuss a service or technical issue on STYLY, or provide bug reports on STYLY.
https://en.forum.styly.cc/support/discussions