In this article, we’ll show you how to match the animation to the movement of a NavMeshAgent.
Specifically, we will combine PlayMaker and Animator to play an animation of a humanoid 3D model following (running) the Agent, and when it gets close to a certain distance, it will become stationary.

Movement of the 3D model we will create
By playing back the animation, we will be able to express the model in a lively way.
It will help to increase the expressiveness of the scene.
Sample
You can experience a sample space from the STYLY GALLERY.
Check it out and get an idea of what it looks like.
Advance preparation
Install PlayMaker, a plug-in for Unity, in advance.
![[Unity Tutorial] Creating a Game Using Playmaker ① From Basic Introduction to Installing](https://styly.cc/wp-content/uploads/2019/06/1200px-160x160.jpg)
If you are using PlayMaker for the first time, please read the following article for a better understanding.
![[Unity] Starting Playmaker from Scratch](https://styly.cc/wp-content/uploads/2019/09/PlaymaerCoreConcept-160x160.png)
Also, in the scene we will be creating, we will be using Unity’s NavMesh to create a game of tag.
The following article explains the basics of NavMesh, so if you have never used it before, please refer to it.
![[Unity / NavMesh] Using AI to Create 3D Models that Move Automatically](https://styly.cc/wp-content/uploads/2020/12/スクリーンショット-2020-12-23-14.33.01-160x160.png)
![[Unity / NavMesh] Let’s play VR game of tag with AI](https://styly.cc/wp-content/uploads/2021/01/スクリーンショット-2021-02-01-17.47.29-160x160.png)
Preparing the 3D model
First, we need to prepare the model we will use.
In this case, we will be using this asset called “Muryotaisu”.
Once you’ve imported the asset into your Unity project, go to Muryotaisu > Prefabs and place it in your scene.
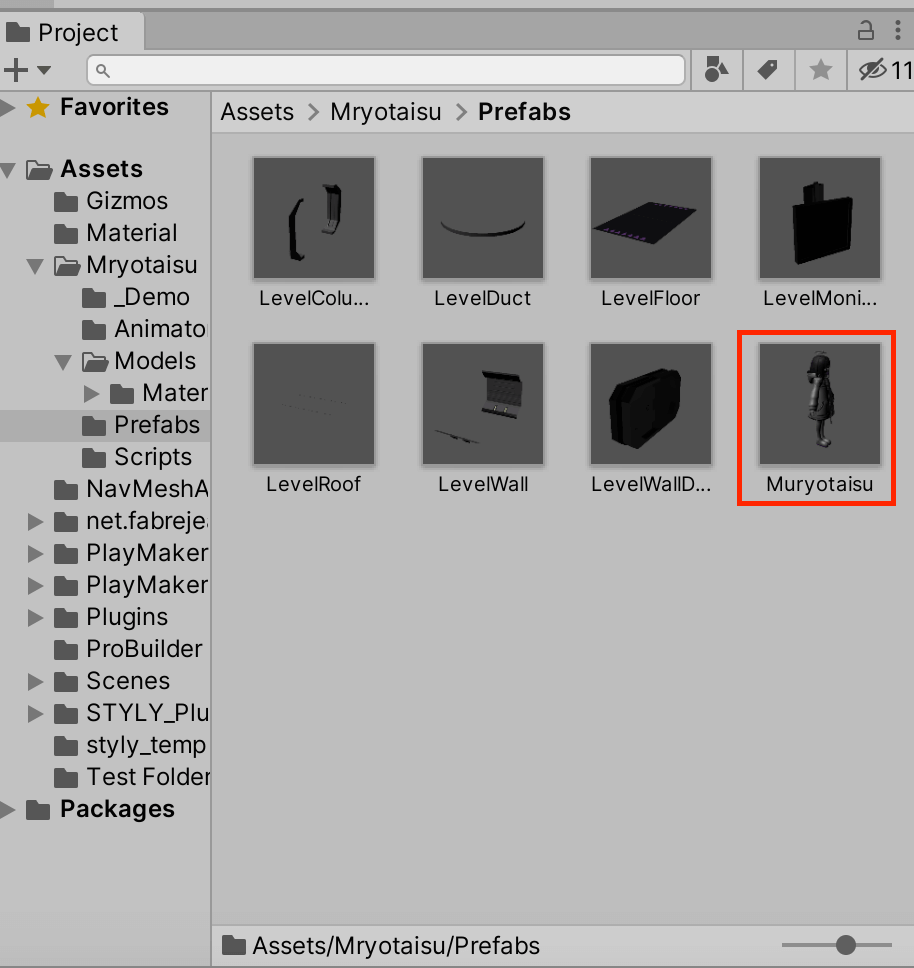
Where to store the Muryotaisu
Since C# scripting is not allowed in STYLY, we need to remove all the components except Transform and Animator.
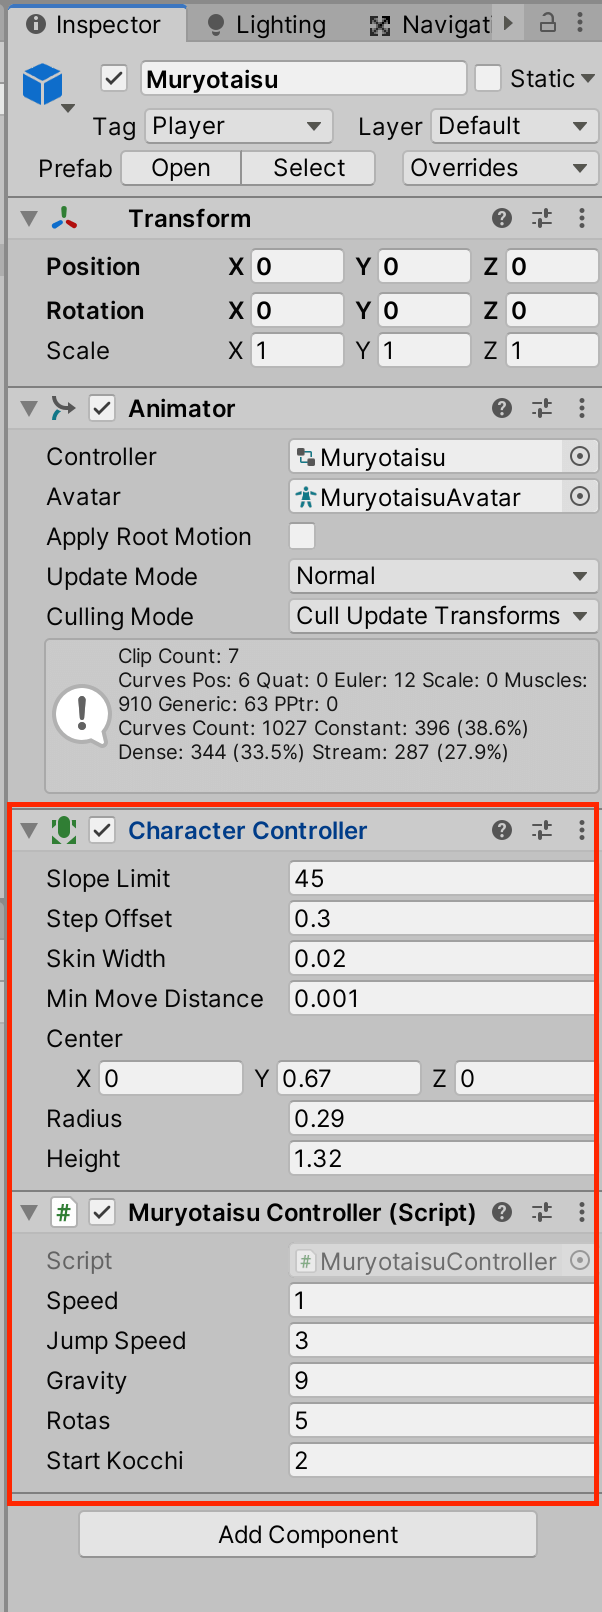
Remove some components
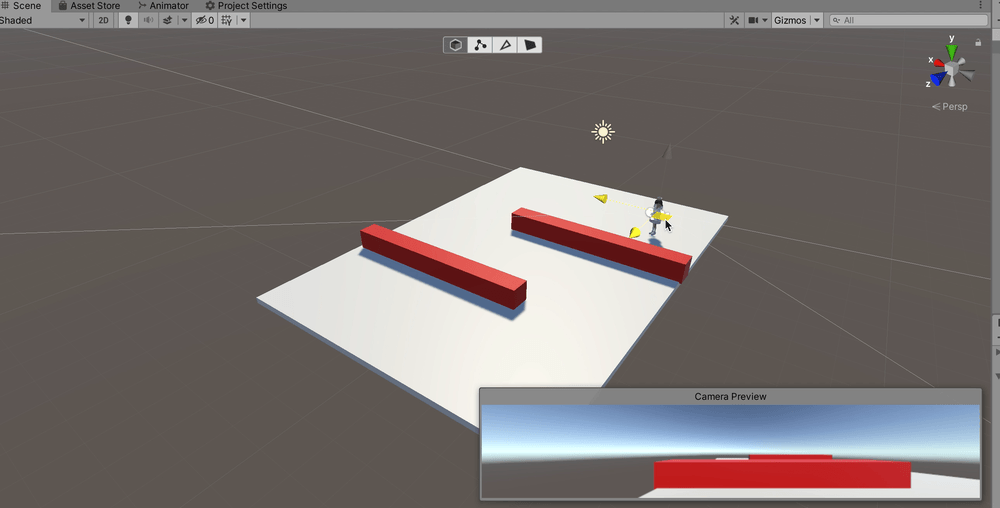
When the model is ready, let’s create the stage for tag.
Once the stage is complete, bake it so that NavMeshAgent can be used.
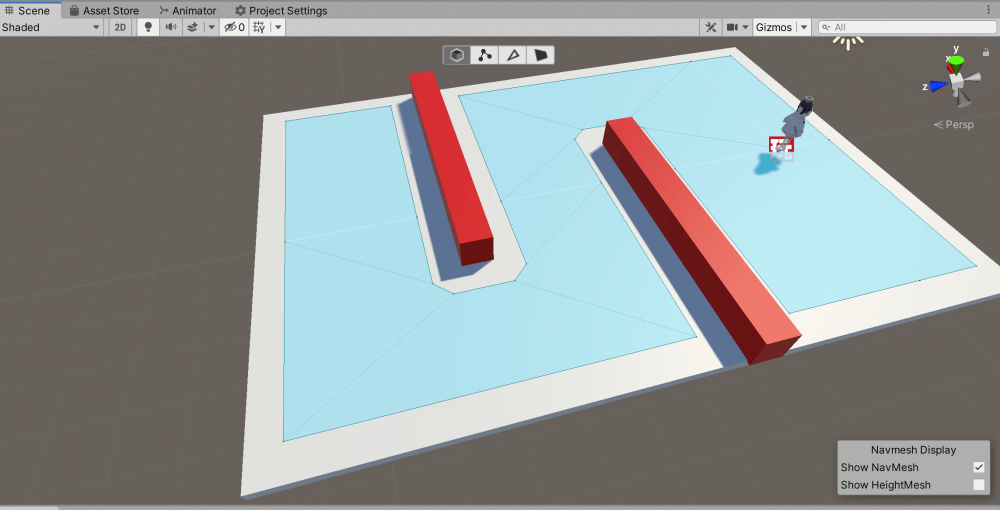
This stage
Setting up the animation
Next, let’s add the animation to the 3D model.
We will add three animations, Idle, Walk, and Run, to ensure smooth movement.
Idle and Walk are included in the assets, so let’s create a new animation for Run.
To create the animation, we will use Mixamo.
Mixamo: https://www.mixamo.com/#/
Mixamo is a service run by Adobe that allows you to easily add animations to 3D models.
For detailed explanation, please refer to the following article.
First, save the fbx data of MUTAIHINA in Models folder to another location.
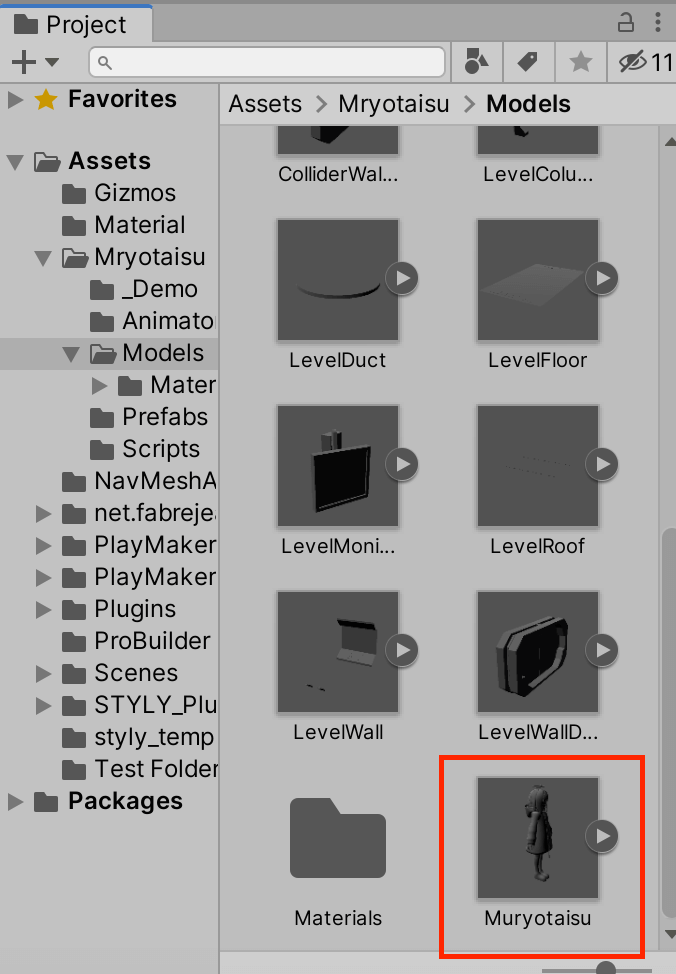
Where to store the fbx files
After opening Mixamo, upload the fbx data from UPLOAD CHARACTER.
This will allow you to play the animation with the model you have prepared.
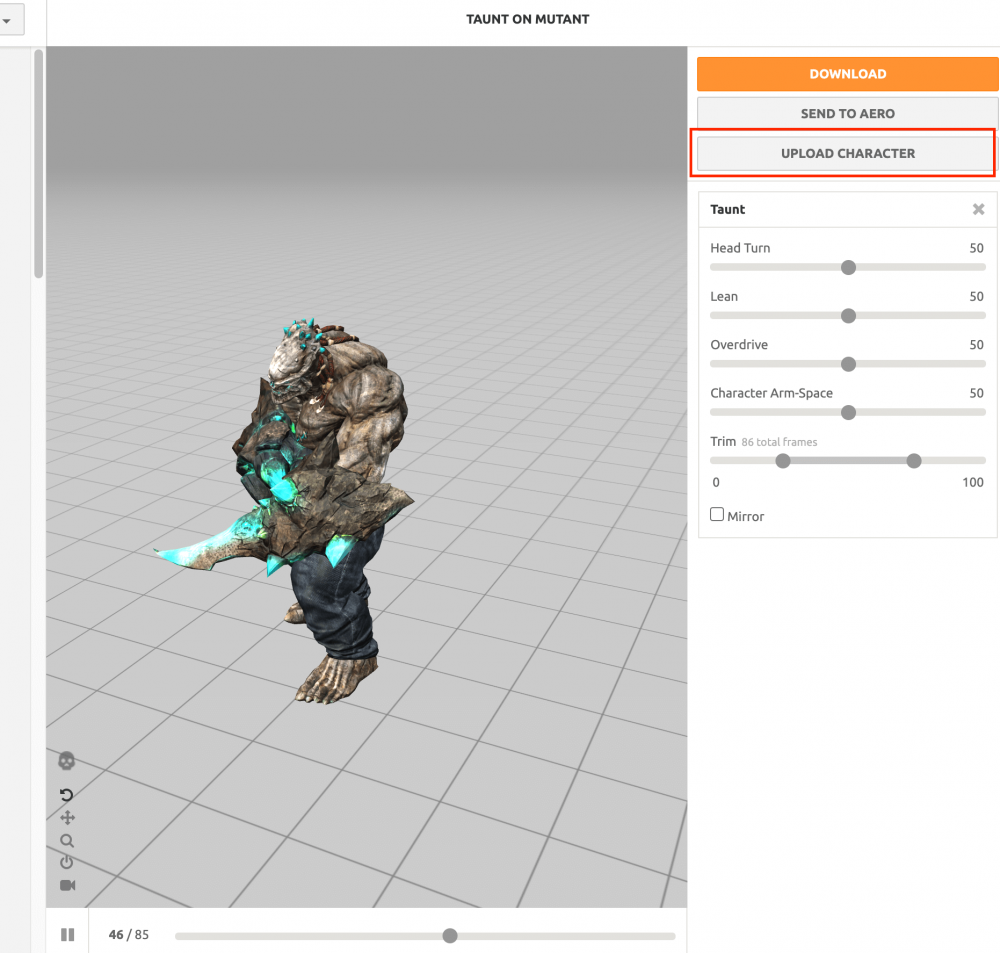
Uploading the fbx file
Let’s add a running animation.
We will use this animation.
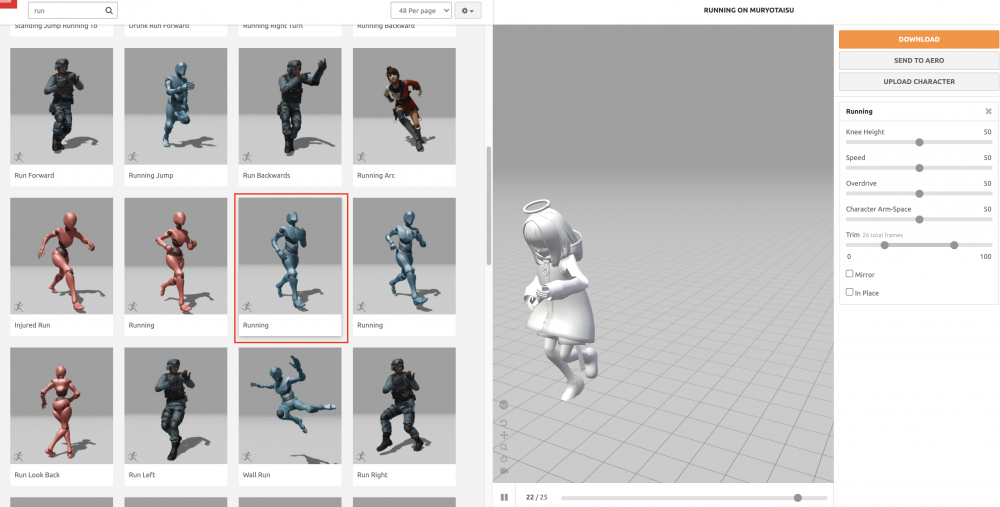
Select the animation
Download the FBX for unity format from DOWNLOAD and place the data in your Unity project.
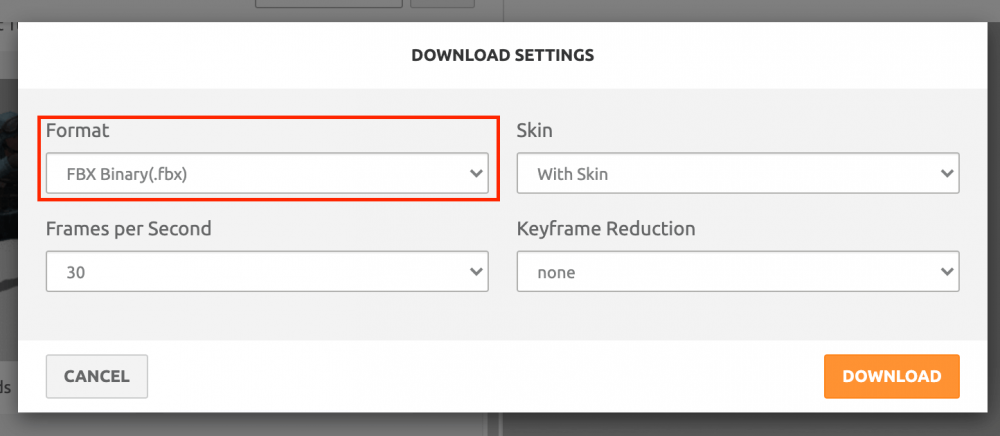
Download the animation
Go to Import Settings > Rig and change the Animation Type to Humanoid.
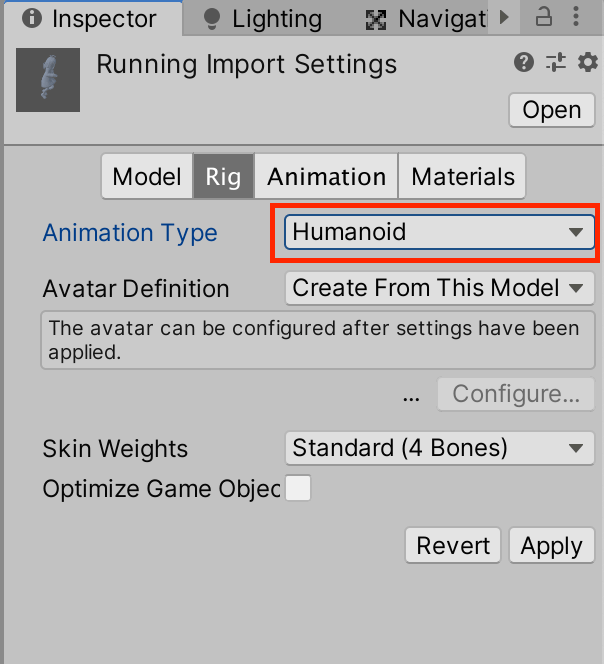
Set the Rig’s Animation Type to Humanoid
Extract the data and duplicate the animation called mixamo.com using [Ctrl + D] ([Command + D] on a Mac).

Duplicate the animation
Since this is the animation you just selected, rename it Run.
This completes the preparation of the animation.
Next, let’s create an animator.
In this case, we will create an animator called “AgentAnimator”.
You can create an animator by right-clicking in the project window and selecting Create > Animator Controller.
Don’t forget to attach the animator to the 3D model.

Attaching an animator to a 3D model
Click on the AgentAnimator to open the Animator window.
Right-click to open the menu and select Create State > From New Blend Tree to create a new “Blend Tree”.
By using this Blend Tree, we can switch the animation by referring to the parameters.
In this case, we will switch the animation by referring to the movement speed of the 3D model.
Next, we need to add the parameter to be referenced.
Open the Parameters tab in the Animator window and select Float from the + button in the upper right corner.
Since we are referring to the speed, we will name the parameter Speed.
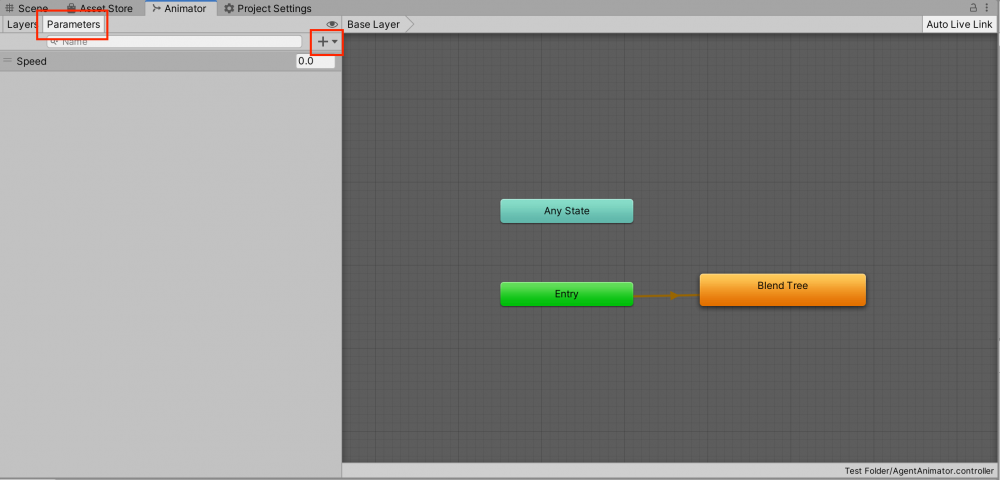
Create a Blend Tree and Parameters
Click on the Blend Tree to open it, and add three motions from Add Motion Field.
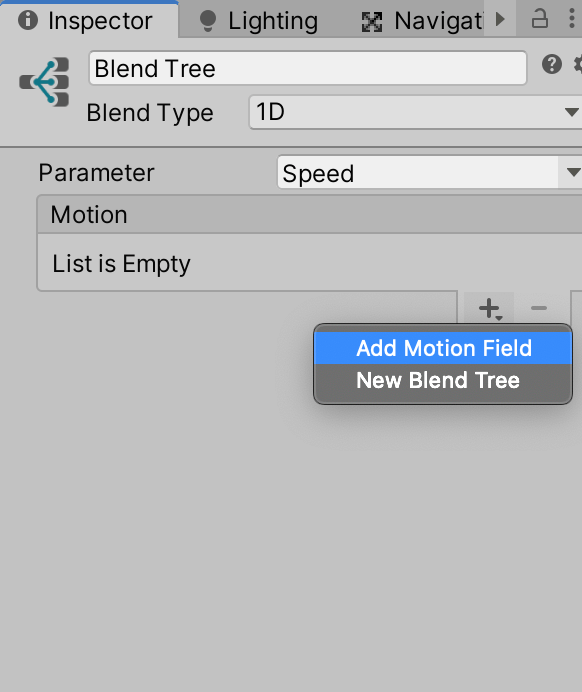
Add the motion fields
Change the referenced parameter to Speed.
Uncheck Automate Thresholds and set a value for how long it takes for the motion to change.
We will try to make it shorter until it starts walking from a stationary state and longer until it starts running after it starts walking.
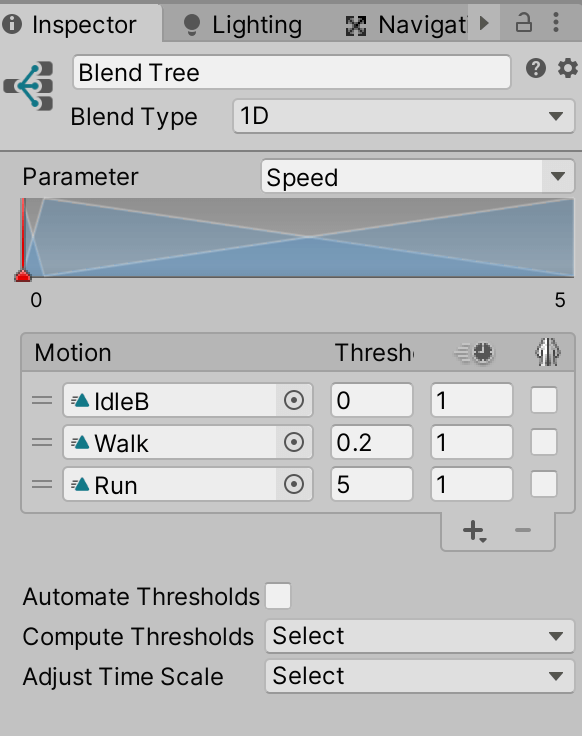
Change the reference to Speed and set the threshold value
This completes the animation settings.
Setting up PlayMaker
Next, we will use PlayMaker to configure the NavMeshAgent.
- Acquire the camera and set it as the destination
- The animation will switch depending on the speed of the 3D model.
Let’s configure these two settings.
Acquiring the camera and making it the destination
First, let’s get the player’s position. Add FSM to the 3D model.
GetMainCamera to get the camera, and GetPosition to store the camera position in the CameraPos variable.
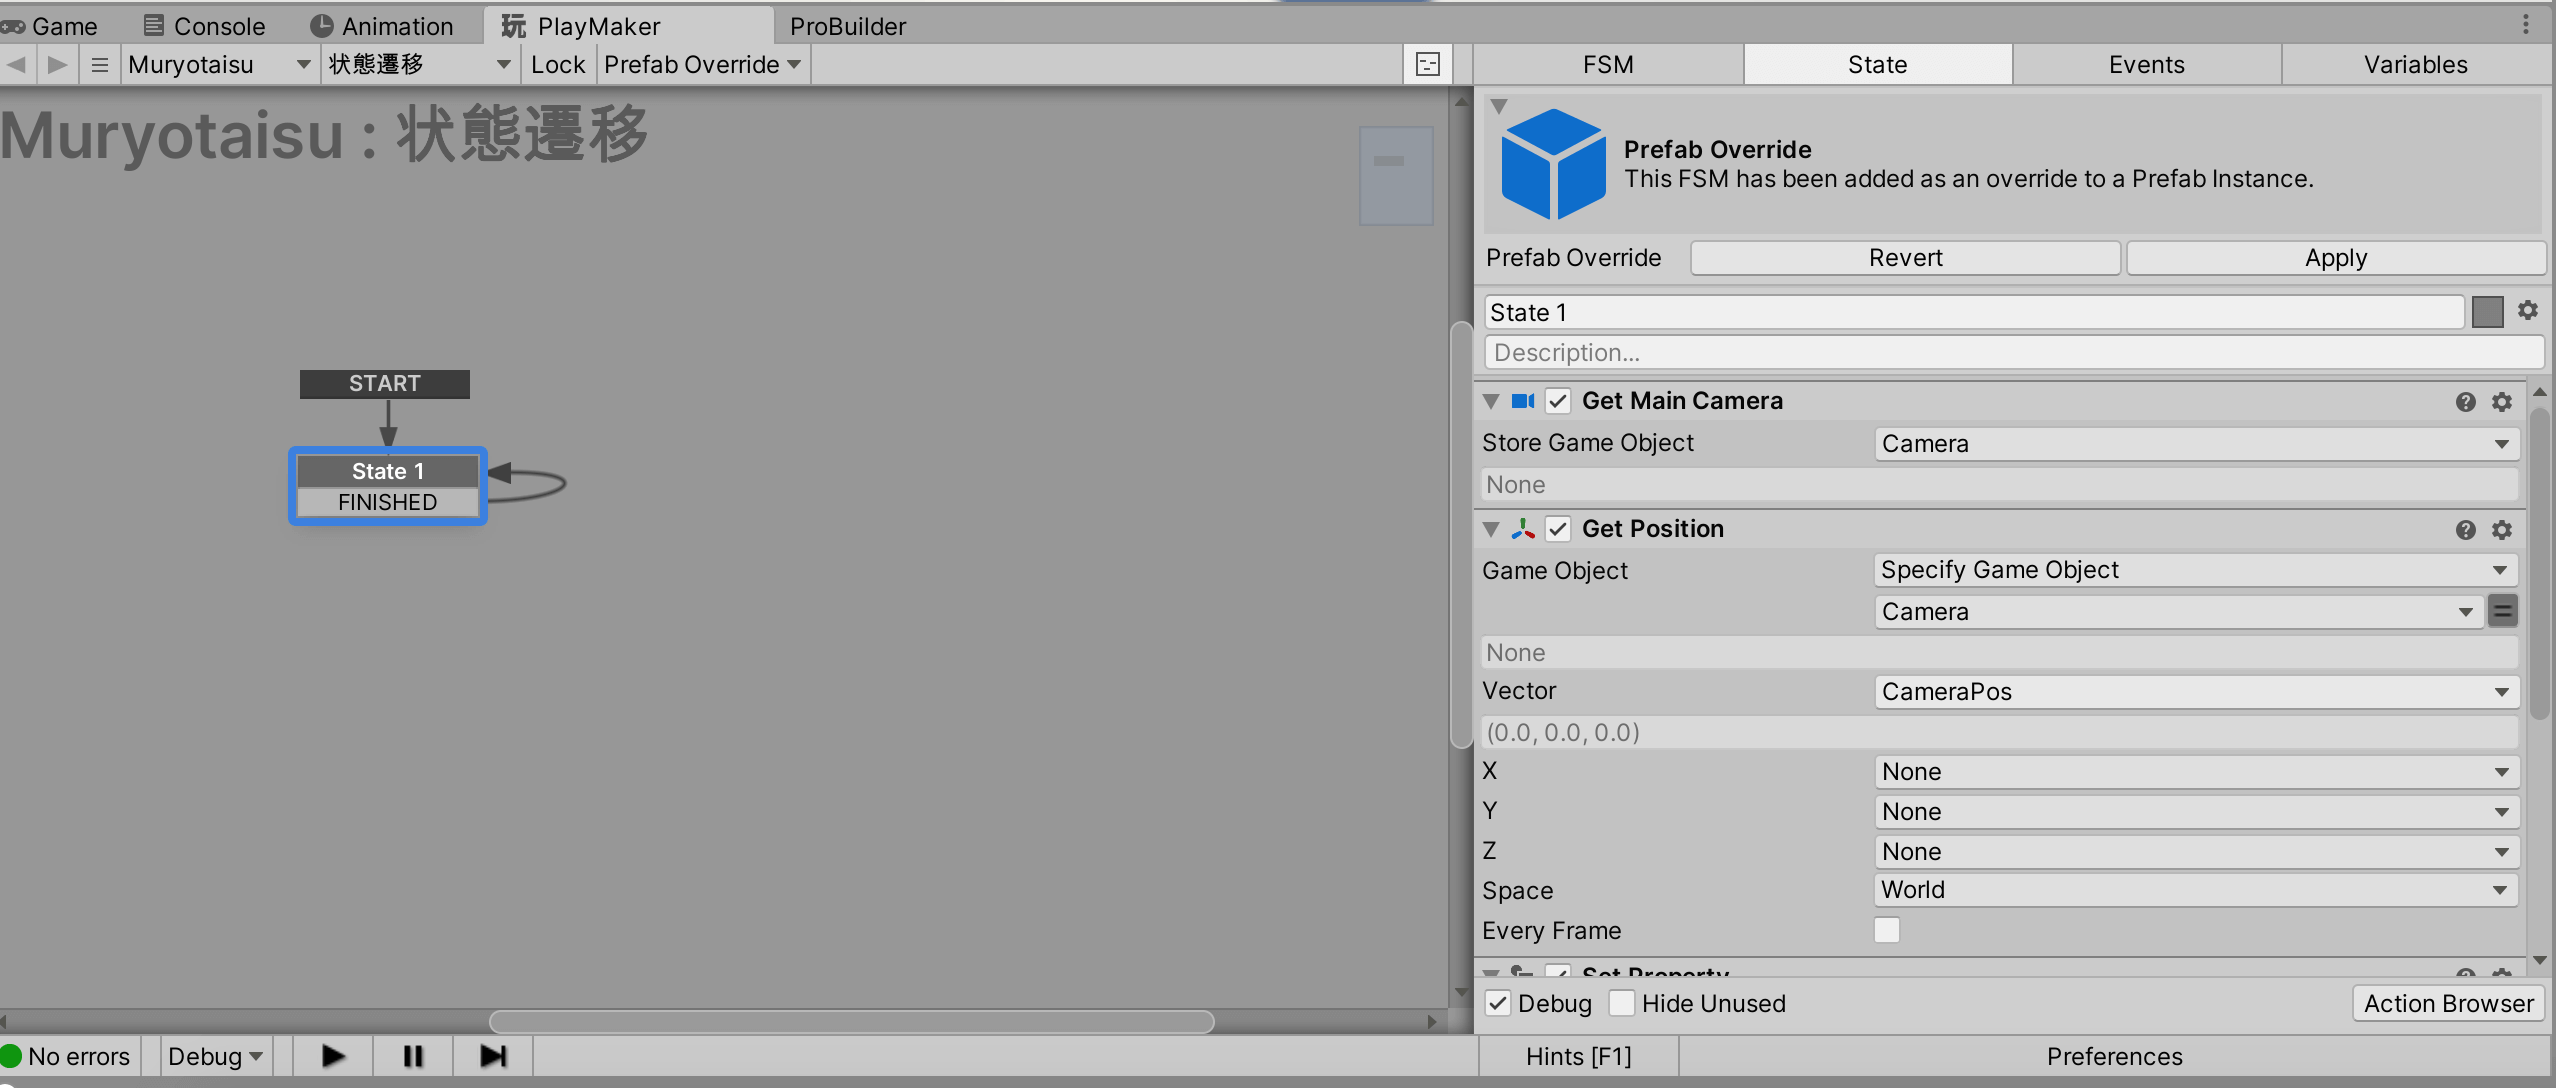
FSM to get the camera
Then add a NavMeshAgent component to the 3D model and set the destination of the NavMeshAgent to CameraPos with SetProperty.
Then set it to wait one second and repeat this process.
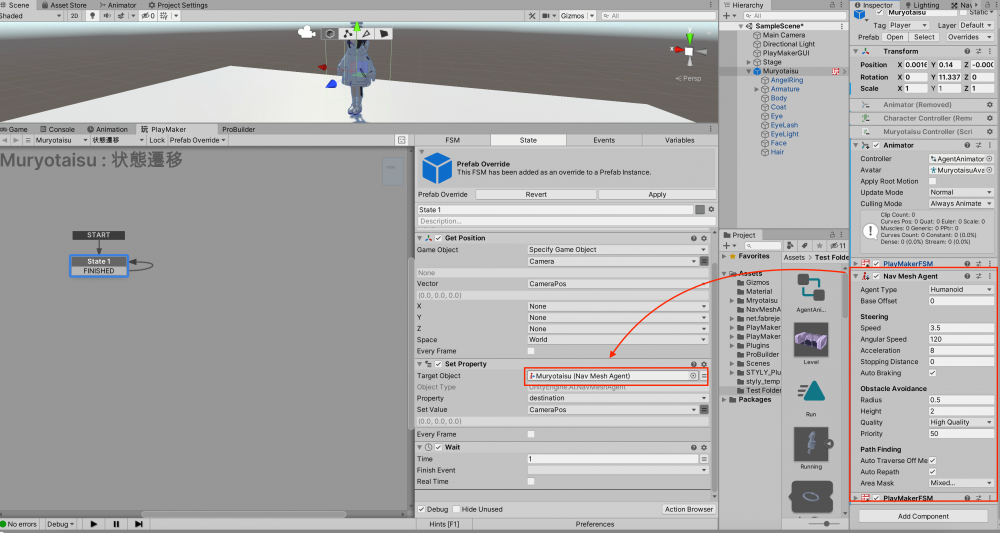
FSM to set the destination to the camera position
Now, the 3D model will move to the camera position.

The model will now move
Switching animations based on speed
The next step is to make the animation switch depending on the speed.
Add another FSM to the 3D model.
The velocity of the Agent can be represented by velocity.sqrMagnitude.
Let’s get the Agent’s velocity.sqrMagnitude from GetProperty and store the model’s velocity in a variable.
In this case, we will store the velocity of the model in a variable called velocity.
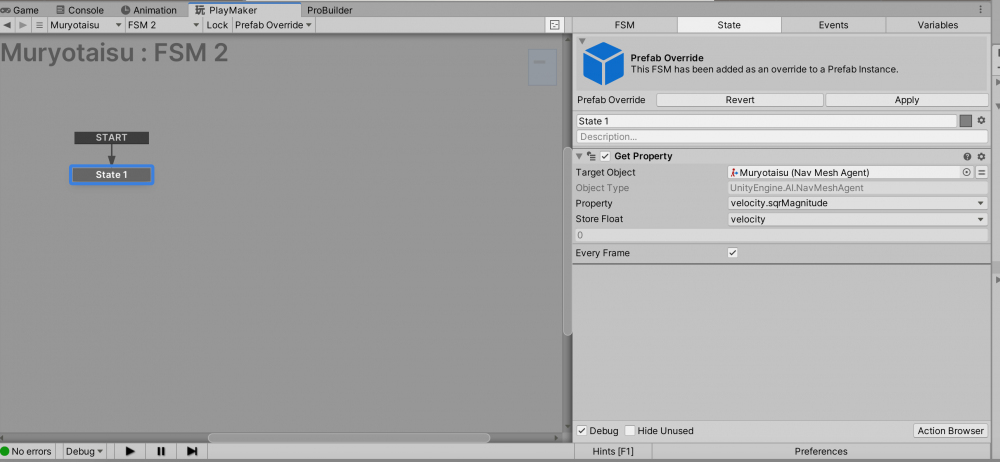
FSM_1 to get the velocity
Set Animator Float to set the animator’s Speed parameter to be the same as velocity.
We want both processes to be done every frame, so check Every Frame.

FSM_2 to get the velocity
Now, the running animation will be played when moving, and the waiting animation will be played when standing still.
The animation will now switch between the two.
Adding facial expressions
The game of tag is starting to look more and more like a game of tag.
Next, let’s add facial expressions to this 3D model.
Adding expressions to the 3D model
Facial expressions are also managed by the animator.
In the Animator window, go to the Layers tab and add a Face Layer for facial expressions, and create a Blend Tree.
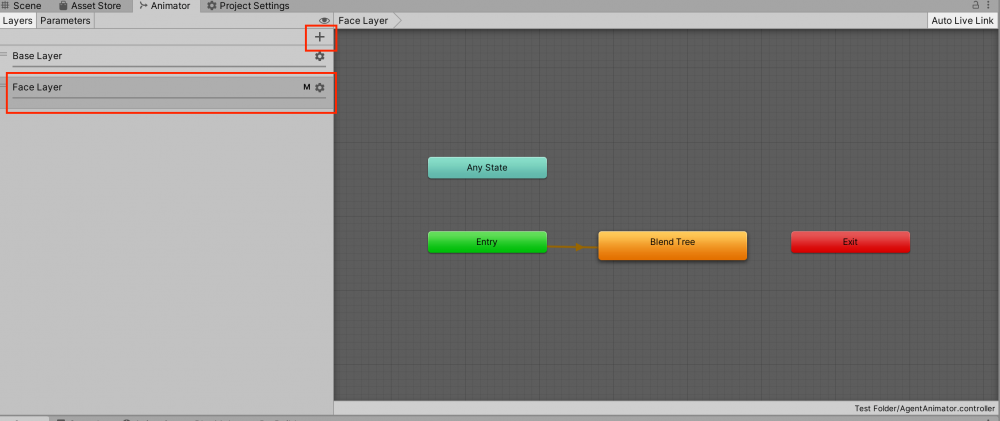
Adding a new layer
Expression animations can be found in Muryotaisu > Models > Muryotaisu > Armature Smile / Armature Trouble.
Armature smile is an animation of a smiling face, and Armature trouble is an animation of a troubled face.
You need to duplicate the two animations.
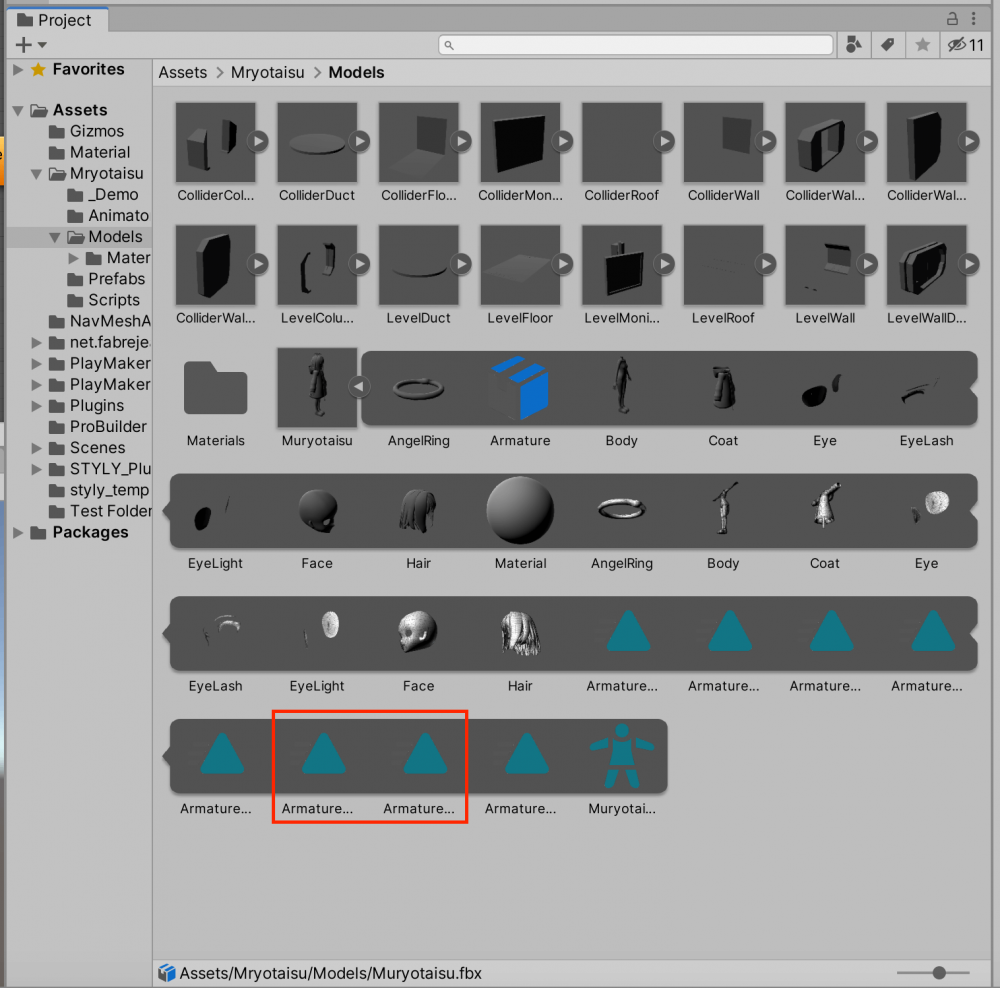
Where to store the facial expression animations
Once duplicated, add the animations to the Blend Tree.
We will make it smile when it is stationary and make it look troubled when it is moving.
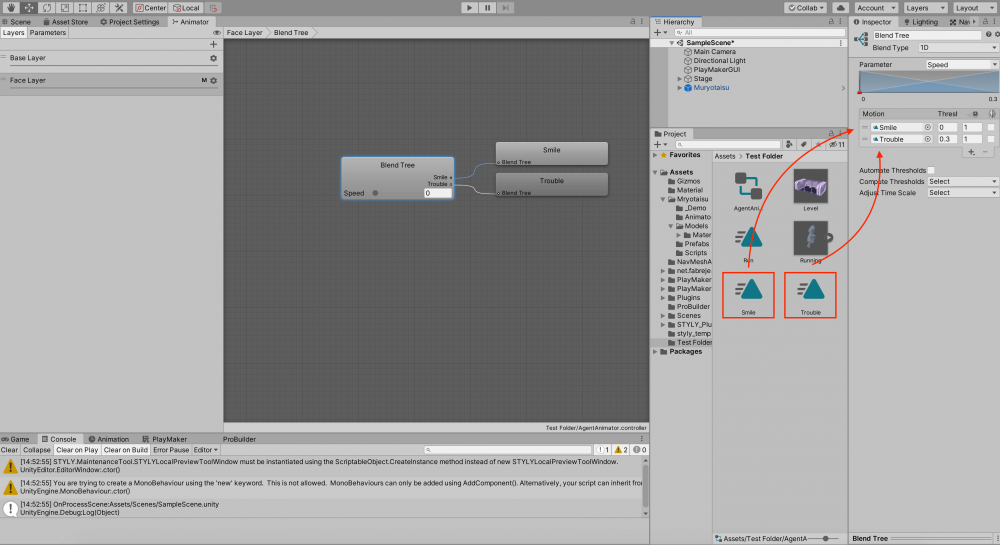
Adding the animation to the Blend Tree
Let’s set the animation to apply only to the face.
In the Layers tab, click the gear button to open the settings and set Weight to 1 and Mask to MaskFace.

Setting the Weight and Mask
Now we can add facial expressions.
To finish up, adjust the NavMeshAgent’s Stopping Distance value so that it doesn’t get stuck in the player.
In this case, I set it to 1.5.

Adjusting the Stopping Distance value
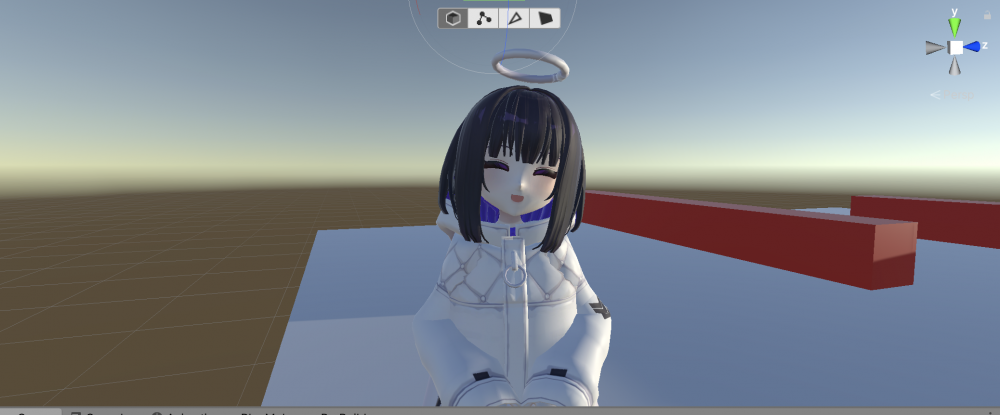
Just by adding facial expressions, the 3D model becomes much more lifelike!

The movement of the 3D model we created
How to upload to STYLY
Let’s upload the completed scene to STYLY.
Create a STYLY account
How to create an account

How to upload to STYLY

How to upload from Unity to STYLY

In this article, I explained how to switch animations using a combination of NavMeshAgent and Animator.
By adding animations to your models, you can bring them to life.
Let’s bring our own models to life!
Let’s learn VR/AR content creation with no experience!
The online learning site NEWVIEW SCHOOL ONLINE is now open, where you can learn from the basics to the application of Unity and PlayMaker, which are necessary for VR/AR content production, and learn the production process (production techniques will also be disclosed) of the attractive content distributed on STYLY!
- You can create VR/AR contents without writing programming code.
- Officially supervised Unity courses are available.
- Additional elements such as photogrammetric production methods and content weight reduction are available.
- You can learn how to think about creating VR/AR content.
