What is City Anchor?
City Anchor is a feature in STYLY’s AR scenes that allows you to designate a “point of origin,” which serves as the basis for defining the position of the scene. Using this “anchor,” AR content can link to a specific location in the real world, enabling users to experience it when they visit that location. City Anchor works by obtaining latitude and longitude data using Google Maps and setting that information in the STYLY scene.
STYLY’s City Anchor uses Google’s VPS (Visual Positioning System). VPS is a technology that determines location by recognizing the surrounding environment through a camera, leveraging visual data for accurate positioning instead of relying solely on GPS. This enables precise AR experiences that align with real-world terrain and structures.
To accurately configure occlusion settings in combination with cities, it is necessary to use 3D city models like PLATEAU to recreate real-world buildings and structures. This allows you to create scenes where real-world objects naturally block AR content (occlusion).
Creating a City Anchor-Compatible Scene in STYLY Studio
Access STYLY Studio and click the “New Scene” button. Select the AR Scene Template.

Delete the AR Template Grid and Enable AR Occlusion assets.
Click the AssetSelector icon and select Function.
Select AR on City and place it in the scene.
Click the AssetSelector icon and select Function. Choose City Anchor and place it in the scene.

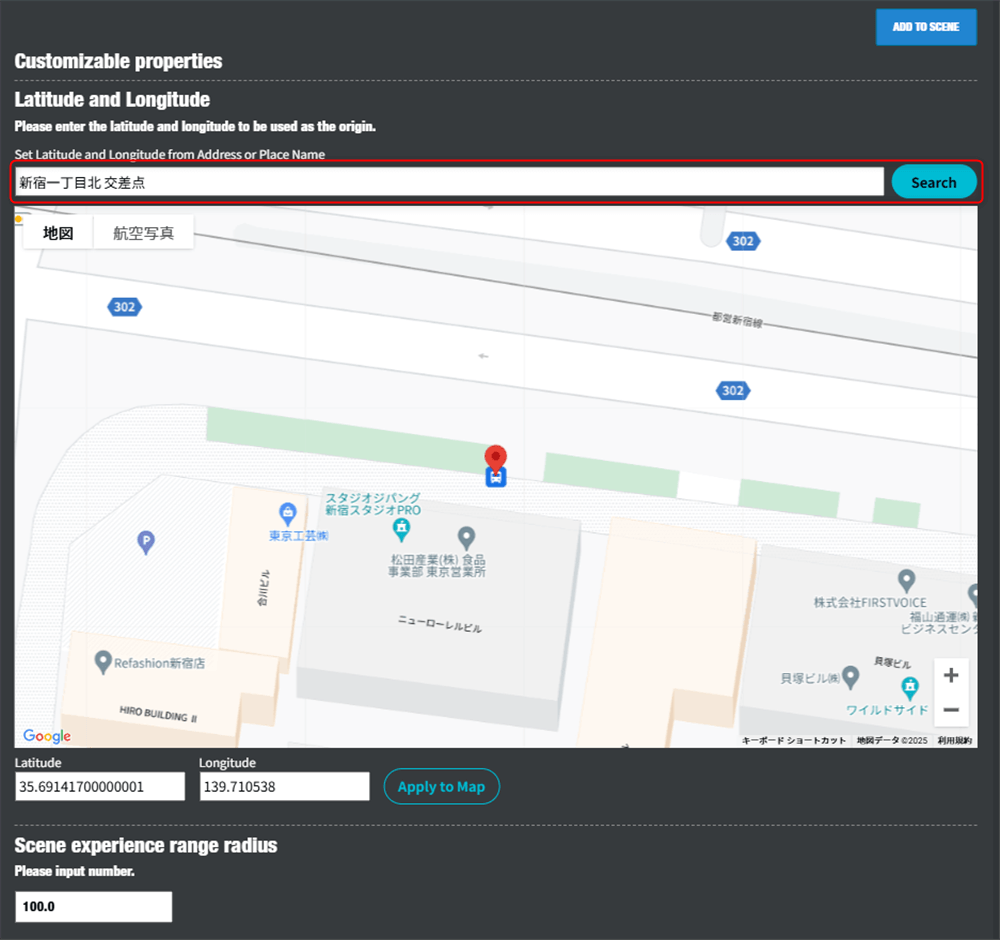
Enter an address or place name in the search bar and click “Search” to locate the place.
Enter the scene experience range radius in meters. For example, if you enter 100.0, an error indicating “out of range” will display if someone tries to experience the AR more than 100 meters away from the anchor.
Click ADD TO SCENE to add the City Anchor to the scene.
Precautions
Do not move the City Anchor after placing it in the scene.
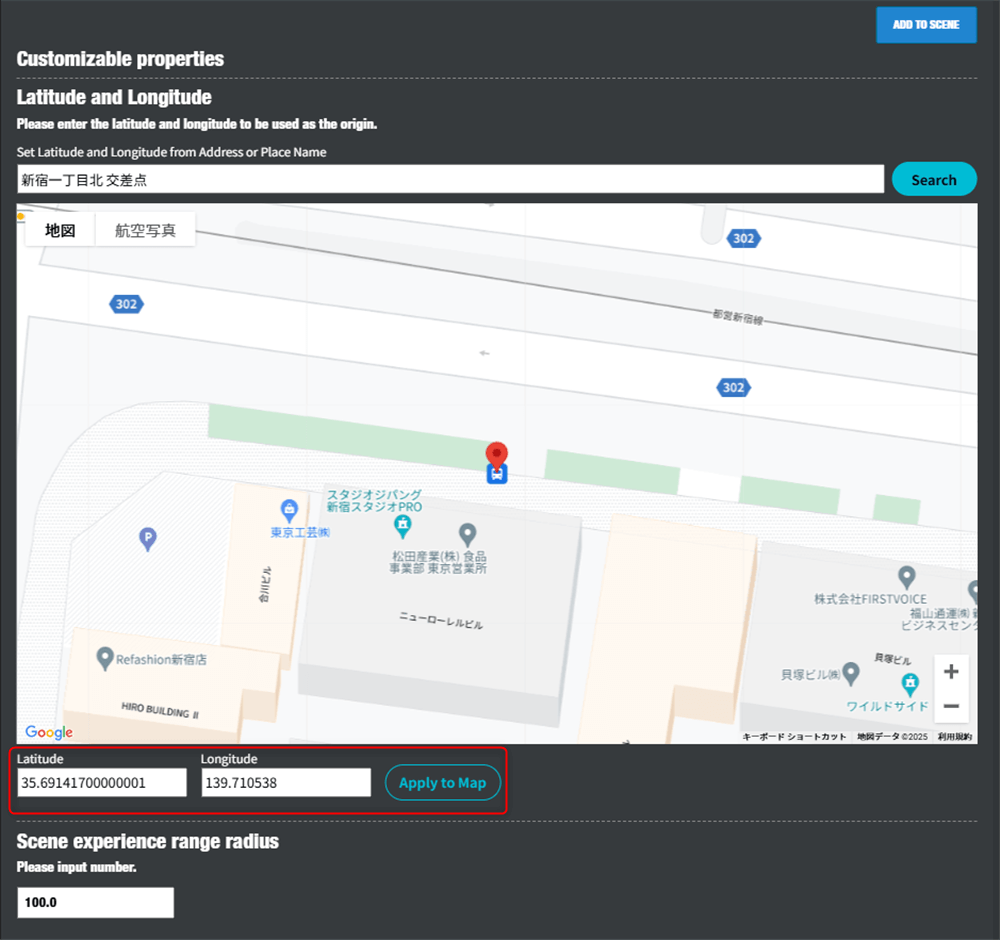
If you want to input latitude and longitude directly
Obtaining Latitude and Longitude for the Point of Origin in a STYLY Scene
Determine the point of origin for the STYLY scene, which is referred to as the anchor.
Selection criteria are as follows:
- Ground level (required condition)
- City Anchor only works at ground level.
- Do not set the origin on rooftops or pedestrian overpasses.
- Outdoor (required condition)
- City Anchor only works outdoors.
- Do not set the origin inside buildings.
- If the origin is inside a building, assets added in STYLY Studio may end up embedded within the building, making them very difficult to work with.
- The location where AR experiences are intended to take place
- It is desirable to set the origin at the location where AR will be experienced.
- Example: A location where the main subject building can be captured in AR.
- If there are multiple AR experience points, the central one is preferred.
- Example: A location where the main subject building can be captured in AR.
- It is desirable to set the origin at the location where AR will be experienced.
Please note that changing the anchor later will require redoing all subsequent work.
Obtaining Latitude and Longitude with Google Maps
Go to Google Maps, hover the cursor over the anchor location, and right-click. A context menu will appear as shown below.

※ Source: Google Maps
Click the numbers at the top to copy the values, then paste them into a text file or similar.
Comma-separated values like the following should be pasted. This is the latitude and longitude of the anchor. Make a note of them.
35.691583375085166, 139.71016426600193
※ The above corresponds to the latitude and longitude of “Shinjuku 1-chome North Intersection.”
Latitude: 35.691583375085166
Longitude: 139.71016426600193
Entering Latitude and Longitude in STYLY Studio
Enter the numbers in the Latitude and Longitude fields on the previous screen and click Apply to Map to specify the location.


