This article introduces the specific production method for creating wearable AR Human Templates in STYLY Studio, which can be used via the STYLY mobile app.
For guidelines on delivering a more attractive and comfortable experience, please refer to the production guidelines section at the end of the article.
*The AR Human Template discussed here is not AR that extends specific body parts such as the face or feet, but rather AR that expands the space around a human (the subject). In other words, the experience is designed to extend the area within a few meters around the person.

Using the Wearable AR Human Template
This article explains two different production approaches.
One approach is to create based on the templates provided by STYLY, and the other is to build around your own assets.
By reading through to the end, you will be able to create an AR Human Template and try it out on Instagram.
Creating an AR Human Template with Modifier
The AR Human Template is created using the “Modifier” feature in STYLY Studio.
A Modifier is a function in STYLY Studio that allows you to add effects such as “animation” and “interaction” to assets.
Additionally, the effects themselves are referred to as “Modifiers.”
Previously, STYLY required the use of Unity or PlayMaker to add functions, but now, anyone can easily add movement and animation to objects directly from the browser.
For a comprehensive overview and detailed functionality of Modifiers, please check past articles.
Creating Based on Templates
Several pre-made AR Human Templates are available in STYLY Studio.
You can replace existing assets that make up the template.
By referencing them to some extent, you can create your own unique expression.
For example, you can keep the same composition shown in the template but replace only the assets, or keep the assets and change the composition instead. This can serve as a source of inspiration or a shortcut in the production process.
Since this is an AR content experience that involves using a smartphone to view the scene, beginners may find it difficult to grasp how assets placed in STYLY Studio appear in the real-world space, and what kind of effects can create an engaging visual expression.
In such cases, the template’s presentation can be a helpful reference.
Copying a Scene to STYLY Studio
- First, make sure you are logged into STYLY Gallery.
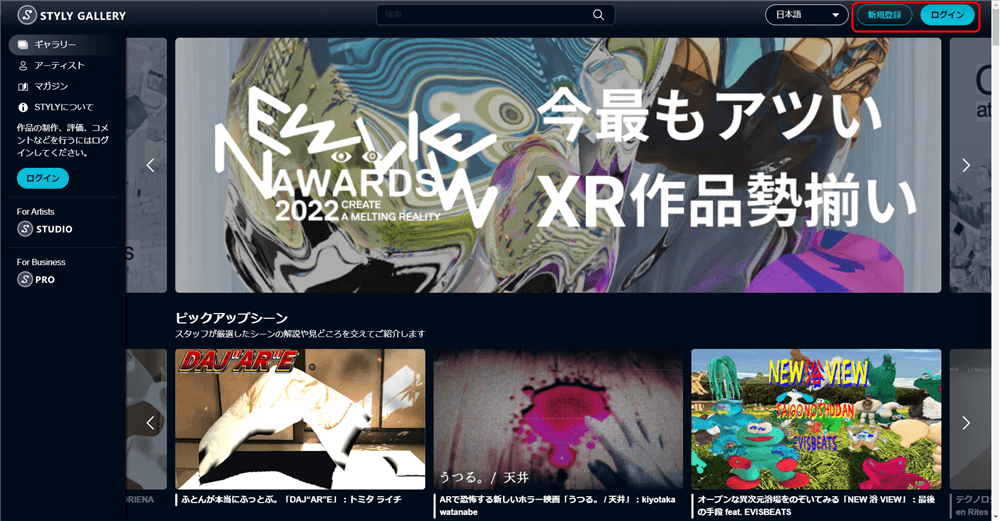
Logged into STYLY Gallery
- If the top right corner of the STYLY Gallery screen shows “Not Logged In,” select “Login.”
Select Login
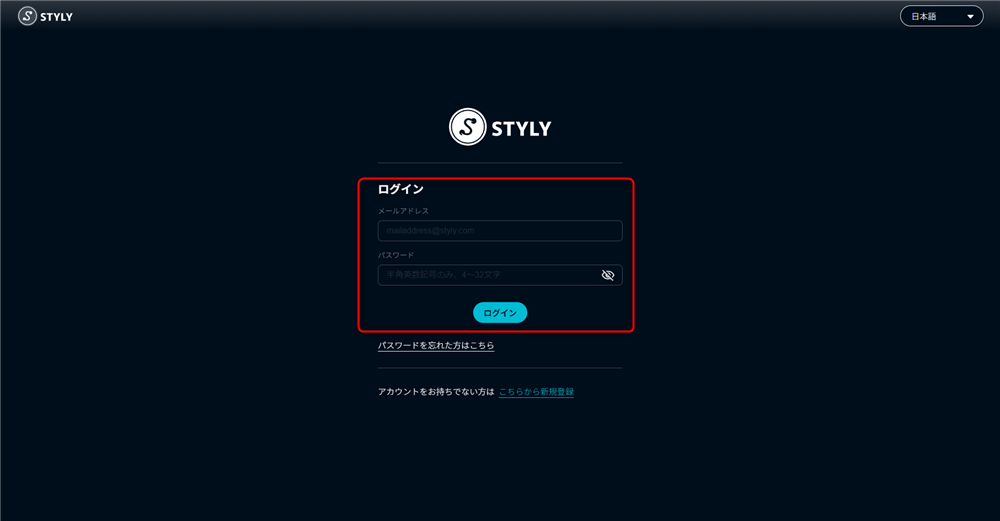
Enter your email address and password, then select “Login.”
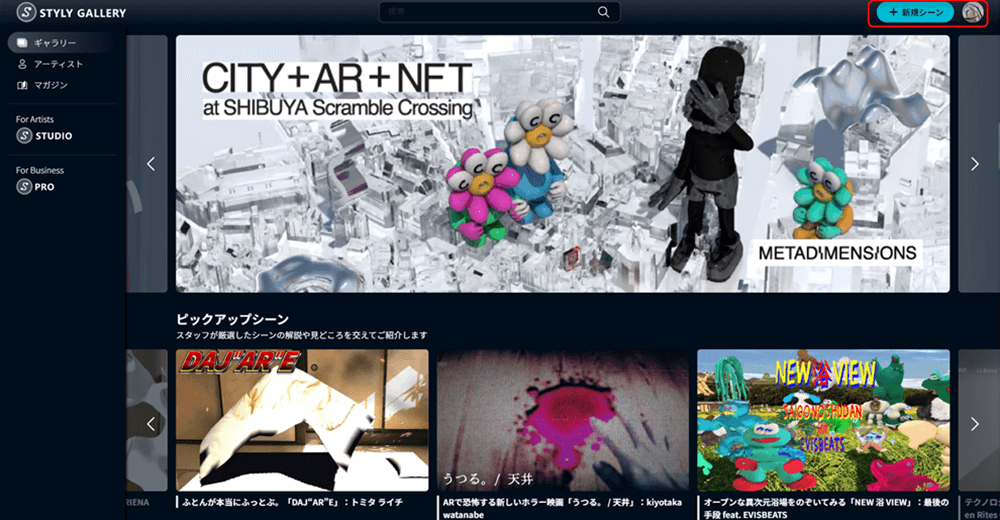
If logged in, your icon will be displayed
- If the top right corner of the STYLY Gallery screen shows “Logged In” (your icon is displayed), you are already logged in.
- If the top right corner of the STYLY Gallery screen shows “Not Logged In,” select “Login.”
- Click the copy button below. *If you are not logged in, the scene will not be copied to your account.

- Once the scene has been added to the scene list in STYLY Studio, the process is complete.
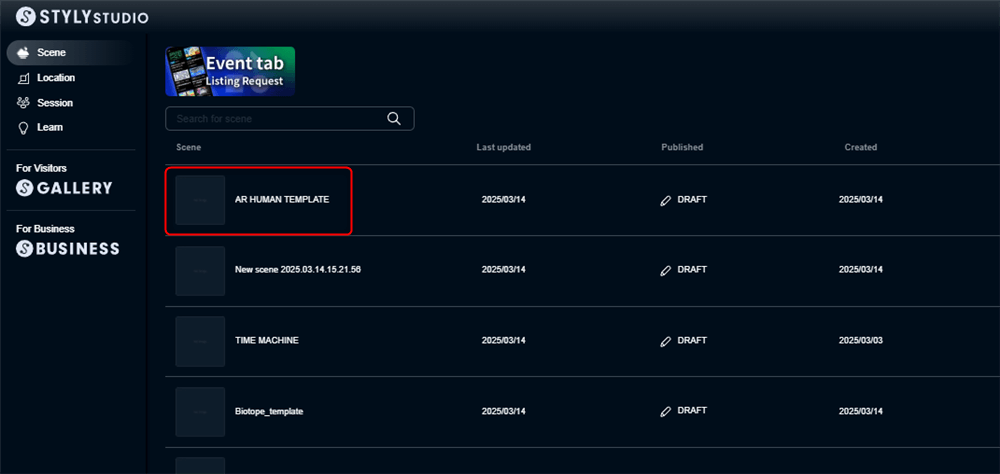
Scene added to the scene list
Let’s open the scene right away.
From here on, we will explain based on the opened scene.
Template Structure and Key Usage Points
First, let’s go over the structure and key points of the template to get an overall understanding.
Template Structure
The template consists of two main types of elements.
These are non-interactive base assets and interactive assets.
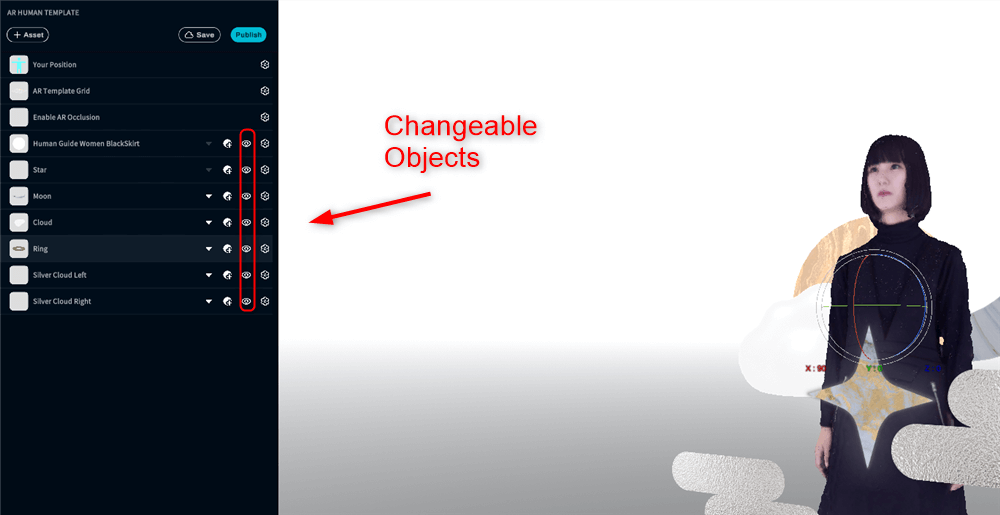
Interactive Objects
Assets without an eye icon are essential parts required for any AR Human Template and cannot be interacted with.
Interactive assets can be modified by clicking on the Modifier icon to add movement.
The template already includes both of these types of assets.

By clicking the Modifier icon, you can select operation items for the asset.
Select assets from the search box
Parameters corresponding to the operation items will be displayed
Key Points for Using the Template
The template includes circles labeled 1m / 0.65m / 0.2m.
These circles are placed to help balance the relationship between the subject and the surrounding space when placing assets.
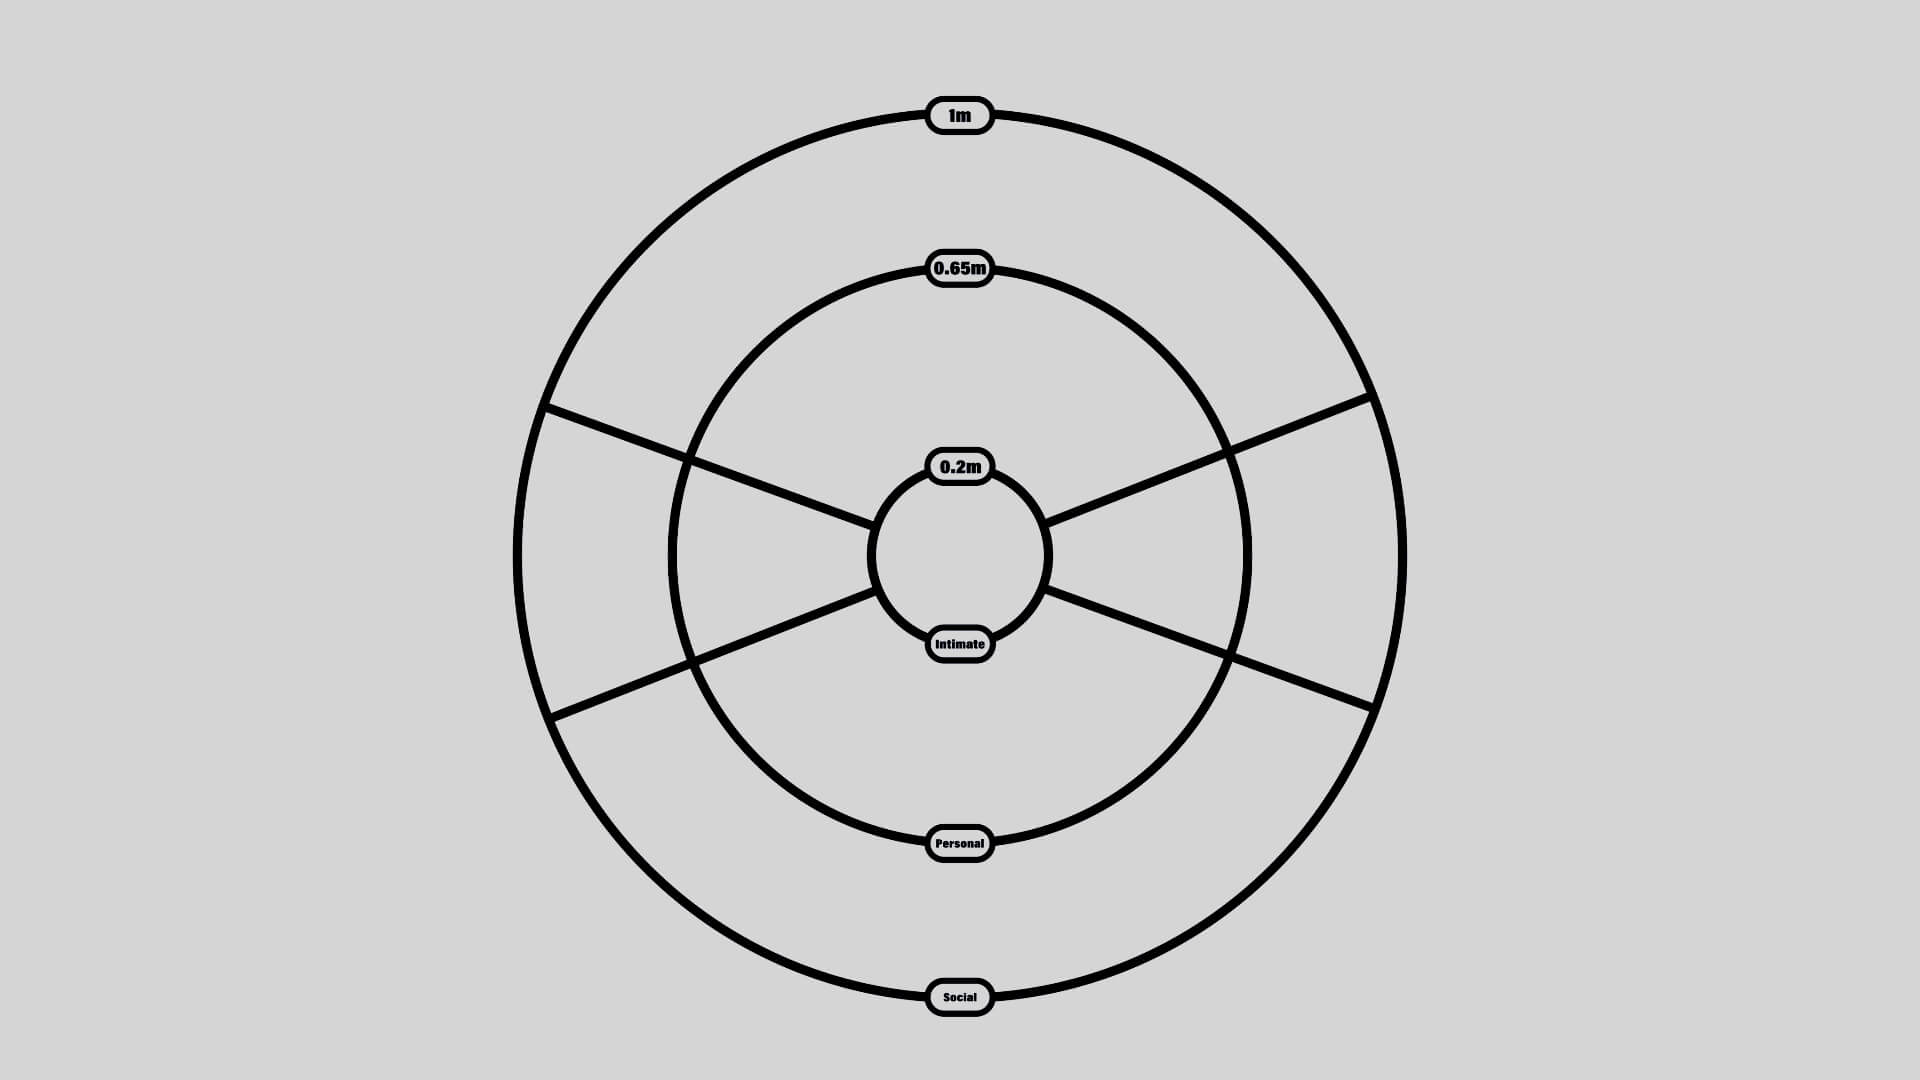
Circles placed in the template
The 0.65m (1.3m total) area represents the Personal Space.
This is the ideal range for placing assets around a person.
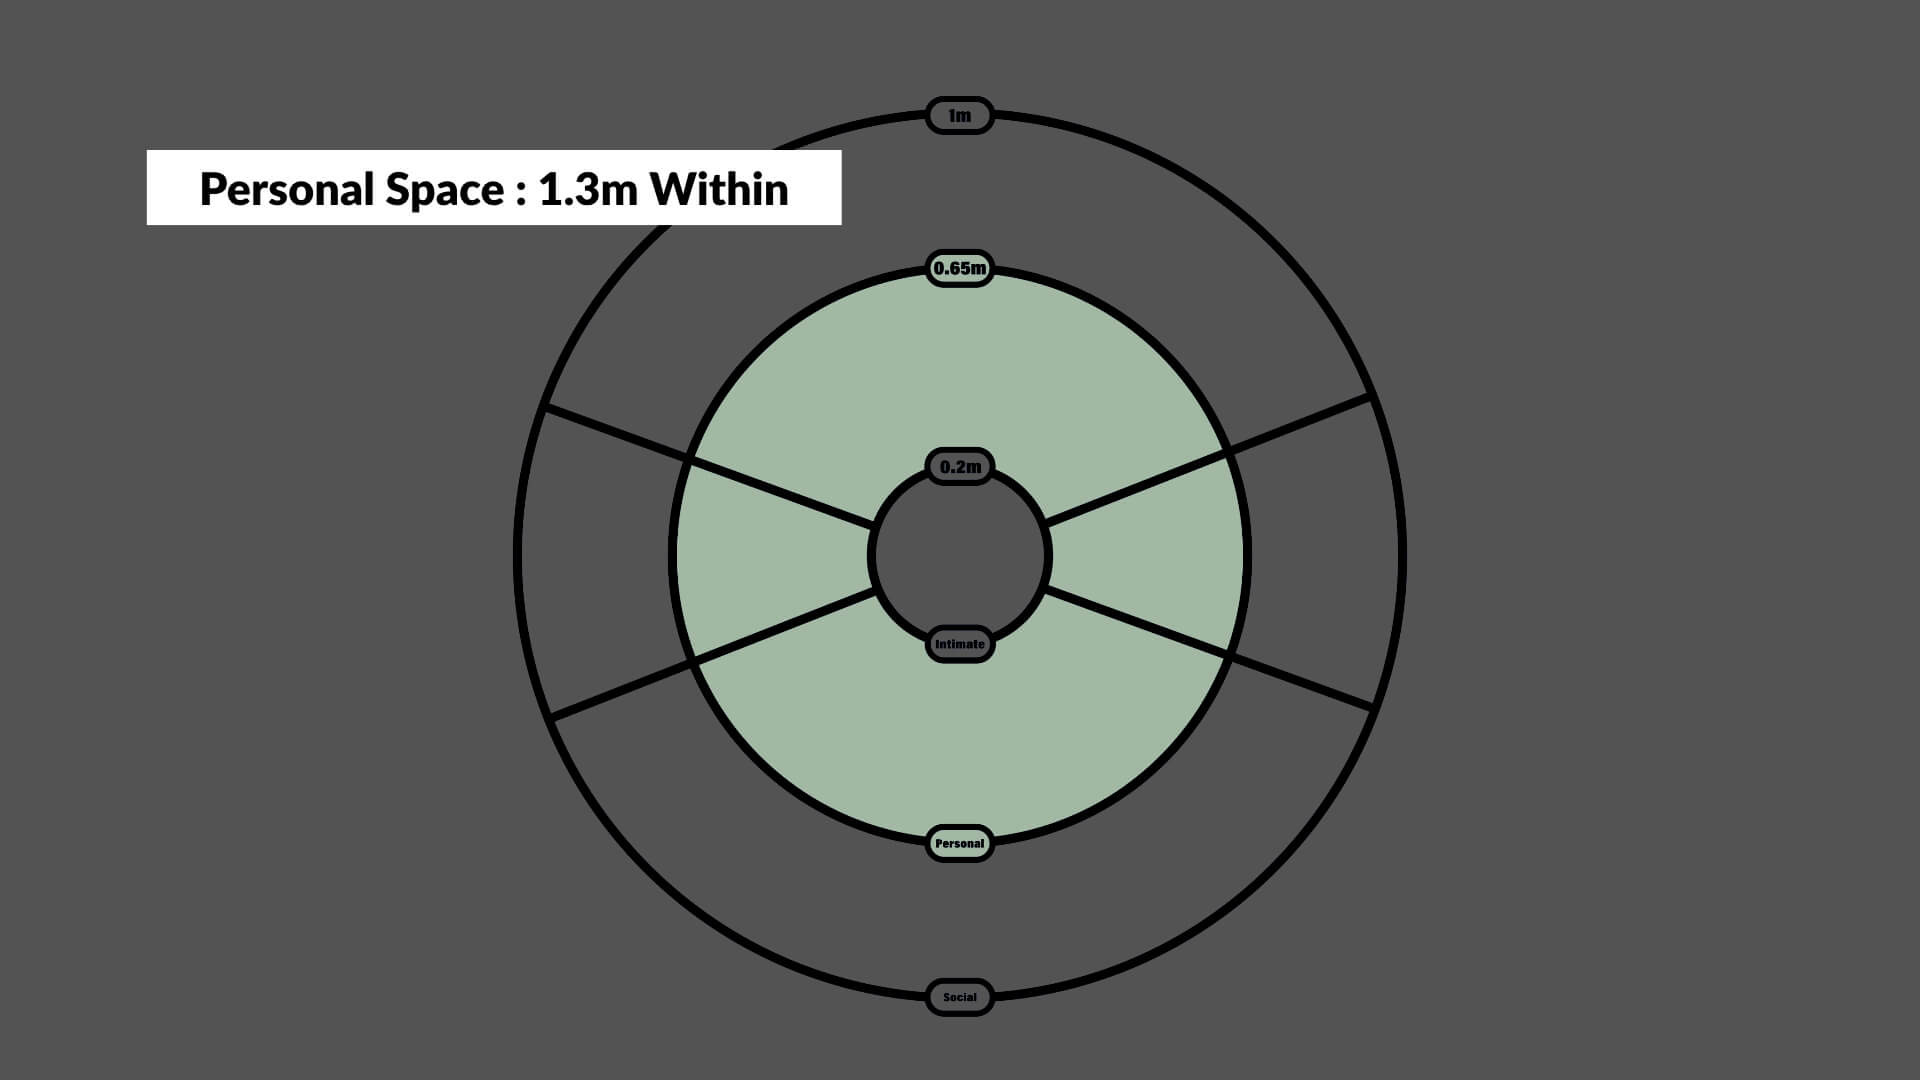
Personal Space
The 1m (2m total) area represents the Social Space.
This is suitable for placing environmental assets.
Use the circles as guides when designing your scene.
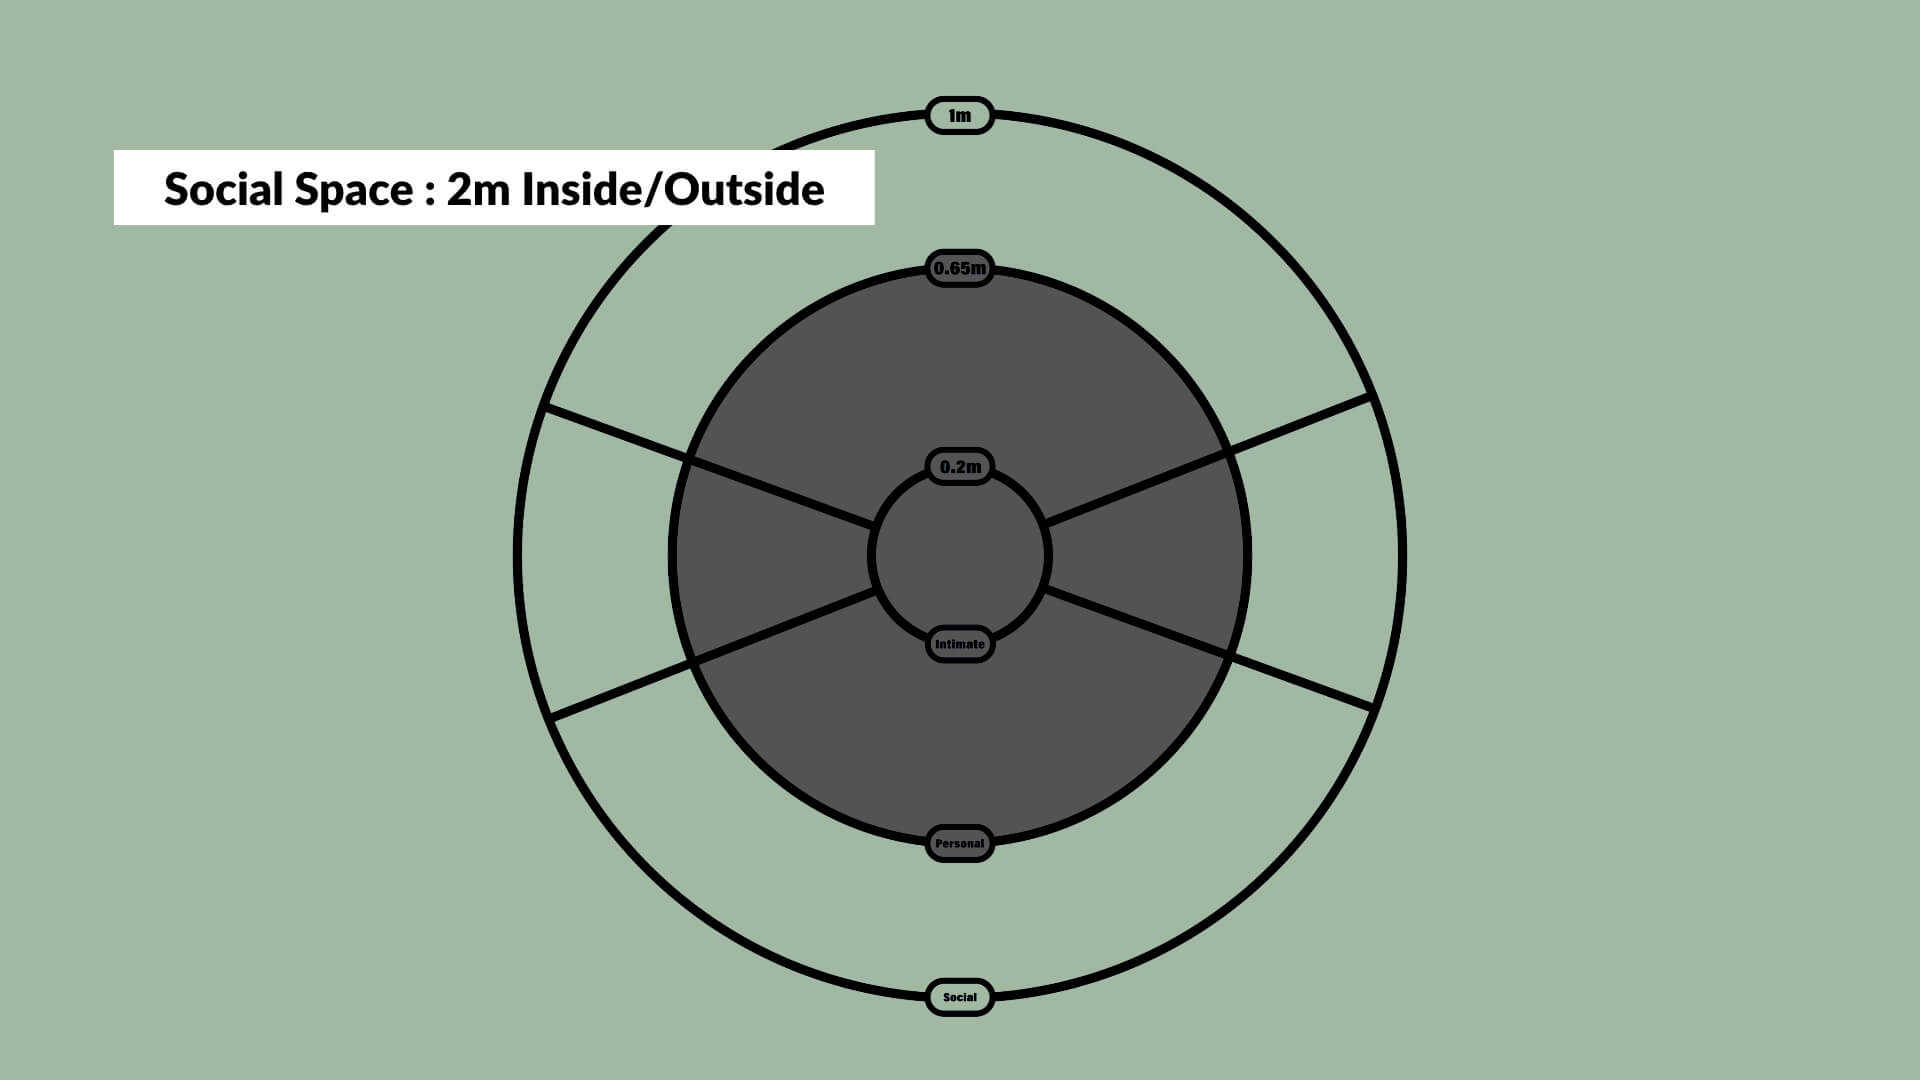
Social Space
The innermost 0.2m (0.4m total) circle represents the Intimate Space.
This area is not ideal for placing assets as they may overlap with the person.
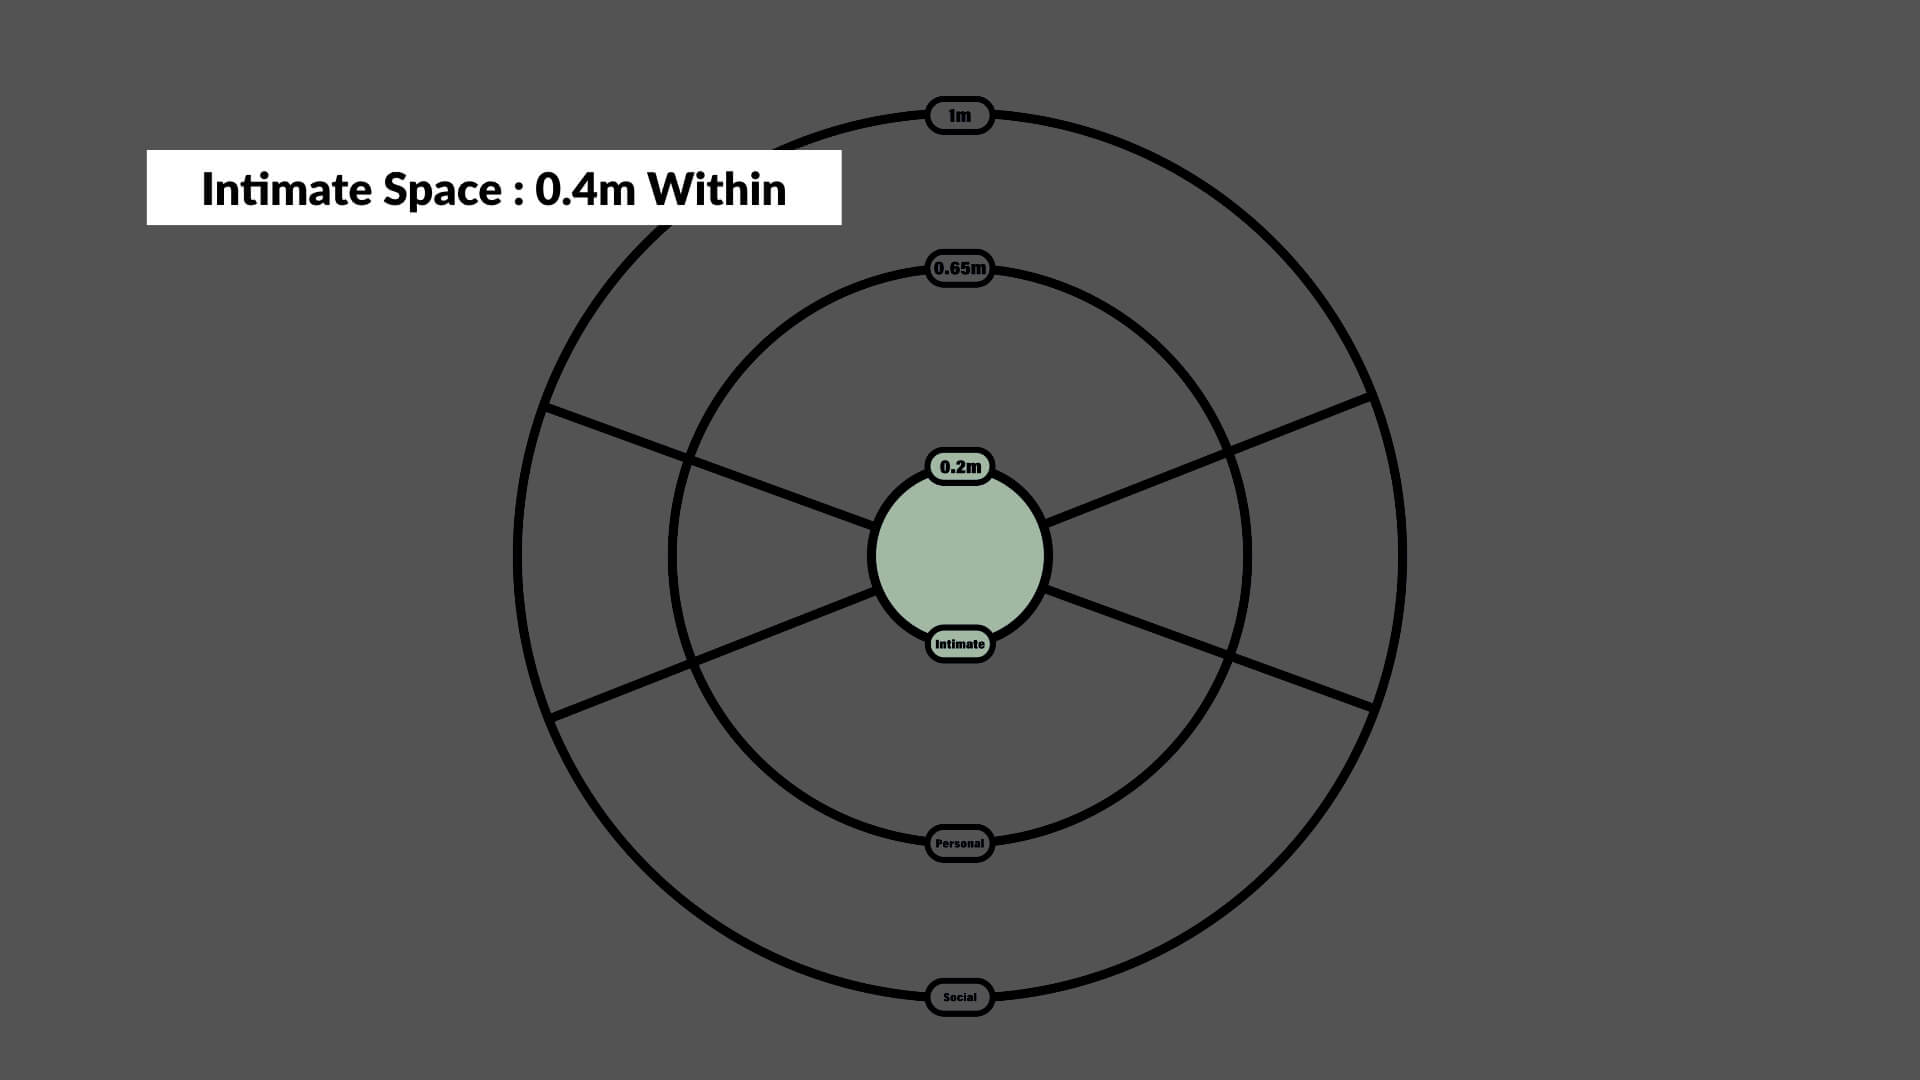
Intimate Space
The template we are using already includes placements that take these circles into account.
With this in mind, here are two key points to consider when using the template:
- How to place the assets
- How those assets will move
Keep these two perspectives in mind.
Now, let’s use the template to create an AR Human Template.
Creating with the Template
When you open the template, you will see several assets already placed.
Now, let’s add animation using Modifiers.
This time, we will adjust the parameters of the animations that have already been applied.
By following this process, you will get a better idea of how to create your unique expression while using the template as a base.
-
- Screen when opening the copied scene
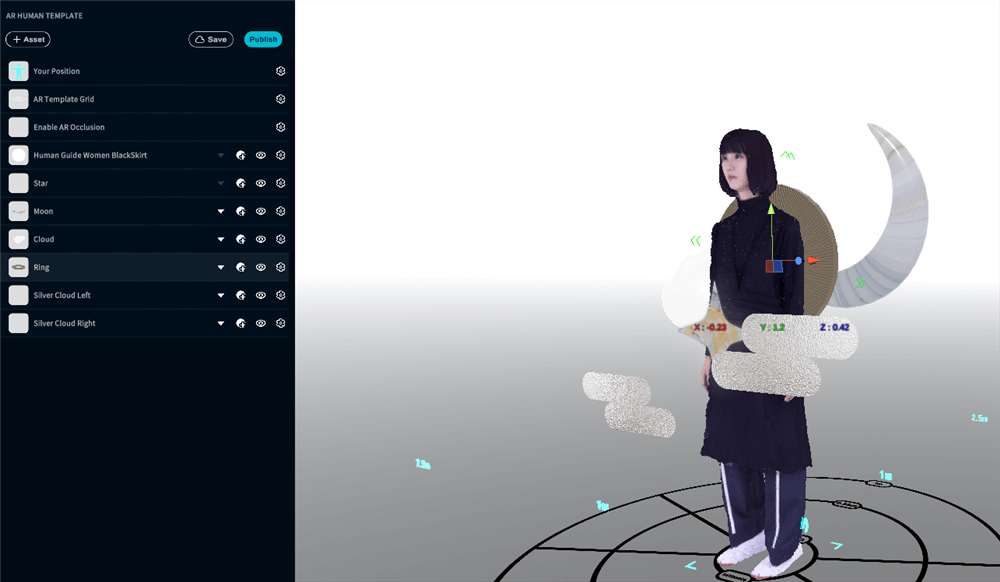
Screen when opening the copied scene
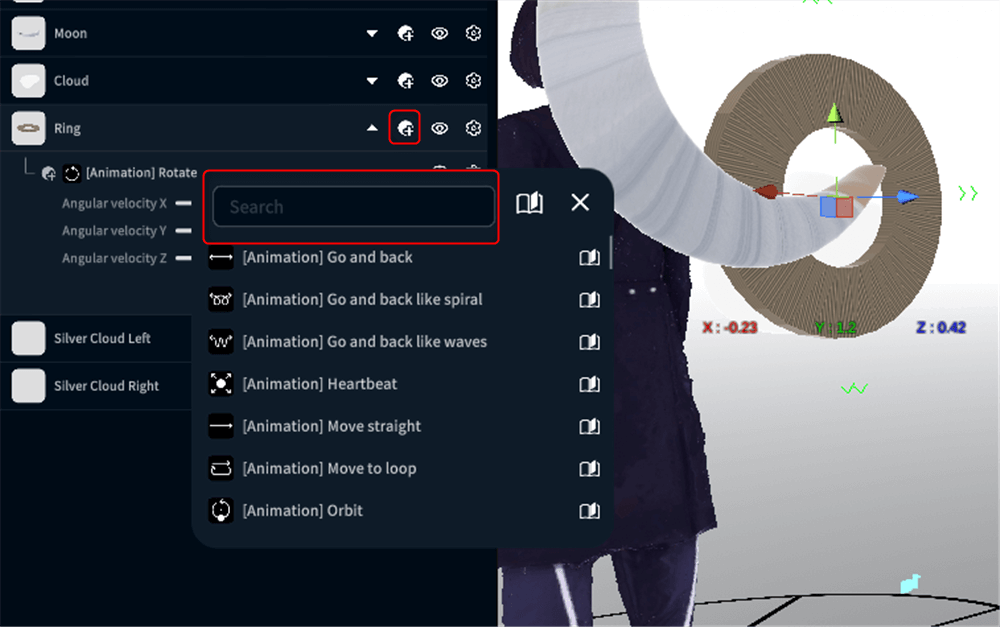
- Select “Ring” and click the Modifier icon to choose the operation options for the asset.
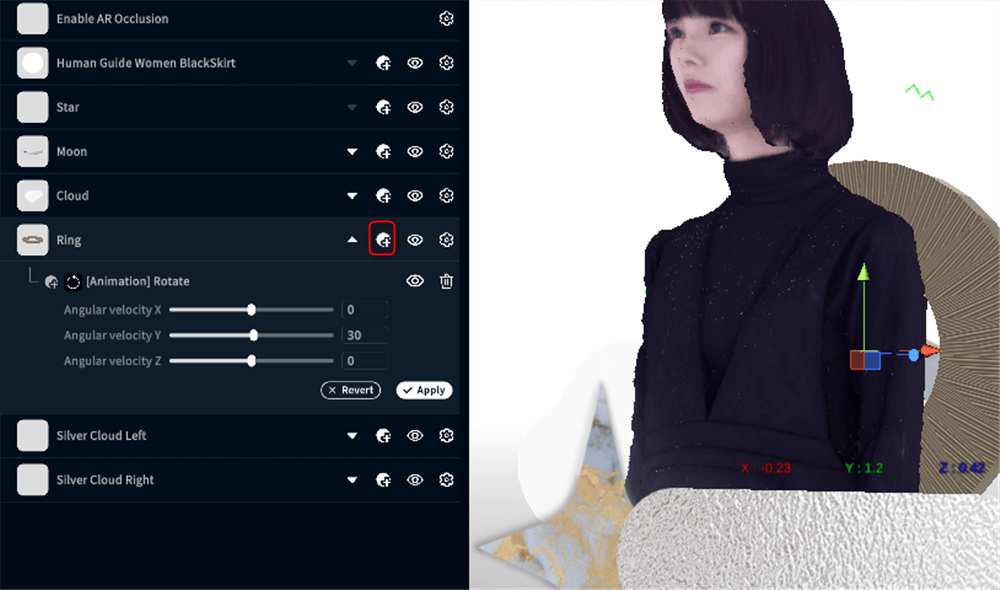
Click the Modifier icon to add a Modifier
- In the search box, select [Animation] Heartbeat.
- Screen when opening the copied scene
![Select [Animation] Heartbeat](https://styly.cc/wp-content/uploads/2022/09/8-3.png)
Select [Animation] Heartbeat
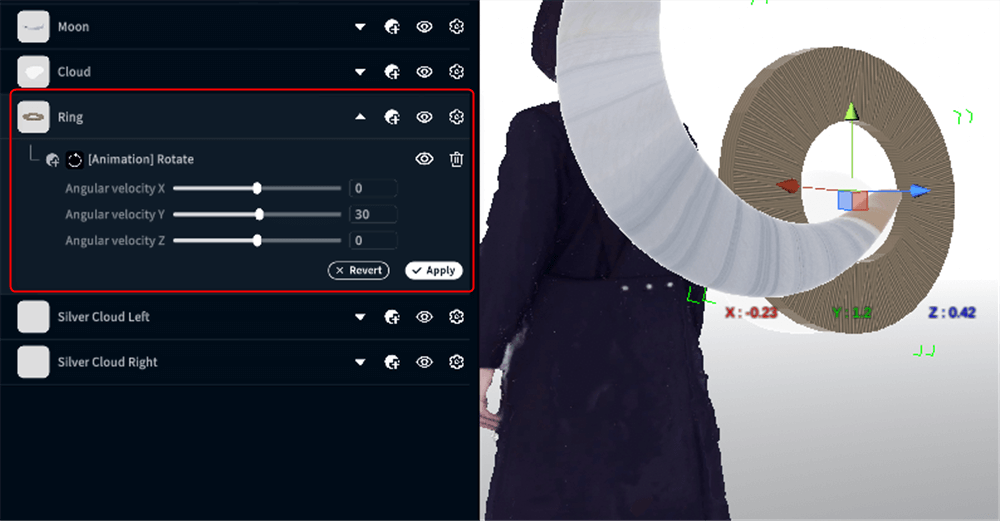
- Confirm that the Modifier has been added and check the current parameter values.
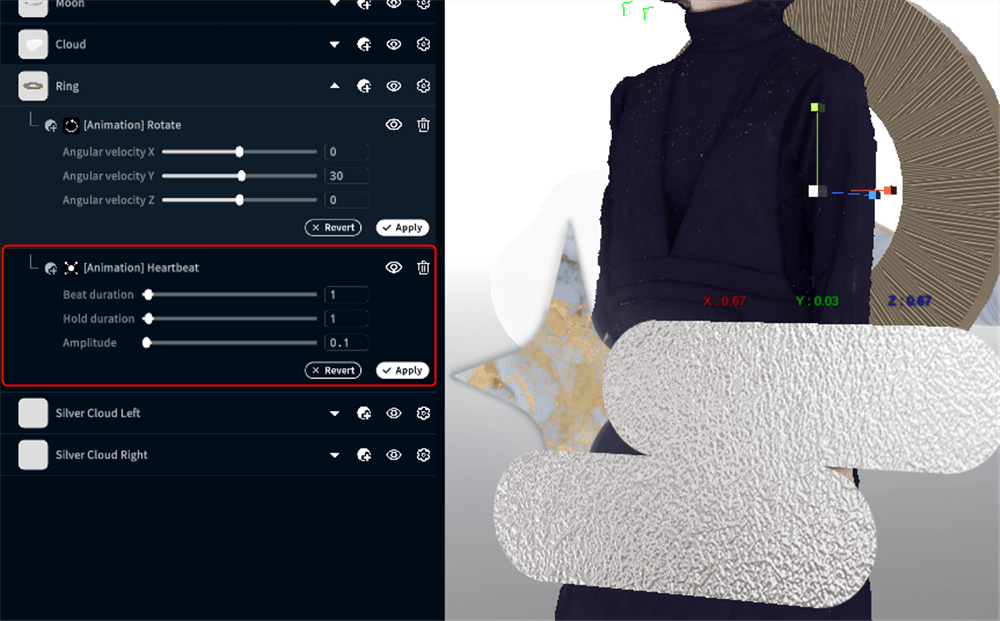
Current parameter values
- Adjust the parameters and apply the changes.
Here, set Beat duration to 2, Hold duration to 1, and Amplitude to 0.1, then select “Apply.”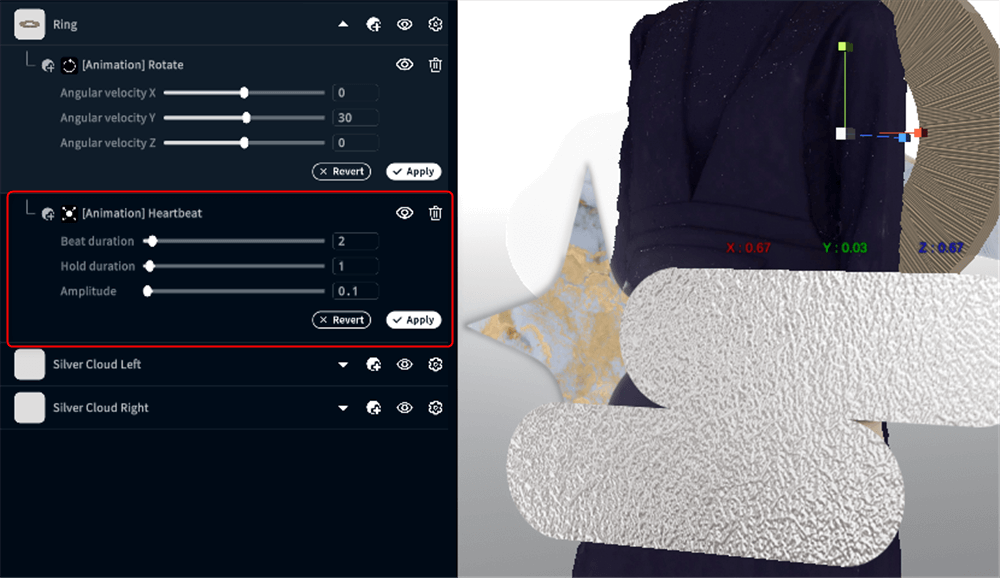
Set Beat duration to 2, Hold duration to 1, and Amplitude to 0.1, then select Apply
- Select “Ring” and click the Modifier icon to add [Style change] wood maple flat.
![Click the Modifier icon to add [Style change] wood maple flat](https://styly.cc/wp-content/uploads/2022/09/11-3.png)
Click the Modifier icon to add [Style change] wood maple flat
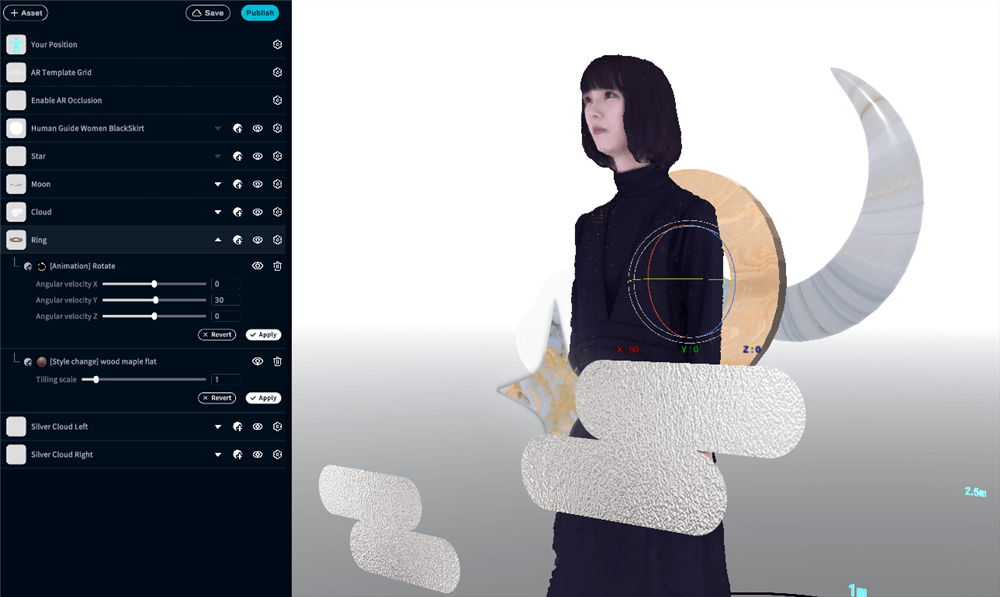
As a result of these operations, we were able to modify the appearance and scale of the background ring.
The presentation now has a more playful feel compared to the original template.
By utilizing or referencing existing templates, you can create your own unique expressions.
Experiencing it on STYLY Mobile
Select the globe icon at the top left of the screen to publish your scene (you can choose between public or private).
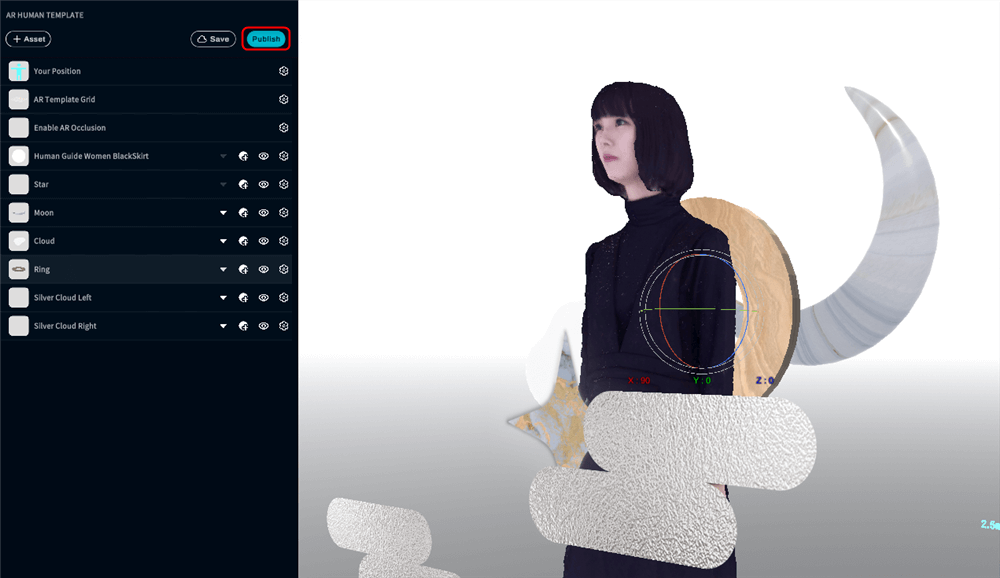
Click Publish to make it public
Once published, the scene can be experienced on various platforms. On desktop, you can access it from STYLY Gallery, while on smartphones, it can be experienced using the dedicated STYLY Mobile app.
Experiencing on Desktop
On desktop, you can scan the displayed QR code with your smartphone to launch the STYLY Mobile app. If you haven’t installed the STYLY Mobile app yet, you’ll need to install it first. (This QR code can always be accessed from STYLY Gallery.)
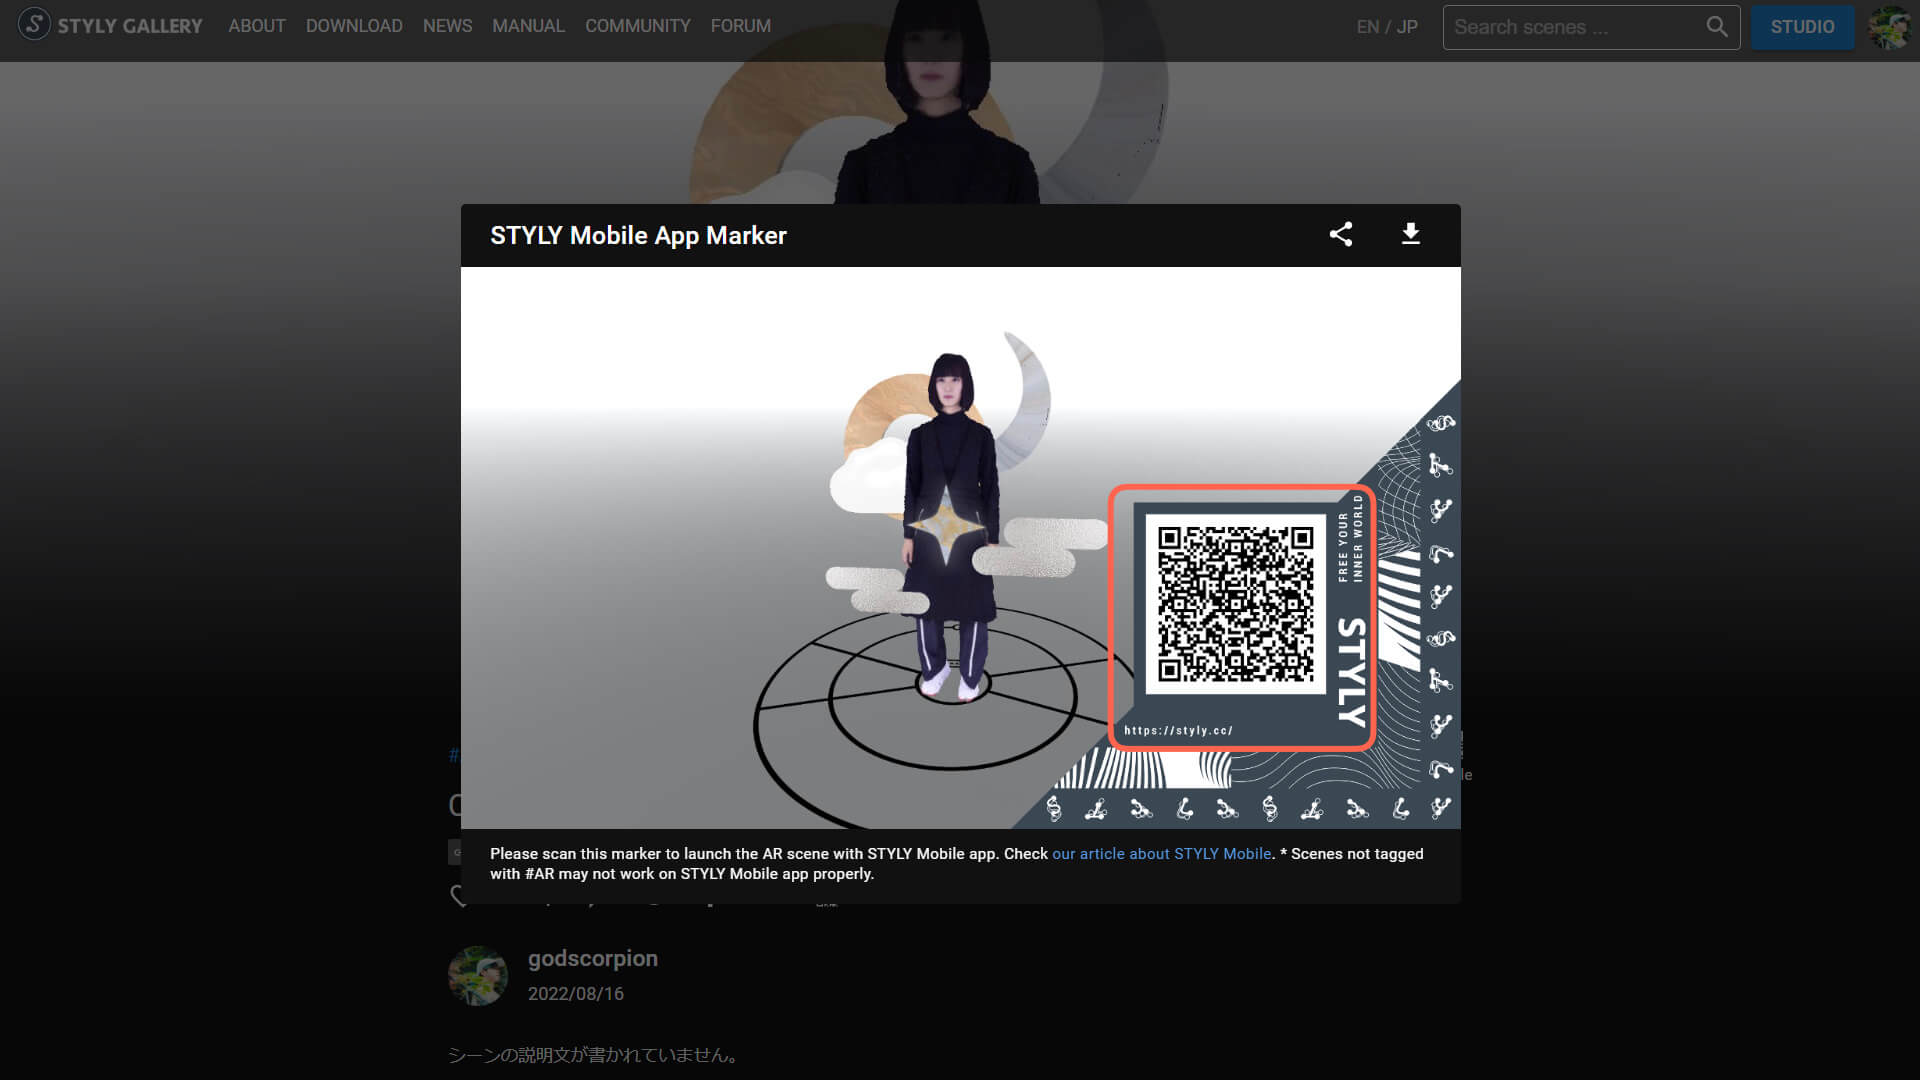
Scan the QR code from STYLY Gallery on desktop to experience it
Experiencing on Smartphone
- After launching STYLY Mobile, select your scene from My Page.
- Select the button labeled “Download.”
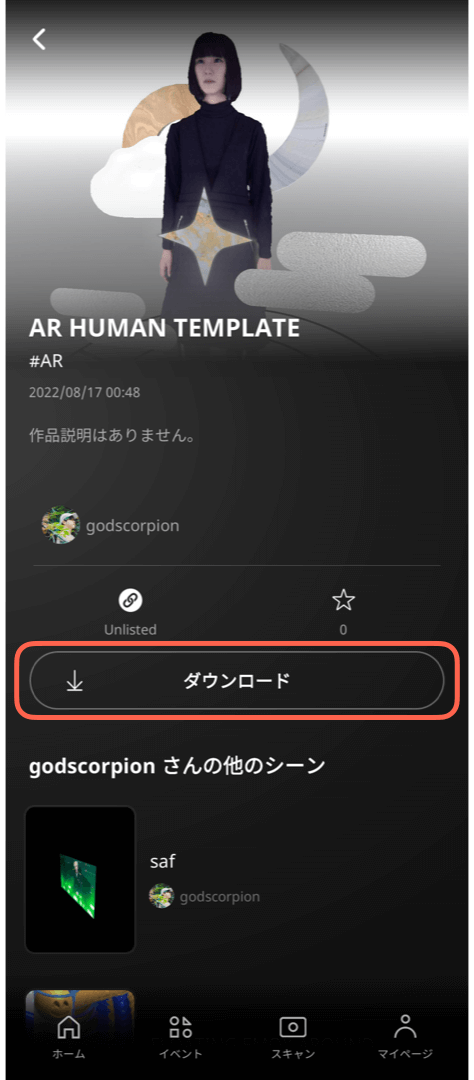
Select Download
- Select the button labeled “View.”
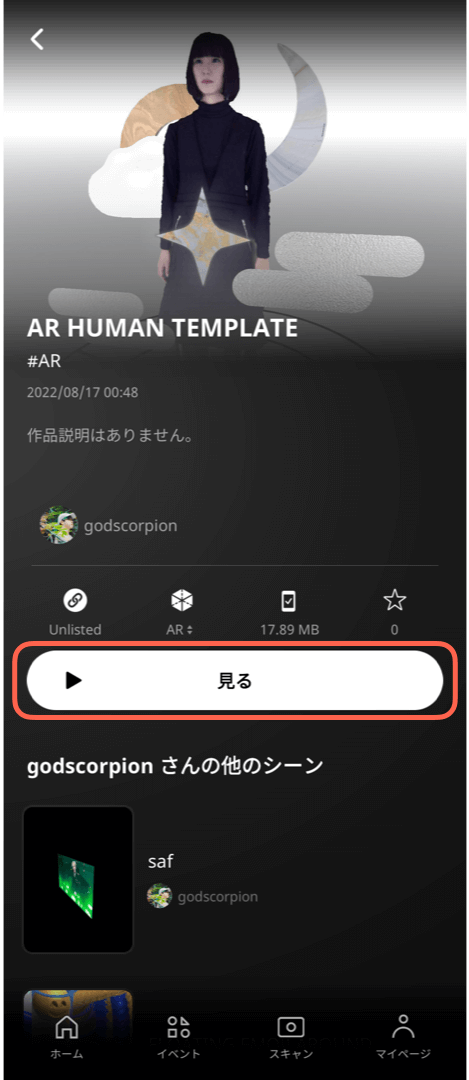
Select View
Follow the on-screen instructions to slowly move your smartphone over a flat surface.
After a moment, the “Tap the screen to start” message will appear, allowing you to begin the experience.
By adjusting the subject’s outfit and pose, as well as the surrounding environment, you can create even more compelling content that fits well with the AR Human Template.
Uploading to Instagram
After selecting “View,” you will find a settings button at the bottom right of the STYLY Mobile app experience screen.
From there, you can switch to recording mode.
By recording a video, the file will be saved to your camera roll, making it possible to upload to Instagram.
View this post on Instagram
Creating with Your Own Assets
In the AR Human Template, in addition to the pre-existing assets placed within the template, you can also use custom 3D models created with modeling software or assets purchased from websites.
Here, we will explain how to upload your own assets.
- Select the upload icon located at the top left of the screen.

Upload icon at the top left of the screen
- Select the “My uploads” section.
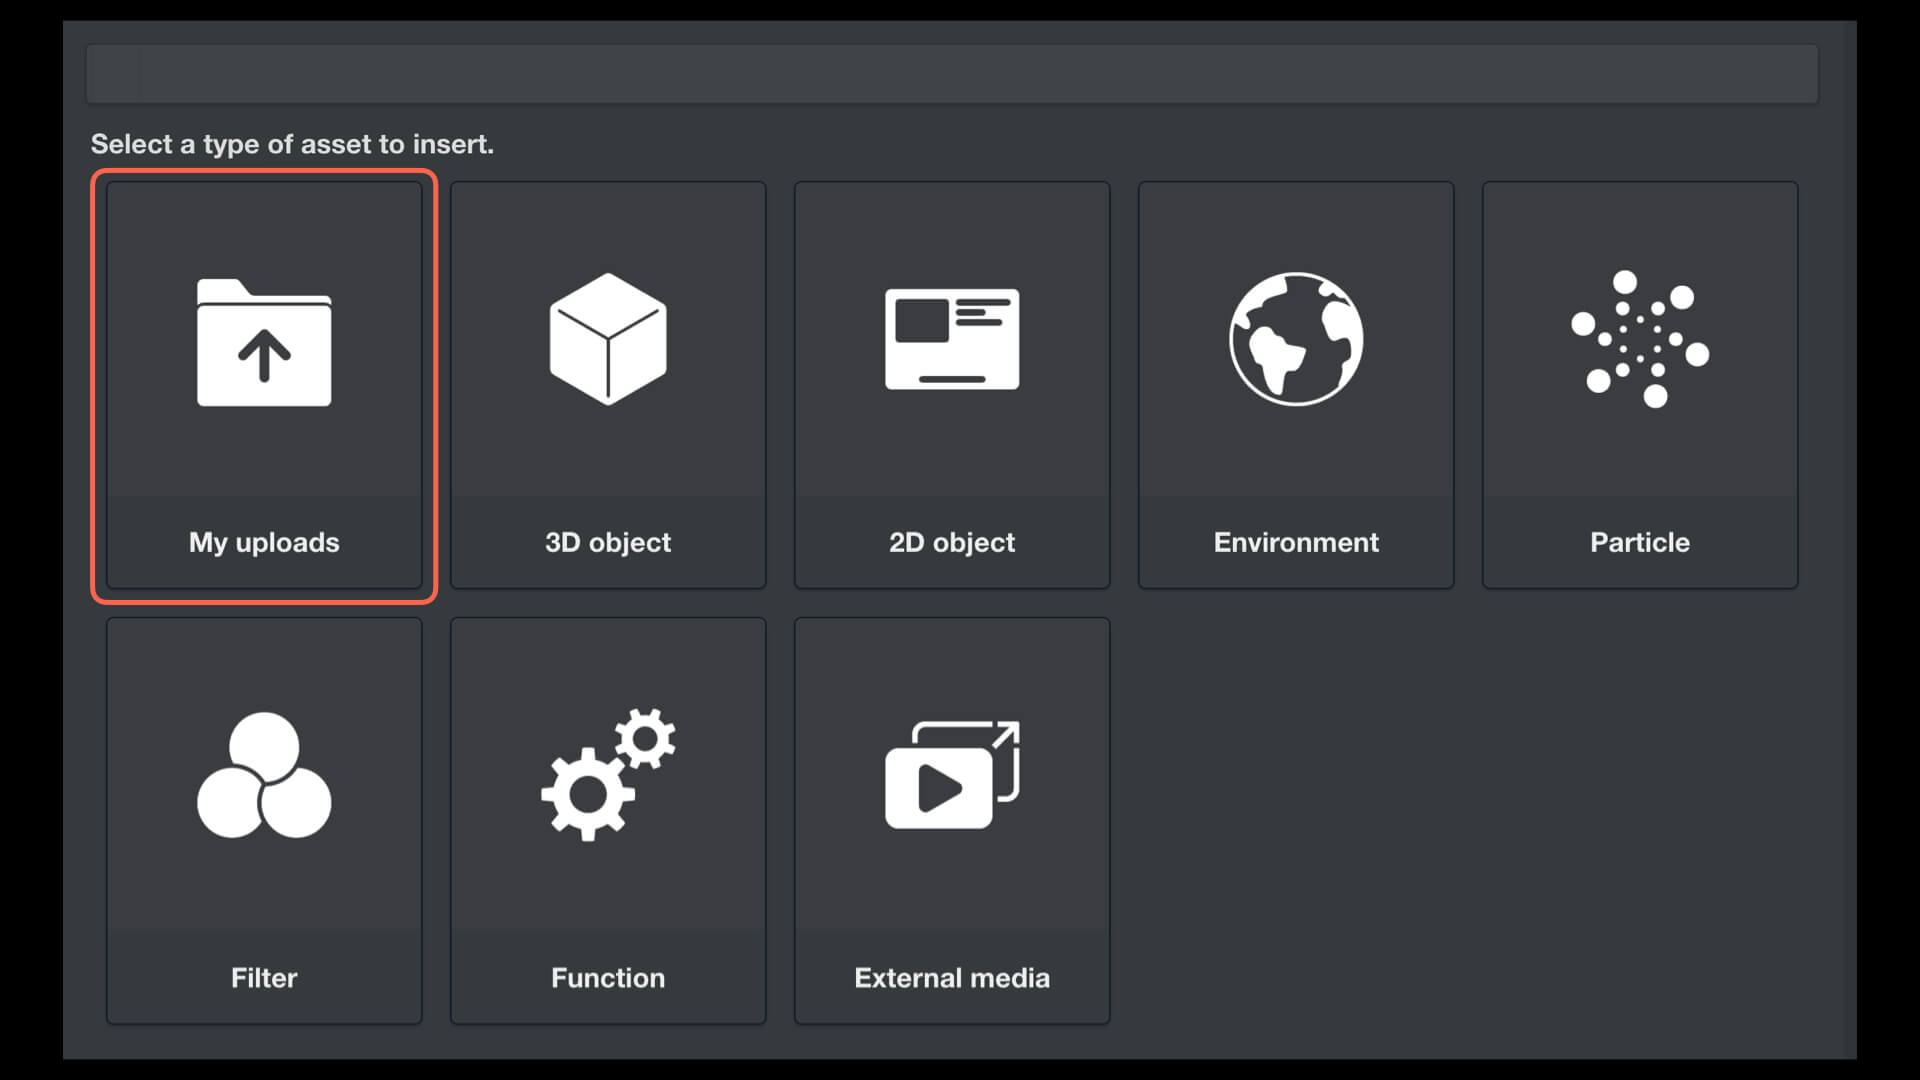
Select My uploads
- Select the “3D model” section.
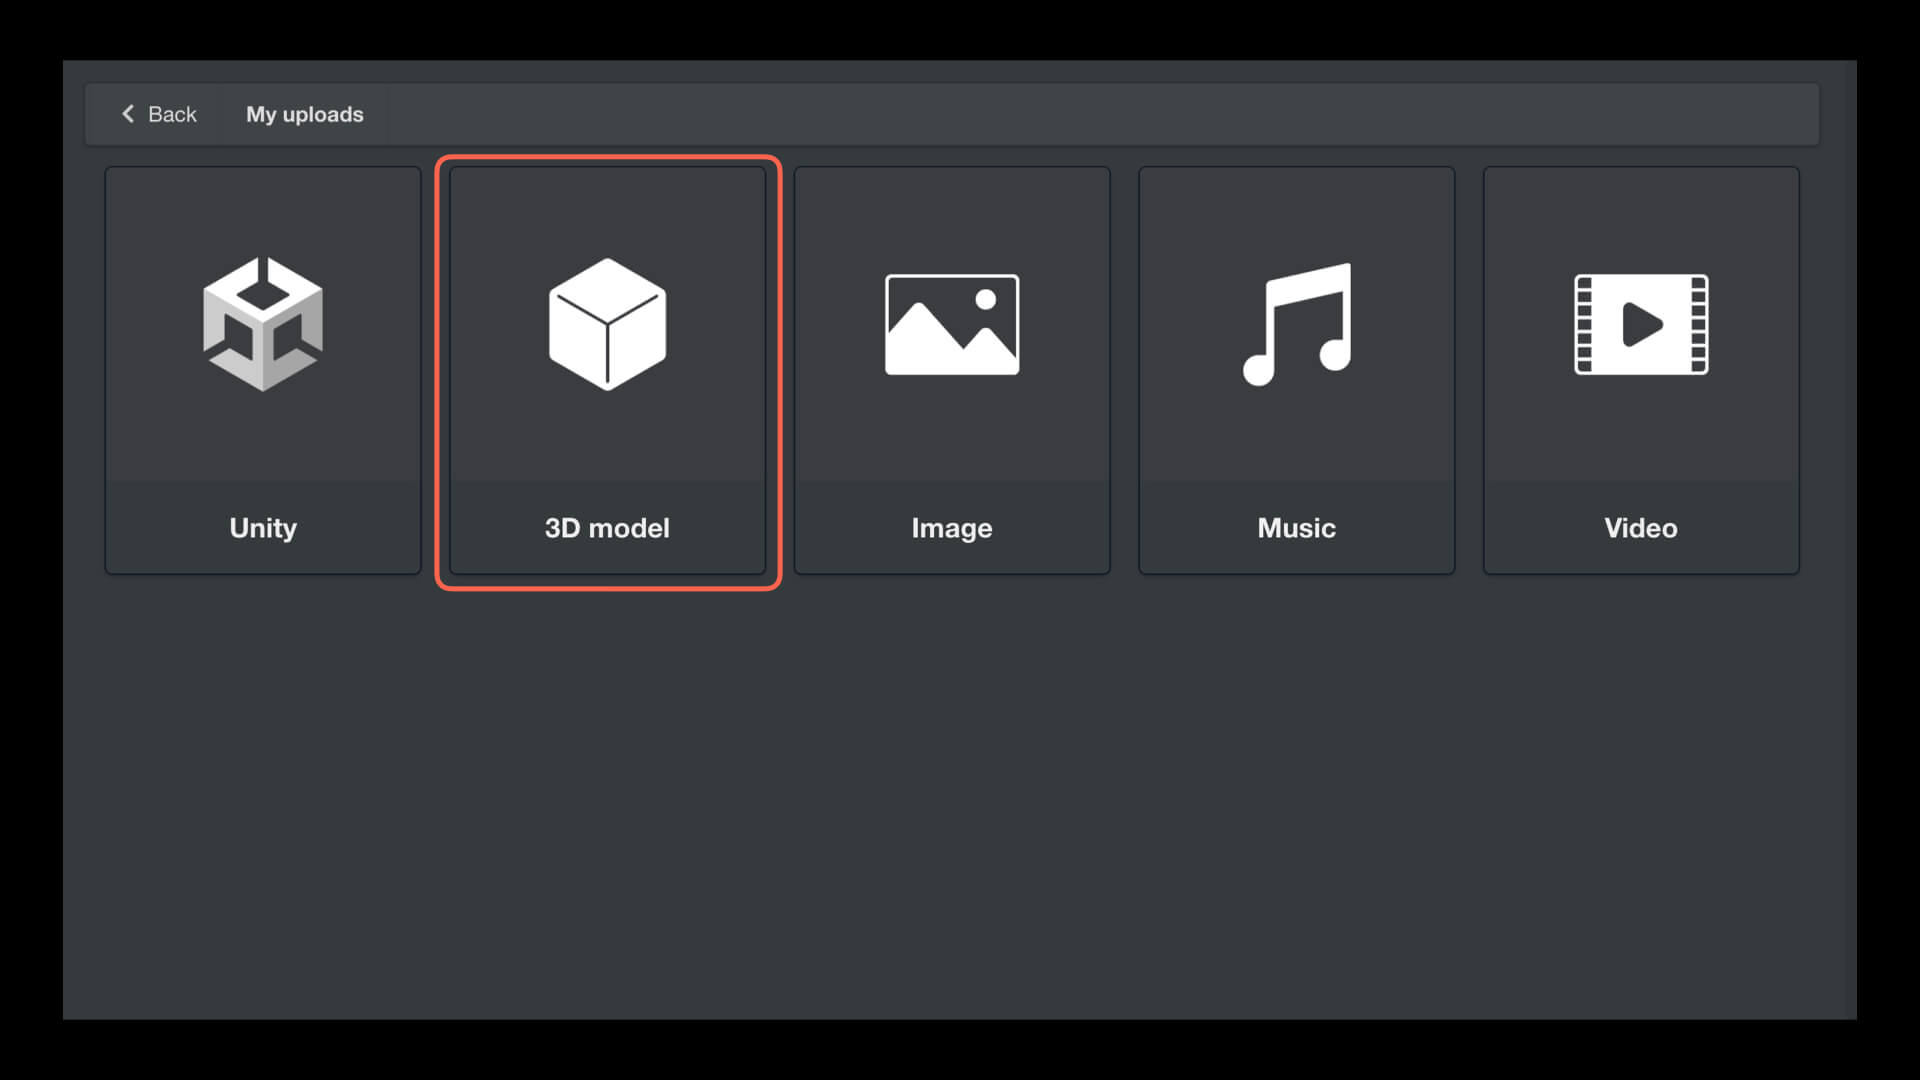
Select 3D model
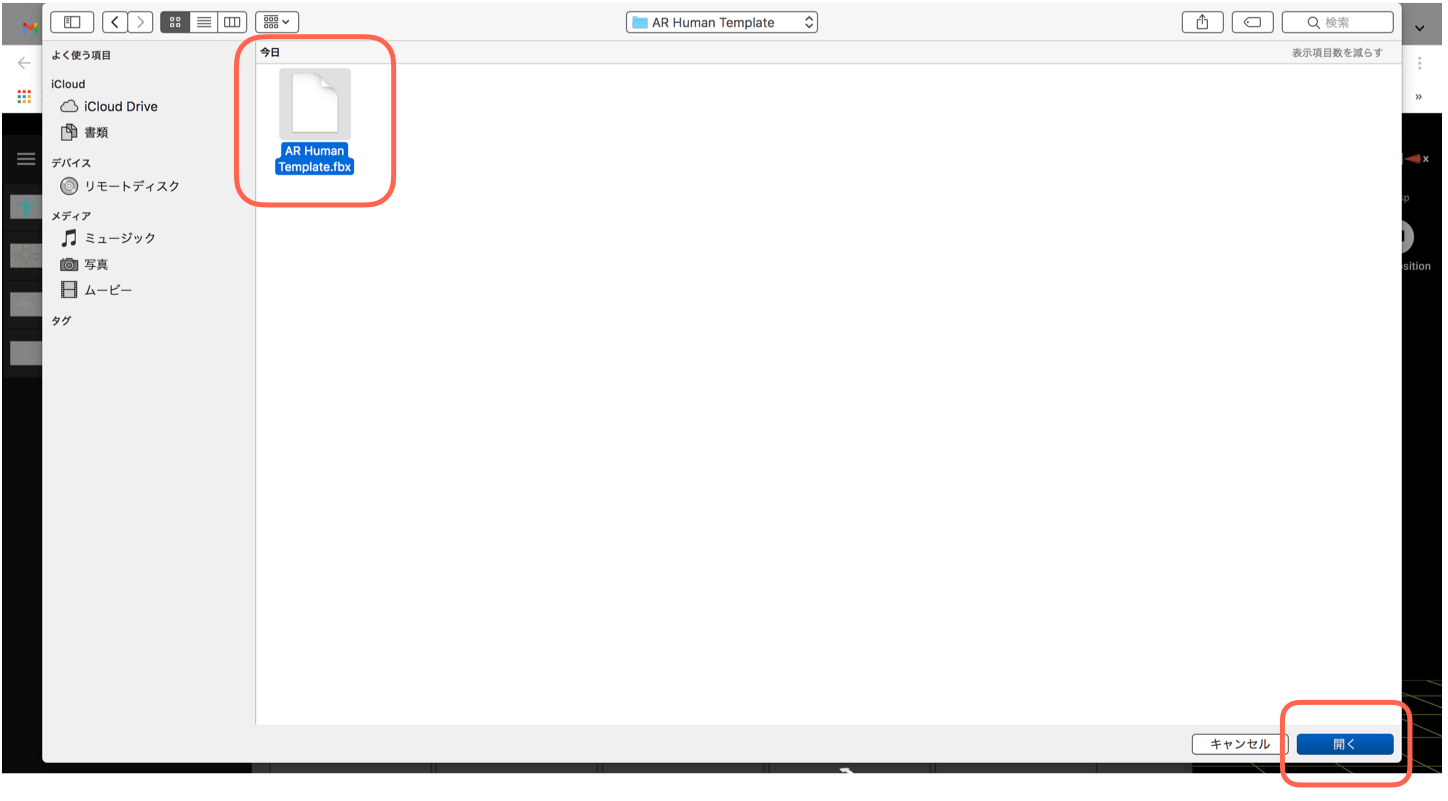
- Select the file for the asset stored on your local device from the “Select” option.
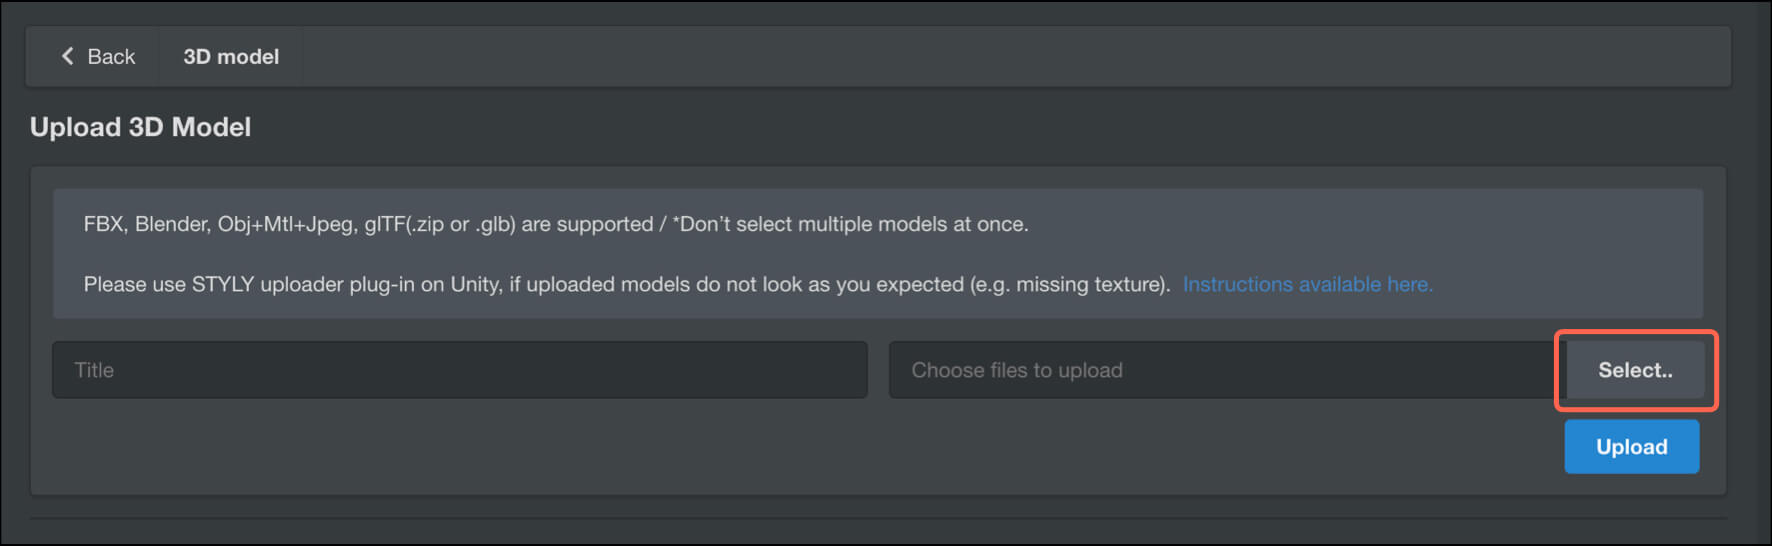
Select local asset file

Select a file stored locally
-
Confirm that the asset is selected and choose “Upload.”
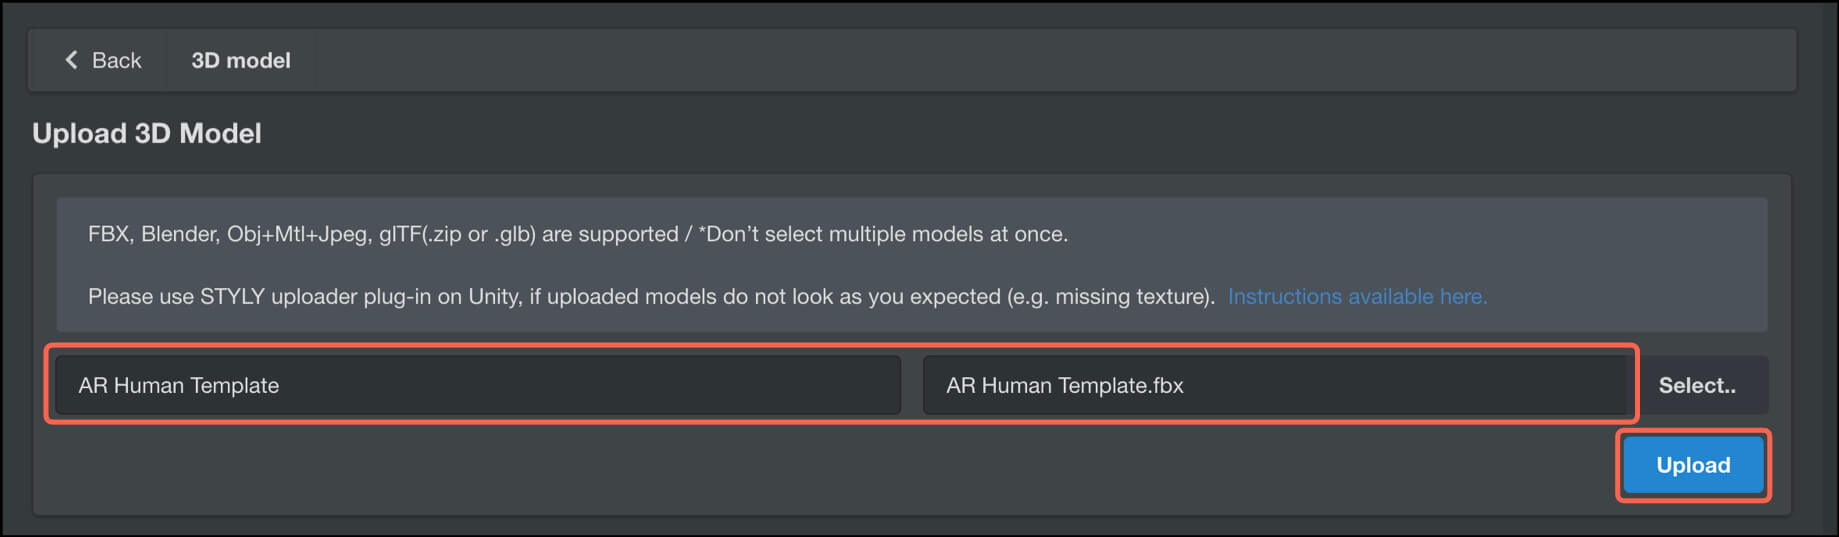
Confirm asset selection and choose Upload
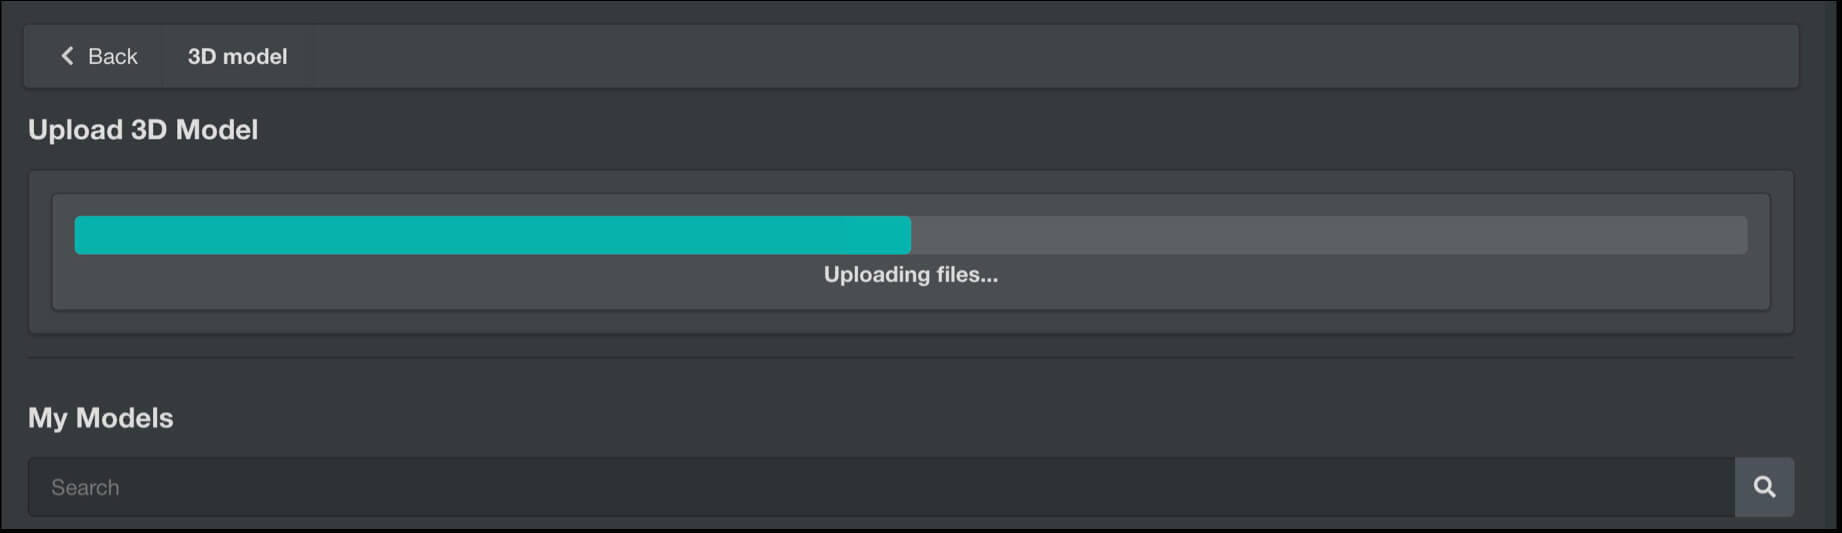
Uploading screen
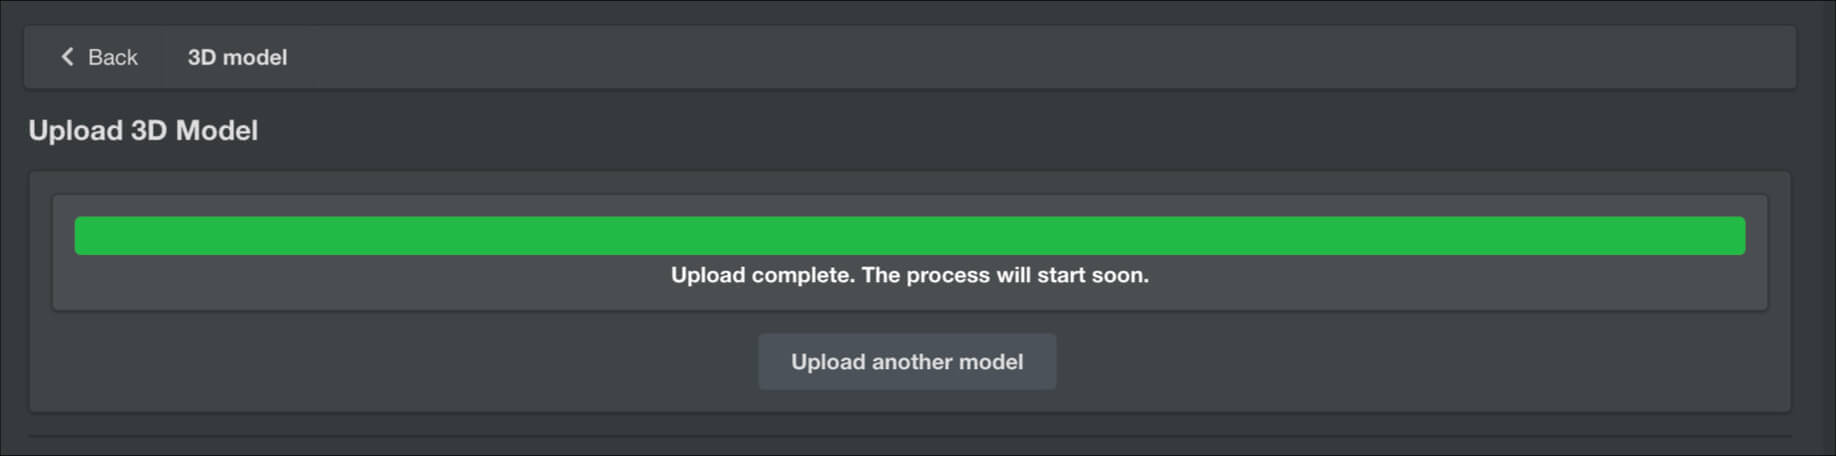
Upload complete screen

In this guide, we uploaded an asset stored as a local file, but you can also upload assets created in Unity.
Check out the following article for more details.
How to upload from Unity to STYLY

For guidelines on delivering a more immersive and comfortable experience, refer to the following article.

For questions about STYLY, bug reports, and feature requests, visit the STYLY FORUM
https://jp.forum.styly.cc/support/discussions
Edited by SASAnishiki