In this article, I’d like to practice lighting with gobos on 3DCG.
I’m sure you’re not familiar with gobos, as they are mainly used for dramatic lighting. However, you can use it to create a more realistic and high-quality 3D model.
The actual operation of the system is not particularly difficult, so let’s put it into practice.
What is GOBO?
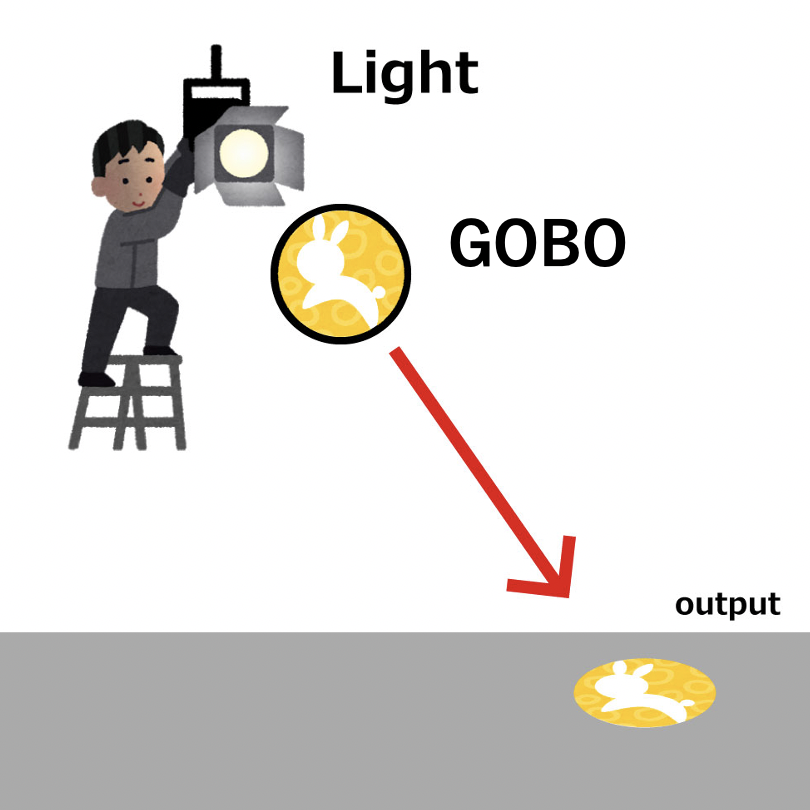
GOBO is a piece of lighting equipment used for staging.
A gobo is a piece of glass, plastic, or thin metal that reflects light to produce various designs and pseudo You can create a shade of a tree and so on. By the way, glass gobos are called glass gobos, and metal gobos are called metal gobos.
You’ve probably seen these at the entrance to pubs and live events without knowing the names. Logos, waves, and text are projected from a light source to create an appealing image.
How to use gobos in 3DCG
Now I’d like to explain gobos from a 3DCG perspective.
To utilize gobos in 3DCG, it is necessary to adjust all of the environment and shadows, in addition to adjusting the light.
Of course, it is possible to use it as a gobo, but this time I would like to create a gobo as a shadow effect using the gobo mechanism.
Usually, we place many objects to create physical shadows, but in this case, we want to create a plain (plane) because as the number of 3D models increases, so does the rendering time. This method also creates pseudo-shadows to keep them down.
What is GOBO?
How to stage gobos in 3DCG
Making a Gobo Image
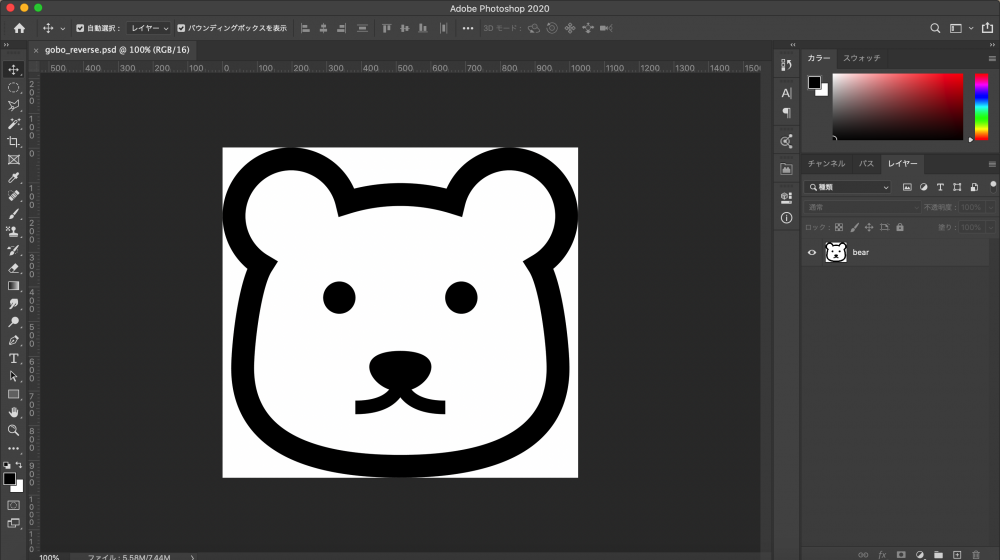
First, create a gobo image with image editing software. It’s easy to do, and you can design it however you want.
Reverse the colors that you want to display when leadering, and be aware of that.
In this case, I’m going to create a gobo image in Photoshop.
I used the following materials.
https://www.silhouette-illust.com/illust/30923
First, I’m going to import them into an image editing software. In this case, I used Photoshop, but you can use different software as well.
Import or create an image
Image > Color Correction > Invert Gradation
To invert the colors, follow the steps in the image to invert the color if you are using the English version.
By the way, even if you do not want to invert the tones, you can use the Color Correct function in Maya. It gives similar results.
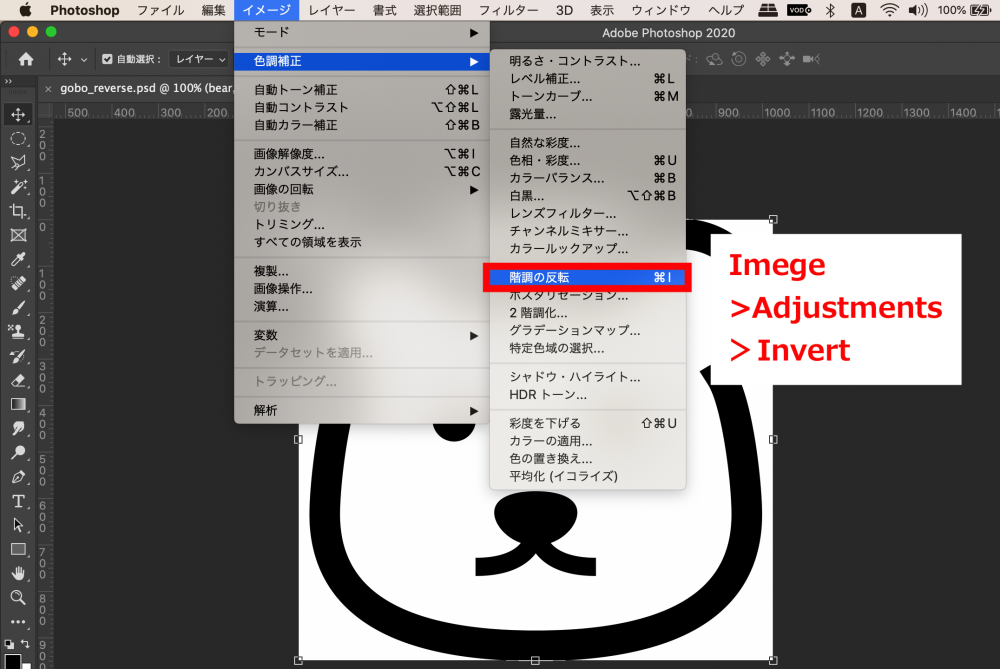
Select the Invert
Now the colors are inverted.
If you want to show the color, set the part you want to show as color and the part you want to make transparent as black. The reason is that the black part will not be visible when rendering in Maya.

Inverted
Now the material is ready.
Maya allows you to use psd data, so you do not need to export it as an image.
Creating a shadow effect with a gobo in Maya
Now, I’d like to create a shadow effect using the bogo material I created in Maya.
First, create two planes.
Create>Polygon Primitives>Plane
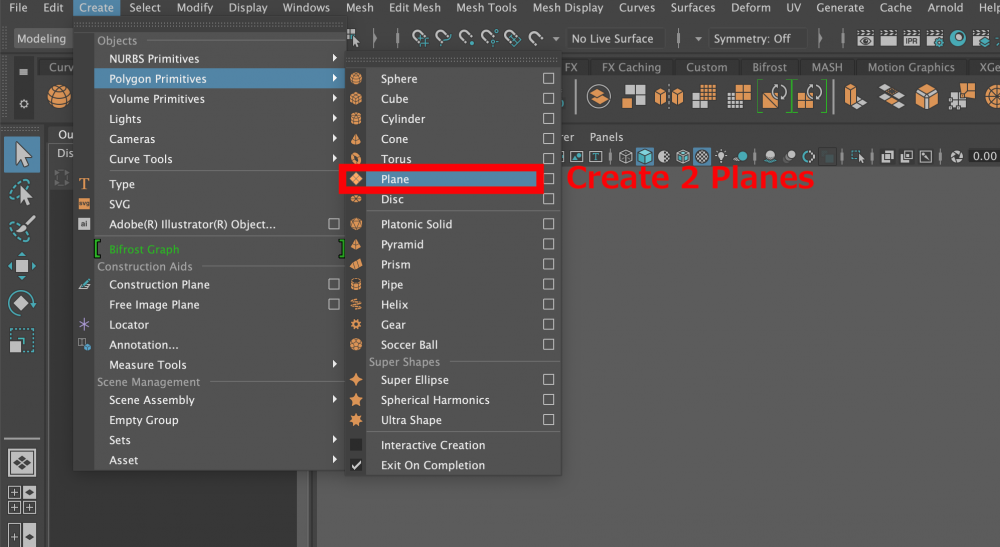
Create 2 Planes
Now we’ll create directional light.

Create a Directional Light
I’ll rename the plane for clarity. The top should be bogo, and the bottom should be ground.
Adjust scale as you like. The light is placed on top of the plane, and it is easy to see the result from a 90-degree angle.
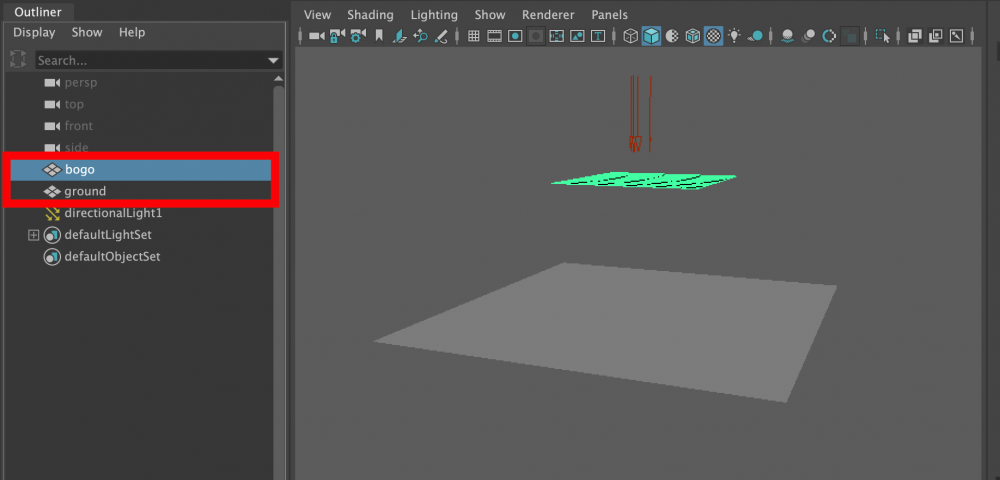
Change name of 2 Planes
Next, we will assign a material to the bogo plane.
Select the bogo plane and right-click on it to Assign New Materials.
In the dialog box that appears, right-click on the
Apply Material in Arnold > Shader > aiStandardSurface
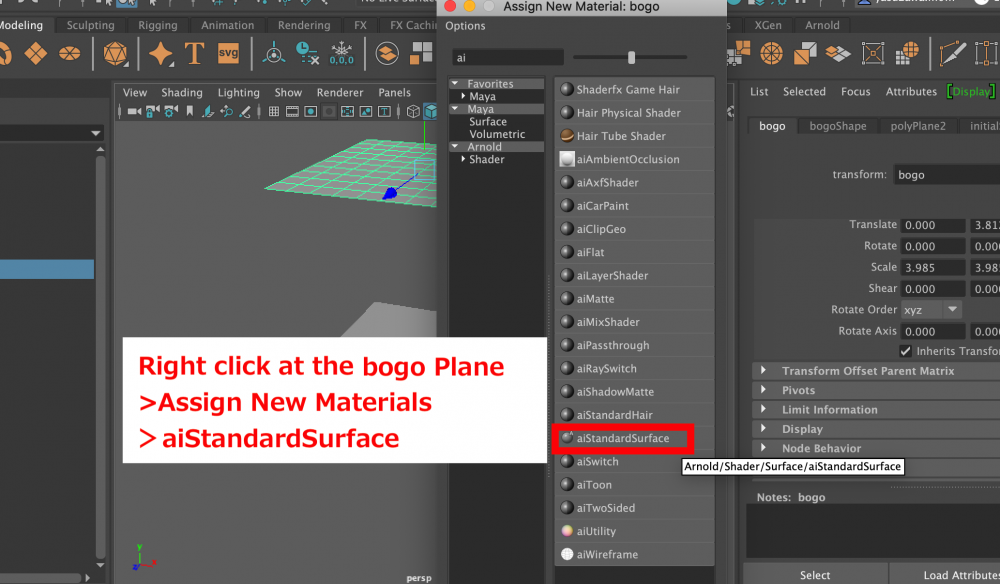
Use an aiStandardSurface
Display the attribute editor of the applied aiStandardSurface.
Turn off the Color and Specular values. We do not need these values because we will create a shadow effect.
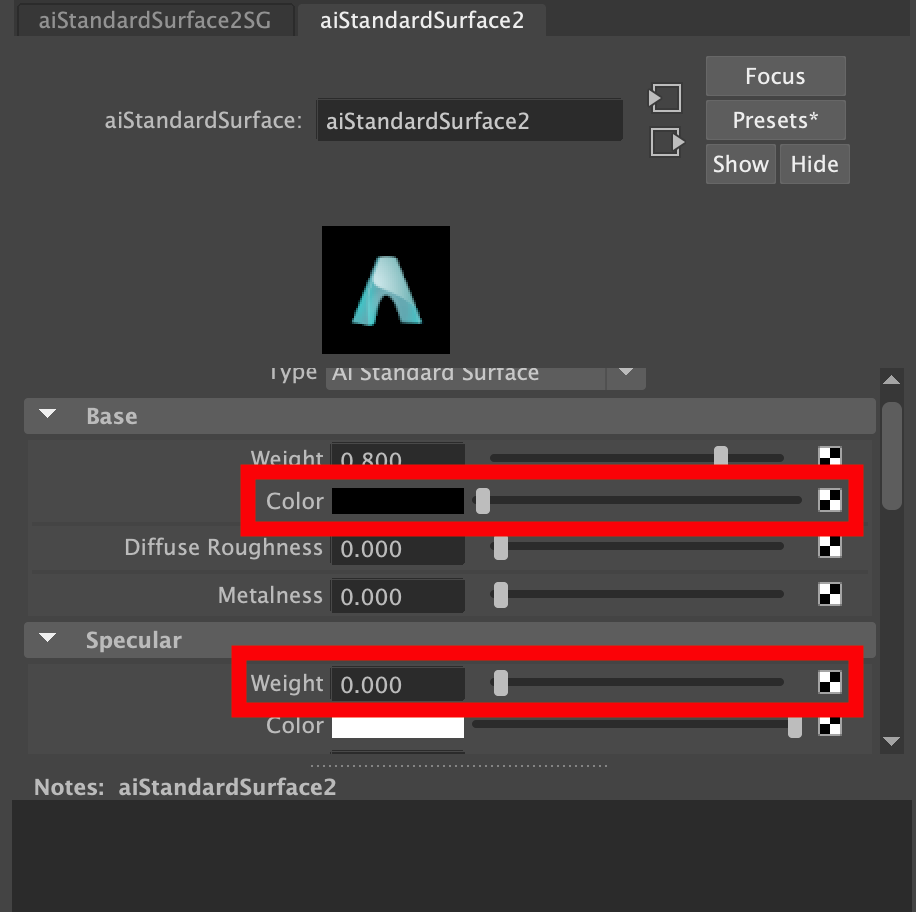
OFF a color and a Weight parameter of aiStandardSurface2 in Attribute Editor
Click the checkmark next to Geometry > Opacity.

Assign a bogo image
Select File and import the bogo material. The psd format does not cause any problems to import as it is on the file button.
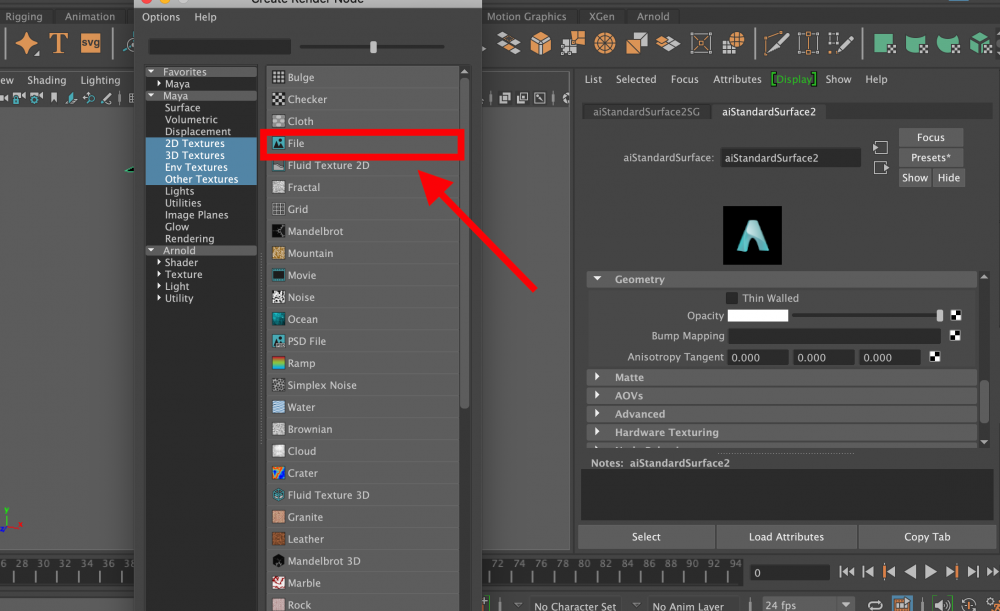
Select a file button
Then, from the attribute editor in the bogo plane, on the bogoShape tab Migrate.
Uncheck the default option in Arnold > Opaque

Uncheck an Opaque
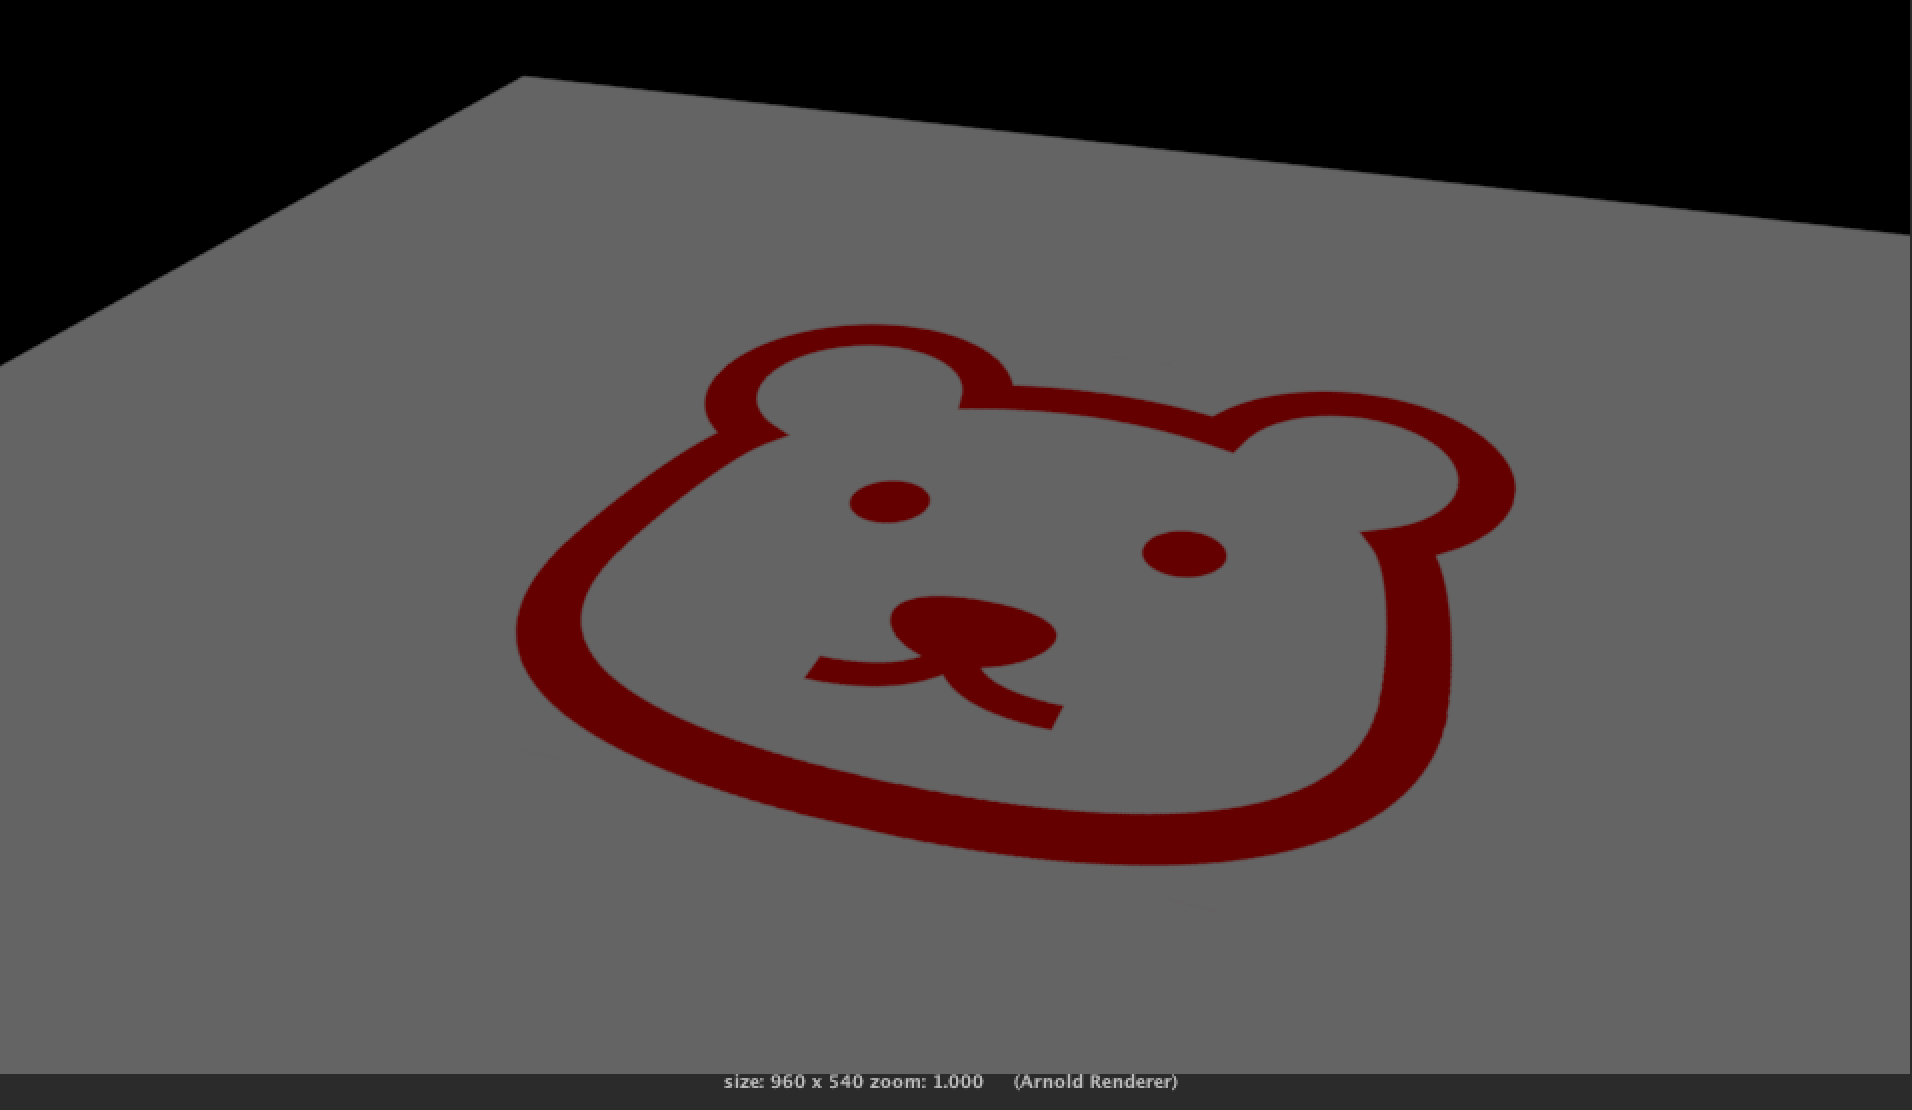
Here’s what it looks like when rendered.
That’s all we have to say about how to create a shadow with gobo.
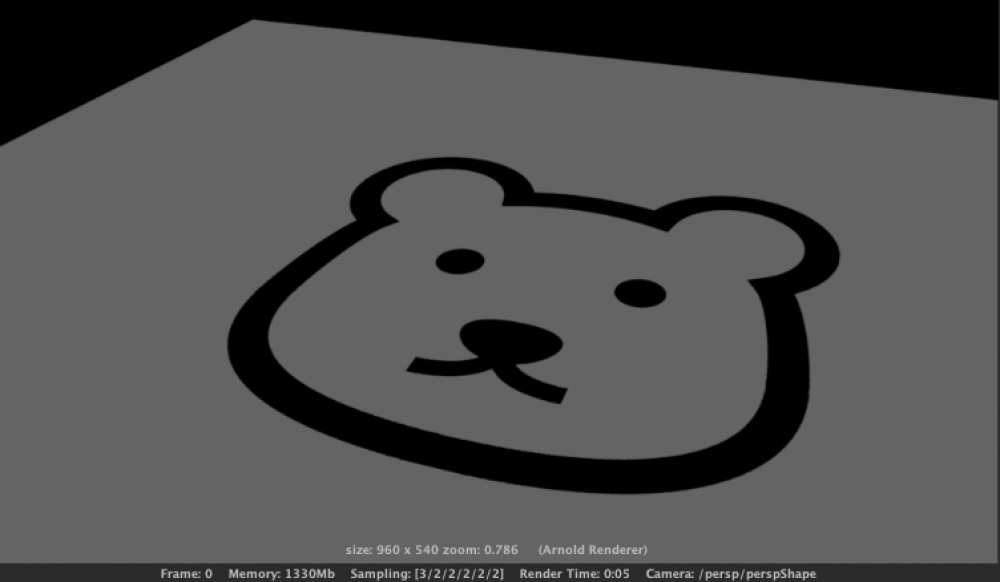
gobo_bear
Invert tones with Color Correct
Here is an aside on the inversion of tones in Maya that I mentioned at the beginning of this article.
The image created in the previous section is displayed in black and white inversion. The same is true for the color display.
For example, if you use red, the rendered result will be blue. If you wanted a yellow render result, you would have to create the bogo image in blue-purple.
It is too troublesome to flip the created image and the output color. So I’ll tell you how to do the inversion of tones in Maya.
Let’s display this image below as a colored bogo image.
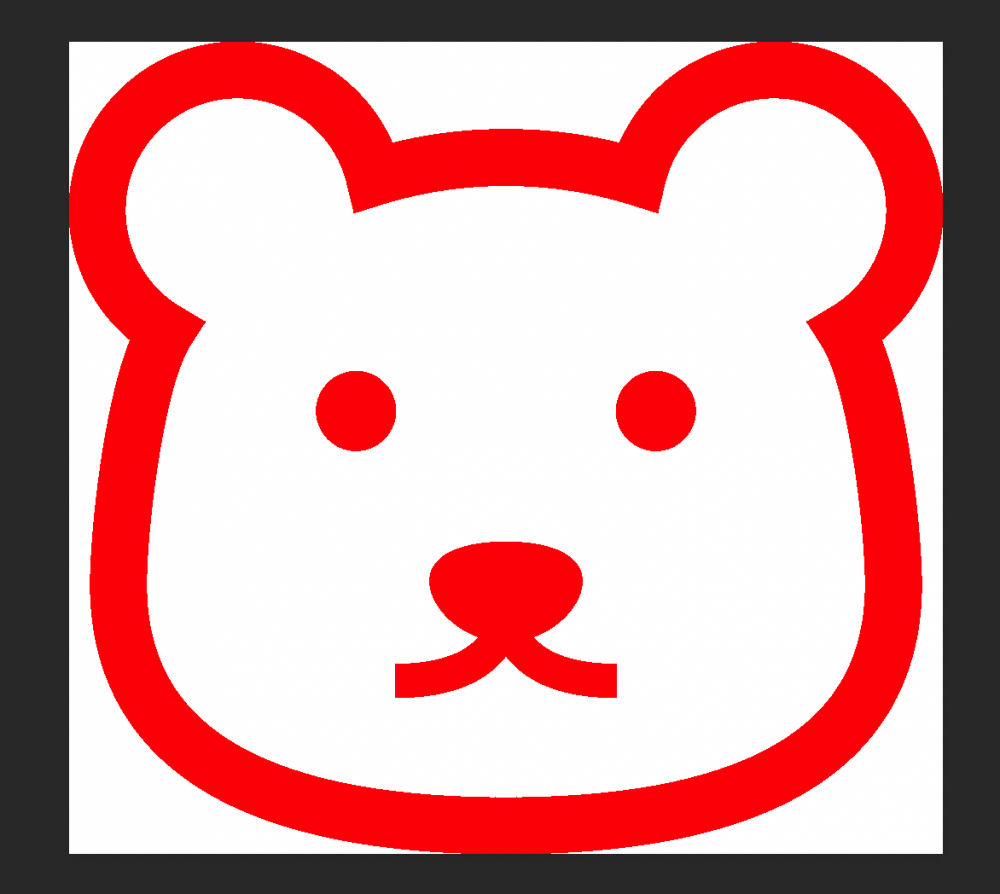
Use a colored gobo image
Select a gobo plane in the outliner and press the HyperShade button at the top of the screen.

Show a HyperShadeWindow
Click ① > ②, and display the node as follows.
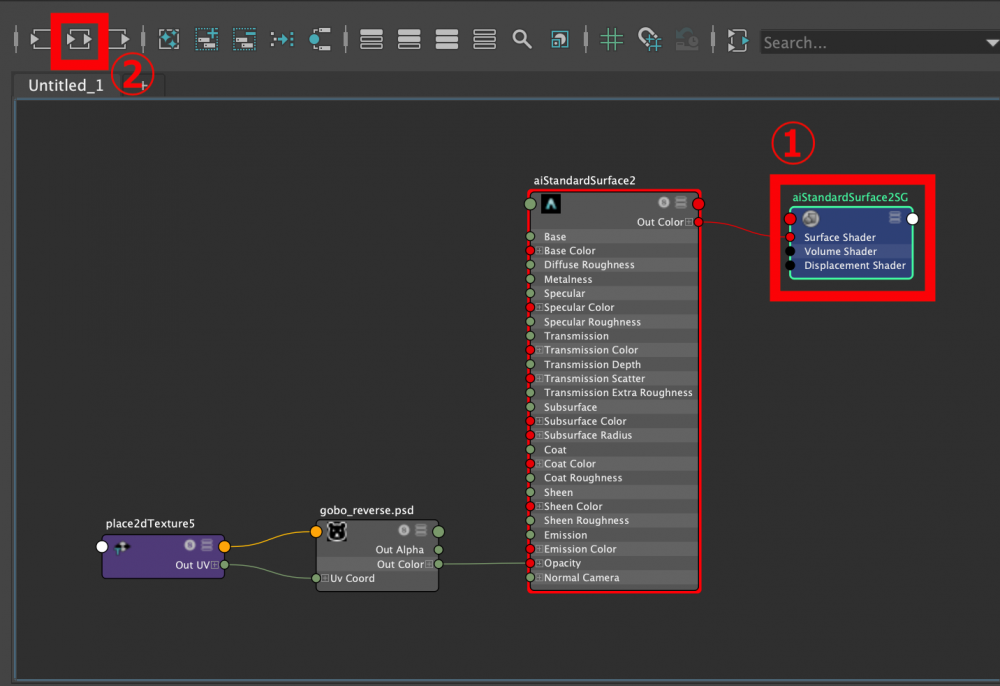
Show a node of aiStandardSurface2SG
From the Create menu, apply aiColorCorrect.
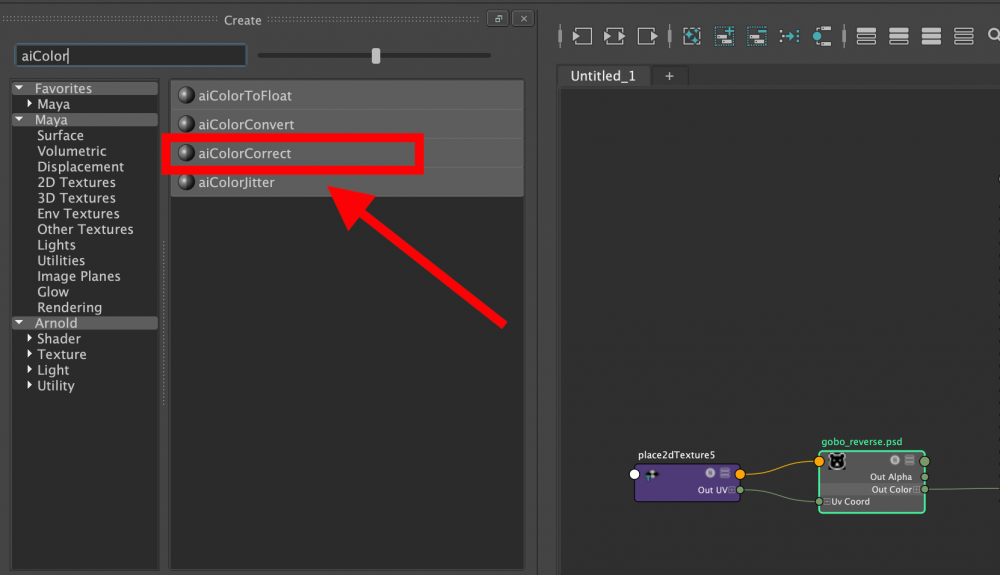
Use an aiColorCorrect
Connect the created aiColorCorrect node as shown in the following images.
Input gobo(psd data) node and aiColorCorrect
aiColorCorrect’s Output and aiStandardSurface2’s Connect Opacity.
Check the output color in the preview on the right side of the image.
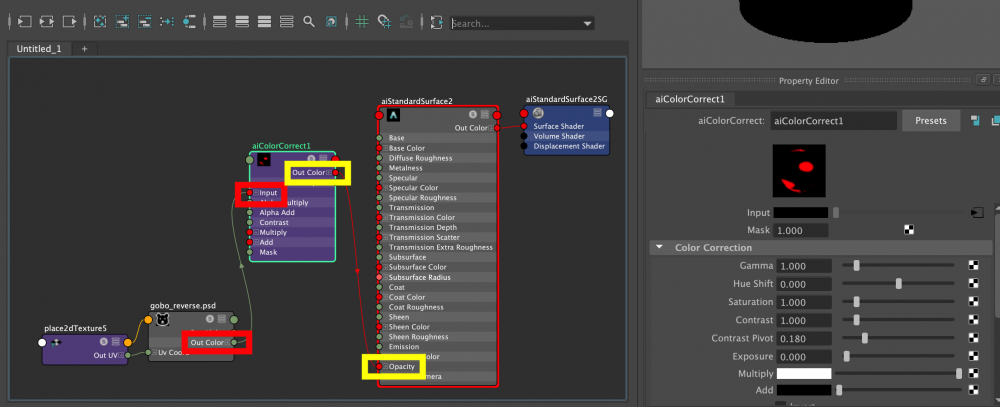
connect nodes to aiColorCorrect
When I rendered it, it was properly displayed in color. If you want to use color to create a shadow effect, try this method.
By the way, if you set up the directional light at an angle, the output will also be distorted at an angle so that you can get a beautiful result. Please be careful of the angle of the light if you want to display it.
colored bobo image
Summary
In order to know how was the creation of gobos, check out the summary at the end.
What is a gobo?
This is one of the methods of staging lighting.
A thin plate is attached to the lighting equipment to illuminate it. Various designs of gobos can be used to achieve this effect.
Use of gobos in 3DCG
We created a shadow effect using planes.
We aimed to reduce the rendering time and work time to ensure the output of quality. The following is an example of how to create a gobo in 3DCG
How to direct gobos in 3DCG
The point is that the color of the bogo image will be inverted, so the color of the bogo image will be reversed, so you can use an image editing software or Maya to create a color. It needs to be reversed.
How did you like it?
By using gobos, you can display a logo or simulate sunshine through the trees. You can use gobos in various ways, not only by setting up lights but also by pasting images to the transparency values. Let’s expand the range of lighting and shadow presentation.