In this article, we will use Archimesh, an architectural add-on in Blender 2.8, to easily create a house and take it to Unity and Styly! 🐼💫
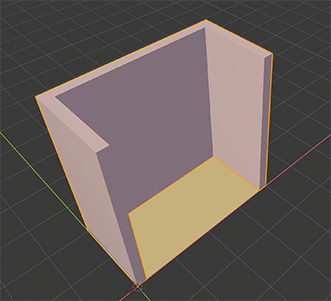
This is how I’d like to make this room look like.
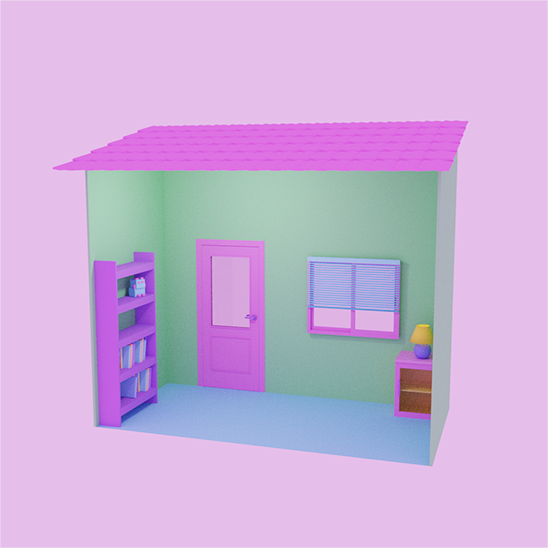
The finished house
I’m going to split this article into two posts because it’s going to be lengthy!
This is the “Let’s make a base room” section. “Let’s make a room” is here.
![[Blender 2.8] Using Archimesh Add-on for architecture (2) “Inside the room. Let’s make it!”](https://styly.cc/wp-content/uploads/2020/06/Head3-160x160.png)
Preparation
Enabling Add-ons
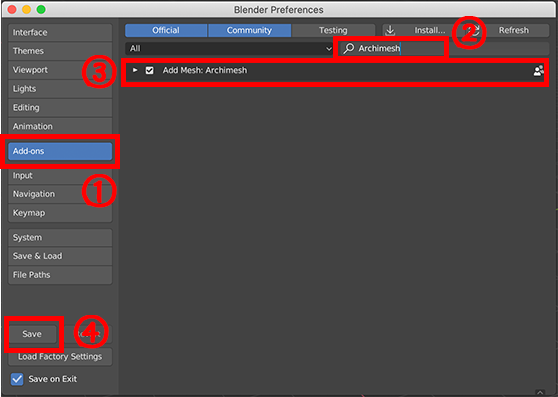
After opening the Blender, go to Edit > Preferences and open Preferences.
- Go to the Add-ons tab and select
- Search for “Archimesh,” and you’ll find it.
- Check the box.
- Save it.
Adding an Add-on
Usage
Once the add-on is added, Shift+A adds Archimesh to the Add Mesh item.
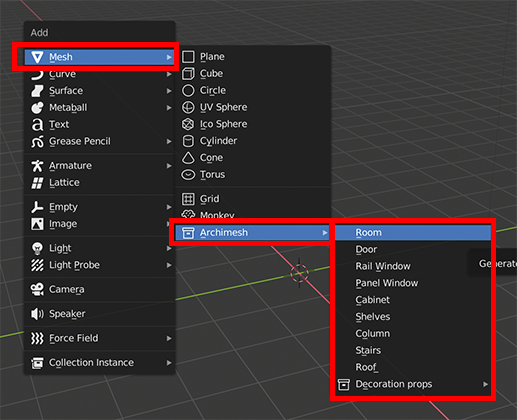
Adding Archimesh
You will find the Room, Door, Rail Window, Rail Window, Panel Window, Cabinet, Shelves, Column, Stairs, and Roof.
These are all things you can create with Archimesh. So, let’s get started! 🐼
How to make a room
Create a base
Let’s create a room first.
Go to Shift+A > Mesh > Archimesh > Room to get a mesh for the Room. Then a small wall will pop up.
When the wall is shown, you can see the wall’s Edit menu on the right side menu’s Create tab. If you select another wall, you can also select it to see this menu.
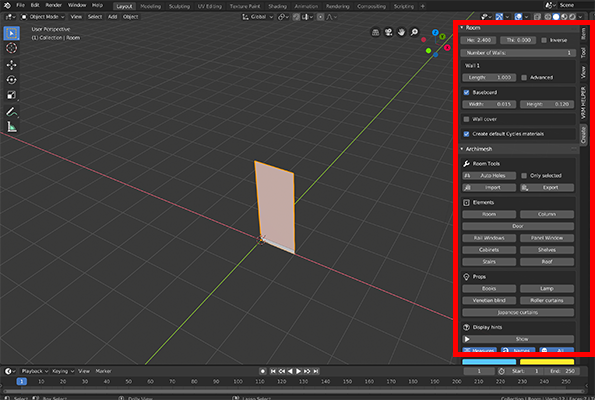
The Edit menu
Let’s create a room by manipulating this menu. First, we’ll set the number of walls in the red frame to “4” this time. This will increase the number of walls to 4, and the menu will also contain more menus from Wall 1 to 4.
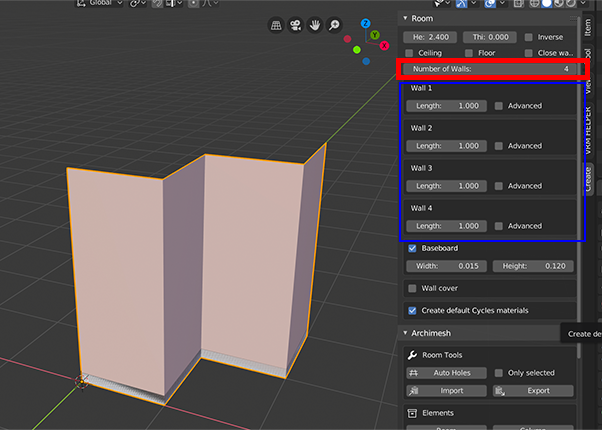
Increasing the number of walls
From here, we will start to shape the room.
In each wall menu, you can set the length and angle of the wall.
At first, you can only change the length of the wall, but if you check the Advanced checkbox, you can change the angle and other options (more on this later).
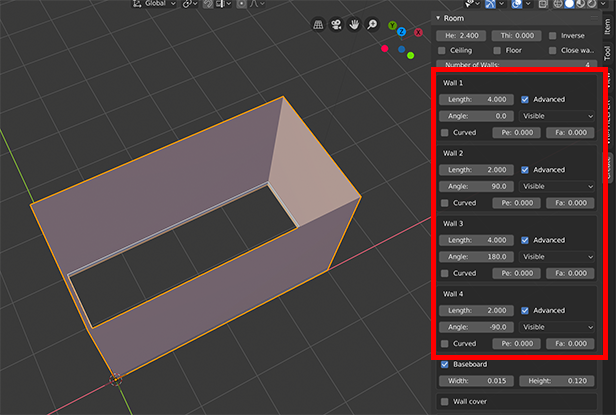
Deciding the length and angle of the wall
If you want to make a square room with 4 walls, make Wall 1 and 3 the same length, Wall 2 and 4 to the same length. The angles should be 0, 90, 180, and -90 to create a square room.
And in the menu
(1) Check “Ceiling” and “Floor” and put a floor and a roof.
(2) When Visible is set to hidden, the wall becomes invisible. If you want to create a room that shows its contents in a nice way, you should use this option.
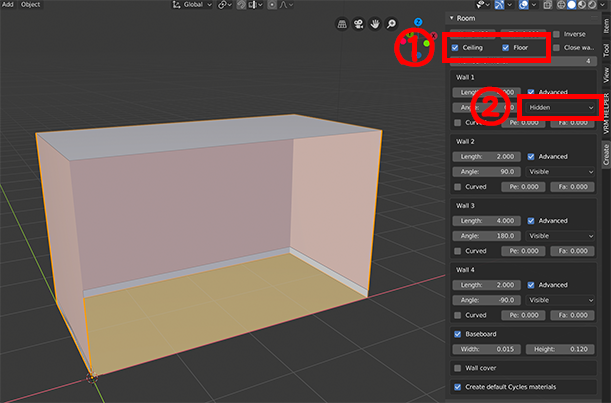
How to add a roof and a floor
Other Advanced Settings
We’ll look at other settings as well.
The other menus
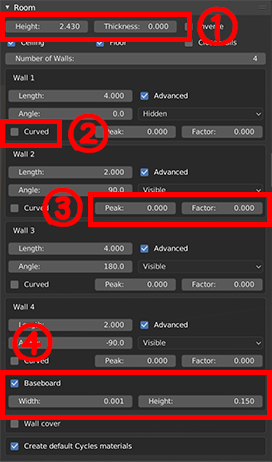
(1) You can set the height of the wall by Heights, and the height and thickness of the wall by Thickness. If Thickness is set to 0, the wall will be visible in Unity. It will be in a state of flux. So it’s a good idea to make it a little bit thicker.
You can set the height and thickness of the wall.
(2) The wall with the curve checked will curve. It will look stylish.
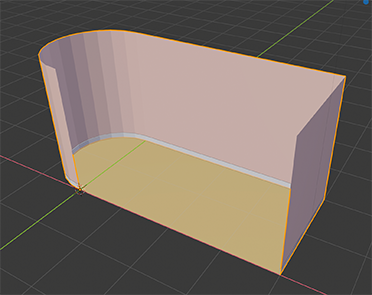
Make a curve.
(3) If you change the value of Peak, you will get a nice shape to add a roof to it. But Ceil doesn’t give you this shape, so you need to add a roof by yourself. There are.
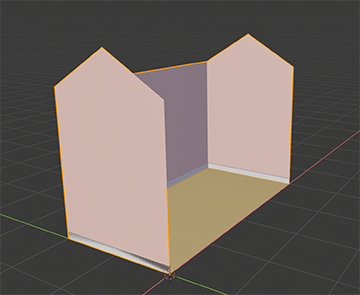
Change the value of Peak.
If you change another value of Peak and change Factor, you can change the position of the sharp edges.
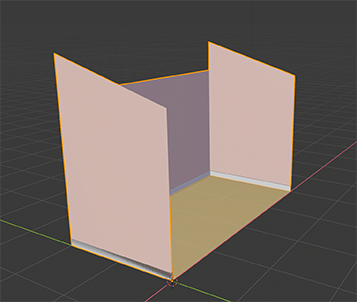
Changing Factor value
(4) The baseboard is a thin board at the bottom of the wall, the base in Width and Height. You can change the thickness and height of the board.
Baseboard
Putting in doors and windows
Once the room is ready, the next step is to put on the doors and windows.
Making the door
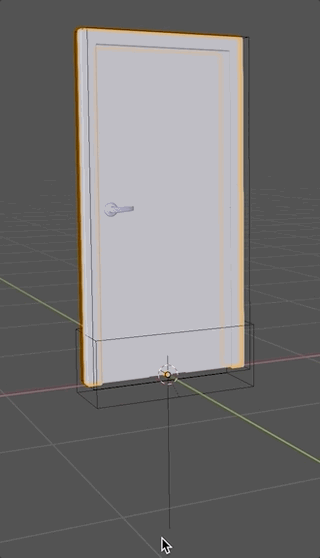
Just as you did with the wall, Shift+A > Mesh > Archimesh > Door to make a door.
There are many choices for the door. The outermost box, the edge of the door, the body of the door, the door handle, the box below, and the thin line below.

Selecting the Door
A menu will appear when you select the door edge to set the type and size of the door. You can change the left and right side of the door handle, the appearance of the door, and the type of handle, as shown in the gif below.

Type of door
To move a door, select the line below and move it.
Moving a door
If you want to change the color of the door, you can change the material by selecting the edge, door body, and handle.
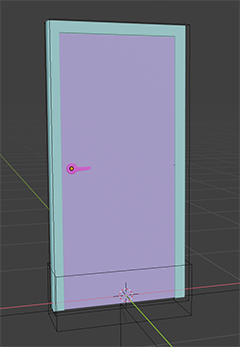
You can change the color of the door
The remaining outermost box and the bottom box will be used for the boolean for the door on the wall. Take the door to the wall you want to install the door on, select the wall, and select Auto Hole from the wall menu. By doing so, you will make a hole in the wall. The outer and lower boxes are used to make holes in the wall.

Install the door in the wall
Turn on a window
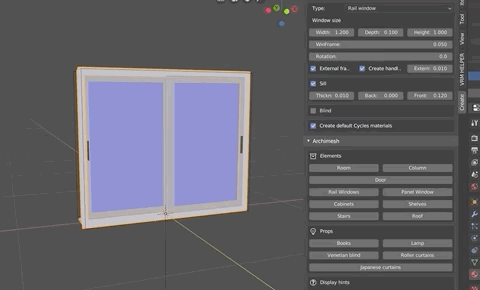
There are two types of windows: Rail Window and Panel Window.
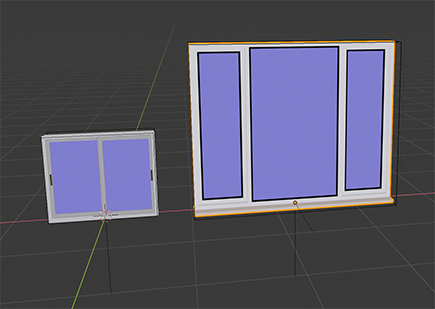
Rail Window and Panel Window
【Rail Window】
The Rail Window allows you to select a box for the boolean, a line to move, a window edge, and left and right window. When you want to tweak the settings, select the window edge.
In the settings, you can select a window type from the Type menu.
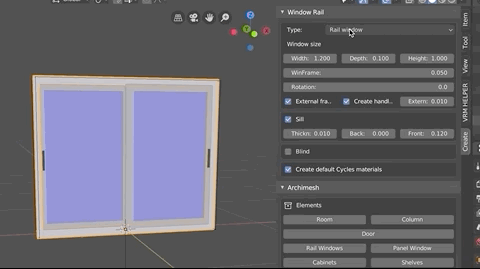
Window Type
You can also set the height, width, and depth of the window, as well as the presence or absence of a shelf underneath and its size.
Configuring the Rail Window
And what’s more, you can also set blinds.

You can even set blinds
This is the same as the door, so I won’t describe how to install and move it.
【Panel Window】
The Panel Window allows you to select the outer edge, the entire inner window, and the line of movement. By selecting the entire window, you can change the settings.
You can change the base size from the Resize pull-down menu.
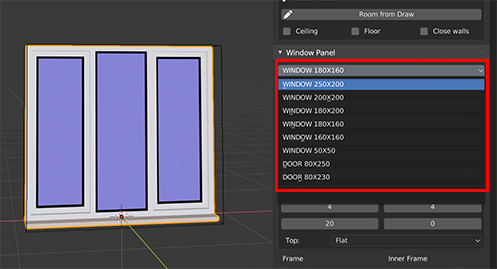
Changing the window base size
In addition to the size of the window and the thickness of the edge of the window, the number of windows (width and height) is set in the same way as the Rail Window. You can change the material of the frame (plastic, wood, etc.) and the shape of the upper portion of the window. Arched and stylish!

Panel Window Settings
This one is also the same as the door in terms of how to install and move it to the wall, so I’ll skip it.
Notes on bringing doors and windows to Unity and STYLY
There’s a caveat to bringing doors and windows to Unity and STYLY in Auto Hole. If you export the cubes after drilling the holes, the doors and windows will look like cubes. This is because the box for the booleans will look like a cube when you put it in Unity.
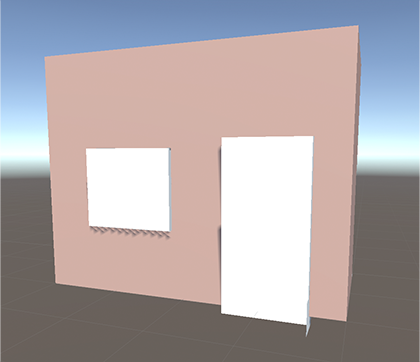
It’s just a box.
As a matter of fact, when I did the Auto Holes, some Boolean was added to the wall modifier made. (By the way, when I added thickness to the wall, it was fitted with a Solidfy modifier.)
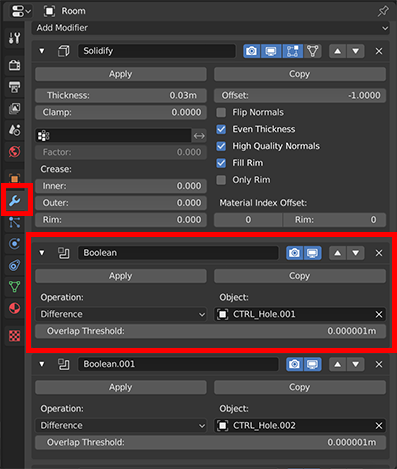
Modifier and Boolean on the modifier.
So apply all of these modifiers and delete the box for the booleans, and then use Write it out. By doing so, you can bring the doors and windows into Unity along with the walls. To erase the Boolean box, select it and delete it by pressing x key, then Delete.
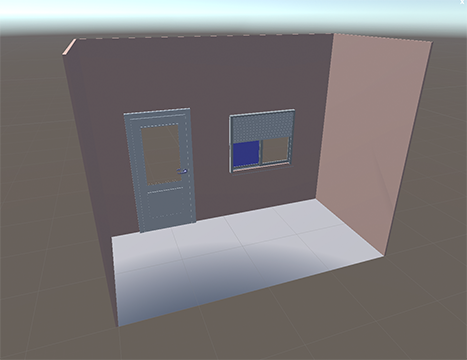
We could bring it into Unity!
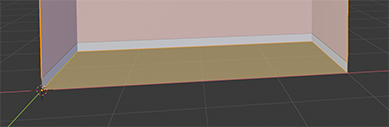
Now we have a base room!
That’s it for this article.
Next up is “Make Room”! ↓↓↓↓↓↓