Blender’s Sculpting Function
Blender has so many features that you can’t use them all, but one of the modeling methods is “sculpting”.
One of the modeling methods is “sculpting”, which allows you to model in Blender as if you were kneading or sculpting clay by hand.
Please refer to the following article for a detailed explanation of the screen and how to use it.
In this article, we will introduce an even freer modeling method using the “Metaball” object and several brushes not covered in the previous article in the second half of the first half.
What is Metaball?
At first glance, Metaballs seem no different from ordinary spheres or cubes.
However, when you put meta balls close to each other, they affect each other like slime or magnets, and connect or change their shapes.
Let’s try Metaball!
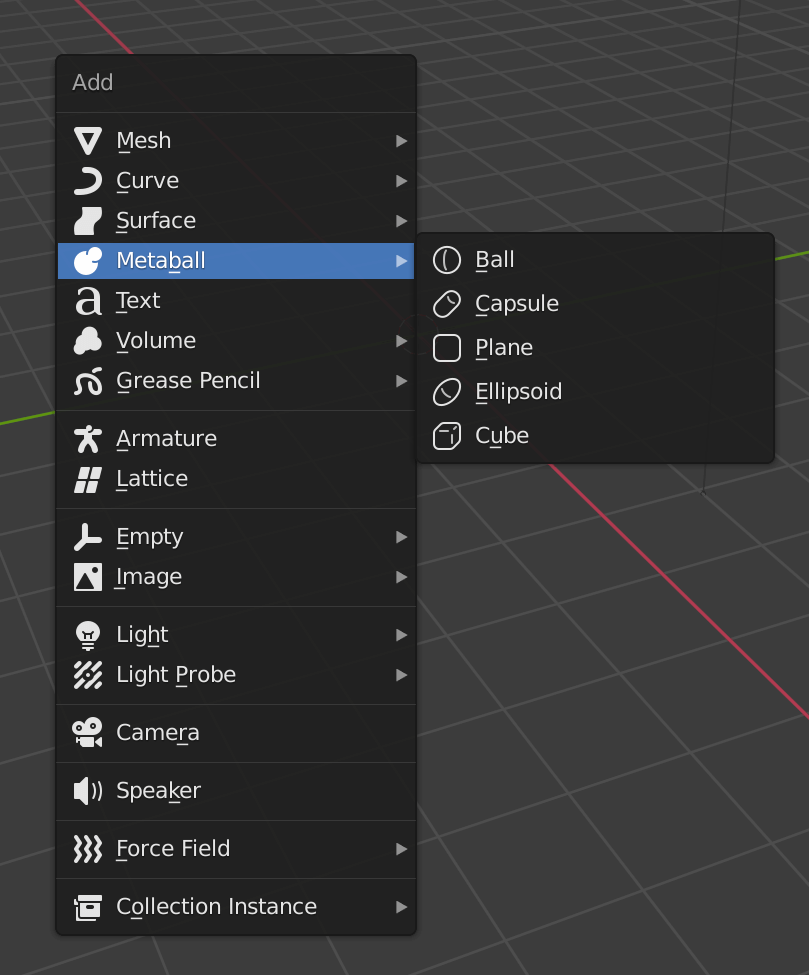
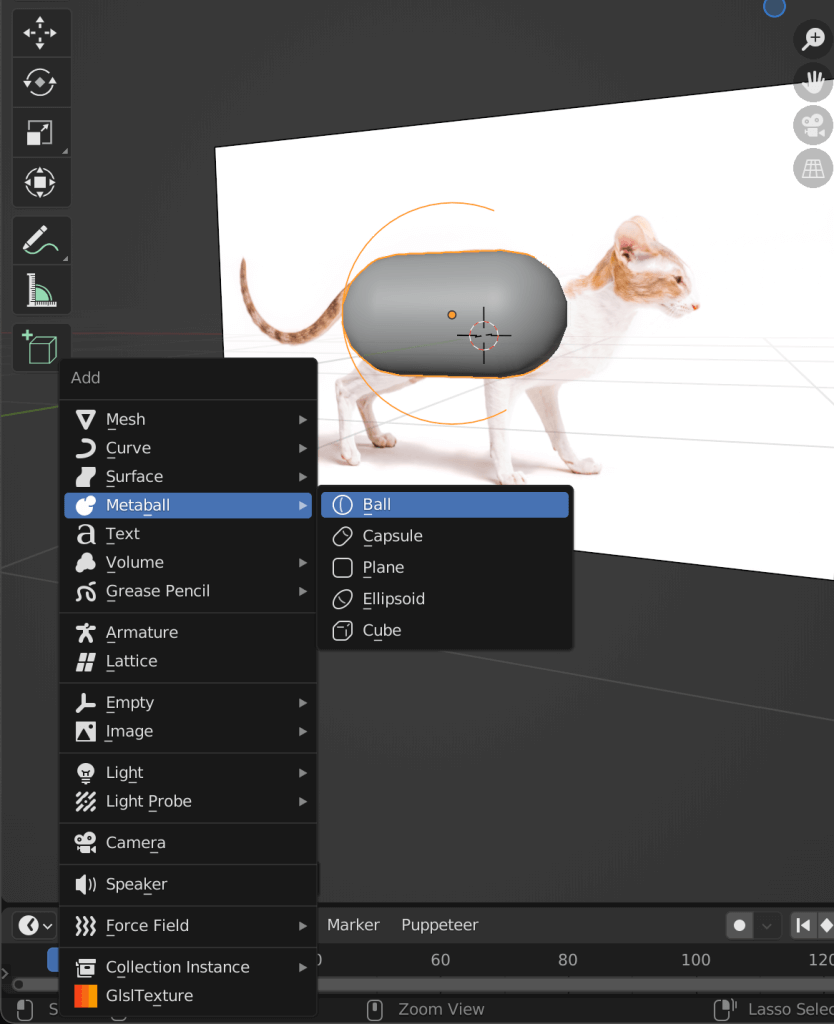
Metaballs can be added by pressing [Shift]+[A], just as you would add a new regular mesh.
The shapes available are similar to those of meshes.
Ball
It is a spherical meta-ball, the same as the mesh sphere.
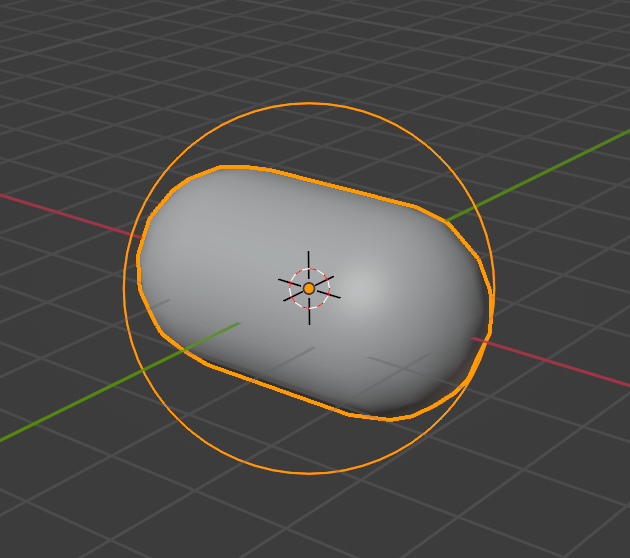
Capsule
It looks like the center of a ball stretched out.
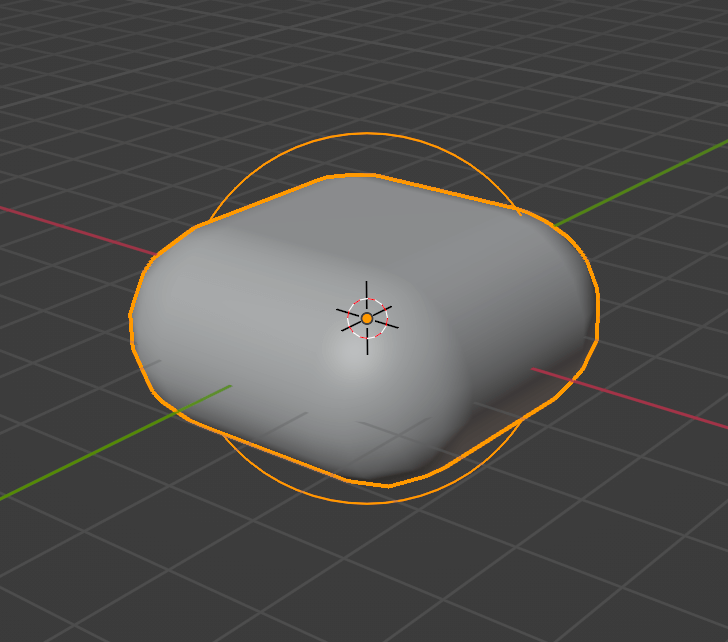
Plane
This metaball looks like a plain mesh with added thickness.
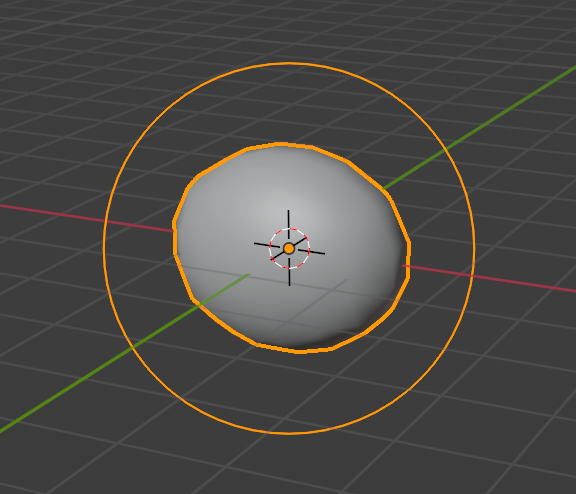
Ellipsoid
It is shaped between a ball and a capsule.
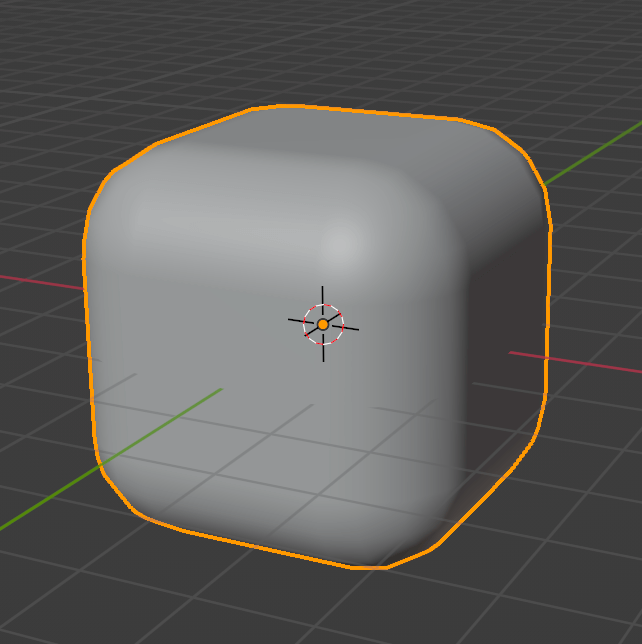
Cube
It is a cubic metaball, the same cube as the mesh cube.
Metaball Advanced Settings
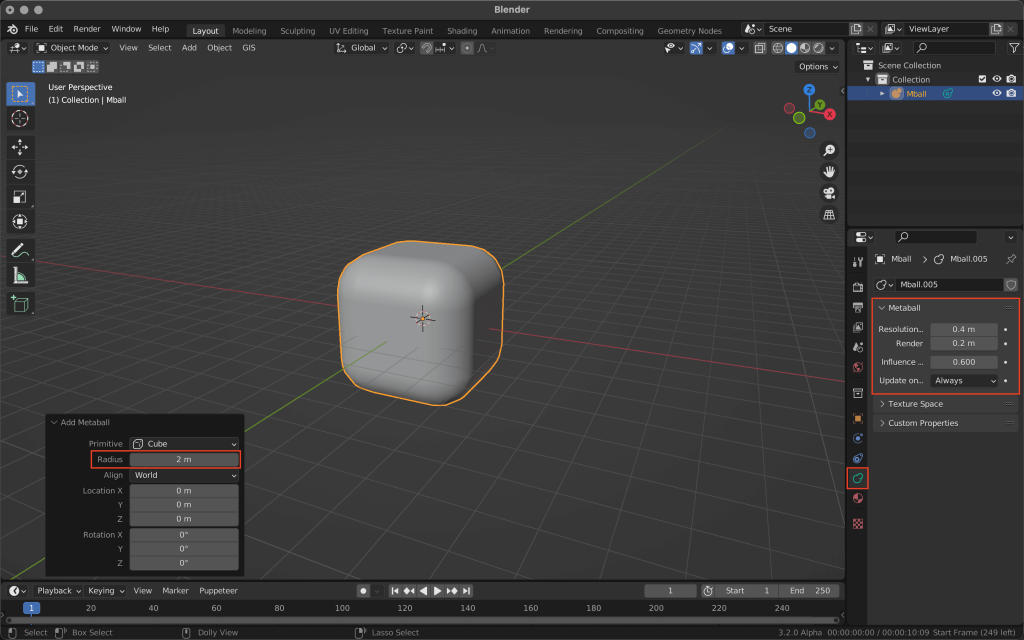
Newly added metaballs can have their radius changed from the menu in the lower left corner, and their resolution, etc., can be changed from the properties on the right.
Sculpting with Metaball (Preparation)
First, assemble the shape of the object you want to create, using a metaball.
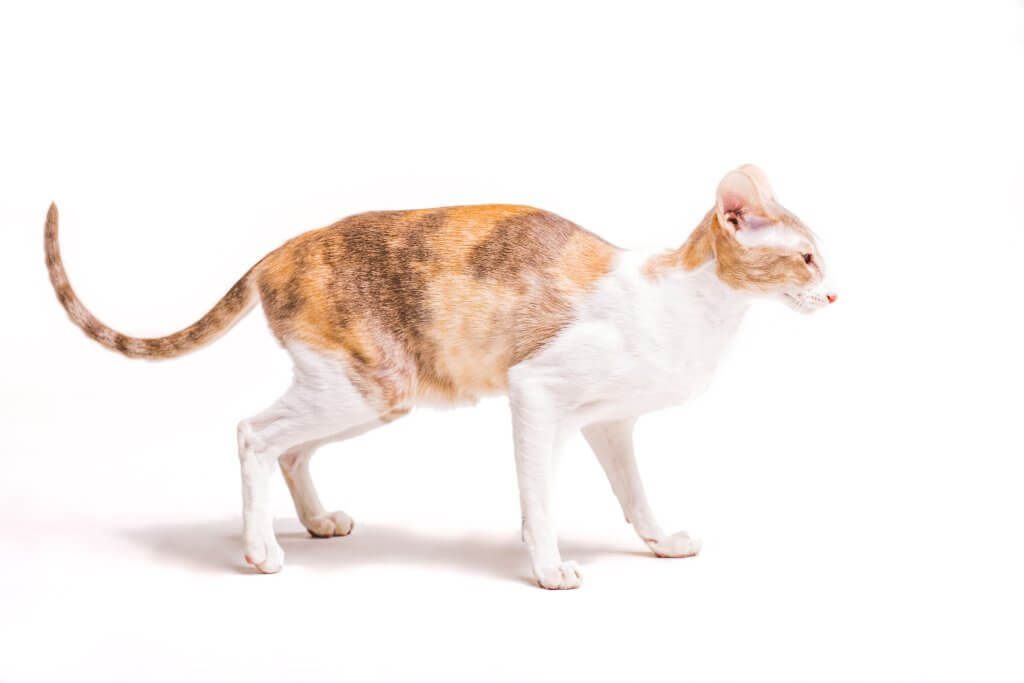
In this case, let’s try sculpting a cat.
It may look difficult, but it can be reproduced with a combination of basic operations and metaball.
The image to be used as a reference should be as close as possible to the true side (+ front) as possible.
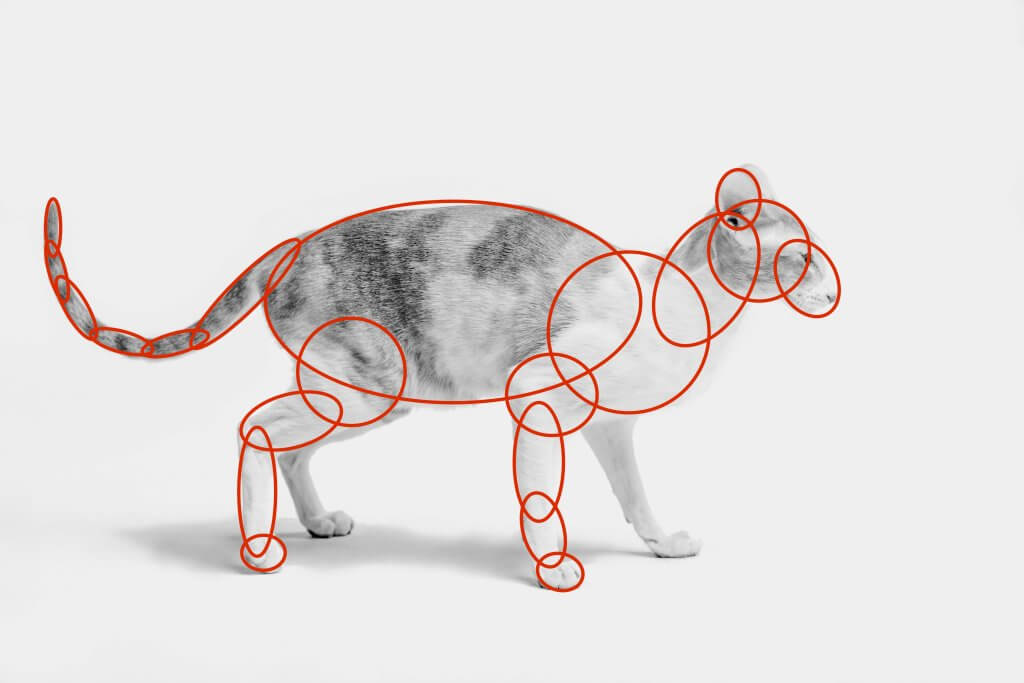
Think of the shapes and sizes of the metaballs as you would assemble them with blocks.
The following image shows an example of a cat’s body using circles and ellipses.
Let’s try modeling this with Metaball.
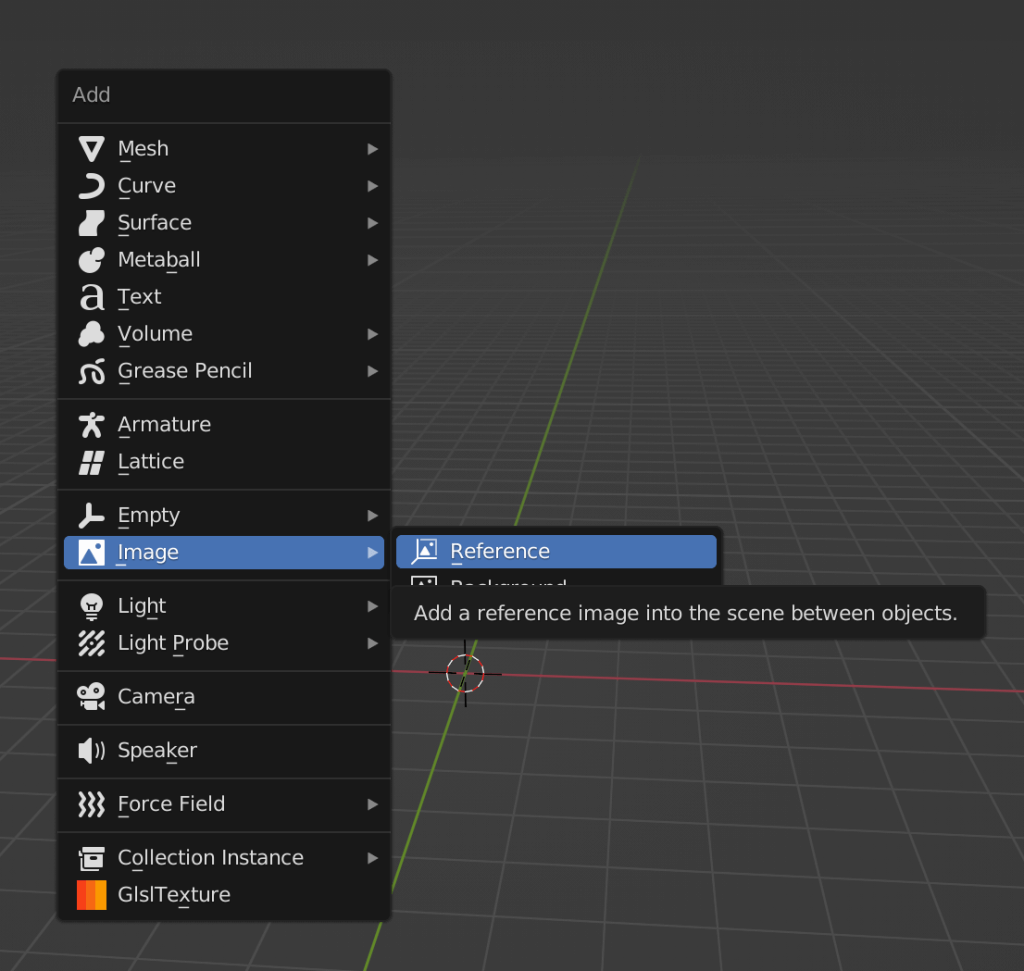
After opening Blender and deleting the cube with the [X] key, add a reference image.
Select Image→Reference by pressing [Shift]+[A] key.
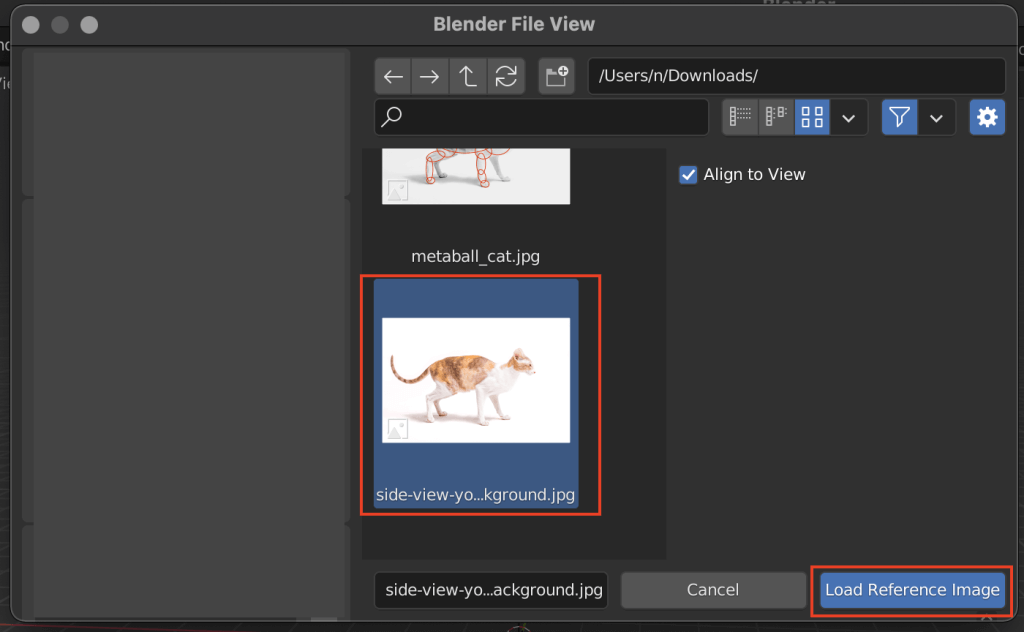
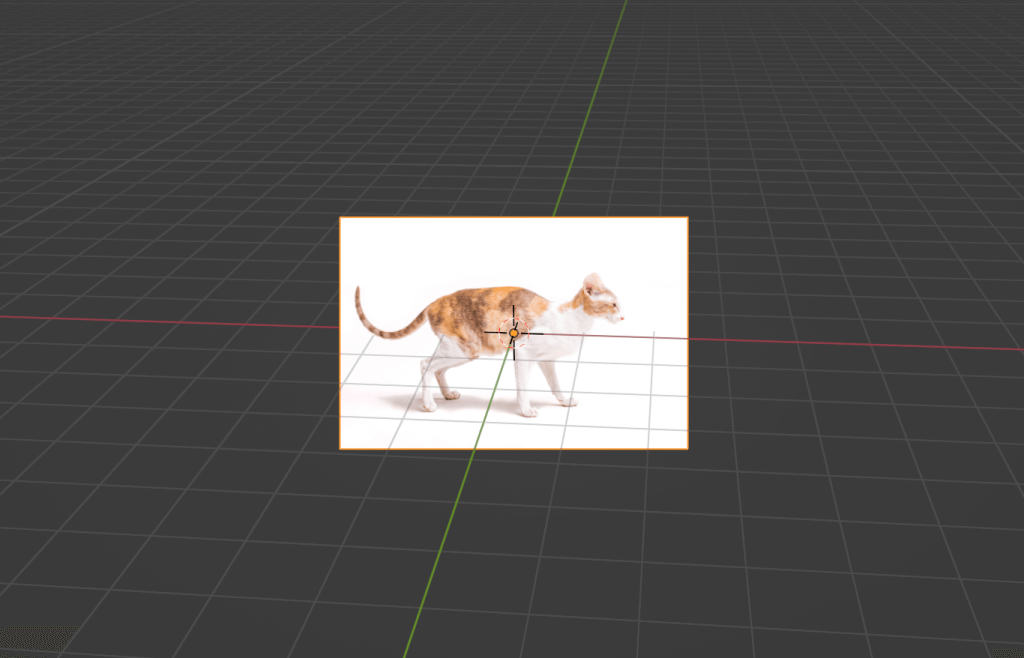
Then an image selection screen will appear, select a specific image, and click the Load Reference Image button.
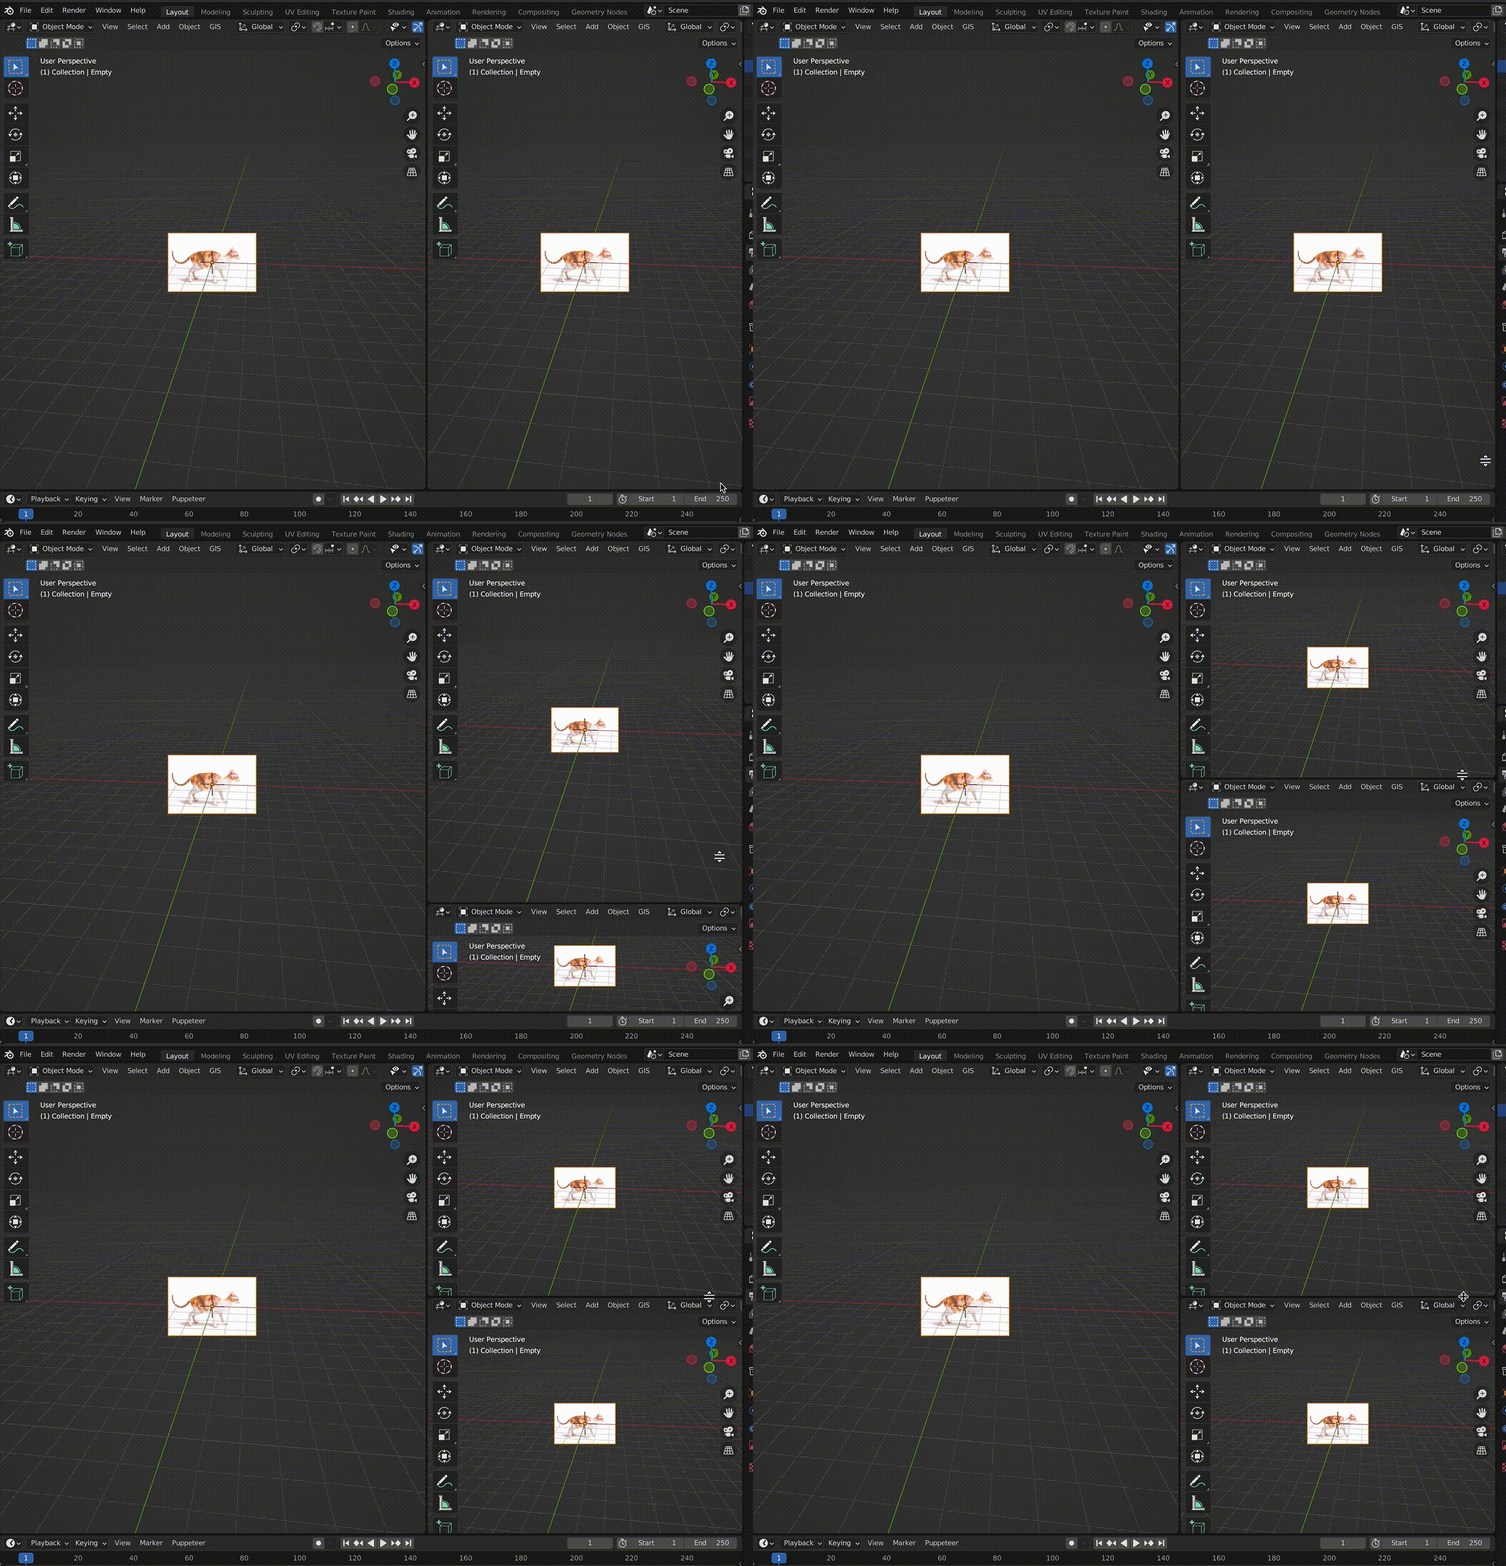
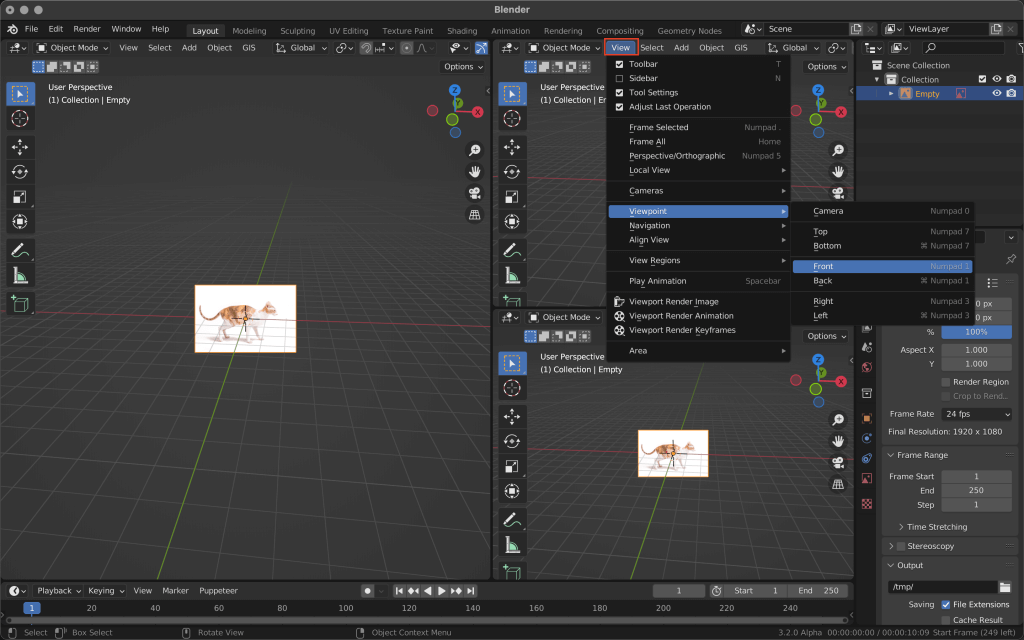
Increase the number of panels and click Viewpoint→Front from View in the top menu.
This will take you to the screen viewed from the Front (directly in front of you).
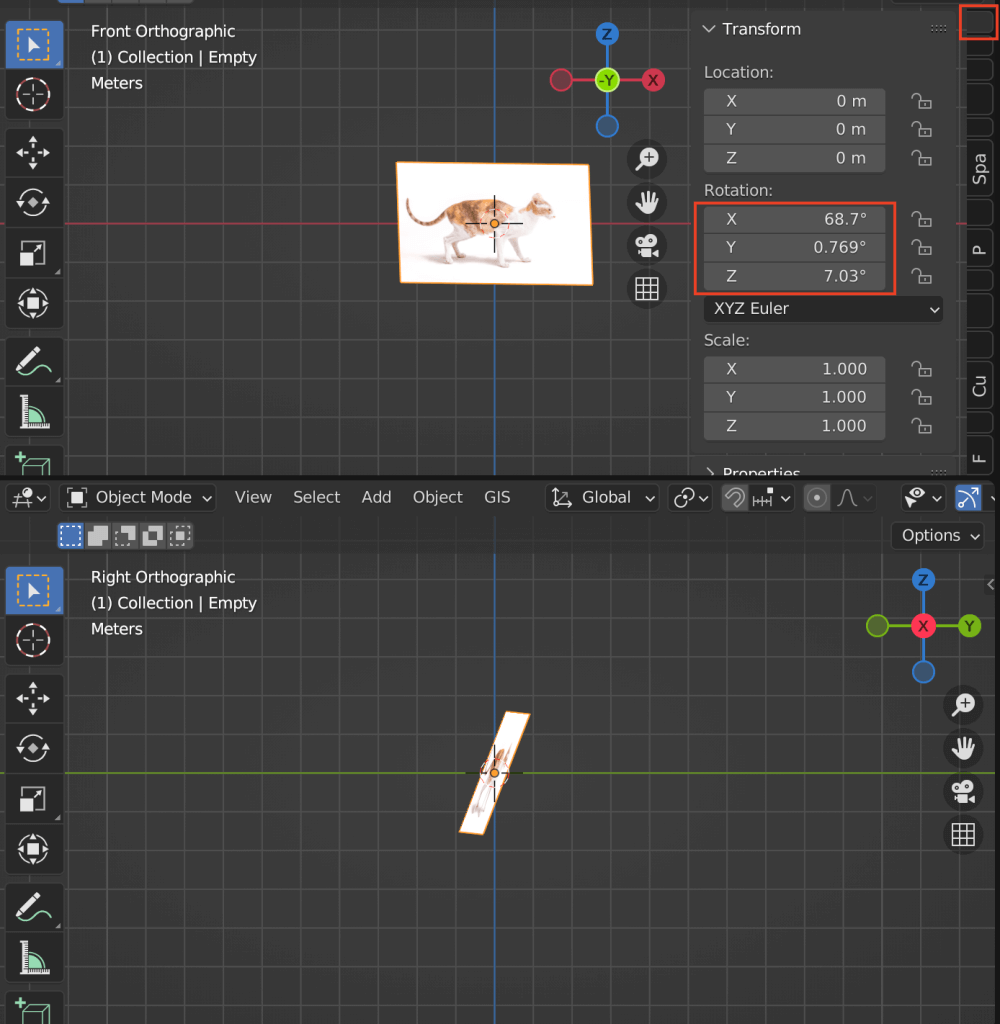
If the loaded image is skewed, click on the image to select it.
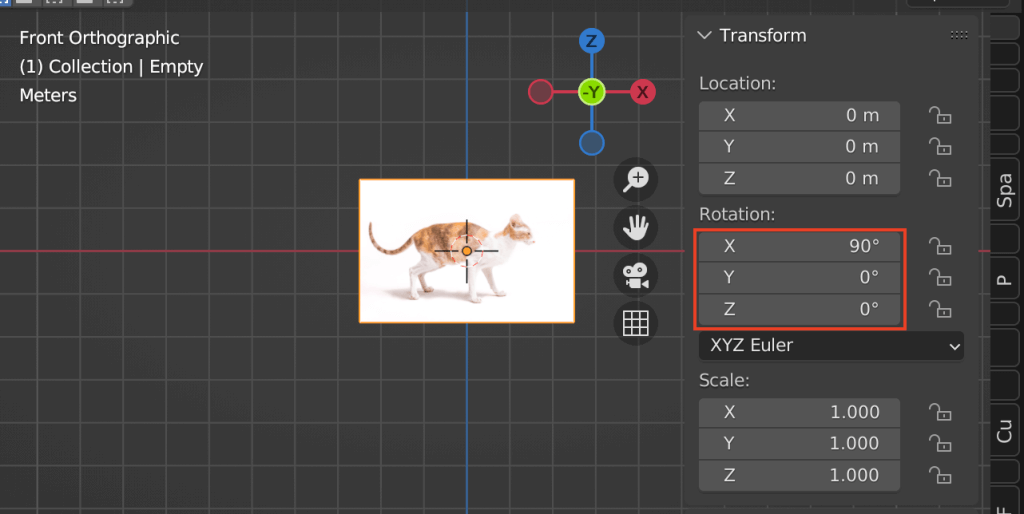
If the image is skewed, click on the image to select it, then press the [N] key to go to the top tab of the right menu and change the value of Rotation to 0 to correct the angle of the image.
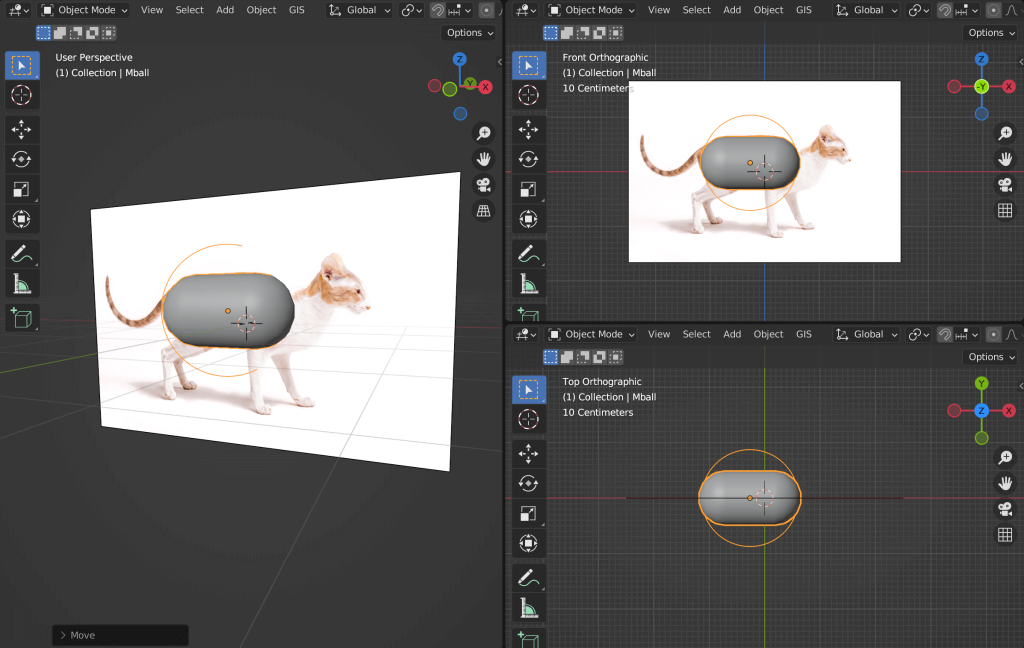
In this case, the screens were assigned as follows.
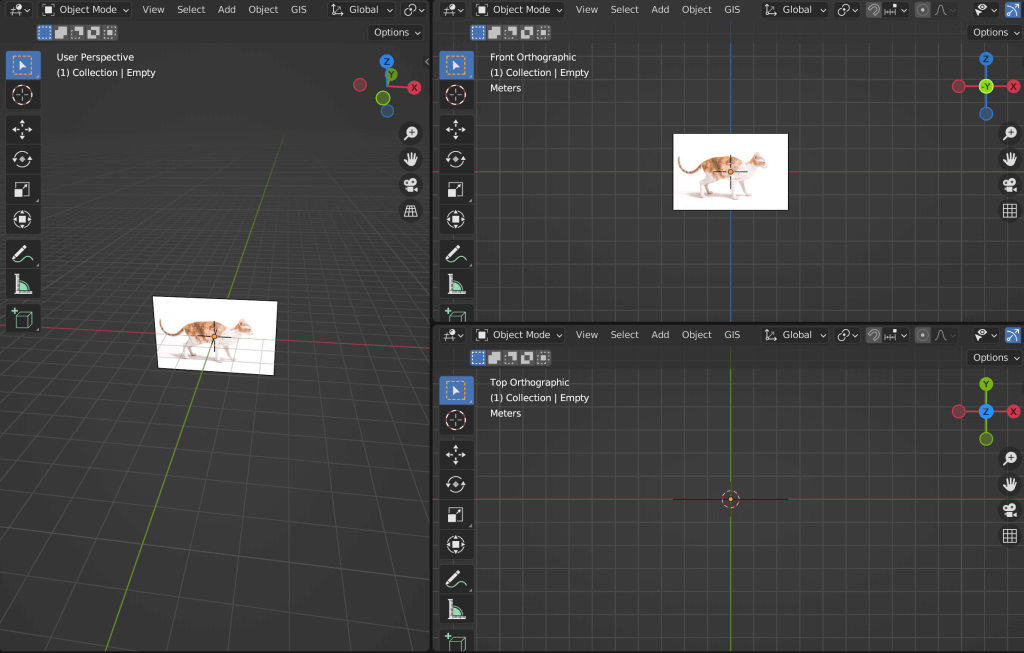
(Left) Move freely / (Upper right) Refer to the image from the front / (Lower right) Check the thickness from the top
Sculpting with Metaball (modeling)
Let’s start with the torso.
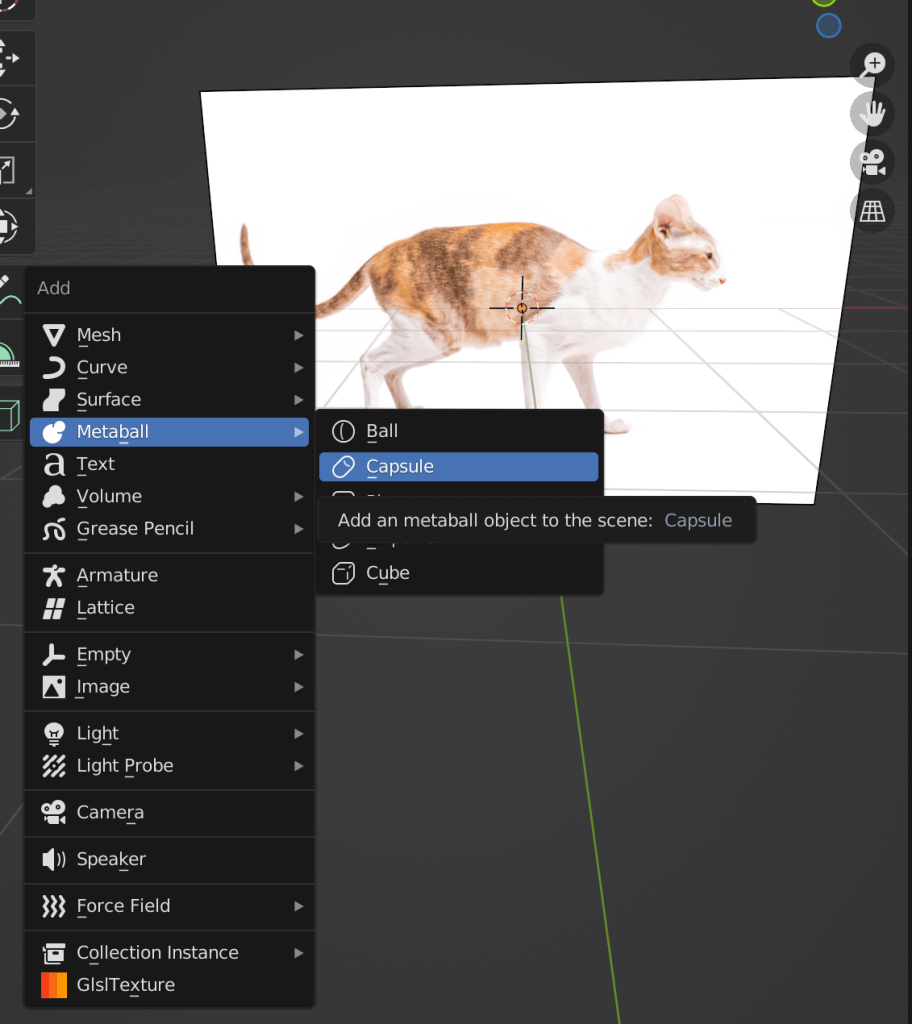
Select Metaball→Capsule by pressing [Shift]+[A] and add a new capsule.
Then change the size and position of the capsule according to the reference image.
| Movement | [G] key → ([X] key / [Y] key / [Z] key any axis) → cursor movement → enter to confirm |
| Reduce/Expand | [S] key→ ([X]/[Y]/[Z] key any axis) → move cursor → enter to confirm |
| Angle change | [R] key→ ([X]/[Y]/[Z] key any axis) → move cursor → enter to confirm |
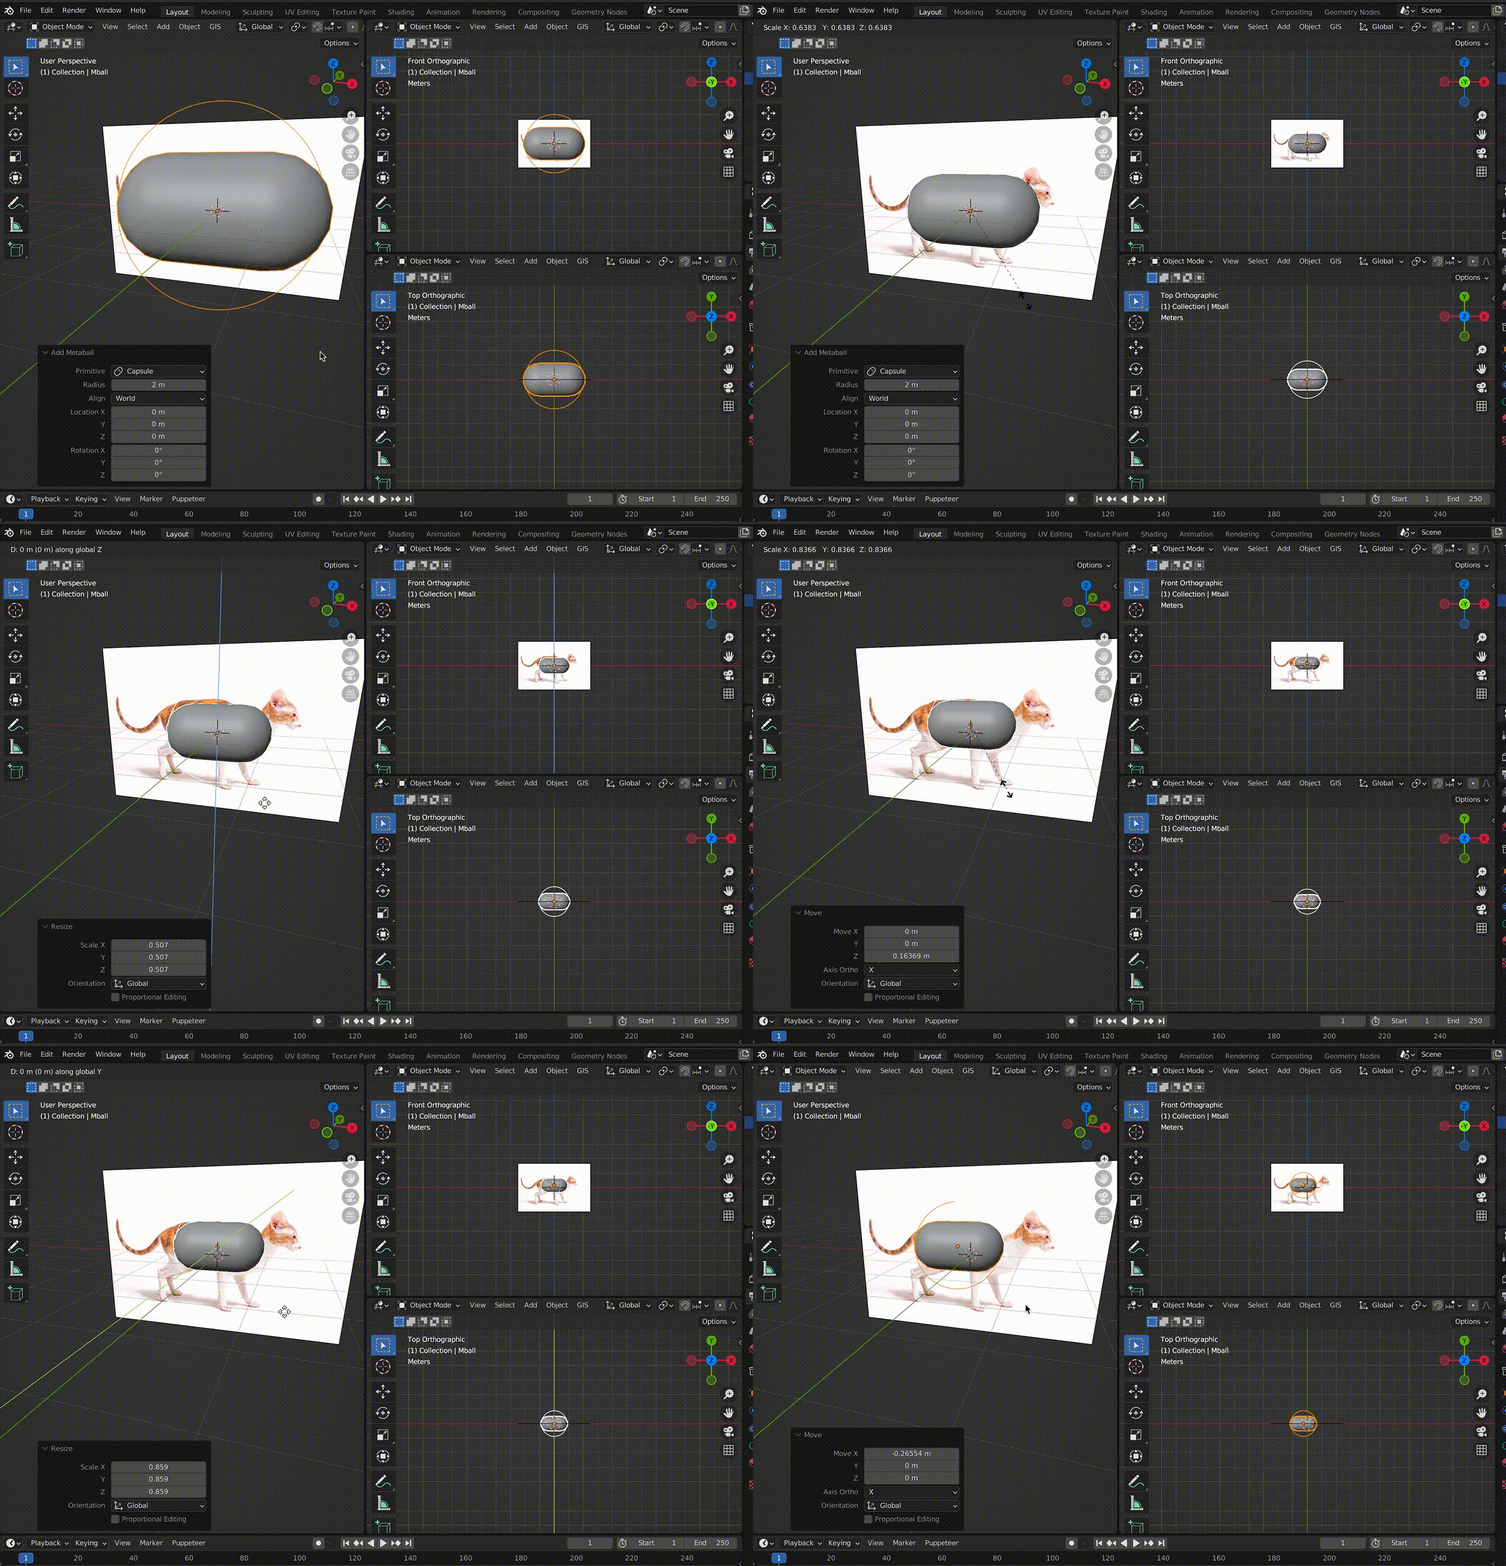
[S] key → cursor operation to zoom out, [G] key → [Z] key to move to Z-axis, [G] key → [X] key to move to X-axis
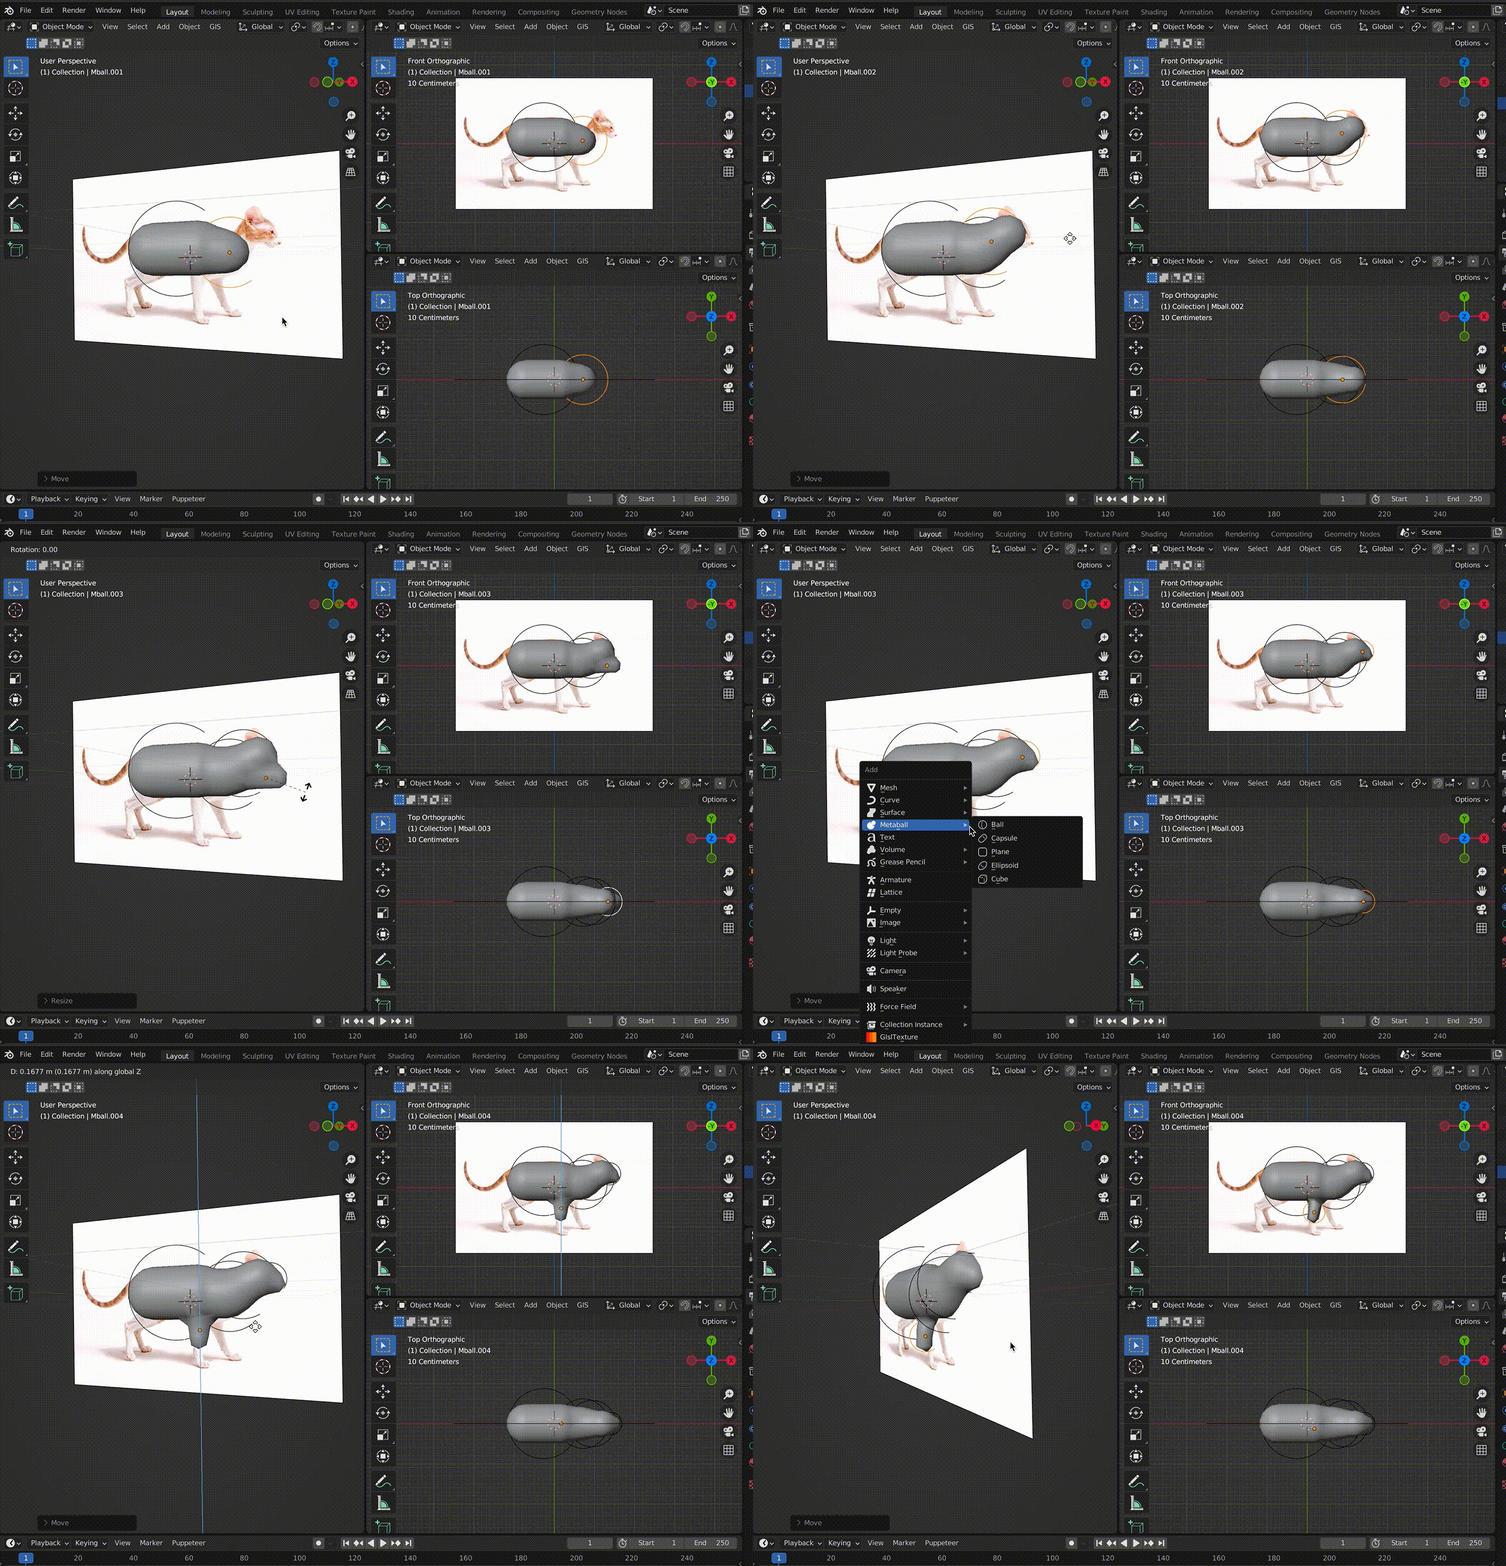
At this rate, let’s add another metaball in other positions.
With the torso metaball selected, press [Shift] + [A] to add another metaball.
Since the feet are outside the center, adjust the position for the thickness of the body at the end.
If you want to edit the position or size of another metaball along the way, click on the circle around that metaball.
You can now re-edit it in the same way as the other metaballs.
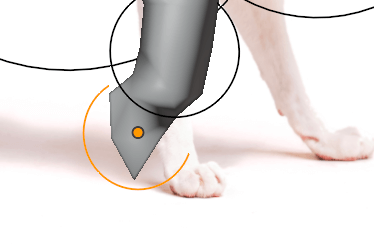
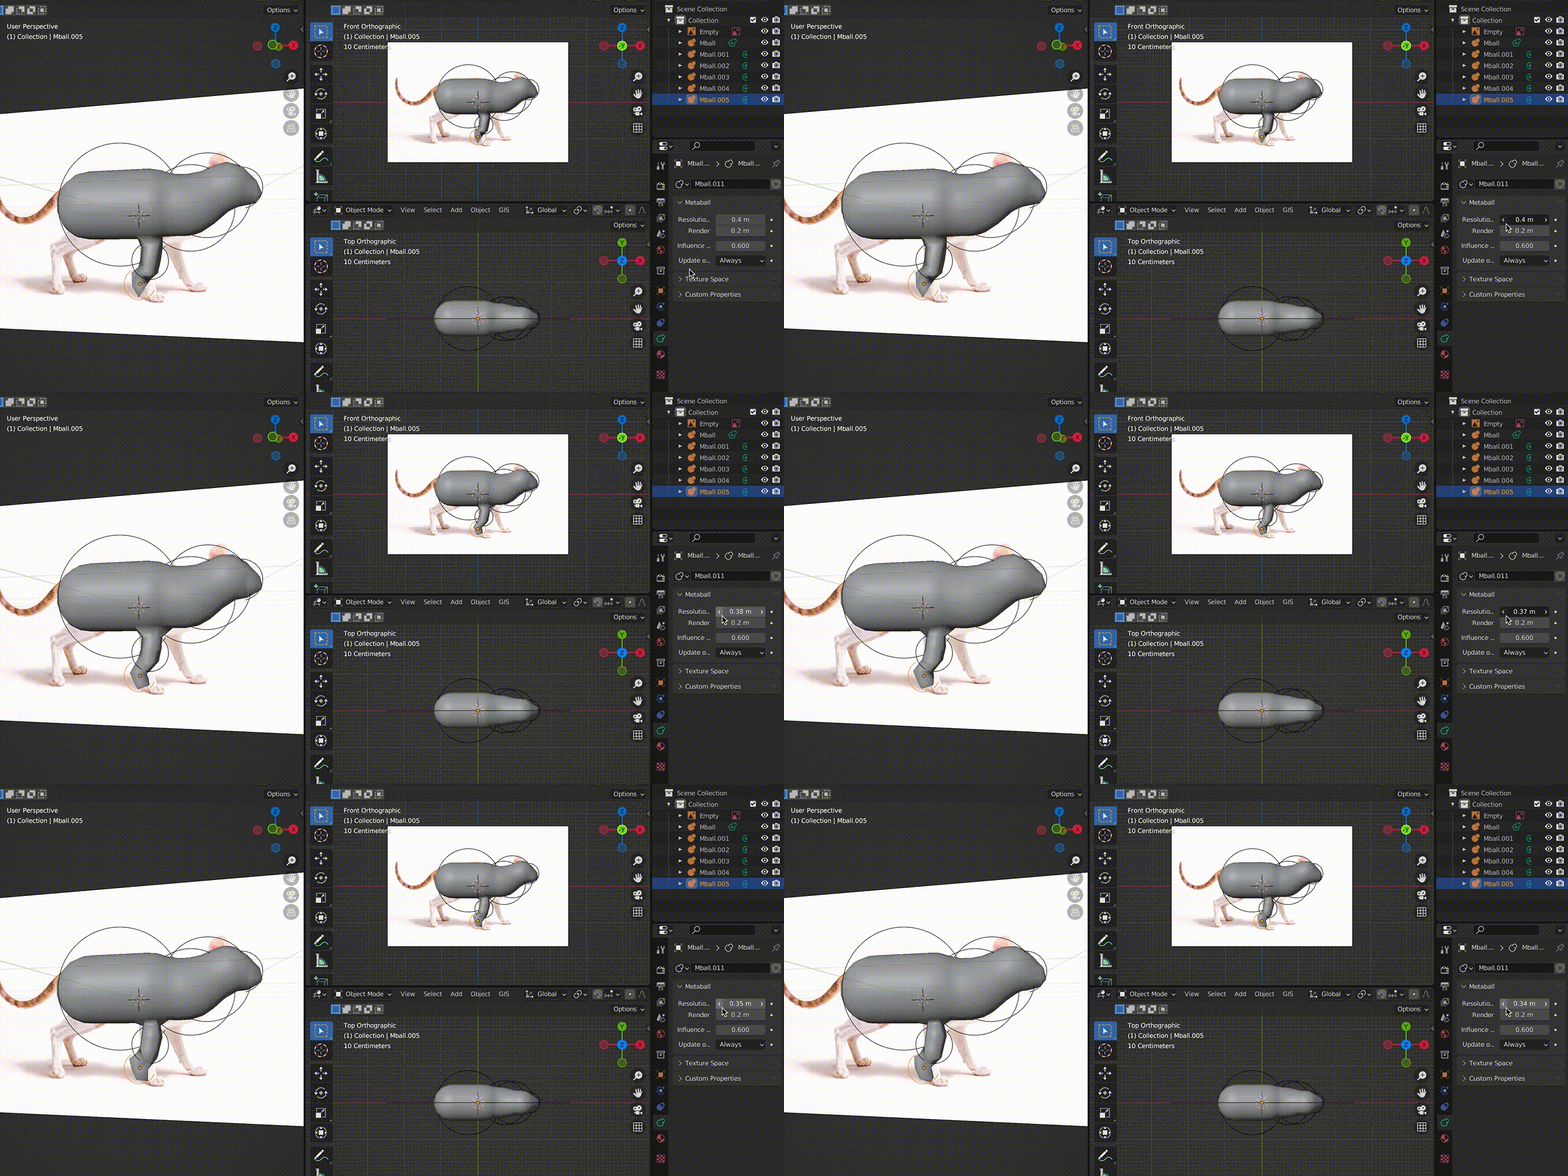
When modeling small parts such as toes, the meta balls may be chipped or may not be shaped as desired.
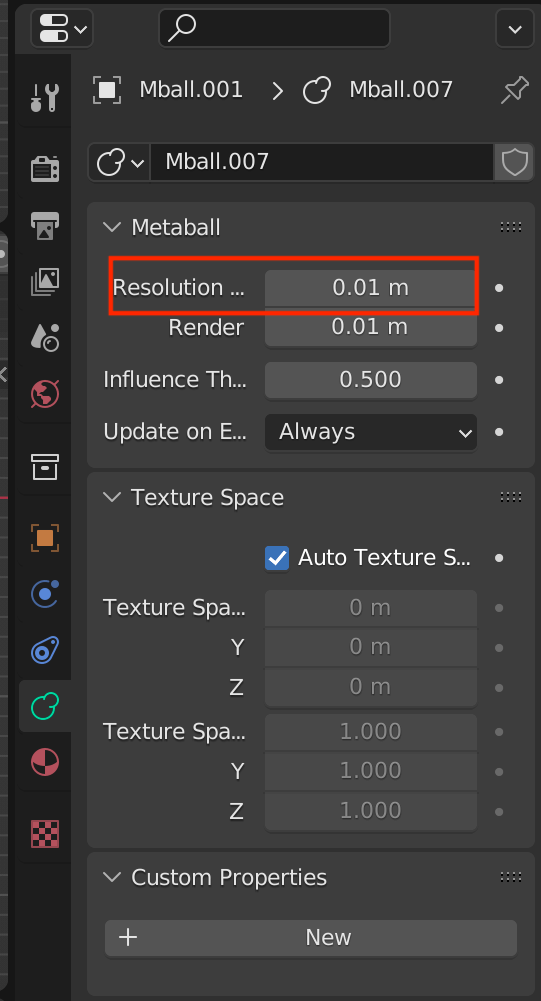
In such cases, try changing the Resolution value from the properties on the right side of the screen.
The resolution will be finer, and the shape of the metaball will be smoother.
If you want to change the influence between metaballs, changing the Influence Threshold value is also effective.
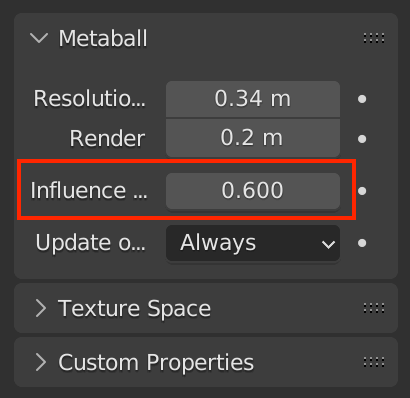
The smaller the value, the more rounded the metaball, and the larger the value, the sharper the detail
The ears were also created by modeling one ear and moving it along the Y axis, then copying the other ear with [Command]+[C] key → [Command]+[D] key to paste.
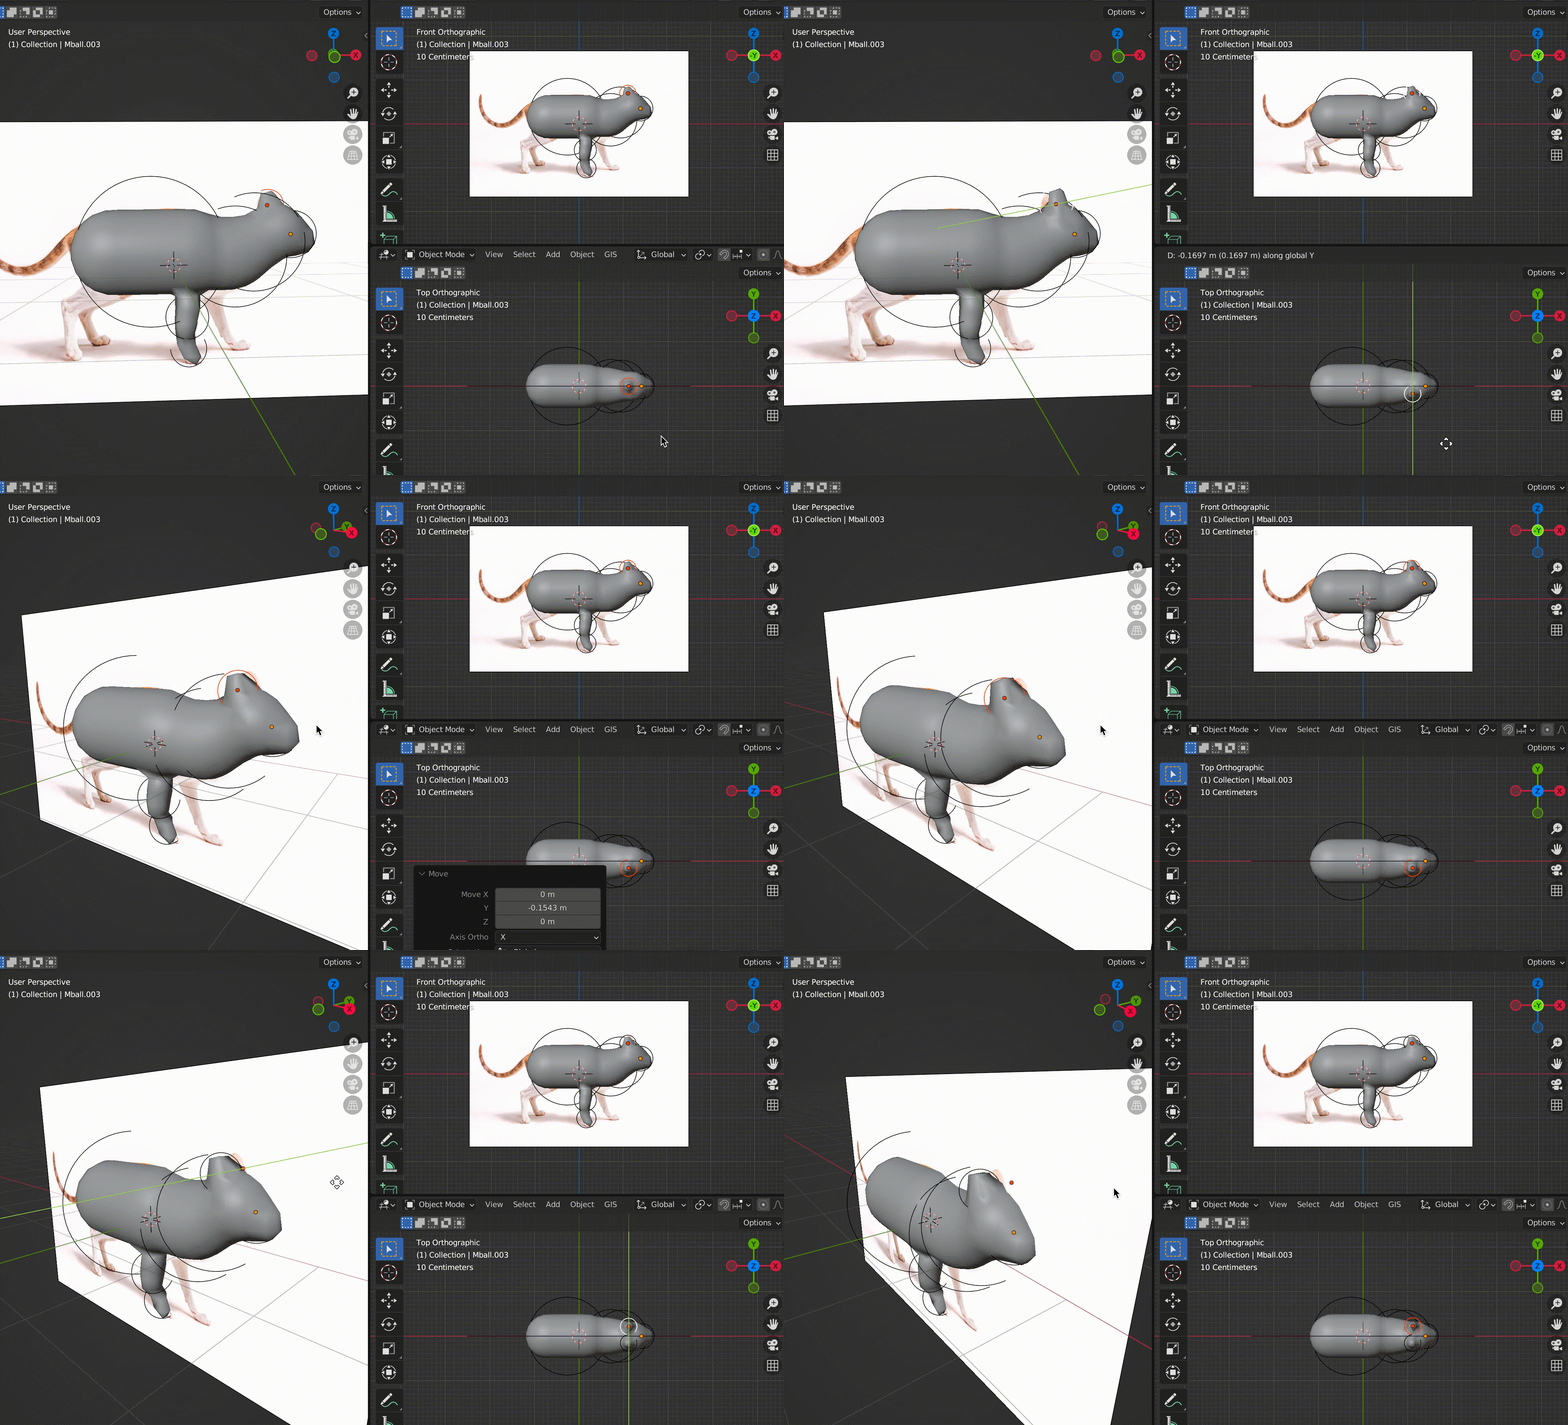
After modeling one ear, move it along the Y axis → [Command]+[C] key to copy → [Command]+[V] key to paste
[/caption]
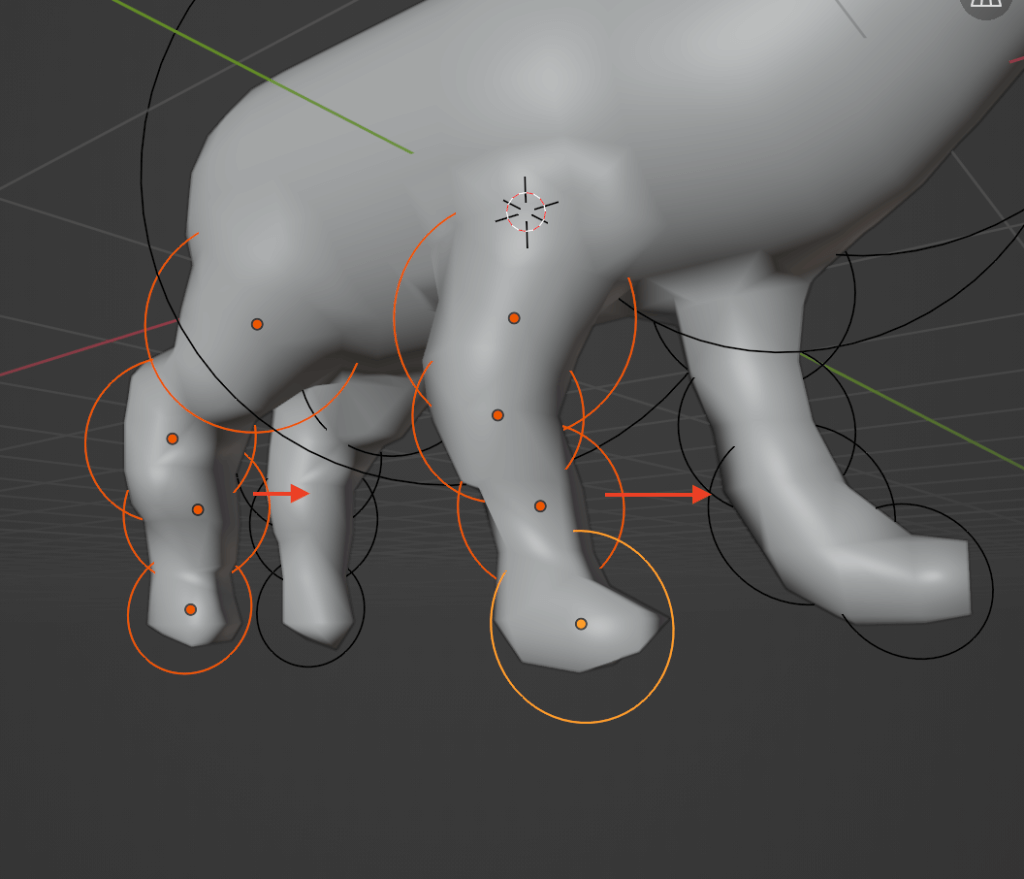
I copied and pasted the front and back legs in front of the feet as well.
The curve of the tail can be edited later with a sculpting brush, so it can be left straight.
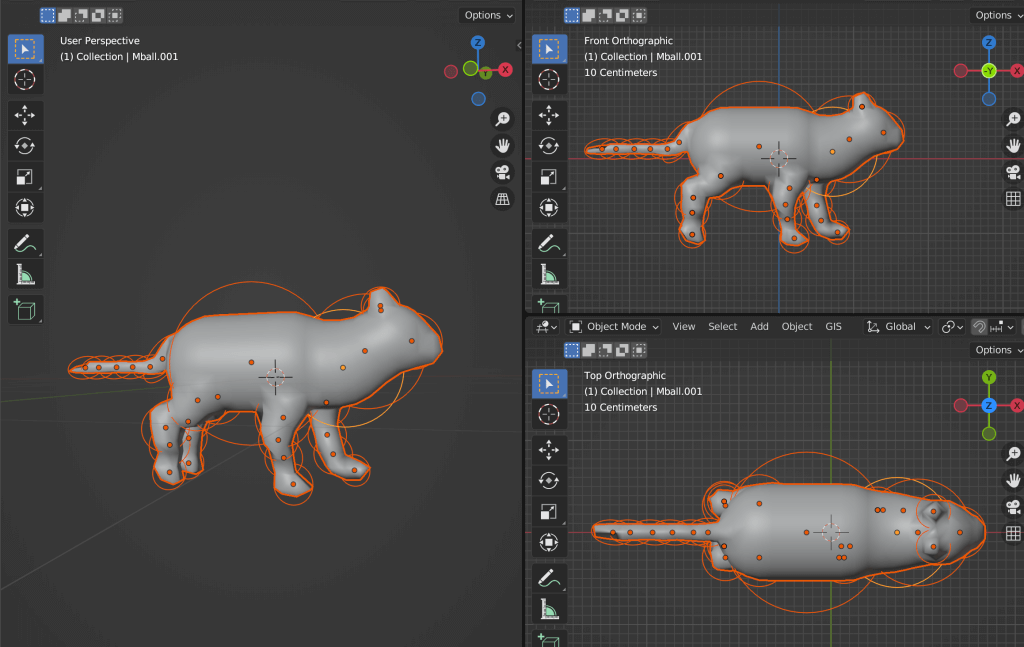
We can now use the metaball to create the shape of a cat.
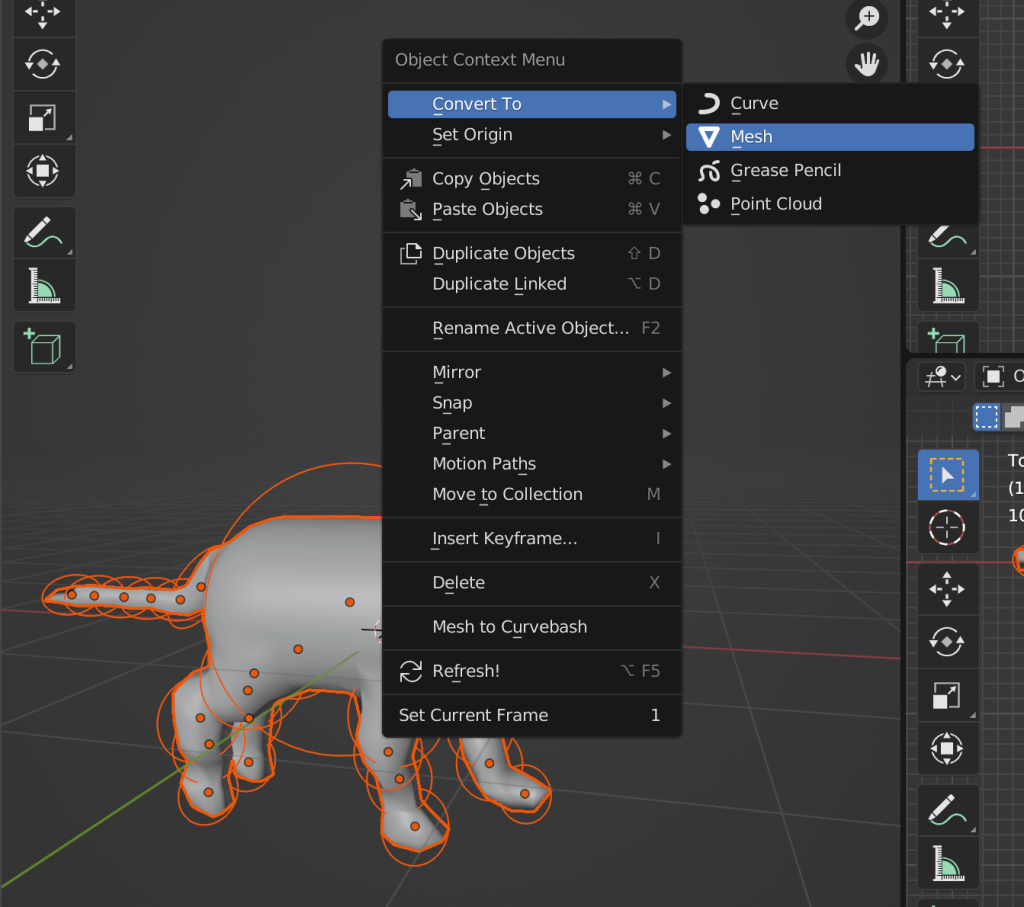
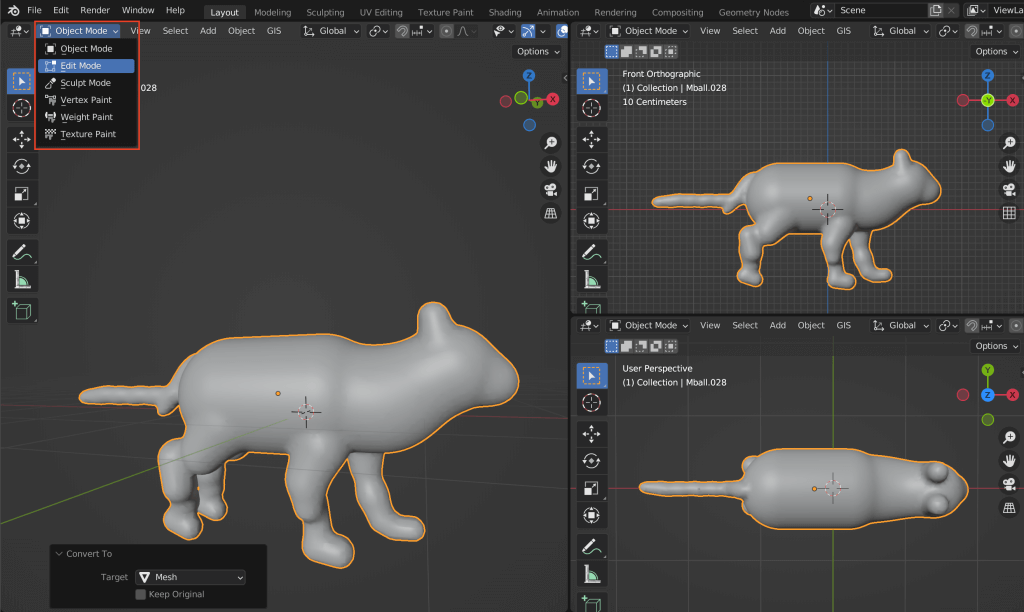
Finally, convert the metaball to a mesh.
With the metaball selected, right-click and select Convert To→Mesh.
All the metaballs will then be combined and transformed into a single model.
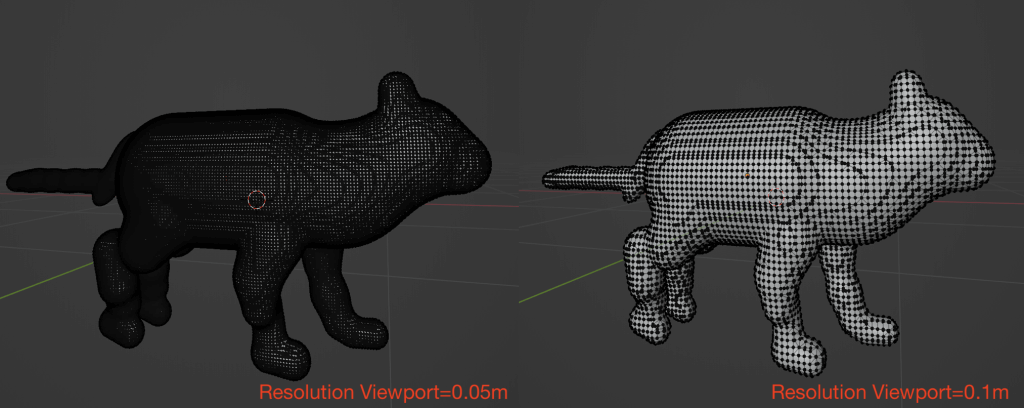
The resolution after conversion to a mesh changes with the value of Resolution Viewport in the advanced settings on the right.
In this case, since sculpting will also be performed, it is recommended to set a slightly smaller value, such as 0.05m.
With the model selected, select Edit Mode from the upper left tab to see how detailed the polygons are.
In the next article, use the sculpting feature to shape it.
![[Introduction to Blender] Basic Sculpting Operations](https://styly.cc/wp-content/uploads/2022/02/eyecatch-160x160.png)

