This article explains how to use the Unity timeline to create a scene where the camera perspective moves artificially.
The main way to move the viewpoint (camera) in STYLY is to use PlayMaker to move it.
When you move a camera in PlayMaker, you create it node-based. As such, you can’t move the camera around in a sequence like you can with a timeline in video editing software. For those familiar with video editing software, the PlayMaker controls can be a bit inconvenient.
In this article, we’ll explain how to use the timeline to control perspective, just like you can in video production software.
Sample
A sample scene using the method explained in this article is available on STYLY. We invite you to experience it for yourself.
Overview
STYLY’s perspective is essentially based on the HMD’s perspective.
In order to move the perspective on the VR scene, you must use PlayMaker to move it.
This can be very difficult for people who are used to moving the camera around in video production software, because it is node-based.
In Unity, you can use the timeline to move objects and cameras around in a way similar to video production software.
However, Unity’s camera, controlled by the timeline animation, will not move correctly in STYLY. (Therefore, they must be controlled by PlayMaker.)
So how can we control space and perspective with the timeline?
In this article, we’re going to create an artificially moving perspective by moving the space itself without controlling the camera’s point of view (which is in a fixed state).
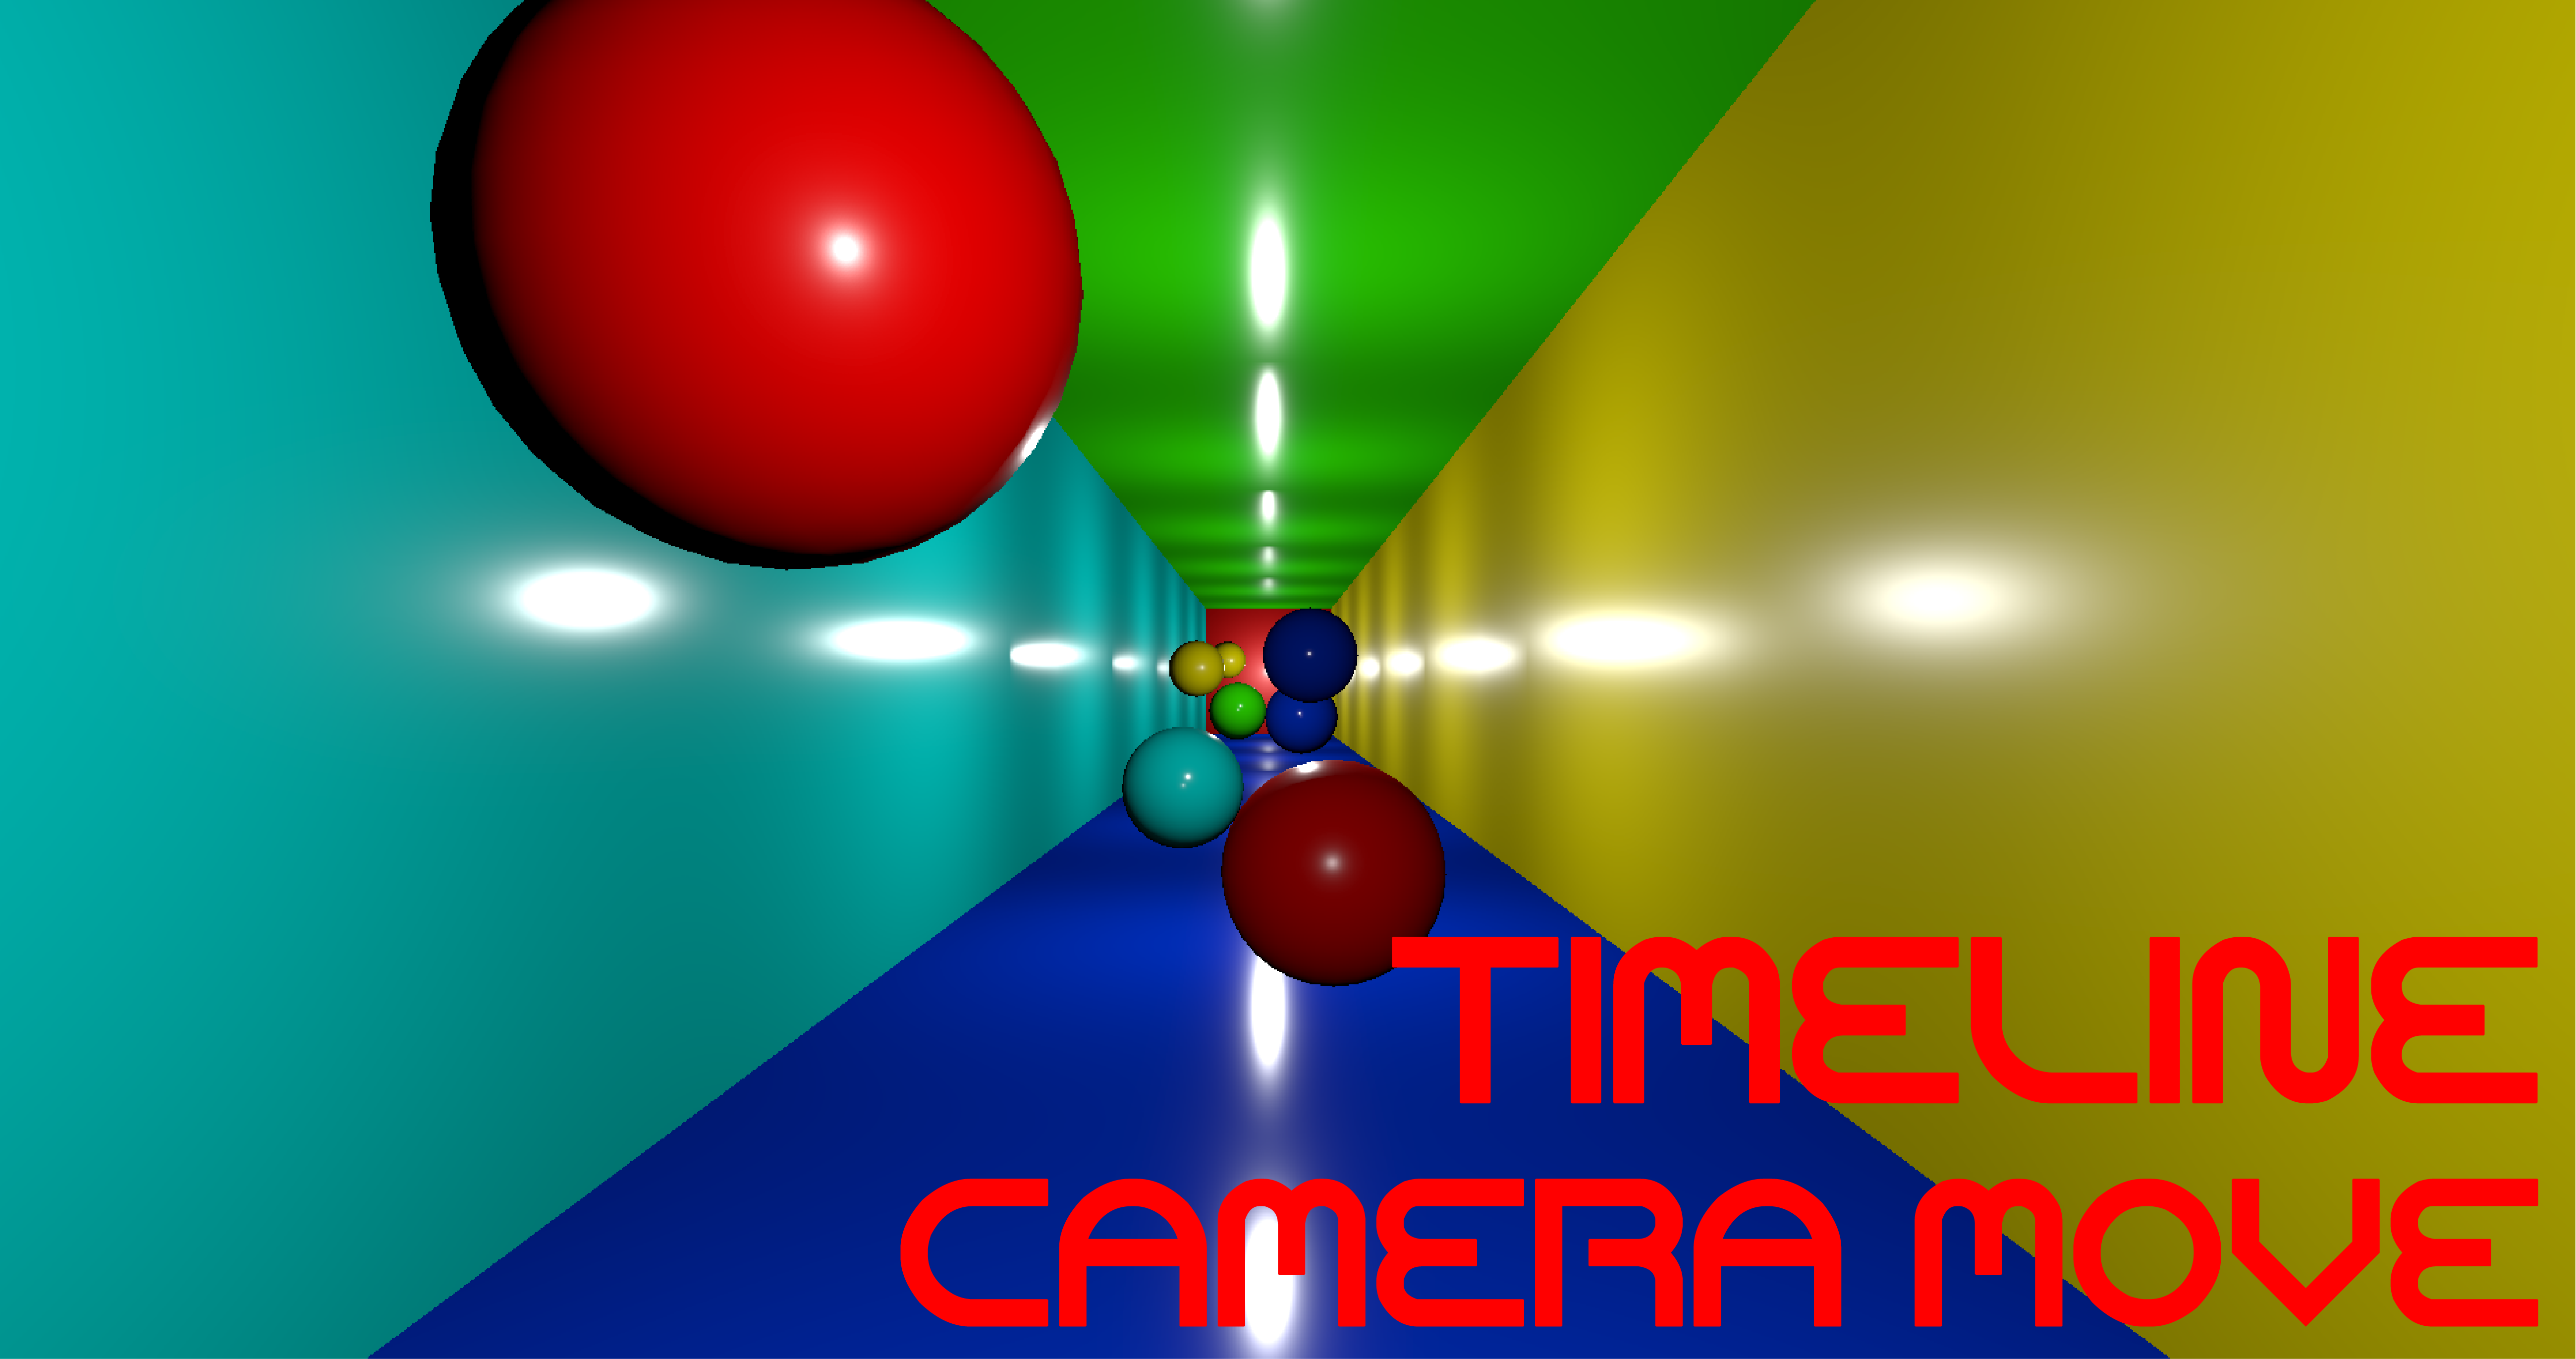
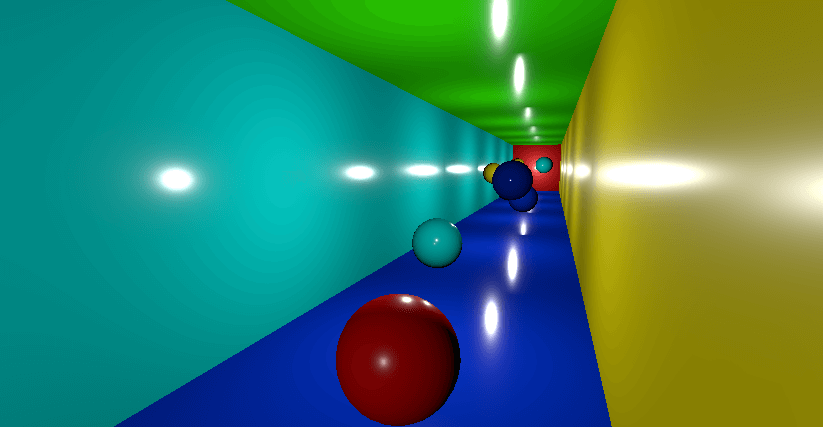
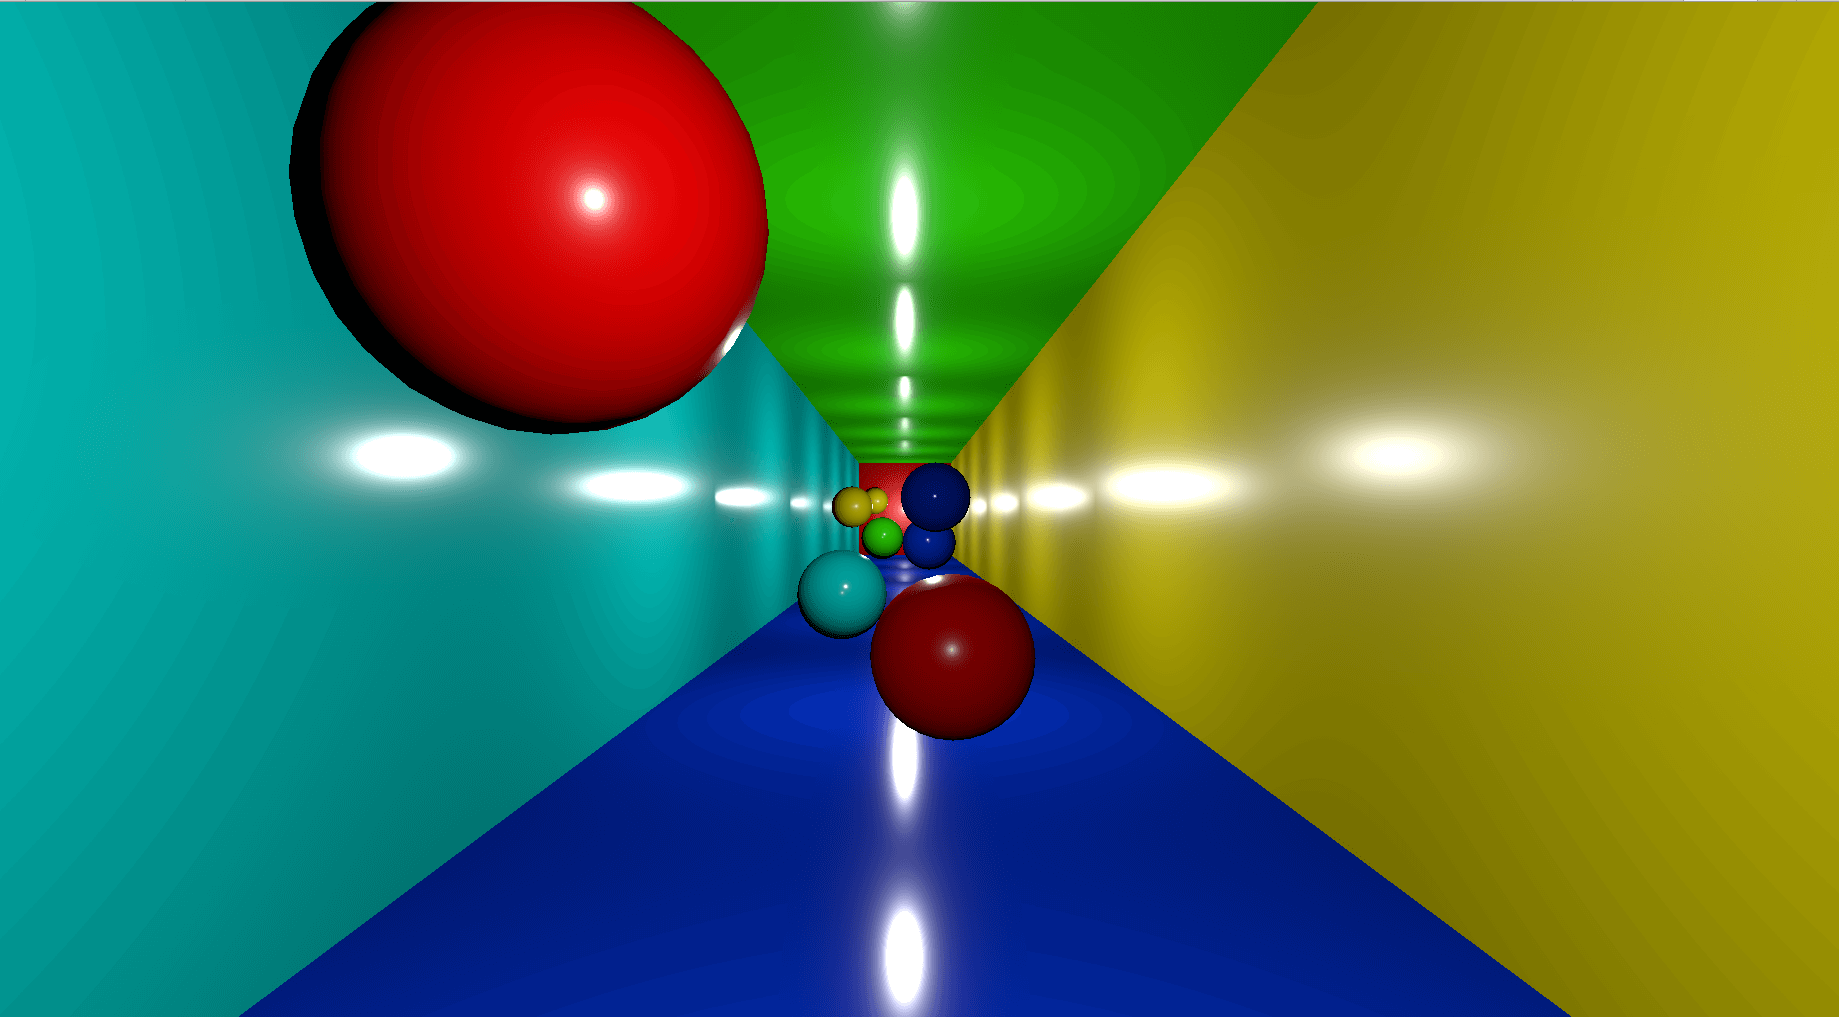
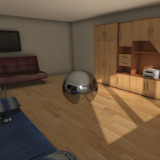
Here’s an example.

The top is the Unity scene window and the bottom is the game window.
On the scene above, the camera is fixed and the space is moving. This makes it seem as if the camera is moving when you look at the game window.
It is also possible to create effects like in an MV.
I will explain how to control the space while creating a sample scene.
Warning
In this scene, I will create an effect where the camera perspective moves artificially by moving Unity objects (3D models, lights, etc.). Because of this, you will not be able to move any Skyboxes that are not placed within the object.
It is recommended to use this method in an enclosed space where the Skybox is not visible in the scene.
Preparation
Let’s start a new project in Unity and display the timeline.
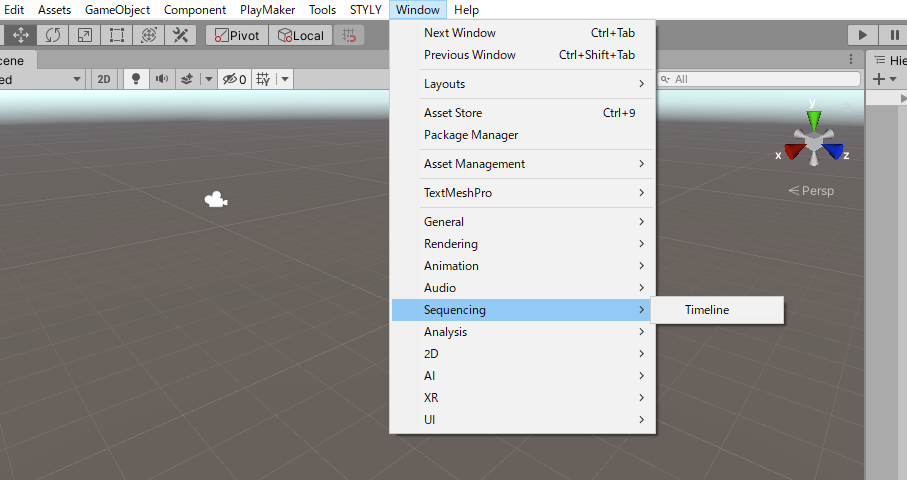
To use the timeline, you’ll need to install it from the Package Manager.
Let’s select Window in Unity’s menu bar and choose Timeline from Sequencing.
Once you have the timeline up, place the window in a desired location.
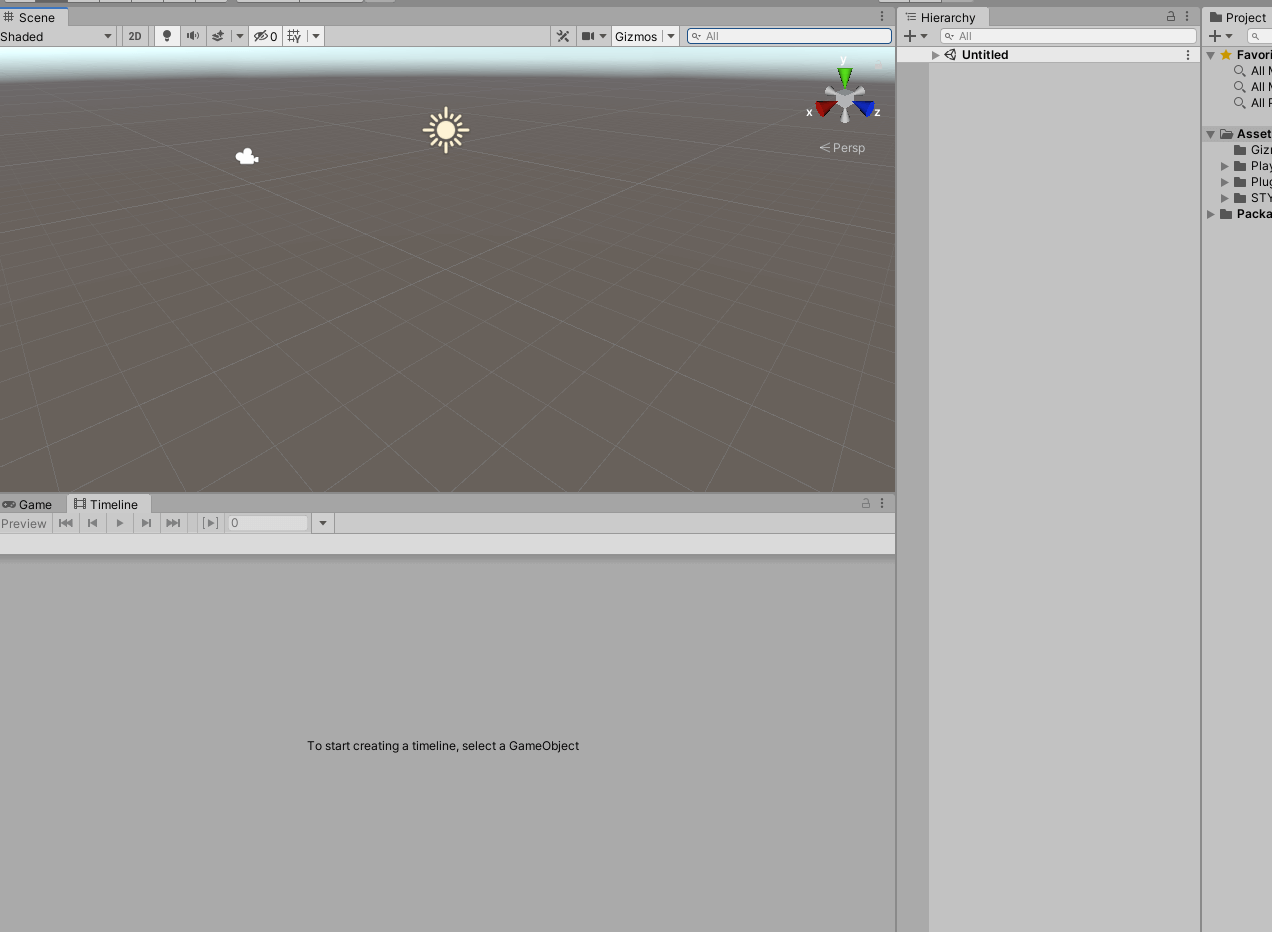
Once you have your timeline ready, it’s time to remove any objects other than the Main Camera. Make the Hierarchy window look like this.
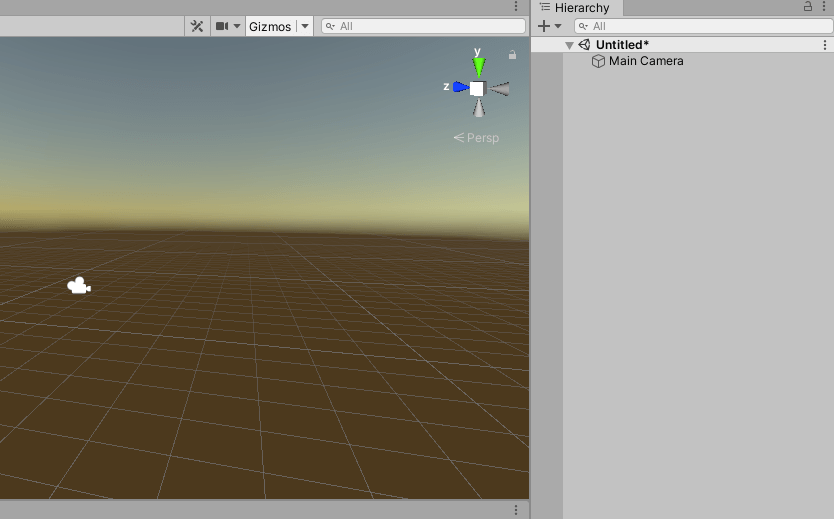
Now you’re ready to go.
Creating a scene
The technique used this time will make the camera seem like it is moving by moving the entire space in the timeline.
We will create a building object and a Sphere decoration object and control them in the timeline.
Creating a Building
In this scene, we will create a simple building as an enclosed space and place 3D models inside of it and move them around.
Let’s create a building using Unity’s Cube.
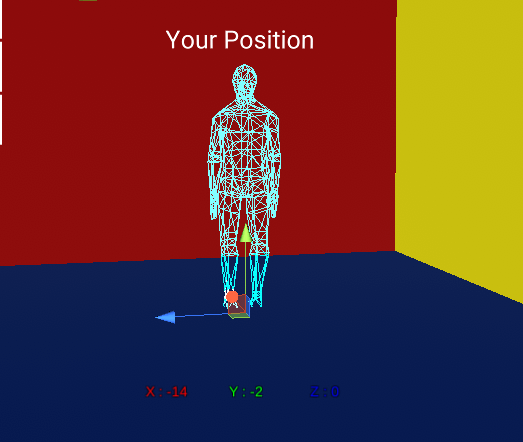
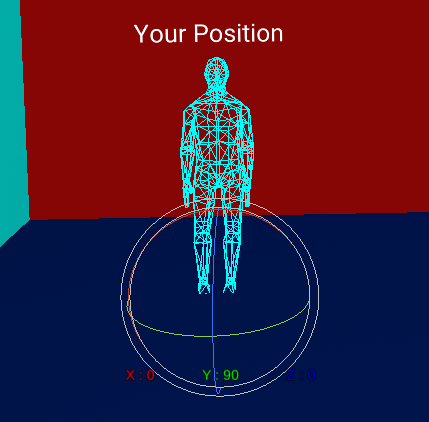
We’ll create a space based on the size of Your Position in STYLY.
Your Position is about one and a half times the height of the default Cube. We will treat this as a reference size.

Right-click on the hierarchy and select Create > Cube.
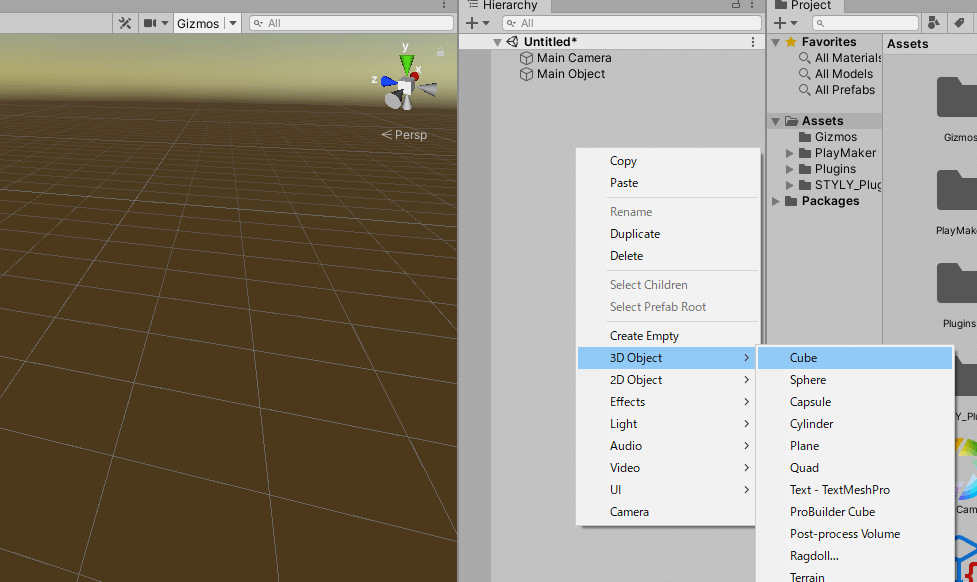
A Cube has been created. There is no light source, so it will appear completely black.
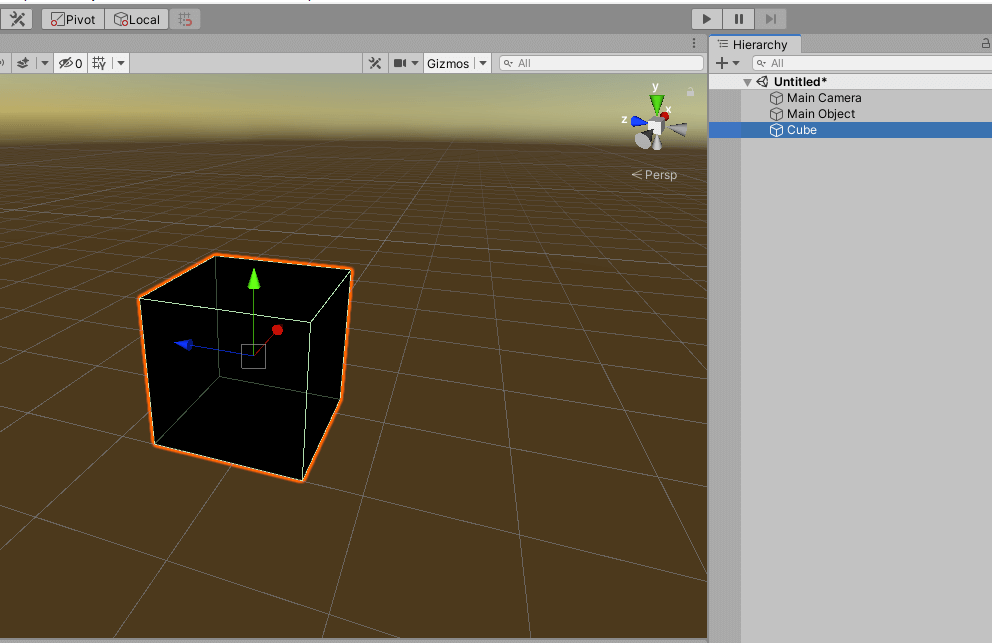
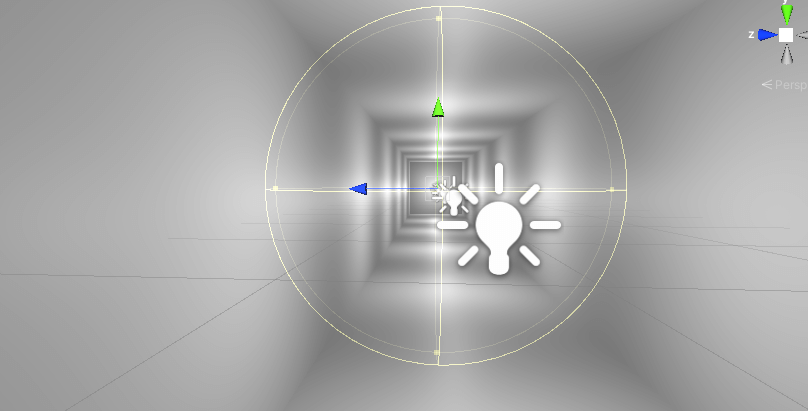
In this case, let’s make sure not to be affected by the light, as it would be inconvenient in creating the scene.
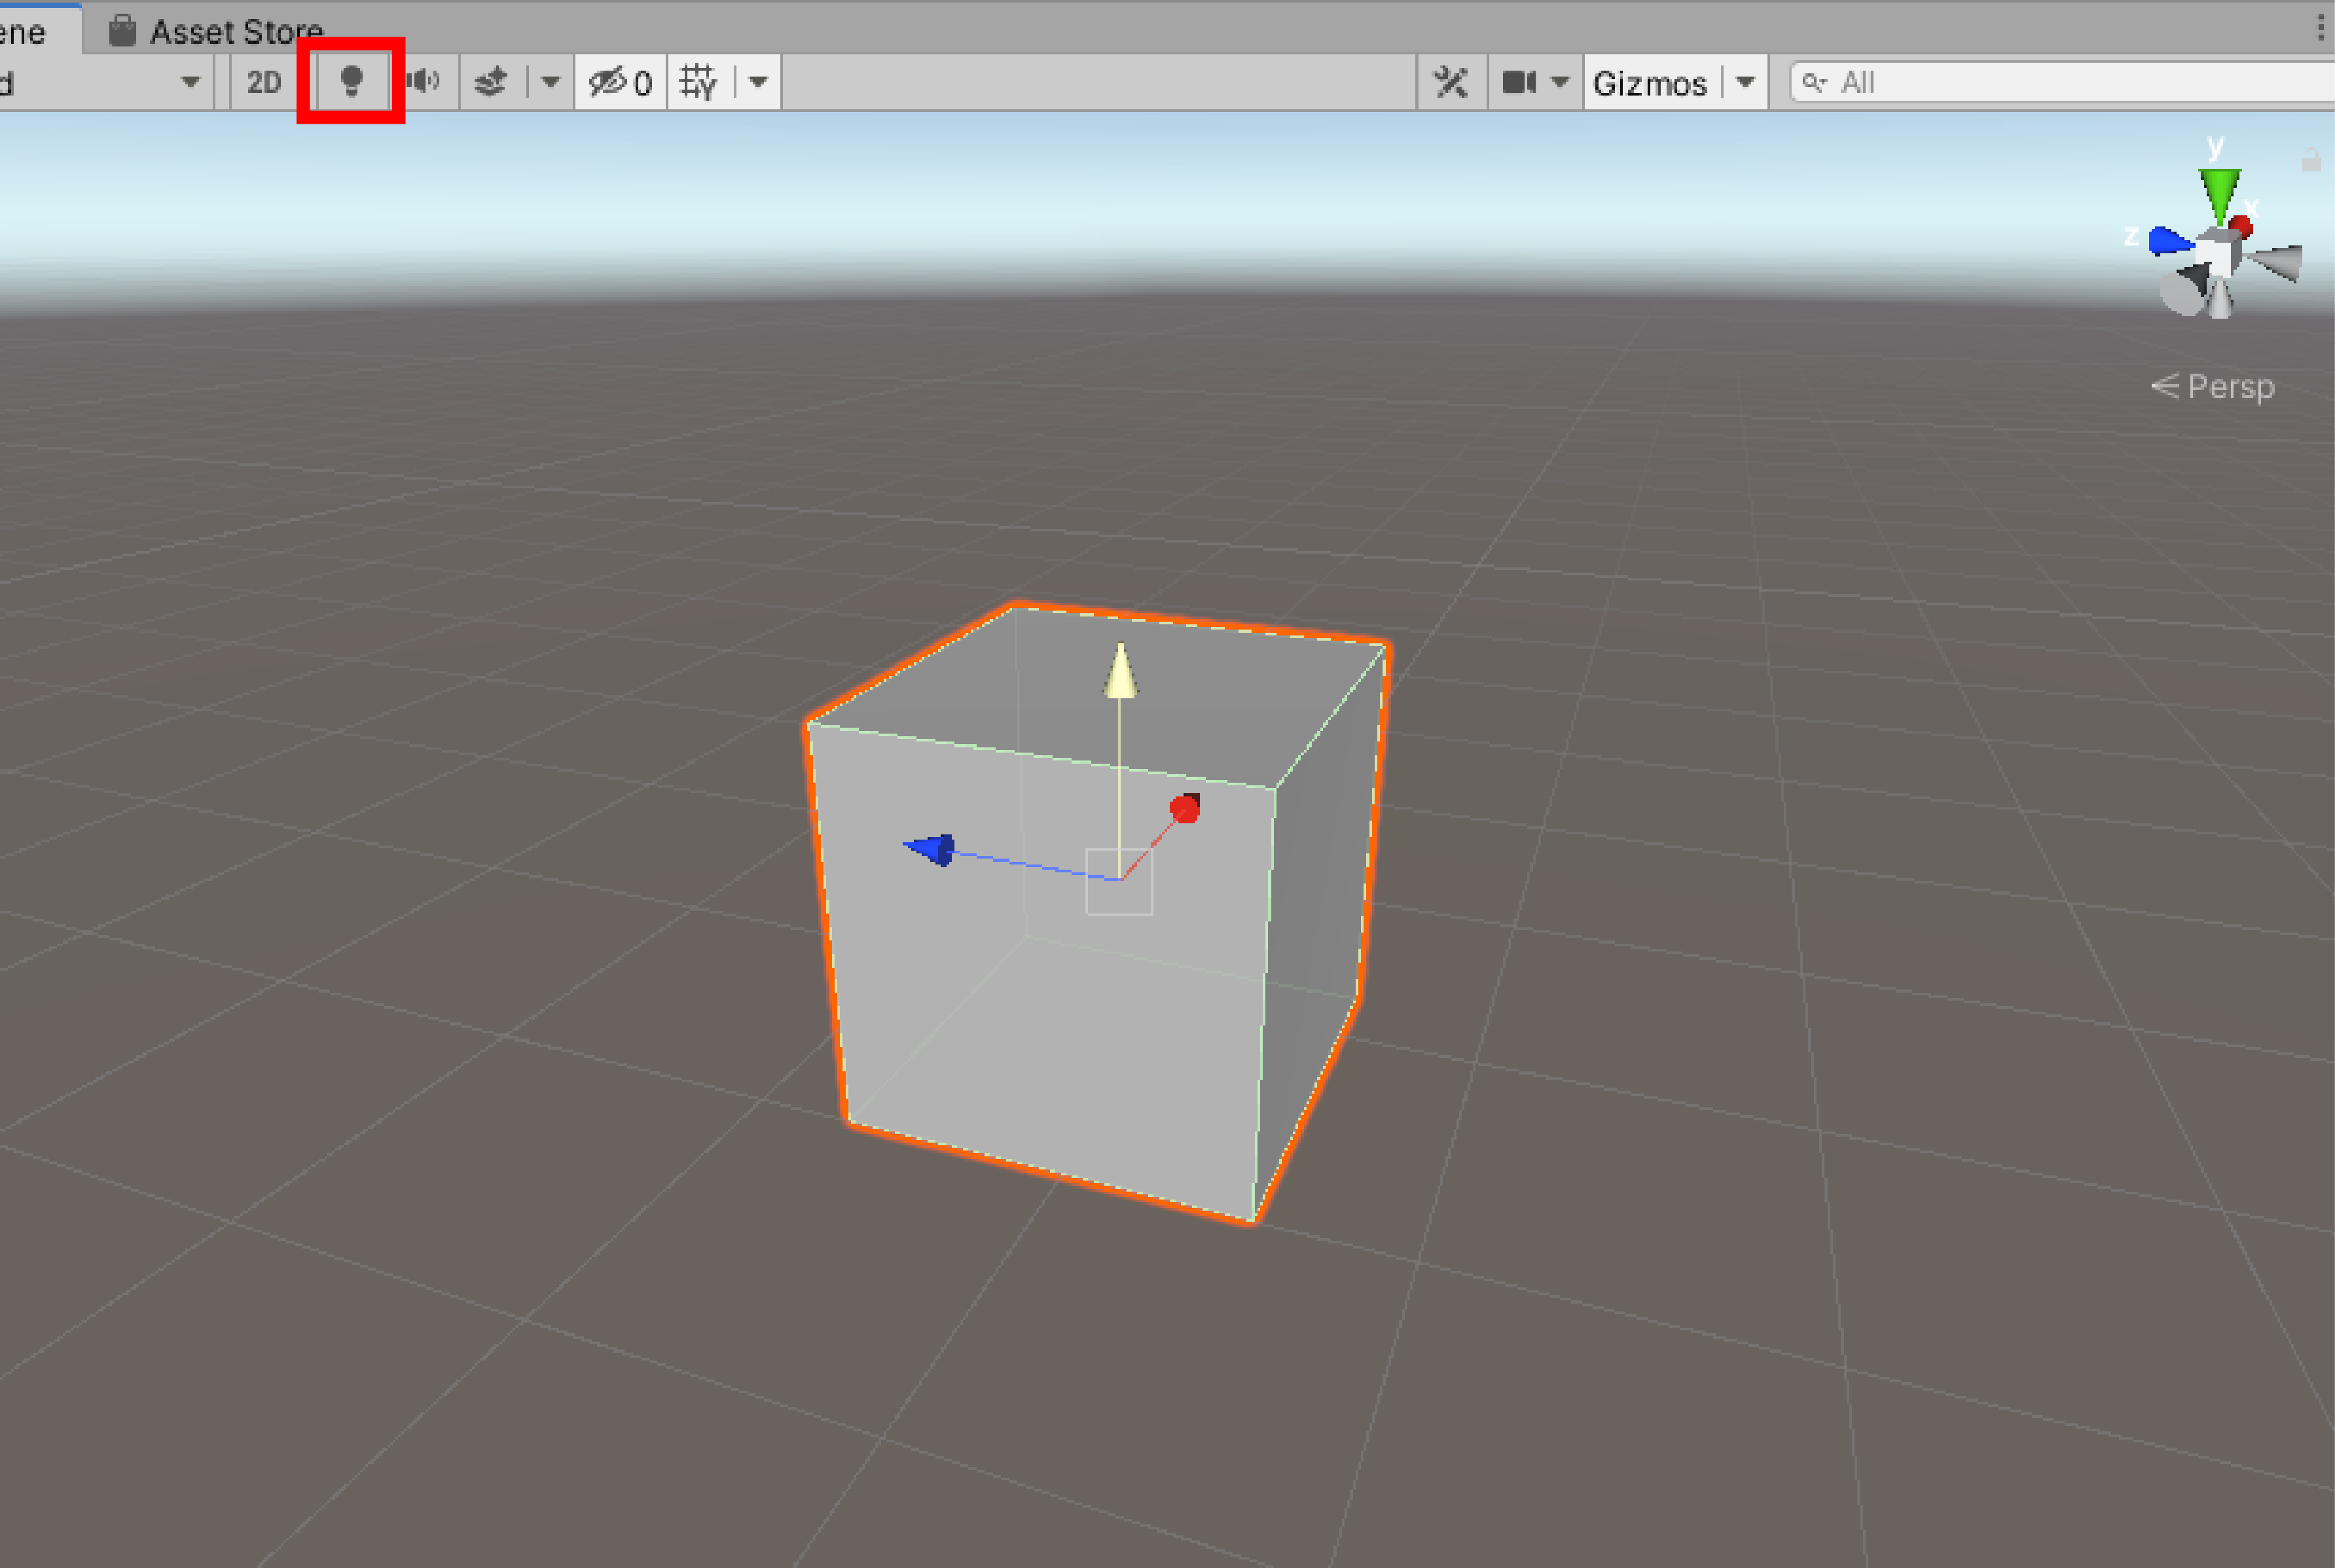
Click on the light bulb in the upper left corner of the scene window.
Now the objects in the scene will be unaffected by light.
The first Cube we created will be the floor object. Let’s name the Cube “Floor”.
The size is arbitrary, but I set it up as follows.
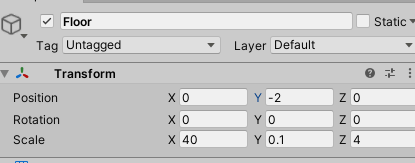
In the scene, it will look like this. The cube at the bottom left is roughly the size of STYLY’s Your Position.
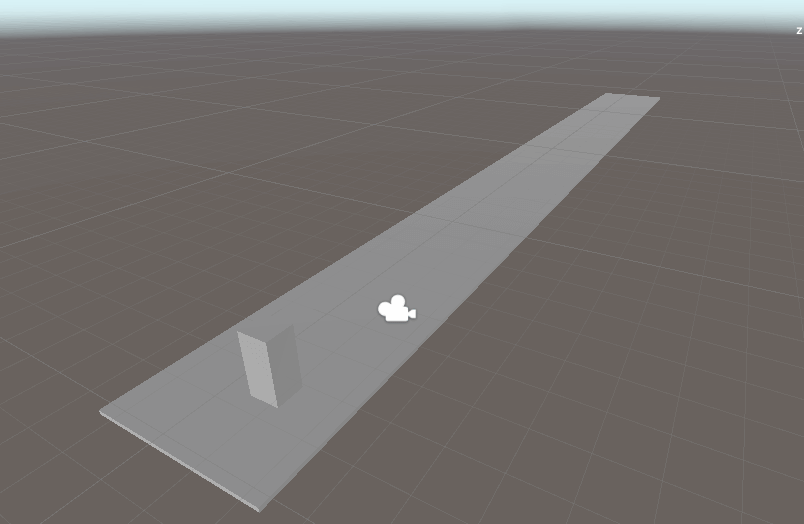
Now you have a floor.
Let’s use the same technique to create walls and a floor.
We will also create the ceiling object with a Cube. Let’s name the Cube “Ceiling” and set Transform as follows.
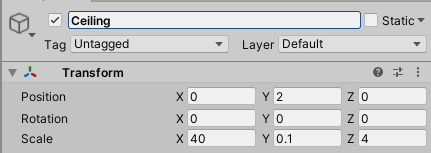
We now have a ceiling.
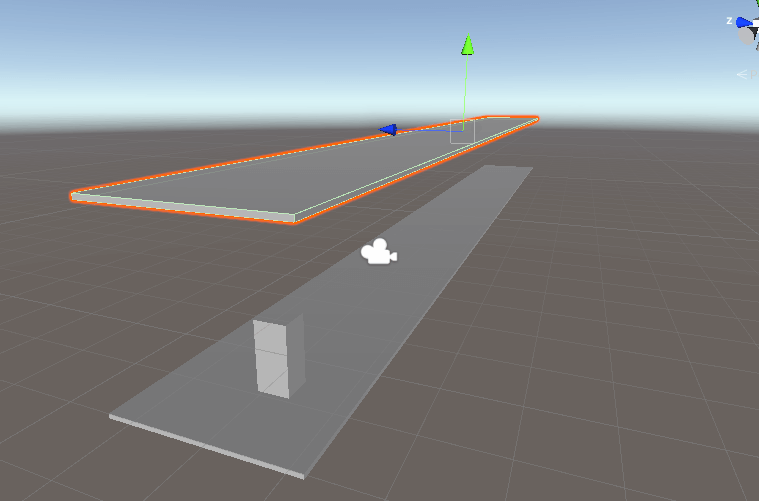
We will also create walls.
Finally we need to create the 4 walls that connect the ceiling to the floor.

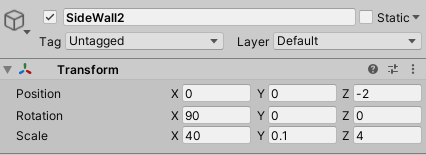
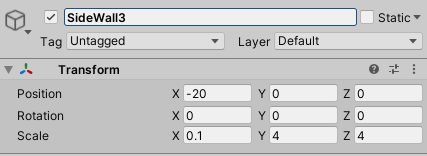
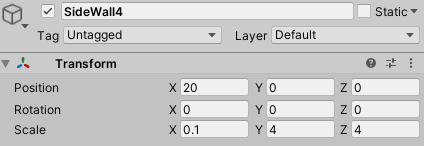
We now have a foundational building. On the scene it will look like this.
Install the lights
We will install lights in the space. This time, we will set up a Point Light.
Select Create > Light > Point Light.
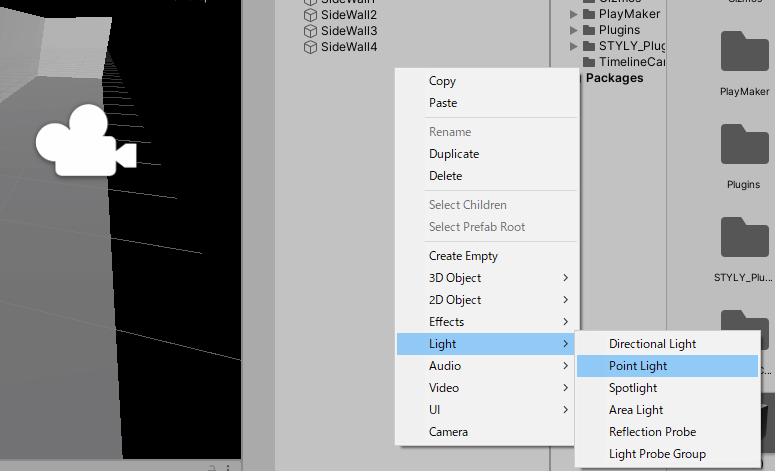
The Point Light has been installed in the scene.
Set the Transform of the first point light as shown in the following image.
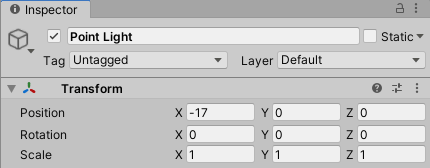
As is, it will not be affected by the light. Select the light bulb symbol in the upper left corner of the scene window and set it to be affected by light.
Now it will be affected by light.
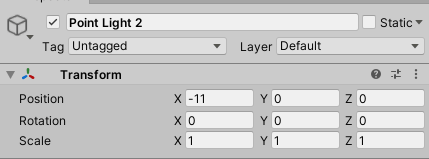
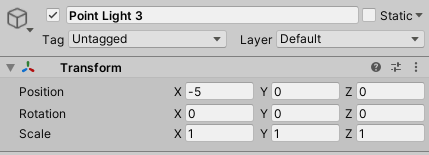
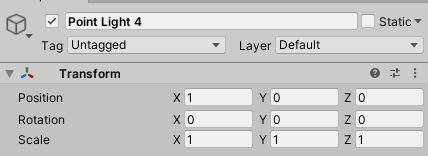
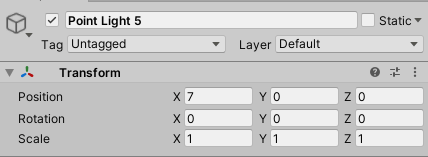
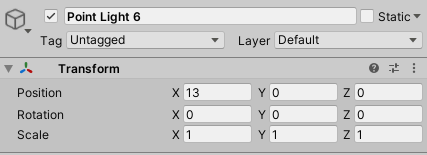
Let’s place the other lights. Add six Point Lights. Place the Point Lights such that each is spaced 6 points on the X-axis apart.
Set the Names and Transform values as follows.
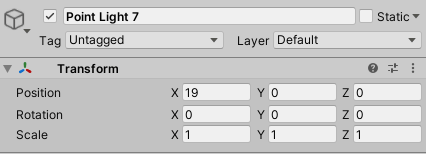
After placing the Point Lights, the building should look like this
The building is now complete and we should remove the Cube that we used as the reference for the size of Your Position.
Let’s merge the building into one.
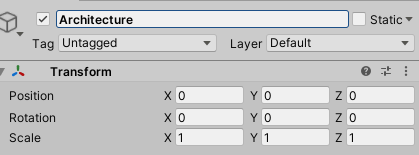
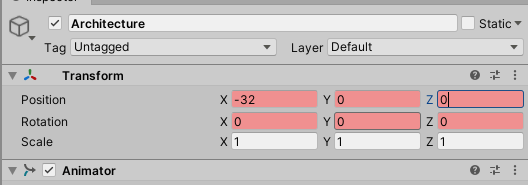
Go to Create > Create Empty and create a Game Object. Name it “Architecture” and change its Transform as follows.
Let’s make the building object and the lights child objects of the Architecture object.
Select the objects other than Main Camera and Main Object and drag them into Architecture to make them parent-child.
Place the objects
Let’s place objects in the building as you see fit.
Choose Create > 3D Object > Sphere to create a Sphere in the building.
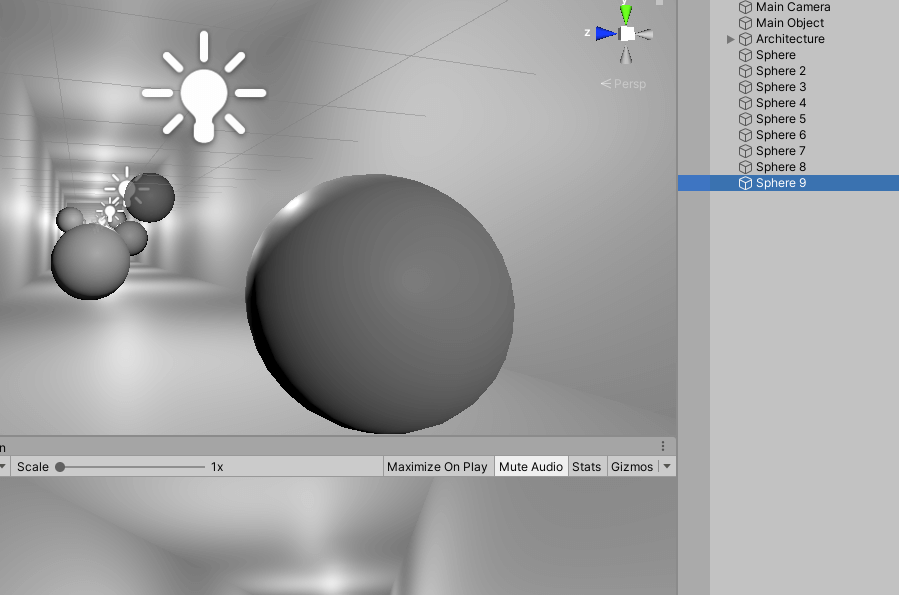
Let’s decorate the building by placing them wherever you would like.
Let’s color the Sphere objects and the building because it looks a bit sad like this.
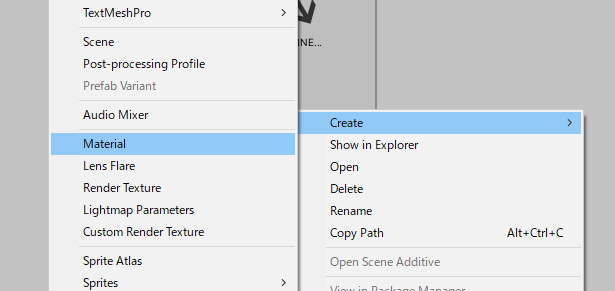
In the project window, go to Create > Material and change the color of the Spheres to your desired colors.
We have colored the Spheres and the building using a material and increased the Smoothness value to give it a little gloss.
Let’s combine the Sphere objects into one.
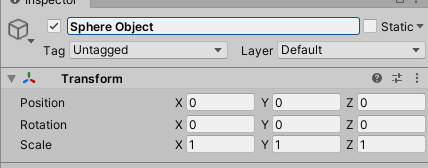
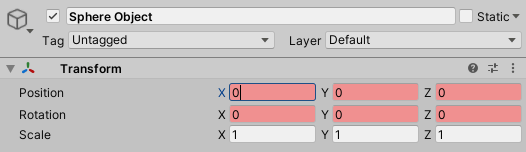
Create a Game Object from Create > Create Empty and name it “Sphere Object”.
Let’s set the Transform like the following image.
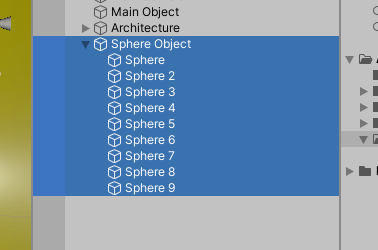
With the Sphere Object as the parent object, drag the Spheres onto it to make them its child objects.
We now have a building and an object for this project.
Next we will create a camera with a timeline.
Controlling Space with the Timeline
Determining Perspective
As a prelude to controlling space in the timeline, let’s decide on a perspective.
Your Position, the viewpoint on STYLY, is the height of 1.5 cubes. This means that the camera should be placed at a height roughly 1.5′ from the floor.
Since the Y height of the floor is at -2, the camera height is set to -0.5.
With that in mind, I set the Transform of the camera to the following.

Then the perspective in the game view will look like this.
We will control the space with this perspective as the base.
Create a timeline
Let’s create a timeline for this project. First, we will create a timeline asset.
Right-click on your project view and select Create > Timeline.
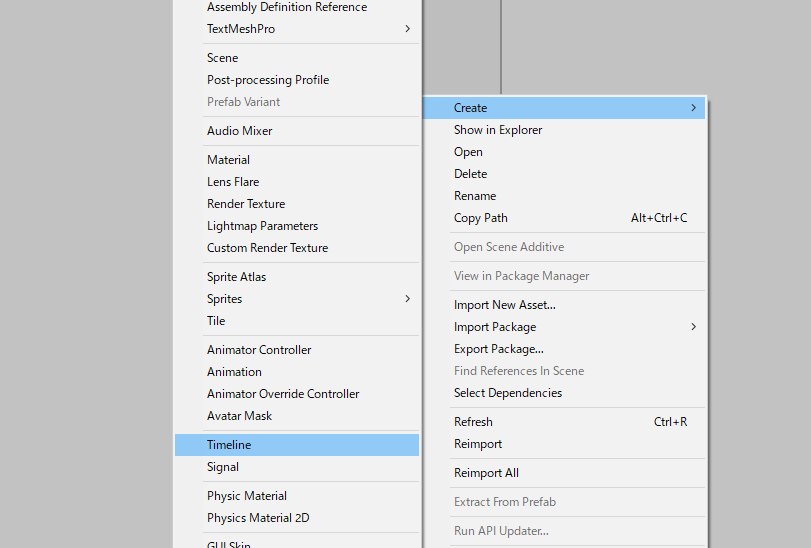
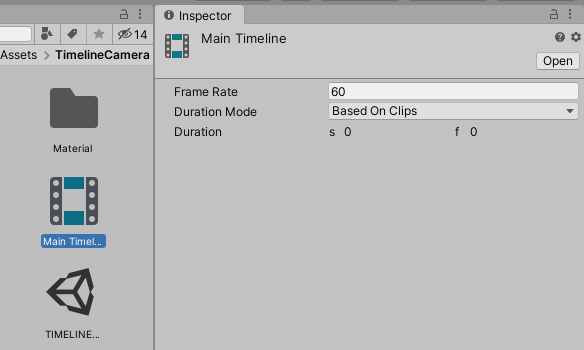
Your timeline asset will be created. Name it Main Timeline.
Next, we will create a timeline instance.
Drag the Main Timeline into the hierarchy window.
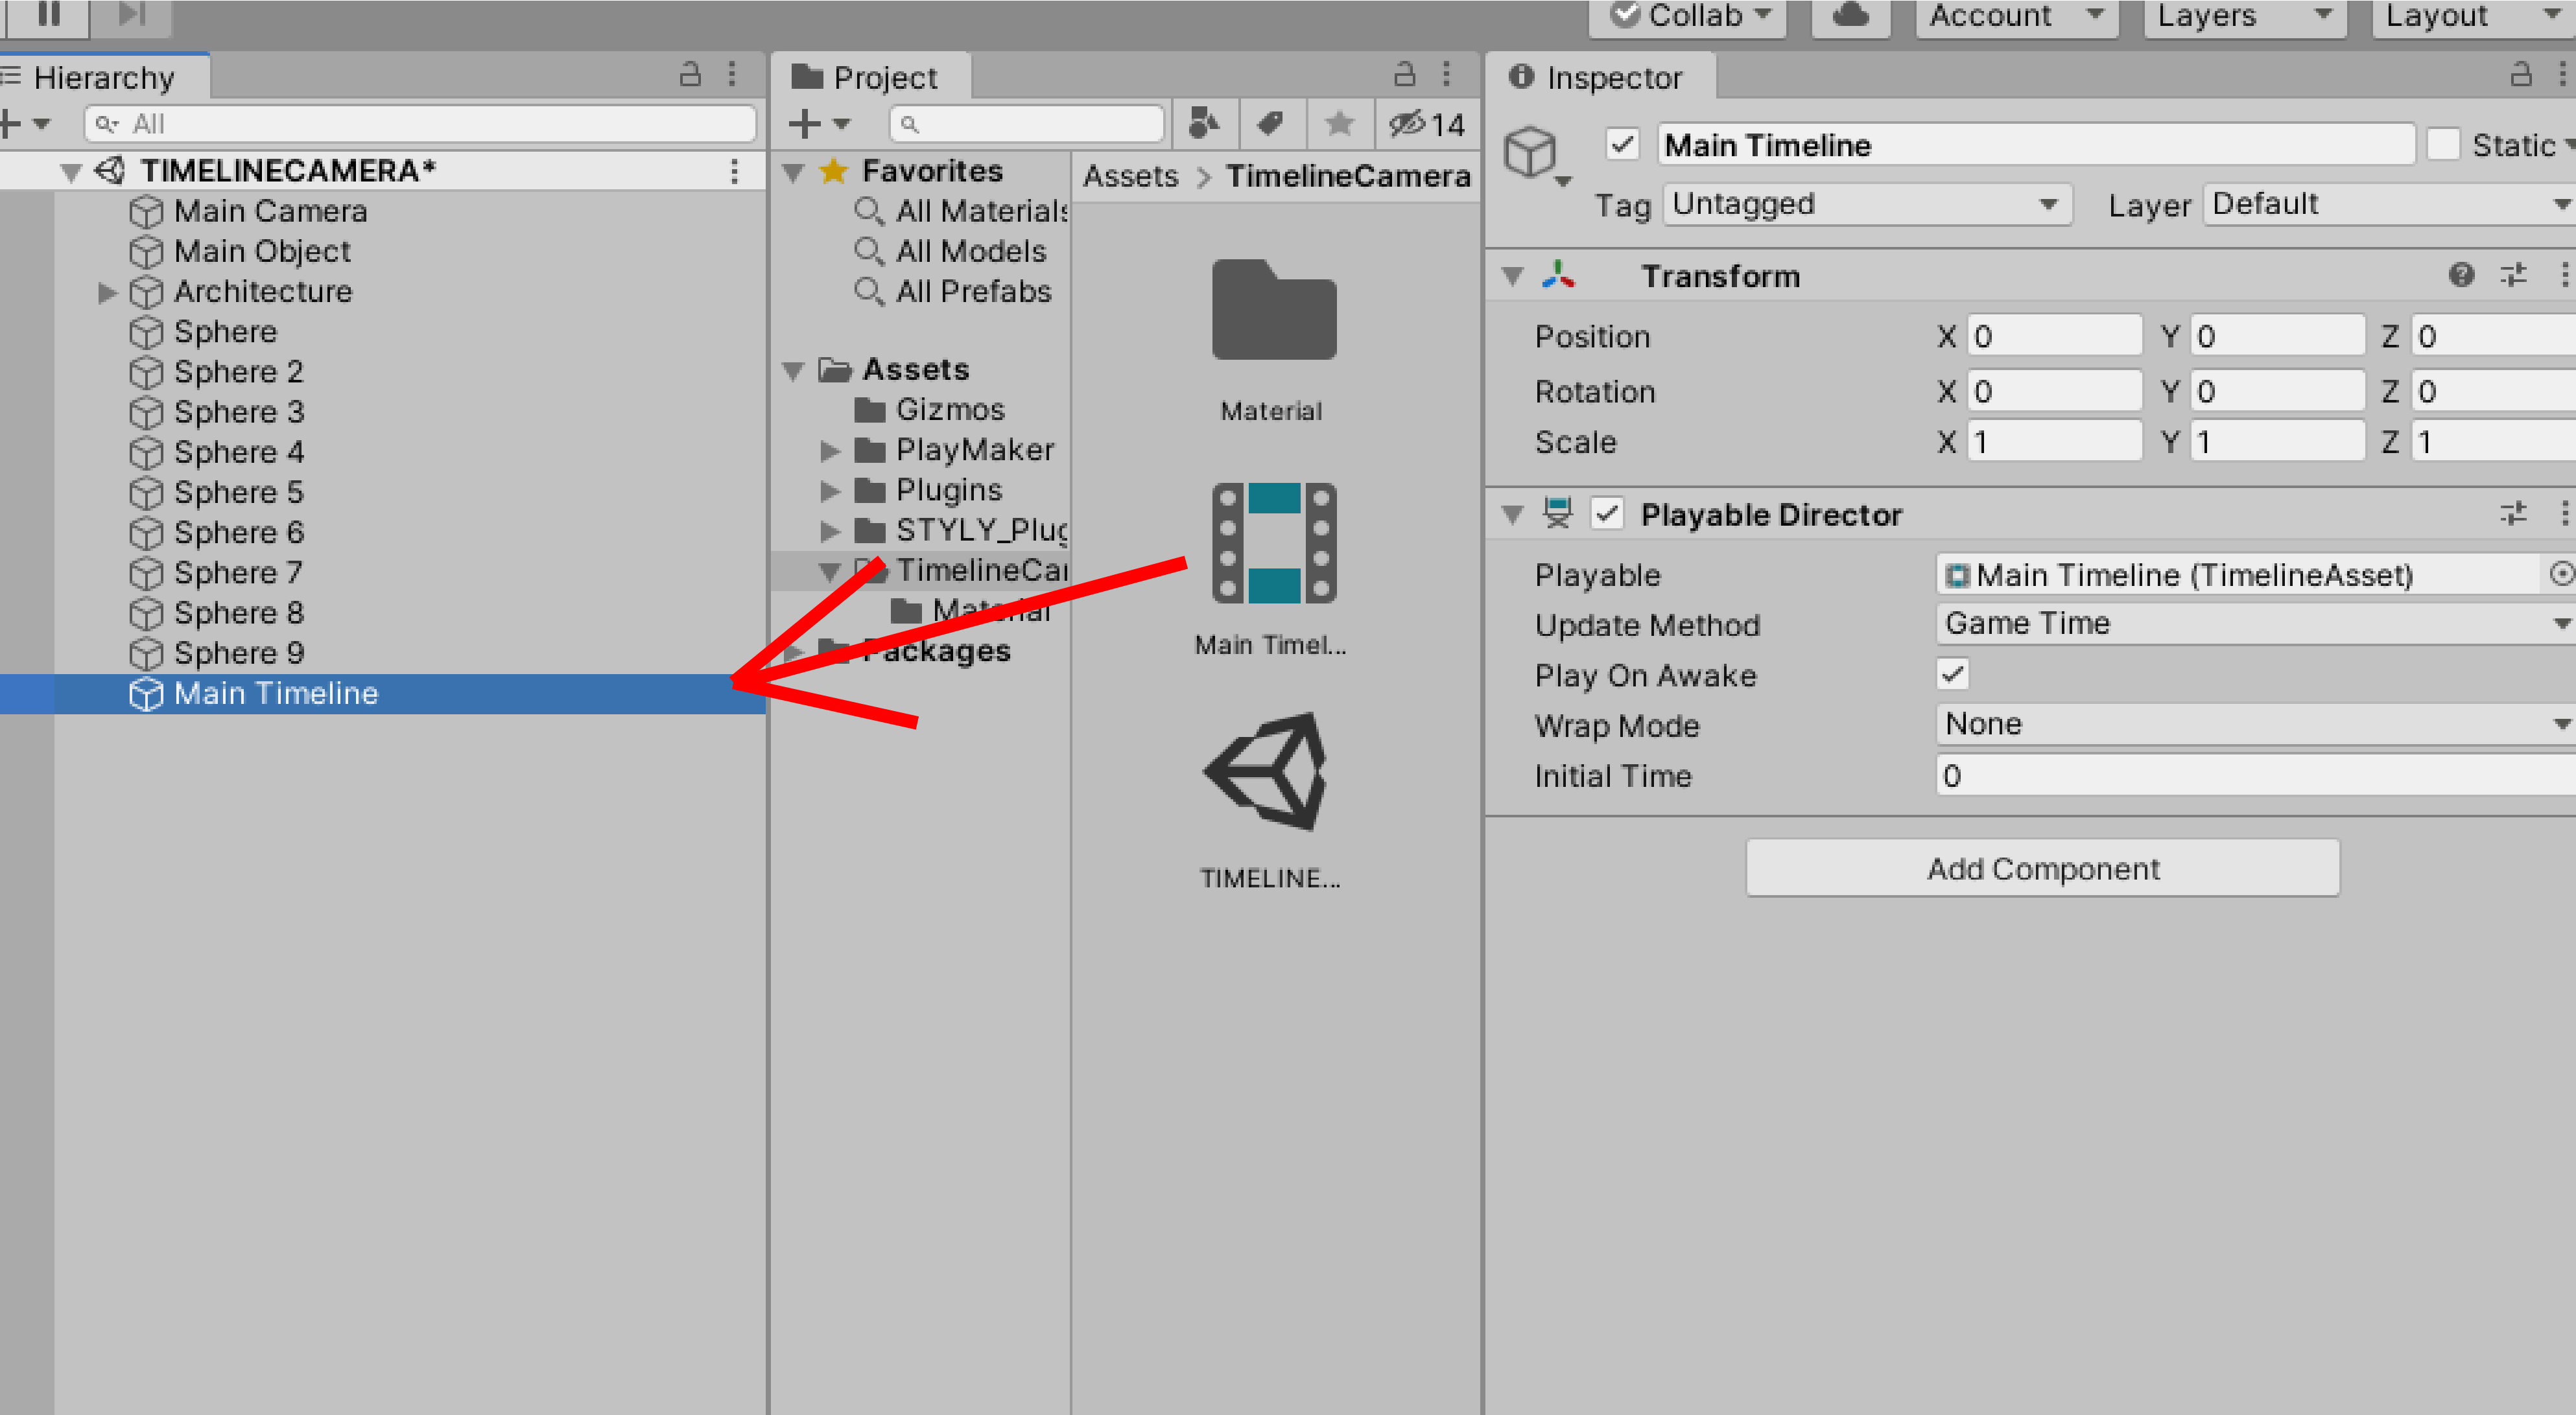
The timeline instance has been created.
With your Main Timeline in the hierarchy window selected, if you select the timeline window, you should see the following.
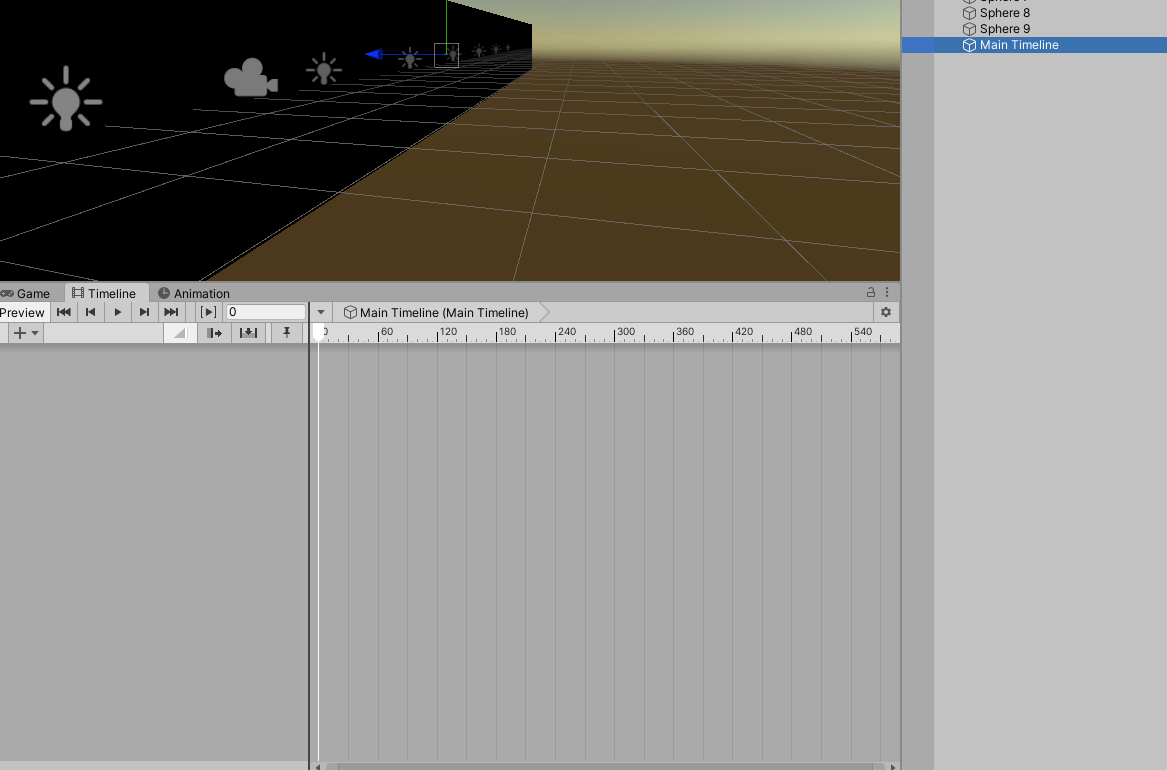
You now have a timeline ready to go.
Let’s make each object a track in the timeline and control it. In this example we will control Architecture and Sphere Object in the timeline.
Drag and drop them into the timeline and make them into an Animation Track.
Controlling Architecture as a track
This time we are going to create a complex animation with a zigzagging perspective.
First, let’s control Architecture.
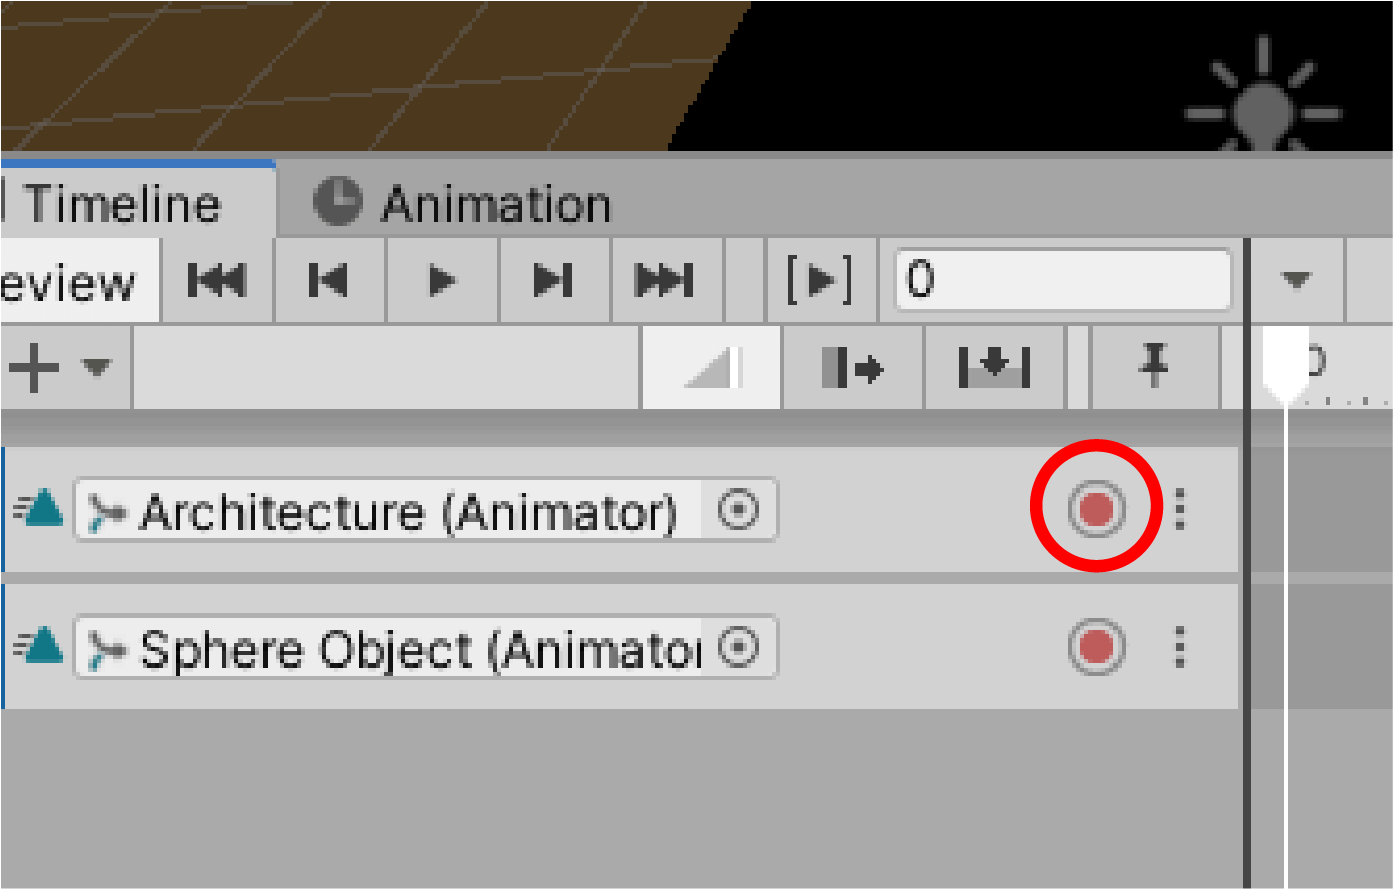
Select the record button (red circle) of Architecture in the timeline to create an animation.
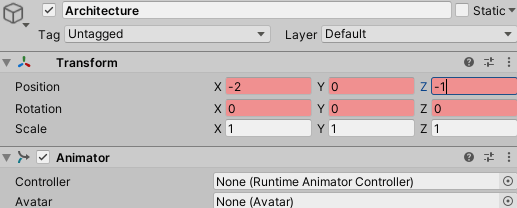
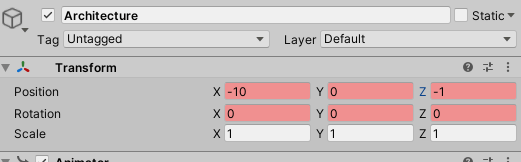
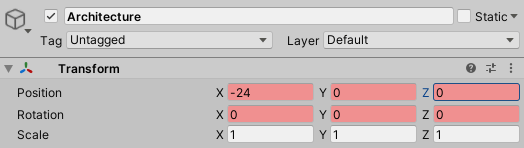
Match the Seek Bar to a value of 0 and set Transform to the following.
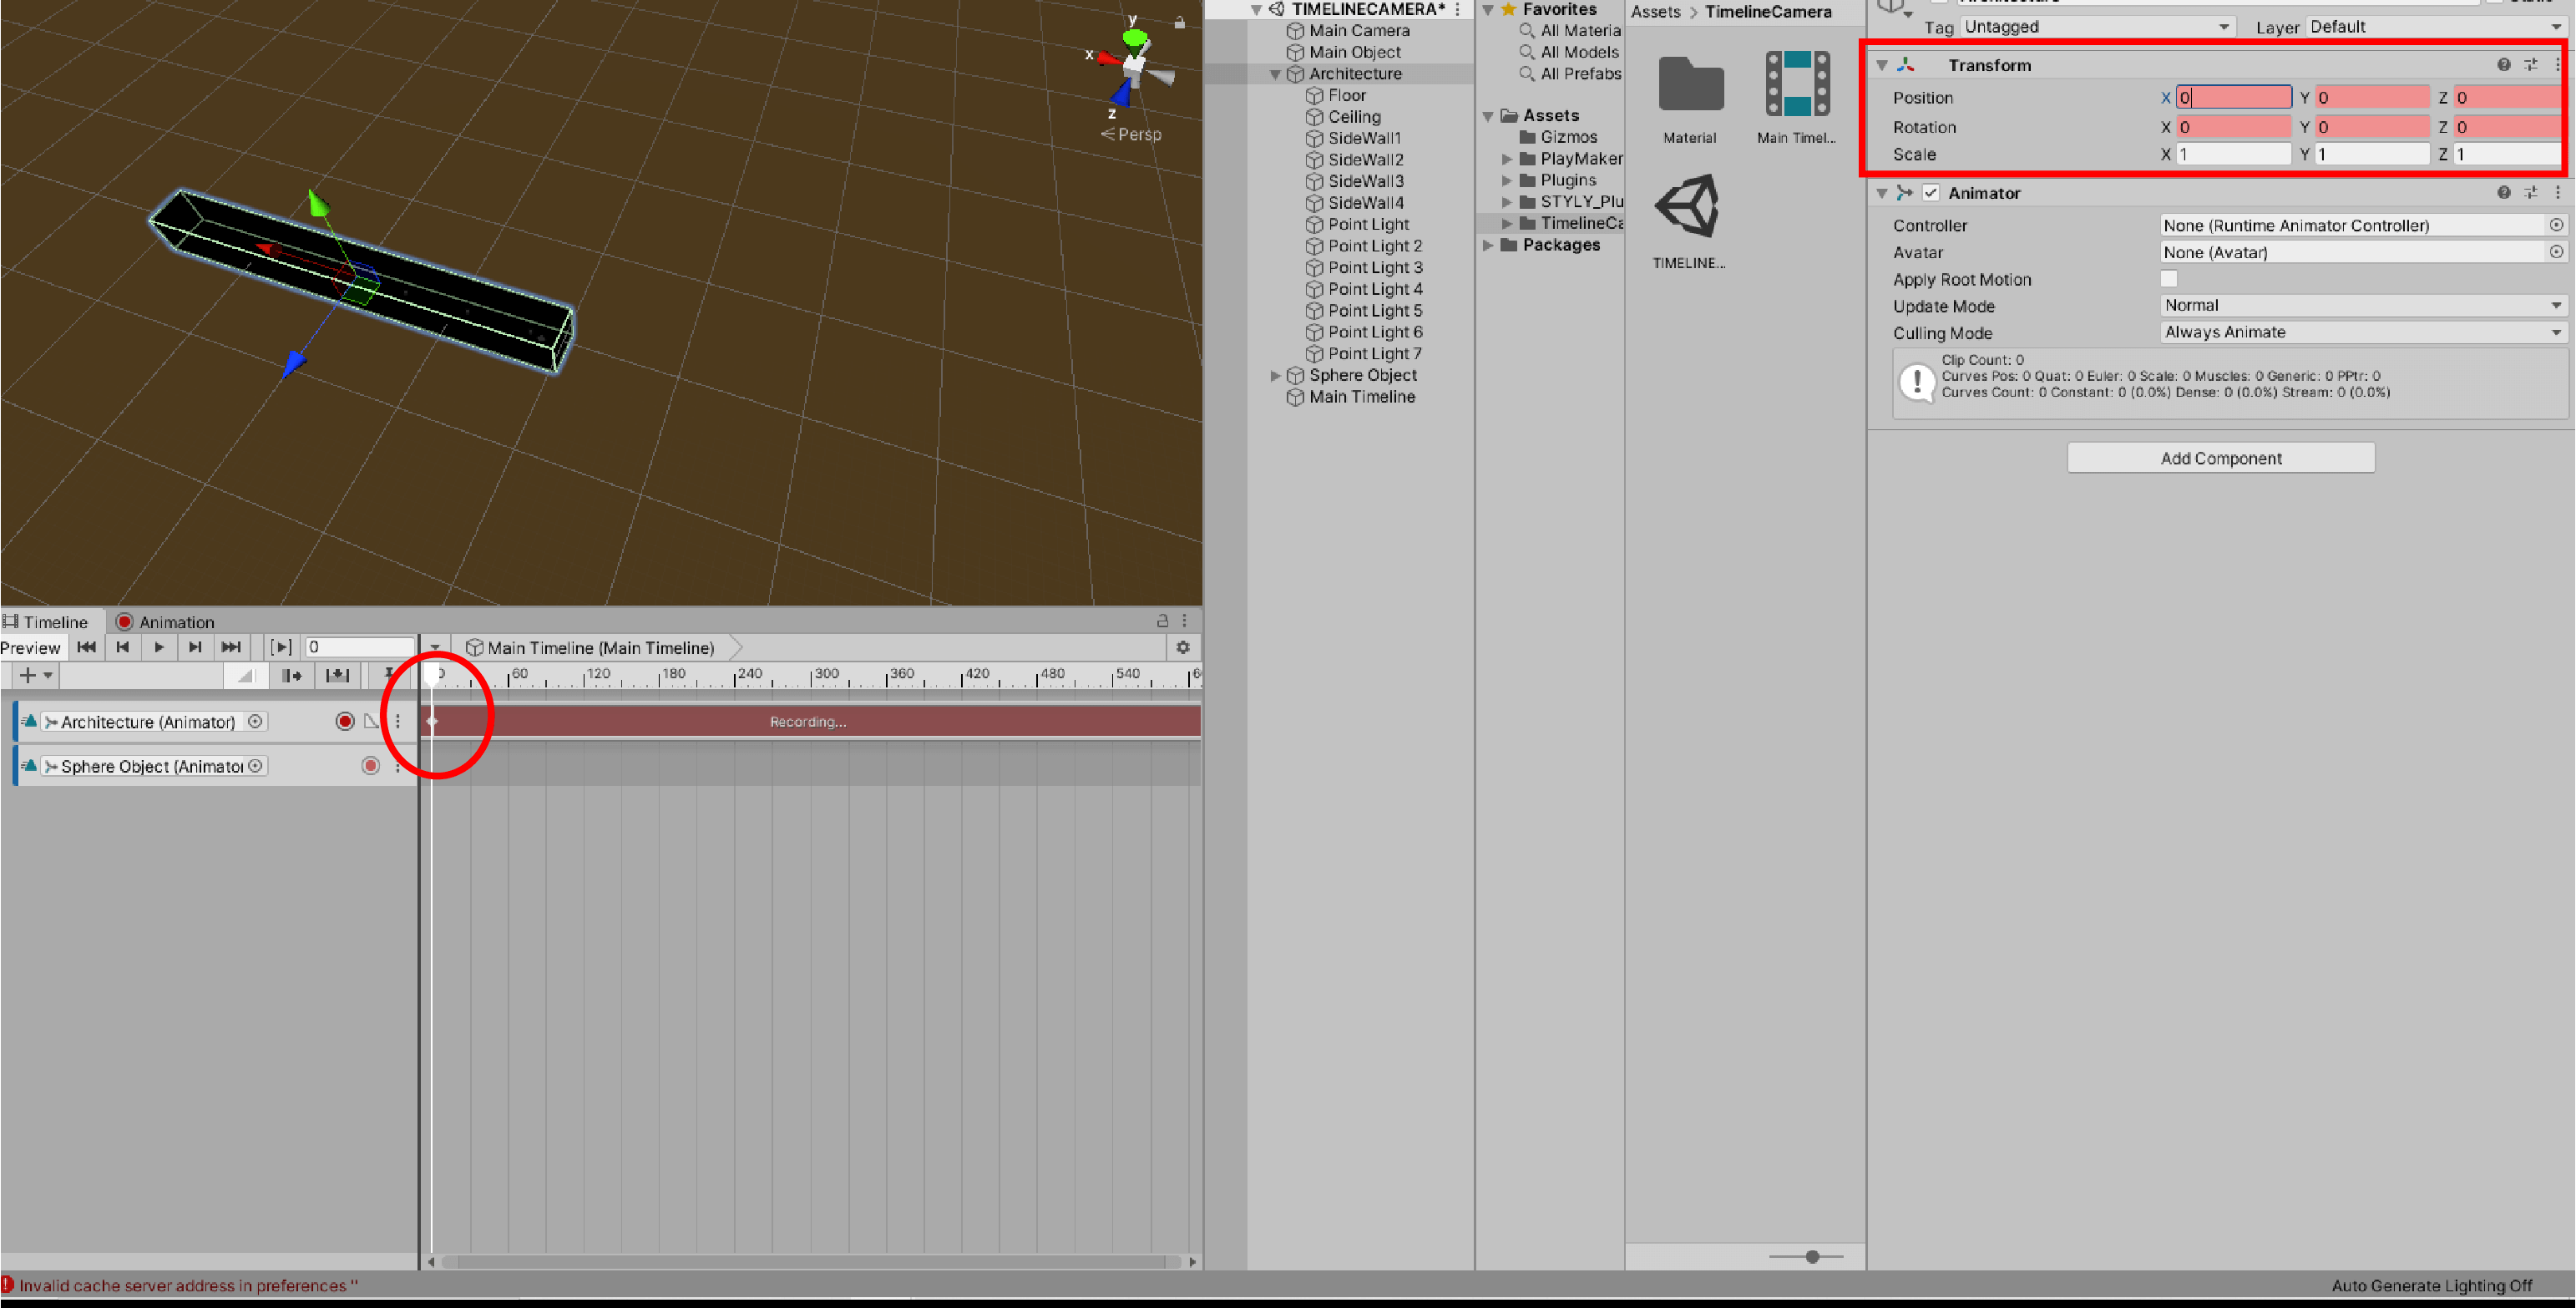
Move Architecture in a zig-zag fashion.
Each time the value is increased by 30 (0.5 seconds), let’s move X by -2 and X by 1.
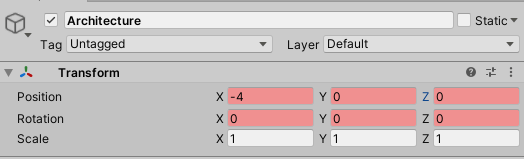
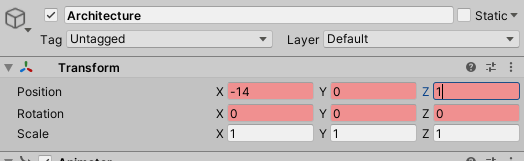
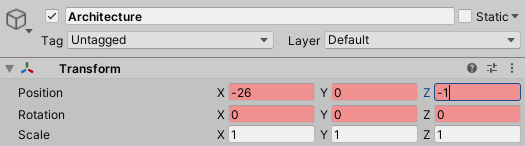
Set Seek Bar to 30 and set Transform to the following.
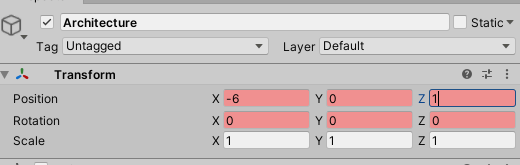
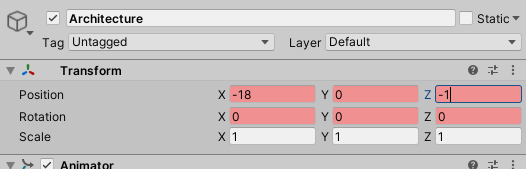
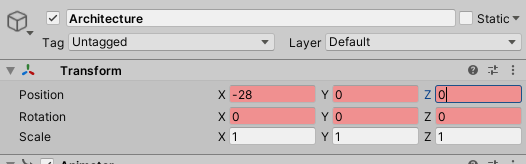
Next, set the Seek Bar to 60 and make Transform look like this.
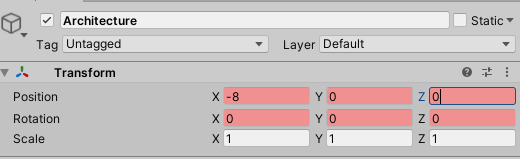
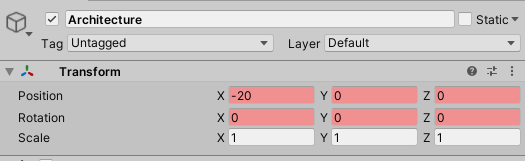
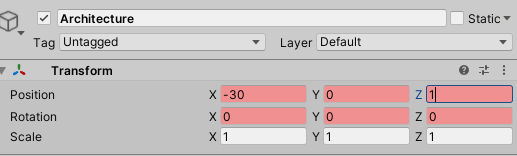
Next, set the Seek Bar to 90 and make Transform look like this.
Next, set the Seek Bar to 120 and make Transform look like this.
Next, set the Seek Bar to 150 and make Transform look like this.
Next, set the Seek Bar to 180 and make Transform look like this.

Next, set the Seek Bar to 210 and make Transform look like this.
Next, set the Seek Bar to 240 and make Transform look like this.

Next, set the Seek Bar to 270 and make Transform look like this.
Next, set the Seek Bar to 300 and make Transform look like this.
Next, set the Seek Bar to 330 and make Transform look like this.

Next, set the Seek Bar to 360 and make Transform look like this.
Next, set the Seek Bar to 390 and make Transform look like this.
Next, set the Seek Bar to 420 and make Transform look like this.
Next, set the Seek Bar to 450 and make Transform look like this.
Next, set the Seek Bar to 480 and make Transform look like this.
Now we have controlled Architecture. When you play it back, it should look like this.
Press the red circle record symbol again to deactivate record mode.
The movement of the building is now complete. Next let’s control the Sphere Object.
Controlling the Sphere Object with a Track
We will create an animation in which the Sphere Object rotates and moves around.
Select the record button (red circle) to enter record mode.
First the Sphere object’s movement must be synchronized with the Main Object.
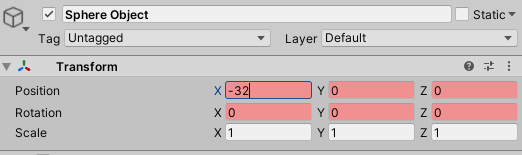
Set the Seek Bar to a value of 0 and set Transform to the following.
Next, move the Sphere object. Set the Seek Bar to a value of 480 and set Transform to the following.
The movement is now synchronized.
Let’s try playing the video.

In this state, the left and right movements are not synchronized so it’s running into a wall.
However, if the left and right movements are also synchronized, it would be a little bland.
Let’s try to create a more creative effect by changing the size and rotation of the Sphere object instead of synchronizing the left and right movements.
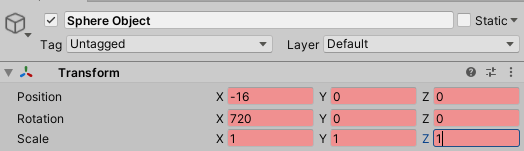
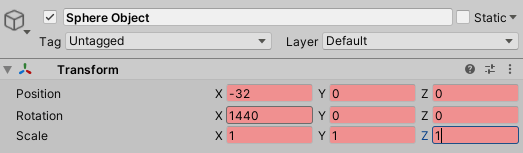
Set Seek Bar to 0 and Transform as follows.
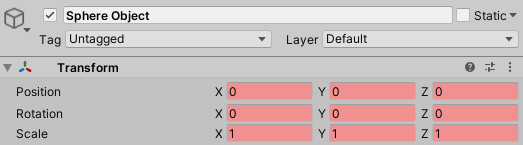
Now you can change the Position, Rotation, and Scale of the Sphere object.
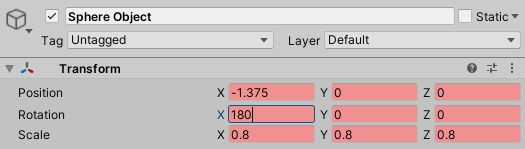
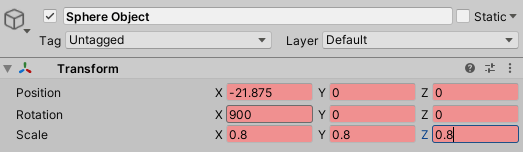
Next, set the Seek Bar to 60 and Transform to look like the following.
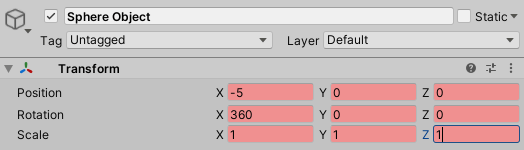
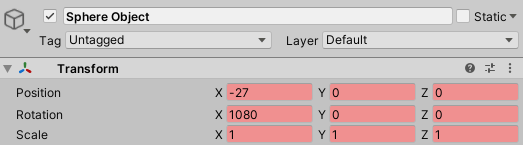
Next, set the Seek Bar to 120 and Transform to look like the following.
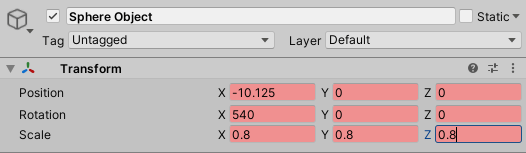
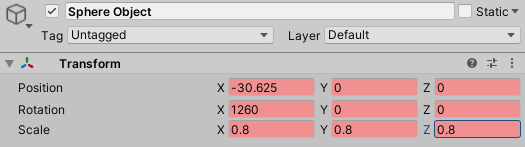
Next, set the Seek Bar to 180 and Transform to look like the following.
Next, set the Seek Bar to 240 and Transform to look like the following.
Next, set the Seek Bar to 300 and Transform to look like the following.
Next, set the Seek Bar to 360 and Transform to look like the following.
Next, set the Seek Bar to 420 and Transform to look like the following.
Finally, set the Seek Bar to 480 and Transform to look like this.
Deactivate the record button with the red circle to deactivate record mode.
You now have control of the Sphere Object. Let’s play it back.
We have now created the space.
Adjustments
We will adjust the overall length of time. We will increase the time slightly.
You can adjust the time by adjusting the animation track created in the timeline.
Display the animation window.
From the top menu bar, click on
Select Window > Animation > Animation.
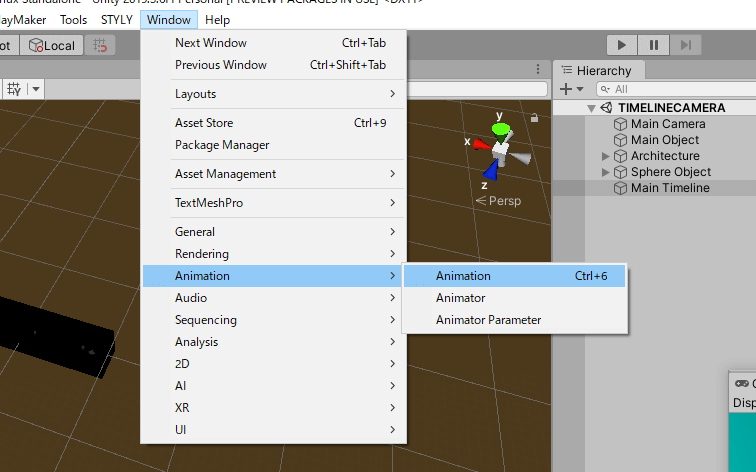
The Animation window is now displayed.
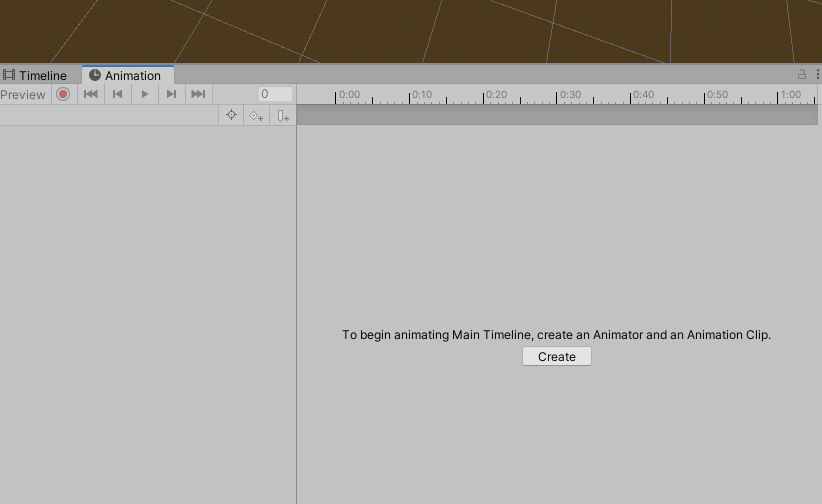
Click on the sequence of animation tracks in the timeline window.
First select Architecture.
It is currently 8 seconds long, but let’s double its length to 16 seconds.
Select all the keyframes and drag them to the 16 second mark.
Now the length is doubled.
Select the Sphere object and double its length.
If you play it back, it will look like this.

It is now half as fast as the original.
Now let’s upload it STYLY.
Uploading to STYLY
In this case, we’re going to upload it as a scene.
How to upload a Unity scene to STYLY
Upload your 3D model to STYLY.
If you haven’t created a STYLY account, click here.

Here’s how to upload a prefabricated standalone game from Unity to STYLY

I placed two directional lights in the space to adjust the brightness of the whole image.
Then I decided the position of Your Position.
Your Position must be at basically the same position as the Main Camera.
This time, your position is in the same position as the Main Camera.
Your Position is now set to the same position as the Main Camera.
Play it back on STYLY.

If Your Position is out of position, you won’t be able to correctly represent an artificially moving camera.
Be careful with the placement.
And that’s it!
This time, the space is simple, but by using the timeline, you can create various scenes like a music video.
Let’s create different scenes!
Introducing NEWVIEW SCHOOL ONLINE
We are now offering a NEWVIEW SCHOOL ONLINE course where you can learn everything from the basics to the applications of Unity and PlayMaker for VR/AR content creation, and learn about the process of creating the fascinating content available on STYLY (we’ll also be revealing our production techniques).
